manuals.online logo
Brands
  1. Home
  2. •
  3. Brands
  4. •
  5. Jorvet
  6. •
  7. Microscope
  8. •
  9. Jorvet Z4 User manual

Jorvet Z4 User manual

Instruction Manual
Z4 Zoom - LED Embryo-GLO Base
P. 800.525.5614 F. 970.663.5042 1450 Van Buren Ave Loveland Co 80538 USA
The Z4 Zoom Stereoscope on the Embryo-GLO Base is the perfect choice for embryo transfer professionals. In a traditional
stereoscope base, the bulb is mounted below the stage plate. Because it shines directly upward into the eyes of the user,
it obscures the view of the embryos. But the new Embryo-GLO Base eliminates that problem. Its variable LED bulb is
mounted in the rear of the base and shines toward a mirror below the stage plate, providing a clear view of the embryos.
The user-adjustable tilting mirror allows for indirect lighting through embryos at various angles, illuminating the internal
structures of the embryos. The light control box features variable intensity, allowing for brighter light when needed for
higher magnifications. 
Morphological evaluation of the quality and stage of development of embryos using the Z4 Zoom Stereoscope on
Embryo-GLO Basewill help to increase fertility rates in embryo transfer programs.
A Rubber Eyeguards
B Eyepieces
C Diopter Adjustment
D Zoom Control Knob
E Head Holder
F Hand Rest
G Stage Plate
H Embryo GLO Base
I Mirror Adjustment Knob
J Double-Sided Mirror
K Magnifying Lens
L Post
M Nosepiece
N Focusing Knob
O Objectives (Internal)
P Light Control Box
Q Variable Intensity Knob
ROn/Off Switch
S LED Light
T Reticle Eyepiece
A
B
C
D
E
FG
H
I
J
K
L
M
N
O
P
S
Q
R
T
Carefully remove the Z4 head and accessories and place on a secure surface.
Put the Embryo-GLO base upright on a sturdy surface. Carefully place the glass stage plate into position on the base.
Slide the plastic hand rest down over the 3 silver pins until flush with the surface of the base.
Loosen the silver thumbscrew in the headholder (focus rack) to allow free passage of the Z4 head into the circular head
holder.
Secure the head and base together by inserting the Z4 head into the circular head holder. Once the head is completely
seated, tighten the thumbscrew to secure the head is in place.
Note: Do not over-tighten.
Remove protective caps from the eyepiece tubes and insert the eyepieces. Remove the cap from the bottom of the Z4
head. For measuring, use the additional reticle eyepiece.
Interpupillary Distance Adjustment: Once you are comfortably seated, adjust the oculars (eyepieces) by moving the
eyepiece tubes together or apart until you see only one circle of light.
Place your specimen on the center of the stage plate.
Turn on the power switch, and then adjust intensity by turning the knob on the control box.
Diopter Adjustment: Since you are using a binocular stereoscope, you need to adjust for the normal difference in vision
between your two eyes. Your Z4 has dual diopter adjustments which must be initially set. This is a simple but critical adjust-
ment!
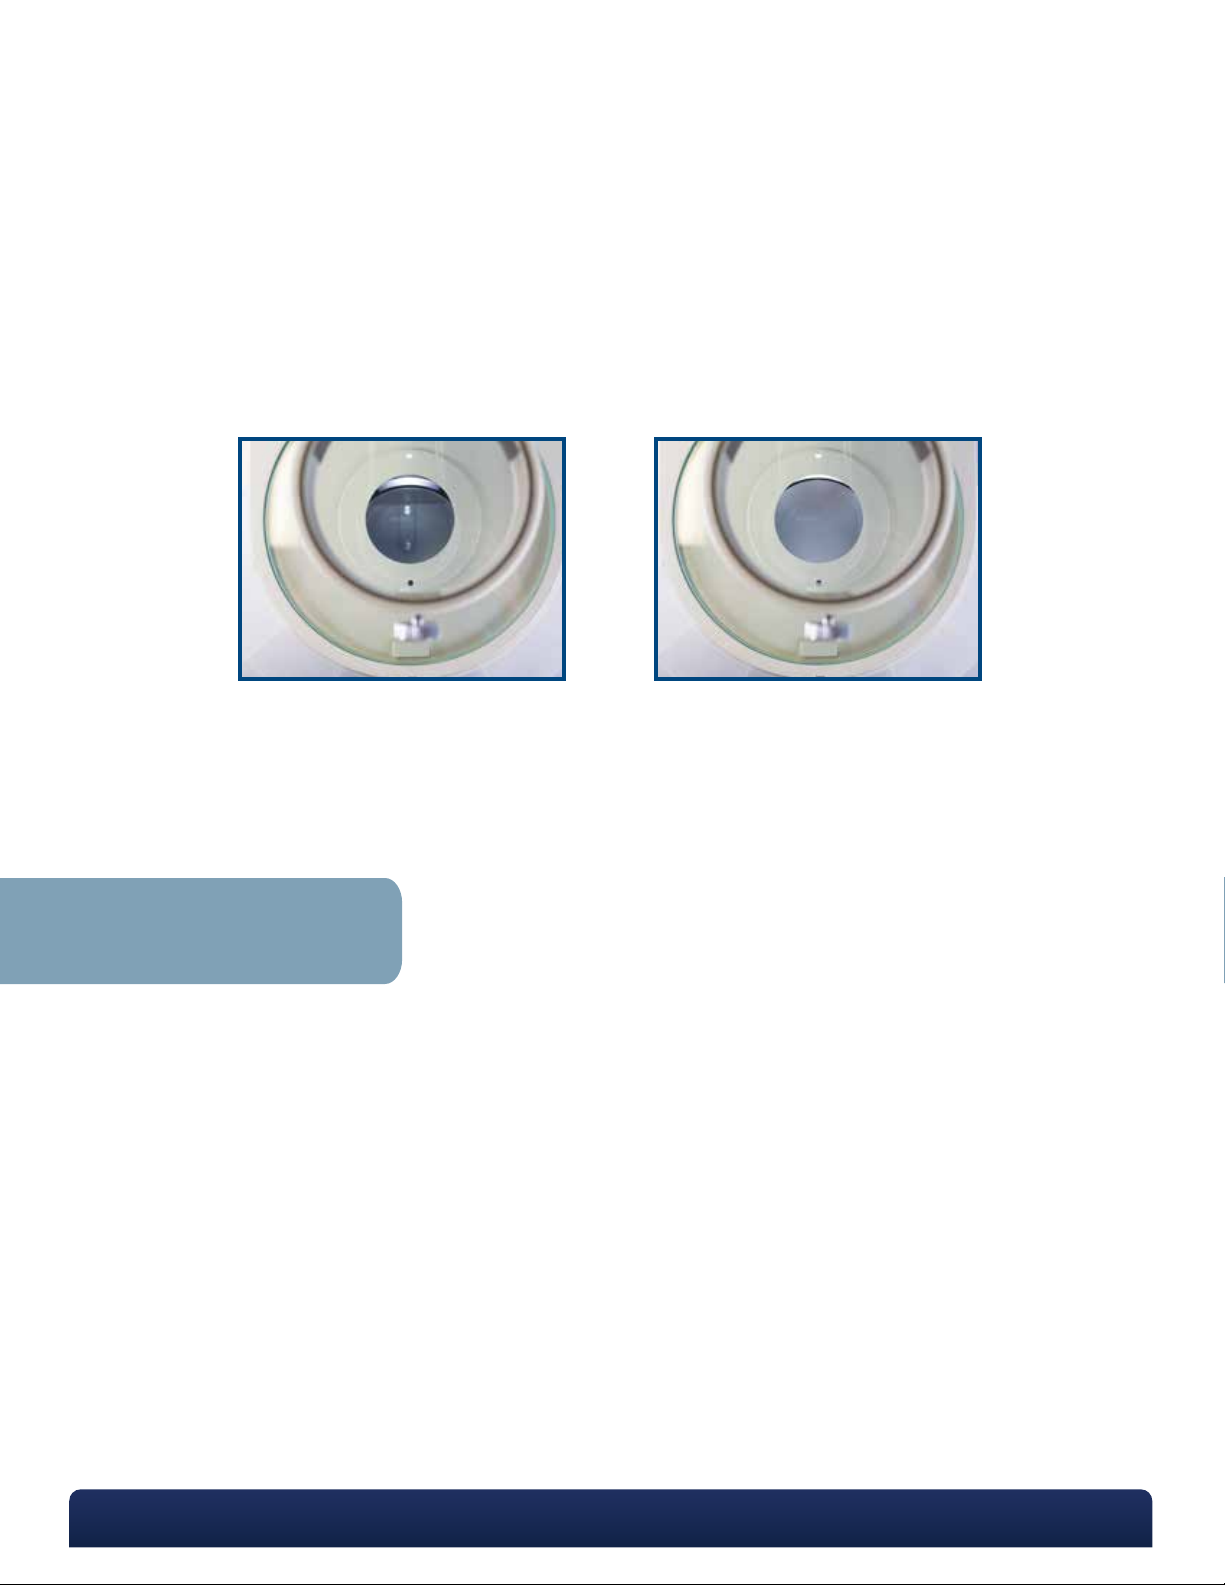
To “center” both eye tubes, make certain that the diopter adjustments are turned so that the silver ring on each of the
ocular tubes is visible (see image). This ensures that the stereoscope will be parfocal (requiring only slight focusing adjust-
ments) while zooming in and out.
P. 800.525.5614 F. 970.663.5042 1450 Van Buren Ave Loveland Co 80538 USA
Assembly and Operation
1
2
3
4
5
6
7
8
9
Your stereoscope has been packed with utmost care to avoid damage in shipping. Retain all of the packing material. If there
is damage, please contact the shipping company, as our warranty does not cover shipping damage. If you are uncertain
who the shipping company was, please contact the distributor where you purchased the stereoscope.
Note: If your stereoscope has been exposed to cold weather, please allow time for all the parts to come to room temperature
before use. Excess cold can fog the lenses and cause the lamp to fail.
Look through the binocular tubes and bring the specimen into focus. To adjust for differences in your eyes, close your right
eye and look into the left ocular with your left eye. Turn the focusing knobs until the image you see with your left eye is
clear. Then close your left eye and look into the right ocular with your right eye. Using the diopter adjustment ring on the
right ocular tube, adjust your right eye focus until you see a clear, focused specimen. This should only be a slight adjust-
ment.
Friction Adjustment: To increase or decrease tension when raising or lowering the head, adjust the fiction by turning the
focusing knobs in opposite directions at the same time until the desired tension is achieved.
Illumination: Your Z4 comes with a long-life LED bulb which may never have to be replaced. If necessary, the bulb assem-
bly can be removed and replaced.
Tilting the Mirror: The Embryo-GLO base is equipped with a two-sided mirror. One side is clear and one side is Frosted. To
switch between the sides and adjust the tilt of the mirror, simply turn the silver mirror adjustment knob on the side of the
Embryo-GLO base.
Your Z4 stereoscope is a precision instrument. Handle it with care, avoiding sudden and abrupt impact or vibration during use
or transportation.
Store your Z4 stereoscope in a clean and dry environment away from high temperatures and direct sunlight.
Never clean lenses with anything other than an optical lens cloth or lens paper with lens cleaning solution. You can purchase
these from our website www.lwscientific.com or at any store that sells eyeglasses or cameras. Using any other cloth or tissue
can damage and scratch the glass. Make every effort not to touch the glass optics with your fingers. This will leave oils on the
lens that will attract dust. Dust in the nosepiece or in the ocular tube should be blown out using only filtered air (canned air
dusters work well).
Do not attempt to clean any internal optics on your own. Only a qualified service technician should perform internal mainte-
nance.
Always cover your Z4 stereoscope with the dust cover when not in use.
Any spilled liquid or powder should be cleaned at once.
To keep your Z4 stereoscope in top condition for years, LW Scientific recommends having the Z4 stereoscope professionally
serviced once a year.
P. 800.525.5614 F. 970.663.5042 1450 Van Buren Ave Loveland Co 80538 USA
10
Maintenance and Care
11
12
Clear Frosted
P. 800.525.5614 F. 970.663.5042 1450 Van Buren Ave Loveland Co 80538 USA
Z4 with Embryo-GLO Base Specifications
Performance Chart
Zoom Range
See chart
Field of View
See chart
Zoom Ratio
1:6.5
Working Distance
See chart
Eye tube Inclination
45°
Microscope Head
360° Rotatable
Weight and Dimensions
Z4 Head: 3.35 lbs (1.52kg)
Embryo-GLO Base: 19 lbs (8.62kg)
MKT-7.5.3-L-302.001 | Rev 0
Magnifica�on
Field
of
View
Magnifica�on
Field
of
View
Magnifica�on
Field
of
View
10X/20 7X 28.6 3.5X 57.1 14X 14.3
45X 4.4 22.5X 8.9 90X 2.2
15X/15 10.5X 21.4 5.25X 42.8 21X 10.7
67.5X 3.3 33.75X 6.7 135X 1.7
0.5X
Working Distance:
100mm
Working Distance:
165mm
Standard
Configura�on
Eyepiece
Magnifica�on
2X
Supplemental Lenses
Working Distance:
30mm

Popular Microscope manuals by other brands

premiere MS-01L user manual

premiere

premiere MS-01L user manual

Orion MicroXplore 52167 instruction manual

Orion

Orion MicroXplore 52167 instruction manual

OPTIKA MICROSCOPES SZM-GEM  Series Operation manual

OPTIKA MICROSCOPES

OPTIKA MICROSCOPES SZM-GEM Series Operation manual

Carton CN Series instruction manual

Carton

Carton CN Series instruction manual

Etaluma LS820 Operator's manual

Etaluma

Etaluma LS820 Operator's manual

JEOL JSM-T200 instructions

JEOL

JEOL JSM-T200 instructions

Zeiss SL 800 Product Documentation Set

Zeiss

Zeiss SL 800 Product Documentation Set

Levenhuk Discovery Artisan 32 user manual

Levenhuk

Levenhuk Discovery Artisan 32 user manual

National 211 instructions

National

National 211 instructions

Swift SW200 user guide

Swift

Swift SW200 user guide

Celestron 44345 instruction manual

Celestron

Celestron 44345 instruction manual

Edu Science SMART SLIDES ACTIVITY KIT instruction manual

Edu Science

Edu Science SMART SLIDES ACTIVITY KIT instruction manual

Home Science Tools MI-1100STD instruction manual

Home Science Tools

Home Science Tools MI-1100STD instruction manual

Vanguard 1241MM Operation manuals

Vanguard

Vanguard 1241MM Operation manuals

Home Science Tools MI-4100STD instruction manual

Home Science Tools

Home Science Tools MI-4100STD instruction manual

Vanguard 1109AML Operation manual

Vanguard

Vanguard 1109AML Operation manual

Philips CM200 operating manual

Philips

Philips CM200 operating manual

Leica DM4000B operating manual

Leica

Leica DM4000B operating manual

manuals.online logo
manuals.online logoBrands
  • About & Mission
  • Contact us
  • Privacy Policy
  • Terms and Conditions

Copyright 2025 Manuals.Online. All Rights Reserved.