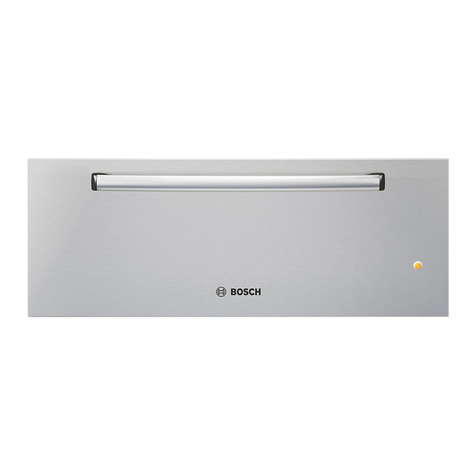
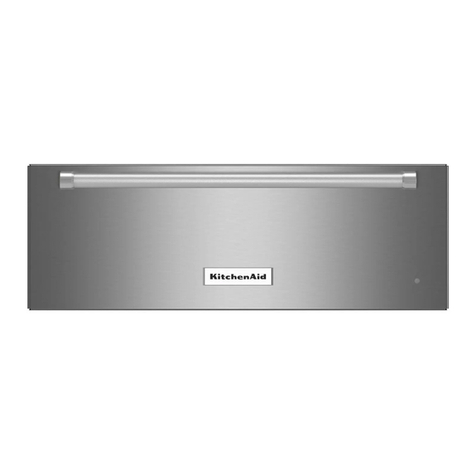
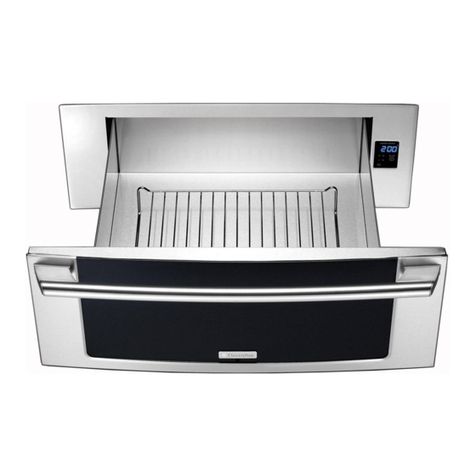
JUNO JWS14S0 User manual

User Manual Manuel
d’utilisation
Gebruik-
saanwijzing
JWS14S0
Gebrauch-
sanleitung
Warming
drawer
Tiroir chauf
fant
Verwar-
mende lade
Wärmefach

3
SAFETY INFORMATION
Carefully read the instructions before installing and using the
equipment. The manufacturer is not liable for property dama-
ge or personal injury resulting from improper installation and
use of the equipment. Always keep the instructions at hand,
so they can be easily referred to during use. This appliance
complies with applicable safety standards. Improper use of
the appliance may put users, bystanders and property at
risk.
Safety of children and vulnerable adults
WARNING! Risk of suocation, injury or permanent
disability.
• This appliance may be used by children aged 8 years and
over and persons with reduced physical, sensory or mental
capabilities or lack of experience and knowledge as long
as they are given supervision or instructions concerning
how to use the appliance in a safe way and understand the
hazards involved.
• Children should not play with the appliance. Keep children
under the age of three away from the appliance.
• Keep packaging materials out of reach of children.
• Keep children and pets away from the appliance during
operation or cooling. The accessible parts are red hot.
• Cleaning and maintenance should not be performed by
unsupervised children.
• Keep the appliance and its cable out of reach of children
under the age of eight.
General safety warnings
During use, the appliance becomes hot. Care should be
taken to avoid touching heating elements inside the device.
Always use oven gloves to insert or remove accessories or
oven-proof cookware.
• Depending on temperature selected and the operating
time, the temperature inside the appliance may reach 80°C.
When taking crockery out of the crockery warmer, protect

4
Installation
• Refer to the installation instructions
supplied separately.
• The installation must ensure protection
against direct contact with live parts.
• The electric system must be equipped
with an isolation switch providing all-po-
le contact separation which provides
for full disconnection under overvoltage
category III.
• A plug must be used for the electrical
connection; this must remain accessi-
ble after installation.
WARNING! Before connecting
the appliance, compare the power
supply data (voltage and frequen-
cy) indicated on the data plate with
those of the mains supply. If these
data do not match there may be
problems. In case of doubt, con-
tact an electrician.
WARNING! If the appliance is to
be connected without using a plug
(hard-wired), the appliance must
be installed and connected by a
technician. Contact a qualified
electrician who will perform the
work in accordance with electrical
code and comply with all provi-
sions of this manual. The manu-
facturer cannot be held respon-
sible for damage resulting from
installation or connection errors.
WARNING! The electrical safety
of the appliance can only be gua-
ranteed if it is properly earthed.
The manufacturer cannot be held
responsible for damage resulting
from the absence of or defects
in the installation’s protective
earthing system (e.g. electrical
shock).
WARNING! Only use the applian-
ce once it has been fully installed.
Only full and final installation
within the kitchen unit carcase
can ensure that there is no risk of
contact with live parts.
WARNING! Never open the
appliance’s structure. Potential
contact with live parts or any
modifications to the electrical and
mechanical structure can lead to
hazardous situations for users and
compromise correct operation of
the appliance.
your hands using oven gloves or a tea towel.
• Do not sit or hang on the drawer – the telescopic runners
would be damaged. The maximum load capacity of the
drawer is 15 kg.
• Do not store synthetic containers or ammable objects insi-
de the crockery warmer. When you switch on the appliance
such containers and objects may melt or catch re. Fire
hazard!
• Do not use the appliance as a space heater. The high tem-
peratures reached could cause ammable objects close to
the appliance to catch re.
• When you stop using the appliance at the end of its wor-
king life, disconnect it from the power supply and render
the electrical cable unusable so that it is not a hazard to
children, for example.
5
Cleaning
• Do not use harsh abrasive cleaners
or metal scrapers/scourers to clean
the device since they can scratch the
surface.
• Do not use steam cleaners to clean the
appliance.
• Do not use high pressure or steam jet
cleaning devices. The steam may affect
electrical components and cause a
short circuit. The steam pressure may
also cause damage to the appliance’s
surface and components in the long
time.
Repairs
• If the appliance’s power supply cable
is damaged, it must be replaced by the
manufacturer, by an authorised techni-
cian or by a qualified electrician in order
to negate any potential hazards.
WARNING! The appliance must
be isolated from the electricity
supply when installation and
repair work is being performed.
To disconnect the appliance from
the current, one of the following
conditions must be met:
– The relevant fuses / circuit brea-
kers at the switchboard must be
disconnected.
– The plug should be removed
from the socket. To remove the
plug from the socket do not pull
on the electric cable but rather
pull out the plug itself directly.
WARNING! Repairs and mainte-
nance, especially of live compo-
nents, must only be performed by
technicians authorised by the ma-
nufacturer. The manufacturer and
retailer do not accept responsibility
for any injury to people or animals
or damage to personal property as
a result of repairs and maintenan-
ce carried out by non-authorised
personnel.
WARNING! Repairs undertaken
during the warranty period must
only be performed by technicians
authorised by the manufacturer.
If this is not the case then any
damage resulting from the repair
in question shall be excluded from
the guarantee

6
APPLIANCE DESCRIPTION
Main components
1On/Off switch and light
2Thermostat
3Non-slip base
4Front panel with push-push
mechanism or handle
How the warming drawer works
This appliance is equipped with a warm
air circulation system. A fan distributes the
heat generated by an electrical heating
element throughout the interior of the
appliance.
The thermostat allows the user to set and
control the temperature for the crockery.
The circulating hot air that is generated
heats up the crockery quickly and evenly.
A protective grille prevents accidental con-
tact with the heating element and fan.
The base of the drawer is covered with
non-slip material to stop dishes from mo-
ving when the drawer is opened or closed.

7
Before First Use
Before using the appliance for the first
time you should clean the interior and the
exterior, following the cleaning instructions
given in the section “Cleaning and main-
tenance”.
Remove the non-slip base.
Then heat the warming drawer for at least
2 hours. To do this, turn the temperature
control to the maximum position (see
section “Selecting temperature”).
Make sure the kitchen is well-ventilated
when you are doing this.
The appliance’s parts are treated with
a special product. This may cause an
unpleasant odour to be released during
this initial heating. Both the odour and any
fumes that may form will disappear after a
short time and neither signifies that there
is anything wrong with the connection or
the appliance.
Control panel
The control panel has a selector and an
on/off switch. The control panel is only
visible when the drawer is open.
USE
Using the warming drawer
• To use the warming drawer, proceed as
follows:
• Place the crockery in the drawer.
• Do not arrange plates vertically in front
of the ventilation slots.
• The warm air would not be able to fully
escape from the slots. This would lead
to uneven heating of crockery.
• Select the desired function by turning
the thermostat knob to the correspon-
ding position.
• Switch on the appliance by pressing
the switch; the corresponding light will
come on.
• Close the drawer.
• Be careful not to use too much force
when closing the drawer since it may
open up again. Before taking out the
warm crockery you must switch off the
warming drawer by pressing the switch
again.
Function Selection
The thermostat knob allows you to select
temperatures between 30 and 80°C.
Do not force the thermostat knob to the
left beyond the “0” position, or to the
right beyond the maximum temperatu-
re, as this could damage it.
As soon as the selected temperature is
reached, the heating element will turn off.
When the temperature drops back below
the selected value, the heating element
will turn on again.
The temperature scale is marked with
absolute temperatures in °C and also has
symbols which correspond to the optimum
temperatures for groups of crockery:

8
Symbol °C (*) Function Warnings
30°C
Defrosting.
Dough proving.
Yoghurt fermentation.
-
Cover the dough.
Cover the tub.
45°C Warming cups and glasses. -
60°C Warming dinner plates.
Reheating delicate foodstus.
-
Preheat the dish.
70°C Keeping foodstus warm. Preheat the dish and cover the
food.
80°C Reheating foodstus. Preheat the dish.
* The temperatures refer to the drawer when empty and closed.
Heating time
Various factors affect heating times:
• The material and thickness of the
crockery
• Load size
• How the crockery is arranged
• Temperature setting
• Repeated opening and closing of the
drawer
• It is therefore not possible to give preci-
se heating times.
• As you use the warming drawer regu-
larly, you will learn the best settings for
your crockery.
Suggestions for the “keep warm” and
“reheat” function:
Preheat the warming drawer for 15 minu-
tes to ensure it is at the required internal
temperature.

9
Cleaning is the only maintenance acti-
vity that is generally required.
WARNING! The warming drawer
must be disconnected from the
power supply before cleaning.
Unplug the device from the socket
or isolate its power supply circuit.
Do not use harsh or abrasive
cleaning products, scouring pads/
sponges or sharp objects, since
this could cause stains or scra-
tches.
Never use high pressure or steam
jet cleaning appliances.
Appliance front and control
panel
The warming drawer can be cleaned using
just a damp cloth. If it is very dirty, add few
drops of washing-up liquid to the water.
Wipe the surfaces dry using a dry cloth.
For stainless-steel fronted warming
drawers, special products for stain-
less-steel surfaces can be used.
These products prevent the build-up of dirt
on such surfaces. Apply a thin layer of this
product on the surface using a soft cloth.
On aluminium fronted warming drawers,
use a delicate glass cleaning product and
a soft, lint-free cloth. Wipe horizontally
without applying.
Interior of the warming drawer
Clean the interior of the warming drawer
regularly using a damp cloth. If it is very
dirty, add few drops of washing-up liquid to
the water
Wipe the surfaces dry using a dry cloth.
Avoid water entering the air circulation
opening.
Only use the warming drawer again when
it is completely dry.
Non-slip base
The non-slip surface mat can be removed
to facilitate cleaning of the drawer.
The mat can be cleaned by hand using
hot water with a few drops of washing-up
liquid. Dry thoroughly.
The non-slip mat should only be replaced
when it is completely dry.
CLEANING AND MAINTENANCE

10
WARNING! Any repairs must only
be performed by a specialised
technician. Any repair performed
by a person not authorised by
the manufacturer is potentially
dangerous.
However, the following faults can
be resolved by the user without
calling Technical Assistance.
Before contacting Technical Assistan-
ce, check on the following:
The crockery does not warm up
sufficiently. Check whether:
– The appliance is on
– The appropriate temperature has
been selected
– The air circulation orifices are
blocked by the crockery
– The crockery was left to warm up
for sufficient time
• Heating time depends on several
factors, such as, for example:
– The material and thickness of the
crockery
– Load size
– How the crockery is arranged
• The crockery does not heat up at all.
Check whether:
– You can hear the noise of the fan If
the fan is running, this means that
the heating element is defective. If
the fan is not running, this means
that it is faulty
– The fuse has blown or the circuit
breaker has tripped
• The crockery is too hot:
– The temperature selector is not
working
• The on/off switch does not light up:
– The switch indicator light has blown
WHAT SHOULD I DO IF THE WARMING DRAWER DOE-
SN’T WORK?
INSTALLATION INSTRUCTIONS
Before installation
Check that the supply voltage indicated on
the data plate is the same as that provided
by the power socket you plan to use.
Open the drawer, take out all the accesso-
ries and remove the packaging material
WARNING! The front surface of
the warming drawer may be cove-
red in a protective film.
Carefully remove this film before
using the warming drawer for the
first time.
Ensure that the warming drawer
is not damaged in any way. Check
that the drawer opens and closes
correctly. If damage is encounte-
red, inform Technical Assistance.
WARNING! The power socket
should be easily accessible after
the warming drawer has been
installed.

11
The warming drawer should only be in-
stalled in combination with the appliances
specified by the manufacturer. If it is fitted
in combination with other appliances, the
guarantee will be void since it is impossi-
ble to guarantee that the warming drawer
will work correctly.
Installation
WARNING! Refer to the installa-
tion instructions supplied separa-
tely.
Installing the warming drawer in
combination with another applian-
ce requires be a fixed intermediate
shelf in the carcase to support the
weight of both appliances.
The appliance to be installed in
combination with the warming
drawer will be installed directly on
top of it.
Follow the instructions given in
the corresponding instruction and
installation booklet for installation
of the combined appliance.
Electrical connection
Electrical installation must be performed
by a qualified electrician.
Before connecting the warming drawer to
the mains electricity supply, check that the
voltage and frequency of the mains supply
matches that shown on the data plate
inside the appliance.
The electrical connection should be made
via an omnipolar switch rated for the cur-
rent capacity with minimum 3 mm contact
separation, in order to provide isolation in
emergencies or when cleaning the war-
ming drawer.
The connection must be suitably earthed.
WARNING! The warming drawer
must be earthed.
If the appliance flex requires
replacement, contact Technical As-
sistance or an authorised service
centre, as specialised tools are
required.
The manufacturer and retailer
do not accept responsibility for
any injury to people or animals or
damage to personal property as a
result of failure to follow the sup-
plied installation instructions.

12
.Recycle materials with the following
symbol.
Place the packaging in the corresponding
containers for recycling.
Help protect the environment and human
health and to recycle waste from electrical
and electronic appliances.
Do not dispose of appliances marked
with the following symbol with general
household waste. Take the product to your
local recycling facility or contact your local
council
ENVIRONMENTAL PROTECTION

14
INFORMATIONEN ZUR SICHERHEIT
Lesen Sie die Anweisungen sorgfältig vor der Installation
und bevor Sie Ihr Gerät in Betrieb setzen. Der Hersteller
haftet nicht für unsachgemäße Installation und Nutzung der
Geräte, die Verletzungen und Schäden verursachen können.
Halten Sie die Anweisungen gribereit, so dass sie während
des Gebrauchs leicht konsultierbar sind. Dieses Gerät en-
tspricht den vorgeschriebenen Sicherheitsbestimmungen.
Ein unsachgemäßer Gebrauch kann jedoch zu Schäden an
Personen und Sachen führen.
Sicherheit von Kindern und gefährdeten Erwachse-
nen
ACHTUNG! Erstickungs-, Verletzungs- und dauerhafte
Unfähigkeitsgefahr.
• Dieses Gerät kann dann von Kindern ab 8 Jahren, von Per-
sonen mit eingeschränkten körperlichen, sensorischen oder
geistigen Fähigkeiten sowie von Personen ohne bisherige
Erfahrung im Umgang mit solchen Geräten bedient werden,
wenn sie dabei von einer Person, die für ihre Sicherheit
verantwortlich ist, beaufsichtigt werden.
• Kinder dürfen nicht mit dem Gerät spielen. Kinder unter 3
Jahren dürfen sich nicht unbeaufsichtigt in der Nähe des
Geräts aufhalten.
• Kinder dürfen das Gerät nicht reinigen oder warten, wenn
sie dabei nicht beaufsichtigt werden.
• Halten Sie Kinder und Haustiere vom Gerät fern, wenn es
in Betrieb oder in der Abkühlphase ist. Berührbare Teile
sind heiß.
• Reinigung und Wartung des Geräts darf nicht von Kindern
ohne Aufsicht erfolgen.
• Halten Sie Kinder unter 8 Jahren vom Gerät und dem
Netzkabel fern.
Warnungen zur allgemeinen Sicherheit
Das Gerät wird bei Gebrauch heiß. Berühren Sie nicht die
Heizkörper des Gerätes. Verwenden Sie immer Topfhand-

15
schuhe, um hitzebeständiges Zubehör oder Töpfe und Pfan-
nen in das Gerät zu stellen oder herauszunehmen.
• Das Gerät kann im Innenraum je nach gewählter Tempe-
ratur und Benutzungsdauer bis zu ca. 80 °C heiß werden.
Verwenden Sie zum Herausnehmen des erwärmten Ge-
schirrs bei Bedarf Topfhandschuhe.
• Stellen oder setzen Sie sich nicht auf die geönete Ge-
schirrschublade. Der Teleskopauszug wird beschädigt. Die
Belastbarkeit der Geschirrschublade beträgt max. 15kg.
• Bewahren Sie keine Kunststobehälter oder brennbare
Gegenstände im Gerät auf. Beim Einschalten können sie
schmelzen oder sich entzünden. Brandgefahr!
• Benutzen Sie das Gerät nicht zum Beheizen von Räumen.
Durch die Temperaturentwicklung können leicht entzünd-
bare Gegenstände in der Nähe zu brennen beginnen.
• Nicht mehr benutzte Geräte müssen vom Elektronetz ge-
trennt und alle wegführenden elektrischen Leitungen en-
tfernt werden, damit sie z. B. für spielende Kinder keine
Gefahr darstellen.
Installation
• Während der Installation folgen Sie die
Anweisungen die getrennt geliefert wur-
den.
• Der Schutz gegen direktes Berühren muss
durch den Integrationsmodus gewährleistet
sein.
• Die Elektronik muss mit einer Einrichtung
zur Abschaltung ausgestattet sein, womit
das Gerät sich von jedem Pol vom Netz
ausschalten lässt und die vollständige
Trennung unter der Überspannungskateg-
orie III bietet.
• Für die elektrische Verbindung muss ein
Stecker verwendet werden, der nach der
Installation zugänglich ist.
ACHTUNG! Vergleichen Sie vor
dem Anschließen des Gerätes die
Anschlussdaten (Spannung und
Frequenz) auf dem Typenschild mit
denen des Elektronetzes. Diese
Daten müssen unbedingt übereins-
timmen, damit keine Schäden am
Gerät auftreten. Im Zweifelsfall fragen
Sie Ihren Elektroinstallateur.
ACHTUNG! Bei einem Kabel ohne
Stecker muss es von einem Elektro-
fachkraft installiert und angeschlos-
sen werden. Wenden Sie sich in
diesem Fall an einen Elektrofachkraft,
der mit den Sicherheitsvorschriften
vertraut ist und der die Arbeiten
entsprechend diesen und allen in
dieser Anleitung enthaltenen Anwei-
sungen durchführt. Für Schäden, die
durch unsachgemäße Montage oder
Anschluss entstehen, übernimmt der
Hersteller keine Haftung.
ACHTUNG! Die elektrische Si-
cherheit des Gerätes ist nur dann
gewährleistet, wenn es an ein vor-
schriftsmäßig installiertes Schutzlei-
tersystem angeschlossen wird. Der
Hersteller kann nicht für Schäden
verantwortlich gemacht werden, die

16
durch eine fehlende oder unter-
brochene Schutzleiterverbindung
verursacht werden (z. B. elektrischer
Schlag).
ACHTUNG! Verwenden Sie das
Gerät nur, wenn es ordnungsgemäß
eingebaut ist. Nur so kann die Gefahr
des Berührens spannungsführender
Teile vermieden werden.
ACHTUNG! Öffnen Sie niemals die
Struktur des Gerätes. Möglicher Kon-
takt mit spannungsführenden Teilen
oder Veränderungen an der elektri-
schen und mechanischen Struktur
können zu gefährlichen Situationen
für den Benutzer führen und die
korrekte Funktion des Gerätes beein-
trächtigen.
Reinigung
• Verwenden Sie keine Scheuermittel oder
scharfe Metallschaber zum Reinigen
des Türglases, da diese die Oberfläche
zerkratzen und somit zum Zersplittern des
Glases führen können.
• Verwenden Sie zur Reinigung des Geräts
keinen Dampfreiniger.
• Verwenden Sie keinen Dampfstrahler oder
Hochdruckreiniger. Zum einen kann der
Dampf an spannungsführende Teile gelan-
gen und einen Kurzschluss auslösen. Zum
anderen kann der Dampfdruck zu dau-
erhaften Beschädigungen von Oberflächen
und Bauteilen führen, für die der Hersteller
keinen Schadenersatz leistet.
Reparaturen
• Wenn das Anschlusskabel beschädigt ist,
kann dieses nur vom Hersteller, seinem
Servicepartner oder einer anderen qualifi-
zierten Person ausgetauscht werden, um
eine gefährliche Situation zu verhindern.
ACHTUNG! Bei Installations- und
Reparaturarbeiten muss das Gerät
vom Netz getrennt sein. Das Gerät
ist nur dann elektrisch vom Netz
getrennt, wenn eine der folgenden
Bedingungen erfüllt ist:
– Die Sicherungen der Hausinstalla-
tion ausgeschaltet sind.
– Die Netzanschlussleitung vom
Elektronetz getrennt ist. Ziehen Sie
bei Geräten mit Netzstecker nicht
an der Anschlussleitung, sondern
am Stecker, um das Gerät vom
Netz zu trennen.
ACHTUNG! Wartungs- oder Repara-
turarbeiten, insbesondere an span-
nungsführenden Teilen, dürfen nur
von dem vom Hersteller autorisierten
Fachpersonal durchgeführt werden.
Der Hersteller und der Wiederver-
käufer lehnen jegliche Haftung für
eventuelle Schäden ab, die Perso-
nen, Tieren oder Sachen infolge der
Nichtbeachtung der vorliegenden In-
stallationsanleitung zugefügt werden.
ACHTUNG! Eine Reparatur des
Gerätes während der Garantiezeit
darf nur von einem vom Hersteller
autorisierten Kundendienst vorge-
nommen werden, sonst besteht bei
nachfolgenden Schäden kein Garan-
tieanspruch mehr.

17
GERÄTEBESCHREIBUNG
Hauptkomponenten
1EIN-/AUS-Schalter
2Thermostat
3Antirutschauflage
4Frontplatte mit Push-Push-Mechani-
smus oder Griff
Bedienprinizip
Dieses Gerät verfügt über ein Heißluftsys-
tem. Ein Gebläse verteilt die Wärme des
Heizkörpers optimal in der Schublade.
Das Thermostat ermöglicht die Bestim-
mung und Überwachung der gewünschten
Geschirrtemperatur.
Durch die entstehende Luftzirkulation wird
das Geschirr gleichmäßig und schnell
erwärmt.
Ein Schutzgitter verhindert die Berührung
mit Heizkörper und Gebläse.
Der Boden der Geschirrschublade ist mit
einer Antirutschauage ausgelegt, die das
Verrutschen des Geschirrs beim Önen
und Schließen der Schublade verhindert.

18
Vor dem ersten Gebrauch
Vor dem ersten Benutzen sollten Sie
Ihr Gerät innen und außen mit einem
feuchten Tuch abwischen und an-
schließend trocknen, siehe dazu Hinweise
„Reinigung und Pflege“.
Den rutschfesten Boden entfernen.
Heizen Sie die leere Schublade minde-
stens 2 Stunden lang auf. Stellen Sie
dazu den Temperaturknebel auf Maximum
(siehe Kapitel „Temperatur wählen“).
Sorgen Sie dabei für eine gute Belüftung
der Küche.
Die Bauteile sind mit einem Pflegemittel
geschützt. Deshalb kommt es beim ersten
Aufheizen vorübergehend zur Geruchsbil-
dung. Die Geruchsbildung und eventuell
auftretender Dunst vergehen nach kurzer
Zeit und weisen nicht auf einen Falschan-
schluss oder Gerätedefekt hin.
Bedienelemente
Die Bedienelemente bestehen aus dem
Thermostat und dem Ein-/Aus-Schalter.
Sie sind nur sichtbar, wenn die Geschirr-
schublade geöffnet ist.
BEDIENUNG
Bedienprinzip
• Um die Wärmeschublade zu verwen-
den verfahren wie folgt:
• Stellen Sie das Geschirr in die Schu-
blade.
• Vermeiden Sie es, Geschirr senkrecht
vor den Belüftungslöcher zu platzieren.
• Die heiße Luft würde nicht vollständig
aus den Schlitzen entweichen. Das Ge-
schirr würde nicht gleichmäßig erhitzt
werden.
• Um die Funktion zu wählen, drehen Sie
bitte den Schalter auf die gewünschte
Position.
• Schalten Sie das Gerät durch drücken
des EIN-/AUS-Schalters ein. Der Schal-
ter leuchtet auf.
• Schließen Sie die Schublade.
• Beachten Sie, dass sich die Schubla-
de wieder öffnen kann, wenn sie mit
übermäßigem Schwung geschlossen
wird. Schalten Sie das Gerät aus, bevor
Sie das erwärmte Geschirr entnehmen.
Funktion wählen
Der Funktionswähler ermöglicht die
stufenlose Einstellung der Temperatur
zwischen ca. 30 und 80 °C.
Den Funktionswähler nur linksherum
bis zur Position “0“drehen oder nach
rechts bis zum Anschlag, den sonst
wird der Wähler zerstört.
Ist die gewählte Temperatur erreicht,
schaltet sich die Heizung ab. Sobald die
Temperatur unter den eingestellten Wert
sinkt, schaltet sich die Heizung wieder ein.
Auf der Temperaturskala sind absolute
Temperaturwerte in °C und Symbole mar-
kiert, die die optimale Temperatur für die
jeweilige Geschirrgruppe darstellen:

19
Symbol °C (*) Funktion Warnung
30 °C
Antauen.
Teig gehen lassen.
Joghurt fermentieren.
-
Teig abdecken.
Behälter abdecken.
45°C Tassen/Gläser vorwärmen. -
60°C
Geschirr vorwärmen.
Schonende Erwärmung von Spei-
sen.
-
Teller vorwärmen.
70°C Speisen warmhalten. Teller vorwärmen und Speisen
abdecken.
80°C Speisen erhitzen. Teller vorwärmen.
* Die Temperaturen beziehen sich auf die leere und geschlossene Schublade.
Aufheizzeiten
Unterschiedliche Faktoren beeinflussen
die Aufheizzeit:
• Material und Dicke des Geschirrs
• Beladungsmenge
• Beladungsanordnung
• Temperatureinstellung
• Wiederholtes Öffnen und Schließen der
Schublade.
• Absolute Angaben sind daher nicht
möglich.
• Bitte ermitteln Sie im praktischen Ge-
brauch die optimalen Einstellungen für
Ihren Haushalt.
Vorschläge für die Funktion „Speisen
warmhalten“ und „Speisen erhitzen“:
Heizen Sie das Gerät grundsätzlich 15
Minuten vor, um sicherzustellen, dass im
Innenraum die erforderliche Temperatur
vorliegt.

20
Die Reinigung stellt die einzige, norma-
lerweise erforderliche Wartung dar.
ACHTUNG! Die Reinigung muss
an dem von der Stromversorgung
getrennten Gerät durchgeführt
werden. Ziehen Sie den Stecker
aus der Steckdose oder schalten
Sie den Stromversorgungskreis des
Gerätes ab.
Benutzen Sie keine aggressiven
Reinigungs- oder Scheuermittel,
keine kratzenden Scheuertücher
noch spitze Gegenstände, denn es
können Flecken entstehen.
Verwenden Sie keinesfalls Dampf-
strahler oder Hochdruckreiniger.
Stirnseite und Bedienblende
Es reicht, das Gerät mit einem feuchten Lap-
pen zu reinigen. Geben Sie, falls das Gerät
sehr verschmutzt sein sollte, einige Tropfen
Geschirrspülmittel ins Waschwasser.
Wischen Sie danach das Gerät mit einem
trockenen Tuch ab.
Für Wärmeschubladen mit Edelstahlvorder-
seite können Spezialmittel für Edelstahlober-
flächen verwendet werden.
Diese Mittel vermeiden, dass die Ober-
flächen schnell wieder schmutzig werden.
Tragen Sie das Mittel mit einem weichen
Tuch flächig und sparsam auf.
Zur Reinigung von Schubladen mit Alumi-
niumfronten verwenden Sie ein mildes, nicht
scheuerndes Reinigungsmittel und tragen
es mit einem weichen, fusselfreien Tuch auf.
Reinigen Sie die Oberfläche horizontal und
ohne Druck.
Innenraum
Reinigen Sie nach jeder Nutzung die In-
nenwände mit einem feuchten Tuch. Geben
Sie, falls das Gerät sehr verschmutzt sein
sollte, einige Tropfen Geschirrspülmittel ins
Waschwasser.
Wischen Sie danach das Gerät mit einem
trockenen Tuch ab.
Verhindern Sie das Eindringen von Wasser
in die Belüftungslöcher.
Nutzen Sie die Wärmeschublade nur nach-
dem sie trocken ist.
Antirutschauflage
Die Antirutschauflage kann zur Reinigung
des Schubladenbodens herausgenommen
werden.
Die Auflage reinigen Sie am besten von
Hand mit warmem Wasser und einem milden
Spülmittel. Trocknen Sie sie im Anschluss
gut ab.
Legen Sie die Antirutschauflage erst wieder
in die Schublade, wenn sie ganz trocken ist.
REINIGUNG UND PFLEGE
This manual suits for next models
1
Table of contents
Languages:
Popular Warming Drawer manuals by other brands

Frigidaire
Frigidaire PLEW27S3ECA Use & care manual

GE
GE Monogram ZKD910 installation instructions

Siemens
Siemens HW 140 Series instruction manual

Hatco
Hatco Drawermax HDM Series Installation and operating manual

Zanussi
Zanussi ZWD141K user manual

La Cornue
La Cornue SUPREME Installation, operation and maintenance instructions