©Just go motorhomes 2021
Keen to get your motorhome adventure started?
Keys
You have 2 keys on your coloured key ring fob:
One for the ignition and diesel cap
One for all the exterior lockers and habitation door
Last 3 digits of your reg is displayed on the key fob
To avoid locking the keys in the motorhome always use
the keys to lock the habitation door last when leaving.
Power
To connect the motorhome to mains electric you need to
use the hook-up cable located in the gas locker. Plug this
into the motorhome and the power supply as soon as you
get to your pitch at the campsite to enable power to your
motorhome.
Once you have arrived at your location try to position the
motorhome on level ground. Un-wind the hook up cable
fully from the reel to avoid overheating due to electric
current.
Fridge
Your fridge can run on van engine (12 volt), 240 volt hook
up, or gas. See instructions on page 11.
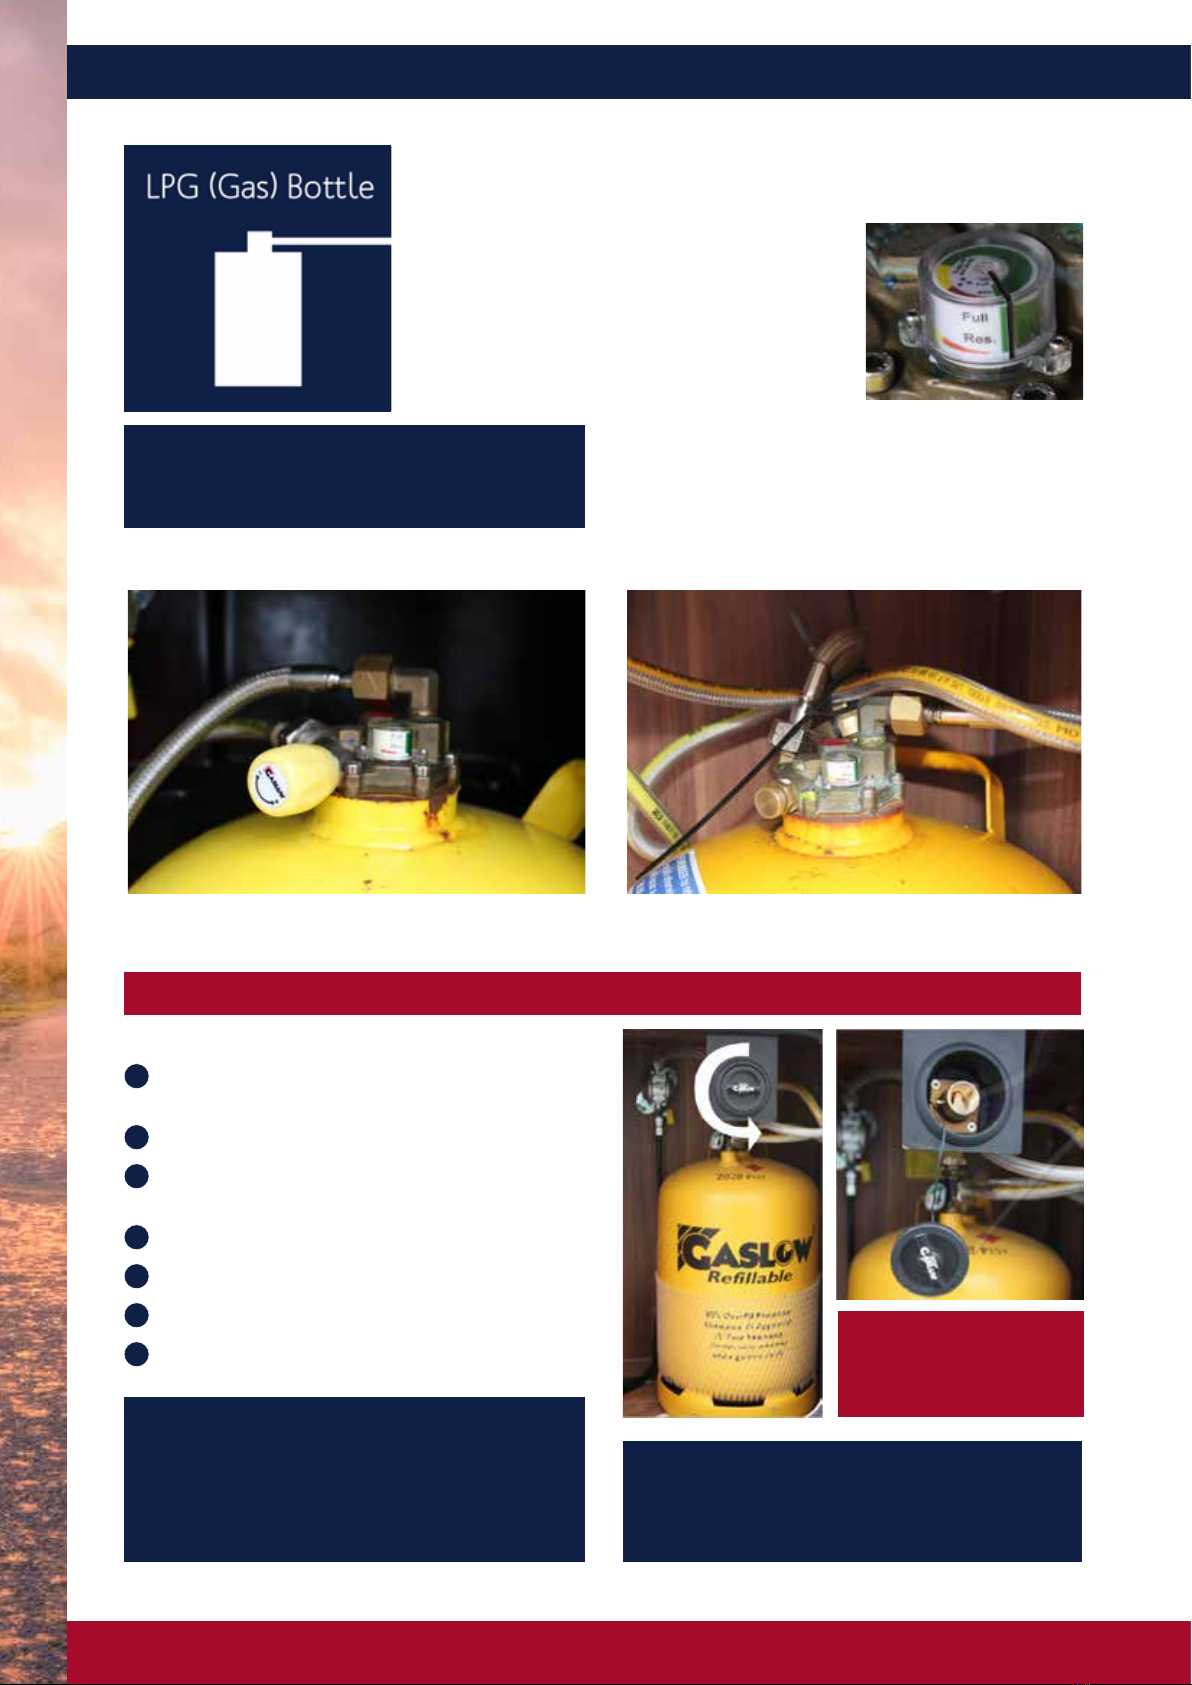
Gas on
If you do not have electric hook up to enjoy the luxury of
warm heating, hot water or to cook your favourite meal,
you will need to make sure you have turned on the gas. To
do this you need to go to your gas locker and turn the tap
on the top of the bottle anti-clockwise. Please remember
to turn the gas off at the bottle after you have finished
using it. Keep the gas turned off when you are travelling,
asleep and when the motorhome is left unattended.
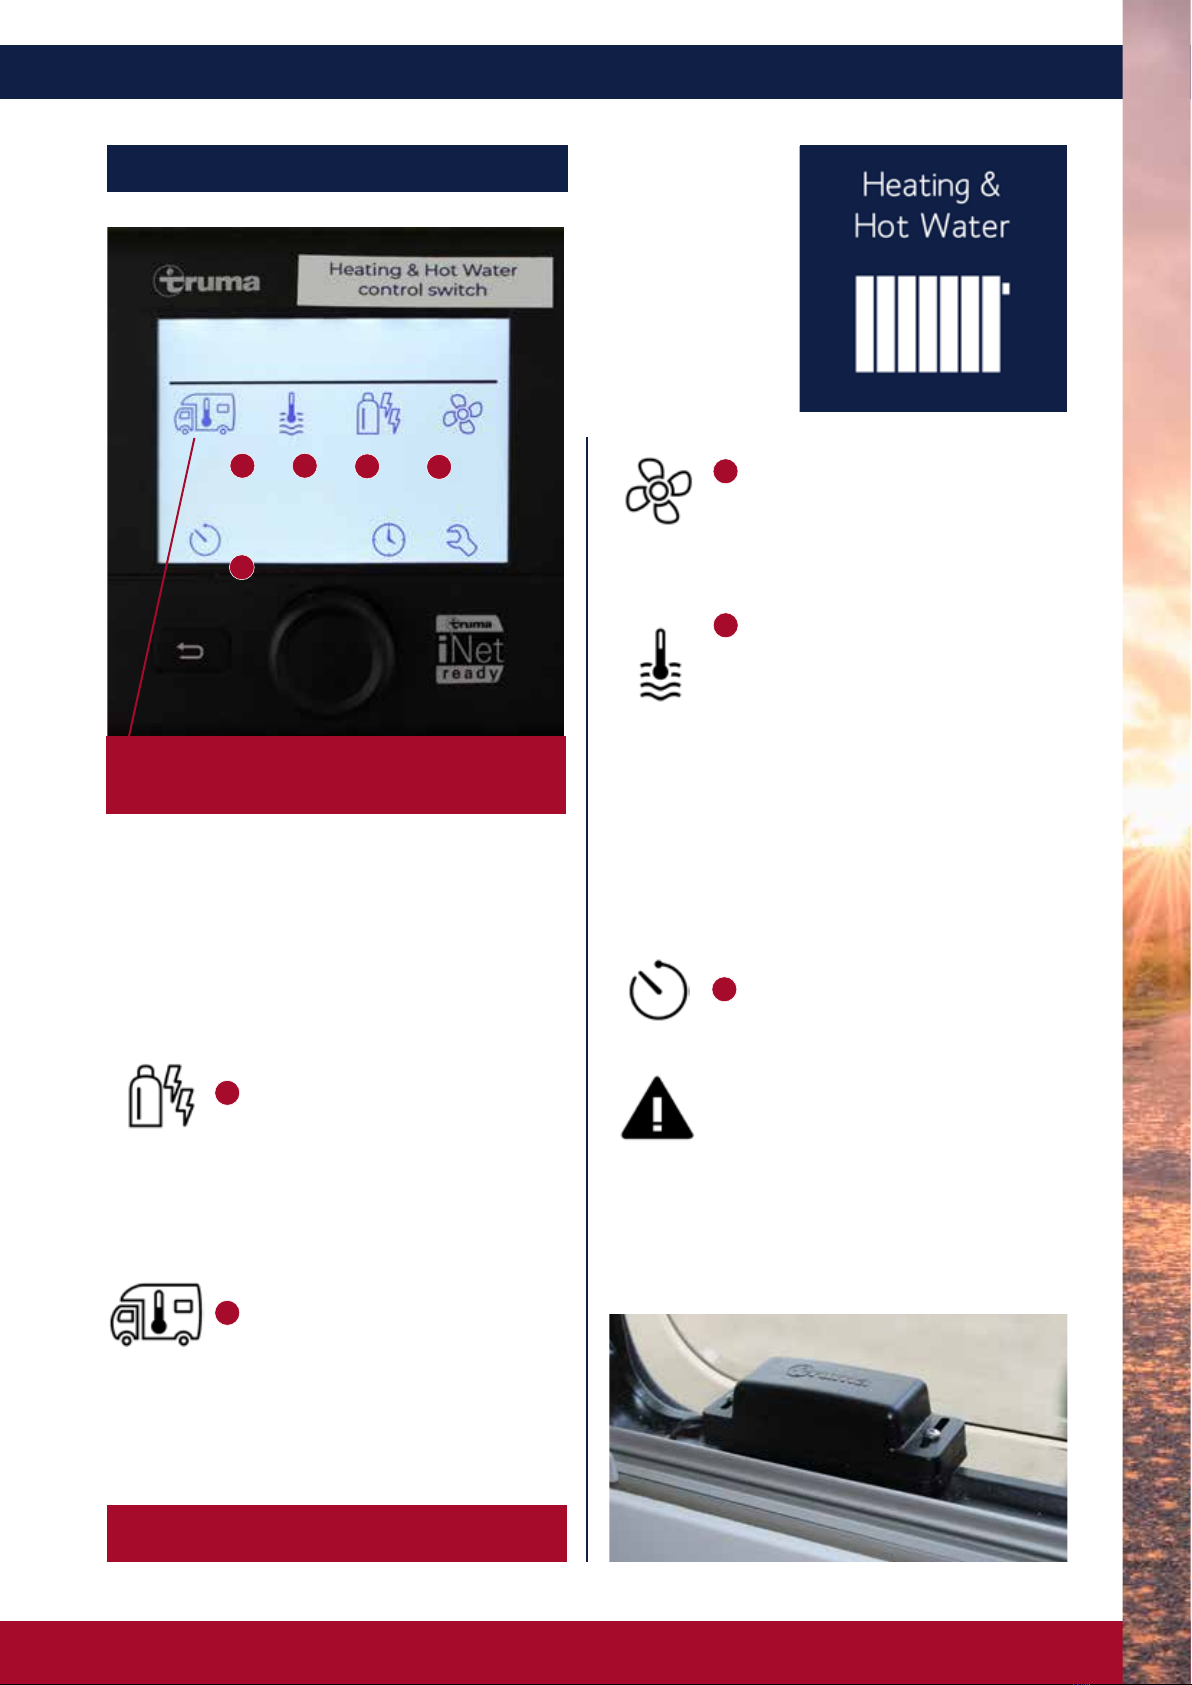
Turning on heating & hot water
Your heating system is either controlled by the Truma
panel with LCD screen, or by the Truma twin dial control.
The LCD control system runs on gas or electric.
The twin dial system runs on gas only.
Look out for the helpful
‘find it sticker’ which has
been placed in your vehicle
which is a quick guide to
find various items on board.
1
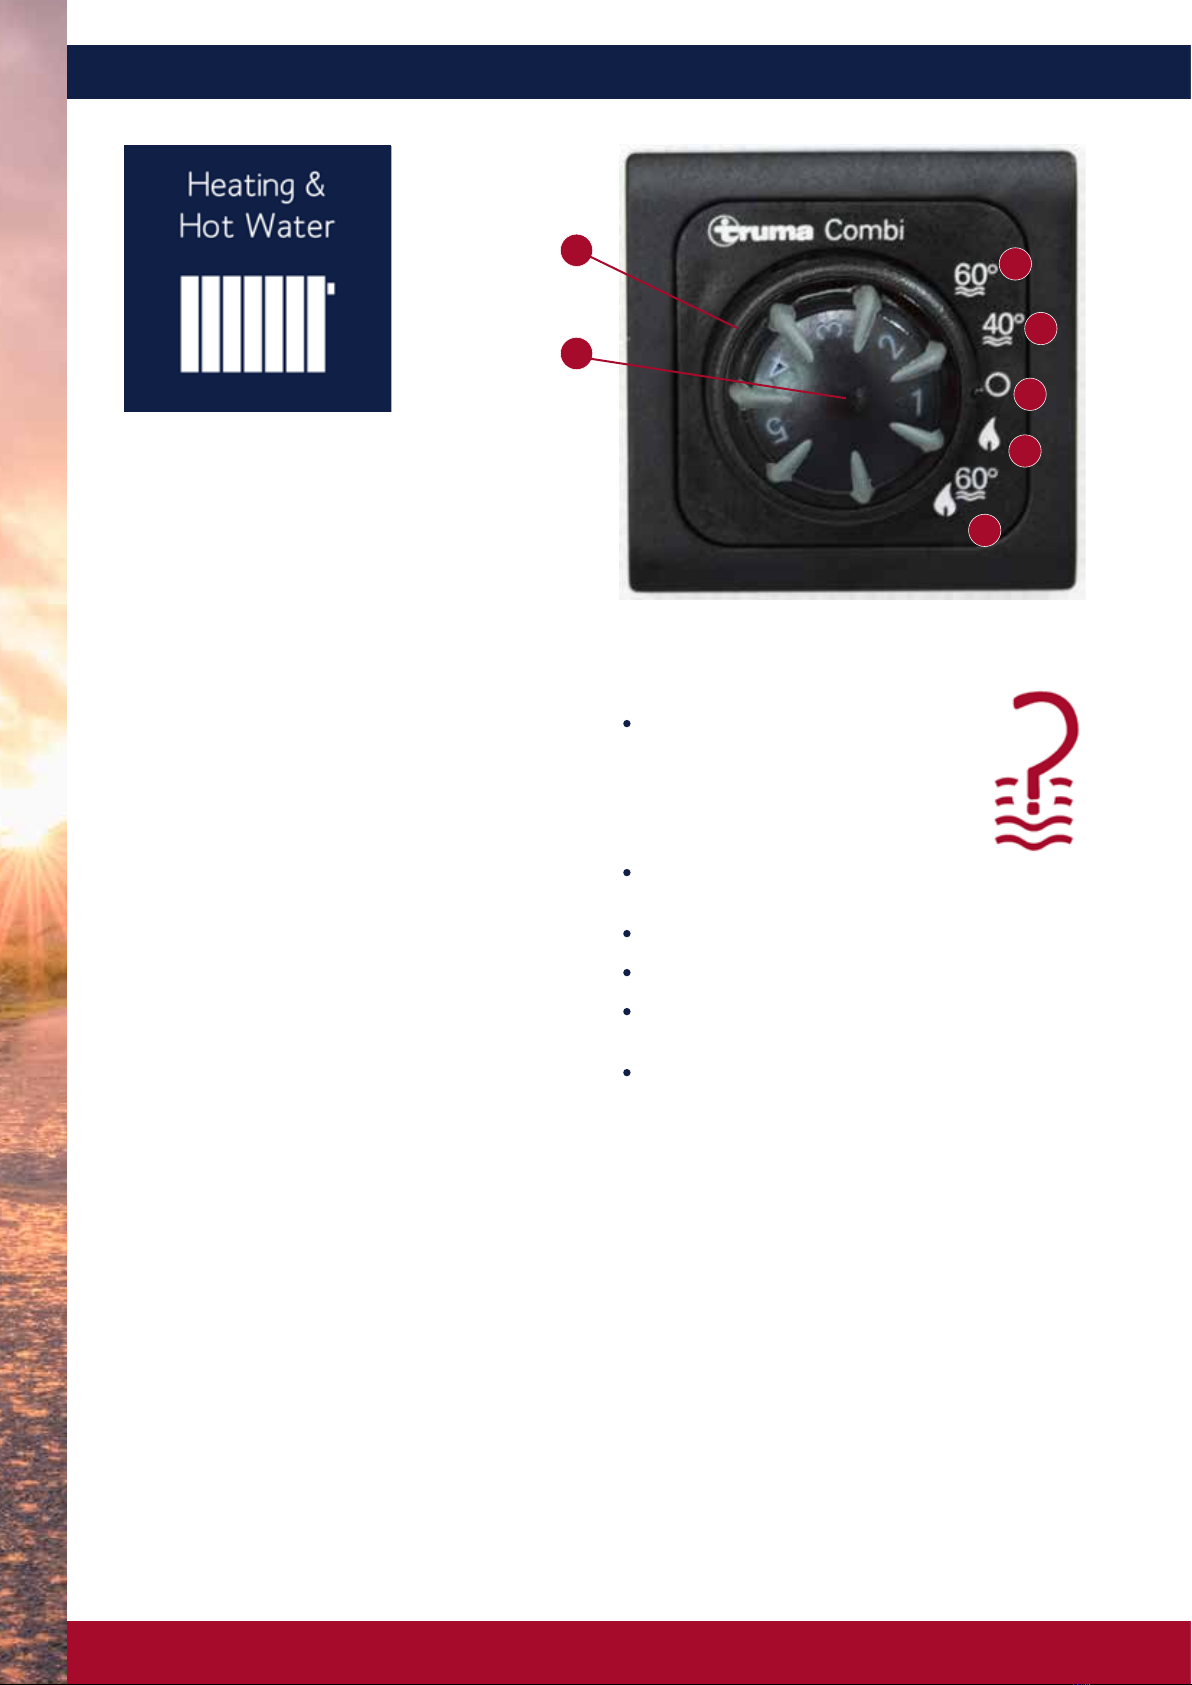
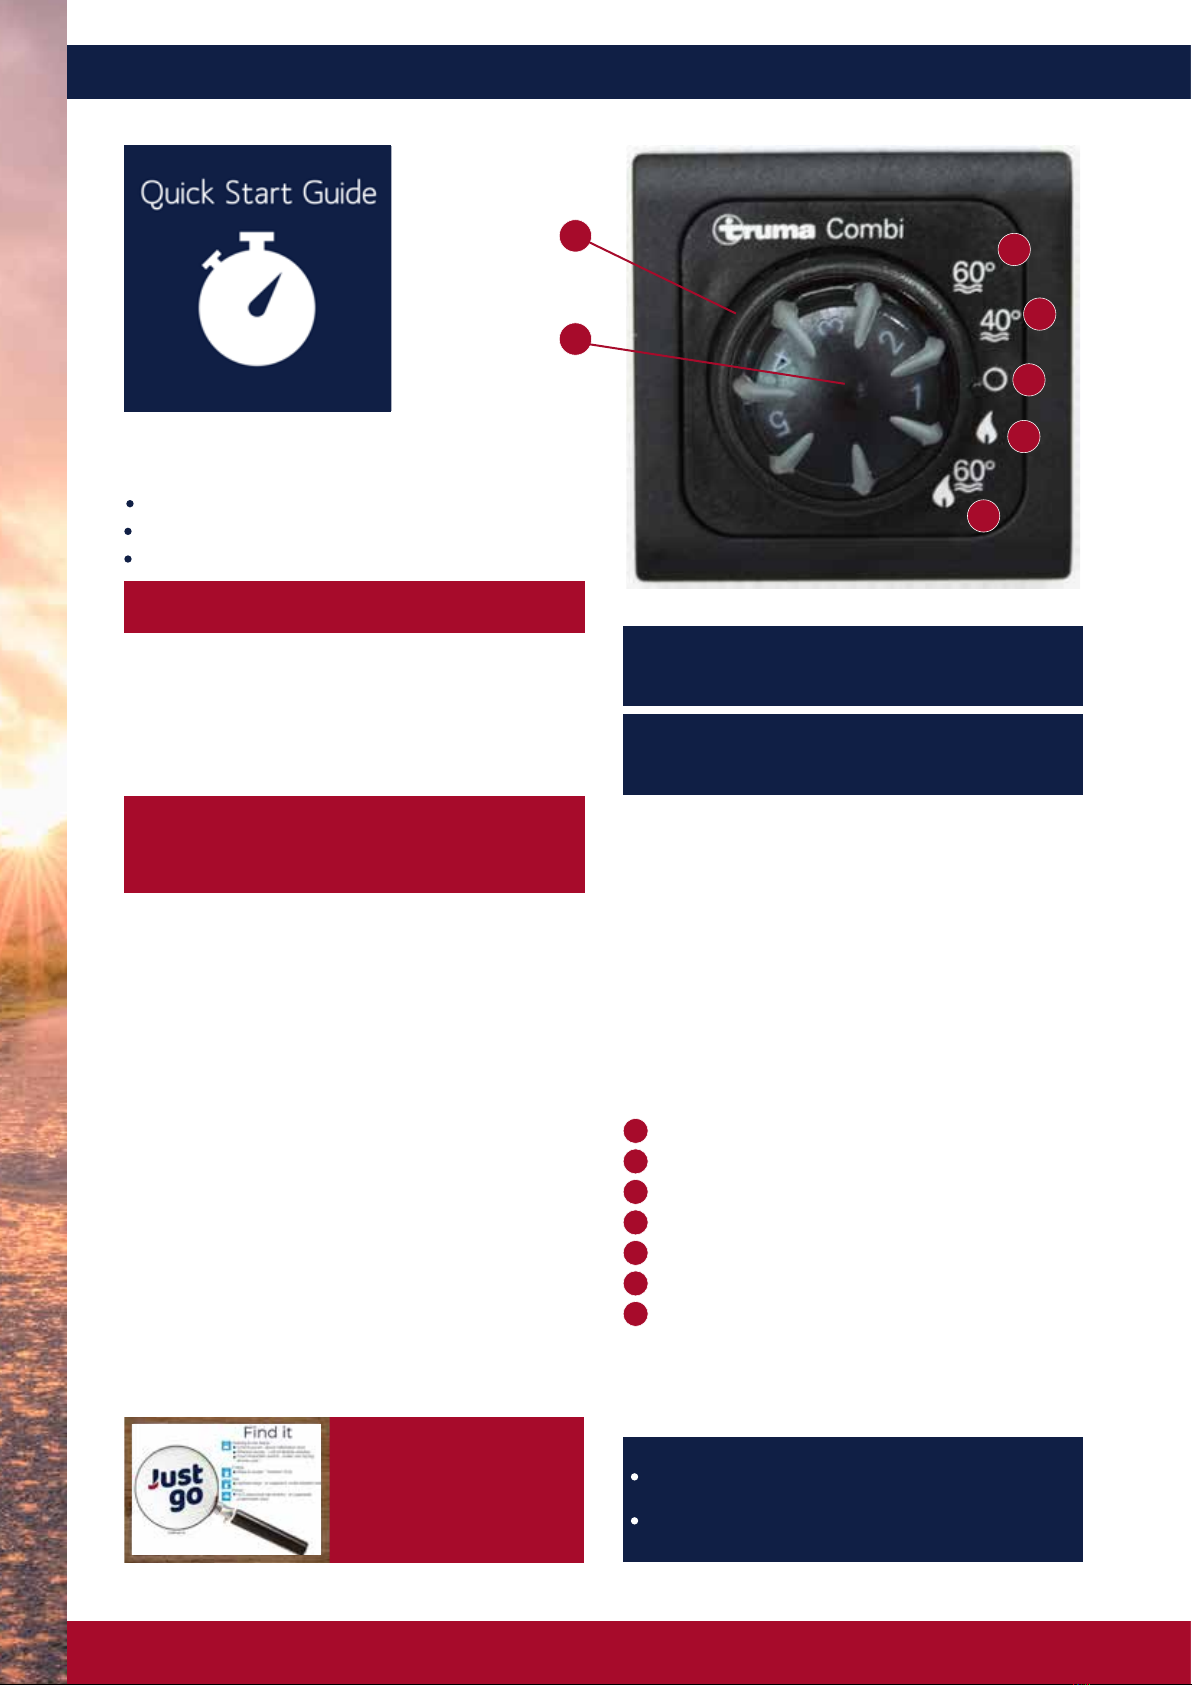
Turning on heating & hot water - Truma Combi Dial
The Twin Dial system runs on gas only, so ensure the
gas bottle is turned on before you turn on your Truma
system.
Similarly when you have finished with the heating, turn
off the system at the Truma dial before you turn off the
gas at the bottle.
First decide if you want hot water only or heating and hot
water together.
The outer dial controls the choices of heating and / or hot
water for settings 1,2,4, 5 or OFF (setting 3)
When the outer dial is set to 4 or 5 you can use the inner
dial to adjust the thermostat setting.
The inner dial will show a green light when the van
heating is on. A yellow light will also show when the
van is heating up, and this will disappear when the set
temperature is reached. If the yellow light flashes or
turns red, the system has gone into fault mode – see
Troubleshooting on page 24
1Hot water only at 60C
2Hot water only at 40C
3Off position
4Heating only without hot water
5Heating with hot water – 60C only
6Outer dial for controlling options
7Inner dial for controlling thermostat
Note
It will take approximately 30 minutes to heat the
water from cold.
It will take approximately 45-60 minutes to heat both
the hot water and heating from cold.
1
2
3
4
5
6
7