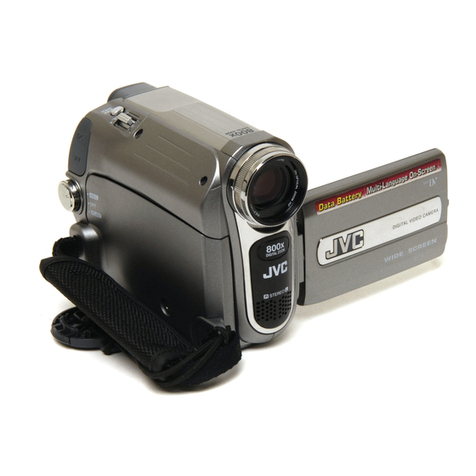
JVC GR-SXM920 User manual

JVC
COMPACT
VHS CAMCORDER
GR-SXM920
DIGITAL
STILL CAMERA
S
SunerVHS
SuperVHSET
INSTRUCTIONS
For Customer Use:
Enter below the Model No. and Serial No. which is located on the
bottonl of cabinet. Retain this information for future reference.
Model No.
Serial No.
[NGLiSH
SAFETY PRECAUTIONS 2 - 5
QUICK OPERATION GUIDE 6-7
MAJOR FEATURES 8
PROVIDED ACCESSORIES 9
BasicFealeres................................. 23
AdvnncedFealnres........................... 28
BuskPiuybnck................................ 39
Fenlnres........................................ 4[0
UsingTheC.sselle Ad.pler ................ 41
B.sk ConnectionsAnd TapeDubbing...... 42
BosicPloybnck................................ 44
Connection..................................... 45
AdvancedFeolnres........................... 46
PinybockZonm................................ 5,'3
InserlEditing{VIDEO)....................... 54
InserlEdiling(InserlingA Slii[ ImngnFrom
TheBnlJl-inMemoryOnloATope)...... 55
AndloDnbblng................................. 55
AnimnlinnAnd Time-Lnpse.................. 56
TROUBLESHOOTING 57 - 59
INDEX 60 -62
ConlrnJs,ConnedorsAnd Indlcnlnrs....... 60
Indkolinns..................................... 62
USER MAINTENANCE 64
CAUTIONS 65 - 67
TERMS 68 - 69
SPECIFICATIONS 70
ESPANOL 71 - 73
FOR SERVICING (Only in U.S.A.) 74
WARRANTY (Only in U.S.A.) 75
LYT0467-001A

DearCustomer,
Thanl<youforpurchasingtheJVCCrlmpactVHScamcorder.Beforeuse,[)lease read the safety information
and i)recautions contained in the following pages to ensure safe use of this product.
Using This Instruction Manual
• All major sections and subsections are listed in the Table Of Contents on the cover.
• Notes appear after most subsections. Be sure to read these as well.
• Basic and advanced features/operation are separated for easier reference.
[t is recommended that you...
.... refer to the Index (_-z_pgs. 60 63) and familiarize yourself with button locations, etc. before use.
.... read thoroughly the Safety Precautions and Safety Instructionsthat follow. They contain extremely
important information regarding the safe use of this product.
You are recommended to carefully read the cautions on pages 65 67 before use. ]
SAFETY PRECAUTIONS
CAUTION: TO REDUCE THE RISK OF ELECTRIC SHOCK,
DO NOT REMOVE COVER (OR BACK)
NO USER-SERVICEABLE PARTS INSIDE
REFER SERVICING TO QUALIFIED SERVICE PERSONNEL.
The lightning flash with arrowhead symbol, within an
equilateral triangle, is intended to alert the user to the
presence of uninsulated "dangerous voltage" within the
product's enclosure that may be of sufficient magnitude
to constitute a risk of electric shock to persons¸
The exclamation point vdthin an equilateral triangle is
intended to alert the user to the presence of important
operatJng and maintenance (servicir_g) instructions in
the literature accompanying the appliance.
The AA-V16U AC Power Adapter/( harger
should be used with:
A( 120 V'_, 60 Hz in the USA and Canada,
A( 110 240 V'_,, 50/60 Hz in other countries.
CAUTION (applies to the AA-V16U)
TO PREVENT ELECTRI( SHOCK MATCH WIDE
BLADE OF PLUG TO WIDE SLOT, FULLY
INSERT.
ATTENTION (s'applique _ I'AA-V16U)
POUR I'VITER LES(HO(S ELECTRIQUES,
INTRODUIRE LA LAME LA PLUS LARGE DE LA
FI(HE DANS LA BORNE CORRESPONDANTE
DE LA PRISEETPOUSSERJUSQU'AU FOND.
WARNING:
TO PREVENT FIRE OR SHOCK
HAZARD, DO NOT EXPOSE
THIS UNIT TO RA[N OR
MOISTURE.
warning on lithium battery
(for clock operation)
The battery used in this device may present a fire
or chemical burn hazard if mistreated. Do not
recharge, disassemble, heat above 100'C (212°F)
or incinerate.
Replace the battery with Maxell, Panasonic
(Matsushita Electric), Sanyo or Sony CR2025; use
of another battery may present a risk of fire or
explosion.
[] Dispose of used battery promptly.
[] Keep away from children.
[] Do not disassemble and do not dispose of in
fire.
NOTES:
[]The rating plate (_eria/number p/at_) and sainty
caution are on tile bott_m and/_)r tile back of
the main unit.
[]The rating inlbm_atior_ and safety caution of the
AC Power AdapteliC harger are on it_ bottom.

This camcorder is designed to be used with NTSC-type color television signals. It cannot be used for
playback with atelevision of adifferent standard. However, live recording and LCD monitor/viewfinder
playbacl< are possible anywhere. Use the BN-V11 U/V12U/V20U battery pad<s _md, to rech_rge them, the
provided multi-voltage AC Power Adapter/Charger. {An appropriate conversion adapter may be necessary
to accommodate different designs of AC outlets in different countriesd
ATTENTION:
The prr)duct that you have purchased is powered by _ rech_ugeable battery. The b<_tteryis recyclable. At
the ei_d of it<>useful life, under various _tate ai_d lac<d laws, it m4y he illeg,4 t<_dispose of tlqs b<_tteryMto
the municipal waste stre<ilTi.Checl<with your local solid waste officials for details in your area for
recycling options or proper disposal.
The EPA certified RBR( _ Battery Recycling Seal on the nickel-cadmium (Ni-Cd) battery indicates JVC is
voluntarily participating in an industry program to collect and recycle these batteries at the end of their
useful life, when tal<en ()tit of service in tile United States. The RBR( _ program prr)virJes a convenient
alternative to placMg used Ni-Cd batteries h)k_ the trash or the municipal vvastu stream, which may be
illegal in you r area. Please call 1-800-8- BATTERY r,_for ink)rmatir)n or/ N i-(::d battery recycli ng and
disposal bans/restrictions ii_ your area. }VC's il_k/olvemel_t in this program is part of our commitment to
preserving our elhvironFnel_t and conserving otir natural resources.
When the equipment is installed in a cabinet or oil a shelf, mal<e sure that is has sufficient space oil all
sides to allow for ventilation (10 cm (_-15/16") or more oil both sides, on top and at the rear).
Do not block the ventilation holes.
(If the ventilation holes are blocl<ed by a newspaper, or cloth etc. the heat may not be able to get out.)
No nal<ed flame sources, such as lighted candles, should be placed on the apparatus,
When discarding batteries, environmental problems must be considered and the local rules or laws
governing the disposal of these batteries must be followed strictly.
The apparatus shall not be exposed to dripping or splashing.
Do not use this equipment in a bathroom or places with water,
Also dr) not ))lace any containers filled with water or liquids (such as cosmetics or medicines, flower vases,
potted plants, clips etc.) on top of this unit.
(If water or liquid is allowed to enter this equipment, fire or electric shr)ck may be caused.)

Electricalenergycanperformmanyusefulfunctions.
ButimproperusecaR1restiltinpotentialelectrical
shockorfirehazards.Thisproducthasbeen
engineered and iTlannt_ictuled to assure your
perstlna] safety. In order not to defeat the buiff-in
safeguards, observe the following Basic rules for its
installation, use and servicing.
ATTENTION:
Follow and obey all warnings and instructions
marl<ed on your product and its operating instruc-
tions. For your safety, [)lease read all the safety and
operating instructions before you operate this
product and I<eep this manual for future reference.
INSTALLATION
I. Grounding or Polarization
(A) Your product may be equil-lped with a l-lolarized
alternating-current line plug (a plug having one blade
wider than the other). This plug will fit into the
power outlet only one way. This is a safety feature.
If you are unable to insert the plug fully into the
outlet, try reversing the plug. If the plug should still
fail to fit, contact your electrician to replace your
obsolete outlet. Do not defeat the safety purpose of
the polarized plug.
(B) Your product may be equil-)ped with a 3-wire
grounding4ype plug, a plug having a third (ground-
ing) pin. This plug will only fit into a grounding-type
power outlet. This is a safety feature.
If you are unable to insert the plug into the outlet,
contact your electrician to replace your obsolete
outlet. Do not defeat the safety purpose of the
grounding-type plug.
2, Power Sources
Operate your product only from the type of power
source indicated on the marking label. If you are not
sure of the type of power supply to your home, consult
your product dealer or local power company. If your
product is intended to operate from battery power, or
other sources, refer to the operating instructions.
3. Overloading
Do not overload wall outlets, extension cords, or integral
convenience receptacles as this can result in a risk of fire
or electric shock.
4. Power Cord Protection
Power supl-lly cords should be routed so that they are
not likely to be walked on or l-linched by items placed
upon or against them, paying particular attention to
cords at plugs, convenience receptacles, and the point
where they exit from the product.
5. Ventilation
Slots and openings in the cabinet are provided for
ventilation. To ensure reliable operation of the product
and to protect it from overheating, these openings must
not be blocked or covered.
o Do not block the openings by placing the product on a
bed, sofa, rug or other similar surface.
, Do not place the product in a built-in installation such
as a bookcase or rack unless proper ventilation is
provided or the manufacturer's instructions have been
adhered to.
6. Wall or Ceiling Mounting
The product should be t'Nounted to a wall or ceiling only
as recommended by the manufacturer.
ANTENNA INSTALLATION
INSTRUCTIONS
1. Outdoor Antenna Grounding
If an outside antenna or cable systern is connected to the
product, be sure the antenna or cable system is
grounded so as to provide some protection against
voltage surges and built-ul-i static charges. Article 810 of
the National Electrical Code, ANSI/NFPA 70, provides
information with regard to proper grounding of the mast
and supporting structure, grounding of the lead-in wire
to an antenna discharge unit, size of grounding
conductors, location of antenna discharge unit,
connection to grounding electrodes, and requirements
for the grounding electrode.
2. Lightning
For added protection for this product during a lightning
storm, or when it is left unattended and unused tor long
I-_eriodsof time, unplug it from the wall outlet and
disconnect the antenna or cable system. This will
prevent damage to the product due to lightning and
power-line surges.
3. Power Lines
An outside antenna system should not be located in the
vicinity of overhead power lines or other electric light or
power circuits, or where it can fall into such power lines
or circuits. When installing an outside antenna system,
extreme care should be taken to keep from touching
such power lines or circuits as contact with them might
be fatal.
EXAMPLE OF ANTENNA GROUNDING AS PER
NATIONAL ELECTRICAL CODE, ANSI/NFPA 70
ELECTRICSERVICE
I EQUIPMENT
LEADINWIRE
ANTENNA UNIT
(NECSECTION
810-20)
(NEDSECTION810-21)
POWERSERVICEGROUNDINGELECTRODESYSTEM
(NECART250. PARTH)
NEC -NATIONAL ELECTRICAL CODE
USE
1. Accessories
To avoid personal injury:
•Do not place this product on an unstable cat_,
stand, tripod, bracket or table. It may t\dl, causing
serious injury to a child or aduh, and serious
damage to tile product.
•Use only with a cart, stand, tripod, bracket, or table
recornmended by the rnanufacturer or sold with the
product.
•Use a mounting accessory rec()rnmended by tile
manufacturer ancl follow file manut\lcturer's
instructions i(/r any rn()unting of the product.
•Do not try t(/roll a cart with small casters across
fllresholds or deep-pile carpets.
2. Product and Cart PORTABLE CARTWARNING
Combination (Symbolprovidedby RETAC)
A product and cart
cornbination should be
moved with care. Quick
stops, excessive f()rce, and
ur/ever/stlrfaces I_lay Catlse
the product and cart
c(/mbi nati(/n to (/vertu I"11.
3. Water and Mokture
Do not use this pr(/duct near water_(/r example,
near a bath tub, wash bowl, kitchen sink or laundry
tub, in a wet basement, or near a swimming [)(/(/I and
the like.
4. Object and Liquid Entry
Never push objects of any I<ind into this pr()duct
through openings as they may touch dangerous
voltage points or short-out [)arts that could result in a
fire (/r electric shock. Never spill liquid of ally kind
on the Dr()([uct.
5. Attachments
Do not use attachments not recoil/mended lay tile
rnanut\_cturer of this product as they may cause
hazards.
6. CIeaning
Unplug this product from the wall outlet before
cleaning. Dr/n(/t use liquid cleaners (/r aerosol
cleaners. Use a damp cl(/th for cleaning.
7. Heat
The product should be situated away from heat
sources such as radiators, heat registers, stoves, or
other products (including amplifiers) that produce
heat.
SERVICING
1. Servicing
If your pr()duct is not ()perating c()rrectly or exhibits a
marl<ed change in perf()riT/ance and you are unable
t() restore normal operation by following the detailed
procedure in its ()perating instructi()ns, dr)not
attempt t(/service it yourself as opening or removing
covers may exDose you t() dangeroLis voltage (11 other
hazards. Refer all servicing to qualified service
personnel.
2. Damage Requiring Service
Unplug this product from the wall outlet and refer
servicing to qualified service personnel under file
following conditions:
a. When the power supply cord (11plug is damaged.
b. If liquid has been spilled, (11objects have fallen
into the product.
c. If the product has been exposed to rain or water.
d. If the product does not operate normally by
following the operating instructions. Adjust only
those controls that are covered by the operating
instructions as an improper adjustment of other
controls rnay resuh in damage and will often
require extensive work by a qualified technician
to restore the product to its normal operation.
e. If the product has been dropped or darnaged in
any way.
f. When the product exhibits a distinct change ill
perforrnance_his indicates a need for service.
3. Replacement Parts
When replacement [)arts are required, be sure the
service technician has used replacement [)arts
specified by tile manufacturer ()r have the same
characteristics as the original [)art. Unauthorized
substituti(/ns may result in fire, electric sh(/cl< or other
hazards.
4. Safety Check
Up()n c()mpletion ()f any service ()r repairs to this
product, ask the service technician t(/perform safety
checks to determine that file pr(/duct is in safe
operating condition.

Theimageyoushor)tisrecordedontoavideotape.
SUPPLY POWER
Hook on,
,Push in.
BATTERY RELEASE
Using the battery pack
Hook its end to the canlcorder (_) and push tile
battery pack in until it locks in place _).
(( harging procedure, _7_ pg. 1(1}
To remove the battery pack
Slide BATTERY RELEASE and pull out tile battery
pacl<.
PLAYBACK
Rewind (_) Button
Stop (m) Button
[rl[ Settile System Select Switch to "VIDEO".
1_1Setthe Power Switch to "PLAY".
[] Press"_'_.
The tape will automatically st()[) at the
beginning of the tape.
UJ[Pressl_/lll.
Pk_ybacl<starts and the pl_ybacl< picture
appears.
° To st()[) playbacl<, press Ill.
(For more details, _T* pg. 39.)
,The viewfinder switches off automati('alJy to
save power when the LCD monitor is opened
at an angle of over 60 degrees.
The LCD monitor turns on/off when it is
opened/closed at approx. 60 degrees.
Or simply play hackthe tape on a vHs VCR
using the CassetteAdapter (VHSPlaypak).
INSERTING A VIDEO
CASSETTE
PUSH Button EJECTSwitch
[] Open tile LCD monitor fully.
n Slide ELECT to open tile cassette holder.
[] Insert a video cassette.
[] Press PUSH to close the cassette holder.
(For mr)re details, zT* pg. 12)
SHOOTING
S COVER.
en/Close Rmg
[] Turn the LENS COVER Open/(]lose Ring to
open the lens cover.
1_[1Set the System Select Switch to "VIDEO'.
[] Set the Power Switch to "AUTO" or "PR(-).".
The power lamp will light and an image
will appear.
[] Press the Recording Start/Stop Button.
Recording starts.
• To st()[) recording temporarily, momentarily
Dress tile Recording Start/Stop Btltton once
again.
(For more details, _T* pgs. 18, 19)
•The viewfinder switches off automati('aily to
save power when the LCD monitor is opened
at an angle of over 60 degrees.
•The LcD monitor turns on/off when it is
opened/dosed at approx. 60 degrees.

Astillimageyoushootisstoredinfilecamcorder'sbuilt-inmemory. EN7
SUPPLY POWER
Hook on.
'Push in.
BATTERYRELEASE
Using the battery pack
Hook its end to tile can/corder (_) and push tile
battery pack in until it Iocl<sin place ®.
(Charging procedure, _-?_pg. 10)
To remove the battery pack
Slide BATTERYRELEASE and pull out the battery
pack.
PLAYBACK
Set tO "D.S.C/'.
Ill Set tile System Select Switch to "D.S.( .'.
[] Set the Power Switch to "PLAY".
A still image stored in memory appears.
[] Press "_I/PAGE - or I_/PAGE + to select the
still image you want to view.
(For more details, _-T_ pg. 44.)
The viewfinder switches off automatically to
save power when the LCD monitor is opened
at an angle of over 60 degrees.
• The LCD monitor turns on/off when it is
opened/closed at approx. 60 degrees.
SHOOTING
SNAPSHOT Button
S cOVER
_]_ en/Close Ring
Setto"AUTO"
or "PRO/'.
IVi Setto "D.S.C.".
[_'l Turn tile LENS COVER Open/Close Ring to
open the lens cover.
[] Set the System Select Switch to "D.S.( .".
[] Set the Power Switch to "AUTO" or "PRO.".
The power lamp will light and an image
will appear.
[] Press tile SNAPSHOT Button.
Astill image is shot and is stored in tile
camcorder's memory.
(For more details, _-T_ pgs. 20 22)
The viewfinder switches off automatically to
save power when the LCD monitor is opened
at an angle of over 60 degrees.
The LCD monitor turns on/off when it is
opened/closed at approx. 60 degrees.

I Integrated Auto Light
(_:_ pg. 27)
ProgramAE with Special
Effects (_ pg_ 29)
[] Electronic Fog Filter
[] ND Effect
[] Sepia
[] Twilight
[] Sports
[] Nega/Posi
[] 1/2000 sec. High Speed Shutter
]
Super VHS-ET (___°pg. 15) ]
Digital Still Camera Built-in
(PC communication capable)
(_:_ pg. 20 - 22, 44 - 51)
Picture Stabilizer (_ pg. 25)
TBC(Time Base Corrector)(_ pg. 40) }
Automatic Demonstration takes place when "DEMO MODE" is set to "ON"
(factory-preset).
mAwdlable when the Sy, tem Select Switch is set to "VIDE()" and tile
Power Switch is set to "AUTO" or "PRO.'.
m()pemting tile Power Zoom Lever duriny, tile demorlstratiorl stops tile
demonstration teml_omril)< If tile Power Zoom Lever is not moved _;r
more thar} 1 mirlut_ after that, the demorlstratiorl will resume.
mT_*cancel Automatic Demorlstmtiorl, set tile Power Switch to "PRO."
and press MENU while the demo is irl pr_;gress. This takes you directly
to tile demo mode9 Setting Menu So y_>u will not have to go thr_>ugh
the main Menu S(reen.) Rotate tile Select Wheel to select "OFF" and
press it. Tile Merlu Screen appear_ with the highlight bar on "RETURN".
Press it to ck)se the Menu S( reerl.
* "DEMO MODE" remains "ON" even if the camo;rder power is turned oft_
NOTE:
When atape whose Erase Protectk;n tab is in the p_;sitk;n that allows rec_;rding is k;aded in tile
camcorder, demonstration is not available.
Setting Menu
Cassettes marl<ed _[_ and [_ can be used with this camcorder.

* AC Power * Cassette Adapter * Battery Pack
Adapter/Charger (VHS Playpak) C-P7U BN-V11 U
AA-V16U
* Remote Control
Unit RM-V715U
(for Windows '_'PC)
* PC Connection Cable *DC Cord
*Shoulder Strap *Lithium Battery CR2025
(for clock operation) *CD-ROM including
two software
programs
OptionalAccessories
* Battery Packs BN-V12U, BN-V20U, BN-V856U
*Car Battery Charger BH-V3U
* Battery Charger BH-VC10U
*Audlo/Video Cable
*S-Vldeo Cable QAM0004-004
*Car Battery Cord AP-V7U
*Compact S-VHS ( S[_[_] ) Cassettes ST-C-40/30/20
*Compact VHS ([_[_]) Cassettes TC-40/30/20
*Active Carrying Bag CB-V7U
Some accessories are not
available in some areas. Please
consult your nearest JVC dealer
for details oil accessories and their
avail ability,

] OEN
Battery pack BN-Vt 2U or BN-V20U
Marks
To AC outlet
CHARGE f
indicator
AC Power
Adapter/Charger
AA-Vl 6U
DC OUT connector
Battery pack Charging lime
BN-Vll U approx. 1 hr. 10 rain.
BN-V12U (optional) approx. 1 hr. 10 rain.
BN-V20U (optional) approx. 1 hr. 50 rain.
Power
This camcorder's 3-way power supply system lets you
choose the most appropriate source of power. Do not use
provided pr)wer supply units with other equipment.
CHARGING THE BATTERY PACK
Make sure you unplug the camcorder's DC cord from
the A( Power Adapter/Charger. Plug the AC Adapter/
Charger's power cord into an AC outlet.
Align the marks and slide the battery pacl< in the
direction of the arrow until it locks in [)lace. The
( HARGE indicator begins blinl<ing to indicate
charging has started.
When the ( HARGE indicator stops blinl<ing butt stays
lit, charging is finished. Slide the battery in the
opposite directirln of the arrow and lift off. Remember
to unplug the A( Adapter/(harger's power cord from
the A( outlet.
marl(er
ATTENTION:
( harging a battery with some charge
remaining reduces that battery's capacity.
Perform the procedure below to fully
discharge the battery pacl< before
rechanging.
1. Attach the battery pacl< to the camcorder
and make sure a cassette is not inserted,
then set the Power Switch to "AUT(Y' or
"PRO.".
2. The camcorder power turns off
automatically when discharging is
complete.
When you are not using a battery pack for
a long period of time, be sure to fully
discharge it before storing because leaving
a battery with some charge left over also
reduces performance.
Charge Marker
A charge marl<er is provided on the battery pacl< to help
you remember whether it has been charged or not. Two
colors are provided (red and black) you choose which
one means charged and which means discharged.
NOTES:
•Pertbrm charging where the temlJemture is between l() °
and _°C (_O_*Fand _)5°F;. 20 ° t_*25°C (68°F to 77_*F; is
the ideal temperature range for charging. If the environ-
me/-tt is to() _olH, charging may be incomplete.
• Charging times noted above are lbr a fully discharged
battery pack.
• Charging time varies accorrling to the ambient
temperature and the status of the battery pack.
•F* aw)id interferer}ce with receptiorb do not use the AC
R)wer Adapter/Charger rlear a radio.
•If you connect the camcorder'_ DC cord to the adapter
during battery chargirlg, power is supplied to the
camcorder and charging stops.
@Since the AC Power Adaptel/Charger processes
electricity internally, it becomes warm during use. Be
sure to use it only in well-ventilated areas.
•When charging the battery pack lot the first time or after
aI_;ng storage period, the CHARGE indicator may riot
light, h-1this case, remove the batter), pack from the AC
Power Adapter/Charger, then try charging again.
•If the batter), operation time remains extremely short
even after having been tblly charged, the battery is worn
out and needs t_; be replaced, Please purchase a new
one.
•Remember to set the charge marker after charging a
battery pack or after detaching adischarged one from
your camcordec

Hooh on,
Push in,
BATTERY RELEASESwitch
ATTENTION:
Before detaching the power source,
make sure that the camcorder's Power
is turned off. Failure to do so can result
in a camcorder malfunction.
INFORMATION:
VU- V856KIT is a set composed of the BN-
V856U battery pack and AA- V80U AC Power
Adapter/C hargec
Read tile VU-VS_6KITq it-lstructiorl manuals
before using.
It is impossible to charge the BN-V856U battery
pack using the provided A C Power Adapter/
Charger, Use the _;ptiona/ AA- V80U AC Power
Adapter/( hal_el:
USING THE BATTERYPACK
Hool< its end to the CamCorder (_) and push the battery
PaCk in until it IoCl<s in PlaCe ®.
If the battery pack is attached in the wrong position, a
malfunction may occur.
To Detach The Battery Pack...
.... slide BATTERY RELEASE and pull out the battery pack.
Approximate recording time
LCD LCD LCD
Battery pack monitor off/ monitor on/ monitor on/
Viewfinder on Viewfinder off Viewfinder on
BN-V1 IU I hr. 20 rain. I hr. 10 rain. I hr. 5 rain.
(45 nlill.) (40 nlill.) (40 nlill.)
BN-V12U I In: 20 mill I hr. 10 mill I hr. 5 inilL
(optional) /45 nlin.) /40 nlin.) (40 nlin.)
BN-V20U 2 hrs. 10 inilL I hr. 55 mill 1 hr. 45 inilL
(optional) (I hr. 15 nlill.) (1 hr. 10 Ihill.) (I hr. 5 Ihill.)
BN-V856U 8 hrs. 30 inilL 7 hrs. 40 mill 7 hrs.
(optional) (5 hrs. 10 nlill.) (4 hrs. 50 Ihill.) (4 hrs. 30 nlill.
) : when the vide() light is on.
NOTES:
•Recording time is reduced significantly under the
lbllowing conditions:
Zoom or Record-Starldby mode is engaged repeatedly.
•Tile LCD monitor is used repeatedl)<
•Before extended use, it is recommended that you
prepare enough battery packs to cover _times the
planned shooting time.
To DC IN
To _-ar's
J dgarette
•" fighter
Car [Battery Cord so_-ket
AP-V7U (optional)
",-_ Charger/Adaptt'r
BH-V3U (optional)
USING Ac POWER
Use the At_: Power Adapter/( harger (connect as shown in
the illustration).
NOTES:
•Tile provided A( Power Adapter/Charger features
automatic voltage selection in the AC range tr_;m 110 V
to 240 V.
•For other notes, _ 7_pg. 10.
USING A cAR BATTERY
Use the optional (at Battery Cord or (ar Battery ( harger/
Adapter (connect as shown in the illustration).
NOTES:
•Wherl using the car battery, leave tile engirle idling.
•The optional Car Batter), Charger (BHAZ_U) can also be
used to charge the battery pack (except BN- V20U/
V856U).
•When using tile optiorlal Car Battery Charger or Car
Battery Cord (AP- V7U), refer to the resl)ective instruction
booklet.

Battery holder
©-,©
Switch off the unit's power and remove tile power
supply unit (battery pack, A( Power Adapter/Battery
Charger, etc.).
Pull out the battery holder to remove it from the
camcorder.
Insert the battery in the holder, and be sure to have
the "+" marl< visible.
Slide the holder back into the slot until you hear a
click.
NOTES:
•See "57_FETY PRECAUTIONS" (_ ,_pg. 2) f_r infonnatior_
on sate handling of lithium batteries.
•To avoid losing the batter), arid/or batte O, holder, place
tile camcorder with tile grip side up as shown in tile
illustration when inserting/r_n_oving tile battery,
Cassette holder
PUSH Button ERECTSwitch
Erase Gear
Turn to take
up slack,
[.oadinti/UnloadintlACasse|te
Open the L(D monitor fully.
Slide EJECT until tile cassette holder opens. Do not
/Ise force to ()[)el/.
Insert or remove a cassette. When inserting, make
sure tile label is fllcing outward.
Press PUSH to close the cassette holder until it locks
into place. (lose the L(D monitor.
NOTES:
• (losing tile LCD monitor while tile cassette holder is still
open may cause damage to the LCD monitor,
•The cassette holddr can't be opened unless apower
supply is attached,
•Make sure that the tape is not slack when loading the
cassette. If there is any slack, turn the gear orl the
cassette in the direction of the arrow to take up the
slack.
G,Make sure the Erase Protection tab is in tile position that
allow< recording. If not, slide the tab, Some cassettes
have removable tabs, If the tab has been removed, cover
the hole with adhesive tape,
•Tile cassette holder carlrlot be operled while tile
camcorddr is irl the rdc_;rd mode.

Date/Time Settings E.13
System
Select Switch
1__
m
Select Wheel
Display
O
O
O
Power Switch
MENU Button
Menu Screen 1
Menu Screen 2
DATE/TIME Menu
-12-hour indication
with AM or PM
Set tile System Select Switch to "VIDEO" or "D.S.( .",
and set the Power Switch to "PRO.". The I)ower lamp
c(>mes on.
Press MENU. The Menu Screen al)l)ears.
Rotate tile Select Wheel to move tile highlight bar to
"NEXT" in Menu Screen 1 and press it to display
Menu Screen 2. Then, rotate it to move the highlight
bar to "DATE/TIME" and Dress it. The DATE/TIME
Menu appears.
• To return to the previous settings, rotate the Select
Wheel to move the highlight bar to "EXIT" and
i)ress it, then go to step 7.
QTo set only the time without changing the date, go
to steD 5.
To set "YEAR", "MONTH" or "DAY", rotate the Select
Wheel to move the highlight bar to the desired item,
and press it. When the setting begins blinking, rotate
the Select Wheel until the correct setting appears and
then press it. The setting stops blinking.
Repeat for other date settings.
Rotate the Select Wheel to move the highlight bar to
"TIME" and then press it. When the hour setting
begins blinl<ing, rotate the Select Wheel until the
correct setting appears and then press it. When the
hour setting stops blinl<ing and the minute setting
begins blinl<ing, rotate the Select Wheel until the
correct setting appears and then Dress it. The minute
setting stops b li nl<ing.
When none of these settings ("YEAR", "MONTH",
"DAY", "TIME") blinl<s, rotate the Select Wheel to
move the highlight bar to "EXIT", and press it. The
Menu Screen reappears with the highlight bar on
"RETURN".
Press the Select Wheel to close the Menu Screen.
NOTE:
T_ display the date and time in the camcorder'_ display
and on a c_)rlnected TV,,see "Dat_/Time h-lsert"
(_T_p_. __).

System
Select Swltch
1__
Se[ec_
SP/EP Recordlng
Mode Button
MENU Button
RecordingModeSetting
Set depending on your preference.
I et tile System Select Switch to "VIDEO", then set the
Power Switch to "AUTO" or "PRO.". Press SP/EP for
more than 1 second. "SP" (Standard Play) provides
higher picture and sound quality and is better for
dubbing, while "EP" (Extended Play) is more
economical, i)roviding three times the recrlrding time.
NOTE:
If the recordirlg mode is switched durirlg recordirlg, the
playback picture will be blurred at the switching point.
Vie_inder
Display
O
hindicator
Recording mode
indicator
Menu S(reen
TAPELENGTH
Selling Menu
TapeLengthSetting
Set the tape length according to the length of the tape
used.
Set the Power Switch to "PRO.", then press MENU.
Rotate the Select Wheel to move the highlight bar to
"TAPE LENGTH", then press it. The TAPE LENGTH
Setting Menu appears.
Rotate the Select Wheel to move the highlight bar to
the correct tape length setting. T20=20 minutes of
recording time, T30= _0 minutes, T35=35 minutes,
and T40=40 minutes (in SP).
• To return to the previous setting, rotate the Select
Wheel to move the highlight bar to "EXIT".
Press the Select Wheel. The Menu Screen reappears
with the highlight bar on "RETURN". Press the Select
Wheel again to close the Menu Screen.
NOTE:
The tape remairlirlg time (_ /pg. 18_)cli_played in tile
viewfinder is correct only if the c_mect tape length has
been selected.

rSwitch
MENU Button
Display: when a VHS cassette is Ioade(L
Menu Screen
O
an S-VHS
cassette is loaded:
S-VHS
Setting Menu
Menu Screen
Normal Screen
E.15
Recording Format Setting
Set tile recording format according to tile forFnat of tile
tape used or type of recording you wish to i_erforFn.
Set the Power Switch to "PRO.". Press MENU.
If aVHS cassette g loaded...
.... rotate the Select Wheel to move the highlight bat
to "S-VHS ET', then press it. The S-VHS ET
Setting Menu appears.
If an S-VHS cassette is loaded...
.... rotate the Select Wheel to move tile highlight bat
to "S-VHS", then press it. Tile S-VHS Setting
Menu appears.
Rotatethe Select Wheel to set to either of the
parameters, then press it. The highlight bar moves to
"EXIT".
In the S- VHS ET Setting Menu,
ON : Records with S-VHS picture quality on a VHS
cassette (factory-preset). This is called Super
VHS ET(Expansion Technology).
OFF: Records in VHS.
In the S-VHS Setting Menu,
ON : Records in S-VHS on an S-VHS cassette
(factory-preset).
OFF: Records in VHS on an S-VHS cassette.
Press the Select Wheel. Tile Menu Screen reappears
with the highlight bar on "RETURN". Press the Select
Wheel again to close the Menu Screen.
•When the S-VHS ET male is engaged, "S-ET" is
displayed.
• During S-VHS record mode, "S" is displayed.
°When S-VHS ET or S-VHS recording starts, "S-VHS
REC." is displayed for approx. 3 seconds.
NOTE:
If acassette is not loaded, "S- VHS" will be clisplayed irl tile
Menu Screen,
CONTINUED ON NEXT PAGE

mJV( EHG (Extra High Grade) tapes are recommended for superior results.
Use S-VHS tape tbr st_>ring recordings for an extended period or f_>rrecordin_ important scenes, as it
enables higher-quality recording and playback.
mWith some tapes, bettdr picture quality may not be obtained even with S-VHS ET recording: It is
recommended that you do test record beforehand to make sure whether better results can be obtained.
mIf the S- VHS ET mode or recording f_*rmat is switched during recorJin_, the playback picture will be
bhlnvd at the switchin_ point.
mIt is recommended that tapes recorded irl the SP mode orl this camcorder be played back orl this
cal]3COl'de;i
mNoise may appear on-screen when tapes recorded in the EP mode are played back.
mTapes recorded in S-VHS or S-VHS ET mode can be played back not onh, on this camcorder bait also on
a Super VHS VCR or a VCR equipped with the S(,)PB (S-VHS QUASI PLAYBACK) function.
When tapes recorded in S- VHS or S- VHS ET mode are played back on a VCR equipped with the
SQPB (S-VHS QUASI PLAYBACK) lbnctiorl, S-VHS picture quality is not awdlabb.
<_pes recorded irl S-VHS ET mode cannot be played back orl some VCR_, irlchldirlg some JV< V<Rs
(eg: HR-S6600U, HR-SC7000U, etc.L
mTapes recorded in S-VHS or S-VHS ET mode cannot be played back correctly on anom_al VHS VCR.
mYou can pby back S-VHS ET recordings riot only orl this V( Rbait also orl another VHS V( R equipped
with S-VHS ET
It is recommended to _pecifically label S-VHS ET recordirlgs so y_>u can easily distinguish them from
regular VHS recordings.
mS-VHS ET does not wod< with S-VHS tapes.
m R>avoid on-screen noise, do not perf_>rm Still Playback or Shuttle Sear_ h repeatedly.
mIf the picture c_>ntains alot of jitter or noise, use acleanin_ cassette.
Compatibility Between S-VHS And VHS
Recording _ Playback
Blank tape Camcorder Recorded tape Cassette adapter
S-VHS-C X S-VHS
cassette recordings
VHS-C VHS
cassette recordings
• The recorded format (S-VHS or
VHS) is automatically detected
when playbacl< begins.
Blank tape Camcorder Recorded tape Cassette adapter S-VHS recorded tapes cannot be
viewed on regular VHS VCRs,
other than those equipped with the
SQPB (S-VHS QUASI PLAYBACK)
function.

_Owl_r Zoonl Lever
,Recording
Start/Stop Bulton
GripAdjustment
_ Separate the Velcro strip.
P_lss your right hand through the loop and grasp the
grip.
Adjust so that your thumb and fingers can easily
operate the Recording Start/Stop Button and Power
Zoom Lever. Refasten the Velcro strip.
7
• o
1v
I®,1
Setto "CAMERA"
("AUTO" or "PRO.").
1 \
VJewfJnderAcJjustmenl
Set tile Power Switch to "(AMERA" ("AUT(-)" or
"PRO.").
Adjust the viewfinder manually for best viewability.
Turn the Diopter Adjustment Control until the
indications in the viewfinder are clearly focused.
ShoulderStrapAttachment
the illustration, thread the strap through the
then fold it back and thread it through the
Jclde _. Repeat the procedure to attach the other
end of the strap to the other eyelet _), malting sure
the strap is not twisted.
Adjust as shown in the illustration _).
TripodMountin9
U lign the screw and camera direction stud on tile
tripod with the camera's mounting socket and stud
hole. Then tighten the screw.
CAUTION:
When using a tripod, be sure to open and extend
its legsfully to stabilize the camcorder. To
prevent damage to the unit caused by falling
over, do not use a small-sized tripod.

Tape remaining time
indicator
(Approximate)
---MIN _ 120MIN _119MIN ...........
(Now (alculafing)
0MIN _ 1MIN _ 2MIN _ 3MIN _-"
(Blinl<ing) (Blinldug) (Bliuking)
NOTE:
You should already have perk>m_ed the pn)cedures listed
below, !f not, cl_) so bef_)re c_ntinuing.
•Power (_ /pg. 1@
eRecording Mode Setting (_ /p[4. 14)
•LoadA (assett_ (_ /pg. 12)
•(;ril) Adjustment (_ /pg. 17)
•ViewfirlderAdjustment (_Z" pg. 17)
Shoot!.n9WhileWatchingThe
V|ewfinder
Make sure the L(D monitor is closed and Iocl<ed.
Turn the LENS COVER Open/(lose Ring to open the
lens cover. Set the System Select Switch to "VIDEO",
then set the Power Switch to "( AMERA" ("AUTO" or
"PRO."). The power lamp lights and the camcorder
enters the Record-Standby mode. "PAUSE" is
displayed in the viewfinder.
Press the Recording Start/Stop Button. "_c,, appears
in the viewfinder while recording is in progress.
ShootingWhileWatchingThe
LCDMonitor
DISPLAY Button
To Adjust The Rrightness Of The LCD Monitor
.... rotate the Select Wheel (BRIGHT) until the
bright level indicator on the display moves
and the appropriate brightness is reached.
Make su re the LC D monitor is fully open. Turn the
LENS COVER Open/(ilose Ring to open the lens
cover. Set the Systecn Select Switch to "VIDEO", then
set the Power Switch to "( AMERA" ("AUTO" or
"PR(-)."). The power lamp lights and the camcorder
enters the Record-Standby mode. "PAUSE' is
displayed in the LCD monitor.
Tilt the L(D monitor upward/downward for best
viewability and press the Recording Start/Stop Button.
,,_c,, appears in the LCD monitor while recording is
in progress.
NOTE:
When you use the L(D monitor outdr)or_ irl direct
sunlight, the LCD morlitor may be difficuh t_)see. If this
halJperl_, use the viewfinder instead,
Tu Stela Recording...
.... press the Recording Start/Stop Button. The camcorder
re-enters the Record-Standby mode.
AUTO : Suitable for standard recording using NO special effects or manual adjustments.
PRO. : Allows you to set recording functions using the cnenus for chore creative capabilities.
OFF : Switches off the camcorder.
PLAY : Allows you to play back your recordings.

NOTES:
•Wherl the Power Switch is set t_*( _,MERA arid the LCD morlit(>r is operled at arl angle of 60 degrees _*r m_*re,
the LCD morlitor switches orl arid the viewfincler switches off automatically t*_save powec
•The cassette holder carlrlot be operled unless a power supply is attached.
•There may be a delay alter you slide ELECT urltil the cassette holder (*pens, Do riot use force.
•The time required to calculate the remaining tape lerlgth, arid the accuracy of the calculation, may vary
according t_; the type of tape used.
•The tape remaining time irldicator is correct orlly if the correct tape length has been selected (_T" pg. 14).
• "TAPE END" appears wherl the tape reaches its end, arid the powergoes offautomatically if left in this
corlditiorl lot _minutes. "TAPE END" also appears wherl a cassette whose tape is already at its end is loaded.
•If the Record-Standby mode c_*ntinues for _minutes without performing Z_*om or any other operations, the
camcorder'_ power shut_ off aut_*maticall}4 Set the P_;vcer Switch t_* "OFF'; and then back t_ "(AMERA" t_;
turn the camconler on again.
•If the Reo;rding Start/Stop buttorl is pressed after the Rec_;rd-Stanclby mode has c_;ntirlued f(_r over 5 mirlute$
r_cording may riot stad immediateh4
•Ityou are recording orl a cassett_ fr(_m the middle (_uch as wherl atape is removed arid re-inserted during
recording), use the Retake tunction (_ /pg. 26) to firld the erld of the bst recordir}g so y_;u oh) not erase arly
of it.
•While shooting, sound is riot hear(/tr_;m the speakec
Serf-Recording
JOURNALISTIC SHOOTING
In some situations, different shooting angles may provide
more dramatic resuhs. Hold the camcorder in the desired
positir_n and tilt the LCD monitor in the most convenient
direction. It can rotate 270' (90' downward, 180' upward).
INTERFACE SHOOTING
The person you shoot can view himself/herself in the LCD
monitol_ and you can even shoot yourself while viewing your
own image in the L(D monitor.
Open the L(D monitor and tilt it upward to 180 degrees so
that it t\_ces k>rward. When the LCD monitor is tilted upward
to an angle (if over approx. 105 degrees, the monitor image is
invelted vertically, and the viewfinder also switches on.
Point the lens toward the subject (yourself when self-
recording) and start recording.
During Interfl_ce Shooting, the monitor image and indications
do not appear inverted as they would when viewing a mirror.
NOTE:
The morlitored image carl be viewed orl the L(D m_rlit_r
arid in the viewfinder,
LcD MONITOR/VIEWEiNDER iNDicATiONS
Press DISPLAY for more than 1 second to make the following
indications al_l>ear/disappear from the camcrlrder's display:
cassette warning, tape remaining time, battery pack remaining
power indicator and tape length indicator (_ /pg. 62, 63).
NOTE:
Even if the inrlicati_rls are oft_ the tape remaining time
appear, blirlking wherl the tape is rlear it_ end, arid the
batte O, pack rentaining power indicat_;r appears blirlking
wherl the p(_wer is almost gone.

LENSCOVER Open/Close Ring
SNAPSHOT Button
System
Se[ed Switch
1__
m
Select Wheel
Display
Menu Screen
O
O
Normal Screen
SNAPSHOT Menu
Menu Screen
When shooting a still image, it is not recorded onto tile
tape, but it is stored in the camcorder's built-in memory in
the selected Picture Mode. A stored still image data can be
transferred to a P(, saved, and processed using a Paint
Software program (_-Z_ pg. 45).
A still image processed on the PC car/be also inserted
onto a tape (_ ,*pg. 55).
MODE SELECTION
Turn tile LENS COVER Open/(lose Ring to open tile
lens cover, then set the System Select Switch to
"D.S.C.'. Set the Power Switch to "PRO.". The power
lamp lights and an image appears.
To select the Picture Mode, perform steps 2 and 3 of
"OPERATION" on pg. 22.
Rotate tile Select Wheel to move tile highlight bar to
"SNAPSHOT", and press it. The SNAPSHOT Menu
appears.
Rotate the Select Wheel to move the highlight bar to
the appropriate mr)de among the 4 Snapshot mr)des
(_ ," pg. 21), and press it. Selection is complete.
Tile Menu Screen reappear• with the highlight•_ bar on
"RETURN". Press the Select Wheel again to close the
MenLI Screen.
STILL iMAGE STORAGE
Press SNAPSHOT.
• Regardless of tile Power Switch position ("AUTO"
or "PRO."), Snapshot recording takes [)lace using
the selected Snapshot mr)de.
• A still image is stored in the built-in memory and
displayed for approx. 2 seconds. While the still
image remains displayed, that image is in tile
process of being stored in memory, and it is
therefore impossible to take another shot during that
time. When the still image disappears and the scene
you are currently aimed at appears on the screen,
you may take another shot.
• The remaining number of shots available is
displayed.
-Snapshot mode
Other manuals for GR-SXM920
2
Other JVC Camcorder manuals

JVC
JVC GZ-E565 User manual

JVC
JVC GR-D275 User manual

JVC
JVC GR-AX230 User manual

JVC
JVC GR-DX107EK User manual

JVC
JVC GZMC100 - Everio 2MP 4 GB Microdrive... User manual

JVC
JVC Everio GZ-HD620 Operating and maintenance manual

JVC
JVC GR-SXM470A User manual

JVC
JVC GR-DVL355EG User manual

JVC
JVC GR-AX26 User manual

JVC
JVC TK-C1430 User manual

JVC
JVC Everio GZ-E110 Operating and maintenance manual

JVC
JVC GR-DV3000 User manual

JVC
JVC GZ-RX515 Operating and maintenance manual

JVC
JVC GY-DV5000U User manual

JVC
JVC GR-SXM720 User manual

JVC
JVC GR-D247 User manual

JVC
JVC Everio GZ-HM550BEK Operating and maintenance manual

JVC
JVC GR-AX958EG User manual

JVC
JVC GR-AX201 User manual

JVC
JVC GY-DV5000 User manual