manuals.online logo
Brands
  1. Home
  2. •
  3. Brands
  4. •
  5. JVC
  6. •
  7. Projector
  8. •
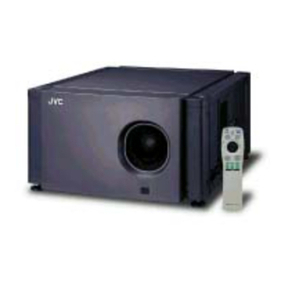
  9. JVC LX-D700U User manual

JVC LX-D700U User manual

Other manuals for LX-D700U

2

This manual suits for next models

2

Other JVC Projector manuals

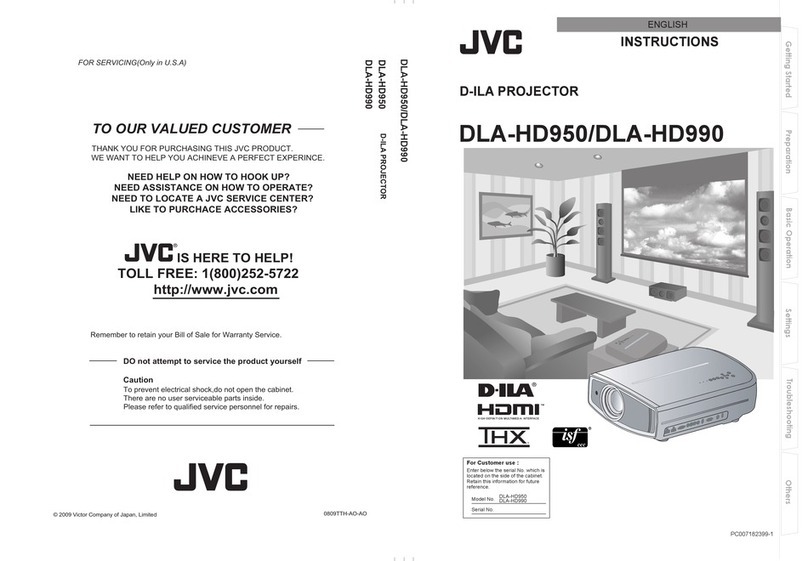
JVC Procision DLA-HD950 User manual

JVC

JVC Procision DLA-HD950 User manual

JVC BLUEscent DLA-VS47NV User manual

JVC

JVC BLUEscent DLA-VS47NV User manual

JVC DLA-X3 Use and care manual

JVC

JVC DLA-X3 Use and care manual

JVC DLA-RS20 User manual

JVC

JVC DLA-RS20 User manual

JVC Reference DLA-RS49U User manual

JVC

JVC Reference DLA-RS49U User manual

JVC DLA-HD10KSU - 1080p Home Theater Projector User manual

JVC

JVC DLA-HD10KSU - 1080p Home Theater Projector User manual

JVC DLA-RS45U Installation manual

JVC

JVC DLA-RS45U Installation manual

JVC DLA-RS3000 User manual

JVC

JVC DLA-RS3000 User manual

JVC D-ILA DLA-VS3000G User manual

JVC

JVC D-ILA DLA-VS3000G User manual

JVC DLA-G15U - D-ila Projector, 1500 Ansi Lumens User manual

JVC

JVC DLA-G15U - D-ila Projector, 1500 Ansi Lumens User manual

JVC DLA-X500R Owner's manual

JVC

JVC DLA-X500R Owner's manual

JVC 0809TTH-AO-AO User manual

JVC

JVC 0809TTH-AO-AO User manual

JVC LX-NZ3 User manual

JVC

JVC LX-NZ3 User manual

JVC DLA-VS4550 User manual

JVC

JVC DLA-VS4550 User manual

JVC DLA-RS55 Installation guide

JVC

JVC DLA-RS55 Installation guide

JVC DLA-G150CLE User manual

JVC

JVC DLA-G150CLE User manual

JVC DLA-HD2KE User manual

JVC

JVC DLA-HD2KE User manual

JVC DLA-RS55 Use and care manual

JVC

JVC DLA-RS55 Use and care manual

JVC DLA-X3 User manual

JVC

JVC DLA-X3 User manual

JVC D-ILA DLA-RS40 User manual

JVC

JVC D-ILA DLA-RS40 User manual

JVC DLA-X9500 User manual

JVC

JVC DLA-X9500 User manual

JVC DLA-HD2KU - D-ila Projector Head User manual

JVC

JVC DLA-HD2KU - D-ila Projector Head User manual

JVC DLA-RS520 Instruction manual

JVC

JVC DLA-RS520 Instruction manual

JVC LX-P1010ZE User manual

JVC

JVC LX-P1010ZE User manual

Popular Projector manuals by other brands

Eiki LC-X985 Specification sheet

Eiki

Eiki LC-X985 Specification sheet

InFocus LitePro 610 quick start

InFocus

InFocus LitePro 610 quick start

Epson EH-TW5900 datasheet

Epson

Epson EH-TW5900 datasheet

FOREVER MLP-100 manual

FOREVER

FOREVER MLP-100 manual

Toshiba TDP-MT8U Specifications

Toshiba

Toshiba TDP-MT8U Specifications

Mitsubishi XD500U specification

Mitsubishi

Mitsubishi XD500U specification

Kodak Ektapro 3020 Illustrated parts list

Kodak

Kodak Ektapro 3020 Illustrated parts list

Toshiba TDP-EW25U Specifications

Toshiba

Toshiba TDP-EW25U Specifications

Barco iQ PRO G500 supplementary guide

Barco

Barco iQ PRO G500 supplementary guide

NEC Showcase Series HT1100 user manual

NEC

NEC Showcase Series HT1100 user manual

Philips LC1341 user guide

Philips

Philips LC1341 user guide

Epson PowerLite 1266 user guide

Epson

Epson PowerLite 1266 user guide

MAGINON DLP 1400S user manual

MAGINON

MAGINON DLP 1400S user manual

Toshiba TLP-380 owner's manual

Toshiba

Toshiba TLP-380 owner's manual

Philips PicoPix PPX2480/EU user manual

Philips

Philips PicoPix PPX2480/EU user manual

Hitachi CP-X605 Series Specifications

Hitachi

Hitachi CP-X605 Series Specifications

Optoma TW1692 user manual

Optoma

Optoma TW1692 user manual

Kodak EKTAPRO instruction manual

Kodak

Kodak EKTAPRO instruction manual

manuals.online logo
manuals.online logoBrands
  • About & Mission
  • Contact us
  • Privacy Policy
  • Terms and Conditions

Copyright 2025 Manuals.Online. All Rights Reserved.

—_
<
2)
au
>
oS
ro)
ac
JVC
&
Printed
in
Japan
oeo7ymrsve
Thank
you
for
purchasing
the
LX-D700U/E/EK
projector.
©
Before
installing
and
operating
the
unit,
read
this
instruction
manual
carefully
for
proper
operation,
and
retain
this
manual
for
your
future
reference
along
with
a
warranty
card.
@A
serial
number
is
important
for
product
quality
control.
When
you
purchase
the
unit,
check
if
the
serial
number
is
properly
marked
on
the
rear
of
the
unit
and
if
the
number
matches
with
that
described
on
the
warranty
card.
Notes
concerning
this
manual:
(1)
Transfer
of
the
contents
in
this
manual
to
other
literature
without
our
prior
approval
is
strictly
prohibited.
(2)
The
contents
of
this
manual,
the
specifications
and
external
appearance
of
this unit
are
subject
to
change
with-
out
notice.
(3)
Illustrations
used
in
this
manual
may
slightly
differ
from
the
actual
configuration
of
this
unit.
BHU30004-015
|
wava/nooza-x71
Z
(600¥ed
ON)
Thank
you
for
purchasing
this
projector.
Before
using
it,
read
and
follow
all
instructions
care-
fully
to
take
full
advantage
of
the
projector's
capabilities.
SAFETY
PRECAUTIONS
IMPORTANT
INFORMATION
WARNING:
TO
PREVENT
FIRE
OR
SHOCK
HAZARDS,
DO
NOT
EXPOSE
THIS
APPLIANCE
TO
RAIN
OR
MOISTURE.
WARNING:
THIS
APPARATUS
MUST
BE
EARTHED.
CAUTION:
To
reduce
the
risk
of
electric
shock,
do
not
remove
cover.
Refer
servicing
to
qualified
service
personnel.
MACHINE
NOISE
INFORMATION
(Germany
only)
ChangesMachine
Noise
Information
Ordinance
3.
GSGYV,
January
18,
1991:
The
sound
pressure
level
at
the
operator
position
is
equal
or
less
than
70
dB
(A)
according
to
ISO
7779.
FCC
INFORMATION
(U.S.A.
only)
CAUTION:
Changes
or
modification
not
approved
could
void
the
user's
authority
to
operate
the
equipment.
a
Perey
NOTE:
This
equipment
has
been
tested
and
found
to
comply
with
the
limits
for
a
Class
B
digital
device,
pursuant
to
Part
15
of
the
FCC
Rules.
These
limits
are
designed
to
provide
reasonable
protection
against
harmful
interference
in
a
residential
installation.
This
equip-
ment
generates,
uses,
and
can
radiate
radio
frequency
energy
and,
if
not
installed
and
used
in
accordance
with
the
instruction
manual,
may
cause
harmful
interference
to
radio
communications.
However,
there
is
no
quarantee
that
interference
will
not
occur
in
a
particular
installation.
If
this
equipment
does
cause
harmful
interference
to
radio
or
television
reception,
which
can
be
determined
by
turning
the
equipment
off
and
on,
the
user
is
encouraged
to
try
to
correct
the
interference
by
one
or
more
of
the
following
measures.
~
Reorient
or
relocate
the
receiving
antenna.
—
Increase
the
separation
between
the
equipment
and
receiver.
~
Connect
the
equipment
into
an
outlet
on
a
circuit
different
from
that
to
which
the
receiver
is
connected.
-
Nicht
the
dealer
or
an
experienced
radio/TV
technician
for
ip.
Declaration
of
conformity
Modet
Number:
LX-D700U
Trade
Name:
Jvc
Responsible
party:
PSEL
Dept.
U.S.
JVC
Corp.
Address:
41
Slater
Drive,
Elmwood
Park,
N.J.
07407
Telephon
Number:
(201)794-3900
This
device
complies
with
Part
15
of
the
FCC
Rules.
Operation
is
subject
to
the
following
two
conditions:
(1)
this
device
may
Rot,
cause
harmful
interference,
and
(2)
this
serio
erat
can
3
KSRENSNES
TOCENEY,
KRTUUINTY
MET
Srence
thn
CAUSE
IESIRN
Operation,
@
IMPORTANT
SAFEGUARDS
Electrical
energy
can
perform
many
useful
functions.
This
unit
has
been
engineered
and
manufactured
to
assure
your
personal
safety.
But
IMPROPER
USE
CAN
RESULT
IN
POTENTIAL
ELECTRICAL
SHOCK
OR
FIRE
HAZARD.
In
order
not
to
defeat
the
safeguards
incorporated
into
this
product,
observe
the
following
basic
rules
for
its
installation,
use
and
service.
Please
read
these
“important
Safeguards’
carefully
before
use.
—
All
the
safety
and
operating
instructions
should
be
read
before
the
product
is
operated.
-
The
safety
and
operating
instructions
should
be
retained
for
future
reference.
—
All
warnings
on
the
product
and
in
the
operating
instructions
should
be
adhered
to.
—
All
operating
instructions
should
be
followed.
—
Unplug
this
product
from
the
wall
outlet
before
clean-
ing.
Do
not
use
liquid
cleaners
or
aerosol
cleaners.
Use
a
damp
cloth
for
cleaning.
—
Do
not
use
attachments
not
recommended
by
the
product
manufacturer
as
they
may
be
hazardous.
—
Do
not
use
this
product
near
water.
Do
not
use
imme-
diately
after
moving
from
a
low
temperature
to
high
temperature,
as
this
causes
condensation,
which
may
result
in
fire,
electric
shock,
or
other
hazards.
—
Do
not
piace
this
product
on
an
unstable
cart,
stand,
or
table.
The
product
may
fall,
causing
serious
injury
to
a
child
or
adult,
and
serious
damage
to
the
product.
The
product
should
be
mounted
according
to
the
man-
ufacturer’s
instructions,
and
should
use
a
mount
rec-
ommended
by
the
manufacturer.
—
When
the
product
is
used
on
a
cart,
care
should
be
taken
to
avoid
quick
stops,
excessive
force,
and
uneven
surfaces
which
may
cause
the
product
and
cart
to
overturn,
damaging
equipment
or
causing
possible
injury
to
the
operator.
-
Slots
and
openings
in
the
cabinet
are
provided
for
ven-
tilation.
These
ensure
reliable
operation
of
the
product
and
protect
it
from
overheating.
These
openings
must
not
be
blocked
or
covered.
(The
openings
should
never
be
blocked
by
placing
the
product
on
bed,
sofa,
rug,
or
similar
surface.
It
should
not
be
placed
in
a
built-in
installation
such
as
a
bookcase
or
rack
unless
proper
ventilation
is
provided
and
the
manufacturer's
instructions
have
been
adhered
to.)
For
proper
ventilation,
separate
the
product
from
other
equipment,
which
may
prevent
ventilation
and
keep
distance
more.than
10
cm.
—
This
product
should
be
operated
only
with
the
type
of
power
source
indicated
on
the
label.
If
you
are
not
sure
of
the
type
of
power
supply
to
your
home,
con-
sult
your
product
dealer
or
local
power
company.
This
product
is
equipped
with
a
three-wire
piug.
This
plug
will
fit
only
into
a
grounded
power
outlet.
If
you
are
unable
to
insert
the
plug
into
the
outlet,
contact
your
electrician
to
install
the
proper
outlet.
Do
not
defeat
the
safety
purpose
of
the
grounded
piug.
Power-supply
cords
should
be
routed
so
that
they
are
not
likely
to
be
walked
on
or
pinched
by
items
placed
upon
or
against
them.
Pay
particular
attention
to
cords
at
doors,
plugs,
receptacles,
and
the
point
where
they
exit
from
the
product.
For
added
protection
of
this
product
during
a
light-
ning
storm,
or
when
it
is
left
unattended
and
unused
for
long
periods
of
time,
unplug
it
from
the
wall
outlet
and
disconnect
the
cable
system.
This
will
prevent
damage
to
the
product
due
to
lightning
and
power
jine
surges.
Do
not
overload
wail
outlets,
extension
cords,
or
con-
venience
receptacles
on
other
equipment
as
this
can
result
in
a
risk
of
fire
or
electric
shock.
Never
push
objects
of
any
kind
into this
product
through
openings
as
they
may
touch
dangerous
volt-
age
points
or
short
out
parts
that
could
result
in
a
fire
or
electric
shock.
Never
spill
liquid
of
any
kind
on
the
product.
Do
not
attempt
to
service
this
product
yourself
as
opening
or
removing
covers
may
expose
you
to
dan-
gerous
voltages
and
other
hazards.
Refer
all
service
to
qualified
service
personnel.
Unplug
this
product
from
the
wall
outlet
and
refer
ser-
vice
to
qualified
service
personne!
under
the
follow-
ing
conditions:
a)
When
the
power
supply
cord
or
plug
is
damaged.
b)
If
liquid
has
been
spilled,
or
objects
have
fallen
on
the
product.
c)
If
the
product
has
been
exposed
to
rain
or
water.
d)
If
the
product
does
not
operate
normally
by
fol-
lowing
the
operating
instructions.
Adjust
only
those
controts
that
are
covered
by
the
Operation
Manual,
as
an
improper
adjustment
of
controls
may
result
in
damage
and
will
often
require
exten-
sive
work
by
a
qualified
technician
to
restore
the
Product
to
normal
operation.
e)
If
the
product
has
been
dropped
or
damaged
in
any
way.
f)
When
the
product
exhibits
a
distinct
change
in
per-
formance—this
indicates
a
need
for
service.
When
replacement
parts
are
required,
be
sure
the
service
technician
has
used
replacement
parts
spec-
ified
by
the
manufacturer
or
with
same
characteris-
tics
as
the
original
part.
Unauthorized
substitutions
may
result
in
fire,
electric
shock,
or
other
hazards.
mae]
ot
3
—
Upon
completion
of
any
service
or
repairs
to
this
product,
ask
the
service
technician
to
perform
safety
checks
to
determine
that
the
product
is
in
proper
operating
condition.
The
product
should
be
placed
more
than
one
foot
away
from
heat
sources
such
as
radiators,
heat
reg-
isters,
stoves,
and
other
products
{including
ampli-
fiers)
that
produce
heat.
When
connecting
other
products
such
as
VCR's,
and
personal
computers,
you
should
turn
off
the
power
of
this
product
for
protection
against
electric
shock.
Do
not
place
combustibles
behind
the
cooling
fan.
For
example,
cloth,
paper,
matches,
aerosol
cans
or
gas
lighters
that
present
special
hazards
when
over
heated.
Do
not
look
into
the
projection
lens
while
the
ilumi-
nation
lamp
is
turned
on.
Exposure
of
your
eyes
to
the
strong
light
can
result
in
impaired
eyesight.
Do
not
look
into
the
inside
of
this unit
through
vents
(ventilation
holes),
etc.
Do
not
look
at
the
illumination
lamp
directly
by
opening
the
cabinet
while
the
illumi-
nation
jamp
is
turned
on.
The
illumination
lamp
also
contains
ultraviolet
rays
and
the
light
is
so
powerful
that
your
eyesight
can
be
impaired.
Use
only
the
accessory
cord
designed
for
this
prod-
uct
to
prevent
shock.
The
power
supply
voltage
rating
of
this
product
is
AC
200-240V,
the
power
cord
attached
conforms
to
the
following
power
supply
voltage.
Use
only
the
power
cord
designated
by
our
dealer
to
ensure
Safety
and
EMC.
When
it
is
used
by
other
power
supply
voltage,
power
cable
must
be
changed.
Consult
your
product
dealer.
Power
cord
LX-D700E/EK
Power
supply
voltage:
AC
200-240V
LX-D700U
Power
supply
voltage:
AC
100-120V
3/3/N0020-X1
|
w
Zz
o
>
ro)
=)
&
wa/ainnnsa-yY1
Safety
Precautions
Precautions
for
Safe
and
Proper
Use
.......6
Names
of
Component
Parts
and
Sections
..
.7
Remote
Control
Unit
Connecting
Resizing
Display
Connection
to
Personal
Computer
Connection
to
AV
Unit
Connecting
Other
Components
Installation
Projection
Distance
and
Screen
Size
Adjustment
on
the
height
and
tilt
of
the
screen...
Connection
of
Power
Cord
Warning
Indication
by
indicators
Light-ON
and
Light-OFF
of
lumination
Lamp
...............
Main
Unit
and
Remote
Control
Unit
.....
Buttons
Provided
On
Main
Unit
Buttons
Provided
On
Remote
Control
Unit
System
of
ON-Screen
Menu
Setting
Method
Through
ON-Screen
On-Screen
Menu
Display
Operation
of
On-screen
Menu
and
Notes
[COMPUTER]
Menu
[VIDEO]
Menu
[AUDIO]
Menu
[OPTION]
Menu
{SPECIAL]
Menu
Have
Fun
With
Special
Modes
Zoom
Mode
Strobe
Mode
Replacing
Iliumination
Lamp
Replacing
Air
Filter
Troubleshooting
Self-diagnosis
by
Indicators
Specifications
External
Dimensions
@
AUTO
button
@
VIDEO
button
@
COMPUTER
button
@®
OPERATE
button
©
Left
speaker
©
Right
speaker
@
Operation
Indicator
(3-
Lamp
Indicator
th
@®
Lens
@
Lens
Focusing
Ring
(front)
@
Lens
Zoom
Adjusting
Ring
(rear)
@
Lens
Cap
@
Remote
Control
Signal
Receiver
PRECAUTIONS
FOR
SAFE
AND
PROPER
USE
:
Regarding
Symbol
Indications
|
a
Numerous
symbols
are
employed
as
indication
in
the
precautions
against
safety,
precautions
against
handling,
and
in
the
indication
to
the
products.
These
are
designed
to
prevent
in
advance
any
possible
infliction
of
injury
on
you
and
other
individuals
and
the
damage
of
properties
through
the
proper
use
of
the
product.
The
symbols
and
mean-
ings
are
shown
below.
Grasp
the
contents
of
the
symbols
compietely
before
reading
this
manual.
This
represents
the
contents
in
which
the
probabilities
for
death
or
serious
WARNING
injury
are
assumed
if
this
symbol
indication
is
ignored
and
the
product
is
erroneously
handled.
Do
not
!ook
into
the
projection
lens
while
an
illumination
lamp
is
turned
on.
This
represents
the
contents
in
which
the
probabilities
for
injury
to
be
inflict-
Exposure
of
your
eyes
to
the
strong
light
can
result
in
impaired
eyesight.
C
AUTION
ed
are
assumed
and
the
contents
in
which
material
damages
to
be
sustained
are
assumed
if
this
symbol
indication
is
ignored
and
the
product
is
erro-
neously
handled.
.
Examples
of
Symbol
Indications
;
This
symbol
informs
you
of
the
presence
of
the
contents
that
demands
caution
(including
danger
and
warning).
Specifically
prohibited
contents
(caution
against
electric
shock
in
case
of
the
left
symbol)
are
illustrated
in
the
symbol.
This
symbol
informs
you
of
prohibited
actions.
Specifically
prohibited
contents
(prohibition
of
disas-
sembly
in
case
of
the
left
symbol)
are
illustrated
in
the
symbol
and
its
vicinity.
lines
or
instructions.
Specific
contents
of
instructions
(unplug
the
power
cord
from
the
outlet
in
case
of
&
This
symbol
informs
you
of
the
contents
that
forces
you
to
take
some
action
or
gives
you
some
quide-
the
left
symbol)
are
illustrated.
@
Handle
Lift
it
to
carry
the
unit.
®
Vents
Z\
CAUTION
To
carry
the
unit,
hold
this
handie.
Do
not
hold
the
lens
section
to
lift
the
unit.
Otherwise,
the
damage
of
the
unit
and
injury
Gan
result.
Do
not
insert
foreign
objects
such
as
metals
and
inflammables
into
the
A
Lv
vents.
Do
not
block
them
with
any
obstacles.
Otherwise,
fire
and
electric
shock
can
result.
©
2
oO
iM
QoQ
QoQ
£
a
¥3/a/N002a-x71
|
Remote
Control
Signal
Receiver
(600Vd
ON)
S
Hot
air
is
blown
out.
Be
careful
as
it
can
cause
a
low-temperature
burn.
Besides,
do
not
insert
into
the
vents
O
any
foreign
objects
such
as
metals
and
inflammabies.
Do
not
block
the
vents
with
obstacles.
Otherwise,
fire
and
electric
shock
can
result.
Rear
Terminal
COMPUTER
IN
1
terminal
COMPUTER
IN
2
termina!
COMPUTER
OUT
terminal
AUDIO
1
terminal
for
COMPUTER
IN
1
AUDIO
2
terminal
for
COMPUTER
IN
2
AUDIO
OUT
terminal
S-VIDEO
input
terminal
AUDIO
R
terminal
AUDIO
L
terminal
VIDEO
terminal
VIDEO
cannot
be
projected
when
S-VIDEO
is
con-
nected.
MOUSE/COM
1,
2
Accessory
remote
control
unit
can
be
used
as
a
sub-
Stitute
for
the
mouse
by
connecting
it
to
the
mouse
connector
of
the
personal
computer's
main
unit.
Remote
Input
Terminal
This
is
used
for
connection
to
the
main
unit
by
provid-
ing
an
external
signal
receiver
when
the
remote
con-
trot
unit
cannot
be
used
due
to
rear-projection,
etc.
The
external
signal
receiver
is
not
available
for
sale
as
a
merchandise.
Consult
with
JVC
Service
Center.
Power
Cord
Connection
Socket
Use
the
accessory
power
cord.
Furthermore,
do
not
use
any
damaged
cord.
Power
cord
itself
gen-
erates
heat, resulting
in
fire
and
electric
shock.
Feet
(2
pieces)
Foot
with
an
elevation
angle
adjusting
function
Bottom
of
Main
Unit
Foot
with
a
tilt
angle
adjusting
function
illumination
tamp
replacement
aperture
ysij6ug
Cooling
fan
air
iniet
Vents
These
vents
suck
in
the
air
to
cool
this
unit.
if
the
vents
are
blocked
with
obstacles,
heat
generated
inside
can
result
in
fire.
Do
not
insert
metals
and
inflammabies
into
the
vents
and
do
not
block
the
vents
with
obstacles.
Moreover,
the
paper,
cloth,
soft
cushion,
etc.,
can
be
sucked
in
if
they
are
placed
near
the
vents.
Therefore,
be
careful
because
such
actions
can
result
in
mechanical
failure,
fire,
and
electric
shock.
Do
not
insert
metals
and
inflammables
into
the
vents
and
do
not
block
the
vents
with
obstacles.
Z
()
\
Otherwise,
fire
and
electric
shock
can
result.
[Accessories]
Power
cord
(2.5
m)..
Mouse
serial
cable
for
MAC
(1.9m)
.
wt
Remote
controt
uni
Mouse
serial
cable
for
DOS/V
(1.9m
1
Lens
cap.
PC
audio
cable
(2m)
1
Persona!
computer
connecting
cable
AV
cable
(3m)........
4
(2
M/D-Sub
15
Pin)
......
eee
ssecseccsteseeceseseeenenenens
1
piece
AA/R6/UM-3
batteries
2
Conversion
adapter
for
MAC
13”
%
Instruction
manual!
(this
Manual).............:scsssssereereeeee
1
Conversion
adapter
for
MAC
16”
Conversion
adapter
for
MAC
19”
[
wava/nooza-x41
.
Reaching
Range
of
Remote
Control
Unit
Remote
Control
Unit
To
use
the
remote
control
unit,
train
it
on
the
remot
control
signal
receiver
provided
on
the
body
of
the
unit.
Straight
reaching
range
is
within
10
meters.
Note,
however,
that
when
using
a
remote
control
unit
that
is
reflected
on
a
Remote
control
signal
transmitter
screen,
the
straight
reaching
range
may
become
shorter
for
some
types
of
screen.
OPERATE
button
VIDEO
button
COMPUTER
button
VOL.
—
button/VOL.
+
button
MUTE
button
HIDE
button
A
:
SPECIAL
button
RESIZE
button
:
1
FREEZE
button
AUTO
button
ST
MENU
button
LEFT
button
“
RIGHT
button
POINTER
button
UGHT
button
a+bS10m
Z\WARNING
When
a
battery
used
in
this
unit
is
removed,
use
caution
so
that
a
little
child
does
not
swallow
it
by
mistake.
Keep
Load
the
batteries
into
the
remote
control
unit
before
starting
operation.
the
batteries
away
from
little
children.
If
a
child
should
swallow
it,
consult
your
medical
doctor
immediately.
(Batteries
are
packed
along
with
accessory
cables.)
How
To
Load
batteries
/\CAUTION
Your
attention
is
invited
to
the
following
points
because
erroneous
use
of
the
batteries
can
resuit
in
liquid
leak
or
rupture.
*
Load
the
batteries
properly
as
indicated
by
the
+
and
—
labels.
*
Remove
the
batteries
when
the
unit
is
not
used
for
a
long
time.
*
Do
not
mix
up
different
types
of
batteries
for
use
because
their
properties
differ.
+
Do
not
mix
new
batteries
and
used
batteries
for
use
because
the
service
life
of
new
batteries
can
be
short-
ened
and
there
is
a
fear
of
liquid
leak
from
the
used
batteries.
*
Remove
the
batteries
as
soon
as
they
are
out
of
service.
Keeping
them
inside
the
unit
can
lead
to
liquid
leak
that
results
in
the
mechanical
failure.
If
you
touch
the
leaked
liquid,
your
skin
may
be
injured,
and
therefore
be
sure
to
wipe
the
liquid
out
immediately.
Be
careful.
*
Depending
on
the
storage
condition,
the
accessory
batteries
can
become
weak
in
a
short
time.
Replace
them
with
new
batteries
a
little
earlier
than
usual.
*
Do
not
throw
the
batteries
into
fire,
and
do
not
charge
the
batteries.
Open
the
back
lid
by
sliding
itin
the
|
Load
accessory
batteries
Close
the
back
tid
by
sliding
it
in
arrow-indicated
direction.
(AA/RG/UM-3
x
2)
as
indicated
by
|
the
arrow-indicated
direction
till
it
+
and
—
labels.
goes
click.
2
a
BY
ao
[=]
2
[o>]
3/A/N00LG-x7
|
(600Vd
ON)
Z
/\CAUTION
When
you
connect
the
television,
video,
computer,
game
machine,
etc.,
to
this
unit,
carefully
read
the
instruction
manuals
of
Tespective
components
before
starting
with
connection.
Do
not
forget
to
tum
off
the
power
of
the
unit
before
connection,
and
observe
given
instructions.
When
the
power
cord
is
connected,
this
unit
becomes
powered
and
enters
into
sleep
mode.
Eyes
can
be
exposed
by
mistake
to
the
light
of
high
brightness
resulting
in
impaired
eyesight
when
a
lamp
is
lit
by
inadvertently
pressing
a
button
during
connection
with
other
components.
The
connection
of
the
power
cord
is
recommended
to
be
performed
after
completing
the
connection
with
other
components
and
the
installation
of
this unit
explained
below.
The
display
sizes
of
the
components
to
be
connected
are
shown
in
the
following
table.
If
the
display
size
is
smatler
than
800
x
600,
the
periphery
of
a
picture
becomes
biack.
Caution
must
be
exercised
as
this
phenomenon
adversely
atfects
adjacent
pic-
tures
when
the
pictures
are
used
in
a
line
coming
close
with
one
another
vertically
and
horizontally
by
using
a
plural
number
of
LCD
projectors.
in
case
of
a
resizing
display,
there
is
a
case
where
the
picture
quality
becomes
more
deteriorated
than
that
of
the
window
display
due
to
electrical
correction.
Also,
video
signals
are
different
in
picture
quality
from
the
picture
that
becomes
a
source
because
the
video
signals
undergo
an
electrically
simplified
digitization.
Connection
of
the
unit
to
the
S-VIDEO
terminal
disables
the
projection
of
a
picture
entered
from
the
VIDEO
IN
terminal.
Compatible
Resolutions
XGA
60
XGA
70
Horizontal
frequency
(KHz)
640
x
480
31.469
1024
x
768
48.:
363
1024
x
768
56.476
1024
x
768
1024
x
768
832
x
624
Vertical
frequency
(Hz)
1024
x
768
1024
x
768
640
x
480
768
x
576
Display
Format
PC
98
768
x
576
Resizing
display
Window
display
640
x
400
VGA
60
640
x
480
VGAEGA
VESA
72/75/85
640
x
350
640
x
480
640
x
480
SVGA
56/60/72/75/85
800
x
600
800
x
600
XGA
60/70/75
1024
x
768
800
x
600
MAC
13"
640
x
480
640
x
460
MAG
16"
832
x
624
‘800
x
600
1024
x
768
800
x
600
640
x
480
im
615
x
460
768
x
576
720
x
540
Resizing
Displa
@
Computer
screen
When
the
input
display
size
is
smaller
than
800
x
600.
The
display
is
switch
each
time
the
Resize
button
of
the
remote
control
is
pressed.
[
The
display
size
is
projected
with-
out
change.
The
outer
periphery
will
become
dark.
a
The
image
is
enlarged
to
800
x
600
(image
quality
may
deteriorate
in
some
cases).
When
the
input
display
size
is
the
same
as
800
x
600.
The
screen
display
cannot
be
switched
by
pressing
the
Resize
button
of
the
remote
control.
When
the
input
display
size
is
larger
than
800
x
600.
a
LE
L
The
image
is
reduced
to
The
display
size
is
pro-
800
x
600
(image
quafity
jected
without
change
may
deteriorate
in
some
(the
upper
left
part
of
the
cases).
image
is
projected).
The
center
part
of
the
The
lower
left
part
of
the
The
lower
right
part
of
The
upper
right
part
of
input
image
is
projected.
input
image
is
projected.
the
input
image
is
pro-
the
input
image
is
pro-
jected.
jected.
©)
|
wava/nooza-x71
8
(600vcd
°N)
@
Video
Images
When
the
input
signal
is
NTSC
The
display
wilt
switch
each
time
the
Resize
button
of
the
temote
control
is
pressed.
The
outer
periphery
of
the
image
will
become
dark.
The
outer
periphery
of
the
image
will
become
dark.
When
the
input
signal
is
PAL
or
SECAM
pep
The
display
will
switch
each
time
the
Resize
button
of
the
remote
control
is
pressed.
The
outer
periphery
of
the
image
will
become
dark.
Connecting
to
a
personal
computer
Always
turn
off
the
projector
and
personal
computer
power
before
connecting.
@
Video
signal
IBM
PC
or
compatible
(DOS/V)
Use
the
accessory
personal
computer
connecting
cable
provided.
Accessory
personal
computer
connecting
cable
ej
<
rl
HD
D-sub
15-pin
(male)
Or
else
use
a
conversion
adapter.
CAUTION
When
connecting
to
a
computer
display
monitor,
use
the
connecting
cable
equipped
with
ferrite
cores
to
reduce
and
remove
the
high-frequency
radiation.
HD
D-sub
15-pin
HD
D-sub
15-pin
=
({maie)
(male)
Macintosh
Use
the
accessory
MA13,
MA16
or
MA19
conversion
adapter,
whichever
is
applicable,
and
the
accessory
personal
computer
connecting
cable.
Accessory
conversion
adapter
7
‘cesee
eee
eee
D-sub
15-pin
HD
D-sub
15-pin
©
(male)
(mate)
e
r
i
%,
CAUTION
When
connecting
to
a
computer
display
monitor,
use
the
connecting
cable
equipped
with
ferrite
cores
to
reduce
and
remove
the
high-frequency
radiation.
@)
3/3/N002a-x11
|
@
Connecting
as
a
mouse
Connection
to
AV
Unit
Connect
here
when
using
the
projector
remote
control
as
a
mouse.
Make
absolutely
sure
that
the
power
cord
of
the
projector
and
the
AV
unit
are
unplugged
before
connection.
Use
the
accessory
AV
cable.
Cable
for
the
AV
unit
with
an
S-VIDEO
terminal
is
not
provided
as
an
accessory.
When
you
extend
the
AV
connecting
cable,
there
is
a
case
where
the
picture
quality
of
the
image
becomes
deteriorated.
What
is
more,
if
a
connector
is
connected
to
the
S-VIDEO
terminal,
video
signals
entered
into
the
VIDEO
terminal
cannot
be
projected.
|
Wa/Va/nooza-xX71
IBM
PC
or
compatible
ssory
Mouse
Cable
(PS/2
compatible}
white
for
DOSW
Toauo
=
/“C==
Note:
A
serial
mouse
cannot
be
input
terminal
us
oa:
—{_fme
Mini-DIN
6-pin
To
video
input
terminal
Accessory
AV
cable
To
audio
output
terminal
When
an
internal
speaker
system
(stereo)
is
used,
con-
nection
is
made
here.
In
case
of
a
monaural
audio,
connect
to
L.
Macintosh
MOUSE/COM
1
OR
2
Accessory
Macintosh
mouse
cable
Mini-DIN
4-pin
To
S-video
output
terminal
|,
To
video
output
terminal
white
red
yellow
To
audio
output
terminal
When
using
a
connector
other
than
the
accessory
mouse
cable,
use
a
commercially
available
adapter,
etc.
Connecting
Other
Components
It
is
feasible
to
connect
amplifier-built-In
speaker
systems
and
game
machines.
Cords
to
connect
such
com-
ponents
are
not
provided
as
accessories
except
the
AV
cable.
To
audio
input
terminal
Audio
cable
ee
om
Amplifier-built-in
speaker
system
To
audio
and
video
input
terminals
ez\
i
cc]
B
aro
Audio
and
video
output
cables
provided
for
the
game
machine
or
separately
sold.
{As
for
setup,
carefully
read
instruction
manuals
prepared
for
the
components.)
é
Pe
(622)
ame
machine
O1
(600—Wc'ON)
When
the
power
cord
is
connected,
this
unit
becomes
powered
and
enters
into
steep
mode.
Eyes
can
be
exposed
by
mistake
to
the
light
of
high
brightness
resulting
in
impaired
eyesight
when
a
lamp
is
lit
by
inad-
vertently
pressing
a
button
during
installation
work
of
this
unit,
etc.
Connection
of
the
power
cord
is
rec-
ommended
to
be
performed
after
completing
the
installation
of
this
unit
and
the
connection
of
other
com-
ponents
mentioned
above.
Projection
Distance
and
Screen
Size
@
The
projection
lens
of
this
unit
is
a
1.3X
manual
zoom.
At
maximum,
it
is
possible
to
project
a
screen
size
1.3
times
as
large
as
the
screen
size
at
minimum.
@
The
projection
distance
focus
ranges
between
3.2
ft.
/1
m
and
32.1
ft./
9.8
m.
Install
the
projector
within
this
range.
@
If
the
four
sides
of
the
screen
are
distorted
when
projecting
at
the
minimum
projection
distance,
we
recommend
you
to
install
the
projector
slightly
backward.
@
If
the
projector
is
used
by
hanging
it
from
the
ceiling,
use
the
metal
fittings
particularly
designed
for
the
purpose.
Furthermore,
it
is
necessary
to
bring
the
projector
down
from
the
ceiling
for
maintenance
such
as
lamp
replace-
ment,
etc.,
to
avoid
any
danger.
We
recommend
you,
therefore,
to
choose
a
suitable
place
under
the
ceiling
to
hang
the
unit,
from
where
you
can
easily
bring
it
down.
@
Polarized
screens
cannot
be
used.
Examples
of
Size
30”
Aspect
ratio
4:3
Diagonal
length
76
cm
(Length
18”
/46
cm
x
Width
247/
61
cm)
60”
Aspect
ratio
4:3
Diagonal
length
152
cm
(Length
36"
/91
cm
x
Width
48”
/
122
cm)
[00]
108]
4]
a0
|
960]
903
|
200
|
300
mee
a
etme
wate
lol
oe
a
Projection
diatance
(mp
_|
10
18]
20[
26
¢7| 30] sa]
aa|
aa]
ae
|
40
eo] cc]
ca]
(iene
te
wane
nen
e
nee
e
een
e
nce
aimewnnenn
naw
s
cones
nner
nennsaceercanensnanecenecamesccecoenenoenecnensneee
}
About
swing
{
A
certain
amount
of
vertical
upward
swing
is
provided.
There
is
no
horizontal
Screen
+
(left/right)
swing,
|
@
The
amount
of
swing
is
fixed.
;
‘
:
‘
‘
H
t
@
The
bottom
of
the
screen
should
be
level
with
the
extended
centerline
of
the
lens
(TELE
-
WIDE).
A
To
avoid
fire
hazards
and
mechanical
failures,
do
not
place
this
unit
in
a
place
exposed
to:
*
Water,
moisture,
and
dust
*
Vibration
and
abrupt
impact
*
Direct
sunlight
*
High
and
low
temperatures:
*
Oily
smoke
and
cigarette
smoke
*
Surface
of
soft
articles
such
as
rugs
and
beddings
Allowable
working
temperature
and
humidity:
from
42°F/5°C
to
104°F/40°C
(20%~80%)
Allowable
storage
temperature
and
humidity:
from
6°F/-10°C
to
140°F/60°C
(10%~-90%)
When
the
sunlight
or
an
illumination
lamp
directly
lights
the
screen,
the
picture
looks
whitish
making
It
difficult
to
see.
Under
the
circumstances,
provide
a
curtain.
etc..
to
shield
it.
iapezoiaat
distortion
caused
by
titing
the
front
of
the
projector
upward
cannot
be
corrected;
threfore,
we
rec-
ommend
that
the
projector
be
positioned
as
perpendicular
as
possible
in-relation
to
the
screen.
Adjustment
on
the
height
and
tilt
of
the
screen
The
elevation
angle
and
tilt
angle
are
adjusted
with
the
feet.
Objective
for
this
action
is
to
adjust
the
height
and
tilt
of
the
projection
screen.
Trapezoidal
distortion
cannot
be
cor-
rected.
We
recommend
you
to
enjoy
the
picture
by
making
as
much
perpendicular
pro-
jection
as
possible
against
the
screen.
When
the
feet
to
adjust
lift
and
tilt
angles
approach
the
limits
of
adjustment,
it
becomes
hard
to
turn
them.
Do
not
turn
the
feet
forcibly.
Mechanical
failures
must
be
avoided.
To
adjust
the
height,
turn
the
foot
having
an
elevation
angle
adjusting
function.
It
can
be
elevated
up
to
+7°.
Turning
direction
To
adjust
the
tilt
of
the
picture,
turn
the
foot
with
a
tilt
angle
adjusting
function.
Turning
direction
3/4/N002a-X7
|