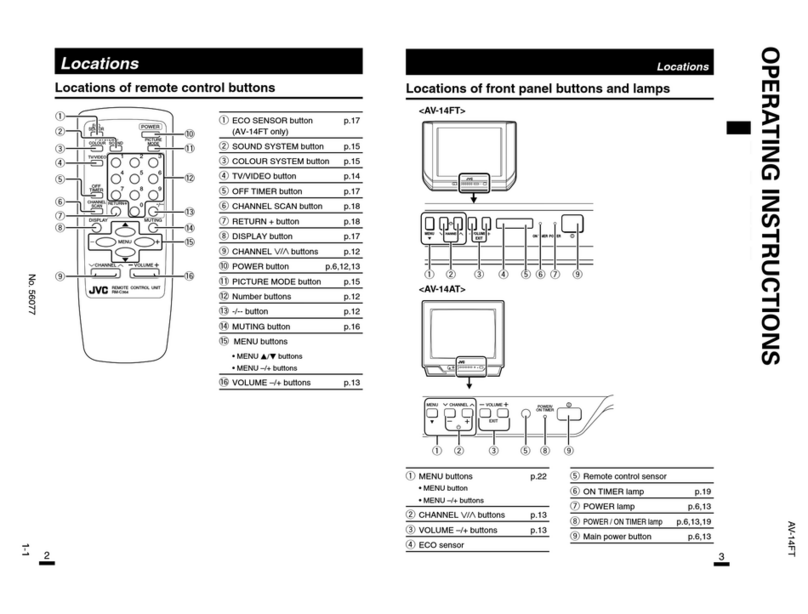
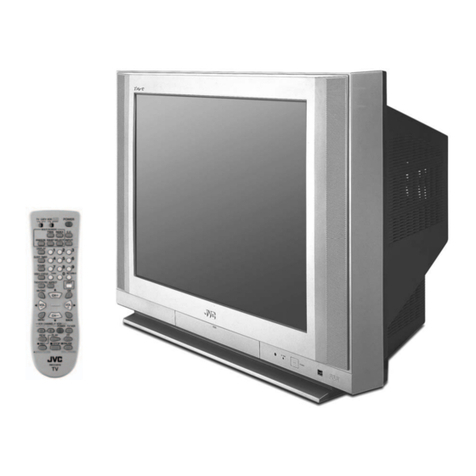
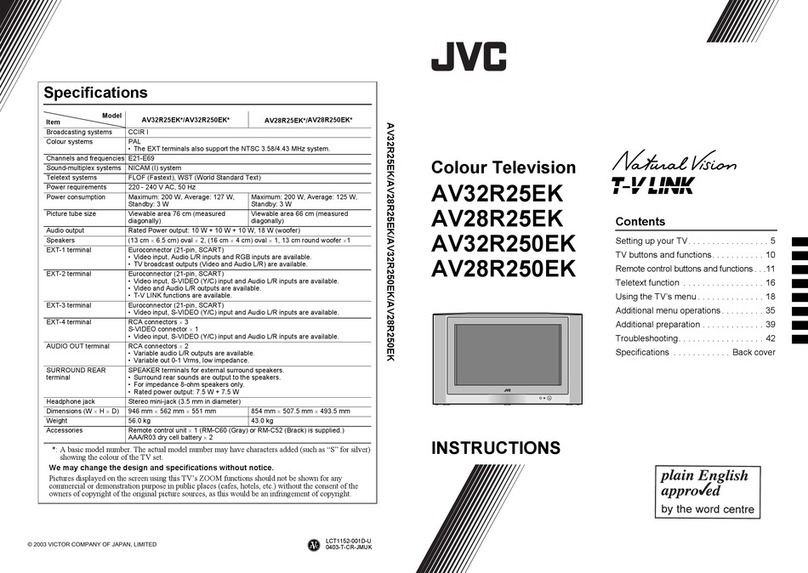
JVC AV-27D500 User manual

OPERATING INSTRUCTIONS
ColorTelevision
User'sGuide
®ForModels:
AV-32D500
AV-32D200
AV-27D500
AV-27D200
/I/ustration of AV-27DSO0 and RM_-,343
Feb.1999 No.51514

od IMPORTANTSAFETY PRECAUTIONS
P,V_==v=_r_toqu=m__ pmmrd.
z_ The lightning flash with arrowhead syml_,
w_in an equila_ereJtdengle is intended to
alert the user to the p_ of uninsulated
•dangerous ',,_t_ e"wi_in the products
6qnctosum that rney be of sufficient magnitude
to conUituts a risk of electpo shock to
p_scns.
The exofamazon point within an eClU_foreraJ
triangle is intended to _the _to the
presence of important operalf ng and maints*
hence (servicing) in_ in the lfterature
accompanying the appliance.
IMPORTANT SAFEGUARDS
CAUTION:
Pfolle rl_l and iltaJln f_r yo_lr laf_¢/.
EleCtrical energy can perform many useful functions. Tn_ TV
set has been engineered _d menufactured to assure your
personeJseJety.But mlprcper use cen msu/t in pc_en_a/
electrical shock Or life hazzuds.In order n0_to defeat the
safeguards imxxpotated inthis Wsot. observe the following
basic rules for its instaJl_on, use and serv;clng.
And also fOllow a_lwarnings and inductions marked on your
TV set.
INSTALLA'RON
1 Your1V set is equfppe(I x_th a _ AC line plug (one
blade of the plug isw4dei"than the other).
WARNING:
CAUTION:
TO PREVENT FIRE OR SHOCK
HAZARDS, DO NOT E)(POSE THIS T_.
SET TO RAIN OR MOISTURE.
TO INSURE PERSONAL SAFETY,
OBSERVE THE FOLLOWING RULES
REGARDING THE USE OF THIS UNIT.
1Operate orJy from the power source specttJed
on me unit.
2 AVOidd_tlg IheAC plug and pO_e¢CO_i.
3. Avoid improper InstaJlatio(1_never position
the unit where good ventlfai_on is una_r_
able.
4. DO not aJk_wcOjects ot liquid into the cabinet
openings.
5_ntheeventofUou_, unplugtheunitand
ca_lasemite technician.DO notattemp_to
repair it yourself or remove the rear cove_
Changes or modificaifons not approved by JVC
could voidthewotranly
" When you don't use Ibis 1V set for a long
beriodOflfme,be serefodisoonnectboththe
power plugfromtheAC ou;letand antennafor
yoursafe_
• TO prevent electric shock do not _se th_s
polar;zedplug_ an e_ _,_ncord,recepta-
cieor otheroutletunless_bladescan be fully
inse,,tedto i_ever_ b_de exposure.
This safety feature allow= the p_g to ffi into _e power
OUtleto_ one way. Sl'lO_ldyou be unable _oInP,ettthe
plug fully Into the outiet, t_y_ng _ plug.
ShOLdditslfllfad to flL co.act y_v (dectr;cJan.
2Operate the 3_/set ofby flora aI;X>_ r source as InOfoeted
On _heW set or referto the operaBlg lastruc_ons for 61is
_in_mati_. If you am not sure of the type Of power _y
to your home. consultyour TV Set deaJo¢o_inceJ po_er
company: Forbattery operat_n, referto the operaling
instructions.
3 Overloaded AC Outletsand _on COrdsare danger-
ous, and SOaze frayed power cords and broken Plugs.
They may result in a shock or fire h,szerd. CaJlyour se_ce
techrde_n for replacement
4DOnot aliowanything to reston or rollover t_e power
cord, and do not p_acethe TV =et where power CC_dis
subject to traffic Ot =buse. This m_y re,suit in ashock ot
fire hazard.
5Do not use this IV set neat water -- fo_"example, near a
bathtub, weshbowl, kitchen sink. c_launmy tub, in a wet
basement, _x near swir_ning po_, etc.
6 Ifan outs-¥1eantenna LScorrected to _e 1V _L be surethe
antenna systemi_ g_oundedso as m p,'o_desome _
against_0_tagesurgesand built_p s_a_ccha_ss. Sec_n 810
of the Na_onaJ_Code pro_es information w#_respect
to lfxop_ Q_,Jnctng of thems_ ar,:l _opo_g s_Jctum,
gn:_nding ofthe _wln_Io an antonnadischargeunit,size
of gr_ng cc_d_, foc_tinn of en_ discharge unit,
conneceonteqlJr_me_ for the g_}n_g elec_0de.
7 An out,de anle_na _ _lould no_be IOCaZedin the
vicinityof oveltleed power _n_ Or other e_c_ic light or
power ctrcuit_,C_where it can fail IntoSuChpower linesor
circuits. When In_tal.ng an out=lde anlenna system, extreme
€*are_ould be taken fo keep ft0m touching such power
lines or c_mult_as contact wh_hIhem mlght be falal
AI_I=F.=qi ILECTRIC&L COD_
8I_/seL_are providedw(thven_ilal_openingsinthecabinet
toatlowheatgeneratedclur_goperatfontobe reteaSed.
Therefore:
-- f_ block_e bottom ven_la_o_ slots of a porteble _
=etby p_acingIto._abed, =ola,nJg,etc.
-- Near place _1V set in a"polltqn"enclosure unless
proper ver,_letfon ispm_d_l.
-- Never cov_ 61_ opeli_g$ "/_lth_ cfo_ or olher materJal
-- New_"10_._theIV _r=sar_O_Wa raoT_ororhe_ reg_e_
ITo avid persm_aJInjury:
-- Do natp_c_ aIV a_ton a s;op_gsh_funles_imoper_s_oJed.
-- Use only a carl or stand recommended by the TV set
manufanturer,
-- DO nottrytorolla eattwithsmalfcastersacrossthresh-
olds c_deep pl_eca_.
-- _I or shelfmountingOfK_Jldfollowthemanufacturer's
instructions,and shoutduse a mountingkitapproved by
the tTlanufacture_
USE
10 C_u_o_c;_m_a_outdroppingc_i:_sringd_s L,toI_e_' set
"_g_ cabl_ oper,hgs,So_ t_=m_pareca_yheza_(_
uc_ge__d coqtactc_ reset_afireoreloctt:_shc_=
11 Unplug the TV se_from the waJIcuret before cleaning. Do
not use liquid or an aerosc_cleane_
12 k_ add ao:asso6_ _oa W se(_a_hasn0tbeen des_Ted fo.
Ibis_F_Ch_d_ns may lu_ hahaz_
13 F0r added ptotect_n of the W setdunng a ighmli_gstorm or
whet]theTt/set istobe le# unetlendsd foran extended penixI
of _'ne, unplugIf flora ine weJIo_Jel and disco,x_ect the
ar_e_n_ Thiswill ptm,ent _v_age fo p,_duct due to Zgh_ing
atc_rnsot_ linesu_gea.
14 A 1V sefa_d cart ccwt_*'_atlonshouldbe mm'ed w_h care.
DOiCJ<stops._cassive force, and uneven surfacesmay cause
_e 1V se( and carl COllbina_m to ovet/_/n.
SERVICE
15 Ltnplugthis_V s_tImm_e wa_cutlet and refersen_c_g to
_alilfed s_v;_ persor._l under_e fo_o_ng con_it_:
A. When the power c_d or pl_ is damsged odrayed,
B. Ifliquid h_$ been spilied into the _/set
C. Ifthe _/set has been exposed to r_dnor wet er.
DIf 1heIV se{does n_4operetenorrrlaliyby fc_lo_ingIhe
operat_,gIns_ci_m.s. Adjusto_lythoseconvols U,.atare
c_ered in_e oc_va_ng k%tru_s asimpmp_ adjust.
meritOfo_er Controlsr_ay n_t indamage _b-._vailo(1_
require_workby a qu_Jr_iedtec_nk_ianto ro,_xe
I_e "iVsetto normal operaU_.
E. If_e 1Vs_ hasbeen _pped o_d_naged hany_,_
F When the 1V set exhibitsadistinct change inperfof
mance -- this indicates e ne_ for service.
16 CO notaitempt to se_ice this"_Vsetyc_m,effasopening or
removingcovers may e_pose you to dange_ voltageor
o61erhazards.Refer a_ servic_g to qua_k_l se_ce pemoreeL
17 When replacementp_Is a_ required,ha'_e_e service
technician verity in writingihat the repot p,_ts he u.s_s
he',_ _hesame safetycharacteds_cs_iheonginaJpar_.
Use of manufacfo_ specified replacementparts can
p_evs_ fire, shock, or cther hezards.
18 Upon completion Ofany seP*tcec#repaL*stoFr=s1V set,
Please as_ the servfoetechnicianto pectonnthe safety chod<
d_cribed inthe mar,JfaclurePsseneca literatma.
19
2O
Wl_n aTVset reaches 1heand ofits use_l lifo,improper
dis_x_aJcould rasu_ina pintumtubeiml_OSiOn.A.Ska
q_ied se_ice t_c_an iodispose of _e IV set
Note to CA3_/system instelle£
Thie reminder is provided to callthe CATV system inStallers
attenbon toArttole 820_K3of the NEC thatprovides
guidelines for proper grounding and, in pad[cu_a_specifies
that the cable ground shaJJbe connected to the grounding
system Of _hebuilding, as close to the point of cable
as prac_Cal.

CONNECTIONS
TABLE OF CONTENTS
CONNECTIONS
ConnectionsChecklist................ 5
Frontang RearPane_D_agrsms .......... 5
Cable & VCR Connections............. _ 6
Connectmg to a DVD Player............. 7
Connecting to aCamcorder............. 8
Connectingto an ExtornalAmplifier......... 8
Connectingto JVCAV Compu LinkEX
CaPable G_npcnents ............. 9
GETTING STARTED
RemoteControls......... : ......... 10
Power......................... 11
AdjustingVc4urne .................. 11
ChangingChannels ................ 11
Seleng the CATVand VCR codes ........ 12
MENU FUNCTIONS
Symbols Used in thisGuile ............ 14
Onscreen Menus................... 14
Plug InMenu ..................... 15
Language
AutoTunerSetup
Set C,_ck .................. 16
Finish
Inibal Setup ..................... 17
Cha_nst Summary
Channel Guard-Lock
V_hip .................... 18
SetLock Code .............. 21
PfctureAdjust .................... 22
T_t
Cok_
Picture
Bt_ht
Detail
Noise Mut#lg
Set VideoStatus
Sound Adjust.................... 23
Treble
Ba_,_e
MTS (Mul_annst Stereo Sound)
Some SoundAdvice
Clock/Timers ..................... 24
On/Off Tkner
InitialSetup ...................... 25
)3/Spea_r
Aud_ Out
Cm'_ooner,t-/n
Ck;_sdCaptk:w
BUll"ON FUNCTIONS
Menu Button ..................... 26
Exit .......................... 26
Display ........................ 26
Video Status ..................... 26
Sleep Timer ...................... 26
BBE .......................... 27
Hyper SurrOund................... 27
TV/Video ....................... 27
100+.......................... 27
VCR Buttons ..................... 27
Muting......................... 27
Return+....................... 27
Number Buttons(10 Key Pad) ........... 27
PIPOrVM_ve ..................... 28
Freeze......................... 28
Swap ......................... 28
Channel -/+ for PIP.................. 28
Source ........................ 28
APPENDICES
Troubleshooting................... 29
umited Warranly................... 30
AuthorizedSor_k:e Centers............. 31
Spec fflesticP..s.................... 32
CONNECTIONS CHECKLIST -- READ ME FIRST!
1) Refer to the €onnection Inntructlons In the uler'l
guide for each component you plsn to connect.
They will provide more detailed informs[ion about
their products, and they will tollyou what plugs and
cables are mquirab.
2) Most AN input jacks and plugs sre cntor coded:
• Yellow plugs are Video connections
•Red plugs are fo_Right Audio connections
•Whha plugs are Left Audio (Mono) connections
3) Pertorm oils hookup nt idine.
if you have many accessories to connect, make sure
each connection is correct by checking to see that it
works propeity before attempting the ne)d connection.
(For example, eiweys start with the RFor Cable
connections, make sure it WORKS.IP_n move o_ to
video or VCR connections.)
4) Unplug the power cord between each connection.
5) Each Jack on the back of the TV is labeled. If you
resd these irmb_cticqlsand still do notfully
understand the connectio_ process, seek
assistance.
RF Connectors
S-Vldeo Plug
0
AN Input Plug
AV Compu Unk Cable
6) The/IV Compu Unk Cable hi supplied with the
JVC devlce which you want to (=ollneCL If you do
not have one, but you do have aJVC Compu Link
capable VCR o{ HiR, contact your locei JVC deaJe_
FRONT AND REAR PANEL DIAGRAMS
FRONT PANEL DIAGRAM
AV-32D500 • AV_2D200
AV-27DS00 • AV*27D2CO
REAR PANEL DIAGRAM
AV-32D500 •AV-32D200
AV-27D500 •AV-27D200
CO

CONNECTIONS CONNECTIONS
CABLE & VCR CONNECTIONS CABLE & VCR CONNECTIONS CONTINUED
1) Comnect cable or _'derlna RF wire OUtfrom the wall, /n to the spl_er RF ir_lJL
2) _RF wire o_t from the splto_r RF output, in to t_e VCR RF input.
3) Cormem RF _re out lmm the sptl_r RF e_¢, _ to the TV VHF/UHF _ut.
4) Connect yellOWvideo o_ble out f_om the VCR Video ou_p_Jt,in _othe TV Video Input jack.
5) Connect while audio c_le cut from the VCR Le_ Audio output, in to the "IV LeftAudio input j_ok.
6) P__nect red su_o cab_ o_ from the'K:R Rg_ iu,_ro ouepu_.,_ to_.e W ._X Audo _ _
Off your VCR is mono # llas cn;y one audio out jack, connect it to TV L/Mono _uL
1) Connect Cable RF wire out from w_dl.in to splitter RF input,
2) Cc_nect RF Gutfrom splitmr RF _tl_Jt, mto cable box RF input.
3) Connect RF wire c_ from cable box RF output,/n to VCR RF input.
4) Connect RF wire out born Sl_ttte_ RF output, in to TV VHFtJHF input+
5) Connect yellow video citableo_ born VCR Video output,/n to 33/Video input iack.
6) Connect white aUdio cable ou/from VCR Le_ audio output,/n to 1_/Left Audio input Jack¸
7) _ red a_o ca_ _lcm V_ _ _:_o o_,ut, ,_ to 1V _ght Audio i_c_t_ac_
[_ lf your VCR ;s rnono it h_s or#y orm _udio outjack, connect ffto TV L/Mo_ input.
CONNECTING TO A DVD PLAYER
1)Connectthecab_eRF wlreoutfromtheweJl,k_tothe cable boxinput.
2) Coe.r,actRF_,_eoutfromthecablebox P,Foutput,_ _ theVCR RI:ircut,
3) ConnectRFwireoutIron tt_ VCRRFoutput..,ntothe1VVPIF/UHFInput.
4) Cormecty_lowvldeo cablecutfromth_ VCRVtoeoo_Jtputinto theTVVldeo inputjack.
5) Connectwhiteaudio cableoutf_cmtheVCRL_I_audiooutput.#__ _ W_ _ _p_ _.
6) Connectr_ audioca_ out_omtheVCRRi_ AL_OoutpC,into_e WRohtAudoin_t jack,
Oif y_urvCR Ismonoit hason_/oneaudiooutj_k. cm_ct # to 71/La4onoinpuL
1)ConnectgreencableoutfromDVD playar"y" video_Jtput, into 13/"y" componemtinput.
2) ConnsctI_uecabk_outfromDVDI_Yer "PB",_icieooutput,intoTV "Ps"c_rnpo_entinput.
3) Connect_edcable outh'omDVDplayer"PR"v'=deOoutput_in to1_ _PR"_omponentinput.
4) Connectredaudiocable outfromDVD Leltaudiooutput,.$1to TVLeftAudioinput2.
5)Connectwhiteauto cableo_tfromDVDRig_audiooutp_ _to IV RightAudoInput_
£3Green.blueandr_d are t_emostcommoncolc_sof DVDcable_.&xne modelsmayvarycable_ors. please
cor,_ theu.se_matwalforyoutOVOp_yer formo_ein_+
OBe carefu/nottoc_fuse #'mredDVDcab/em_ththe redaudioGutputcab/e,lt _ _ _ _ _ set_
c_'mec_ns (DVDor audiooutput)befotmstatt;ngtoe otherto_void accidenta__wtct#ng _ _$.
OPleasesetth_ COMFONENT-/Non the/ni_WSatupMenu fo 'yES"v,_enever_connectaD_ _a_

_CONNECTIONS
CONNECTING TO A CAMCORDER
CONNECTIONS
CONNECTING TO JVC AV COMPU LINK EX
CAPABLE COMPONENTS
1) White audio cable out from carncorder, in to TV Left Audio input jack.
2) Ye_towvideo cable out from camcorde_ _ to TV V_deo input jack.
3) If you have astereo model oamcorder_connect the Red Audio cable out from the Carncorde_ in
to the TV Right Audle input jack.
TO CONNECT TO S-VHS ACCESSORIES:
Keep the audio connections the same as for a non-S*VHS VCR or camcorder (above), and use the
special S-VHS cable that catTm withthe VCR or Carncorder.
! ) S-VHS Plug out from VCR. in to TV'SS-Video input.
CONNECTING TO AN EXTERNAL AMPLIFIER
NOTE_
A) The AV Compu Link EX cable has a male 3.5 mm (mono) mini plug on each end.
B) If your JVC brand VCR has A Code/B Code Refrtote Control Switching (see your VCR instructions),
using VCR A Code wi]] switch the TV to video Input 1. If you use Input 1 for Video out frownthe
cable box, use Input 2here. Using B Code will switch the TV to Video Input 2.
C) Toconnect a JVC HiFi receiver or amplifier for a completely automated home theater, see the HiFi
receiver's instructions for detailed hookup diagrams.
• In order for the VCR to start playback automatically, the recording tabs must be removed from the
VHS tape. ff the tab is in place, aut_natic switching starts when you push the VCR P_Y button.
"AV COMPU LINK EX is compatible with the following 1998 receivers: RX-664V, RX*665V, RX-774V,
RX-884V, RX-1024V, and later _tver models.
"** Please consult the user's manual for your JVC DVD Player on how to connect a JVC DVD Player
using AV Compu Link EX
1)'v%_iteaudio cable out from TV Left Audio output jack, in to Amplifier [Left] input.
2) Red audio cable out Ifom 33/Right Audio output jack. in to Amplifier [Right] input.
NOTE: A) Set the T,/Speaker to OFF(page 25). switchthe audio output to VARI (page 25), and adjust
the soundwith the TV remhte_ VCt.UMEbutton.
Gq

IGETTING STARTED
REMOTE CONTROLS
RM_-343 RM-C342
AV-32D500•AV*27E_00 AV-320200 • AV-27D2(X)
CHANGING THE BATTERIES
Be sure to use on/y size AA batferfes.
]Push down on the remote's back cover and stide
towards the bottom to remove it.
]Insert the two supplied AA battaries, carefully noting
the "+" and "-" rrlarlengs on the batteries and remote
control.
] TOavoid a shortcircuit, insert "-" end first. Slide the
cover back into place (until it clicks into position).
0If the remotBcontr_ a_ts erratical, tepfece the bat_fies.
Typical battery life i_ usuaJ_ about six months to one yeaK
£3 We recommend alkalinebatteries for a fenger battery life.
NOllE:
When you change the batteries, try to complete the task
w_in 3 minutes, ff it takes leng_r than 3 minutes, the remote
control c_des for yourVCR and/or Cable box will have to be
reset (page 12).
GETTING STARTED
POWER
OMake sure that the TV/CA_/sw_h isset to TM Switoh to CAW _Jy to operate a cable box.
£3 pressthe Powm button cn _e remote contrc_ortheTV front penel. The On T, ner letup wili glew rod.
OThe first time you turn on the _ the "Rug In Menu" will appea_ you should turn to the Plug In
Menu section (page 15) nowto learn more abo4Jt this menu.
To turn the power off, press the Pow_ button again. The On Timer Jampwill go out.
OWhen the TV isoff, the OnTimer lamp remains on while the On/Off Timer function is active, but at a
reduced brightness.
ADJUSTING VOLUME
[] Use the V__UME-{-_ buttons ( •• ) on the front panel or remote control. Use the VOLU_E-(• )
button to lower the voJume.Press the VOLUME÷button (• ) raise the volume.
:::::::::::::
]Press the MVnNGbutton to instantJy torn the volurne off to zero. To restore the volume to the
previous volume level, simply press the MU11NGbutlon again.
CHANGING CHANNELS
[] lO_ dl_ =:_.
Press the numbers on the rernote_ tO key pad. For single<tigit channel numbers press 0 then the
number. For chennels above 100, pre_ the 100+ button plus the 2-digit number.
[] ChIHyl_w _mn button.
*Ibs_n tbed_ one _ a free,pressthar_'s C_ So_ bu_ 8_d re_.
•To_an mrough the chr, neb ray e/_dy, h_d dovm theremote's C_,#,-M_m,Sc_ I:x_:_.
Ntef two channeb goby at hemal speed,_e n_t of1hechanr_ v_llspeed by atthe rate@f_
chonr_ p_ _ You_I n_ seei_ _ thechonn_ mty thechoag_ng_ nurnbem_
theho_om ofthescm_
[] Return.
Press and release the RE_JRN+button tOreturn to the previous channel. First, select achanne_
(game #1). Then, select another channel (game #2) with the 10 key pad and push the RE1_RN+
button to flip directly back and forth.
[] Return+.
Press and hold down the RETURN+button for three seconds. The message, =RETURN CHANNEL
P_OGP.N_MED !" witt _pbaar and you cart scar_as you wisP,.Press _+ again a_d you will go
back to the Return+ channeL
Tocancel a Return+ channel, press and hold down the RE']_IRN+button for another three seconds
and the _age, "RETURN CHJ_NNEL CANCELLSD !" appears.
0Pressing a number key Ortemlng the set off v_/siso cancel a Return+ channel

GETTING STARTED GETTING STARTED
SETrlNG THE CATV & VCR CODES
CABLE BOX OR SATELLITE SETUP
Theremote is prog_ w_ththeCATVaqd Sa_ifte codes fcr poweron and o_ 10key,and _lannel up
and down.
1) Determine the correct code from the "CATV&SatelliteCodes" chat betow.
2) Slide the 2-Way Mode Selector Swftchto CATM
3) Pressand Se_ddown the DtsP_Y button
4) Enter the 3-digit code withthe 10 key pad while continuingto hold down the DtsPt_ybcttc_
5) Release the D_Pu_ybuti_n
6) Confirmthe operation of the cable box,
Note : if your cable box or satellitebox does not respond to any code _1 the chart, use the Search
Codes FunctJonbelow
CATV & Satellite Codes
GABLE E_J_ COOE8 _UlLE BO)3_ CODIW
N3C 024
0G2, 0_
061,032
_2 r O51
068.069
D_mor_d 024, _2. 025
=Jgb aZ9
3C Brand 062, 061
_r#r_ Q22. 043
021r ¢_21057, _3
040. 041. _42. 045
049. _24
055,024,023.026.021,0_.
021. 022. _7. _
049. _0, _t. 064
m0_0
_oV_ _e Q_2, 051
_ma_Nc _, 0_6_ 0_0
_a_n 063
O28. 029. 0_0, 0_2, 0_3. _31,
0_
_omw 0471062
Search Codes Function :
O32
)CA 06f
kML"_¢ 032
I=ga_ 05B. 064, 040. 041. 042, 04&
P_T, brmdt 037, 03_ 051, 038
051
S¢_t_ A_mta 057. 058. OS_
051. 047
032, _61
Tl_lpbo_ O67
Tm 047.061
_=_¢_m O44
_50
632, C_25
_2. 032
029, 030
Z_ 063 r 046
Zeq_l,_ O46
SmelUte
€_ffAL
E
B
ECh_W 100
Q_. 106
112
K4tm_ 1_4_ 111
I-II_ (HUO_ 104
Pmmmr4c 1_
Phr,_ _0_ 103
106,109, II0
107 ¸
T_th_l 101
tJ_dm 1_, 1_
COOBS
1) Slidethe 2-Way Mode Selector Switchto CATV
2) Pressthe TV power and RE1URN+buttonssimuifaneouslyfor more than three seconds,then release.
3) Pressq[3/POWERand check if the accessory respa_ds.
4) Iftherew_.sa respanse,pressRE_eN+. if the_ewas noresponse,repeatStep3 un6lIsereis a_. if
you repeat Slep3 rnorethan 70 timesaod there isstil_no re_, use$_eeccesso_ remote.
VCR SETUP
The remote is pre-programmed with the VCR codes forpower on and power off, pla_,,stop, fast-forward,
re.rid, and chenne/ up and down.
1) Determine the correct code from the "VCRCodes" chart (below).
2) Slidethe 2-Way Mode Selector Switch to TV.
3) Pressand hold down the DtsP_y but_n,
4) Enterthe 3_[gif code ',_,iththe 10 key pad while continuingto hold down the D_SFL,_¥button.
5) Release the DtS_¥ buttc_.
6) Co_firm theoperation of the VCR.
£3 When you record achannel, press the PLAYbuttonwhile continuing to hold down the RECbutton.
Note : If yourVCR does notrespond to any code on the chart, use the Search Codes Function below,
VCR Codes
vcP_I (_o_E8
_in_r_ O3S
027_ 0_2
029072.073.074
vJd*OC*_am_ OO30O6
_e_& Pim_ 063, O71
_4
_rlJg 0_. 029, 064
_is Ma_es 045, 024, _7
VCRI CODE8
064,
WGA _3& 040. 047. 048, 041 _?
058,045
038. 040. 047, 048. _41,042,
078, 090
047 r 027, 062
_4._3
VCRS CODES
S=r_zuno _37, 0_, 062, 033, 0_
Sanyo 063. 067. 091. 071
0_). Q_I. Q62, 067. 0_. Q40.
075
_g.lture 2_00 02"/,005
$1no_r O75
_oqv
_mt.oo 043. _. _Q4
043. 026, OTT, 061. ¢_25,04,_
Q_O1078
umd 027. _6. 020. 000
;E 003. (_4& 024
;G_ '*'ldeo Q_7. 051. 044_.0_0. Qe9
,3ok_a_r O64
G_m_ 06& 064. Qel. 000. 001
Hltad_l CQ3,045. Q_8. _'7. Qel
In_Zr, tRechw 024, 0_3
JenReq
,NC 0_0. _01. 002. 00& 0C4. _6
K_w.r, od 00& 004. 064. 0_
O67
028. Q21. _. 064
Q26 _Q0
hmn_y C24. _, 045, 0_3, 00_, 004,
O43
C,4& (_8. ¢,23._,Q4.031. C4&
05& 060. _33. _Z_7
X,_t er 021,022r Q_3, 0_4
Iw_o S_'k 03& O24. 083, 03& 067 ,C40.
O27
ICA _. 04& 068. _Q3. 024. 031.
046, 06_. 060. _. 0eS. _7
_/2(_0 O27
S_a 0311 _l o24r _7
r_o o64
r_ O21,_2, _3,o24
r_dka 024 _7 0"/0
ro_ba 069. 046 O79
/e_or Re_*_=_ OO5
(_5. 036. 067. 044. _1
(m_ha 0_3, 0_, 004. 005
!_ 044.082.064
Search Codes Function :
1) Slidethe 2-Way Mode Selector Switch to TV.
2) Pressthe VCR Pow_ and R_+ buttons simultaneouslyfor morethan three seconds, then release.
3) Press VCR Pow_ and check if the ac_essoq_responds.
4) Ifthemwas a _e, pressR_J_N+. If themwas no response,repeat Step3 untilthere is a response.If
you repeat Step3 rnc_e_a_ 80 Urnesand there Is stJllnoresponse,usethe acce.ssowremote.

_ _ THE ONSCREEN MENUS
THE 81fMBOLS USED IN THIS GUIDE
&_f V'.rflSnEN_"yOU _e Up and down arrows _sth_
book, press the M_'_U UP or MENU DCWN buttofl to:
• Move verlJcally in the main menu.
• Move through a _Jbrnenu.
• Move to the next letter. I1umber. or other Ghoice
in 8Subrnenu. (x
•Back up to co/rBct an error, or
• Channel Up o( Down
Whenever you see lef_and hght arrows, press the
MENU L_T or MENU P,_ button to:
•Select the highlighted item, cf
• Select the options in a submenu, (x
• Volume Up or Down
(_ Tr_ "P_ss Bud;ton" me_,ns yo_ _ Hess that
button c_ the remote cOnvol
The 'He_ping Hand" points to the highlighted or
seated _ecr__r__ re_r_.
To ule the Menu. press the MENU b_3on and then use
th,e &V _mci 41b" buttons to move around the menu.as
descr_t:ed _bove. it ym_ com_nt;e p_ss_r,g th,e M_'_U
button, the display will skip t_ the next menu screen.
N_. Ttte menu screens shown m this boo_ are
representations of the menu screens On your s6t,
not exact rep/iGation$,
The*PiuglnMenu"ony appears#_ h_t_ttimethe
TV_p_ug_d{n
+
V,d_
mm
_rA
PLUG IN MENU
PLUG IN MENU
ca/Iv when you firstturn on the 73/after
ptuggJngit in. The Pug In Menu sets the
default preferences for you for:
_3]he Language in which you want the
onscreend_sp_ys_ e.ppe_.
0The AutoTuner Setup ofchannels to
be included in sc_q.
0Set the clock to the ptope_ tJrneso
that yourtimer functionswillw_k.
LANGUAGE
_ur J_ _ev_ _tiows_ _o
choosefromEnglish,French,or Spanish
omscrsenmenusand displays.
_kY To LANGUAGE
• • Tochoose the language
AUTO TUNER SETUP
During Auto TunerSetup, the TV will
automaticallyscan _rough all available
channels and memorize the active ones
so that _en you scan, you do notpleti
up weak or no_ channels.
&V ToAUTO TUNER SETUP
• • Tooperate
• • To choose CABLE or AIR
&Y To move to START
• • To start pragramrning
Ftq2_g takes apptoxknat_ty
1to2mmu_s
No_ No_se Muting w_tr_, work whys
Auto Tuner Setup is _rking.

(D
PLUG IN MENU
SET CLOCK
The C/_k _ theheart of all #met
funcll_,s, The c/Gckmust be set
before the timer functions v,ork.
&V To SET CLOCK
• • To operate
• • TO setthehour(AM/PM)
• To move tominutes
• • To settheminutes
• To move toSTART CLC_K
when done withsettings
• • To starttheclock
CLOCK _ON/OFF TIMER
MESSAGE
If you do not set the clock but
attempt to use the On/Off Timer, you
will get the following message:
FINISH
Once you have set up the items in the
Plug/n Menu you must select Finish.
&• TOFINISH
••Toexit
Note: Y_J can resst tho preferences that
you set here in the Plug In Menu via the
regular JVC Menu system.
<1•To set the hour (AM/PM)
•To move to minutes
• • To set the minutas
•To move to START CLOCK
when done with settings
• • Tostart the clock
CHANNEL SUMMARY
You can add or delete channels from
channel scanning. Youcan also k;ck
out any "unauthorized"viewers from
one or up to all 125 channels.
(_ Press the MB_tj Button
&• To CH/C_NELSUMMARY
• • Tooperate
Note: Noise MutJngwill not work while
you are inthe Channel S_mmary menu.
Youcan manuallyset chanr_.s to scan
63atwere too weak to be piskeciup
dodng Aufo Tuner Sstag. Con•seedy, if a
channel was too weak to _ a good
_lure but was picked up anyway,delete
it by remo_ng the _L(If you have not
pe_ _e Asto TO_erSetup
doscribab on page 15. do son_v.)
(_ _ -/+ to se_ct the c'nannel
&• To the SCAN column
• • To include or delete from scan
I_ Exrrwhen finished
Note: Channels set to scan will be
marked with an -_.
Note: S_ne cable systems experience
interference from radio frequermie6
Cable Channel 95. If you like, you can
delete this channel from scanning by
removing_e q.
Comft_u_t a_ove...
INITIAL SETUP
CHANNEL GUARD - LOCK
&• TOCHANNEL SUMMARY
• • To operate
&• TOthe L.cx_kcolumn
The access code zero (0) to
lock or unlock that channel
Use the CHAN_L -/+ button to go to any
othe[ channel you want _olock
(_ EXIT when finished
CHANNEL GUARD MESSAGE:
This message appears when aviewer
attempts to watch a guarded channel :
Towatsh a channel you have iscked,
enter the lockcode ualngthe 10 key pad.
If the wrong lock cede is entered,this
message will appear:
Note_ See _SetLock Code'_ for more
information_

,-=
_ _ INITIAL SETUP INITIAL SETUP 1
¥.CHIP
Your7Y is equipped with V-Chip
program y_r TV to rece_, or not recer_,
Whana v_ewerat_r_o_ fo wafoha
btod<edchannel this message appears:
To watch a channelyou have Iocked_enter
thaldck cede ualng_e lO keypab_
To set up the TV Parental Guideline
Ratings...
I_ Pressthe IvIFJ_13utton
&V TOV-CHIP
• • Tooperate (Lock icon appears)
_) Pre_ _ fo _ V4_ip menu
• • To turn V-Chip ON or OFF
&V To move _ Sk_r JV P_TINGS
VIEWING GUIDELINE8
V_V LSfor V]OL_CE IFANTASY ViCL_CE
_1 S stands f_ SEXUAL CONTENT
OL stands for strong LANGUAGE
_1 D stands for suggestive DIALOG
U.S. PARENTAL RATING SYSTEMS
Programs with the following Ratings
are appropriote for Children.
07VYIsApl_forAJlCidldmn.
Programs_'e created forvery young
viewers and should be suitable for all
ages, inclediog childrenages 2 -6.
OTV "It'/is for Older Children.
Most parents would find such
programs suitable forchildren 7 and
above. There may exist some mitd
fantasy violence or comedic
violence. Children should be able to
discern reality from fantasy.
Prognw=.eh Uwfo,_w_ RaUn_
areappropd_e for _e _=#re aud/_€_
TV G stands for Gener_ Audkmce.
Most parents would find
programs suitable fo! all age groups.
contain lit'deor noviolence, no
strong language, and littleor no
sexuaddialog or situaitons.
[3 "R/PG Parental Guidance
Suggested.
May contain some. but not much,
strong lenguage, limited violence.
and some suggestive sexuat dialog
or situations. It isr_dab that
parentswatch these programs first, or
withtheir children.
_3 TV 14 Parents Strongly Cautioned.
Progr-'on_conteJnsc_n:ematerial
mayha unsuitablefor children unde"
the age of 14 includingpo_ible
intenseviolence, sexual situations,
strongcoarse language, or intensely
suggestive dialog. Parentsare
against unattendedviewing
by chilofe_ under 14.
OTV MA Mature Audiences Only,
lbese progran_ aresbecificallyf_(
abuits and may be unsuitablefor
anyone uaber 17 yeansof age. T',/MA
p_grams may have extensiveV,S, L.
_rD.
DWecUorLsto Block Viewing:
Une up the cumor inthe column(_/
PG, TV G. efo.) with thecontent row
(V_ & etc.) and pmsstha AorV to
move the cursorld tha correctIoca_n,
and press <1or I="to turn the locking
feature _n or off.An item is kx:_ed ifthe
iconA appears instead of a"--'.
An example. To block viewers under
14 from _11shows:
Move the cursor to the top row of that
column and add a lock icon. Once
you've put a lock on the top row,
everything in that cotumn is
automatically locked.
&_r To the TV 14 Column
• • To turn on the lock
Press Ex. when done
No_: If you want to change the
setup, move the cursor to the top
COlumnand change to 'J and then
you can select individual catagones
to block.
To set up Movie Ratlng_s...
(_ Press the MENUbutton
&Y TOV-CHIP
• • TOoperate (Lock icon J_J
appears)
(_ Press ZEROto access V-Chip setup
options
&V To SET MOVIE RATINGS
• • To enter movies menu
0NR - Not Rated.
Ttlis is afilm that has no rating. In many
cas6_ these filmswere i_ fro_
o_m counttios.Othe"NR finnsm_y be
from amateur Woducem who didn't
intendto have their flk'nwibely raleesab.
NR (Not Rated) Programming may
contain all types of prograrnming
ldc/udiag chhi/dren's programming,
fc{eign programs, oradu# mat_aL
OG - General Audience.
In the opinion of the review board.
these films contain nothing in the way
of sexual content, violence, or
language that would be unsuitable for
audiences of any age.
OPG - Parental Guidance.
Parental Guideance means the mov_
may contains_me co, tentssuch as mild
vk3lence,Bornebriefnudity,and sl_Ong
language. The contentsare notdeemed
intense.
0PG-13 - Parents Strongly Cautk)ned.
For parents withchildren under 13,
they are cautiOned that the content of
rnovle_ withthis rating ismore explicit
in sexual, language, and viofence
content than PG.

INITIAL SETUP
0R Re.rioted.
These films contain material that is
explicit in nature and is not
recommended for unsupervised
children under the age of 17.
0NC-17 NO One Under 17.
These rTx_es am _nalpered what m_t
parents wouldfeel is too adult fo_thor
childrento view and can consist of strong
language, nudity, _otsnce,
suggestiveand ex_icit subject rnattets.
0 X NO One under 18,
Innappropriate for anyone under 18.
D/mctlonB toBlock Movie Vlewlng..
Inordertoblock"viewersfromar'_or811of
thesesortsof contents,pressthe
Aor Vto move thecurse"tothecorrect
l_taln,and press•or •totornthe
l_king feature_ or off.An itemislocked
if_e _ iconappears insteadofa -m..
To blockviewersunder X and NC-I7
ratedfrom shows:
&V To theXColumn
• • To tornon the tsck
m
&V Tothe NC-17 Column
• • Toturnon thelock
i
q_) Pre_sEXiTwhen dOrle
AboutUnratedPrograms:
Unrated p_gramming refers to any
ptograrnmfog that does not contain a
rating signal. Programming on tatsvision
stations which do not broadcast ratings
signal will be in the "Unratad
Programming" category.
Examplesof Unrated programs:
Emergency Bulletins
Locally o_iginatad programming
News
PoliticalPrograms
Pub(ic Service Announcements
Religious Programs
Sports
Weather
Some Commercials
Note: TV programs or movies that do not
have rating signal will be blocked if the
Unratod Category isset to LOCK
DIrecUm_ to Block Unrat_l Programs:
You can block programs that are not
rated.
(_) Press the M_qu button
&Y TOV-CHIP
• • TOoperate
Press Z_O to access V-Chip setup
options
&V To UNRATED
• • To View o_Block
(_) Press EXiTwhen done
INITIAL SETUP
Accessing V-Chip Informa#on:
Toaccess Rating information about a
certain program, pre_s the V-CHI_ button
whileviewing that program, this appears:
If you decide you want to block this
category of viewfng, press '0" while the
above screen is visible, and all programs
from that category will be locked.
F.xampleI:
If you want to set your V_;hip settings to
block all programming above TV PC:
Press 0 (zero) when TV-PG is
diSpLayed
All Programming above TV PG will
be blockap!
Examp/e2:
If you want to set your V_hip settings to
block all programming above a current
setting such as TV PG*V (with vioisnce):
(_ Press O (zero) when W_F13- V is
displayed
All Programming above TV PG with
Violence will be blockedl
Nota:
For Childrens programming you can
block TV-y and Y programs by
Pressing "0" when Y is displayed
during a program. Programming for
audiences Otherthan children_
audiences will not be affected.
LOCK CODE
The Lock Code locks and unk_cks
Channel Guard and V_hip settings.
Wr#e this four digit number down and
keep it safe!
_) _ tha M_lu buti_
AV To SET LOOK CODE
• • TOoperate
a
The padlock icon appears
ZEqO(tha access code iszero)
• • To choose the number
&V TOmove to the next place
Continue to followthese directions for
all four numbers
&Y TORNJSH
• • To save settings and exit
Note: If you for'orgeletthe Lock Code
you can set another one this same
way.
Note** After a power interruption you
must reset the lock code.
,=_.

PICTURE ADJUST
TINT
Adjust the levels of red and green.
(_ Pressthe MENUButton
&V To TINT
•To accentuate green
•To accentuate red
&y To move to the next
COLOR
Adjust both the vividness and sub_aly
of #le cok_
(_) Press the MENUButton
AY To COLOR
• To make colors more vivid
•To subdue colors
&V To move to the next
PIOlFUNE
Picture allows you to adjust the
picture_ range of black and white.
Pressthe MENUBu_on
TOPICTURE
•To increase contrast
•To decrease contrast
&V TOmove to the next
BN/@NT
Adjust the degree of fight and dark.
Press the MFJ_ Button
To BRIGHT
•To lightenthe picture
•TOdarken the picture
AV Tomove to the next
DErA/L
Adjust the level of detail in the picture.
(_ Press the MENUButton
4,y To DETAIL
• To make the picture sharper
• To make the picture smoother
Ay To move to the next
NOISE MUll3NO
Inserts a blue screen and aliminates
r_ise from channels that are not
broadcasting o[ are too weak.
Pmss rne Me_J Buttc_
&V To NO_SEMUTING
• • To turn ON/OR:
Note: Noise Muting will not work
when you operate the Auto Tuner
Setup orChannel Summary,
SET VIDEO STATUS
Save a set of Picture Set_ngs and
access later as "Choice".
_) Press the MENUButton
&y TO SET VIDEO STATUS
• • TOoperate
•IP TOoperate the TINT opUon
kY To move to the next option
Repeat_e abovsstepstoseteachopen.
Ay TOSAVE AS CHOICE
• • Tosave settings and exit
Note: Access your "Choice" settings
by pressing the VIDEOSTA_JSbutton
on the remote control,
BASS
Tne Bass _ve/ adjus_n_t fea_He
allows you to raisa or lowsr P_e leval of
Iower _ _ #Te71rs sound.
(_ Press the MENUButton
&V To BASS
•To emphasize bass
•To reduce bass
AV To move to next
TREBLE
_e Trab_ _ edjus_ent feature
a#owsyou to ralse or lov_ tha levalof
high_ _c_s _ _e TVs sound
Press the MENUButton
AY TOTREBLE
•TOemphasize treble
•To reduce treble
AV TOmove tonext
WeE
The Balance adjustment feature
allows you to cenatr the T_ sound
to yc_r needs.
(_ Press the MES_JButton
AY To BALANCE
•To shift the speaker balance
to the right
•To shift the speaker balance
to the left
&lr To move to next
SOUND ADJUST
MTS (Mul_.hannel
Television Sound)
MrS t_chnalogy gives you a choice
among stereo, _, and Second
Audio Programs (SAP).
(m) Press the MEe,'UButton
&y To MTS
• • Select the mode
(Ti_eONA/R a_rowtelL_y_u ff
rhecutrentsignalcontalns
Stereoor SAP)
Note: Keep the TV in STEREO mode
to get the fenest sound
quaJity,
Note: SAP will allow you to hear an
alternative soundtrack, if
available,
Note: Choose MONO to reduce
excess noise in a program or
channel.

CLOCK/TIMERS
ON/OFF TIMER
YOU tell the TV to turn on and off
Use it as an alarm to wake up, as a
program reminder, or to simulate that
you*re home when you're out of the
house.
1_ Press the ME_qUButton
,kV ToON/OFF TIMER
• • Tooperate
• • TOset the hour (AM/PM) you
want the TV to turn on
•Tomove to minutes
• • Toset the minutes
• Toaccept ONTIME and to rno.,e
tuOFFTIME (sat_ne agan)
• To move to CHANNEL
• • To select channel
• To move to MODE
• • Choose ONCE or EVERYDAY
• To YES NO
<1• Choose YES for on, NO for off
• To FINISH
• • TOsave settings
Note: in order for ON/OFF Timer to
wed<,the clock must be set. After e
power interruptionthe clock will be
cancelled.
Note: ON/OFFTirner cannot be set
to locked or guarded channels.
Note: ATimer Preview window
(D-500 series only) will appear in the
PiP. lower right corner of your
screen. 7 seconds before the Timer
changes the current channel to the
timed program channel.
p
Timer activates
(Preview of ON/OFF
Timer program)
2"s_onde tater...
4
Timer activates
INITIAL SETUP
TV SPEAKER
You can listen to the TV speakers, or
if your set is c_nected to astereo,
turn them off to listen to the ster_
speakers,
(_ Press the MENUButton
&• To TV SPEAKER
• • To turn the speaker ON
or OFF
Exfr when finished
NOte: TV Speaker will be cancelled
after a power interruption.
Note: Beforeyou set TV Speaker
from Off to On, make certain thot
the volume kivel Is IowJ If the
Volume is high, the sound will be
extremely loud when you turn iton.
AUDIO OUT
Select fixed level or variable level
audio ou_outsignals,
I_ Press the MENUButton
&• TOAUDIO OUT
• • To VARI or FIX
VARI: Adjust the volume of the
external speaker by using the TV's
V__UME+_ button or remo_ control.
FIX: Adjust the volume of the
external speaker withthe audio
device controls.
Note: When using exlerneJ
amplifiersand speakers, shut off the
TV Speakers (above).
COMPONENT.IN
Get the best quality video from your
DVD player by using this setting and
the DVD inputs at the rear of the
television. Set the Video2 input either
to the component input (for DVD)
"YES; or to the composite video input
(for a reguler VCR player) "NO_
(_ Press the MENUButton
&• TOCOMPONENT-IN
• • TOturn theinput ON
or OFF
(_ E_ff when finished
Note: For more information on
connecting a DVD player, see page7.
Note: This function is to be used
with DVD players only, For
connecting VCR's, see page 6,
CLOSED CAPTION
ff they are included ina program, you
can view closed captions or text
information.
(_ Press the MENUbutton
&• TOCLOSED CAPTION
• • To operate
• • TOselect CAPTION, TEXT orOFF
&• ToCAPTION or TEXT
• • TOselect a caption (CCl to
CC4) or text channel (TI to T4)
• To accept that selection and
move to FINtSH
• • To exit and save settings

BUTTON FUNC
MENU
The MENUbutton a/tows you to access
the onscreen menu system. Another
complete discussion of these butter,s
and the menu system is located on
paget4,
Once you press the menu button, the
CHANNEL-I+ ( &V )and VOLUMe-/+
( 41_ ) buttons work to operate the
menu system.
• Press (&y )to rr_ve up and down in
the menu system,
•Press ( ,<b- ) to operate afeature in
the menu systarn.
The FXITbutton lets you leave the
menu system or tom off PIP when you
ptess iz
DISPL&Y
Theenscrean display shows the current
status of timers and inputs.
DtSPLAy
CIT]_echanr_ or AV input (Oh. 07)
QCurrent time (12:20 PM)
Q Sleep Timer ndnutesremaining (Off)
[3 On/Off ]3rner status (Everyday, on at
;_00 PM, off at 1_00 PM)
Not=: Each press of the DtSPLAybutton
changes the display mode:
If you select time or channel, the time
or channel (or video input) will remain
on the screen.
TIONS
VIDEO STATUS
The V_o S_JS bUttonlets y3u select
_e "Choice"satticgs of t_ Set Wdeo
Sletusrr_enu,or reset tufactorysattJngs.
=b"tar_ard" resets the picture settings
to factory standard levels,
"ChoiCe" consists of the settings that
you sg.vedin the Set Video Status
menu, page 22.
"Th=mter" for afilm-like look to video.
(_ VIDEO STA_JS
Wlr11111_
The Sleep Timer will turn off the TV for
you in case ycu fall asleep. Pn_ram tt
to workin inte/yalsof 15 minutes up to
fSO mlnuats.
SLEEP TIMER MESSAGE:
20 seconds prior to the automatic
shut-off, this mesaage will appear:
Youthen have 20 seconds to press the
Sleep Timer button to delay turn off for
another 15 mtt_t:to&
BUTTON
BBE
BBE high definitionaudio adds natural,
clear and extracrdinary sound to any
program.
JRfPER SURROUND
Create a deep, 3-dimensional sound
effect by channeling the sound through
the TV's front firing speakers.
I_ HYP_ SURROUND
TV/V#DEO
TV/V_o controls the TV's input mode.
100 +
The 100+ button lets you access all
channels above Channel 99.
To move to Channel 124:
(_ 100+
_) 4 (f_Jr)
VCR Iltrl'ro_t_l
This remo_ will controly_ur VCR. You
can play, rewind and fast.forward,
feceS, pause, stop, move channel up
and down, and power on and off
Note: This remote is preset withthe
code 000 to control a JVC VCR. For
any other brand, you mult set up the
manufacturer's code (page 12.)
FUNCTIONS
MUI1NG
The MunNG button toms the sound off
completely when you press it. Press it
again to restore Lhavolume to the
previous level.
RETURN+
Therearetwo kindsof Return.,.
Re_m.p -- Set a"Ratum Channel" to
return to after scanning with CPP,NN_ -/+.
(_) REIL_N+ and hold to_ 3 seconds
&'.an with _ -/÷
RETURN+
Note: TOc_cel aReturnchannel,
and hc_lReturn+f_r a/lo_ef 3 secures
ur_l "RETURNCHANNEL CANCELLED!"
appears.
R_um -- Retom to the last channel
viewed after moving to another channel
via the 10 key pac_
RETURN+
Move to another channel with
the 10 key pad.
(_ RElURN+
Nole: _en P_ ls on, _'_eRE_Um,_-bu_t_n
function affects only the main screen.
MmlB_ B_ I IO KElf R_D
Chengech_,_ wi__e1O keyped.
Forexample,tomovetoChannel7:
(_) 0(zero)
(_) 7(seven)

BUTTON FUNC
ON/tiOV£ (Picture in Pinture)
PIPallowsyou towewtwopictures
simuitanecus/y
i_ (PIP) ON/IVfoVE
m
I_ EXiTto turn PiP off
Note: The PIP channel and mai_
screen channel will appear in the
display rnon_ntarily right after you turn
on PiP.You can teave them up
permanently by pressing DISPL_,yuntil
you reach the mode.
Note: The PIP Screen is 1/9 of the
regular screen size.
Once PiP is turned on, the ON/IVIOV_E
button operates the Move feature.
You can move the PIP window to any of
the TV's four corners.
Note: Each press of the On/MovE
button will shiftthe PIP window one
position.
Note: When the PIP screen has no
signal, the PIP window will be blue.
TIONS
FREEZE
Youcan freeze the picture in _e main
screen into the PIP windo_
_) FREEZE
Note: When the PIP is off. pressing
FREEZEtakes asnapshot of the main
screen and puts it into the PiP
window.., great forcatching those mail
order addresses.
Note: When the PIP ison FPJEF1Estops
the PIP picture.
SWAP
YGucan swap the P/P picture and the
main picture.
_SWAP
CHANNEL 4+ For PIP
Change the channel in the PIP _findo_
CH4+
I_UmCE
You can select the source for the PIP
windo_
Nots: When you connect the
component input (OVD) to V-2, the PIP
window will be blue.
TROUBLESHOOTING
No power
No pictureorsound
Remote controlis
notoperating
You caNrlotsaiect a
certefn channel
Powertomsoff
The clockis wrong
I|
Poorcolorquality
Lines or streaks
acro_ the 8creell
Spotted pleture
Double picture
(Ghosts)
Snowy pleture/
Image noise
Screen is8G% bisck
•See if the power cord became unplugged,
• Perhaps you have experienced a blown cimuit breaker or fuse or apower outage
• The antenna could be disconnected.
• The input mode _or video) could not be set properly, refer to page 27.
• The tuner mode (in the menu selection) could be set improperly, refer to page 15
• The staiton may be having dif_cul_es, check to see if other channels are operating normally.
•Check that the batteries are still wothJng and properly installed.
•Make sure there are no objects blocking a clear path from the remote to the _L
• Check that the 2-way mode sefecto_"switch is in the proper pesitto_ -- 8st to TV to view televis_n
• Maybe you are too te," from the TV. you must be within 23 feet (or 7 n_ters).
•Make sure the channels a_e progran',m_d. See Channel Summary, page 17.
•Perhaps _e channel is locked, select it with Ihe 10 key pad and futlew les_uctions.
•Perhaps the Or_ Timer is set, press the power button, check page 24
•The power was ir,te_lJpted or Ibe _cord unplugged.
*33".eSleep Timer rnay pe seL see page Z6.
• The clock needs to be reset. See page 16.
lih i
• Tint a_l cefo_ may be Improderly adjusted, Check pege 22.
• _peo Status mode may be set to an inappropriate setting. Check page 22
• There cOUld be interference from another energy consuming appliance, such as acomputer,
another TV or VCR. Move any other such appJlenees ter ther away fr(Jcn the TV.
• Ti_ere could be intederence 5ore a running high wattage appliance such as ahair_ryer, vacuum
Gisane_ or nectl sig_. You will have to move the anterma away from the source of the interfer-
ence or change it to a coaxial cable which isless prone to inledarence.
•Abuilding or akplane can reflect the original signal producing a sec_d, delayed one. Adjust
the antenna position,
• The antenna may be damaged, dilated or turned, Check the antenna connection.
pages 6 to 7. It it is dan_ged, you will have to replace it.
• Ctoc_d Caption Text Mode is on.
1"
B_q_JaJ (x slemo • Make sure 6_e MTS mode is properly set. Refer to page 23 for details on setting MTS Modes.
I:_rjans cantke hm=d
No sound from TV * TV Speakers may be turned off in the menu. see page 25.
speakers at all
I'i'llli ........ I'liln[
Stotic ai_icify • It is nofmef to toef a surge of stegc aleci_'icity if you brL,shover or touch the screen.
Occa.s_n_ • It Js normal th_ the ]_' to emit crackling sounds whefl turned on or off Unless the soond or
c_ackJing sounds picture become abi!orma[, this is fine,

o<
o_
AUTHORIZED SERVICE CENTERS
JVC
HOW TO LOCATE YOUR JVC SERVICE CENTER
"rOLL FRF.._: 1 (800) 837-6722
_r Cmt_, httpdlwww.Jvc_mrvlce.com ]
_n_rder t_ n_e_ve _;e m_8t _t_n fr_m y_ur _read _e k_c_ b_Nwt befo_ _p_a_g b_eur4L _nther
or _ _e Con_'_*t_ United _a_es, _1-8OO-537-5722 for youcw#J_r;z_i mewlc_ _ to mcainyo_r S# _
Salef_cWan_ Se_4om. -- JVC
JVC SERVICE &ENGINEERING
COMPANY OF AMERICA
DIVISION OF JVC AMERICAS CORR
FACTORY SERVICE CENTER LOCATIONS
}ear custc_er;
Inord_" to rsceive the mcet satJsfactlC_from your purchase, read thls guide before opera_ng the unit, and baize caiting
_r servicemake sure yo_ check _Tn;o_Jeshoo_ngpages at the end of this book. Inthe even_ thatrepeatis necessa_, or
_3 addressnearest you, please refer to the fac_c_yservice center list below, or vAthin_con_nentaJUnited States, call
the t_l free nurnbe_above fo_an au_0dzed service center Renumber to retainyour bill of sale forwan'amy sen'_e.
107 LittteFallsRoad 15_X_Lakes Parkway 705 En_rise Street
Fallhald, NJ 07004-2105 Lawrencevitle, GA 30_43-5857 Aurc_a, IL 60504_149
973) 808-9279 (404} 339-25L_ (630) 851-7855
5665 CorporateAvenue 296_ Mapunapuna Ple_e 10700 Hammedy Suite ! 10
Cypmq, CA 90630-0024 Honolulu,HA 96819-2040 Houston, 33( 77043
(714) 2298011 (808) 833-5828 (713) 9_5-9331
13 Cummings Park 8192 SLateRoad 84 890 Dubuque Avenue
Wobum, MA 01801 Da_qe.FL 33324 SouthSan R'ar_sco. CA g4_80-1804
(781 } 376-9100 (954) 472-1969 (650) 871-2666
Sophist_at_d electronic products may require occasior_ sen,ice JuSt as qua/P//s a key_o_d In ff_e engineertng and
pr_uc_n _f the _de arr_y _f JVC pmducts_ mis key t_ maintajning the h_ _eve/_f pe_rmance _ _J_ J_
is word famous¸ The JVC semite and engineering orga_zation standsbehind ow products,
NATIONAL HEADQUARTERS
JVC _ICE & ENGINEERING COMPANY OF AMERICA
DIVISION OF JVC AMERICAS CORE
1700 Valley Road
Wayne. New Jersey 07470
IF YOU SHIP THE PRODUCT --1 Don't servl_e it yourself.
r
pa_ you_ JVC unitln theoriginat cart_ c_ _4_eof equivalent
and s_ng_. Enck_e, _the un_ atet_ s_t_n_ the CAUTION
prob/ern or syrnptom that ex_sts_nd also scopy ohthe receiot or
bi!/ of sa!e y_u _ived when you purchased your JVC uniLPdnt Toprev_t e/6c_ical slx_k, do nct o_en the
y(_r home re_urnaddress on _heoutside end inside of the cabinet. No user _b/e pa/ts inside
c_ton. Send to the appropdate JVC Facto_ySen_e Cen_ as Refer to oua/ified sen_e _wsonn_.
ACCESSORIES
TOpurchase acce_rles for your JVC product you may contact _ou_/ocaJJVC Dea_ Or fromthe
_UnltsclStatas ca_ tofl_:I (_0) a_2-23_
I
Type
Recep_on Forma
Reception Range
Power Source
Pow_
Screen Size
AudioOutput
SpeaY.efs
Antenna Terminal
_nal input
Jecks
S-",rldeo Input
Jack
CompormntInpu
Jack
Audio Output
Jacks
AVCompe UnkE_
Jack
D_=e_e_s('_chas
(WxH xD)-(crn}
Weight (Ibs.)
Weight (1_,)
Accessories
SPECIFICATIONS
NTSC system, STSD system (Mult_channe[ Sound)
VHF 2 to 13, UHF 14 to 69
Sub Mid, Mid, Super, H_per and Uli_a bands
(181 channel frequency synthesizer system)
AC !20_ 60Hz
133W I1.9A 128W /1.8A 123W /1.8A i 118W/1.7A
I
32"/80 cm measured 27"/68 cm mee.sured
diagonally, fall square diagon aJly,full square
5.0W + 5.0W
5cm x 12 onotalx2
75 ohms (VHF/UHF) terminal (F-_ype connector)
Video:1 Vp-p. 75 ohms
AudiO:500 mVrrns(-4 dBs),high impedance
_1vp-p10ositiva,75 ohms(negativesyncprovided)
C:0286 Vl>P(burstsign_J,75 chrns
Y:1Vl>Ppositive,75 ohms(neqeu_esyncpro_eq)
I:_: 0.7 Vp-p,75ohms
Morn than O to 1,_Vrrns (+6 dBs), k_w impedance (400 HZ when modulated 100%)
3.5 mm mini jack x 1
33 7_'x2Tx 21 5_ 295_" x 23 1/4' x 19 lfZ
85_9x 68.4 x54.B Q'q 75_. x 59.0 x 49.40T_
114.4 (thS.) 78.1 (thS.)
52.0 (kl_.) 35.5 (kg.)
Remote con frc_ x 1 •AA Sat_eries x 2
Spec/f_a_nssub_t _ocha,'_ew_,_ not,_e.
JVC COMPANY OF AMERICA
DIVISION OF JVC AME_tlCASCORP.
1700ValleyRoeq
Wayne,NewJersey07470 JVC" JVC CANADA, INC.
21 RnChdeneSquare
$carb_'ough, Ontario
Canada M1X "_A7
LCT_IA _
This manual suits for next models
3
Table of contents
Other JVC TV manuals