K-JAPAN KJHTL600B User manual


ITALIANO ENGLISH
- 1 -
FOREWORD
This Owner’s/ Operator’s Manual is designed to familiarize the operator with the various features and component parts of
the equipment and to assist you with the operation and maintenance of your new Hedge Trimmer.
It is essential that any operator of this Hedge Trimmer product reads and understands the contents of this manual
before using the Hedge Trimmer.
Important safety instructions will be identified by the following safety symbol:
Failure to comply with the instructions in this manual may result in serious injury or death.
For additional assistance, contact any local authorized K-JAPAN dealer or K-JAPAN MFG., Inc.
PREMESSA
Questo Manuale del Proprietario/ Operatore è stato progettato per fare in modo che l’operatore familiarizzi con le varie
caratteristiche e componenti del dispositivo e per fornire aiuto nel funzionamento e nella manutenzione della vostra nuova
Cesoia per Siepi.
È fondamentale che gli operatori di questa Cesoia per Siepi leggano e comprendano il contenuto di questo
manuale prima di usare il dispositivo.
Le istruzioni di sicurezza importanti verranno identicate con i seguenti simboli di sicurezza:
Un mancato rispetto delle istruzioni contenute in questo manuale può causare ferite gravi o morte.
Per ulteriore assistenza, contattare qualsiasi rivenditore locale autorizzato di K-JAPAN o K-JAPAN MFG, Inc.

ITALIANO ENGLISH
- 2 -
TABLE OF CONTENTS/ INDICE
FOREWORD/ PREMESSA................................................................................................................................................... 1
TABLE OF CONTENTS/ INDICE .......................................................................................................................................... 2
SAFETY INSTRUCTIONS/ ISTRUZIONI DI SICUREZZA.................................................................................................... 3
SPECIFICATIONS/ SPECIFICHE......................................................................................................................................... 4
PRODUCT DESCRIPTION/ DESCRIZIONE DEL PRODOTTO........................................................................................... 5
MARKING/ SEGNALETICA................................................................................................................................................... 6
SYMBOL EXPLANATION/ SPIEGAZIONE SIMBOLI ........................................................................................................... 7
SAFETY INSTRUCTIONS/ ISTRUZIONI DI SICUREZZA.................................................................................................... 8
OPERATOR SAFETY/ SICUREZZA DELL’OPERATORE .................................................................................................... 8
POWER HEDGE TRIMMER SAFETY/ SICUREZZA DELLA CESOIA PER SIEPI .............................................................. 8
FUEL SAFETY/ SICUREZZA DEL CARBURANTE .............................................................................................................. 9
POWER HEDGE TRIMMER OPERATING SAFETY/
SICUREZZA DURANTE IL FUNZIONAMENTO DELLA CESOIA PER SIEPI...................................................................... 9
BEFORE OPERATION/ PRIMA DEL FUNZIONAMENTO.................................................................................................. 10
FUELING/ RIFORNIMENTO DEL CARBURANTE ............................................................................................................. 10
ADJUSTING THE CUTTING BLADES/ REGOLAZIONE DELLE LAME DI TAGLIO.......................................................... 11
ROTATIONAL REAR HANDLE/ IMPUGNATURA POSTERIORE GIREVOLE................................................................... 11
STARTING AND STOPPING PROCEDURE/ PROCEDURA DI AVVIO DI E ARRESTO................................................... 12
BEFORE STARTING THE ENGINE/ PRIMA DI AVVIARE IL MOTORE............................................................................. 12
STARTING THE ENGINE/ AVVIO DEL MOTORE .............................................................................................................. 12
TO STOP THE ENGINE/ PER ARRESTARE IL MOTORE ................................................................................................. 12
CARBURETOR ADJUSTMENT/ REGOLAZIONE DEL CARBURATORE.......................................................................... 13
OPERATING THE POWER HEDGE TRIMMER/ ATTIVAZIONE DELLA CESOIA PER SIEPI........................................... 13
REGULAR MAINTENANCE/ MANUTENZIONE NORMALE.............................................................................................. 14
AIR FILTER/ FILTRO DELL’ARIA........................................................................................................................................ 14
FUEL FILTER/ FILTRO DEL CARBURANTE...................................................................................................................... 14
SPARK PLUG/ CANDELA................................................................................................................................................... 15
CYLINDER COOLING FINS/ ALETTE DI RAFFREDDAMENTO DEL CILINDRO............................................................. 15
LUBRICATION : GEARCASE AND BLADES/ LUBRIFICAZIONE: SCATOLA DEGLI INGRANAGGI E LAME ..................16
STORAGE/ IMMAGAZZINAMENTO................................................................................................................................... 16
EC DECLARATION OF CONFORMITY/ DICHIARAZIONE DI CONFORMITÀ CE .................................................... 17 - 18

ITALIANO ENGLISH
- 3 -
SAFETY INSTRUCTIONS
The warning system in This manual identifies potential hazards and has
special safety messages that help you and others avoid personal injury, even
death.
DANGER
,
WARNING
and
CAUTION
signal words to identify the level of
hazard.
DANGER
: signals an extreme hazard that will cause serious injury or death
if the recommended precautions are not followed.
WARNING
: signals a hazard that may cause serious injury or death if the
recommended precautions are not followed.
CAUTION
: signals a hazard that may cause minor or moderate injury if the
recommended precautions are not followed. Two other words are
also used to highlight information. “Important” calls attention to
special mechanical information and “Note” emphasizes general
information worthy of special attention.
ISTRUZIONI DI SICUREZZA
Il sistema di avvertimento nel presente manuale identifica i potenziali pericoli
e presenta particolari messaggi di sicurezza che aiutano te e gli altri a evitare
lesioni personali o decesso.
PERICOLO
,
AVVERTENZA
e
ATTENZIONE
sono termini che identificano un
livello di rischio.
PERICOLO
: segnala un rischio estremo, che provocherà lesioni gravi o
morte nel caso in cui non si seguano le precauzioni
raccomandate.
AVVERTENZA
: segnala un rischio che potrebbe provocare lesioni gravi o
morte nel caso in cui non si seguano le precauzioni
raccomandate.
ATTENZIONE
: segnala un rischio in grado di provocare lesioni minori o di
grado moderato nel caso in cui non si seguano le precauzioni
raccomandate. Per evidenziare le informazioni sono utilizzate
altre due parole. “Importante” richiama l’attenzione a particolari
informazioni meccaniche e “Nota” sottolinea le informazioni di
carattere generale che meritano una particolare attenzione.

ITALIANO ENGLISH
- 4 -
Model/ Modelli KJHTL600D KJHTL750D
Dimensions L x W x H/
Lunghezza x Larghezza x Altezza 1010 × 250 × 200mm 1155 × 250 × 200mm
Dry Weight(without grease)/
Peso a Secco (senza grasso) 4,8 kg 5,1 kg
Total Weight (With fuel and cover)/
Peso Totale (Con carburante e coperchio) 5,2 kg 5,5 kg
Blade Length/ Lunghezza Lama 600mm 750mm
Rear Handle/ Manìglia Posteriore Rotational/ Rotazionale
Engine Model/ Motore Modello HE232
Engine Displacement/ Cilindrata del motore 22.5cm3
Fuel Tank Capacity/
Capacità Serbatoio Carburante 0.4L
Carburetor/ Carburatore Walbro Diaphragm Type/ Walbro a Diaframma
Ignition System/ Sistema di Accensione Solid State/ Stato Solido
Spark Plug:/ Candela:
Make/ Marca
Type/ Modello
NGK
BPMR8Y
Electrode Gap/
Distanza tra le punte degli elettrodi 0,6~0,7mm
Fuel Mixture:/
Carburante Miscela
Use only non-leaded regular petrol.
two-stroke oil mix 50~25:1 ratio must be approved for air-cooled engines.
Uso solo benzina normale senza piombo. 2-Ciclo olio miscela 50~25:1 rapporto deve
essere approvato per motori raffreddati ad aria.
Starter/ D’avviamento Nomal/ Normale
Measured maximum engine power
Misurato potenza massima del motore 0,77kW
Warranted maximum engine power
Autorizzato potenza massima del motore 0,61kW
Guaranteed Sound Power Level
Livello garantito della potenza del suono
(10000rpm:racing)/ (10000giri massimi/min)
109dB(A) 109dB(A)
Vibration Level/ Vibrazione
Front Handle/ Manìglia Destra(Anteriore)
Rear Handle/ Manìglia Sinistra(Posteriore)
(10000rpm:racing)/ (10000giri massimi/min)
13m/s2
8m/s2
13m/s2
8m/s2
CO2※1 1554 g/kwh
SPECIFICATIONS/ SPECIFICHE
※1 CO2
This CO2 measurement results from testing over a xed test cycle under laboratory conditions a(n) (parent) engine representative of the engine type
(engine family) and shall not imply or express any guarantee of the performance of a particular engine.
※1 CO2
Questo è il valore di misurazione del CO2risultato da un ciclo di prova fisso eseguito in condizioni di laboratorio su un motore (capostipite)
rappresentativo del tipo di motore (della famiglia di motori) e non comporta alcuna garanzia implicita o esplicita o delle prestazioni di un particolare
motore.

ITALIANO ENGLISH
- 5 -
PRODUCT DESCRIPTION/ DESCRIZIONE DEL PRODOTTO
PRODUCT DESCRIPTION
1. Blade
2. Engine
3. Starter Grip
4. Stop Switch
5. Throttle Trigger
6. Fuel Tank
7. Front Handle
8. Rear Handle
9. Lock Lever
REAR HANDLE
MANIGLIA POSTERIORE
④
⑤
⑨
DESCRIZIONE DEL PRODOTTO
1. Lama
2. Motore
3. Prese d’avviamento
4. Interruttore di arresto
5. Trigger Throttle
6. Serbatoio del combustibile
7. Maniglia anteriore
8. Maniglia posteriore
9. Leva di blocco
①
②④
⑤
⑦
⑧
⑨
③
⑥

ITALIANO ENGLISH
- 6 -
MARKING/ SEGNALETICA
1. MODEL NAME/ NOME DEL MODELLO
2. SERIAL No. (STAMPED)/ NUMERO DI SERIE (STAMPATO)
3. Approved EC emission/ Emissioni CE approvate
4. See SYMBOL EXPLANATION/ Vedere SIMBOLO SPIEGAZIONE
5. GUARANTEED SOUND POWER LEVEL/ LIVELLO DI ALIMENTAZIONE GARANZIA
6. CE marking/ MARCATURA CE
7. Lubricate 15H/ Lubrificare 15H
8. See SYMBOL EXPLANATION/ Vedi SPIEGAZIONE DEL SIMBOLO
⑧
⑧
①
②
④
④
⑤
⑤
③
③
⑥
⑥
⑦
⑧

ITALIANO ENGLISH
- 7 -
Read and understand this Owner’s/ Operator’s Manual before using this product.
Leggere e comprendere questo manuale del Proprietario/Operatore prima di utilizzare questo prodotto.
Fire Danger: Petrol is highly flammable. Never add fuel to the Hedge Trimmer with a running or hot engine.
Do not smoke or place any sources of heat in the vicinity of the fuel.
Pericolo di incendio: la benzina è altamente infiammabile. Non aggiungere mai carburante alla Cesoia per
Siepi con il motore in funzionamento o caldo. Non fumare o avvicinare nessuna fonte di calore al
carburante.
Breathing exhaust fumes can cause death. Never start or run the engine inside a close room or building.
La respirazione dei fumi di scarico può causare morte. Non avviare o fare girare il motore all’interno di una
stanza o di un edificio chiuso.
Hot Surface Warning: Contact may cause burns. During use and for some time after stopping the engine,
the engine and the gearcase are very hot. Do not touch engine components such a cylinder, muffler and
engine covers and gearcase until the engine has cooled to ambient temperature.
Avviso Superficie Calda: Il contatto può causare ustioni. Durante l’uso e per un po’ di tempo dopo avere
arrestato il motore, questo e la scatola degli ingranaggi sono particolarmente caldi. Non toccare i
componenti del motore come il cilindro, il silenziatore e il rivestimento del motore e la scatola degli
ingranaggi fino a quando il motore non si è raffreddato e ha raggiunto la temperatura ambiente.
Always use:
• A protective helmet.
• Ear protection.
• Protective glasses or visor.
Utilizzare sempre:
• Un elmetto protettivo
• Protezione per le orecchie
• Occhiali o visiera di protezione
SYMBOL EXPLANATION/ SPIEGAZIONE SIMBOLI

ITALIANO ENGLISH
- 8 -
OPERATOR SAFETY
1. Read and understand this Owner’s/Operator’s Manual before using this product. Be
thoroughly familiar with the proper use of this product.
2. Always wear eye protection.
3. Wear hearing protection.
4. Always wear heavy long pants, boots and gloves. Do not wear loose clothing, jewelry,
short pants, sandals or go barefoot. Secure hair so it is above shoulder length.
5. Never operate this Hedge Trimmer when you are tired, ill, under the influence of
alcohol, drugs or medication.
6. Never start or run the engine inside a closed room or building. Breathing exhaust
fumes can cause death.
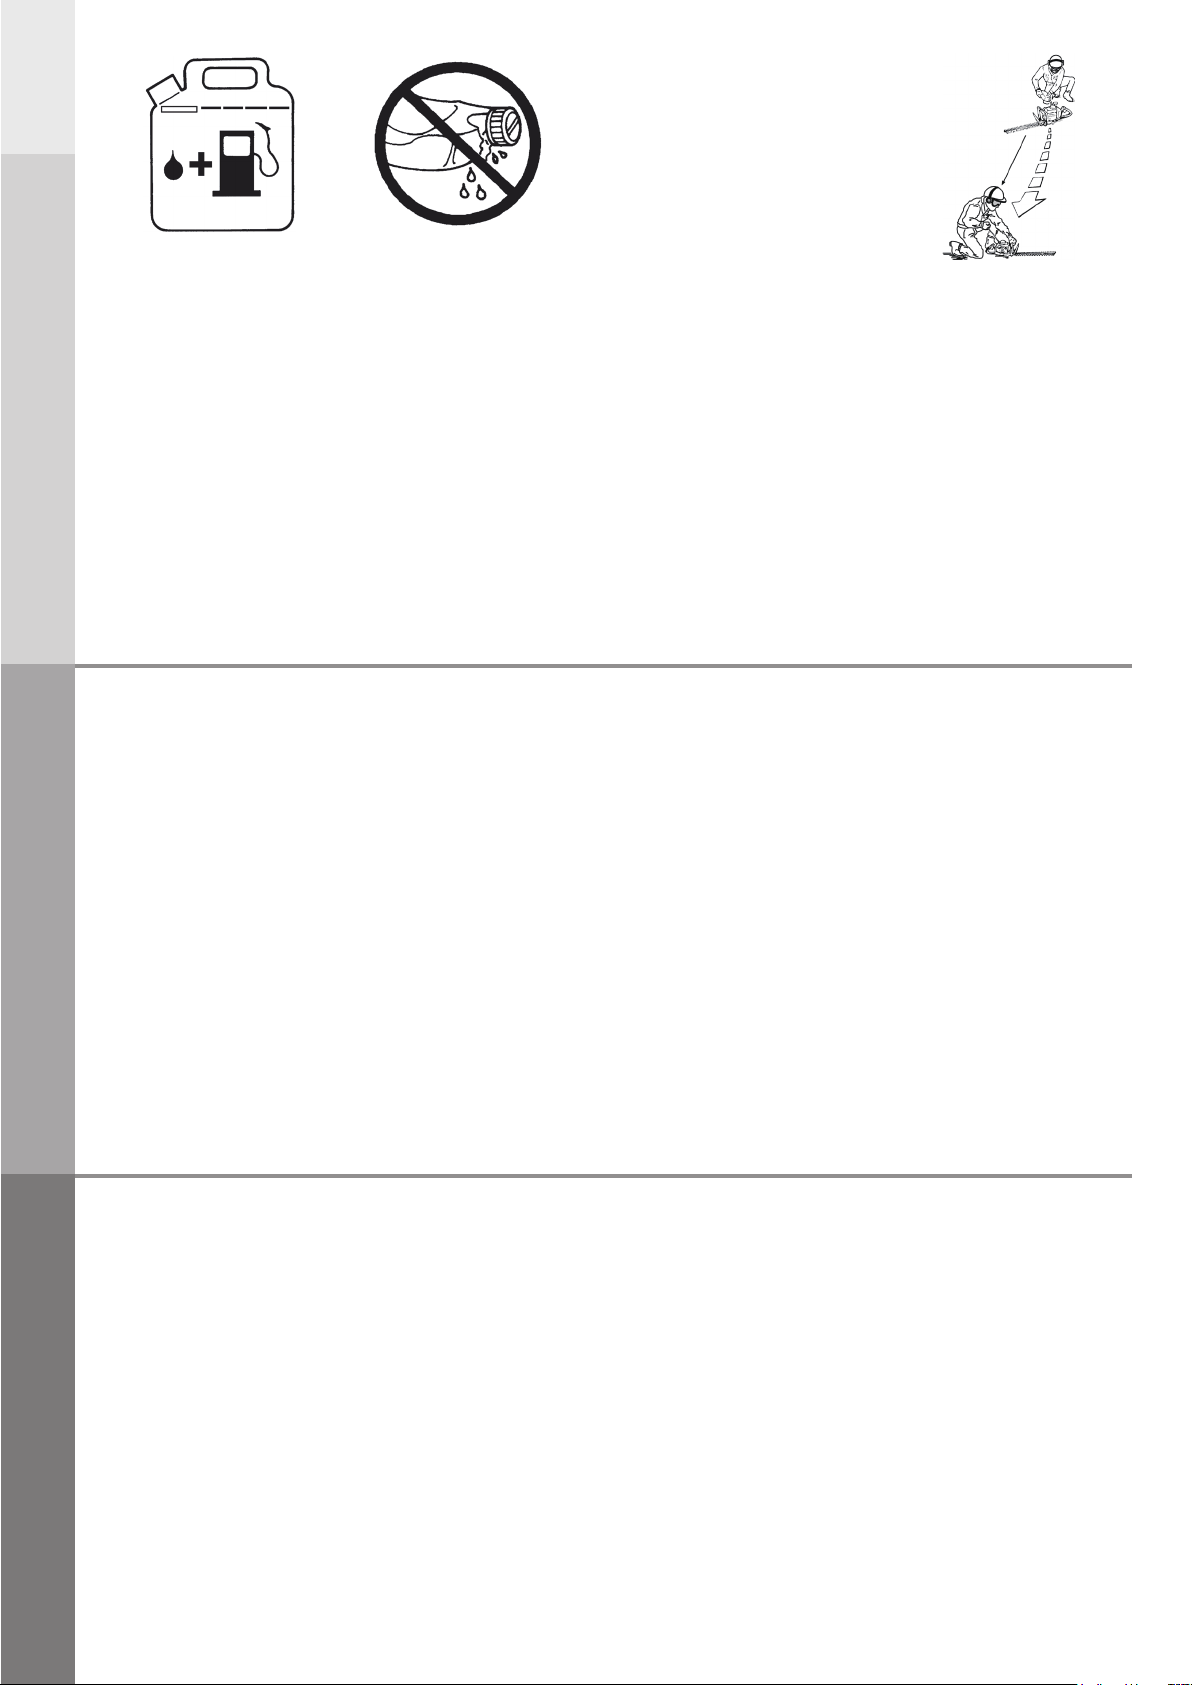
7. Keep handles clean of oil, fuel and dirt.
POWER HEDGE TRIMMER SAFETY
1. Shut off the engine and wait unit the cutting blades have completely stopped moving
before checking, maintenance or working on the Hedge Trimmer. Shut off the engine
before leaving the Hedge Trimmer unattended.
2. Inspect the Hedge Trimmer before each use. Replace damaged parts. Check for fuel
leaks. Make sure all fasteners are in place and tightened securely. Follow the
maintenance instructions provided on page 14 to 16 of this manual.
3. Inspect the Hedge Trimmer cutting blades and guide. Replace any parts that are
cracked, chipped, damaged or excessively worn cutting device before using the
Power Hedge Trimmer.
4. Never use replacement parts that are not approved by K-JAPAN.
5. Maintain the Hedge Trimmer in accordance with the recommended maintenance
intervals and procedures in the maintenance section, pages 14 to 16.
6. If running problems or excessive vibration occur, stop immediately and inspect the
unit for the cause. If the cause cannot be determined or is beyond your ability to
correct, return the Hedge Trimmer to your servicing dealer for repair.
7. Never use the Hedge Trimmer if handles are damaged or handle fasteners are loose.
Always make sure all fasteners (nuts and bolts) are installed and properly tightened.
8. Never use a machine that has been modified so that it no longer corresponds with the
original design.
9. Do not attempt to repair the Hedge Trimmer unless you are qualifie to do so.
10. When transporting or storing the Hedge Trimmer always fit the blade shield.
11. Stop the Hedge Trimmer if the cutting mechanism hits a foreign material or if the
hedge trimmer produces an abnormal vibration sound. Disconnect the spark plug wire
from the spark plug and take the following steps;
● Inspect damages, check the loosing parts, and tighten the bolts.
● Any damaged parts must be replaced or repaired with genuine parts.
12. To reduce the risk of fire, keep the engine and muffler free of debris, leaves and
excessive lubricant.
13. The Exhaust gases are extremely hot. Keep flammable materials and objects away
from the direction that the exhaust gases are coming out of the muffler. Do not cover
the exhaust gases with any items.There is a high risk of materials and objects
catching fire and getting burned.
14. During the operation and idling of the unit, the engine is very hot. Also, for a while
after the engine stops, the engine is still hot. Do not place the engine near flammable
materials such as dried grass. There is a high risk of materials catching fire.
SAFETY INSTRUCTIONS
ISTRUZIONI DI SICUREZZA
SICUREZZA DELL’OPERATORE
1. Leggere e comprendere questo Manuale del Proprietario/Operatore prima di
utilizzare questo prodotto. Familiarizzare in modo approfondito con l’uso adeguato di
questo prodotto.
2. Indossare sempre protezioni per gli occhi.
3. Indossare protezioni per le orecchie.
4. Indossare sempre pantaloni lunghi e pesanti, stivali e guanti. Non indossare
indumenti sciolti, gioielli, pantaloni corti, sandali o lavorare scalzi. Assicurarsi che i
capelli non siano più lunghi dell’altezza delle spalle.
5. attivare mai la Cesoia per Siepi quando si è stanchi, malati, sotto l’influenza di alcol,
farmaci o medicamenti.
6. Non avviare mai il motore all’interno di una stanza o di un edificio chiusi. La
respirazione di fumi di scarico può causare la morte.
7. Mantenere le maniglie pulite dall’olio, il carburante e la sporcizia.
SICUREZZA DELLA CESOIA PER SIEPI
1. Spegnere il motore e attendere fino a quando le lame di taglio si sono arrestate
completamente prima di effettuare controlli, manutenzione o lavori sulla Cesoia per
Siepi. Spegnere il motore prima di lasciare incustodito il tagliasiepi.
2. Controllare la Cesoia per Siepi prima di ogni utilizzo. Sostituire le parti danneggiate.
Verificare eventuali perdite di carburante. Assicurarsi che tutte le cinghie sono al
posto giusto e che vengono strette in modo sicuro. Seguire le istruzioni per la
manutenzione fornite da pagina 14 a 16 di questo manuale.
3. Controllare le lame e la guida per il taglio della Cesoia per Siepi. Sostituire qualsiasi
parte rotta, scheggiata, danneggiata o dispositivo di taglio eccessivamente usurato
prima di utilizzare la Cesoia per Siepi.
4. Non utilizzare mai pezzi di ricambio non approvati da K-JAPAN.
5. Effettuare la manutenzione della Cesoia per Siepi in base agli intervalli di
manutenzione consigliati e alle procedure indicate nella sezione della manutenzione,
pagine da 14 a 16.
6. Se si dovesse notare qualche problema di funzionamento o una vibrazione
eccessiva, arrestare immediatamente la macchina e controllare l’unità per individuare
la causa. Se la causa non può essere determinata o non può essere corretta
dall’utente, consegnare la Cesoia per Siepi al servizio di assistenza per farla riparare.
7. Non utilizzare mai la cesoia per siepi se le maniglie sono danneggiate o le cinghie
delle maniglie sono allentate. Assicurarsi sempre che tutte le cinghie (dadi e bulloni)
siano state installate e strette adeguatamente.
8. Non utilizzare mai una macchina che è stata modificata al punto da non
corrispondere più al progetto originale.
9. Non cercare di riparare la Cesoia per Siepi a meno che non si sia qualificati per
effettuare questa operazione.
10. Quando si trasporta o si immagazzina la Cesoia per Siepi piegare sempre lo scudo
della lama.
11. Fermare il Tagliasiepi se il meccanismo di taglio colpisce un materiale estraneo o se il
tagliasiepi produce un suono anormale di vibrazione. Scollegare il cavo della candela
dalla candela e procedere come segue:
● Ispezionare i danni, controllare le parti allentate e serrare i bulloni.
● Eventuali parti danneggiate devono essere sostituite o riparate con parti originali.
12. Per ridurre il rischio di incendio, tenere il motore e il silenziatore liberi da detriti, foglie
e lubrificante eccessivo.
13. I gas di scarico sono estremamente caldi. Tenere materiali e oggetti infiammabili
lontano dalla direzione in cui i gas di scarico escono dalla marmitta. Non coprire i gas
di scarico con nessun oggetto. Esiste un alto rischio che materiali e oggetti prendano
fuoco e vengano bruciati.
14. Durante il funzionamento e anche al minimo dell’unità, il motore è molto caldo.
Inoltre, per un po ‘dopo l’arresto del motore, il motore è ancora caldo. Non
posizionare il motore vicino a materiali infiammabili come erba secca. Vi è un alto
rischio che i materiali prendano fuoco.

ITALIANO ENGLISH
- 9 -
FUEL SAFETY
1. Petrol is highly flammable and must be handled and stored carefully. Use a container
approved for storing petrol and/or fuel/oil mixture.
2. Mix and pour fuel outdoors and where there are no sparks or flames.
3. Do not smoke near fuel or the Hedge Trimmer or while using the Hedge Trimmer.
4. Do not overfil the fuel tank. Stop fillin 10-20 mm from the top of the tank.
5. Wipe up any spilled fuel before starting the engine.
6. Move the Hedge Trimmer at least 3 m away from the fueling location before starting
the engine.
7. Do not remove the Hedge Trimmer fuel tank cap while the engine is running or
immediately after stopping the engine.
8. Allow the engine to cool before refueling.
9. Empty the fuel tank before storing the Hedge Trimmer. Fuel should be emptied after
each use. Fuel left in the tank may leak during storage. If the fuel tank is drained,
this should be done outdoors.
10. Store fuel and Hedge Trimmer away from open flame sparks and excessive heat.
Make sure fuel vapors cannot reach sparks or open flame from water heaters,
furnaces, electric motors, etc. Always allow the hedge trimmer to cool down before
storing.
11. Always replace and securely tighten the fuel cap after refueling.
POWER HEDGE TRIMMER OPERATING SAFETY
1. THIS HEDGE TRIMMER CAN CAUSE SERIOUS INJURIES. Read the instructions
carefully. Be familiar with all controls and the proper use of the Hedge Trimmer.
2. Never allow children to operate the Hedge Trimmer. It is not a toy.
3. Keep the area of operation clear of all persons, particularly small children and pets.
4. The Hedge Trimmer blades are extremely sharp. Do not put hands or feet near or
under any moving parts. Keep body clear at all times.
5. Use the Hedge Trimmer only in daylight or good artificial light.
6. Inspect your work area before you begin. Remove string, rope or similar materials
which can become entangled in the Hedge Trimmer blades.
7. Avoid hidden hazards. Watch for hidden objects within your working area, such as
chain link fencing, cables, wires, telephone and power lines.
8. Never operate the Hedge Trimmer without proper guards or other protective safety
devices in place.
9. Keep a firm footing and balance. Do not over-reach. Do not operate the Hedge
Trimmer while standing on a ladder or similar temporary support.
10. Use the right tool for the job. Do not use the Hedge Trimmer for any job that is not
recommended by the manufacturer.
11. While operating the Hedge Trimmer be always sure of a safe and secure operating
position. Do not over reach.
12. To reduce fire hazard keep engine and silencer free of debris, leaves, and dry
materials. Always wipe away spilled fuel and excessive lubricant before starting.
13. Always use two hands to operate the Hedge Trimmer.
14. Always be aware of your surroundings and stay alert for possible hazards that you
may not hear due to the noise of the machine.
15. Know how to stop the machine quickly in an emergency. (See to stop the engine in
STARTING AND STOPPING PROCEDURE SECTION.)
16. Beware of overhead power lines.
Min. 3 m
Mínimo 3 m
WIPE UP ANY FUEL SPILLAGE
PULIRE TUTTE LE PERDITE DI CARBURANTE
SICUREZZA DEL CARBURANTE
1. La benzina è altamente infiammabile e dev’essere gestita e immagazzinata con
attenzione. Utilizzare un contenitore approvato per immagazzinare benzina e/o
miscela carburante/olio.
2. Mescolare e versare il carburante all’esterno e in zone in cui non siano presenti
scintille o fiamme.
3. Non fumare vicino al carburante o alla Cesoia per Siepi o quando si usa il
dispositivo.
4. Non riempire eccessivamente il serbatoio del carburante. Fermarsi a 10-20mm dal
punto più alto del serbatoio.
5. Pulire tutto il carburante versato prima di avviare il motore.
6. Spostare la cesoia per siepi ad almeno 3 metri dal punto di rifornimento di
carburante prima di avviare il motore.
7. Non togliere il coperchio del serbatoio di carburante della Cesoia per Siepi durante il
funzionamento del motore o immediatamente dopo avere arrestato lo stesso.
8. Consentire al motore di raffreddarsi prima di rifornirlo con nuovo carburante.
9. Vuotare il serbatoio di carburante prima di immagazzinare la Cesoia per Siepi. Il
carburante deve essere vuotato dopo ogni uso. Il carburante lasciato nel serbatoio
potrebbe fuoriuscire durante l’immagazzinamento. Quando si svuota il serbatoio del
carburante, questo deve essere fatto all’aperto.
10. Immagazzinare il serbatoio e la Cesoia per Siepi lontani da fiamme, scintille e calore
eccessivo. Assicurarsi che i vapori del carburante non possano raggiungere scintille
o fiamme provenienti da caldaie per l’acqua, fornaci, motori elettrici, ecc. Lasciare
sempre raffreddare il tagliasiepi prima di riporlo.
11. Dopo il rifornimento, riportare il tappo del serbatoio nella posizione originale e
serrarlo saldamente.
SICUREZZA DURANTE IL FUNZIONAMENTO DELLA CESOIA PER SIEPI
1. QUESTA CESOIA PER SIEPI PUÒ CAUSARE GRAVI FERITE. Leggere
attentamente le istruzioni. Familiarizzare con tutti i comandi e con l’uso adeguato
della Cesoia per Siepi.
2. Non consentire ai bambini di utilizzare la Cesoia per Siepi. Non si tratta di un
giocattolo.
3. Mantenere l’area di attività priva di altre persone, soprattutto bambini piccoli e
animali.
4. Le lame della Cesoia per Siepi sono estremamente affilate. Non mettere le mani o i
piedi vicini o sotto a parti in movimento. Mantenere il corpo libero in ogni momento.
5. Utilizzare la Cesoia per Siepi solo alla luce del giorno o con luce artificiale molto
buona.
6. Controllare l’area di lavoro prima di iniziare. Togliere corde, cavi o materiali simili
che si possono intrappolare nelle lame della Cesoia per Siepi.
7. Evitare pericoli nascosti. Fare attenzione ad oggetti nascosti all’interno dell’area di
lavoro, come ad esempio una recinzione a catena, cavi, fili, linee telefoniche e di
corrente.
8. Non Attivare mai la Cesoia per Siepi senza le protezioni adeguate o altri dispositivi
protettivi al loro posto.
9. Mantenere sempre il corpo solidamente in equilibrio. Non sporgersi. Non utilizzare
la Cesoia per Siepi stando su una scala o un supporto temporaneo simile.
10. Utilizzare lo strumento adeguato al lavoro da realizzare. Non utilizzare la Cesoia per
Siepi per qualsiasi lavoro che non sia consigliato dal produttore.
11. Durante l’uso della Cesoia per Siepi assicurarsi di mantenere sempre una posizione
di lavoro sicura. Non sporgersi.
12. Per ridurre i rischi di incendio mantenere il motore e il silenziatore privi di detriti,
foglie e materiali secchi. Pulire sempre il carburante versato e i lubrificanti in
eccesso prima di iniziare.
13. Usare sempre due mani durante l’utilizzo della Cesoia per Siepi.
14. Controllare sempre le zone circostanti e prestare attenzione a possibili pericoli che
non si potrebbero sentire a causa del rumore della macchina.
15. Assicuratevi di sapere come arrestare rapidamente la macchina in caso di
emergenza. (per arrestare il motore vedi la sezione relativa PROCEDURA DI
AVVIO DI E ARRESTO)
16. Attenzione alle linee elettriche aeree.

ITALIANO ENGLISH
- 10 -
Petrol
Benzina
Two-stroke oil/ Olio per motore a 2 tempi
50:1 25:1
ISO-L-EGC/ EGD, JASO class FC/ FD, or equivalent two-stroke oil
ISO-L-EGC/ EGD, classe JASO FC/ FD, o olio per motore a 2 tempi equivalente
ISO-L-EGB, JASO class FB, or equivalent two-stroke oil
ISO-L-EGB, classe JASO FB, o olio per motore a 2 tempi equivalente
1 litre
1 litro 20 mL 40 mL
2 litres
2 litros 40 mL 80 mL
5 litres
5 litros 100 mL 200 mL
BEFORE OPERATION
FUELING
DANGER! The following precautions will lessen the risk of fire.
1. Do not smoke near fuel.
2. Mix and pour fuel outdoors and where there are no sparks or flames
3. Always shut off the engine before refueling. Never remove the Hedge Trimmer fuel
tank cap while the engine is running or immediately after stopping the engine.
4. Always open the fuel tank cap slowly to release any possible pressure inside the
tank.
5. Do not overfil the fuel tank. Stop fillin 10-20 mm from the top of the tank.
6. Tighten the tank fuel cap carefully but firmly after refilling.
7. Wipe up any spilled fuel before starting the engine.
8. Move the Hedge Trimmer at least 3 m away from the fueling location and fuel storage
container before starting the engine.
FUEL: MIXING PETROL AND OIL
IMPORTANT: The engine used on this Hedge Trimmer is of a two-stroke design. The
internal moving parts of the engine, i.e., crankshaft bearings, piston pin bearings and
piston to cylinder wall contact surfaces, require oil mixed with the petrol for lubrication.
Failure to add oil to the petrol or failure to mix oil with the petrol at the appropriate ratio
will cause major engine damage which will void your warranty. For your fuel premix, only
use a quality oil designed for two-stroke air-cooled engine.
FUEL MIXTURE CHART
Refor to the chart above.
MIXING INSTRUCTIONS:
Always mix fuel and oil in a clean container approved for petrol. Mark the container to
identify it as fuel mix for the Hedge Trimmer. Use regular unleaded petrol and fill the
container with half the required amount of petrol. Pour the correct amount of oil into the
container then add the remaining amount of petrol.
Close the container tightly and shake it momentarily to evenly mix the oil and the petrol
before filling the fuel tank on the Hedge Trimmer.
When refilling the Hedge Trimmer fuel tank, clean around the fuel tank cap to prevent
dirt and debris for entering the tank during cap removal. Always shake the premix fuel
container momentarily before filling the fuel tank.
Always use a spout or funnel when fueling to reduce fuel spillage. Only fill the tank to
within 10-20 mm from the top of the tank. Avoid filling to the top of the tank filler neck.
NOTE:
1. Never mix petrol and oil directly in the Hedge Trimmer fuel tank.
2. Do not use National Marine Manufacturer’s Association (NMMA) or BIA certified oils.
This type of two-stroke engine oil does not have the proper additives for air-cooled,
two-stroke engines and can cause engine damages.
3. Do not use automotive motor oil. This type of oil does not have the proper additives
for air-cooled, two-stroke engines and can cause engine damage.
PRIMA DEL FUNZIONAMENTO
RIFORNIMENTO DEL CARBURANTE
PERICOLO! Le seguenti precauzioni ridurranno il rischio di incendi.
1. Non fumare vicino al carburante.
2. Mescolare e versare il carburante all’aperto e lontani da scintille o fiamme.
3. Spegnere sempre il motore prima di effettuare il rifornimento di carburante. Non
Togliere mai il tappo del serbatoio del carburante della Cesoia per Siepi quando il
motore sta funzionando o immediatamente dopo che si è fermato.
4. Aprire sempre il coperchio del serbatoio del carburante lentamente in modo da fare
uscire la pressione che si può essere creata all’interno del serbatoio stesso.
5. Non riempire eccessivamente il serbatoio del carburante. Fermarsi a 10-20 mm
prima che il livello del carburante raggiunga la parte superiore del serbatoio.
6. Stringere attentamente il tappo del serbatoio del carburante in modo che sia saldo
dopo avere effettuato il rifornimento.
7. Pulire il carburante fuoriuscito prima di avviare il motore.
8. Spostare la cesoia per siepi ad almeno 3 metri dal punto di rifornimento di carburante
e dal contenitore di immagazzinamento del carburante prima di avviare il motore.
CARBURANTE: MISCELA DI BENZINA E OLIO
IMPORTANTE: Il motore usato per questa Cesoia per Siepi è del tipo a due tempi. Le
parti mobili all’interno del motore, ad esempio i cuscinetti dell’albero motore, i cuscinetti
dell’asta dello stantuffo e le superfici di contatto della parete tra pistone e cilindro hanno
bisogno di un olio miscelato con benzina per una corretta lubrificazione. Se non si
aggiunge l’olio alla benzina o se si prepara la miscela con un rapporto inadeguato si
causeranno gravi danni al motore che annulleranno la garanzia. Per la miscela del
carburante utilizzare solo un olio di qualità adatto per motori a due tempi raffreddati ad
aria.
MISCELA TABELLA
Fare riferimento alla tabella qui sopra.
ISTRUZIONI PER LA MISCELA: Mescolare sempre il carburante e l’olio in un
contenitore pulito e apposito per la benzina. Fare un segno sul contenitore per
identificarlo come miscela di carburante per la Cesoia per Siepi. Utilizzare benzina
normale senza piombo e riempire il contenitore con la metà della quantità di benzina
richiesta. Versare la quantità corretta di olio nel contenitore e, quindi, aggiungere il
resto della benzina. Chiudere il contenitore saldamente e scuoterlo per qualche
momento in modo da mescolare l’olio e la benzina prima di riempire il serbatoio del
carburante della Cesoia per Siepi.
Quando si riempie il serbatoio di carburante della Cesoia per Siepi, Pulire intorno al
tappo del serbatoio della benzina per evitare che la sporcizia e i detriti possano entrare
nel serbatoio durante l’estrazione del tappo. Scuotere sempre il contenitore della
miscela per qualche momento prima di riempire il serbatoio del carburante.
Utilizzare sempre un tubo o imbuto durante il rifornimento di carburante per ridurre la
quantità di carburante versato. Riempire il serbatoio solo fino a 10-20 mm prima di
raggiungere la parte superiore dello stesso. Evitare di riempire il serbatoio fino al collo
dello stesso.
NOTA:
1. Non mescolare mai benzina e olio direttamente nel serbatoio del carburante.
2. Non utilizzare la National Marine Manufacturer’s Association (NMMA) o la BIA
certificata Olii. Questo tipo di olio motore a 2 tempi non dispone degli adeguati
additivi per aria refrigerata, Motori a due tempi e possono causare danni al motore.
3. Non utilizzare olio motore automobilistico. Questo tipo di olio non ha gli adeguati
additivi Per motori a 2 tempi con raffreddamento ad aria e possono causare danni al
motore.

ITALIANO ENGLISH
- 11 -
ADJUSTING THE CUTTING BLADES
WARNING
DO NOT TOUCH THE SHARPENED EDGES OF THE CUTTING BLADES. THE
CUTTING BLADES ARE EXTREMELY SHARP AND DANGEROUS AT ALL TIMES.
ALWAYS WEAR GLOVES TO HELP PROTECT YOUR HANDS AND FINGERS
FROM INJURY.
Before operating the Hedge Trimmer it is necessary to check the adjustment of the cutting
blades. Blades that are too loose may vibrate, and will not provide a clean, smooth cut.
CAUTION
BLADES THAT ARE TOO TIGHT CAN CAUSE OVERLOADING WHICH MAY
DAMAGE THE EQUIPMENT
To adjust the cutting blades, refer to the illustration and locate the screws. Loosen the
nuts. Gently turn the screws in until snug, then turn the screws back out onefourth to a
half. While holding the screws in place, tighten the nuts. Liberally coat the cutting blades
with light oil. Start the engine and operate the Hedge Trimmer at full speed for at least
one minute. Stop the engine, and when the blades are motionless, touch the blades with
your hand. The blades should be warm, but if they are too hot to touch, loosen the
screws 1/2 turn.
ROTATIONAL REAR HANDLE
Rear handle is adjustable to five different positions by pulling the lock lever and turn the
rear handle. Pull the lock lever directly in line with the handle (following the arrow in fig),
then turn the rear handle. It is extremely important that the handle is completely located
and correctly locked in the selected position.
Do not adjust the rear handle to any other position than specified five positions
(Throttle lever does not work when the rear handle is unlocked).
Stop the engine before change the rear handle position.
Make sure the rear handle is locked before start the engine.
During operation, hold the rear handle with upright regardless the blade
direction.
Select the proper handle position to be always sure of a safe and secure
operating position.
UPPER BLADE
LAMA SUPERIORE
NUT
DADO
NUT/ DADI
GUIDE BAR
BARRA DI GUIDA
SCREW
VITE
SCREW/ VITI
LOWER BLADE
LAMA INFERIORE
WASHER
RONDELLA
LOCK LEVER
LEVA DI BLOCCO
REGOLAZIONE DELLE LAME DI TAGLIO
AVVERTENZA
NON TOCCARE I BORDI AFFILATI DELLE LAME DI TAGLIO. LE LAME DI TAGLIO
SONO ESTREMAMENTE AFFILATE E PERICOLOSE. INDOSSARE SEMPRE
GUANTI PER AIUTARE A PROTEGGERE LE VOSTRE MANI E DITA DA EVENTUALI
FERITE.
Prima di azionare la Cesoia per Siepi è necessario verificare la regolazione delle lame
di taglio. Le lame possono vibrare se sono allentate, e non forniscono un taglio netto e
dolce.
ATTENZIONE
LE LAME TROPPO STRETTE POSSONO CAUSARE UN SOVRACCARICO CHE
PUÒ DANNEGGIARE IL DISPOSITIVO.
Per regolare le lame di taglio, fare riferimento all’illustrazione e individuare le viti.
Allentare i dadi. Avvitare dolcemente le viti fino alla testa, quindi svitarle da un quarto a
metà. Mentre si mantengono le viti al loro posto, stringere i dadi.
Rivestire le lame di taglio con uno strato di olio leggero. Avviare il motore e attivare la
Cesoia per Siepi a massima velocità per almeno un minuto. Arrestare il motore, e quando
le lame si sono fermate, toccare le stesse con la mano. Le lame devono essere tiepide,
ma se risultano troppo calde al tatto, allentare le viti per 1/2 di giro.
IMPUGNATURA POSTERIORE GIREVOLE
L’impugnatura posteriore può essere regolata in cinque diverse posizioni spingendo la
leva di blocco e girando l’impugnatura posteriore. Spingere la leva di blocco e allinearla
direttamente con l’impugnatura (seguendo la freccia della fig.) quindi girare l’impugnatura
posteriore. E’ estremamente importante verificare che l’impugnatura sia perfettamente
posizionata e correttamente bloccata nella posizione scelta.
Non regolare l’impugnatura posteriore in una posizione diversa rispetto alle
cinque specificate. (La leva del gas non funziona quando l’impugnatura
posteriore non è bloccata).
Spegnere il motore prima di cambiare la posizione dell’impugnatura posteriore.
Prima di accendere il motore, verificare sempre che l’impugnatura posteriore
sia stata bloccata.
Durante il funzionamento mantenere l’impugnatura posteriore in posizione
verticale, indipendentemente dalla direzione della lama.
Selezionare la posizione dell’impugnatura adeguata, in modo da assicurarne
sempre un uso corretto e sicuro.

ITALIANO ENGLISH
- 12 -
BEFORE STARTING THE ENGINE
Fill the fuel tank as instructed in the BEFORE OPERATION section of this manual. Rest
the Hedge Trimmer on the ground. Make sure that the cutting blades are clear of
branches, shrubs, debris, etc. Keep all bystanders, children and animals away from the
working area.
STARTING THE ENGINE (for the carburetor with primer bulb)
The carburetors on K-JAPAN engines contain a choke system and are designed to start
at IDLE speed.
1. Push and release the fuel primer bulb located on the bottom of the carburetor until air
bubble free fuel is seen flowing through the clear fuel return hose back to the fuel
tank.
2. Move the choke lever to the closed position “ ”. When the engine is warm, move the
choke lever to the open position “ ”.
3. Set the engine stop switch to the “ON ( | )” position. The throttle trigger positioned at
IDLE.
4. Grasp the starter grip and slowly pull the starter cord out until you feel some
resistance, then pull the cord quickly and powerfully. Pull the starter grip until the
engine starts. After the engine is started, move the choke lever to the open position.
5. After starting, allow the engine to run a few minutes to warm it up before using.
NOTE:
1. Do not pull the starter rope out completely.
2. Do not release the starter rope from the fully extended position.
3. Do not start the engine without rear handle locked.
Indication of the sound power levels:
The values in the owner’s/operator’s manual indicate measured sound power level. The
values in the EC declaration of conformity indicate guaranteed sound power level.
TO STOP THE ENGINE:
1. Release the throttle trigger.
2. Slide the stop switch to the “STOP ( O )” position.
STARTING AND STOPPING PROCEDURE/ PROCEDURA DI AVVIO DI E ARRESTO
PRIMA DI AVVIARE IL MOTORE
Riempire il serbatoio di carburante come illustrato nella sezione PRIMA DELL
FUNZIONAMENTO di questo manuale. Appoggiare per terra la tagliatrice di siepi.
Assicurarsi che sulle lame di taglio non ci siano rami, arbusti, detriti, ecc. Non fare
avvicinare nei pressi dell’area di lavoro, collaboratori, bambini, animali ecc.
AVVIO DEL MOTORE (per il carburatore con il bulbo di innesco)
I carburatori collegati ai motori K-JAPAN dispongono di un sistema diffusore e
sono progettati per partire a folle velocità.
1. Spingere e rilasciare il bulbo di innesco del carburante, situato in fondo al
carburatore, sino a quando non si vede fluire carburante privo di bolle d’aria dentro il
tubo di ritorno del carburante pulito verso il serbatoio del carburante;
2. Spostare la leva di strozzatura sulla posizione di chiusura “ ”. Quando il motore si
sarà riscaldato, portare la leva sulla posizione di apertura “ ”.
3. Predisporre il commutatore di arresto motore sulla posizione “ON ( | )”. La levetta
della valvola a farfalla posizionata su IDLE;
4. Tenere l’impugnatura dello starter e tirare lentamente verso fuori il cavo dello starter
sino a quando non si sente una certa resistenza, a questo punto tirare velocemente
il cavo con fermezza. Tirare l’impugnatura dello starter fino a quando il motore non
parte. Dopo che il motore sarà partito, spostare la leva di strozzatura sulla posizione
di apertura;
5. Dopo l’avvio, far funzionare il motore per alcuni minuti per farlo riscaldare prima di
procedere al suo utilizzo.
NOTA:
1. Non tirare completamente la fune di avviamento.
2. Non rilasciare la fune di avviamento dalla posizione completamente estesa.
3. Non avviare il motore senza bloccare la maniglia posteriore.
Indicazioni sui livelli della potenza del suono:
I valori riportati nel manuale del Proprietario/Operatore indicano il livello rilevato della
potenza del suono.
I valori riportati nella Dichiarazione di Conformità CE indicano il livello garantito della
potenza del suono.
PER ARRESTARE IL MOTORE:
1. Rilasciare la leva della valvola a farfalla.
2. Spostare l’interruttore di arresto in posizione “STOP ( O )”.
STOP SWITCH
INTERRUTTORE DI ARRESTO
STOP ( O ) ←→ ON ( | )
FERMATA ( O ) ←→ SU ( | )
PUMP
POMPA
CHOKE LEVER
LEVA DI STROZZATURA
PRIMER BULB
BULBO DI INNESCO
FUEL-RETURN LINE
LINEA DI RITORNO DEL CARBURANTE

ITALIANO ENGLISH
- 13 -
CARBURETOR ADJUSTMENT
This Hedge Trimmer is equipped with non-adjustable fuel mixture carburetor. The engine
idle speed is the only adjustment to the Operator.
The cutting blades may be moving during idle speed adjustment. Wear the recommended
personal protective equipment and observe all safety instructions. Keep hands and body
away from blade area.
Engine Idle Speed:
When the throttle trigger is released the engine should return to an idle speed which is
2700 ~3300 rpm or just below clutch engagement speed. The cutting blades must not
move and the engine should not stall (stop running) at engine idle speed. The engine idle
speed is adjusted by rotating the idle speed screw on the carburetor. Turning the idle
speed screw in (clockwise) increases engine speed while turning the screw out
decreases engine speed.
If idle speed adjustment is necessary and after adjustment the cutting blades move or the
engine stalls, stop using the Hedge Trimmer immediately!
Contact your local authorized K-JAPAN Dealer for assistance and servicing.
OPERATING THE POWER HEDGE TRIMMER
WARNING
Read the SAFETY INSTRUCTIONS on page (8) concerning the proper use of the
Hedge Trimmer. The K-JAPAN Hedge Trimmers is designed for cutting and trimming
foliage and small branches up to 7 mm in diameter. Although the K-JAPAN Hedge
Trimmer is capable of cutting larger diameter branches, wear and tear of the machine
would be proportionally increased.
CAUTION
Always wear gloves and protective clothing when operating the Hedge Trimmer. If the
cutting blades become jammed, stop the engine immediately. Make certain all
moving parts have stopped and disconnect the spark plug before inspecting the
equipment for damage. Never use a Power Hedge Trimmer that has chipped,
cracked, or broken cutting blades.
CAUTION
Exhaust heat from the muffler may get heated leaves and turn the color of leaves.
REGOLAZIONE DEL CARBURATORE
Questa Cesoia per Siepi è dotata di un carburatore che non può essere regolato in base
alla miscela di carburante. La velocità minima del motore è l’unica regolazione consentita
all’operatore.
Le lame di taglio potrebbero muoversi durante la regolazione della velocità minima.
Indossare i dispositivi di protezione personale consigliati e osservare tutte le istruzioni di
sicurezza. Mantenere le mani e il corpo lontani dalla zona delle lame.
Velocità minima del motore:
Quando si rilascia la leva della valvola a farfalla il motore dovrebbe tornare a una velocità
minima di 2700-3300 rpm o appena sotto la velocità di innesto. Le lame di taglio non
devono muoversi e il motore non deve bloccarsi (arrestare il movimento) alla velocità
minima.
La velocità minima del motore viene regolata ruotando la vite del minimo del carburatore.
Se si gira la vite del minimo in senso orario si aumenta la velocità del motore, mentre se
la si gira in senso antiorario la velocità diminuisce. Se risulta necessaria la regolazione
del minimo e se dopo tale regolazione le lame di taglio si muovono o il motore si arresta,
smettere immediatamente di usare la Cesoia per Siepi! Contattare il rivenditore ufficiale
locale di K-JAPAN per assistenza e manutenzione.
ATTIVAZIONE DELLA CESOIA PER SIEPI
AVVERTENZA
Leggere le ISTRUZIONI DI SICUREZZA a pagina (8) relative all’uso adeguato della
Cesoia per Siepi. Le Cesoie per Siepi K-JAPAN sono state progettate per tagliare e
sfoltire il fogliame e piccoli rami fino a un diametro di 7 mm.
Anche se la Cesoia per Siepi K-JAPAN è in grado di tagliare rami con un diametro
maggiore, ciò aumenta il rischio di rottura e usura della macchina.
ATTENZIONE
Indossare sempre guanti e indumenti protettivi durante l’utilizzo della Cesoia per
Siepi. Se le lame di taglio si inceppano, arrestare immediatamente il motore.
Assicurarsi che tutte le parti in movimento si siano fermate e scollegare la candela
prima di controllare la presenza di eventuali danni alla macchina. Non utilizzare una
Cesoia per Siepi con lame di taglio spezzate, crepate o rotte.
ATTENZIONE
Il calore di scarico della marmitta può ottenere foglie riscaldate e cambiare il colore
delle foglie.
IDLE SPEED ADJUSTMENT SCREW
VITE DI REGOLAZIONE DEL MINIMO
INCREASE
AUMENTA

ITALIANO ENGLISH
- 14 -
WARNING
When the hedge trimmer is stopped for servicing, inspection or storage, shut off the
power source, disconnect the spark plug wire from the spark plug and make sure all
moving parts have come to a stop. Allow the hedge trimmer to cool before making any
inspections, adjustments, etc.
AIR FILTER
Maintenance Interval:
The air filter should be cleaned daily or more often when working in extremely dusty
conditions and replaced after every 100 hours of operation.
Maintenance:
Push and open the air filter cover. Remove the foam filter. Clean the filter with warm,
soapy water. Let the filter completely dry. Lightly apply SAE 30 motor oil to the foam
filter and squeeze out all excess oil. Reassemble the filter and filter cover.
FUEL FILTER
Maintenance Interval:
The fuel filter should be replaced after every 100 hours of operation.
Maintenance:
The fuel filter is attached to the end of the fuel pick-up hose inside the fuel tank. To
replace the fuel filter, first make sure the fuel tank is empty. Remove the fuel cap. Using
a wire hook, gently pull the fuel filter out though the fuel filter opening. Grasp the fuel
hose next to the fuel filter fitting and remove the filter but do not release the hose. While
still holding on to the fuel hose, attach the new fuel filter.
Drop the fuel filter back into the fuel tank. Make sure that the fuel filter is not stuck in a
corner of the tank and that the fuel hose is not doubled over (kinked) before refueling.
REGULAR MAINTENANCE/ MANUTENZIONE NORMALE
AVVERTENZA
Se il tagliasiepi si ferma per riparazioni, ispezioni o conservazione, spegnere il
motore, rimuovere il filo della candela e assicurarsi che tutte le parti mobili siano
ferme. Lasciare raffreddare il tagliasiepi prima di effettuare ispezioni, regolazioni, ecc.
FILTRO DELL’ARIA
Intervalli di manutenzione:
il filtro dell’aria dovrebbe essere pulito quotidianamente o più spesso quando si lavora in
condizioni estremamente polverose e deve essere sostituito ogni 100 ore di
funzionamento.
Manutenzione:
premere e aprire il coperchio del filtro dell’aria. Togliere il filtro di schiuma. Pulire il filtro
con acqua tiepida e saponata. Lasciare asciugare completamente il filtro.
Applicare dolcemente dell’olio motore SAE 30 al filtro di schiuma e strizzare l’olio in
eccesso. Montare nuovamente il filtro e il coperchio dello stesso.
FILTRO DEL CARBURANTE
Intervalli di manutenzione:
Il filtro del carburante dovrebbe essere sostituito dopo ogni 100 ore di funzionamento.
Manutenzione:
Il filtro del carburante viene applicato all’estremità del tubo di rifornimento del carburante
all’interno del serbatoio. Per sostituire il filtro del carburante, assicurarsi in primo luogo
che il serbatoio sia vuoto. Togliere il tappo del carburante.
Utilizzando un gancio estrarre dolcemente il filtro del carburante attraverso l’apertura
del filtro stesso. Afferrare il tubo del carburante vicino al raccordo del filtro e toglierlo
senza però sganciare il tubo. Sempre mantenendo il tubo del carburante, inserire il
nuovo filtro. Lasciare cadere il filtro del carburante di nuovo nel serbatoio. Assicurarsi
che il filtro del carburante non si blocchi in un angolo del serbatoio e che il tubo del
carburante non sia ripiegato prima di effettuare il rifornimento.
PUSH
SPINGERE
OPEN
APRI
FOAM FILTER
FILTRO DI SCHIUMA
AIR FILTER COVER
COPERCHIO DEL FILTRO DELL’ARIA
WIRE
FILO DI FERRO
FUEL TANK
SERBATOIO DEL CARBURANTE
FUEL FILTER
FILTRO DEL CARBURANTE

ITALIANO ENGLISH
- 15 -
SPARK PLUG
Maintenance Interval:
The spark plug should be removed from the engine and checked after each 25 hours of
operation and replaced after every 100 hours of operation.
Maintenance:
With the engine at ambient (room) temperature, twist the high tension lead boot on the
spark plug back and forth a couple of times to loosen boot then pull the boot off of the
spark plug. Loosen the cylinder cover screw and lift off the cylinder cover. (Refer to the
illustration shown in the following CYLINDER COOLING FINS section.) Remove the
spark plug. The electrodes can be cleaned with a stiff brush. Adjust the electrode air gap
to 0.6-0.7 mm. Replace the spark plug if it is oil-fouled, damaged or if the electrodes are
worn down. Do not overtighten the spark plug when installing. The tightening torque is
10.7-16.6Nm. Reinstall the cylinder cover and the boot of the spark plug.
CYLINDER COOLING FINS
Maintenance Interval:
The cylinder cooling fins should be cleaned after every 25 hours of operation or once a
week which ever comes first. Air must flow freely around and through the cylinder
cooling fins to prevent engine overheating. Leaves, grass, dirt and debris buildup on the
fins will increase the operating temperature of the engine which can reduce engine
performance and shorten engine life.
Maintenance:
With the engine at ambient (room) temperature, remove the two socket head screws
and remove the muffler cover(FIG.1), loosen the cylinder cover screw (knob) (Fig.2),
and lift off the cylinder cover. Clean all dirt and debris from the cooling fins and from
around the cylinder base. Reinstall the cylinder cover and the muffler cover.
CYLINDER COVER
COPERCHIO DEL CILINDRO
FIG.1
FIG.2
CANDELA
Intervalli di manutenzione:
La candela deve essere tolta dal motore e controllata ogni 25 ore di funzionamento e
sostituita ogni 100 ore di funzionamento.
Manutenzione:
Con il motore a temperatura ambiente (ambiente), ruotare lo stirale della testa ad alta
tensione Spingere la candela avanti e indietro per un paio di volte per allentare il
caricamento del sistema, quindi estrarre lo scarpone dalla candela. Allentare la vite del
coperchio del cilindro e sollevare il coperchio del cilindro. (Fare riferimento
all’illustrazione illustrata nella sezione ALETTE DI RAFFREDDAMENTO DEL
CILINDRO.)
Rimuovere la candela. Gli elettrodi possono essere puliti con una spazzola rigida.
Regolare il divario dell’elettrodo a 0,6-0,7 mm.
Sostituire la candela se è sporca di olio, danneggiata o se gli elettrodi sono indossati.
Non estendere la candela quando si installa. La coppia di serraggio è di 10,7-16,6 Nm.
Reinstallare il coperchio del cilindro e lo scarpone della candela.
ALETTE DI RAFFREDDAMENTO DEL CILINDRO
Intervallo di manutenzione:
Le alette di raffreddamento del cilindro devono essere pulite ogni 25 ore di
funzionamento o una volta Una settimana che viene prima. L’aria deve fluire liberamente
intorno e attraverso il cilindro Alette di raffreddamento per evitare il surriscaldamento del
motore. Le foglie, l’erba, lo sporco e l’accumulo di detriti sulle alette aumentano la
temperatura di funzionamento del motore che può ridurre le prestazioni del motore e
ridurre la durate del.
Manutenzione:
Con il motore a temperatura ambiente (camera), Rimuovere le due viti e rimuovere il
copertura muffler (FIG.1), allentare la vite del coperchio del cilindro (manopola) (FIG.2)
e Sollevare il coperchio del cilindro. Pulire tutte le sporcizie e detriti dalle alette di
raffreddamento e da Intorno alla base del cilindro. Reinstallare il coperchio del cilindro e
la copertura muffler.
3 mm ALLEN WRENCH SUPPLIED IN TOOL KIT
3 MM ALLEN CHIAVE DI ATREZZI
KNOB
MANOPOLA
MUFFLER COVER
COPERTURA MUFFLER
TIPS/ ONTATTI
0.6 ─ 0.7 mm

ITALIANO ENGLISH
- 16 -
STORAGE/ IMMAGAZZINAMENTO
LUBRIFICAZIONE: SCATOLA DEGLI INGRANAGGI E LAME
La scatola degli ingranaggi è dotata di uno stoppino di feltro situato all’apertura della
lama. Durante l’uso della Cesoia per Siepi il grasso nella scatola degli ingranaggi diventa
molto liquido. Le lame alternate apportano costantemente piccole quantità di grasso tra le
superfici di contatto delle lame per una lubrificazione ulteriore. Se la scatola degli
ingranaggi non viene lubrificata in base agli intervalli consigliati, potrebbe verificarsi un
guasto alla scatola degli ingranaggi dovuto a mancanza di lubrificazione. I guasti alla
scatola degli ingranaggi dovuti a una manutenzione inadeguata non vengono coperti
dalla garanzia K-JAPAN. La scatola degli ingranaggi e le lame dovrebbero essere
lubrificate ogni 15 ore di utilizzo. La quantità di grasso da applicare è di circa 15 g. Ma
poi, smettere di applicare quando il grasso fuoriesce dall’apertura della lama.
NOTA:
se la Cesoia per Siepi viene utilizzata in condizioni particolarmente severe come
temperature molto elevate (al di sopra dei 25 ºC) o per periodi di funzionamento continuo
particolarmente lunghi, la scatola degli ingranaggi e le lame devono essere lubrificate
ogni due ore.
Lubrificare la scatola degli ingranaggi nel punto apposito per la lubrificazione, con un olio
di buona qualità a base di litio #2. Lubrificare le lame utilizzando un olio leggero (#10 wt.).
Per un immagazzinamento a lungo termine della Cesoia per Siepi, vuotare il serbatoio
del carburante in un contenitore adeguato per conservare il carburante.
Pompare il tubo di adescamento del carburatore fino a quando è scaricato tutto il
carburante dal tubo di ritorno del carburante pulito. Avviare il motore per eliminare la
presenza di carburante che potrebbe essere rimasto nel carburatore. Realizzare le
procedure normali di manutenzione e le riparazioni eventuali necessarie. Togliere la
candela e versare una minima quantità di olio nel cilindro. Tirare una volta la corda dello
starter.
ATTENZIONE
L’olio può esaurirsi dall’apertura della candela mentre tirando la corda di avviamento.
Proteggere I tuoi occhi e tenere la faccia lontana dall’apertura della candela. Tirare
lentamente La corda di avviamento per portare il pistone alla parte superiore del
cilindro (TDC). Reinstallare la scintilla spina. Lubrificare liberamente le lame con un
leggero olio (#10 wt). Conservare l’Hedge Trimmer in un luogo asciutto lontano da
calore eccessivo, scintille o fiamme libere.
OIL/ OLIO
GREASE FITTING FOR GEAR CASE
DISPOSITIVO PER LA LUBRIFICAZIONE
DELLA SCATOLA DEGLI INGRANAGGI
LUBRICATION: GEARCASE AND BLADES
The gearcase has a felt wick located at the blade opening. As the Hedge Trimmer is
used, the grease within gearcase becomes very soft. The reciprocating blades constantly
draw small amounts of grease between the blade contact surfaces for additional
lubrication. If the gearcase is not lubricated at the recommended intervals, a gearcase
failure will occur due to a lack of lubrication. Gearcase failures due to improper
maintenance are not covered by K-JAPAN warranty. The gearcase and blades should be
lubricated after each 15 hours of use. The amount of grease to be applied is about 15g.
But then, stop applying when grease comes out from the blade opening.
NOTE:
If the Hedge Trimmer is used under severe conditions such as high ambient
temperatures (above 25°C) or for extended continuous periods of operation, the
gearcase and blades must be lubricated every 2 hours.
Lubricate the gearcase at the grease fitting with a good quality #2 lithium-base grease.
Lubricate the blades using a light (#10 wt.) oil.
For long-term storage of the Hedge Trimmer, empty the fuel tank into a suitable fuel
storage container. Pump the primer bulb on the carburetor until all fuel is discharged
through the clear fuel return hose. Run the engine to remove any fuel that may remain in
the caburetor. Perform all regular maintenance procedures and any needed repairs.
Remove the spark plug and squirt a very small amount of oil into the cylinder. Pull the
starter cord once.
CAUTION
Oil may squirt out of the spark plug opening while pulling the starter rope. Protect
your eyes and keep your face away from the spark plug opening. Slowly pull the
starter rope to bring the piston to the top of the cylinder (TDC). Reinstall the spark
plug. Liberally lubricated the blades with a light (#10 wt.) oil. Store the Hedge
Trimmer in a dry place away from excessive heat, sparks or open flame.

ITALIANO ENGLISH
- 17 -
Herewith declares that :
Type: K-JAPAN Hedge Trimmer
The hand-held Hedge trimmers are powered internal combustion-engine.
Serial number: A000001~M999999
Model Use Net installed power
(kw/ min-1)
Measured sound
power level
(dBA)
Guaranteed sound
power level
(dBAG)
KJHTL600D Hedge trimmer 0,77/ 7500 107 109
KJHTL750D Hedge trimmer 0,77/ 7500 107 109
EC DECLARATION OF CONFORMITY
Name and address of manufacturer:
Maruyama Mfg. Co., Inc.
4-15, Uchi-kanda 3-Chome, Chiyoda-ku, Tokyo, 101-0047 Japan
Name and address of the person who compiled the technical les:
Obelis European Authorized Representative Center (O.E.A.R.C.)
Boulevard Général Wahis, 53, B-1030 Brussels, Belgium
Name and address of the european authorized representative:
Obelis European Authorized Representative Center (O.E.A.R.C.)
Boulevard Général Wahis, 53, B-1030 Brussels, Belgium
Maruyama Mfg. Co., Inc.
4-15, Uchi-kanda 3-Chome, Chiyoda-ku, Tokyo, 101-0047 Japan
December 3, 2018
Managing Director
Junichi Sugimoto
- Does comply with the provisions of the “Machinery” Directive 2006/42/EC, Annex II A.
- Does comply with the provisions of the “Electromagnetic compatibility” 2004/108/EC amended 2014/30/EU, and
applicable supplements.
- Does comply with the provisions of the “Noise emission in the environment by equipment for use outdoors “Directive
2000/14/EC Annex V, amended 2005/88/EC.
- Complies with the provisions of REGULATION (EU) 2016/1628 “Gaseous and particulate pollutant emission limits and
type-approval for internal combustion engines for non-road mobile machinery”
And furthermore declares that.
- The following harmonized standards have been applied:
ISO 12100:2010 Safety of machinery-Basic concept, general principles for design.
ISO 10517:2009 Powered hand-held hedge trimmers-Safety.
- The following (parts/clauses of) technical standards and specifications have been used:
CISPR12/2007 +A1/2009: Vehicles, boats and internal combustion engines - Radio disturbance characteristics - Limits
and methods of measurement for the protection of off-board receivers.

ITALIANO ENGLISH
- 18 -
Tipo: Tosasiepi K-JAPAN
Tosasiepi sono azionati da un motore a combustione interno.
Nº di serie: A000001~M999999
Modello Uso
Potenza netta
installata
(kw/min-1)
Livello di potenza
sonora misurato
(dBA)
Livello di potenza
sonora garantito
(dBAG)
KJHTL600D Tosasiepi 0,77/ 7500 107 109
KJHTL750D Tosasiepi 0,77/ 7500 107 109
DICHIARAZIONE DI CONFORMITÀ CE
Nome e indirizzo del produttore:
Maruyama Mfg. Co., Inc.
4-15, Uchi-kanda 3-Chome, Chiyoda-ku, Tokyo, 101-0047 Giappone
Nome e indirizzo delle persona che ha compilato le schede tecniche:
Obelis European Authorized Representative Center (O.E.A.R.C.)
Boulevard Général Wahis, 53, B-1030 Brussels, Belgio
Nome e indirizzo del rappresentante europeo autorizzato:
Obelis European Authorized Representative Center (O.E.A.R.C.)
Boulevard Général Wahis, 53, B-1030 Brussels, Belgio
Si dichiara che il macchinario:
Maruyama Mfg. Co., Inc.
4-15, Uchi-kanda 3-Chome, Chiyoda-ku, Tokyo, 101-0047Giappone
Dicembre 3, 2018
Junichi Sugimoto
Amministratore Delegato
- È conforme a quanto disposto dalle Direttive 2006/42/CE, Annex II A -“Macchinario”.
- È conforme a quanto disposto dalle Direttive 2004/108/CE, 2014/30/UE corretto- “Compatibilita elettromagnetica” e
supplementi applicabili.
- È conforme a quanto disposto dalle Direttive 2000/14/CE Annex V, 2005/88/CE corretto - “Emissione di rumore nell’ambiente
con attrezzature per uso all’aperto”.
- Conforme alle disposizioni del REGOLAMENTO (UE) 2016/1628 “materia di limiti di emissione di inquinanti gassosi e
particolato inquinante e di omologazione per i motori a combustione interna destinati alle macchine mobili non stradali”
- È dichiara inoltre che:
- I seguenti standard accordati sono stati applicati:
ISO 12100:2010 Sicurezza del macchinario - Principi generali di progettazione - Valutazione del rischio e riduzione del rischio.
ISO 10517:2009 Tosasiepi portatili a motore - Sicurezza.
-I seguenti (parti/clausole di) standard tecnici e specifiche techniche sono stati usati:
CISPR12/2007 +A1/2009: Veicoli, imbarcazioni e motori a combustione interna — Caratteristiche di radiodisturbo — Limiti e
metodi di misura per la protezione dei ricevitori non montati a bordo.

Original Instruction
Istruzione Originale
P/N 246271-01 1912 IN
Manufacturer/ Fabbricante:
Maruyama Mfg. Co., Inc. 4-15, Uchi-kanda 3-Chome, Chiyoda-ku,
Tokyo, 101-0047, Japan
Name and address of the european authorized representative/
Nome ed indirizzo dell’european autorizzarono rappresentativi:
Obelis European Authorized Representative Center (O.E.A.R.C.)
Boulevard Général Wahis, 53, B-1030 Brussels, Belgium
Tel: +(32) 2. 732.59.54 Fax: +(32) 2.732.60.03
This manual suits for next models
1
Table of contents