Kambrook KMO201 User manual

Kambrook - Australia
Building 2, Port Air Industrial Estate
1A Hale Street
Botany NSW 2019
Australia
Customer Service Line 1300 139 798
Customer Service Fax 1800 621 337
www.kambrook.com.au
Due to continual improvement in design or otherwise, the product you
purchase may differ slightly from the illustration in this book. Issue D14
Kambrook - New Zealand
Private Bag 94411
Botany, Manukau
Auckland 2163
New Zealand
Customer Service Line/
Spare Parts 0800 273 845
Customer Service Fax 0800 288 513
www.kambrook.co.nz

Instruction Booklet
Microwave
Oven
KMO201/251/301/301B

Important
Please retain your instruction
book for future use.
In the event that you need some assistance with your
Kambrook appliance, please contact our Customer Service
Department on 1300 139 798 (Australia) or 0800 273 845
(New Zealand). Alternatively, visit us on our website at
www.kambrook.com.au or www.kambrook.co.nz

Contents
Kambrook Recommends
Safety First
Your Kambrook
Microwave Oven
Using your Kambrook
Microwave Oven
Operating Your Kambrook
Microwave Oven
Hints & Tips
Care, Cleaning and Storage
Troubleshooting Guide
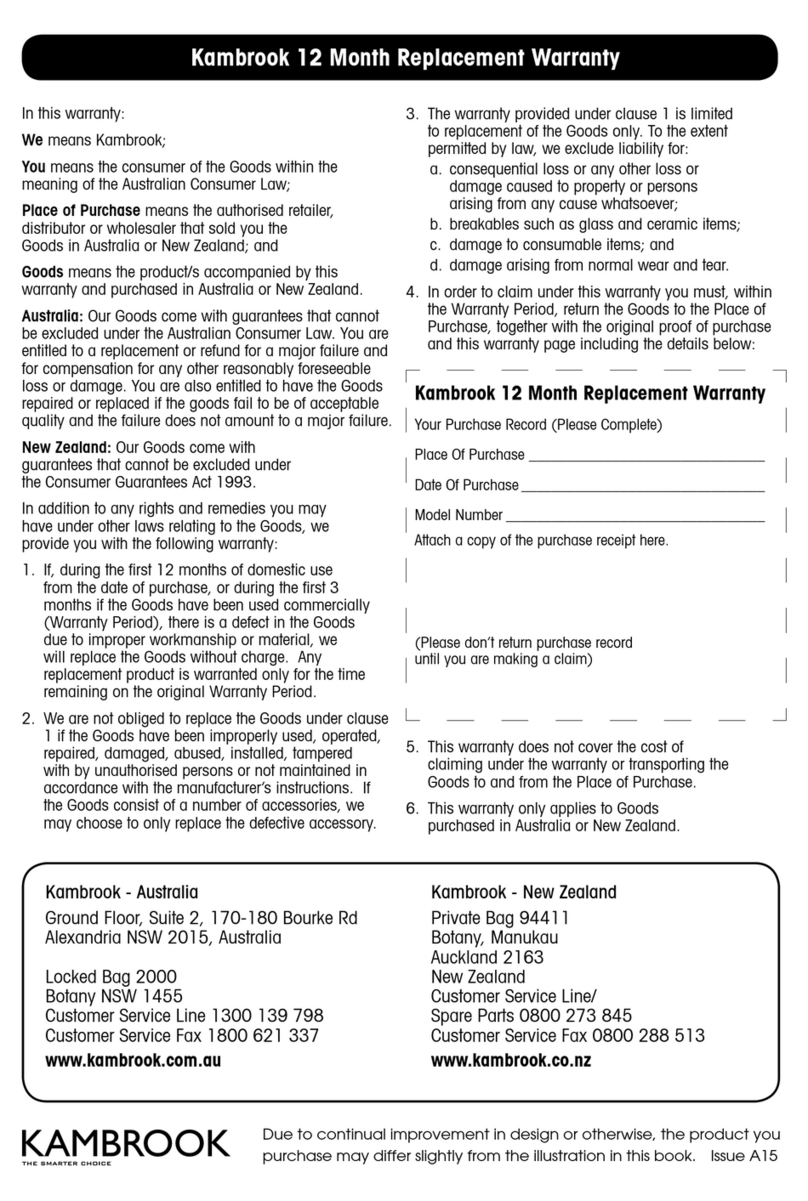
Warranty
p4
p8
p9
p10
p16
p17
p18
p23

4
• Carefully read all instructions before
operating the Microwave Oven and save for
future reference.
• Remove any packaging material and
promotional stickers and labels before using
the Microwave Oven for the first time.
• To eliminate a choking hazard for young
children, remove and safely discard the
protective cover fitted to the power plug of
this appliance.
• Do not place the Microwave Oven near the
edge of a bench or table during operation.
• Ensure all surfaces are level, clean and free
of water or any other substances.
• Do not place the Microwave Oven on or
near a hot gas or electric burner, or where it
could touch a heated oven.
• When using the Microwave Oven, provide
adequate air space above and on all sides
for air circulation.
• Always operate the Microwave Oven on
a heat-resistant surface. Do not use on a
cloth-covered surface, near curtains or other
flammable materials.
• Do not use the Microwave Oven on a metal
surface, for example, a sink drain board.
• Always ensure the Microwave Oven is
properly assembled before connecting to
the power outlet and operating. Do not use
the oven without the roller ring and glass
turntable tray in place. Ensure the turntable
tray is positioned correctly into the indents on
the rotating shaft.
• The Microwave Oven is not intended to be
operated by means of an external timer or
separate remote control system.
• Never use the Microwave Oven without food
or water in the oven cavity. Operating the
Microwave Oven when empty could cause
damage to the appliance.
• Do not leave the Microwave Oven
unattended when in use.
• Do not touch hot surfaces. Allow the
Microwave Oven to cool before moving or
cleaning any parts.
• Do not place or store anything on top of the
Microwave Oven.
• Always ensure the Microwave Oven is
turned off at the power outlet and the cord
is unplugged from the power outlet before
attempting to move the appliance, when
not in use, if left unattended and before
disassembling, cleaning or storing.
• Keep the appliance and accessories clean.
Follow the cleaning instructions provided in
this book.
• Wipe the oven cavity with a soft, damp
cloth after each use. Leaving food residue,
grease or fat in the cavity could cause the
oven cavity to overheat and may cause the
Microwave Oven to smoke or catch fire.
• The Microwave Oven should be cleaned
regularly and any food residue or splattering
should be removed. Failure to maintain
the Microwave Oven in a clean condition
could lead to deterioration of the surface,
adversely affecting the life of the appliance
and possibly resulting in a hazardous
situation
Kambrook Recommends Safety First
IMPORTANT: Please retain your
instruction book for future use.
At Kambrook, we believe that safe performance is the first priority in any
consumer product, so that you, our valued customer can confidently
use and trust our products. We ask that any electrical appliance that
you use be operated in a sensible fashion with due care and attention
placed on the following important operating instructions.
Important Safeguards For Your Kambrook
Microwave Oven

5
• If the door seals or any part of the Microwave
Oven are damaged, the Microwave Oven
must not be operated until it has been
inspected and/or repaired at an authorised
Kambrook Service Centre.
• Ensure all food containers and/or plates are
suitable for use in the Microwave Oven. This
should be done prior to preparing food for
heating or cooking in the Microwave Oven.
Monitor foods and liquids heating or cooking
in the Microwave Oven at all times due to
the possibility of containers igniting.
• Containers or plates suitable for use in the
Microwave Oven should not exceed the
width of the glass turntable tray as this may
impede the rotation of the tray and result in
food being unevenly cooked.
• Food and/or liquids should not be heated or
cooked directly on the turntable tray. Food
and/or liquids must be placed into a suitable
microwave-proof container before placing
onto the turntable tray.
• Food and/or liquids should not be heated
or cooked in plastic or paper containers or
bags, unless specified as suitable for use by
the manufacturer, due to the possibility of
containers exploding or igniting. Metal clips
or twists should be removed from packaging
as these could cause sparking and/or fire.
• Do not use recycled paper or kitchen paper
towelling when cooking. Recycled paper
may contain small metal or other impurities
which could cause sparking and/or fire.
• Do not use metal containers or utensils in
the Microwave Oven as these could cause
sparking and/or fire.
• Food grade foil wrapping may be used in a
single layer to mask 1⁄3portion of the food to
be cooked and should not extend pass the
edge of the glass turntable tray. Food grade
foil should not be used in layers or fully cover
the food as this could cause sparking and/or
fire. Food grade foil should not be used
to cover any part of the glass turntable tray.
• Ensure that lids and caps covering containers
are removed prior to placing liquids and/or
foods into the Microwave Oven since they
are liable to explode.
• Feeding bottles and baby food jars should
have the lids and caps removed before
warming or heating in the Microwave Oven.
To avoid burns or scalding after heating, the
contents should be stirred or shaken and the
temperature checked before serving.
• Always ensure the temperature of food or
drink which has been heated or cooked
in the Microwave Oven has been tested
before eating, drinking or serving to others,
especially children, disabled or elderly
people.
• The heating of liquids and beverages in
the Microwave Oven can result in delayed
eruptive boiling. Care must be taken when
handling any containers containing hot
liquids or beverages.
• Do not heat popcorn in the Microwave
Oven unless it has been commercially
packaged for microwave use. There may be
a number of un-popped kernels that may
overcook and burn when popping popcorn.
Do not use oil unless recommended by
the manufacturer. Do not pop popcorn
longer than the manufacturer’s instructions
(popping time should not exceed 3 minutes).
Longer cooking could cause scorching
or fire.
• Do not cook any food surrounded by a
membrane (such as potatoes, chicken liver,
egg yolks, oysters, etc) without first piercing
the membrane several times with a fork.
• Fresh eggs in the shell and whole hard-boiled
eggs should not be cooked or heated in
the Microwave Oven as they may explode
during cooking, at the end of cooking
or after removing from the Microwave Oven.
• Do not heat oil or fat for shallow or deep
frying in the Microwave Oven. Doing so may
cause the Microwave Oven and/or the oil to
overheat and/or ignite.
• If any smoke is observed, switch off
and unplug the Microwave Oven at the
power outlet. Keep the door closed to stifle
any flames.
• Do not attempt to operate the Microwave
Oven by any method other than those
described in this book.
• Do not disconnect the Microwave Oven from
the power supply by pulling on the cord to
unplug from the power outlet.
• When storing the Microwave Oven, loosely
wind the cord. Donot wrap the cord around
the Microwave Oven.
• Some containers and/or plates may appear
suitable for use in the Microwave Oven but
may be coated in a glaze that will absorb
the microwave energy, overheat and cause
the container to crack. The glaze may also
prevent the food from heating/cooking.
WARNING:Liquids or
other foods must not
be heated in sealed
containers since they
are liable to explode.

6
Important Safeguards For Your Kambrook
Essentials 30L Microwave Oven continued
! WARNINGS FOR
MICROWAVE USE:
• Donotattempttooperatetheovenwith
thedooropensinceopen-dooroperation
canresultinharmfulexposuretomicrowave
energy.Itisimportantnottodefeatortamper
withthesafetyinterlocks.
• Donotplaceanyobjectbetweentheoven
frontfaceandthedoororallowsoilor
cleanerresiduetoaccumulateonsealing
surfaces.
• Liquidsandotherfoodsmustnotbeheated
insealedcontainerssincetheyareliableto
explode.
• Ifthedoorordoorsealsaredamaged,the
ovenmustnotbeoperateduntilithasbeen
repairedbyaBrevilleServiceCentre.Itis
particularlyimportantthattheovendoor
closesproperlyandthatthereisnodamage
tothe:(1)Door(bent),(2)Hingesand
latches(brokenorloosened),(3)Doorseals
andsealingsurfaces.
• Donotputanyforeignmaterialbetweenthe
dooranddoorjamofthemicrowaveoven
asthiscouldcauseexcessiveleakageof
microwaveenergy.
• Itishazardousforanyoneotherthana
KambrookServiceCentretocarryoutany
serviceorrepairoperationthatinvolvesthe
removalofacoverwhichgivesprotection
againstexposuretomicrowaveenergy.
• Surfacesmaybehotduringandafteruse.
• Iftheapplianceisnotmaintainedinagood
stateofcleanliness,itssurfacecouldbe
degradedandaffectthelifespanofthe
productandleadtoadangeroussituation.
WARNING:Only allow
children to use the oven
without supervision when
adequate instructions
have been given so that
the child is able to use
the oven in a safe way
and understands the
hazards of improper use.
WARNING:Check the
oven for any damage,
such as misaligned or
bent door, damaged
door seals and sealing
surface, broken or
loose door hinges
and latches and dents
inside the cavity or
on the door. If there is
any damage, do not
operate the oven and
contact a Kambrook
Service Centre.

7
Important Safeguards For All
Electrical Appliances
• Fully unwind the power cord before use.
• Connect only to 230V or 240V
power outlet.
• Do not let the power cord hang over
the edge of a bench or table, touch hot
surfaces or become knotted.
• To protect against electric shock do not
immerse the power cord, power plug or
appliance in water or any other liquid.
• The appliance is not intended for use by
persons (including children) with reduced
physical, sensory or mental capabilities,
or lack of experience and knowledge,
unless they have been given supervision or
instruction concerning use of the appliance
by a person responsible for their safety.
• Children should be supervised to ensure
that they do not play with the appliance.
• It is recommended to regularly inspect the
appliance. To avoid a hazard do not use
the appliance if power cord, power plug or
appliance becomes damaged in any way.
Return the entire appliance to the nearest
authorised Kambrook Service Centre for
examination and/or repair.
• Any maintenance other than cleaning
should be performed at an authorised
Kambrook Service Centre.
• This appliance is for household use only. Do
not use this appliance for anything other
than its intended use. Do not use in moving
vehicles or boats. Do not use outdoors.
Misuse may cause injury.
• The installation of a residual current device
(safety switch) is recommended to provide
additional safety protection when using
electrical appliances. It is advisable that
a safety switch with a rated residual
operating current not exceeding 30mA be
installed in the electrical circuit supplying
the appliance. See your electrician for
professional advice.
• Always turn the appliance to the OFF
position, switch off at the power outlet
and unplug at the power outlet when the
appliance is not in use.
• Before cleaning, always turn the
appliance to the OFF position, switch off
at the power outlet, unplug at the power
outlet and remove the power cord, if
detachable, from the appliance and
allow all parts to cool.
• Do not place this appliance on or near
a hot source, such as hot plate, oven or
heaters.
• Position the appliance at a minimum
distance of 20cm away from walls,
curtains and other heat or steam sensitive
materials and provide adequate space
above and on all sides for air circulation.
WARNING:Surfaces
may be hot during and
after use.

8
Your Kambrook Microwave Oven
1. 10 power levels
2. 6 auto cook settings: Popcorn,
Potato, Pizza, Frozen Veg, Hot
Choc, & Dinner Plate
3. Capacity:
KMO201 – 20 litres
KMO251 – 25 litres
KMO301/B – 30 litres
4. Weight and time defrost
5. LED Screen and clock
6. Child safe lock
7. Rollar ring
8. Glass turntable:
KMO201 – 255mm
KMO251 – 315mm
KMO301/B – 315mm
KMO301 shown
Insert image KMO301B

9
Using Your Kambrook Microwave Oven
LED Screen – shows selected cooking
time, power, and time-of-day.
Set Time – The ‘SET TIME’ setting allows
for instant programming for up to 99
minutes and 99 seconds. The default
power level is “PL10”.
Time Defrost –
The ‘TIME DEFROST’
setting is for programming the
defrosting of frozen foodstuffs by
time and automatically divides the
defrosting time into periods, alternating
between defrosting and standing by
cycling between on and off.
Weight Defrost – The ‘WEIGHT
DEFROST’ setting is used for defrosting
frozen meat, poultry and seafood
by weight. The defrosting time and
power level is automatically set once
the food category and the weight
are set.
Power – The ‘POWER’ button is
used to select the power level
required for cooking and can only
be used in conjunction with another
cooking setting.
Clock – The ‘CLOCK’ button is for
setting the time-of day or to recall
the time-of-day display. The time-
of-day will be displayed at all times
except when the microwave oven
is operating. In the event of a power
failure or if the microwave oven is
unplugged, the clock will have to
be re-set.
Kitchen Timer – The ‘KITCHEN TIMER’ is
a countdown timer function that can
be used to monitor cooking times for
other appliances in the kitchen.
Popcorn – The ‘POPCORN’ setting
has 2 pre-set weight and time
settings, specifically determined for
cooking popcorn.
Potato – The ‘POTATO’ setting has
3 pre-set weight and time settings,
specifically determined for
cooking potatoes.
Pizza – The ‘PIZZA’ setting has 3 pre-set
weight and time settings, specifically
determined for cooking pizza.
Frozen Vegetable – The ‘FROZEN VEG’
setting has 3 pre-set weight and time
settings, specifically determined for
cooking frozen vegetables.
Hot Choc – The ‘HOT CHOC’ setting
has 3 pre-set cup sizes, for heating
hot chocolate.
Dinner Plate – The ‘DINNER PLATE’
setting has 3 settings for quickly
heating plates before a meal.
Stop/Cancel – The ‘STOP/CANCEL’
button enables the selected power
level, cook or defrost times previously
programmed to cease operation.
Memory – The ‘MEMORY’ function
enables up to 3 cooking programmes
to be saved to be recalled and
used again.
Start/+30 SEC – The ‘START/+30 SEC’
button is for activating all cooking or
defrosting functions, as well as adding
30 seconds to the cooking time, or
programming cooking time by 30
second lots. The interior oven light will
turn on, the interior fan will operate
and the glass turntable will rotate.

10
Operating Your Kambrook Microwave Oven
Before First Use
Before first use remove all promotional
stickers and packaging material.
Carefully unpack the microwave
oven and keep all the packing
material until all the parts of the
microwave oven have been found
and the appliance has been
assembled. It is recommended to
keep all the packing material in a
safe place in case you wish to repack
the product for shipping purposes.
To remove any dust that may have
accumulated during packing, wash
the roller ring and glass turntable in
warm soapy water, rinse in clean
water then dry thoroughly. Wipe the
interior and exterior of the microwave
oven with a soft, damp cloth then
dry thoroughly.
WARNING:
Do not
immerse any part of your
microwave oven in water
or any other liquid.
Assembling the Glass
Turntable and Turning “On”
the Microwave Oven
1. Place the roller ring into position
in the indented space in the oven
cavity base.
2. Insert the glass turntable into
position, matching the indents on
the base of the glass turntable
with the indents in the shaft
located in the centre of the oven
cavity base.
3. Plug the power cord into a 230V
or 240V power outlet. Switch on at
the power outlet. The microwave
oven is now “On”.
Setting the Clock
1. Press the ‘CLOCK’ button, “00:00”
will be displayed on the LED Screen.
2. Using the number pad, enter the
current time. For example, if the
time is 12:10 now, press ‘1’, ‘2’, ‘1’,
‘0’ in that order.
3. Press the ‘CLOCK’ button again
to finish setting. “:” will now flash
indicating that the time has
successfully been set.
NOTE: The microwave oven
features a 12 hour clock. To set the
time, a valid time between 1:00
and 12:59 needs to be entered.
NOTE: In the process of clock
setting, if the ‘STOP/CANCEL’
button is pressed or if there is no
operation within 1 minute, the
oven will automatically go back
to standby.
Kitchen Timer
1. Press the ‘KITCHEN TIMER’ button,
the LED Screen will display
“00:00” flashing.
2. Using the number pad, enter the
required countdown timer time
(the maximum time is 99 minutes
and 99 seconds).
3. Press the ‘START/+30SEC’ button to
confirm the time and commence
the countdown.
4. When the timer has counted down
to “0”, it will beep 5 times. The LED
Screen will revert back to standby.
NOTE: The Kitchen Timer is only
a countdown mechanism, the
microwave will not cook on
this setting.

11
Microwave Cooking
1. Press the ‘SET TIME’ button once,
The LED Screen will display “00:00”.
2. Using the number pad, input the
cooking time; the maximum cooking
time is 99 minutes and 99 seconds.
3. Press the ‘POWER’ button once,
the LED Screen will display “PL10”.
The default power setting is 100%
power. Now use the number pad
to adjust the power level (as per
the ‘Microwave Power Levels’
table).
4. Press ‘START/+30SEC’, to
commence operation.
Example: Microwave with 50% power
for 15 minutes.
1. Press the ‘SET TIME’ button once
“00:00” is displayed on the
LED Screen.
2. Press ‘1’, ‘5’, ‘0’, ‘0’ in that order.
3. Press the ‘POWER’ button once,
then press ‘5’ to select 50%
microwave power “PL5”.
4. Press the ‘START/+30SEC’ button to
commence operation.
NOTE: During microwave
cooking, ‘POWER’ can be
pressed to change the power
level. After pressing ‘POWER’, the
current power level will light for
3 seconds, now you can select
the new power level, by pressing
the relevant number (as per
the ‘Microwave Power Levels’
table). The oven will work with the
selected power for the remaining
cooking time.
Microwave Power Levels
Press ‘POWER’
& Number Pad
Microwave
Power
LED Screen
Display
10 100% PL10
9 90% PL9
8 80% PL8
7 70% PL7
6 60% PL6
5 50% PL5
4 40% PL4
3 30% PL3
2 20% PL2
1 10% PL1
Example: To set power level 8 “PL8”,
when using in conjunction with a
microwave setting.
1. Press the ‘POWER’ button once, the
LED Screen will display “PL10”. Then
press ‘8’, the power level is now set
at 80% power “PL8”.
NOTE: The Power Level function
is not an independent setting.
Please read through the
instructions to see how it is
programmed in conjunction with
other microwave settings.
End Cooking Reminder
When cooking is completed, the
beeper will sound 5 “beeps” to alert
the user that operation has ceased.

12
Weight Defrost Function
1. Press the ‘WEIGHT DEFROST’ button,
the LED Screen will display “dEF1”.
2. Using the number pad, input the
weight of the food to be defrosted
(between 100gm and 2000gm).
NOTE: If the weight input is not
between 100gm and 2000gm,
the input will be invalid and the
microwave oven will not operate.
The microwave oven will only
operate once a valid weight has
been entered.
3. Press the ‘START/+30SEC’ button to
start defrosting. The cooking time
remaining will be displayed on the
LED Screen.
Time Defrost Function
1. Press the ‘TIME DEFROST’ button,
the LED Screen will display “dEF2”.
2. Using the number pad, input the
defrosting time. The effective time
range is 00:01~99:99
3. The default microwave power is
power level 3 “PL3”. To change
the power level, press ‘POWER’
once, and the LED Screen will
display “PL3”, then use the
number pad to select the power
level required.
4. Press the ‘START/+30SEC’ button
to start defrosting. The remaining
cooking time will be displayed.
Popcorn Function
1. Press the ‘POPCORN’ button
repeatedly until the approximate
weight you wish to cook appears on
the LED Screen, “50” or “100” grams
will be displayed in that order. For
example, press ‘POPCORN’ once,
“50” will be
displayed.
2. Press the ‘START/+30SEC’ button
to commence operation, the
beeper will sounds once. When
cooking is finished, the beeper
will sound five times and the LED
Screen will revert back to standby.
NOTE:
Only use popcorn packs
designed to be microwaved. Ensure
that the instructions and warnings
on the pack are followed.
Potato Function
1. Press the ‘POTATO’ button
repeatedly until the number of
potatoes (or approximate weight
of potatoes) to be cooked
appears on the LED Screen,“1”,
“2”, “3” will display in that order.
• “1” : 1 potato
(approximately 230 grams)
• “2” : 2 potatoes
(approximately 460 grams)
• “3” : 3 potatoes
(approximately 690 grams)
For example, press the ‘POTATO’
button once, “1” will be displayed.
Press the ‘START/+30SEC’ button to
commence operation, the beeper
will sound once. When cooking is
complete, the beeper will sound five
times and the LED Screen will revert
back to standby.
NOTE: DO NOT cook a potato
unless it has been pierced
several times.
Operating Your Kambrook Microwave Oven continued

13
Frozen Vegetable Function
1. Press the ‘FROZEN VEG’ button
repeatedly until the weight of the
frozen vegetables to be cooked
appears on the LED Screen,
“150”, “350”, “500” grams will
be displayed in that order. For
example, to programme 150 grams
press the ‘FROZEN VEG’ button
once, “150” will be displayed.
2. Press the ‘START/+30SEC’ button
to commence operation, the
beeper will sound once. When
cooking is finished, the beeper
will sound five times and the LED
Screen will revert back to standby.
Hot Chocolate Function
1. Press the ‘HOT CHOC’ button
repeatedly until the number of cups
to be heated appears on the LED
Screen, “1”, “2”, “3” (representing
cups) will be displayed in that order.
One cup is approximately 120ml.
For example, press the ‘HOT CHOC’
button once, “1” will be displayed.
2. Press the ‘START/+30SEC’ button
to commence operation, the
beeper will sound once. When
cooking is finished, the beeper
will sound five times and the LED
Screen will revert back to standby.
Dinner Plate Function
1. Press the ‘DINNER PLATE’ button
repeatedly until the approximate
weight of the food to be re-heated
appears on the LED Screen,
“250”, “350”, “500” grams will
display in that order. For example,
press the ‘DINNER PLATE’ button
once , “250” will be displayed.
2. Press the ‘START/+30SEC’ button to
commence cooking, the beeper
will sound once. When heating
is finished, the beeper will sound
five times and the LED Screen will
revert back to standby.
Pizza Function
1. Press the ‘PIZZA’ button
repeatedly until the approximate
weight of the pizza to be cooked
appears on the LED Screen,
“100”, “200”, “400” grams will
be displayed in that order. For
example, press the ‘PIZZA’ button
once, “100” will be displayed.
2. Press the ‘START/+30SEC’ button
to commence cooking, the
beeper will sound once. When
cooking has finish, the beeper will
sound five times and then the LED
Screen will revert back to standby.
To Set the Memory Function
The Memory Function allows
for three programmes to be set and
saved in order to be recalled and
used again. The programmes can be
multi-staged, using different cooking
programmes and power levels.
Example: Set the following procedure
as the second memory, with 80%
microwave power for 3 minutes and
20 seconds.
NOTE: Only one or two stages
can be set on a single memory
programme.
The steps are as follows:
1. Press the ‘0/MEMORY’ button
twice, stop when the LED Screen
displays “2”.
2. Press the ‘SET TIME’ button once,
then press ‘3’, ‘2’, ‘0’ in order.
3. Press the ‘POWER’ button once.
“PL10” will be displayed on
the LED Screen, then press the
‘8’ button, “PL8” will now be
displayed on the LED Screen.

14
4. Press the ‘START/ +30 SEC’ button
to save the setting as Memory
Function setting 2. The beeper will
sound once and will display “2”.
The setting has now been saved
as Memory “2”.
5. Press the ‘START/+30SEC’ button
again to commence operation.
NOTE:
If the electricity is not cut off,
the procedure will be saved. If it is,
the procedure needs to be reset.
To Recall the Memory
Function
In order to recall the saved cooking
programme, press the ‘0/MEMORY’
button twice,the LED Screen
will display “2”, then press the
‘START/+30SEC’ button to commence
operation.
Multi-stage cooking
At most, 2 stages can be set for
cooking. In multi-stage cooking,
if one stage is defrosting, then
defrosting will be automatically
saved as the first stage.
NOTE: The 6 Auto cooking
programs can not be
programmed in to a multi-stage
cooking setting.
Example: To cook with 80%
microwave power “PL8” for 5 minutes
+ 60% microwave power “PL6” for
10 minutes. The cooking steps are as
following:
1. Press the ‘SET TIME’ button once,
then press ‘5’, ‘0’, ‘0’ to set the
cooking time.
2. Press the ‘POWER’ once, then
press the ‘8’ button to select 80%
microwave power “PL8”.
3. Press the ‘SET TIME’ button once,
then press ‘1’, ‘0’, ‘0’, ‘0’ to set the
cooking time to 10 minutes.
4. Press the ‘POWER’ button again,
then press the ‘6’ button to select
60% microwave power “PL6”.
5. Press the ‘START/+30 SEC’ button
to commence operation.
Inquiry Function
1. The Inquiry Function allows for the
power level or time to be viewed
during operation.
The power level can only be
viewed when the microwave
oven is operating on a SET TIME
setting. To view the power level,
press the ‘POWER’ button and the
power level will be displayed on
the LED Screen for 3 seconds.
To view the time, press the
‘CLOCK’ button during operation
and the time will be displayed on
the LED Screen for 3 seconds.
Child Lock Function
1. To activate the Child Lock, press
and hold the ‘STOP/CANCEL’
button for 3 seconds, there will
be a long “beep” denoting that
the microwave is entering into the
child-lock state; meanwhile, the
LED Screen will display:
Operating Your Kambrook Microwave Oven continued

15
2. To de-activate the Child Lock,
in the locked state, press and
hold the ‘STOP/CANCEL’ button
for 3 seconds, there will be a long
“beep” denoting that the lock
is released.
WARNING:
Check the
microwave oven for
any damage, such as
misaligned or bent door,
damaged door seals and
sealing surface, broken
or loose door hinges
and latches and dents
inside the cavity or on
the door. If there is any
damage, do not operate
the microwave oven and
contact a Kambrook
Service Centre.
WARNING:Do not
immerse the microwave
oven, power cord or plug
in water or any
other liquid.

16
Microwave Utensils
• Containers, plates, dishes, etc.
used in the microwave oven
should always be microwave-safe.
Check if stated on the underside
of the utensil or contact the
manufacturer.
• To test if a container, plate or dish
is microwave-safe, place it into
the
microwave oven
with 1 cup
of cold water and heat on High
Power “PL10” for 1 minute. If the
container is hot and the water is
cold, the container is not suitable
for
microwave oven
use. If the
container is cold and the water is
hot, then the container is suitable
for
microwave oven
use.
• Metal containers and utensils
should not be used in the
microwave oven
.
• Foods that are high in liquid,
fat and sugar cook well in the
microwave oven.
• Drier foods require shorter
cooking time.
• Always arrange food carefully.
Place the thickest areas towards
the outside of the dish.
• Place smaller items, such as 1 cup
drinks, towards the outer edge of
the glass turntable.
• Place larger items, such as
chicken or cake, in the centre of
the glass turntable.
• Larger items, such as chicken
or cake, should be raised on a
microwave-safe rack for more
even cooking.
• Pay close attention to the cooking
time. Cook for the shortest
amount of time indicated and
add more time as needed. Food
that is severely overcooked can
smoke or ignite.
• Cover foods loosely with vented
lids or microwave safe plastic
wrap while heating or cooking.
• Covering foods prevents splattering
and helps foods cook evenly.
• Turn foods over once during
microwaving to speed the
cooking process of foods such as
chicken and hamburgers. Large
items like roasts must be turned
over at least once.
• Rearrange foods such as
meatballs halfway through
cooking both from top to bottom
and from the centre of the dish to
the outside.
Hints & Tips

17
1. Switch off the microwave oven
at the power outlet and remove
the plug from the power outlet
before cleaning.
2. Keep the inside of the
microwave
oven
clean. When food splatters
or spilled liquids adhere to the
microwave oven internal walls,
wipe with a damp cloth. Mild
detergent may be used if the
cavity gets very dirty. Avoid the
use of spray and other harsh
cleaners as they may stain, streak
or dull the door surface.
3. The outside surfaces should be
cleaned with a damp cloth. To
prevent damage to the operating
parts inside the microwave
oven cavity, water should not
be allowed to seep into the
ventilation openings.
4. Wipe the door and window on
both sides of the door seals and
adjacent parts frequently with a
damp cloth to remove any spills
or spatters. Do not use an
abrasive cleaner.
5. Do not allow the control panel
to become wet. Clean with a
soft, damp cloth. When cleaning
the control panel, leave the
microwave oven door open
to prevent it from accidentally
turning on.
6. If steam accumulates inside or
around the outside of the oven
door, wipe with a soft dry cloth.
This may occur when cooking
foods high in moisture or if the
microwave oven is operated
under high humidity conditions,
this is normal.
Care, Cleaning and Storage
7. It is occasionally necessary to
remove the glass turntable for
cleaning. Wash the turntable in
warm soapy water, rinse in clean
water and dry thoroughly.
8. The roller ring and microwave
oven floor should be cleaned
regularly to ensure the glass
turntable rotates correctly and
avoids making excessive noise.
Simply wipe the bottom surface
of the microwave with a soft
damp cloth. The roller ring may
be washed in mild soapy water,
rinse in clean water and dry
thoroughly. When removing the
roller ring from the cavity floor for
cleaning, be sure to replace in the
proper position.
9. Remove odours from your
microwave oven by combining a
cup of water with the juice of one
lemon in a deep microwave-safe
bowl, microwave on High “PL10”
for 5 minutes. Wipe the microwave
oven cavity thoroughly and dry
with a soft cloth.
10. When it becomes necessary to
replace the oven light, please
consult your Kambrook Service
Centre to have it replaced.
11. Please do not dispose this
appliance with domestic rubbish; it
should be taken to the appropriate
disposal centre provided by the
local council municipalities.
12. If storing the microwave oven,
press the ‘STOP/CANCEL’ button,
switch off at the power outlet then
unplug the power cord. Ensure
the microwave oven is completely
cool, clean and dry. Secure the
roller ring and glass turntable
and close the door. Do not place
heavy objects on top. Store the
microwave oven upright.

18
Before you call for service
• Check to ensure that the
microwave oven is plugged in
securely. If it is not, remove the
plug from the power outlet,
wait 10 seconds and plug it in
again securely.
• Check for a blown circuit fuse or a
tripped main circuit breaker.
• If these seem to be operating
properly, test the power outlet
with another appliance.
• Check to ensure that the control
panel is programmed correctly
and the timer is set.
• Check to ensure that the door
is securely closed engaging
the door safety lock system.
Otherwise, the microwave energy
will not flow into the oven.
NOTE:
If none of the above
rectify the situation, then contact
your Kambrook Service Centre.
Do not try to adjust or repair the
microwave oven yourself.
Troubleshooting Guide

19
Problem Solution
Microwave
oven does not
heat
• Door not closed properly • Ensure door is shut properly
Possible Reason
Microwave oven
will not start
• Power cord not plugged in
properly or switched on
• Fuse blown or circuit
breaker problem
• Trouble with outlet
• Unplug, put the plug in
again and switch on
• Replace the fuse or reset
circuit breaker
• Have a professional check
that the outlet is not faulty
Glass turntable
makes
noise during
operation
• Roller not assembled
properly or needs to be
cleaned
• Reset and clean if necessary
Problem
Dim microwave oven light • When operating on low power levels, the
microwave oven light may be dimmer.
Explanation
Microwave oven interfering
with television reception
• Radio and TV reception may be interfered
with during operation. This is similar to the
interference that is sometimes cause by
vacuums, blenders etc.
Steam accumulating on
door and hot air coming
out from vents
• During operation, steam may be produced.
Most will exit through the vents, however
some may accumulate around the
oven door.
This manual suits for next models
3
Table of contents
Other Kambrook Microwave Oven manuals