Kärcher K250 User manual

250
5.956-052 05/03
Operator Manual
Manuel d’utilisation
Please keep the original box, packaging and receipt. Before operating this unit, please read
this manual thoroughly and retain it for future reference.
Veuillez conserver la boîte originale, l’emballage et le reçu. Avant d’utiliser cet appareil
pour la première fois, veuillez lire la présente notice et vous conformer aux instructions
qu’elle contient.

ENGLISH WindowWasher
2
Unit diagram
1 Battery cover (not shown)
2 Carryinghandle
3 Switch – spraying and vacuuming
4 Indicator lamp
5 Fresh-watertank
5a Cap – fresh-water tank
6 Dirty-water tank
6a Locking button – dirty-water tank
7 Threaded connection hose to unit
8 Plug-and-socketconnection
hose to cleaning head
9 Shoulderstrap
9a Fastening point for shoulder strap
10 Fastening point for waist belt
11 Spray button
12 Charger (notshown)
13 Cleaning head
13a Slider – cover
13b Rubberblade
13c Felt strip
1. Preparing the unit for use
Applications
• Cleaning of windows, tiles or smooth surfaces (e.g.
mirrors, kitchen cabinets, shower surrounds) with the
cleaning head.
!
Information about the battery
• The Window Washer should only be used with the lead
gel battery that has been supplied with the unit. Use
only the supplied charger to charge this battery.
• The battery should never be allowed to become fully
discharged, so charge it as soon as the indicator lamp
on the unit illuminates continuously or if there is a
marked reduction in performance (demonstrated by a
drop in the noise level and poor vacuuming results).
• We recommend that the battery is recharged overnight
after each use of the unit. Overcharging cannot happen
when doing so.
• If the unit is to remain unused for a lengthy period of
time, store the unit only with fully charged battery.
• See Chapter 3 for technical specifications relating to
the battery and charger.
Charging the battery
• Open the cover at the rear of the unit and insert the
battery in such a way that the battery contacts make
contact with those of the unit. Close the cover again.
(Fig. A, B)
!
Risk of short-circuit!Risk of short-circuit!
Risk of short-circuit!
Do not insert any conductive objects (e.g.
screwdriver, etc.) into the charging socket.

WindowWasher ENGLISH
3
• Charge the battery by
connecting the supplied
charger to the unit and then
plugging the charger into a
mains socket. The indicator
light on the unit should
illuminate to show that the
equipment has been
correctly connected to the
mains. (Fig. C)
• After the battery has been on charge for approx. 15 hours,
disconnect the charger from the mains.
Attaching the accessories
• Push the hose firmly on to
the cleaning head,
depending on the usage,
ensuring that the hose is
correctly aligned. (Fig. E)
• Insert the other end of the
hose into the unit and
secure the connection by
tightening the outer sleeve
on the hose. (Fig.F)
• Attach the shoulder strap by
inserting the studs into the
holes provided for this
purpose in the unit. (Fig.
G).
Instructions for use
!
Toavoiddamagetoequipmentandinjuryto
persons, never use detergents that contain
alcohol or generate large amounts of foam.
Use only original Kärcher cleaning agent in
the prescribed dosage.
Cleaning of windows, tiles or smooth surfaces
• Use the cleaning head. (Fig.E)
• Remove the fresh-water tank and open the cap. (Fig.H)
• Pour in 20 ml of Profi RM 500 (window cleaner) or Profi
RM 505 (tile cleaner). This corresponds to the content of
the supplied sample pack or one cap of a refill bottle. Fill
the tank with tap water. (Fig.I)
• Close the tank and put it on
the unit again. Release air
trapped in the unit by
pressing the venting button
for approx. 1 second. (Fig.
J)
Do not disconnect
the hose from the unit
if there is any water in the fresh-water tank,
otherwisethe water will escape.
• Switch on the spray pump
by pushing the unit switch
into position I. Spray the
surface that is to be cleaned
evenly from a distance of 6 -
8 inches (15-20 cm) by
pressing down on the button
on the grip section. (Fig.O)
Only spray on as
much cleaning liquid as does not run down.
!
Do not spray into eyes!

ENGLISH WindowWasher
4
• Push the switch back into
position 0 and loosen the
accumulation of dirt by
wiping with the felt strip.
(Fig. P)
• Activate the vacuum by
pushing the unit switch into
position II. Draw the rubber
blade from top to bottom
over the surface being
cleaned, while at the same
time applying a small
amount of pressure. The
dirty water is thus
vacuumed off. (Fig.Q)
• Finally vacuum off the lower
edge of the surface and then
push the switch back to
position 0. (Fig. R)
Cleaning and storing the unit
• Press the release buttons at
the side and detach the
dirty-water tank from below.
(Fig. S)
• Empty the dirty-water tank.
When replacing it
in the unit, make sure that
the release buttons snap
into place. (Fig. T)
The dirty-water tank should always be
emptied before the fresh-water tank is refilled,
otherwisewater can overflow anddamage the
unit.
• Always recharge the battery overnight before storing
the unit. (Fig. C)
• The grip section of the
cleaning head can be
fastened to the carrying
handle on the unit for
storage or transport
purposes. (Fig. U)
Indicator lamp on the unit
• The indicator lamp can illuminate briefly when the
vacuum action is switched on.
• If the indicator lamp is
continuously illuminated
while the unit is in use, the
battery must be recharged
immediately. (Fig. V)
Replacing the rubber blade and felt
strip
• Replace the rubber blade if there are still stripes on the
surface being cleaned after it has been vacuumed.
• To replace the rubber blade or felt strip, open the slider
on the cleaning head and remove the cover of the
cleaning head. (Fig.W)
• When replacing the rubber blade, take into account that
it can be inserted from both sides and used twice. (Fig.
X)
• Replace the cover and lock into place by closing the
slider

WindowWasher ENGLISH
5
2. Troubleshooting
Unit does not start
Check battery for correct seating.
Chargebattery.
Unit does not spray
Check connections of accessory.
Check to see whether there is still some water in
the fresh-water tank, refill if necessary.
Release air from the unit.
Screw off nozzle from the cleaning head and
clean it carefully under running water.
Unit does not vacuum
Check connections of accessory.
Check seating of the dirty-water tank.
Check seating of the rubber blade.
Other malfunctions
The authorised customer service must be
instructed to deal with other malfunctions.
3. Technical data
Operatingvoltage (battery) 8 V
Operating pressure(spray pump) 1 bar
Fresh-watertank 250 ml
Dirty-water tank 250 ml
Operating period of the unit
with fully charged battery approx. 35 min
Chargingtimeforemptybattery approx.15hours
Voltage of the battery charger 9 V
Chargingcurrent 500 mA
Weight(when ready to operate) 2.7 kg
Dimensions:
Length x width x height 250 x 130 x 260 mm
Maintenance
The appliance is maintenance-free.
Spare Parts
Only use original Kärcher spare parts. You will
find a list of spare parts at the end of this
document.
Protect the environment
The unit has a
rechargeablebattery
mounted.Remove this
before scrapping the unit
and dispose of it (at a
special collection point or
Kärcherdealer). Donot
put it into the household
rubbish.

FRANÇAIS WindowWasher
6
Schéma de l’appareil
1 Couvercle du compartiment à accus
(accus non représentés)
2 Poignéedetransport
3 Commutateur de pulvérisation et aspiration
4 Témoinlumineux
5 Réservoird’eau propre
5a Bouchon du réservoir d’eau propre
6 Réservoird’eausale
6a Bouton de verrouillage du réservoir
7 Embout à vis unissant le flexible et
l’appareil
8 Embout à emboîtement entre le flexible
et la tête de nettoyage
9 Sangle de transport
9a Fixation de la sangle
10 Fixation de la ceinture
11 Bouton de pulvérisation
12 Chargeur
13 Tête de nettoyage
13a Curseur du couvercle
13b Raclette en caoutchouc
13c Manchon en non-tissé
1. Mise en service de l’appareil
Description de l’utilisation
• La tête sert à nettoyer les fenêtres, carrelages ou
surfaces lisses (par ex. les miroirs, placards de cuisine,
cloisons de douche).
!
Informations relatives aux accus
• Ne faites marcher le Window Washer qu’avec les accus
au gel de plomb livrés d’origine. Ne les rechargez qu’avez
le chargeur livré d’origine.
• Etant donné que les accus ne doivent jamais se
décharger complètement, mettez-les à la recharge au
plus tard lorsque le témoin lumineux de l’appareil
s’allume par intermittence ou en cas de nette perte de
puissance (perceptible par une diminution du bruit ou une
aspiration moins bonne).
• Nous recommandons de mettre les accus à la recharge
pendant la nuit, après chaque utilisation de l’appareil. Il
n’y a aucun risque de surcharge.
• Si l’appareil doit rester longtemps sans servir, rangez-le
uniquement après avoir complètement rechargé ses
accus.
• Données techniques relatives aux accus et au chargeur:
voir le chapitre 3.
Rechargez les accus
• Ouvrez le couvercle situé au dos de l’appareil puis
introduisez les accus de telle sorte que leurs contacts
touchent ceux de l’appareil. Refermez le couvercle.
(Fig. A, B)
!
Risque de court-circuit !Risque de court-circuit !
Risque de court-circuit !
N’enfoncez aucun objet électroconducteur (par
ex. un tournevis ou assimilé) dans la prise de
recharge.

WindowWasher FRANÇAIS
7
• Pour recharger les accus,
branchez la fiche mâle du
chargeur dans une prise de
courant.
Le voyant du chargeur
s’allume pour indiquer qu’il
est bien relié au secteur.
(Fig. C)
• Débranchez le chargeur de la prise une fois qu’il a
rechargé les accus pendant 15 heures env.
Monter l’appareil
• En respectant le sens de
fixation, emmanchez
fermement le flexible sur la
tête de nettoyage, suivant
l’application. (Fig. E)
• Enfichez le flexible dans
l’appareil puis verrouillez la
fixation en tournant l’écrou à
collet situé sur le flexible.
(Fig. F)
• Fixez la sangle de transport
par ses boutons dans les
évidements à cet effet
prévus sur l’appareil. (Fig.
G)
Conseils d’utilisation
!
Pour éviter de blesser des personnes et
d’endommager l’appareil, n’utilisez jamais
de détergent à base d’alcool ou moussants.
N’utilisez que desdétergents Kärcher
d’origine dosés conformément aux
instructions figurant sur leurs emballages.
Nettoyage des fenêtres, carrelages ou surfaces
lisses
• Utilisez la tête de nettoyage. (Fig.E)
• Retirez le réservoir d’eau propre puis défaites
le bouchon. (Fig.H)
• Versez 20 ml de Profi RM 500 (détergent pour fenêtres)
ou Profi RM 505 (détergent pour carrelages). Cette
quantité équivaut à celle du sachet-échantillon livré avec
l’appareil, ou à un capuchon de la bouteille de recharge.
Remplissez le réservoir avec de l’eau du robinet. (Fig.
I)
• Fermez le réservoir puis
remontez-le sur l’appareil.
Pour dégazer l’appareil,
appuyez pendant env. 1
seconde sur le bouton de
dégazage. (Fig.J)
Si de l’eau se
trouvedans le réservoir
d’eaupropre, ne débranchez pas le flexible car
sinonl’eau fuierait.
• Pour enclencher la pompe
de pulvérisation, appuyez
sur l’interrupteur (Pos. I) de
l’appareil. Pulvérisez la
solution uniformément sur la
surface, à 15-20 cm de
celle-ci: appuyez sur le
bouton de la poignée puis
poussez-le (Fig. O)
Pulvérisez peu de solution détergente
sinon celle-ci coulerait sur la surface.
!
Le jet de liquide ne doit pas pénétrer dans
les yeux.

FRANÇAIS WindowWasher
8
• Appuyez sur l’interrupteur
de l’appareil pour le
ramener sur la position 0
puis détachez les
salissures en essuyant
avec le manchon en non-
tissé. (Fig. P)
• Pour enclencher
l’aspiration, appuyez sur
l’interrupteur (Pos. II) de l’
appareil.Appuyez
légèrement sur la raclette
en caoutchouc et passez-la
de haut en bas. Ce geste
réaspire l’eau sale présente
sur la surface. (Fig. Q)
• Pour terminer, passez la
raclette horizontalement au
bas de la surface puis
ramenez l’interrupteur de
l’appareil sur la position 0.
(Fig. R)
Nettoyage et rangement de l’appareil
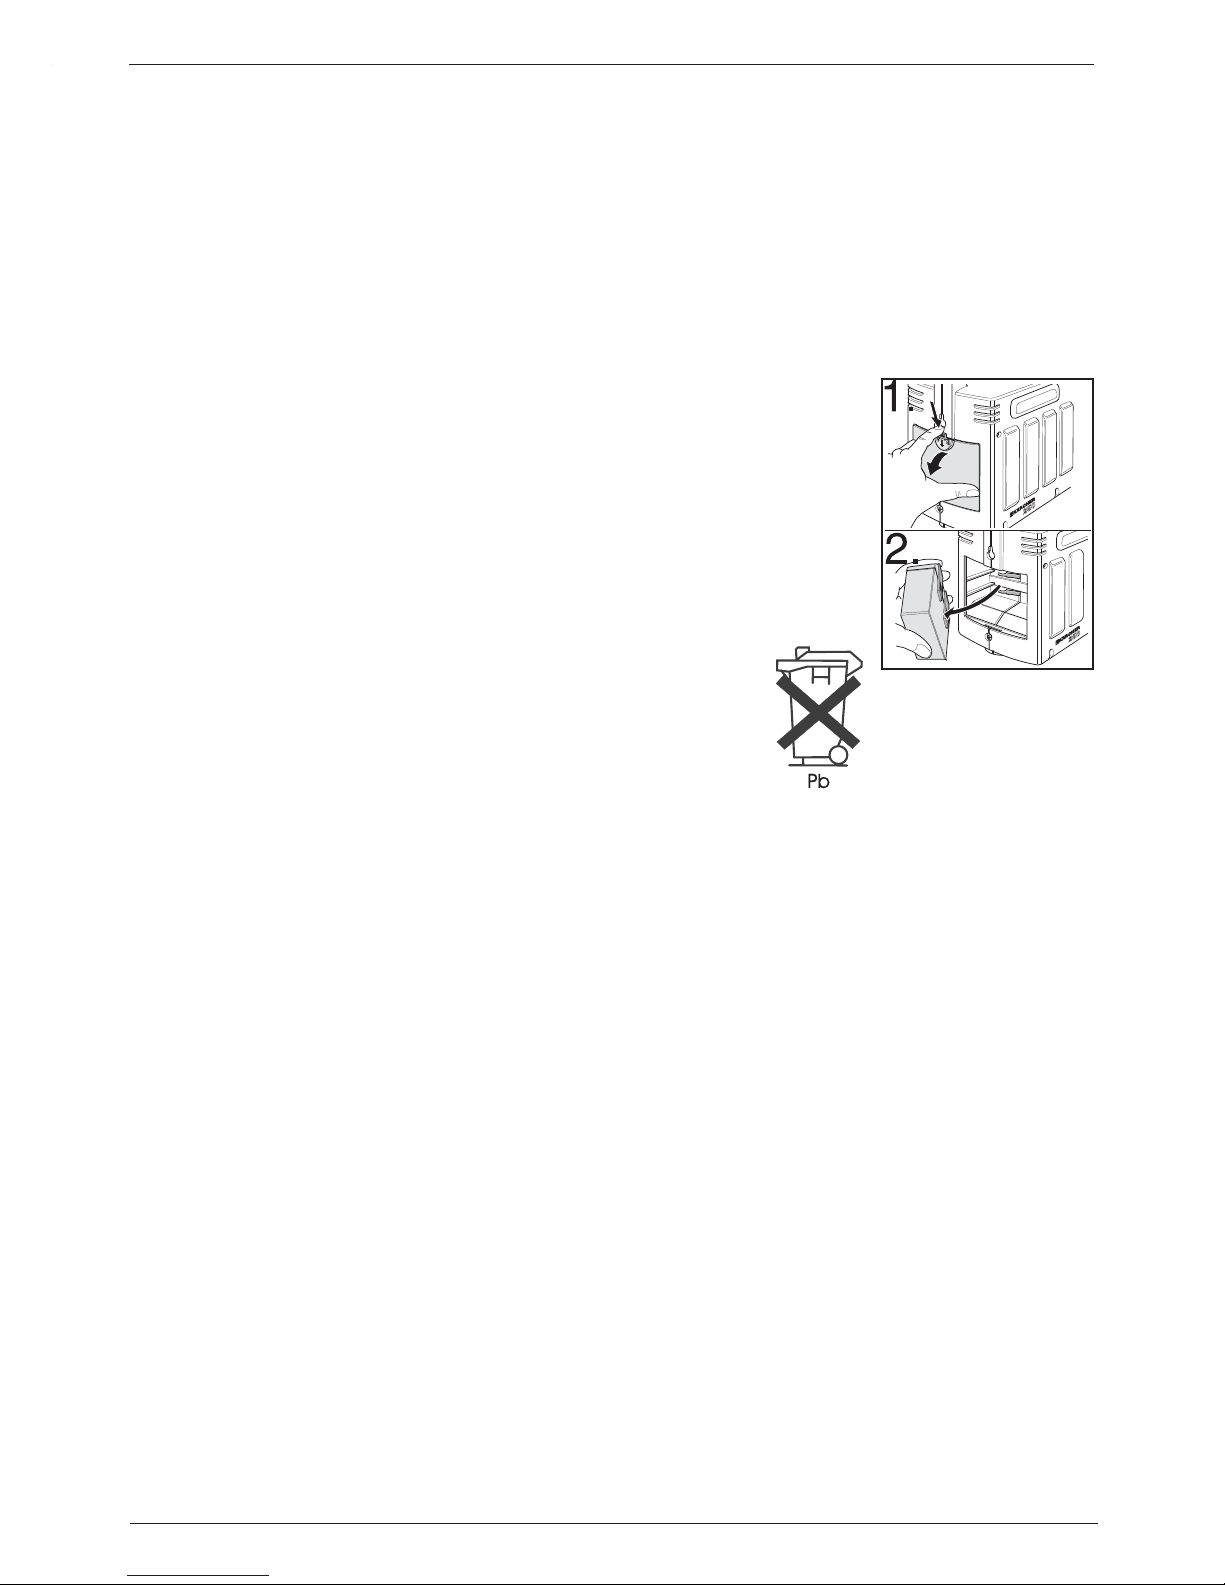
• Appuyez sur les boutons de
verrouillage latéraux puis
retirez le réservoir d’eau
sale par le bas. (Fig.S)
• Vidangez le réservoir d’eau
sale.Au moment de
réinstaller l’appareil, veillez
à ce que les boutons de
déverrouillage encrantent.
(Fig. T)
N’oubliez pas de
viderle réservoir d’eau
sale avant de refaire le plein du réservoir d’eau
propre,faute de quoi l’eauen débordant risque
d’endommagerl’appareil.
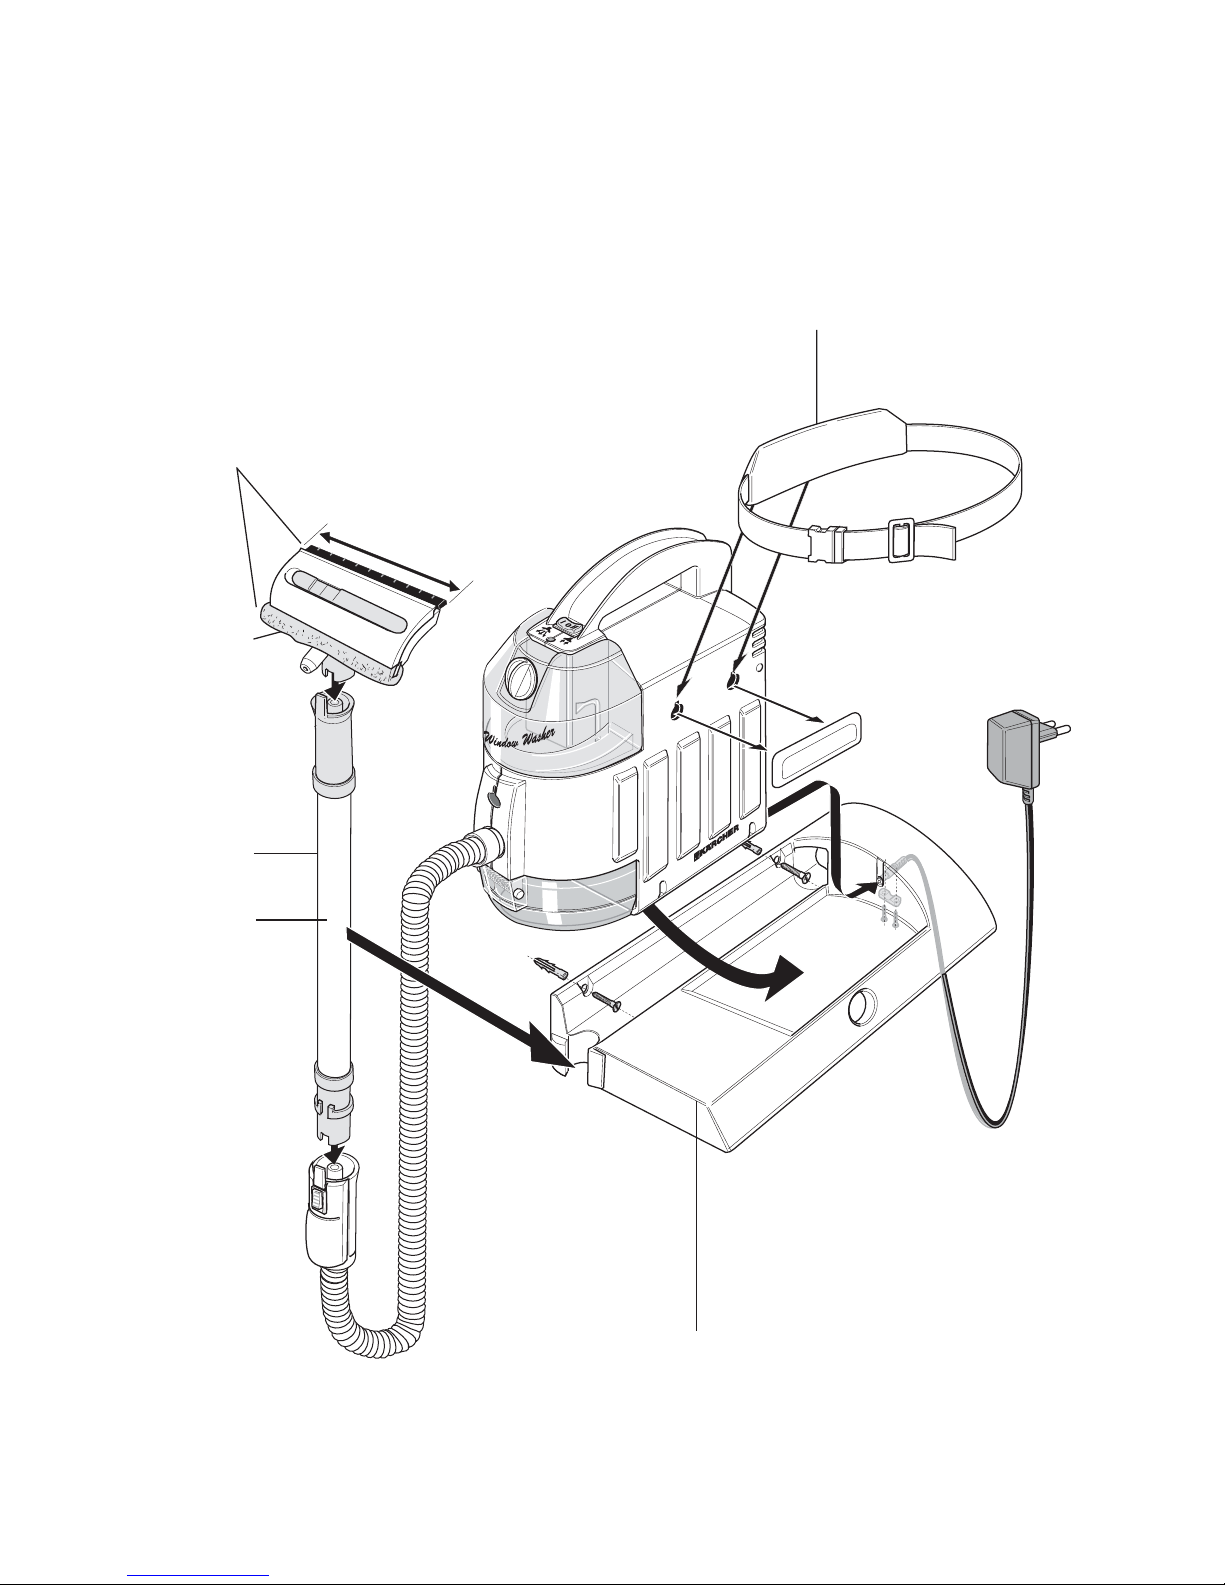
• Mettez toujours les accus à la recharge pendant la nuit
avant de ranger l’appareil. (Fig. C)
• Pour ranger l’appareil ou le
transporter, vous pouvez
verrouiller la poignée de la
tête de nettoyage dans la
poignée de transport de
l’appareil. (Fig. U)
Témoin lumineux sur l’appareil
• Lors de l’enclenchement de l’aspiration,
il peut arriver que le témoin lumineux s’allume
brièvement.
• Si le voyant lumineux reste
allumé en permanence
pendant le service, mettez
les accus immédiatement à
la recharge. (Fig.V)
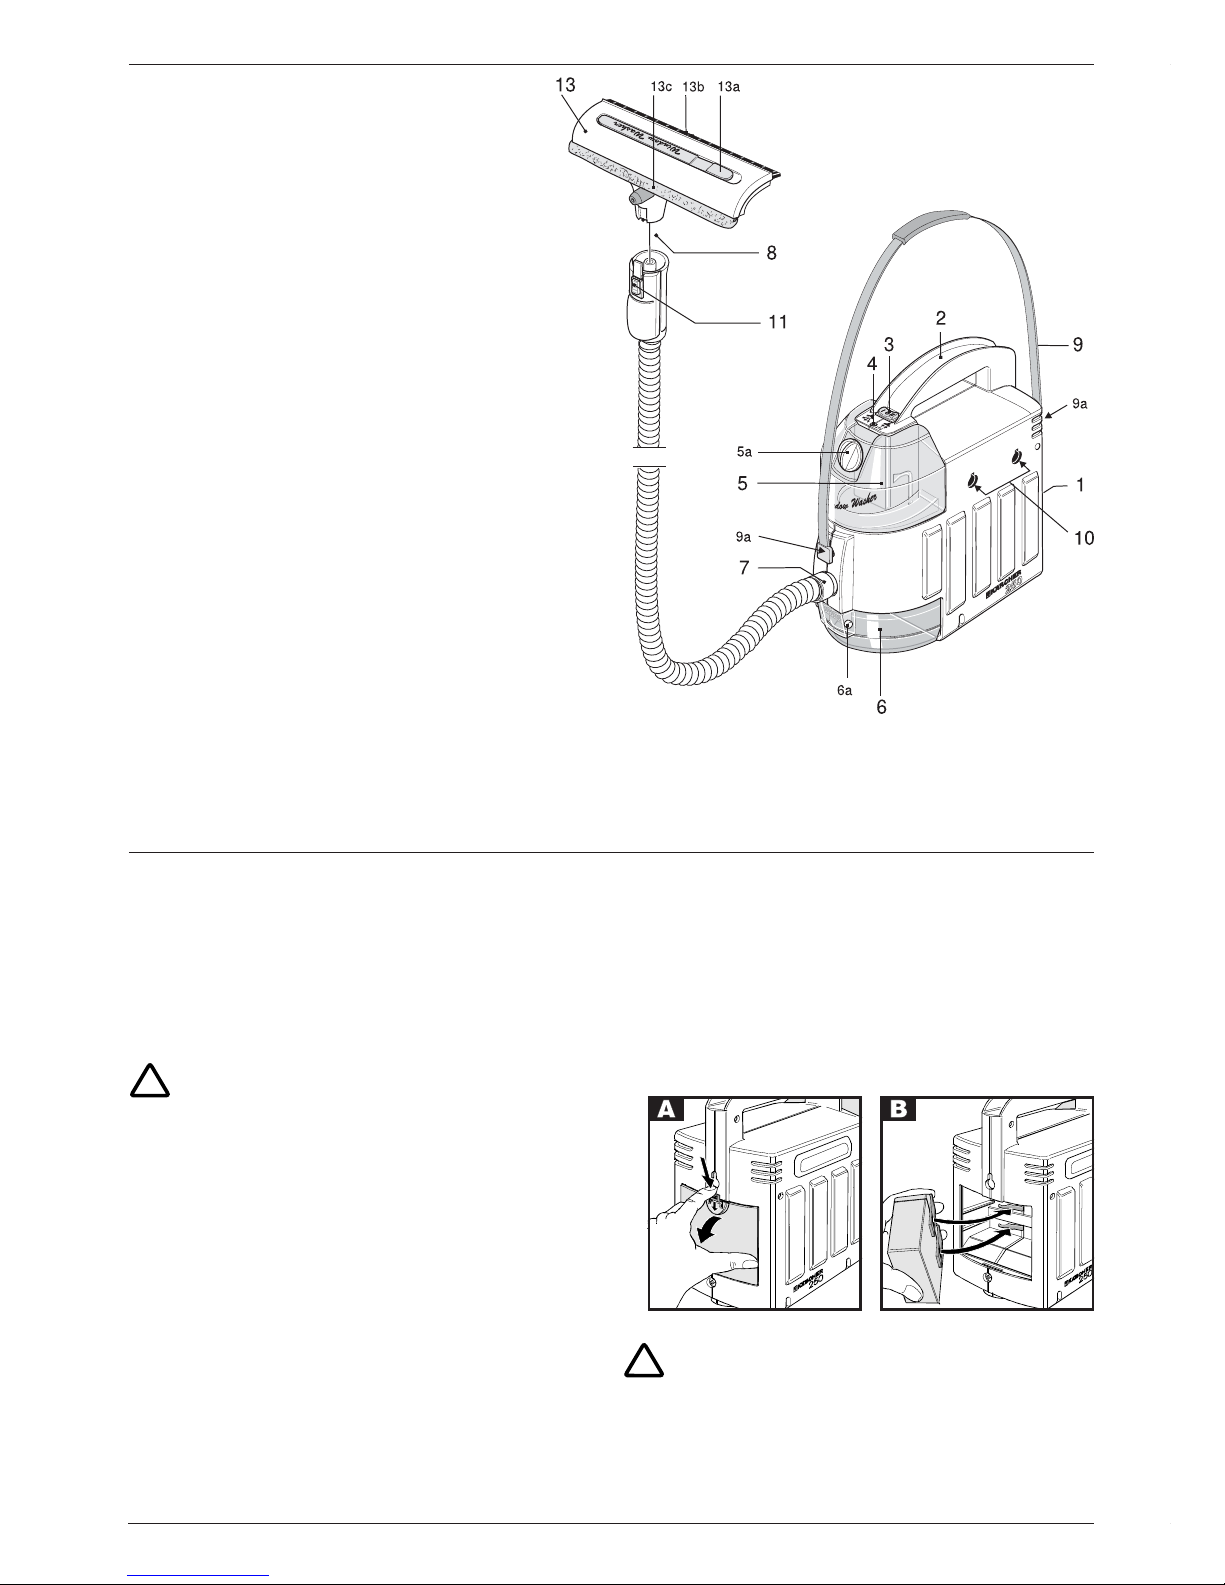
Changement de la raclette en
caoutchouc et du manchon en non-
tissé
• Changez la raclette en caoutchouc lorsque la surface à
nettoyer présente des stries après l’aspiration.
• Pour changer la raclette en caoutchouc ou le manchon
en non-tissé, ouvrez le curseur de la tête de nettoyage
puis retirez le couvercle de cette dernière. (Fig.W)
• Lors du changement de la raclette en caoutchouc,
rappelez-vous qu’il suffit de la retourner pour l’utiliser
des deux côtés. (Fig.X)
• Une fois le couvercle remis en place, fermez le curseur
pour verrouiller le couvercle.

WindowWasher FRANÇAIS
9
2. Dérangements et remèdes
L’appareil ne démarre pas
Vérifiez si les accus sont bien en contact dans
l’appareil.
Rechargez les accus.
L’appareil ne pulvérise pas
Vérifiez les liaisons des accessoires.
Vérifiez s’il y a encore de l’eau dans le réservoir
d’eaupropre. Rajoutez-en si nécessaire.
Dégazezl’appareil.
Dévissez la buse de la tête de nettoyage puis
nettoyez-la précautionneusement sous l’eau du
robinet.
L’appareil n’aspire pas
Vérifiez les liaisons des accessoires.
Vérifiez si le réservoir d’eau sale est bien en place.
Vérifiez la fixation de la raclette en caoutchouc.
Autres dérangements
Si des dérangements autres que ceux
précédemment énoncés se produisent, prévenez
le service après-vente agréé.
3. Données techniques
Tension de travail (accus) 8 V
Pression de service
(pompe depulvérisation) 1 bar
Réservoird’eau propre 250 ml
Réservoird’eau sale 250 ml
Autonomiede l’appareil,
accus chargés à fond 35min. env.
Durée de recharge des accus vides 15 h env.
Tensiondébitée par lechargeur 9 V
Intensité de recharge 500 mA
Poids (appareil prêt à servir) 2,7 kg
Dimensions:
LongueurxLargeur
xHauteur 250 x 130 x 260 mm
Respect de l’environnement
Cet appareil contient une
batterieincorporée.Avant
de la mettre à la ferraille,
retirez-la de l’appareil et
éliminez-la(déposez-la à
un point de collecte
approprié ou chez votre
revendeurKärcher;ne la
jetez pas avec les
déchetsménagers).
Entretien
L’appareilne nécessite aucun entretien.
Pièces de rechange
Veuillez utiliser exclusivement des pièces de
rechangeKärcher d’origine. Vous trouverezun
récapitulatif des pièces de rechange à la fin de la
présente notice.

Special accessories / Special accessoires
2.862–069
(0,5 m)(0,5 m)
(0,5 m)(0,5 m)
(0,5 m)
2.862–074
(1,0 m)(1,0 m)
(1,0 m)(1,0 m)
(1,0 m)
2.884–006
2.863–059
BAT
250
12,5 cm
2.862–070
2.862–068

4.777-020.0
2.883-341.0
4.071-083.0
2.638-494.0
2.862-067.0
2.883-352.0
1.633-680.0 * USA
1.633-700.0 * CDN
5.002-948.0
4.070-202.0
6.506-019.0
6.506-019.0
11/95
4.063-230.0
4.321-086.0
Spare parts / Pièces de rechange

CDN
KarcherCanadaInc.
6975CreditviewRoad,Unit2
Mississauga,Ontario L5N8E9
Please call our Customer Service at 1-800-465-
4980 for help, or visit www.karcher.ca
Veuillez appeler notre centre de service: 1-800-
465-4980, ou visité www.Karcher.ca
USA
Alfred Karcher, Inc
2170 Satellite Blvd, Suite 350
Duluth,GA30097
Call: 1-800-537-4129
or visit our website: www.karcher-usa.com
Table of contents
Languages:
Other Kärcher Washer manuals