– 5
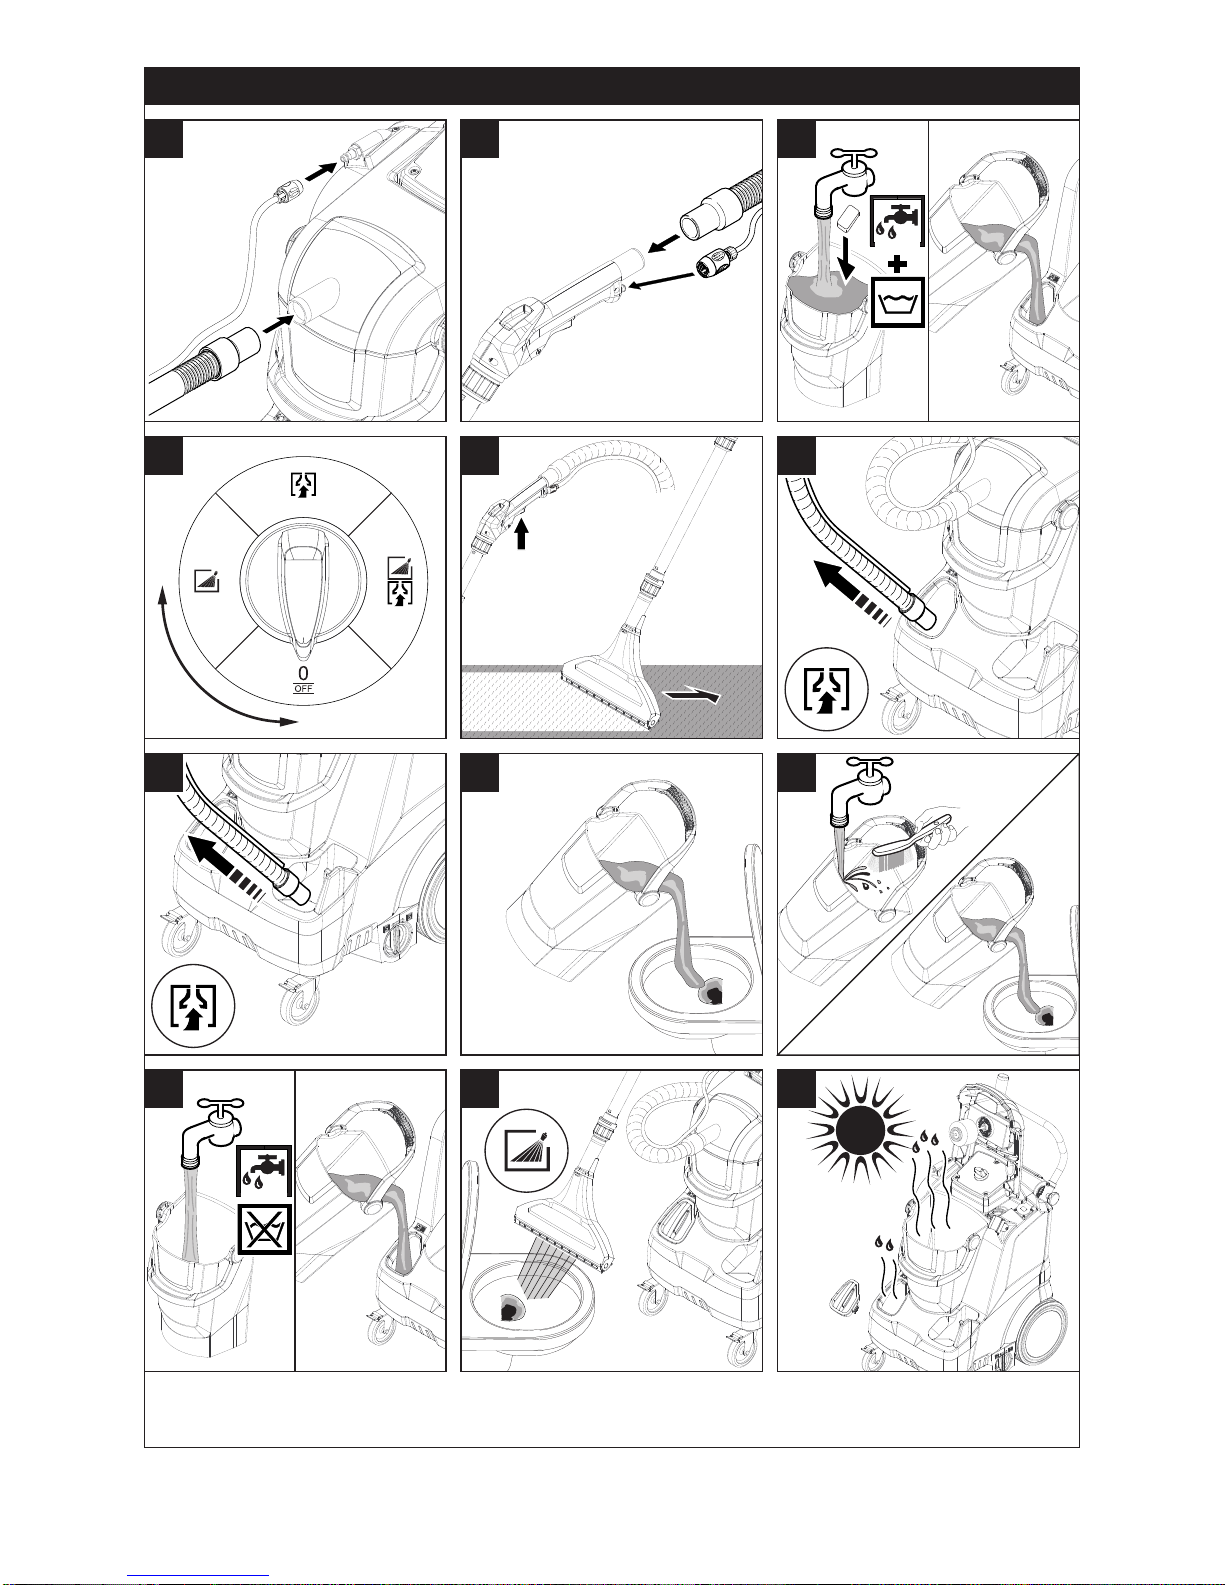
Attach hand nozzle (optional accesso-
ry) instead of the floor nozzle.
With sensitive materials, use less deter-
gentandspraythesurfaceatadistance
of approx. 200 mm. Then simply vacu-
um off.
– Highly soiled spots should be pre-
soaked and the detergent solution
should soak 5 to 10 minutes.
– Always work from the light to the shade
(from the window to the door).
– Always work from the cleaned to the un-
cleaned surface.
– Themoresensitivethesurface(oriental
rugs, berbers, upholstery material) the
lower the cleaning solution concentra-
tion should be.
– Rugs with jute backing can shrink if too
much water is used and can bleed col-
ours.
– Brush high-fiber rugs in the direction of
the weave after cleaning (using a fiber
brush or a scrubber).
– Water-proofing the fabric using Care
Tex RM 762 after the wet cleaning pre-
vents a quick resoiling of the textile sur-
face.
– Do not step on cleaned surfaces until
they have dried and do not place furni-
ture on them to avoid pressure spots or
rust stains.
– When cleaning previously shampooed
carpets, foam will be generated in the
dirt water reservoir. In such a case add
Foam ex RM 761 to the dirt water reser-
voir.
For further information, please request
product information sheet and EU safety
data sheet of the relevant detergent.
몇CAUTION
Risk of injury and damage! Observe the
weight of the appliance when you transport
it.
Grab the appliance by the chassis and
by the sliding bow to load it.
Pull the device behind you at the carry-
inghandlefortransportingitoverlonger
distances
When transporting in vehicles, secure
the appliance according to the guide-
lines from slipping and tipping over.
몇CAUTION
Risk of injury and damage! Note the weight
of the appliance in case of storage.
This appliance must only be stored in inte-
rior rooms.
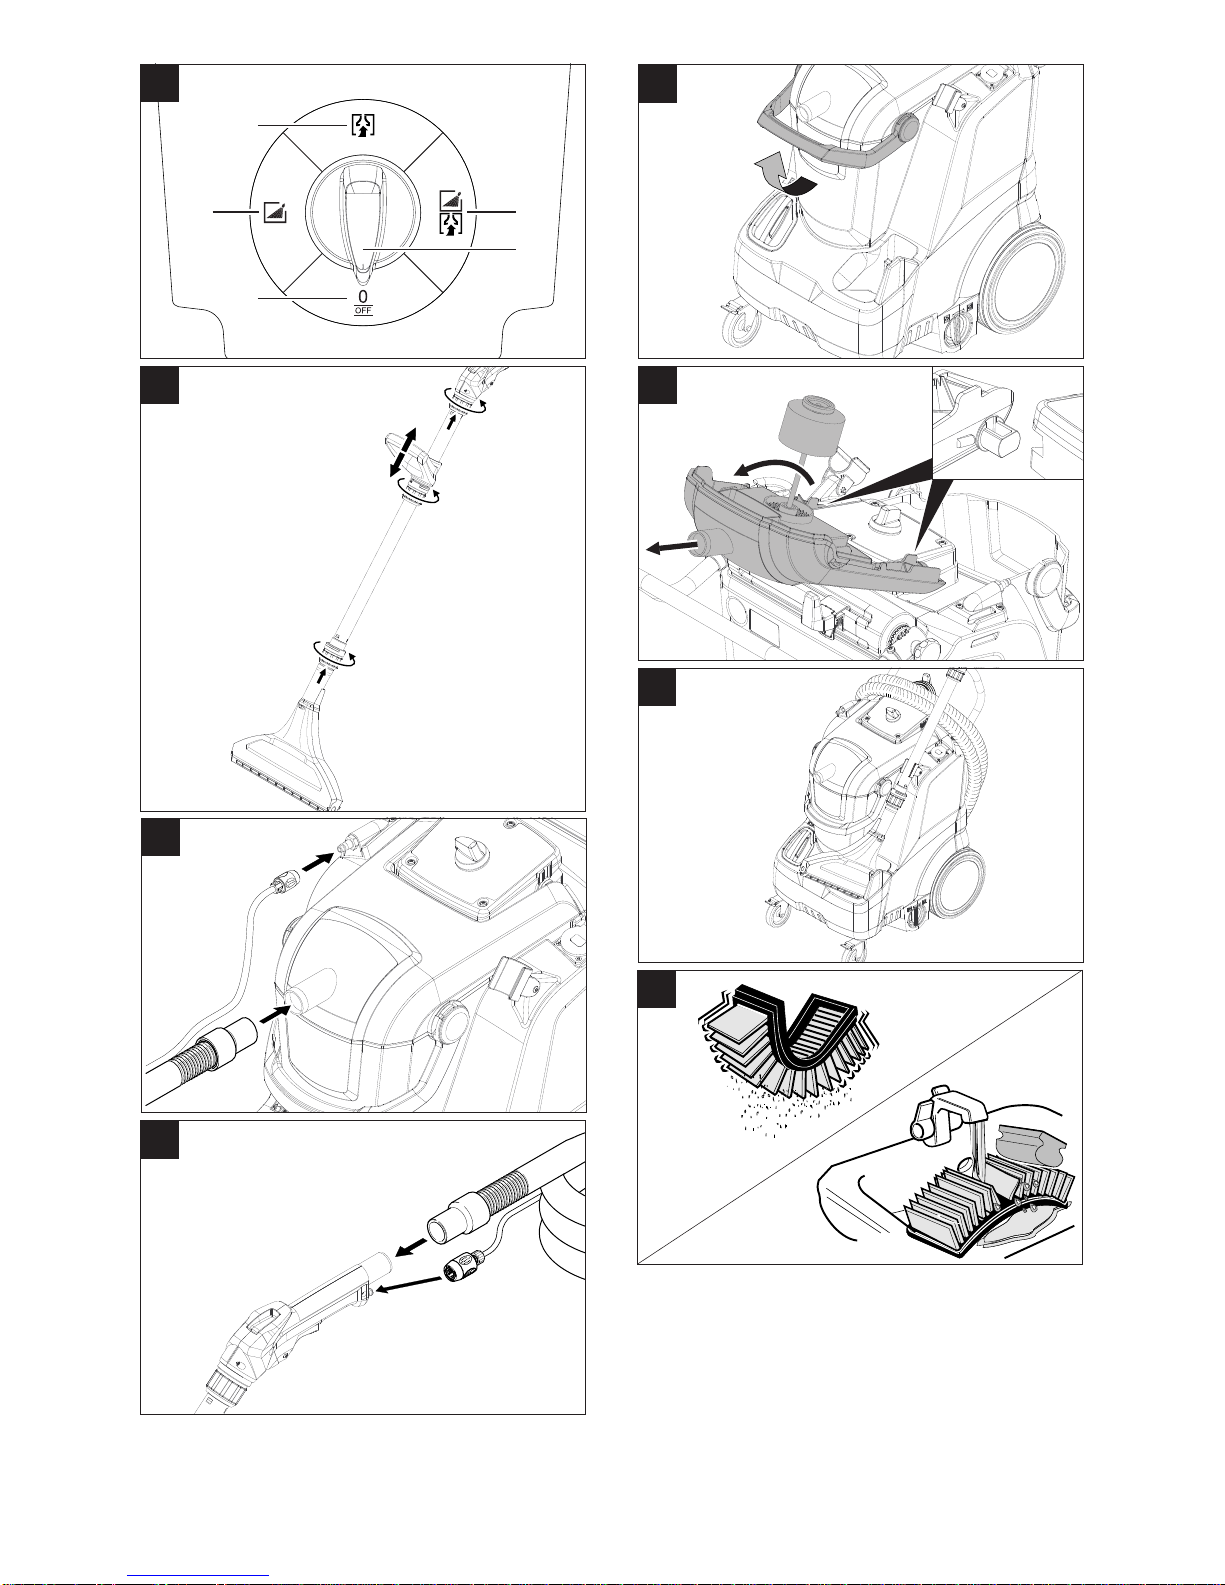
DANGER
Danger of injury by electric shock.
Firstpull out theplugfrom the mainsbefore
carrying out any tasks on the machine.
Note: With normal use, clean the flat pleat-
edfilterweekly,orevenearlierifthesuction
performance is decreasing.
Note: Use a commercially available house-
hold sponge made of soft material in order
to avoid damaging the coated lamellae.
Unlock the bonnet, swivel it upwards
and snap it in place at the locking devic-
es.
Unlock and remove the filter casing.
Take out the flat folded filter.
Illustration
Clean the individual lamellae of the flat
pleated filter under running water using
the sponge.
Allow the filter to dry completely.
Upholstery cleaning
Cleaning tips
Detergent
Carpet and upholstery
cleaning RM 760 powder
RM 760 tabs
RM 764 liquid
Defoaming RM 761
Waterproofing carpets RM 762
Transport
Storage
Maintenance and care
Cleaning/replacing the flat pleated
filter
17EN