Karl Storz 9619NB User manual

GEBRAUCHSANWEISUNG
9619 NB/9627 NB 19"/27" KARLSTORZ HD Monitor
INSTRUCTION MANUAL
9619 NB/9627 NB 19"/27" KARLSTORZ HD Monitor
MANUAL DE INSTRUCCIONES
9619 NB/9627 NB Monitor HD de 19"/27" de KARLSTORZ


3
9619 NB / 9627 NB HD Monitor 9619 NB / 9627 NB HD Monitor 9619 NB / 9627 NB Monitor HD
Contenido
Acerca de esta Instrucción..................................4
Instrucciones de seguridad..................................5
Uso previsto y contraindicaciones .......................6
Declaración de conformidad................................7
Dimensiones......................................................10
Carcasa del monitor ..........................................10
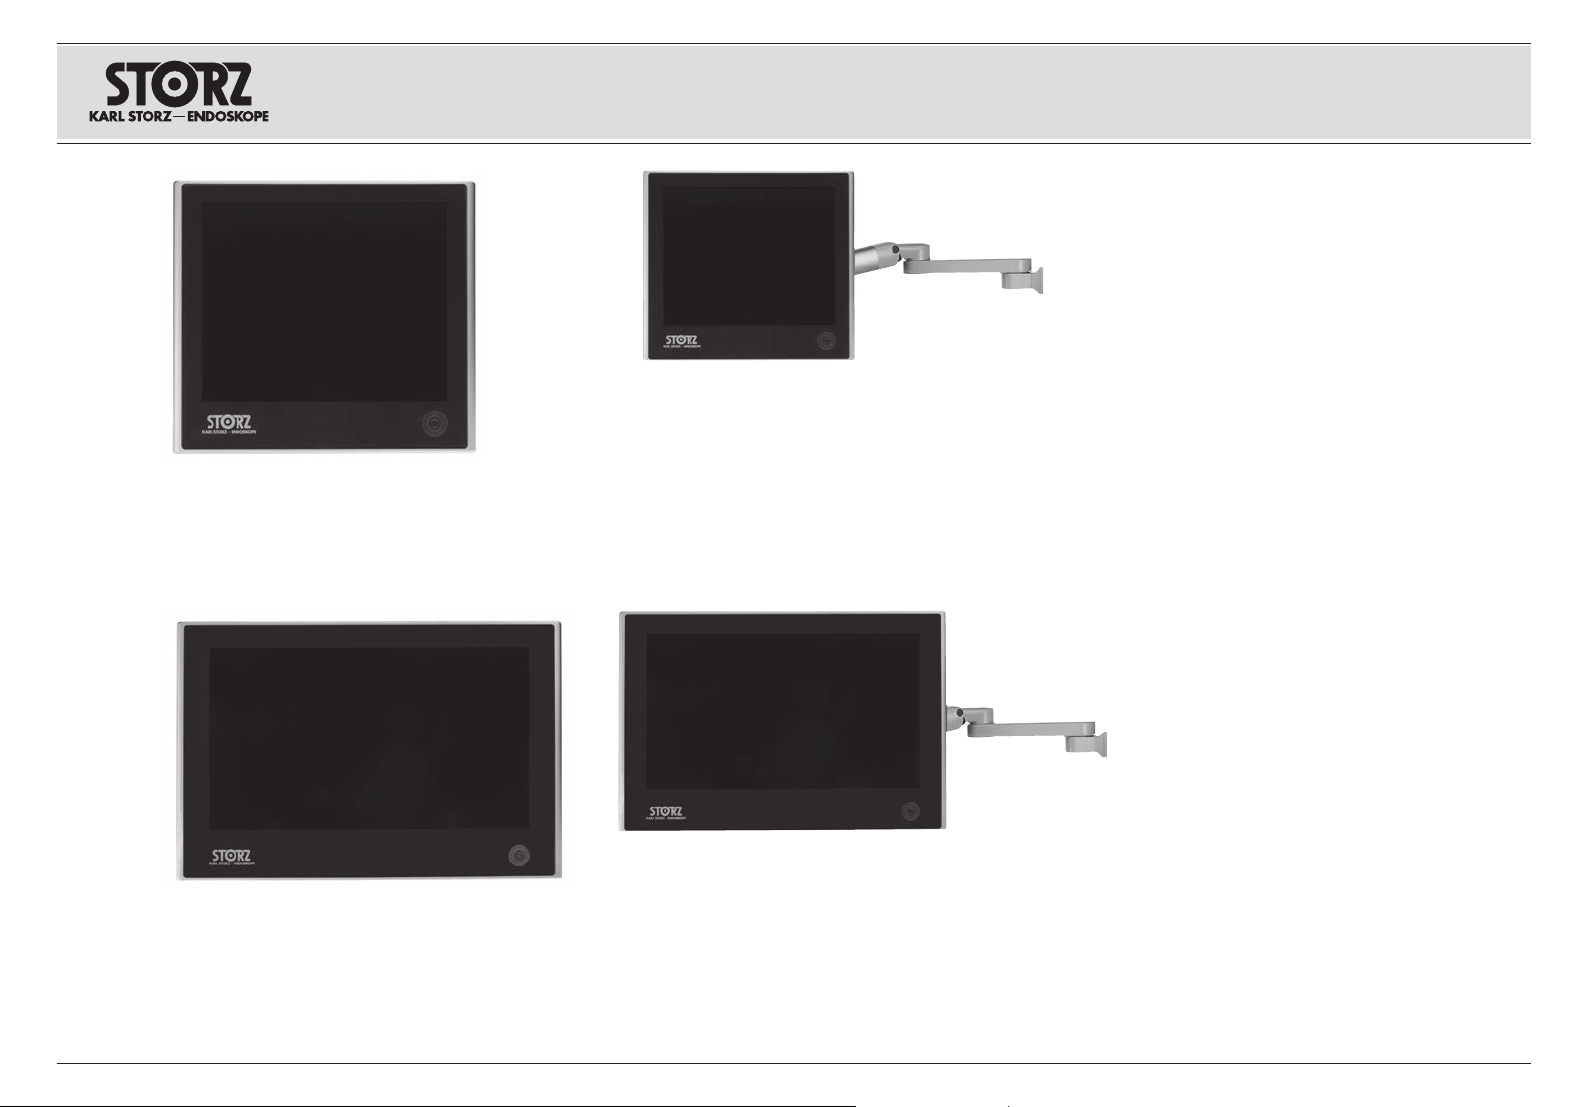
Suspensión .......................................................11
Entrada de cable...............................................11
Campo de conexión .........................................12
Entradas y salidas .............................................12
Fijación del monitor al pie soporte .....................13
Inicio rápido.......................................................14
Resoluciones (sincronizaciones).........................15
Valores gamma de salida ..................................15
Clasificación del monitor....................................15
Superficie de usuario.........................................16
Control de interfaz.............................................16
OSM (On-Screen-Manager)...............................17
Desbloquear la indicación de pantalla (OSD) .....20
Estructura general del menú..............................21
Giro y reflejo de la señal de entrada ..................26
PiP, PoP, PbP...................................................27
Control remoto ..................................................28
Duración de arranque y pantalla de bienvenida
...28
Modo “Sleep”....................................................28
Modo Standby ..................................................28
BIOS (actualización)...........................................28
Idiomas .............................................................28
Limpieza y conservación del monitor HD...........29
Mantenimiento...................................................30
Reparaciones ....................................................30
Programa de reparaciones ................................31
Responsabilidad................................................32
Garantía ............................................................32
Ficha técnica .....................................................33
Esquema de distribución...................................34
Indicaciones sobre compatibilidad
electromagnética (CEM) ....................................35
Sociedades distribuidoras .................................50
Inhalt
Über diese Anleitung ...........................................4
Sicherheitshinweise .............................................5
Zweckbestimmung und Kontraindikation.............6
Konformitätserklärung..........................................7
Maße.................................................................10
Monitorgehäuse.................................................10
Aufhängung.......................................................11
Kabeleingang ....................................................11
Anschlussfeld ....................................................12
Ein- und Ausgänge............................................12
Befestigung des Monitors am Standfuß.............13
Schnellstart .......................................................14
Auflösungen (Timings)........................................15
Ausgangsgamma ..............................................15
Monitor-Klassifizierung.......................................15
Benutzeroberfläche ...........................................16
Schnittstellensteuerung......................................16
OSM (On-Screen-Manager)...............................17
Bildschirmanzeige (OSD) entsperren..................20
Übersicht über die Menüstruktur .......................21
Drehung und Spiegelung des Eingangssignals ..26
PiP, PoP, PbP...................................................27
Fernbedienung ..................................................28
Bootzeit und Begrüßungsbildschirm ..................28
»Sleep« Modus..................................................28
Stand-by-Modus ...............................................28
BIOS (Update) ...................................................28
Sprachen...........................................................28
Reinigung und Pflege des HD Monitors.............29
Wartung ............................................................30
Instandsetzung..................................................30
Reparaturprogramm..........................................31
Verantwortlichkeit ..............................................32
Garantie ............................................................32
Technische Daten..............................................33
Übersichtsschaltplan .........................................34
Hinweise zur elektromagnetischen
Verträglichkeit (EMV)..........................................35
Niederlassungen................................................50
Table of Contents
About this Manual ...............................................4
Safety Instructions...............................................5
Intended Use and Contraindications....................6
Declaration of Conformity ....................................7
Dimensions........................................................10
Monitor housing ................................................10
Mounting...........................................................11
Cable Entry Point ..............................................11
Connection Field ...............................................12
Inputs and Outputs............................................12
Monitor Mounting to Stand................................13
Quick Start ........................................................14
Resolutions (Timings).........................................15
Output Gamma .................................................15
Monitor Classification ........................................15
User Interface....................................................16
Interface Control................................................16
OSM (On-Screen Manager) ...............................17
Unlocking the on-screen display (OSD) .............20
Overview of the Menu Structure ........................21
Rotation and Mirroring of the Input Signal .........26
PiP, PoP, PbP...................................................27
Remote Control.................................................28
Boot Time & Welcome Screen ..........................28
Sleep Mode.......................................................28
Stand-by Mode .................................................28
BIOS (Update) ...................................................28
Languages ........................................................28
Cleaning and Care of the HD Monitor................29
Maintenance......................................................30
Servicing and Repair .........................................30
Repair Program .................................................31
Limitation of Liability ..........................................32
Manufacturer’s Warranty ...................................32
Technical Specifications ....................................33
General Circuit Diagram ....................................34
Electromagnetic Compatibility
(EMC) Information..............................................35
Subsidiaries.......................................................50

4
9619 NB / 9627 NB HD Monitor 9619 NB / 9627 NB HD Monitor 9619 NB / 9627 NB Monitor HD
Version 2.0 – 10/2017 96206563D
Über diese Anleitung
Vielen Dank für Ihr Vertrauen in den Namen
KARLSTORZ. Auch in diesem Produkt steckt un-
sere ganze Erfahrung und Sorgfalt. Sie und Ihr Haus
haben sich damit für ein modernes und hochwerti-
ges Gerät der Firma KARLSTORZ entschieden.
Die vorliegende Gebrauchsanweisung soll Ihnen
bei der Installation, Einstellung und Bedienung des
9619NB - 19" und 9627NB - 27" LCD Flach-
bildschirms helfen. Je nach erworbenem Modell
und Ausstattung sind möglicherweise einige hier
beschriebene Funktionen bei Ihrem Monitor nicht
verfügbar.
Die Funktionsbeschreibungen in dieser Anleitung
gelten für:
Teilenummer: 9619 NB KARLSTORZ HD Monitor
19" und 9627 NB KARLSTORZ HD Monitor 27".
Alle notwendigen Einzelheiten und Handgriffe
werden anschaulich erklärt. Bitte lesen Sie deshalb
diese Anleitung sorgfältig durch. Bewahren Sie
sie zum etwaigen Nachlesen gut zugänglich und
sichtbar in der Nähe des Geräts auf.
About this Manual
Thank you for your expression of confi dence in
the KARLSTORZ brand name. Like all of our
other products, this product is the result of years
of experience and great care in manufacture. You
and your organization have decided in favor of
a modern, high-quality item of equipment from
KARLSTORZ.
This manual is designed to assist the user with
proper installation, setup and operation of the
9619 NB -19" and 9627 NB -27" LCD fl at screen
monitor. Depending on the model and options
that were purchased, some of the features in this
manual may not apply to the monitor you are using.
The functional descriptions in this manual apply to:
Part Number: 9619 NB KARLSTORZ HD Monitor
19" and 9627 NB KARLSTORZ HD Monitor 27".
All essential details of the equipment and all actions
required on your part are clearly presented and
explained. We thus ask that you read this manual
carefully before proceeding to work with the
equipment. Keep this manual available for reference
in a convenient and conspicuous location near the
device.
Acerca de esta Instrucción
Agradecemos la confi anza que ha depositado en la
marca KARLSTORZ. Este producto, como el resto
de los que fabricamos, es el resultado de nuestra
amplia experiencia y capacidad técnicas. Con esta
adquisición, tanto usted como su institución se han
decidido por un producto KARLSTORZ de gran
precisión, alta calidad y tecnología vanguardista.
Este Manual de instrucciones contiene todas las
indicaciones necesarias para la instalación, el ajuste
y el manejo de la pantalla plana de cristal líquido de
19" 9619NB y de 27" 9627NB. Según el modelo
adquirido y el equipamiento, es posible que algunas
funciones aquí descritas no estén disponibles en su
monitor.
Las descripciones de funciones en esta Instrucción
son válidas para:
Número de artículo: monitor HD de 19" de
KARLSTORZ 9619 NB y monitor HD de 27" de
KARL STORZ 9627NB.
Contiene todas las explicaciones necesarias sobre
las particularidades y detalles de su manejo. Reco-
mendamos la lectura detenida de esta Instrucción.
Coloque este Manual en un lugar visible y fácil-
mente accesible cercano al aparato para facilitar la
consulta.
Eigentumshinweis und Haftung
Alle Informationen in diesem Schriftstück, ein-
schließlich aller Zeichnungen und ähnlichen Mate-
rials, sind Eigentum der Firma KARLSTORZ und/
oder ihrer Lizenzgeber. Sie behalten sich sämtliche
Patentrechte, Urheberrechte und sonstigen Eigen-
tumsrechte am vorliegenden Dokument, einschließ-
lich sämtlicher Muster-, Herstellungs-, Reprodukti-
ons-, Nutzungs- und Verkaufsrechte vor, sofern die
besagten Rechte nicht ausdrücklich Dritten gewährt
werden.
Alle Produktnamen und Marken sind eingetragene
Warenzeichen ihrer jeweiligen Inhaber.
Derechos de propiedad y responsabilidad
Toda la información contenida en este manual,
incluyendo todos los dibujos y materiales similares,
son propiedad de la empresa KARLSTORZ y/o
de sus licenciadores. Éstos se reservan todos los
derechos de patente, los derechos de autor y los
demás derechos de propiedad del presente docu-
mento, incluyendo todos los derechos de modelos,
de fabricación, de reproducción, de uso y de venta,
salvo que dichos derechos hayan sido concedidos
expresamente a terceros.
Todos los nombres y marcas de productos son
marcas registradas de sus respectivos propietarios.
Proprietary Notice and Liability Disclaimer
The information disclosed in this document,
including all designs and related materials, is the
valuable property of KARLSTORZ and / or its
licensors and, as appropriate, they reserve all
patent, copyright, and other proprietary rights to
this document, including all design, manufacturing
reproduction, use, and sales rights thereto, except
to the extent said rights are expressly granted to
others.
All product names and trademarks or registered
trademarks are the property of their respective
holders.

5
9619 NB / 9627 NB HD Monitor 9619 NB / 9627 NB HD Monitor 9619 NB / 9627 NB Monitor HD
Sicherheitshinweise
VORSICHT
0Dieses Symbol weist auf wichtige Infor-
mationen zur Bedienung des Geräts hin.
Diese sollten sorgfältig gelesen werden, um
Probleme zu vermeiden.
Dieses Symbol warnt den Anwender vor
nicht isolierten Teilen im Gerät, die einen
elektrischen Schlag verursachen können.
Ein Kontakt mit Teilen im Inneren des Ge-
räts ist daher gefährlich. NICHT ÖFFNEN.
Gefahr eines elektrischen Schlages. Das
Gerät enthält keine dem Anwender
zugänglichen Teile. Lassen Sie Service-
arbeiten nur von qualifi ziertem Personal
durchführen.
Das Gerät vor Regen oder Feuchtigkeit schüt-
zen, um einen Brand oder elektrischen Schlag zu
vermeiden. Außerdem darf der gepolte Stecker
des Geräts nur mit Verlängerungen oder anderen
Steckdosen verwendet werden, in die die Stecker
vollständig versenkt werden können. Der Bildschirm
erfüllt die medizinischen Sicherheitsanforderungen
für ein Gerät in Patientennähe nach EN60601-1
Ed.3 2007.
Klassifi kation von Underwriters Laboratories
(UL):
Einhaltung von UL Sicherheitsbestimmungen:
Dieser LCD-Monitor erfüllt die UL-Bestimmungen
für MEDIZINISCHE GERÄTE in Bezug auf ELEK-
TRISCHEN SCHLAG, BRAND und MECHANISCHE
GEFAHREN nur gemäß ANSI/AAMI ES60601-1
(2005), CAN/CSA-C22.2 Nr. 60601-1 (2008).
Einhaltung von EU-
Sicherheitsbestimmungen:
Dieser Bildschirm erfüllt die Bestimmungen der
Norm EN60601-1 Ed.3 2007 in Übereinstimmung
mit der Medical Device Directive 93/42/EWG
(allgemeine Sicherheitshinweise).
Safety Instructions
CAUTION
0
This symbol alerts the user that important
information concerning the operation of this
device has been included. Therefore, it should
be read carefully in order to avoid potential
problems.
This symbol warns the user that non-
insulated parts within the device may have
suffi cient magnitude to cause electrical
shock. Therefore, it is dangerous to make
contact with any part inside the device. DO
NOT OPEN. Risk of electrical shock. The
device does not contain parts which can
be accessed by the user. Refer servicing
to qualifi ed service personnel.
To prevent fi re or shock hazards, do not expose
this device to rain or moisture. Also, do not use
this device’s polarized plug with an extension cord
receptacle or other receptacles unless the prongs
can be fully inserted. The display is designed to
meet the medical safety requirements for devices
in the vicinity of patients according to EN60601-1
Ed.3 2007.
Underwriters Laboratories (UL)
Classifi cation:
UL Safety Compliance:
This LCD monitor is U.L. Classifi ed as medical -
GENERAL MEDICAL EQUIPMENT as to ELECTRIC
SHOCK, FIRE and MECHANICAL HAZARDS only
in accordance with ANSI/AAMI ES60601-1 (2005),
CAN/CSA-C22.2 No. 60601-1 (2008).
EEC Safety Compliance:
This display meets the requirements of EN60601-1
Ed.3 2007 so as to conform to the Medical Device
Directive 93/42/EEC (general safety information).
Instrucciones de seguridad
ADVERTENCIA
0Este símbolo llama la atención sobre infor-
mación importante acerca del manejo del
equipo. Lea detenidamente esta informa-
ción a fi n de evitar problemas.
Este símbolo advierte al usuario de piezas
del aparato que no tienen aislamiento y
pueden provocar un choque eléctrico. Por
esta razón, es peligroso entrar en contacto
con las piezas del interior del aparato. NO
ABRIR. Peligro de descarga eléctrica. El
aparato no contiene piezas accesibles al
usuario. Las tareas de mantenimiento sólo
han de ser realizadas por personal técnico
cualifi cado.
Proteja el aparato contra la lluvia o la humedad, a
fi n de impedir un incendio o un choque eléctrico.
Además, el enchufe polarizado del aparato debe
utilizarse únicamente con tomas de prolongación
u otras tomas de corriente en las cuales puedan
insertarse completamente. La pantalla cumple con
los requisitos de seguridad médica para el uso de
aparatos cerca del paciente según EN60601-1
Ed.3 2007.
Clasifi cación de Underwriters Laboratories
(UL):
Cumplimiento de las disposiciones de
seguridad de UL:
Este monitor de cristal líquido cumple con las
disposiciones de UL para APARATOS MÉDICOS en
relación con CHOQUES ELÉCTRICOS, INCENDIOS
Y RIESGOS MECÁNICOS únicamente según ANSI/
AAMI ES60601-1 (2005), CAN/CSA-C22.2 n°.
60601-1 (2008).
Cumplimiento de las disposiciones de
seguridad de la UE:
Esta pantalla cumple con las disposiciones de
la norma EN60601-1 Ed.3 2007 conforme a la
Medical Device Directive 93/42/CEE (instrucciones
generales de seguridad).

6
9619 NB / 9627 NB HD Monitor 9619 NB / 9627 NB HD Monitor 9619 NB / 9627 NB Monitor HD
Dieser Monitor erfüllt die oben genannten Normen
nur, wenn er mit dem von KARLSTORZ zugelas-
senem Netzteil für medizinische Zwecke betrieben
wird.
24 Volt, Gleichstrom: Art.-Nr. 9626PS
Der Monitor sollte in den USA bei Verwendung bei
einer Spannung von über 120 Volt an einen zentra-
len Stromkreis angeschlossen werden. Der Monitor
ist für den Dauerbetrieb ausgelegt.
Der Bildschirm wird über eine externe Stromquelle
für Geräte der Klasse 1 betrieben. Der Einrichter
ist für die Prüfung der Erdung des Bildschirms und
der Einhaltung der Impedanzbestimmungen des
Krankenhauses sowie der lokalen und nationalen
Behörden verantwortlich.
Zur Erdung/Potenzialausgleich des
Bildschirmgehäuses kann ein Erdungsstift an der
Rückseite des Bildschirms verwendet werden.
Eine derartige Erdung muss nach den gültigen
Bestimmungen für elektrische Anlagen erfolgen.
Der Erdungsstift ist in der Zeichnung auf Seite 11
dargestellt (Kabeleingang).
Zweckbestimmung und
Kontraindikation
Zweckbestimmung
Der Monitor ist für die Darstellung von hochwertigen
Video- und Grafi kbildern in einer medizinischen
Umgebung bestimmt und erfüllt die Sicherheitsan-
forderungen für ein Gerät in Patientennähe.
Kontraindikation
0Sterilität: Lässt sich nur durch ein Trape
mit Ausschnitt für den aktiven Bereich
des Displays und des Ringsliders her-
stellen. Keine Lüftungsschlitze in denen
sich Schmutz sammeln kann. Die ebene
Glasfront ist deutlich größer als die aktive
Anzeigefl äche, ein Abkleben ist also pro-
blemlos möglich ohne den Sichtbereich
einzuschränken. Die Kabelabdeckung
verbirgt die unmöglich zu desinfi zieren-
den Steckverbindungen und schützt das
Trape vor Beschädigungen.
This monitor complies to the above standards only
when used with the medical grade power supply
approved by KARLSTORZ.
24 Volt DC: Order no. 9626PS
The monitor should be powered from a center
tapped circuit when used in the US at voltages over
120 volts. The monitor is intended for continuous
operation.
This display is energized from an external
electrical power source for class 1 equipment.
It is the responsibility of the installer to test the
display’s grounding and to verify that it complies
with the hospital, local and national impedance
requirements.
A ground post, located on the back of the
display, may be used for the purpose of potential
equalization and grounding of the display’s housing.
Any such ground must be installed in accordance
with applicable electrical regulations. The ground
post is shown on the drawing found on page 11
(cable entry point).
Intended Use and
Contraindications
Intended Use
This monitor is intended for use in a medical
environment to display high-quality video and
graphic images, and complies with the safety
requirements for devices used in the vicinity of
patients.
Contraindications
0Sterility: The device can only be sterile
when used with a plastic sheet containing
a cut-out for the active area of the display
and the ring slider. No air vent in which dirt
can collect. The smooth vitreous surface
is signifi cantly bigger than the active
display area, meaning it is easily possible
to mask the glass without restricting the
fi eld of vision. The cable cover conceals
the connectors, which are impossible to
disinfect, and protects the sheet from
damage.
Este monitor únicamente cumple con las normas
arriba indicadas si se utiliza con la fuente de
alimentación para fines médicos autorizada por
KARLSTORZ.
24 V, corriente continua: n.º de art. 9626PS
El monitor debe conectarse a un circuito eléctrico
central si se utiliza en los EE.UU. con una tensión
de más de 120 V. El monitor ha sido diseñado para
funcionar en régimen de servicio continuo.
La pantalla funciona con una fuente de corriente
externa para equipos de la clase 1. El instalador
es el responsable de comprobar la puesta a tierra
de la pantalla, así como del cumplimiento de las
disposiciones referentes a impedancia del hospital y
de las autoridades locales y nacionales.
Para conectar la carcasa de la pantalla a tierra/a
la conexión equipotencial, puede emplearse una
varilla de puesta a tierra en la parte posterior de la
pantalla. Esta puesta a tierra ha de efectuarse de
acuerdo con las disposiciones aplicables para ins-
talaciones eléctricas. La varilla de puesta a tierra se
representa en la ilustración de la página 11 (entrada
de cable).
Uso previsto y
contraindicaciones
Uso previsto
El monitor está previsto para la representación de
imágenes de vídeo e imágenes gráfi cas de gran
calidad en un entorno médico y cumple con los
requisitos de seguridad médica para el uso de
aparatos cerca del paciente.
Contraindicaciones
0Esterilidad: La esterilidad está sujeta al uso
de un recubrimiento con ventanilla para la
zona activa del display y para el deslizador
de anillo. No existen ranuras de ventilación
en las que pueda acumularse suciedad. La
superfi cie vítrea plana es considerablemen-
te mayor que la superfi cie de la pantalla
activa, por lo que puede precintarse sin
problemas sin limitar el campo visual. La
cubierta para cables oculta las conexiones
de enchufe, imposibles de desinfectar, y
protege el recubrimiento contra deterioros.

7
9619 NB / 9627 NB HD Monitor 9619 NB / 9627 NB HD Monitor 9619 NB / 9627 NB Monitor HD
0Der Monitor darf nicht in explosionsfähi-
gen Gemischen von Narkosegasen mit
Luft, Sauerstoff oder Distickstoffoxid
verwendet werden.
0Es wird empfohlen, für kritische Anwen-
dungen ein Ersatzgerät bereitzuhalten.
Recycling
Die Lampen dieses Geräts können kleinste
Mengen Quecksilber enthalten.
Das Recycling bzw. die Entsorgung dieses
Geräts muss nach den geltenden Bestim-
mungen erfolgen. Sie können sich auch an
den Verband der Elektroindustrie wenden
(www.eiae.org).
Konformitätserklärung
Richtlinien der FCC und des Rates zu
europäischen Normen
Dieses Gerät erfüllt Teil 15 der FCC-Richtlinien und
die Richtlinie 93/42/EWG des Rates für europäische
Normen. Dazu müssen folgende zwei Vorausset-
zungen erfüllt sein: (1) Dieses Gerät darf andere
Geräte nicht stören und (2) es muss Störungen
anderer Geräte aushalten. Hierzu zählen auch Stö-
rungen, die unerwünschte Folgen haben können.
1. Verwenden Sie für den Farbmonitor hochwerti-
ge Videokabel, um Störungen durch Radio- oder
Fernsehempfang zu vermeiden. Bei Verwendung
minderwertiger Kabel und Adapter kann es zu
Störungen durch andere elektronische Geräte
kommen.
2. Dieses Gerät wurde geprüft und entspricht den
Grenzwerten gemäß FCC Teil 15 und CISPR 11
(Comité International Spécial des Perturbations
Radioélectriques). Das Gerät erzeugt und nutzt
Hochfrequenzenergie und strahlt sie unter Umstän-
den auch ab. Es könnte daher bei nicht bestim-
mungsgemäßer Verwendung Funkübertragungen
stören.
0The monitor may not be used in the
presence of fl ammable anesthetic
mixtures with air, oxygen or nitrous oxide.
0For critical applications, we strongly
recommend that a replacement device be
immediately available.
Recycling
The lamps in this device may contain a very
small amount of mercury.
Follow local governing ordinances and
recycling plans regarding the recycling
or disposal of this device, or contact the
Electronic Industries Alliance (www.eiae.org).
Declaration of Conformity
FCC and Council of European Standards
Directives
This device complies with Part 15 of FCC Directives
and 93/42/EEC of the Council Directives of
European Standards. Operation is subject to the
following two conditions: (1) This device may not
cause harmful interference, and (2) this device must
be able to withstand any interference received,
including interference that may cause undesirable
results.
1. Use only high-quality video cables with the
color monitor to avoid interference from radio
and television reception. Use of inferior cables
and adaptors may cause interference with other
electronic equipment.
2. This device has been tested and found to
comply with the limits pursuant to FCC Part 15
and CISPR11 (Comité International Spécial des
Perturbations Radioélectriques). This device
generates, uses and can radiate radio frequency
energy and, if not used in accordance with the
instructions, may cause harmful interference to
radio communications.
0El monitor no puede ser utilizado en salas
en las que puedan formarse mezclas
explosivas de gases anestésicos con aire,
oxígeno u óxido nitroso.
0En el caso de aplicaciones críticas, se
recomienda tener disponible un aparato
de recambio.
Reciclaje
Las lámparas de este aparato pueden
contener cantidades ínfi mas de mercurio.
El reciclaje o la gestión de desecho de este
aparato ha de efectuarse según las dispo-
siciones vigentes. Asimismo, usted puede
dirigirse a la Asociación de Industrias
Eléctricas (www.eiae.org).
Declaración de conformidad
Directivas de la FCC y del Consejo sobre
normas europeas
Este aparato cumple con la parte 15 de las direc-
tivas FCC, así como con la directiva 93/42 CEE
del Consejo de normas europeas. Para ello han
de darse las dos condiciones previas siguientes:
(1) Este aparato no ha de causar interferencias en
otros equipos y (2) ha de tolerar interferencias pro-
cedentes de otros equipos. A este efecto cuentan
las interferencias que pueden comportar efectos
indeseados.
1. Utilice el cable de vídeo de alta calidad sumi-
nistrado para el monitor de color, a fi n de impedir
interferencias producidas por la recepción de radio
y de televisión. Si se utilizan cables o adaptadores
de baja calidad, pueden producirse interferencias
procedentes de otros equipos electrónicos.
2. Este aparato ha sido debidamente verifi cado y
responde a los valores límite conforme a la parte
15 FCC y a CISPR 11 (Comité International Spécial
des Perturbations Radioélectriques). Este aparato
genera y consume energía de alta frecuencia y
también la irradia bajo determinadas circunstan-
cias. Por esta razón, si no se emplea según el uso
previsto podría interferir en radiotransmisiones.

8
9619 NB / 9627 NB HD Monitor 9619 NB / 9627 NB HD Monitor 9619 NB / 9627 NB Monitor HD
IEC
Dieses Gerät wurde geprüft und entspricht
den Grenzwerten für Medizinprodukte gemäß
EN60601-1-2:2007. Diese Grenzwerte sollen
angemessen vor schädlichen Einfl üssen bei einem
medizinischen Einsatz schützen. Das Gerät erzeugt
und nutzt Hochfrequenzenergie und strahlt sie unter
Umständen auch ab. Es könnte daher bei nicht
bestimmungsgemäßer Aufstellung und Verwendung
andere Geräte in der Umgebung stören.
Richtlinien der FCC, des Rates zu
europäischen Normen und IEC
Es ist nicht ausgeschlossen, dass bei einer
bestimmten Aufstellung eine Störung vorkommt.
Wenn das Gerät den Radio- oder Fernsehempfang
stört (zu überprüfen durch Aus- und Wiederein-
schalten des Geräts), sollte man versuchen, die
Störung durch folgende Maßnahmen zu beseitigen:
•die Empfangsantenne umdrehen oder umstellen.
•den Abstand zwischen Gerät und Empfänger
vergrößern.
•das Gerät an eine andere Steckdose
anschließen als der Empfänger.
•Hilfe erhalten Sie bei Ihrem Händler oder einem
erfahrenen Radio-/TV-Techniker.
An diesen Monitor angeschlossenes Zubehör muss
nach den entsprechenden IEC-Normen zugelassen
sein (z. B. IEC60950-1 für Datenverarbeitungs-
geräte und EN60601-1 Ed. 3 2007 für medizini-
sche Geräte). Jeder, der weitere Geräte an einen
Signalein- oder -ausgang anschließt, konfi guriert ein
medizinisches System und ist daher dafür verant-
wortlich, dass das System die Anforderungen der
EN60601-1 Ed.3 erfüllt. Jeder, der für die Montage
des Monitors an ein System verantwortlich ist,
muss sicherstellen, dass die für diesen Monitor ver-
wendeten Montagevorrichtungen der EN60601-1
entsprechen. Im Zweifelsfall wenden Sie sich bitte
an Ihre medizintechnische Abteilung oder Ihren
zuständigen Kundendienst.
IEC
This device has been tested and found to comply
with the limits for medical devices pursuant to
EN60601-1-2:2007. These limits are designed
to provide reasonable protection against harmful
interference in a typical medical installation. This
device generates, uses and can radiate radio
frequency energy and, if not installed and used
in accordance with the instructions, may cause
harmful interference to other devices in the vicinity.
FCC, Council of European Standards and
IECDirectives
There is no guarantee that interference will not
occur in a particular installation. If this device does
cause harmful interference to radio or television
reception, which can be determined by turning the
device off and on, the user is encouraged to try
to correct the interference by one or more of the
following measures:
•Reorient or relocate the receiving antenna.
•Increase the separation distance between the
device and receiver.
•Connect the device into an outlet on a circuit
different from that to which the receiver is
connected.
•Consult your dealer or an experienced radio/TV
technician for help.
Accessory equipment connected to this monitor
must be certifi ed according to the respective IEC
standards (i.e., IEC 60950-1 for data processing
equipment and EN 60601-1 Ed. 3 2007 for medical
equipment). Any person who connects additional
equipment to the signal input part or signal
output part confi gures a medical system, and is
therefore responsible for ensuring that the system
complies with the requirements according to EN
60601-1 Ed.3. Any person who is responsible for
mounting the monitor to a system must ensure that
the mounting equipment used with this monitor
complies to the standard EN 60601-1. If in doubt,
consult the medical technical services department
or your local representative.
CEI
Este aparato ha sido debidamente verifi cado
y responde a los valores límite para productos
médicos conforme a la norma EN60601-1-2:2007.
Estos valores límite tienen por objeto asegurar una
protección apropiada contra infl uencias nocivas
en aplicaciones médicas. Este aparato genera y
consume energía de alta frecuencia y también la
irradia bajo determinadas circunstancias. Por esta
razón, si se instala o se emplea indebidamente
podría interferir en otros equipos situados en las
inmediaciones.
Directivas de la FCC, del Consejo de normas
europeas y de la CEI
No se excluye el riesgo de interferencia en posi-
ciones de instalación determinadas. En caso de
que el aparato interfi era en la recepción de radio o
televisión (compruébese apagando y encendiendo
el aparato), debe intentarse subsanar la interferen-
cia mediante las siguientes medidas:
•cambio de orientación o de emplazamiento de
la antena de recepción.
•aumento de la distancia entre el aparato y el
receptor.
•conexión del aparato a un enchufe diferente al
del receptor.
•En caso de requerir ayuda, diríjase a su co-
mercio especializado o a un técnico de radio y
televisión cualifi cado.
Los accesorios conectados a este monitor han de
estar homologados conforme a las correspondien-
tes normas CEI (p. ej., CEI 60950-1 sobre equipos
de procesamiento de datos y EN 60601-1 Ed. 3
2007 sobre equipos médicos). Toda persona que
conecte un equipo adicional a una entrada o salida
de señales está confi gurando un sistema médico
y es, por lo tanto, responsable de que el sistema
cumpla con los requisitos de la norma EN 60601-1
Ed. 3. Toda persona responsable del montaje del
monitor a un sistema debe asegurarse de que los
dispositivos de montaje utilizados para dicho moni-
tor cumplan con la norma EN 60601-1. En caso de
duda, diríjase a su departamento técnico-médico o
al Servicio Técnico competente.

9
9619 NB / 9627 NB HD Monitor 9619 NB / 9627 NB HD Monitor 9619 NB / 9627 NB Monitor HD
19" HD Monitor 9619 NB / 19" HD Monitor 9619 NB / Monitor HD de 19" 9619 NB
27" HD Monitor 9627 NB / 27" HD Monitor 9627 NB / Monitor HD de 27" 9627 NB

10
9619 NB / 9627 NB HD Monitor 9619 NB / 9627 NB HD Monitor 9619 NB / 9627 NB Monitor HD
Maße
Monitorgehäuse
•Beide Monitore haben ein spezielles Gehäuse
aus einer Magnesiumlegierung und Glas.
•Keine Lüfter
Dimensions
Monitor housing
•Both monitors have a special housing made of a
magnesium alloy and glass.
•No fans
Dimensiones
Carcasa del monitor
•Ambos monitores cuentan con una carcasa
especial compuesta de una aleación de
magnesio y cristal.
•No lleva ventiladores
KARLSTORZ HD Monitor 27" 9627 NB
KARLSTORZ HD Monitor 19" 9619 NB
75.5
55

11
9619 NB / 9627 NB HD Monitor 9619 NB / 9627 NB HD Monitor 9619 NB / 9627 NB Monitor HD
Aufhängung
Die Monitore sind mit einer VESA100-Aufhängung
versehen, die für die meisten Auslegerarme oder
Turmhalterungen geeignet ist. Bitte prüfen Sie, ob
der vorgesehene Ausleger- oder Deckenarm, bezie-
hungsweise der Gerätewagen für das Gewicht des
Monitors geeignet ist.
Mounting
The monitors are equipped with a VESA100
mounting which is compatible to most boom
arms and tower mounts. Please check whether
the designated extension or ceiling arm or the
equipment trolley is able to take the weight of the
monitor.
Kabeleingang
Verdeckter Kabeleingang durch VESA100-Aufhän-
gung oder Unterseite der Kabelabdeckung.
Cable Entry Point
Hidden cable entry through VESA 100 mounting or
the lower side of the cable cover.
Erdungsstift/ground post/Varilla de
puesta a tierra
Suspensión
Los monitores están provistos de un dispositivo de
suspensión VESA 100, apto para la mayoría de bra-
zos de extensión o soportes de columna. Por favor,
compruebe que el brazo de extensión o el brazo de
techo previsto, o en su caso la unidad móvil sean
apropiados para el peso del monitor.
Entrada de cable
Entrada de cable oculta mediante el dispositivo
de suspensión VESA 100 o la parte inferior de la
cubierta para cables.

12
9619 NB / 9627 NB HD Monitor 9619 NB / 9627 NB HD Monitor 9619 NB / 9627 NB Monitor HD
Anschlussfeld
Ein- und Ausgänge
9619 NB KARLSTORZ HD Monitor 19"
9627 NB KARLSTORZ HD Monitor 27"
Connection Field
Inputs and Outputs
9619 NB KARLSTORZ HD Monitor 19"
9627NB
KARLSTORZ HD Monitor
27"
Campo de conexión
Entradas y salidas
9619 NB, Monitor HD de 19" de KARLSTORZ
9627 NB, Monitor HD de 27" de KARLSTORZ
9619 NB 9627 NB I/O Ein- und Ausgangstyp /
Type of In-&-Output /
Tipo de entrada/salida
Anschlusstyp /
Connection type /
Tipo de conexión
② ① IN DC (24V) SL143
–②OUT DC (5V) Ø 1,3 mm/4,5 mm
–③IN DVI-Eingang (Steckplatz für optisches Modul)
DVI-Input (Slot for optical module)
Entrada DVI (conexión para el módulo óptico)
DVI-I
① ④ IN RS232 D-Sub 9-polig
③ ⑤ IN SDI (3G-, HD-, SD-SDI) BNC
④ ⑥ OUT SDI (3G-, HD-, SD-SDI) (loop through) BNC
⑤ ⑦ IN Composite BNC
⑥ ⑧ IN S-Video Mini-DIN 4-polig
⑦ ⑨ IN RGB D-Sub 9-polig
⑧ ⑩ OUT DVI (loop through) DVI-I
⑨ ⑪ IN DVI DVI-I
⑩ ⑫ IN Ethernet RJ45
1 2 3 4 5 6 7 08 9
1 2 3 4 5 6 7 0 q w8 9

13
9619 NB / 9627 NB HD Monitor 9619 NB / 9627 NB HD Monitor 9619 NB / 9627 NB Monitor HD
Befestigung des Monitors am
Standfuß
Befestigen Sie den Monitor mit den vier beigefügten
Torxschrauben und dem speziellen Bit am Standfuß.
Der Standfuß lässt sich drehen (±60°) und neigen
(±25°).
Hinweis: Der Monitorständer ist ein optional
erhältliches Zubehörteil – Bestellnummer 9626 SF.
0Vorsicht: Kippgefahr! Der sichere Stand
des Monitors muss sichergestellt sein.
Stellen Sie sicher, dass der Standfuß
mit dem Monitor entsprechend mit dem
Gerätewagen, Deckenarm oder der
Hängeampel verschraubt wird.
Monitor Mounting to Stand
Attach the stand to the monitor using the four Torx
screws and special bit supplied.
The stand can be rotated (± 60°) and tilted (± 25°).
Note: The monitor stand is an optional accessory.
Order no. 9626 SF.
0Caution: Risk of tipping! Ensure that the
monitor is stable. Ensure that the stand
with the monitor is screwed correctly to
the equipment trolley, ceiling arm or the
suspended supply unit.
Fijación del monitor al pie soporte
Fije el monitor al pie soporte utilizando los cuatro
tornillos Torx suministrados y la punta especial.
El pie soporte puede girar (±60°) e inclinarse
(±25°).
Nota: El soporte para monitor puede adquirirse
como accesorio opcional con el número de pedido
9626 SF.
0Advertencia: Peligro de vuelco. Es nece-
sario asegurarse de que el monitor queda
fi jado de manera estable. Asegúrese de
que el pie soporte con el monitor se atorni-
lle correspondientemente a la unidad móvil,
al brazo de techo o a la columna colgante.

14
9619 NB / 9627 NB HD Monitor 9619 NB / 9627 NB HD Monitor 9619 NB / 9627 NB Monitor HD
Schnellstart
Einschalten des Geräts
Entfernen Sie die Kabelabdeckung an der Rück-
seite des Monitors und schließen Sie den Monitor
mittels Netzkabel an die Stromversorgung an.
Stecken Sie den Netzstecker ein. Schließen Sie
die Videoquelle an den Monitor von KARLSTORZ
an. Schalten Sie das Peripheriegerät und anschlie-
ßend den Bildschirm ein. Es wird das Logo von
KARLSTORZ und anschließend das aktive Video-
signal angezeigt.
Die Elektronik von KARLSTORZ untersucht nach
dem »Stand der Technik« bei der Initialisierung das
Eingangssignal und zeigt das Videobild automatisch
im richtigen Format an. Auf diese Weise müssen
für die meisten Videoquellen keine Einstellungen
vorgenommen werden. Die Feineinstellung des
Bildes wird unter »Bedienung der OSM-Funktion«
auf Seite17 beschrieben.
ON/OFF-Funktion
Ein Ausschalten des Monitors kann über das OSD
(siehe Seite 17) oder durch das kontinuierliche Be-
rühren – mehr als 5Sekunden – der Regelrad-Mitte
erfolgen.
Um den Monitor aus diesem Zustand einzuschal-
ten, muss die Regelrad-Mitte für mehr als 2Se-
kunden berührt werden. Nun stehen Ihnen alle
gewohnten Funktionen zur Verfügung.
Die Leistungsaufnahme im ausgeschalteten
Zustand beträgt weniger als 1W.
Quick Start
Switching on the Device
Remove the cable cover at the back of the monitor
and connect the power supply to the display using
the mains cable. Insert the power plug. Connect the
video source to the KARLSTORZ monitor. Switch
on the peripheral device and then the display. The
KARLSTORZ logo is displayed, followed by the
active video signal.
The electronics, designed by KARLSTORZ,
incorporate ‘state of the art’ technology which,
at initialization, examines the incoming signal
and automatically displays the video image in its
proper format. This eliminates the need to make
adjustments to most video sources. To fi ne tune
the image, please refer to how to use the OSM on
page17.
ON/OFF-Function
The monitor can be turned off via the OSD (see
page 17) or by holding down the middle of the
control wheel for more than 5 seconds.
To power up the monitor again from this state, the
center of the control wheel must be held down for
more than 2seconds. All of the usual functions can
now be used again.
The maximum power consumption when switched
off is less than 1 W.
Inicio rápido
Conexión del aparato
Extraiga la cubierta para cables en la parte posterior
del monitor y conecte el monitor a la alimentación
de corriente mediante el cable de red. Introduzca el
enchufe de la red en el conector. Conecte la fuente
de vídeo al monitor de KARLSTORZ. Encienda
el equipo periférico y, a continuación, la pantalla.
Ahora aparece el logotipo de KARL STORZ y, a
continuación, la señal de vídeo activa.
El sistema electrónico de KARLSTORZ incorpora
la tecnología más avanzada que examina la señal
de entrada durante la inicialización y muestra auto-
máticamente la imagen de vídeo con el formato co-
rrecto. De este modo puede prescindirse de ajustes
para la mayoría de fuentes de vídeo. En la sección
“OSM (On-Screen-Manager)” en la pág.17 se
explica el ajuste de precisión de la imagen.
Función ON/OFF
Puede apagar el monitor por medio del menú OSD
(véase página 17) o tocando continuadamente,
durante más de 5 segundos, la parte central de la
ruedecilla de ajuste.
Para encender el monitor a partir de ese estado,
pulse el centro de la ruedecilla de ajuste durante
más de 2segundos. A partir de entonces estarán
disponibles todas las funciones habituales.
Mientras el monitor esté apagado, el consumo de
potencia es inferior a 1W.

15
9619 NB / 9627 NB HD Monitor 9619 NB / 9627 NB HD Monitor 9619 NB / 9627 NB Monitor HD
Aufl ösungen (Timings)
Eingang Signalname
SDI 1080p, 50/60 Hz *
1080i, 50/60 Hz *
720p, 50/60 Hz
525i, 60 Hz
625i, 50 Hz
DVI
RGB 640 x 480, (VGA)
800 x 600, (SVGA)
1024 x 768, (XGA)
1280 x 720, (HD)
1366 x 768, (WXGA)
1280 x 1024, (SXGA)
1440 x 1024, (SXGA+) *
1920 x 1080, (FHD) *
1600 x 1200, (UXGA) */**
1920 x 1200, (WUXGA) */**
S-Video PAL, NTSC
Composite PAL, NTSC
Folgender Aufl istung entnehmen Sie die native
Aufl ösung des entsprechenden Panels:
•9619NB: 1280 x 1024
•9627NB: 1920 x 1080
Daher müssen die gekennzeichneten (*) Aufl ösun-
gen in der obigen Tabelle zur Darstellung auf dem
jeweiligen Monitor modifi ziert werden.
* 9619NB
** 9627NB
Standardmäßig wird das Seitenverhältnis
(Bildformat) des Eingangssignals beibehalten.
Ausgangsgamma
Es werden verschiedene Gammaeinstellungen
durch die Monitore unterstützt und selbst erkannt.
Eine manuelle Gammaeinstellung ist daher nicht
nötig bzw. nicht vorgesehen.
Monitor-Klassifi zierung
Toleranzen gemäß EBU Tech 3320, Monitor Grad 3
Resolutions (Timings)
Input Signal name
SDI 1080p, 50/60 Hz *
1080i, 50/60 Hz *
720p, 50/60 Hz
525i, 60 Hz
625i, 50 Hz
DVI
RGB 640 x 480, (VGA)
800 x 600, (SVGA)
1024 x 768, (XGA)
1280 x 720, (HD)
1366 x 768, (WXGA)
1280 x 1024, (SXGA)
1440 x 1024, (SXGA+) *
1920 x 1080, (FHD) *
1600 x 1200, (UXGA) */**
1920 x 1200, (WUXGA) */**
S-Video PAL, NTSC
Composite PAL, NTSC
Refer to the native resolution of the respective panel
for the following list:
•9619NB: 1280 x 1024
•9627NB: 1920 x 1080
Therefore, the marked (*) resolutions in the above
table must be modifi ed for display on the relevant
monitor.
* 9619NB
** 9627NB
The aspect ratio (image format) of the input signal is
retained by default.
Output Gamma
Various gamma settings are supported and
detected by the monitors.
Setting gamma manually is therefore not necessary
and not intended.
Monitor Classifi cation
Tolerances according to EBU Tech 3320 Grade 3
Monitor
Resoluciones (sincronizaciones)
Entrada Nombre de la señal
SDI 1080p, 50/60 Hz *
1080i, 50/60 Hz *
720p, 50/60 Hz
525i, 60 Hz
625i, 50 Hz
DVI
RGB 640 x 480, (VGA)
800 x 600, (SVGA)
1024 x 768, (XGA)
1280 x 720, (HD)
1366 x 768, (WXGA)
1280 x 1024, (SXGA)
1440 x 1024, (SXGA+) *
1920 x 1080, (FHD) *
1600 x 1200, (UXGA) */**
1920 x 1200, (WUXGA) */**
S-Video PAL, NTSC
Composite PAL, NTSC
En el siguiente listado se recoge la resolución
original del panel correspondiente:
•9619NB: 1280x1024
•9627NB: 1920x1080
Por tanto, las resoluciones que estén marcadas
con un asterisco (*) en la tabla superior deben
modifi carse en los monitores respectivos.
* 9619NB
** 9627NB
La relación de aspecto (formato de imagen)
de la señal de entrada se mantiene de forma
predeterminada.
Valores gamma de salida
El monitor es compatible con y reconoce
automáticamente diferentes ajustes de gamma.
Por tanto, no es preciso ni está previsto un ajuste
manual de los valores gamma.
Clasifi cación del monitor
Tolerancias conforme a EBU Tech 3320, monitor de
grado 3

16
9619 NB / 9627 NB HD Monitor 9619 NB / 9627 NB HD Monitor 9619 NB / 9627 NB Monitor HD
Benutzeroberfl äche
Die einzelnen Einstellungen des Geräts können
über eine Steuerung mit visueller Kontrolle über eine
Bildschirmanzeige (OSD) vorgenommen werden.
Folgende Funktionen sind in zweckmäßigen Menüs
zusammengefasst und lassen sich über die Benut-
zeroberfl äche einstellen:
•Eingangsauswahl, Automatische Eingangssuche
•Helligkeit, Kontrast, Sättigung, Farbton
•H-Spiegelung, V-Spiegelung, H&V-Spiegelung,
90° Rotation, 270° Rotation
•Auto Setup (Komplett, Phase, Geometrie)
•Skalierung/Underscan/Overscan zur Erweiterung
des Hauptbilds stufenlos von -50 % bis 150 %
•PiP, PoP, PbP (siehe Seite 27)
•Energiespareinstellung
•OSD-Sprachoptionen
•Info (Seriennummer, Betriebszeit, Betriebszeit
Hintergrundbeleuchtung, SW-Revision, HW-Re-
vision, Signalerkennungsstatus und Format bei
verschiedenen Eingaben)
•OSD Sperrung (siehe OSD entsperren,
Seite20)
Die meisten Einstellungen beziehen sich speziell
auf das gewählte Eingangssignal (Einstellungen für
Farbe, Skalierung, Helligkeit, usw.).
Schnittstellensteuerung
Die Schnittstellensteuerung für alle Funktionen
der Benutzeroberfl äche befi ndet sich rechts unten
am Monitor und funktioniert wie ein Regelrad. Der
äußere runde Kreis ist in das Glas eingraviert und
geätzt. Eine zirkuläre Bewegung oder eine direkte
Berührung in diesem Bereich ermöglicht eine
Menüauswahl.
Durch Berühren der Schaltfl äche »OK« des
Elements erfolgt eine Auswahl. Auf diese Weise
lässt sich eine Menüoption auswählen oder in der
Menühierarchie nach oben oder unten blättern.
Bei inaktiver Steuerung leuchtet die LED nicht.
Wenn die Steuerung aktiviert wird, leuchtet die LED
dauerhaft (siehe OSD entsperren, Seite20).
User Interface
The individual settings can be made using a control
with visual feedback via an on-screen display
(OSD).
The following functions are comprised in the
relevant menus and can be set via the user
interface:
•Input Selection, Automatic Input Search
•Brightness, Contrast, Saturation, Hue
•H-Mirror, V-Mirror, H&V-Mirror, 90° Rotation,
270° Rotation
•Auto Setup (Full, Phase, Geometry)
•Scaling/Underscan/Overscan to expand main
image continuously from -50 % to 150 %
•PiP, PoP, PbP (see page 27)
•Power Save Setting
•OSD Language Options
•Info (Serial Number, Run Time, Backlight
Run Time, SW Revision, HW Revision, Signal
detection status and format with various inputs)
•Locking the OSD (see Unlocking the OSD,
page20)
Most of these settings are specifi c to the selected
input signal (color, scaling, brightness settings etc.).
Interface Control
The interface control (located at the lower right
corner on the monitor) for all user interface
functions works like a control wheel. The outer
circle is engraved into the glass and etched over. A
sliding circular action or even a direct touch in this
area enables menu selection.
A selection is made by touching the ‘OK’ button. In
this way, menu items can be selected and it is also
possible to scroll up and down the menu hierarchy.
The LED does not light up if the control is
inactive. When the control is activated the LED is
permanently illuminated (see Unlocking the OSD,
page 20).
Superfi cie de usuario
Para efectuar individualmente los ajustes del apara-
to puede utilizarse un mando de control visual me-
diante parámetros de ajuste en la pantalla (OSD).
Las siguientes funciones se agrupan en menús fun-
cionales y pueden ajustarse utilizando la superfi cie
de usuario:
•selección de entrada, búsqueda automática de
entrada
•brillo, contraste, saturación, tono
•reflejo H, reflejo V, reflejo H/V, rotación de 90°,
rotación de 270°
•Auto Setup (completo, fase, geometría)
•escala/subbarrido/sobrebarrido para ampliación
de la imagen principal continuadamente de
-50% a 150%
•PiP, PoP, PbP (véase la pág. 27)
•modo de ahorro de energía
•opciones de idioma OSD
•información (número de serie, tiempo de servicio,
tiempo de servicio de iluminación de fondo, revi-
sión SW, revisión HW, estado de reconocimiento
de señal y formato con ingresos diferentes)
•Bloqueo OSD (Véasedesbloquear OSD.
pág.20)
La mayoría de los ajustes se refiere específicamente
a la señal de entrada seleccionada (ajustes de
color, escala, brillo, etc.).
Control de interfaz
El control de interfaz de todas las funciones de
la superfi cie de usuario se encuentra en la parte
inferior derecha del monitor y funciona como una
ruedecilla de ajuste. El círculo exterior está grabado
en el cristal al agua fuerte. La función de selección
de menú se controla deslizando el dedo circular-
mente sobre esta área o pulsándola directamente.
Para seleccionar un elemento, hay que pulsar el
botón “OK” del elemento correspondiente. De este
modo, puede seleccionarse una opción de menú o
bien hojear hacia arriba y hacia abajo en la jerarquía
del menú.
Si el control no está activado, el diodo luminoso
no se enciende. En caso de que sea activado, el
diodo luminoso se enciende de forma permanente
(Véasedesbloquear OSD. pág. 20).

17
9619 NB / 9627 NB HD Monitor 9619 NB / 9627 NB HD Monitor 9619 NB / 9627 NB Monitor HD
OSM (On-Screen Manager)
The following images describe how to use the OSM
function.
Touching the center of the 'control wheel' opens up
the main menu.
Note: Pressing the center of the control wheel for
at least 5seconds switches the monitor to Stand-
by mode.
Pressing the center of the control wheel a second
time switches the monitor on again (see page 28).
Note: The 'control wheel' must not be pressed
during the boot-up process.
The desired function (e.g., Picture) can be selected
directly.
OSM (On-Screen-Manager)
Die folgenden Bilder beschreiben die Bedienung der
OSM-Funktion.
Bei einer Berührung der Mitte des »Regelrads«
öffnet sich das Hauptmenü.
Hinweis: Durch das Drücken der Regelrad-Mitte
für min. 5 Sekunden schaltet den Monitor in den
Stand-by-Mode.
Erneutes Betätigen der Regelrad-Mitte schaltet den
Monitor erneut ein (siehe Seite 28).
Hinweis: Das »Regelrad« darf während des Boot-
Up Prozesses nicht betätigt werden.
Die gewünschte Funktion (z.B. Bild) kann direkt
angewählt werden.
OSM (On-Screen-Manager)
Las siguientes imágenes describen el manejo de la
función OSM:
Al pulsar el centro de la ruedecilla de ajuste, se abre
el menú principal.
Nota: Pulsando el centro de la ruedecilla de ajuste
durante 5segundos como mínimo, el monitor pasa
al modo Standby.
Si vuelve a pulsar el centro de la ruedecilla de
ajuste, el monitor se enciende de nuevo (véase la
pág. 28).
Nota: No está permitido pulsar la ruedecilla de
ajuste del monitor durante el proceso de arranque.
La función deseada (p. ej., imagen) puede ser
seleccionada directamente.

18
9619 NB / 9627 NB HD Monitor 9619 NB / 9627 NB HD Monitor 9619 NB / 9627 NB Monitor HD
After this, touch and release the center of the
control wheel (OK) again.
You are now one step down in the menu hierachy.
You can again slide to or directly touch the function
(i.e. Position) you wish to select.
Anschließend müssen Sie erneut auf die Regel-
rad-Mitte (OK) tippen und diese wieder loslassen.
Jetzt befi nden Sie sich in der Menühierarchie auf
der nächst niedrigeren Stufe.
Sie können wieder zur gewünschten Funktion
(z. B.Position) fahren oder diese direkt antippen.
A continuación, pulse de nuevo el centro de la
ruedecilla de ajuste (OK) y vuelva a soltarlo.
Ahora se encuentra en el nivel inmediatamente
inferior de la jerarquía del menú.
Usted puede desplazarse de nuevo hasta la función
deseada (p. ej., posición) o pulsar esta función
directamente.

19
9619 NB / 9627 NB HD Monitor 9619 NB / 9627 NB HD Monitor 9619 NB / 9627 NB Monitor HD
After this, touch and release the center of the
control wheel (OK) again.
You are now in the ‘Position’ menu level.
To change the picture position, click on the desired
picture direction (e.g., right) several times or leave
your fi nger in this area until the desired position has
been reached.
Anschließend müssen Sie erneut auf die Regel-
rad-Mitte (OK) tippen und diese wieder loslassen.
Jetzt befi nden Sie sich in der Menüebene
»Position«.
Zum Ändern der Bildposition müssen Sie mehrmals
auf die gewünschte Bildrichtung (z.B. rechts) tippen
oder den Finger so lange in dem Bereich lassen, bis
die gewünschte Position erreicht ist.
A continuación, pulse de nuevo el centro de la
ruedecilla de ajuste (OK) y vuelva a soltarlo.
Ahora se encuentra usted en el nivel de menú
“Posición”.
Para modificar la posición de la imagen, pulse
repetidas veces sobre la dirección deseada (p. ej.,
hacia la derecha) o mantenga el dedo en esta área
hasta alcanzar la posición deseada.

20
9619 NB / 9627 NB HD Monitor 9619 NB / 9627 NB HD Monitor 9619 NB / 9627 NB Monitor HD
Bildschirmanzeige (OSD) entsperren
Das OSD wird automatisch nach 120Sekunden
gesperrt um versehentliche Verstellungen der
Einstellungen während z.B. des Reinigens zu
vermeiden. Die Werkseinstellung von 120 Sekun-
den können Sie nach Ihren Bedürfnissen auf eine
Zeit zwischen 30Sekunden und 600 Sekunden
einstellen (»MainMenu>>Setup – Menu Lock«).
Um das OSD zu entsperren gehen Sie wie folgt vor:
1. Berühren Sie die Regelrad-Mitte.
2. Führen Sie am Regelrad eine halbe Drehung im
Uhrzeigersinn bis in die Mitte unten aus.
3. Führen Sie am Regelrad eine halbe Drehung
gegen den Uhrzeigersinn bis in die Mitte unten
aus.
4. Wiederholen Sie Schritt 2.
Danach entsperrt sich das OSD automatisch.
Unlocking the on-screen display
(OSD)
The OSD is automatically locked after 120 seconds
in order to prevent the settings being accidentally
changed during cleaning, for example. The default
setting of 120 seconds can be set to a time
between 30 and 600 seconds depending on your
requirements (‘MainMenu>>Setup – Menu Lock’).
Proceed as follows to unlock the OSD:
1. Touch the center of the control wheel.
2. Move your fi nger clockwise on the control wheel
through half a circle to the bottom of the wheel.
3. Move your fi nger counterclockwise on the
control wheel through half a circle to the bottom
of the wheel.
4. Repeat step 2.
The OSD is then unlocked automatically.
Desbloquear la indicación de
pantalla (OSD)
El OSD se bloquea automáticamente después de
120 segundos para evitar reajustes involuntarios,
p. ej., durante la limpieza. El ajuste de fábrica de
120 segundos, puede regularse en función de los
requisitos particulares entre 30 y 600 segundos
(“MainMenu>>Setup – Menu Lock”).
Para desbloquear el OSD proceda de la siguiente
forma:
1. Pulse el centro de la ruedecilla de ajuste.
2. Gire la ruedecilla de ajuste media vuelta en el
sentido de las agujas del reloj hasta el centro
inferior.
3. Gire la ruedecilla de ajuste media vuelta en
sentido contrario al de las agujas del reloj hasta
el centro inferior.
4. Repita el paso 2.
El OSD se desbloquea después de forma
automática.
This manual suits for next models
1
Table of contents
Other Karl Storz Monitor manuals