If you wish to equip your motorhome with
special accessories such as bicycle, ski or
surfboard racks or awnings, you should take
advantage of the range on offer from Karmann
Mobil dealers.
These accessories have been especially
developed for your vehicle and tested for
reliability, safety and suitability - please also
note the instructions regarding the basic
chassis.
Detailed assembly and operation instructions
are of course included with these accessories.
This instruction manual contains important
notes for operation and care of your mobile
home as well as for use of its equipment.
Page 2-2 provides an overview of all instructions
and papers which accompany your motorhome.
The many practical tips included in it are
intended to make it easy for you to use your
Karmann-Mobil motorhome in the best way
possible, safely and in an environmentally
friendly way.
In the interests of safety, please read the
information regarding use of the gas equipment
and the 230 Volt vehicle electrical supply
system.
You will find all general information regarding
operation and handling of your vehicle in the
operating instructions for the basic chassis.
ON-BOARD LITERATURE
Sections with this symbol written in
italics offer important information on
environmental protection.
Sections introduced by the word "Caution"
and with a coloured background indicate
possible sources of accident, injury or
damage.
Caution
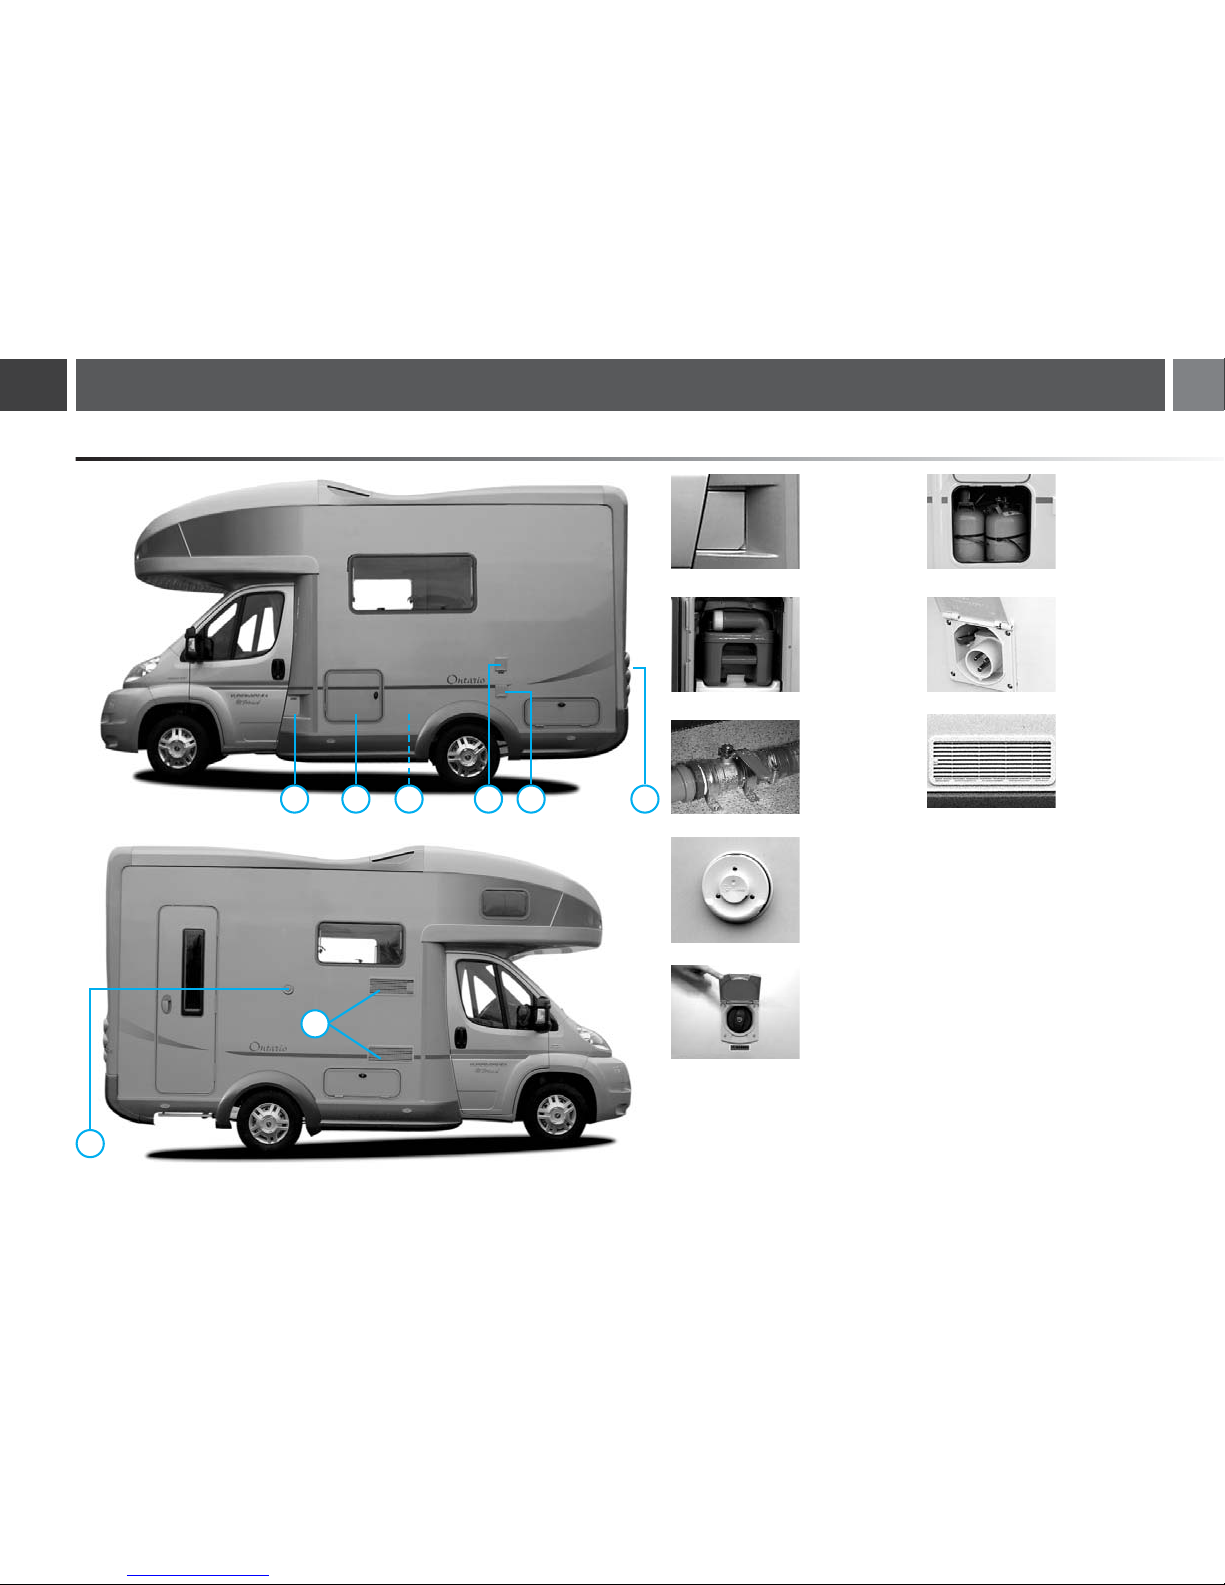
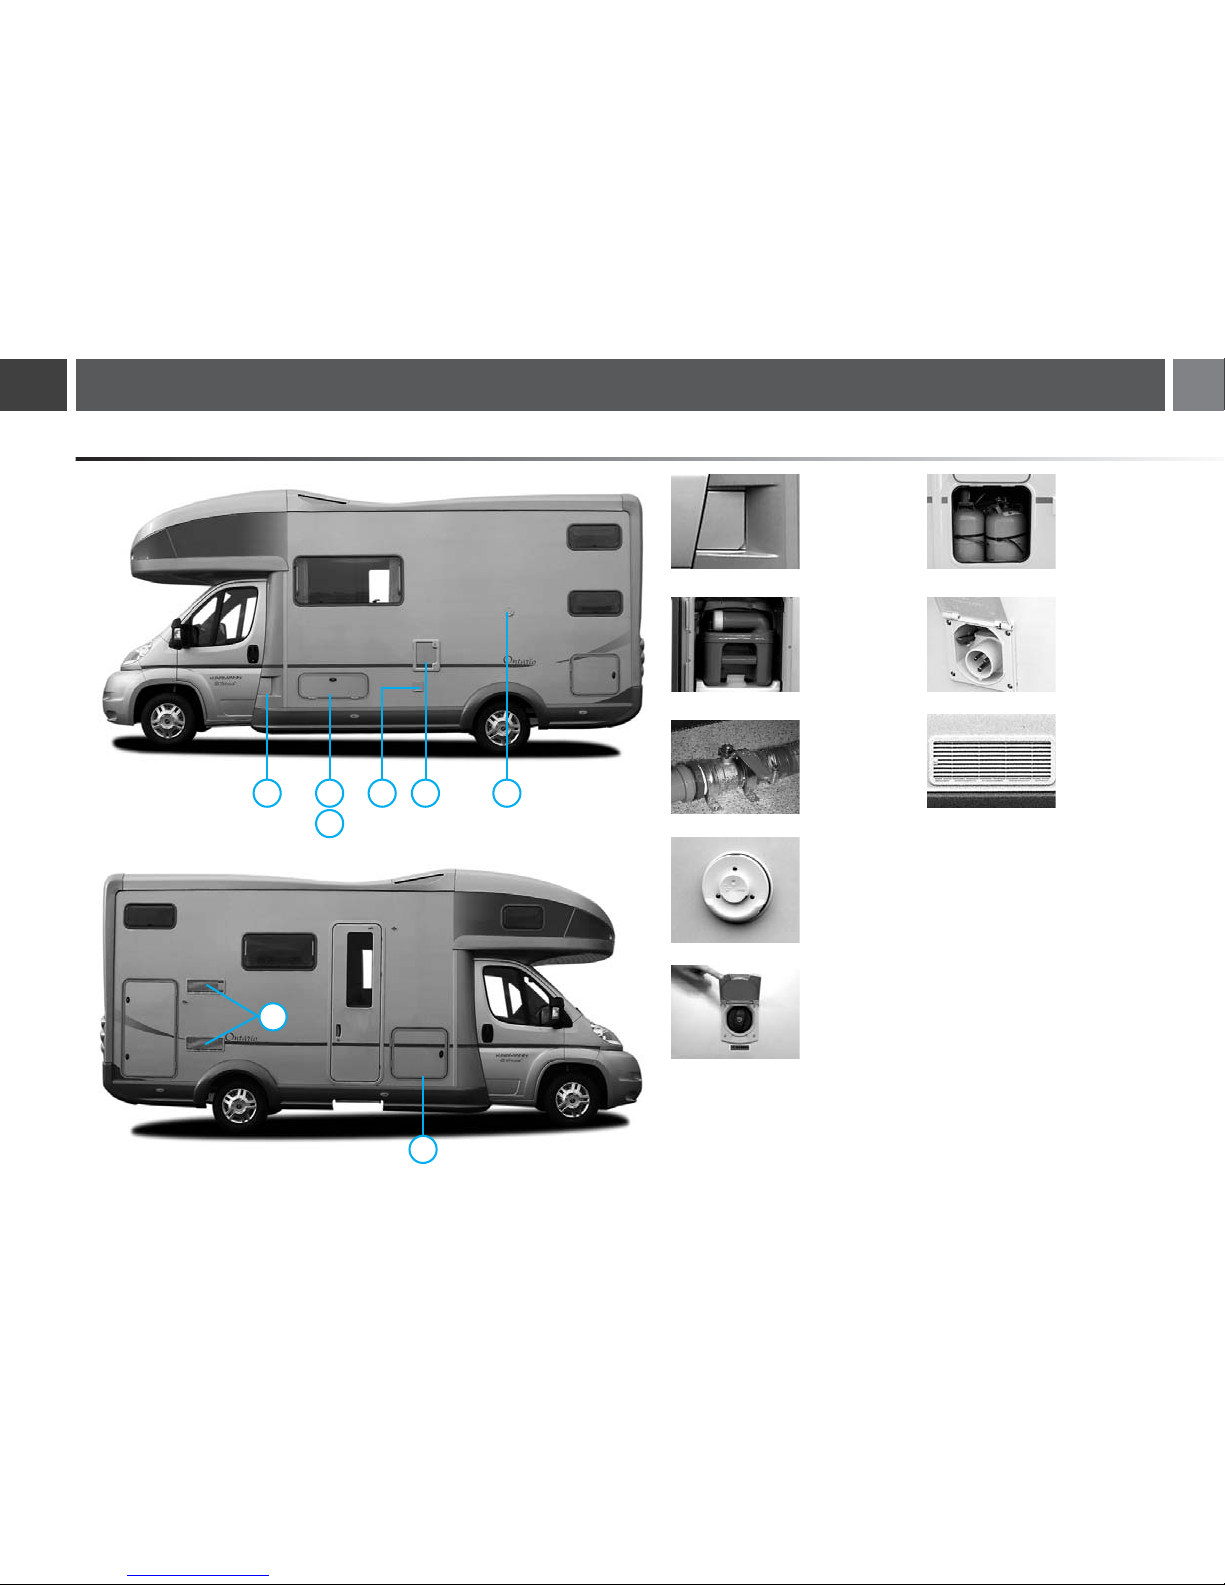
Location:
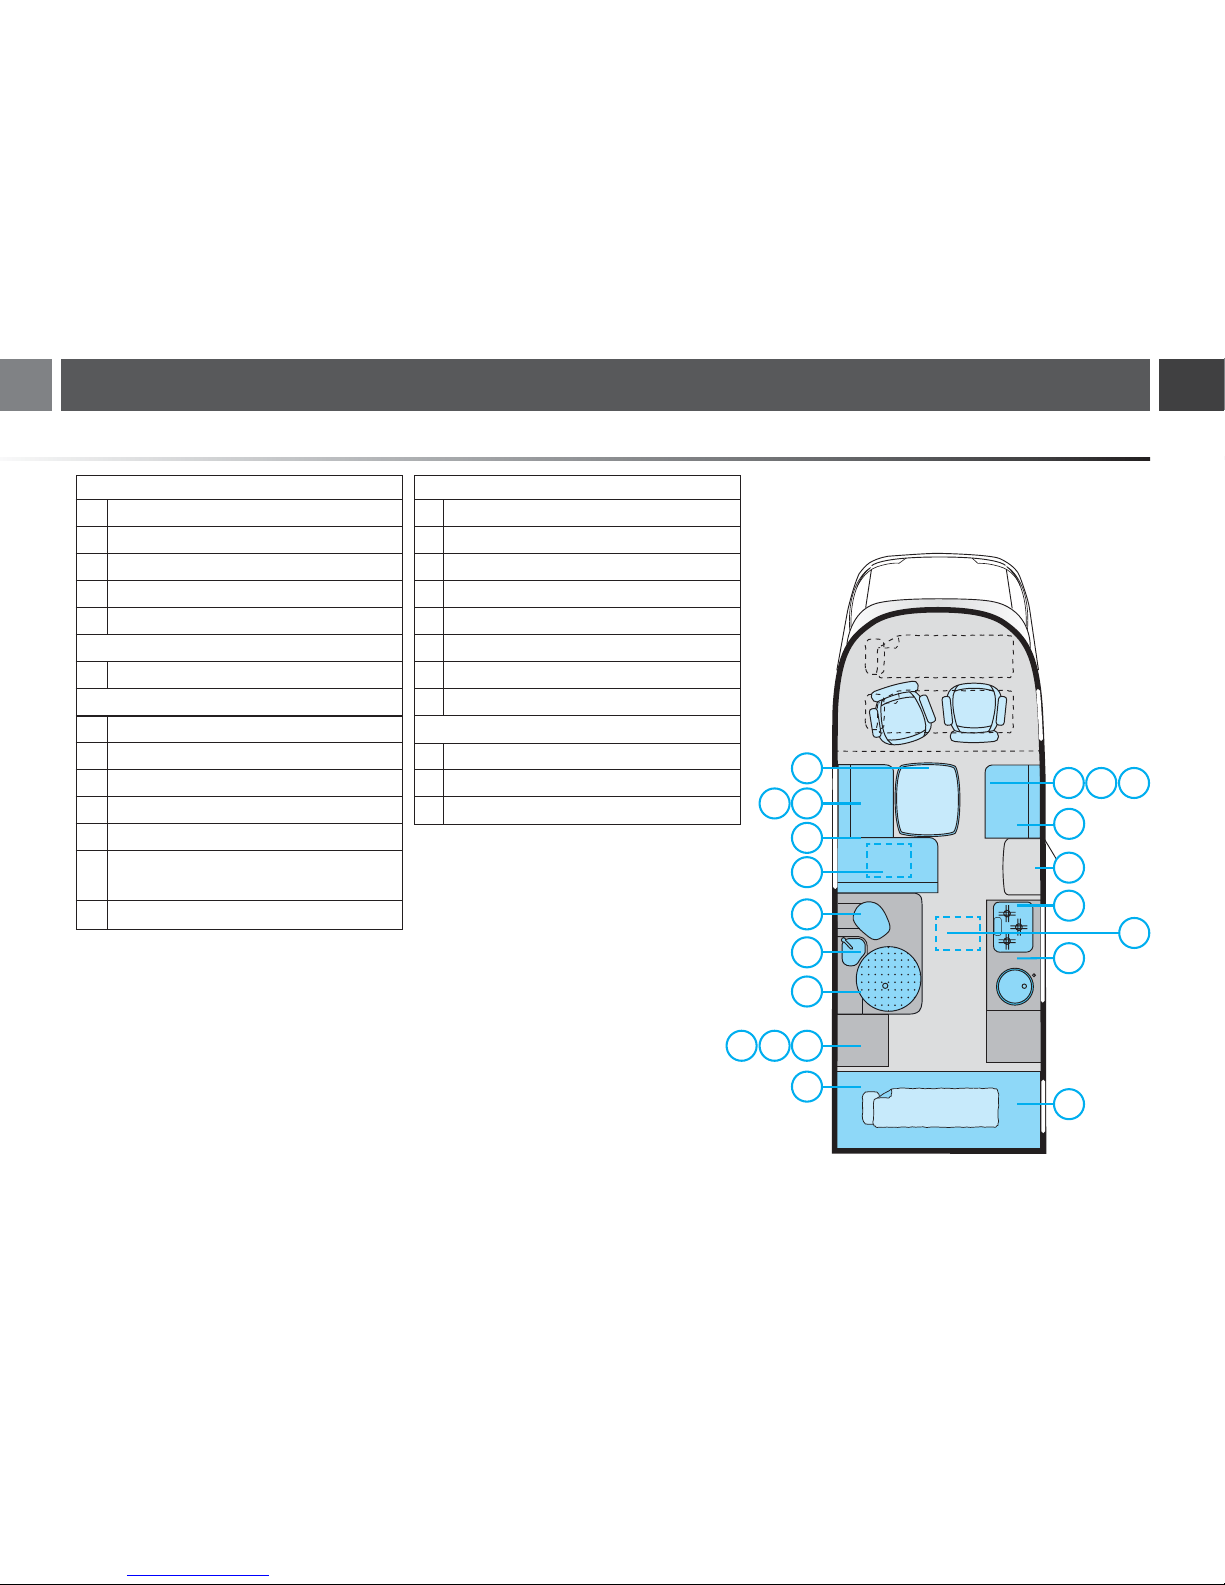
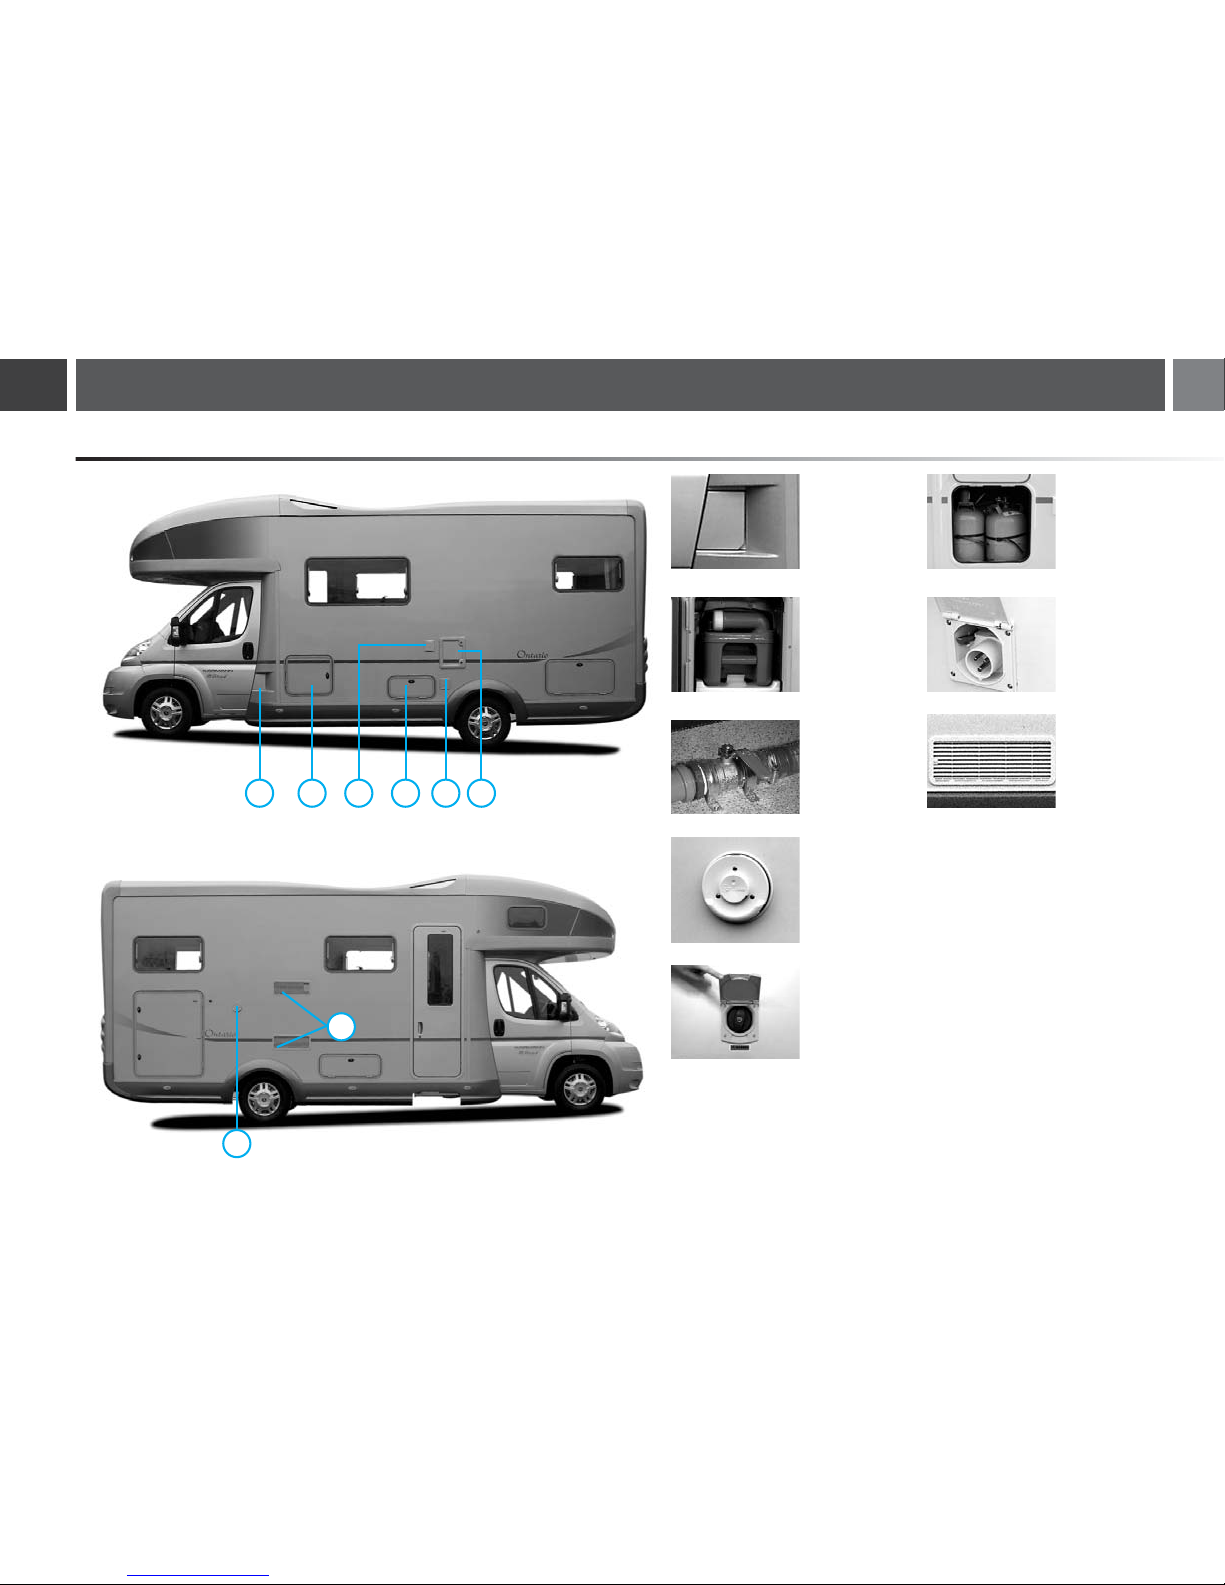
Notes that are outlined in blue indicate the
location of the described component and
are intended to provide quick orientation.