Table
of
Contents
Ø
Basic
Controls
......................
1
MBasic
Operation
....................
3
Hi
Advanced
Features.................
5
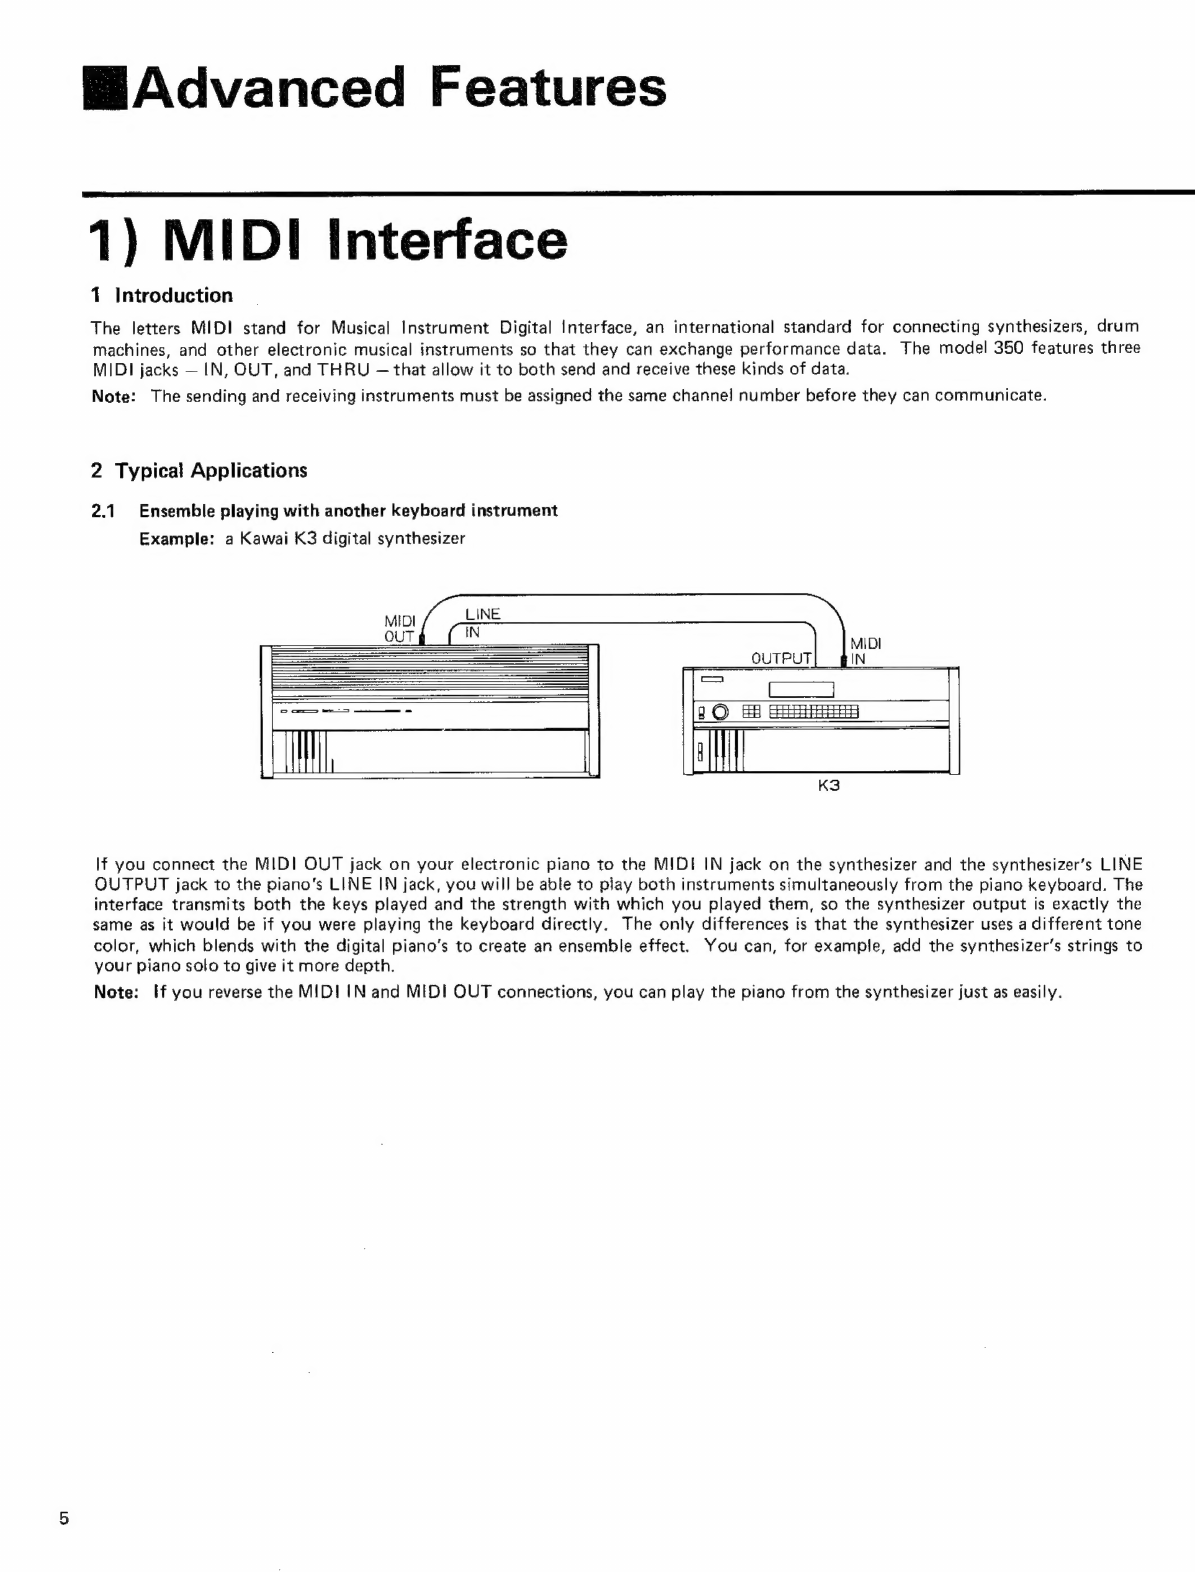
1)
MIDI
Interface...................
5
2)
TUNING
rara
9
3)
Temperaments..................
10
4)
Changing
the
SPLIT
Point
MSpecifications......................
11