Kaypro A1100 User manual

Notebook computer
User’s guide
H3H2.book Page i Wednesday, April 3, 2002 3:45 PM

Changes may be made periodically to the information in this publication without obligation to notify any
person of such revision or changes. Such changes will be incorporated in new editions of this manual or
supplementary documents and publications. This company makes no representations or warranties, either
expressed or implied, with respect to the contents hereof and specifically disclaims the implied warranties of
merchantability or fitness for a particular purpose.
Record the model number, serial number, purchase date, and place of purchase information in the space
provided below. The serial number and model number are recorded on the label affixed to your computer. All
correspondence concerning your unit should include the serial number, model number, and purchase
information.
No part of this publication may be reproduced, stored in a retrieval system, or transmitted, in any form or by
any means, electronic, mechanical, photocopy, recording, or otherwise, without the prior written permission
of this company.
Model Number : __________________________________
Serial Number: ___________________________________
Purchase Date: ___________________________________
Place of Purchase: ________________________________
Copyright © 2002
All Rights Reserved
Notebook computer User’s guide
Original Issue: March 2002
Notebook computer
All trademarks and registered trademarks are the properties of their respective companies.
H3H2.book Page ii Wednesday, April 3, 2002 3:45 PM

iii
Preface
We would like to thank you for making this notebook computer your choice for
your mobile computing needs. We hope you will be happy with your notebook
computer as much as we enjoyed making it for you.
This User’s guide introduces you to the many ways your computer can help you be
more productive. This guide provides clear and concise information about the
computer, so read it thoroughly.
Connecting your computer
Connecting the computer is as easy as 1-2-3. Do as follows:
1Insert the battery pack into the battery bay.
Note: When using a battery pack for the first time, fully recharge the battery,
then disconnect the adapter to use up the battery before recharging again.
Perform this action twice to condition the battery pack.
H3H2.book Page iii Wednesday, April 3, 2002 3:45 PM

iv
2Connect the adapter to the computer.
3Slide the display cover latch to the right to open the display, and tilt the
display screen to a desired viewing angle. Then press the power switch to
turn on the computer.
The POST (power-on self-test) routine executes and Windows begins loading.
H3H2.book Page iv Wednesday, April 3, 2002 3:45 PM

v
Basic care and tips for using your computer
Turning your computer on and off
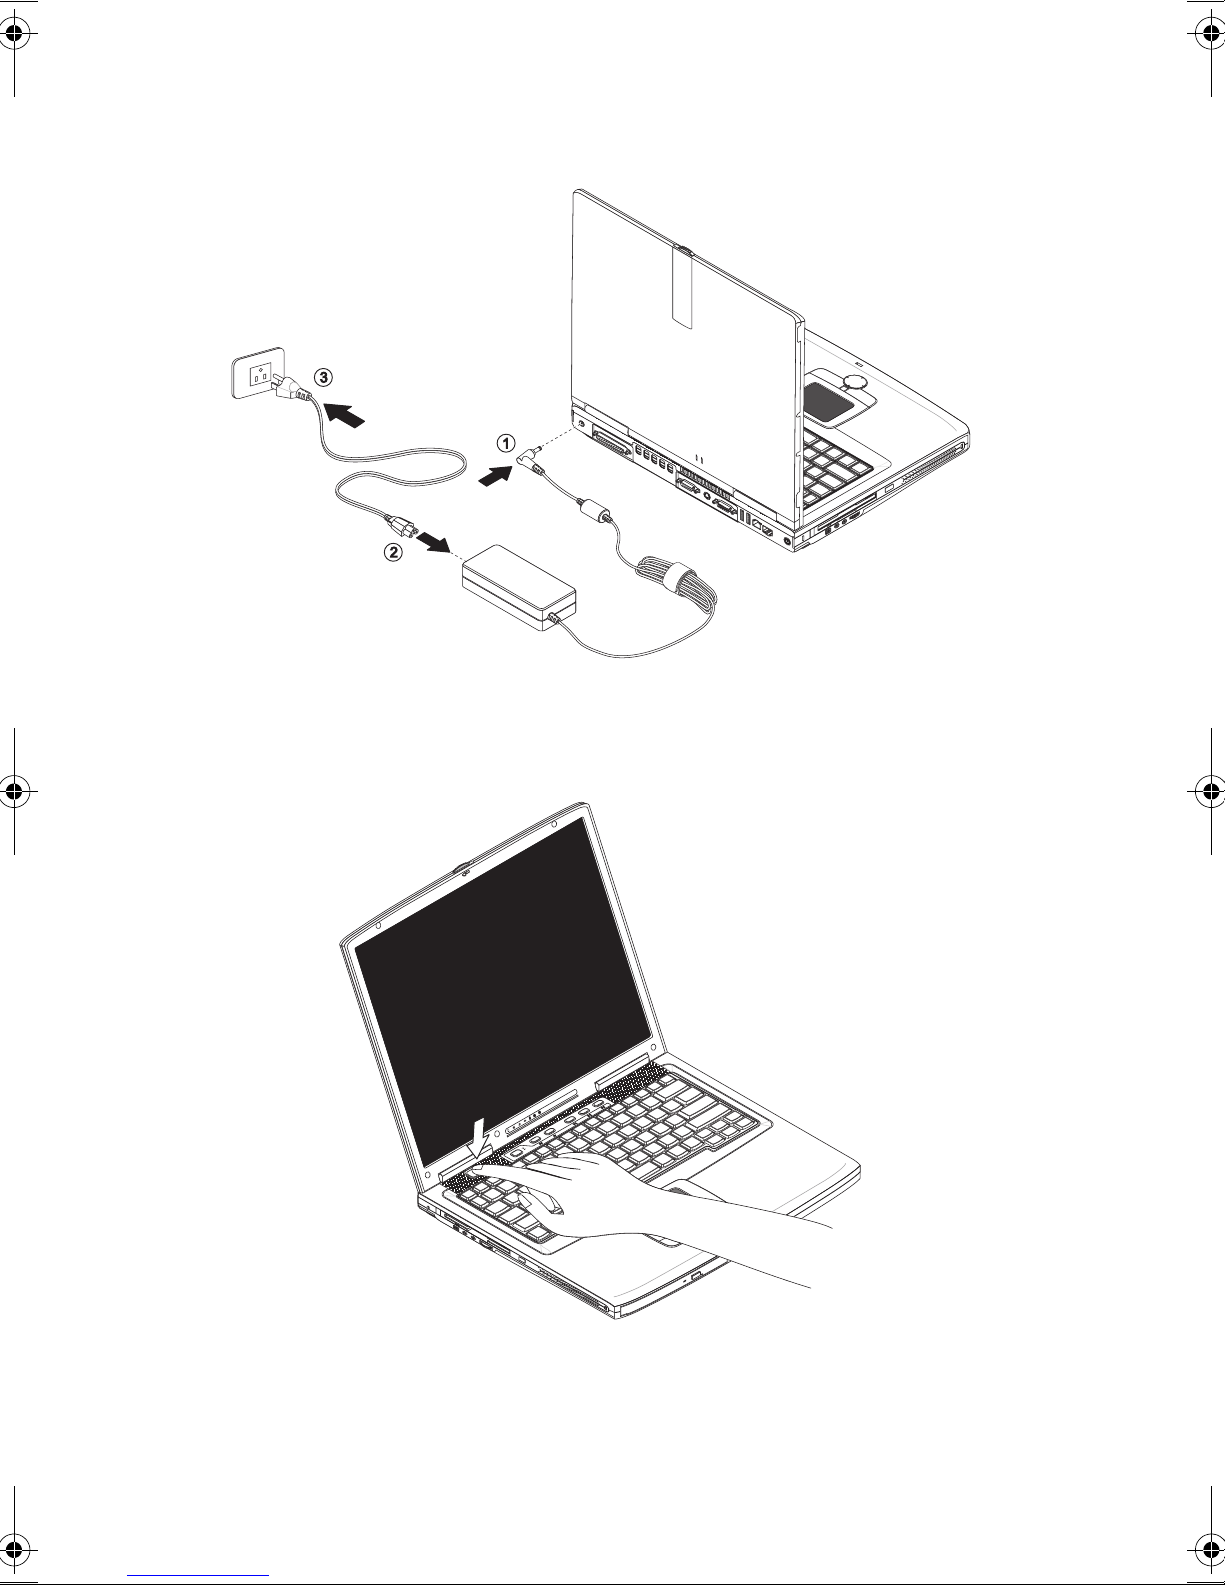
To turn on the computer, open the display cover, and press the power switch above
the keyboard.
To turn the power off, do any of the following:
•Use the Windows shutdown command
Click on Start, and select the Shut Down or Turn Off command.
•Use the power switch
If you set the power switch to “Shut down”, you can use this button to turn off
the computer. See Windows help for details.
Note: If you cannot power off the computer normally, press and hold the
power switch for more than four seconds to shut down the computer. If you
turn off the computer and want to turn it on again, wait at least two seconds
before powering up.
Taking care of your computer
Your computer will serve you well if you take care of it.
•Do not expose the computer to direct sunlight. Do not place it near sources of
heat, such as a radiator.
•Do not expose the computer to temperatures below 0°C (32°F) or above 50°C
(122°F).
•Do not subject the computer to magnetic fields.
•Do not expose the computer to rain or moisture.
•Do not spill water or any liquid on the computer.
•Do not subject the computer to heavy shock and vibration.
•Do not expose the computer to dust and dirt.
•Never place objects on top of the computer to avoid damaging the computer.
•Do not slam the computer display when you close it.
•Never place the computer on uneven surfaces.
H3H2.book Page v Wednesday, April 3, 2002 3:45 PM

vi
Taking care of your AC adapter
Here are some ways to take care of your AC adapter:
•Do not connect the adapter to any other device.
•Do not step on the power cord or place heavy objects on top of it. Carefully
route the power cord and any cables away from personal traffic.
•When unplugging the power cord, do not pull on the cord itself but pull on the
plug.
•The total ampere ratings of the equipment plugged in should not exceed the
ampere rating of the cord if you are using an extension cord. Also, the total
current rating of all equipment plugged into a single wall outlet should not
exceed the fuse rating.
Taking care of your battery pack
Here are some ways to take care of your battery pack:
•Use only batteries of the same kind as replacements. Turn the power off
before removing or replacing batteries.
•Do not tamper with batteries. Keep them away from children.
•Dispose of used batteries according to local regulations. Recycle if at all
possible.
Cleaning and servicing
When cleaning the computer, follow these steps:
1Power off the computer and remove the battery pack.
2Disconnect the AC adapter.
3Use a soft cloth moistened with water. Do not use liquid or aerosol cleaners.
If any of the following occurs:
•The computer has been dropped or the body has been damaged.
•Liquid has been spilled into the product.
•The computer does not operate normally.
Please refer to "Troubleshooting my computer" on page 79.
H3H2.book Page vi Wednesday, April 3, 2002 3:45 PM

Contents
Preface iii
Connecting your computer iii
Basic care and tips for using your computer v
1 Getting familiar with your computer 1
A tour of your computer 3
Front view 3
Top view 4
Rear view 6
Left view 7
Right view 8
Bottom view 9
Features 10
Display 12
Indicators 13
Keyboard 15
Special keys 15
Keyboard ergonomics 19
Touchpad 20
Touchpad basics 20
Easy Launch Keys 22
Storage 23
Hard disk 23
Floppy drive 23
Media bay 24
Connectivity options 27
Ethernet and LAN 27
Fax/data modem 27
Audio 29
Adjusting the volume 29
Securing your computer 30
Security notch 30
Passwords 30
2 Operating on battery power 31
Battery pack 33
Battery pack characteristics 33
Installing and removing the battery pack 34
Charging the battery 36
Checking the battery level 36
Optimizing battery life 36
Battery-low warning 37
H3H2.book Page vii Wednesday, April 3, 2002 3:45 PM

viii
Power management 38
3 Peripherals and options 39
External display devices 41
External monitor 41
External display with s-video input 42
Using simultaneous display 42
External input devices 43
External keyboard 43
External keypad 44
External pointing device 45
Printer 46
Audio devices 47
Expansion devices 48
PC Card slots 48
USB 50
IEEE 1394 51
Media bay 52
Swapping Media bay modules 52
Miscellaneous options 54
Battery pack 54
AC adapter 54
Key component upgrades 55
Memory upgrade 55
Hard disk upgrade 56
4 Moving with your computer 57
Disconnecting from the desktop 59
Moving around 60
Preparing the computer 60
What to bring to short meetings 60
What to bring to long meetings 60
Taking the computer home 61
Preparing the computer 61
What to bring with you 61
Special considerations 61
Setting up a home office 62
Traveling with the computer 63
Preparing the computer 63
What to bring with you 63
Special considerations 63
Traveling internationally with the computer 64
Preparing the computer 64
H3H2.book Page viii Wednesday, April 3, 2002 3:45 PM

ix
What to bring with you 64
Special considerations 64
5 Software 65
System software 67
Launch Manager 68
BIOS Utility 69
System Information 70
Basic System Settings 71
Startup Configuration 72
Onboard Devices Configuration 74
System Security 75
Load Default Settings 77
6 Troubleshooting 79
Frequently-asked questions 81
Error messages 85
Appendix A Specifications 87
Appendix B Notices 93
Index 101
H3H2.book Page ix Wednesday, April 3, 2002 3:45 PM

x
H3H2.book Page x Wednesday, April 3, 2002 3:45 PM

1 Getting familiar with
your computer
H3H2.book Page 1 Wednesday, April 3, 2002 3:45 PM

This computer combines high-performance, versatility,
power management features and multimedia capabilities
with a unique style and ergonomic design. Work with
unmatched productivity and reliability with your new
power computing partner.
This chapter gives an in-depth "tour" of the computer’s
many features.
H3H2.book Page 2 Wednesday, April 3, 2002 3:45 PM

3
A tour of your computer
After setting up your computer as illustrated in the preface section, let us show you
around your new notebook computer.
Front view
# Item Description
1 Media bay module Installed in the Media bay, provides optical media
access or secondary storage by way of removable
modules.
2 Optical drive activity
indicator
Lights/flashes when the optical drive is in use.
3 Optical drive eject button Ejects the disc from the optical drive.
4 Optical drive emergency
eject hole
Ejects the disc from the optical drive when the
computer is turned off. See “How do I eject the
optical drive tray with the computer turned off?”on
page 82 for more details.
5 Display latch Slide to the right to unlatch and open the display.
H3H2.book Page 3 Wednesday, April 3, 2002 3:45 PM

1 Getting familiar with your computer4
Top view
# Item Description
1 Display screen Also called LCD (liquid-crystal display), displays
computer output.
2 Status indicators LEDs that show the status of the computer and its
functions and components.
3 Power button Turns on the computer power.
4 Keyboard Inputs data into your computer.
5 Touchpad Touch-sensitive pointing device which functions like a
computer mouse.
H3H2.book Page 4 Wednesday, April 3, 2002 3:45 PM

5
6 Click buttons (left,
right and scroll pad)
The left and right buttons function like the left and right
mouse buttons. The center button is a four-directional
scroll pad.
7 Palmrest Comfortable support area for your hands when you use
the computer.
8 Easy Launch Keys Buttons for launching frequently-used programs. See
“Easy Launch Keys”on page 22 for more details.
# Item Description
H3H2.book Page 5 Wednesday, April 3, 2002 3:45 PM

1 Getting familiar with your computer6
Rear view
# Item Description
1 DC-in jack Connects to the AC adapter.
2 Parallel port Connects to a parallel device (e.g., parallel printer).
3 External display port Connects to a display monitor.
4 Video-out port
(optional)
Connects to a display device with S-video input.
5 Serial port Connects to a serial device (e.g., serial mouse).
6 USB ports (two) Connects to USB devices (e.g., USB digital camera).
7 Modem jack Conncts a phone line.
8 Network jack Connects to an Ethernet 10/100-based network.
9 PS/2 port Connects to a PS/2-compatible device (e.g., PS/2
keyboard/mouse/keypad).
H3H2.book Page 6 Wednesday, April 3, 2002 3:45 PM

7
Left view
# Item Description
1 Security keylock Connects to a Kensington-compatible
computer security lock.
2 IEEE 1394 port (optional) Connects to a IEEE 1394 compatible device
(e.g., digital camcorder).
3 Floppy drive activity indicator Lights when the floppy drive is in use.
4 Audio line-out jack Connects to audio line-out devices (e.g.,
speakers, headphones).
5 Audio line-in jack Connects an external microphone or an
external audio line-in device.
6 Volume control knob Adjusts the volume level.
7 Floppy drive Accepts a 3.5-inch diskette.
8 Floppy drive eject button Ejects the diskette from the floppy drive.
9 Infrared port (optional) Links with other infrared devices (e.g., PDA)
10 Speaker (left) Outputs sound.
H3H2.book Page 7 Wednesday, April 3, 2002 3:45 PM

1 Getting familiar with your computer8
Right view
# Item Description
1 Speaker (right) Outputs sound.
2 PC Card eject buttons Eject the selected PC Card from its slot.
3PC Card slots Accepts one Type III or two Type II/I PC Card(s).
H3H2.book Page 8 Wednesday, April 3, 2002 3:45 PM

9
Bottom view
# Item Description
1 Battery release latches When battery lock is unlocked, press and hold to
release the battery pack.
2 Battery Installed in the battery bay, a charged battery powers
your computer.
3 Battery lock Locks/unlocks the battery pack in the battery bay
4 Media bay module Installed in the Media bay, provides optical media
access or secondary storage by way of removable
modules
5 Media bay release latch Press and hold to release the Media bay module.
6 Memory compartment Houses the computer’s main memory.
H3H2.book Page 9 Wednesday, April 3, 2002 3:45 PM

1 Getting familiar with your computer10
Features
This computer was designed with the user in mind. Here are just a few of its many
features:
Performance
•Mobile Intel®Pentium®4 Processor - M featuring Intel®Enhanced
Speedstep™technology
•Main memory expandable up to 1 GB
•High-capacity, Enhanced-IDE hard disk
•Lithium-Ion or Nickel Metal-Hydride battery pack
•Power management system
Multimedia
•16-bit high-fidelity stereo audio with 3-D sound
•Built-in dual stereo speakers
•Removable Media bay - optical drive (CD-ROM, DVD-ROM, or DVD/CD-
RW combo) or secondary storage (2nd hard disk)
•Large LCD display
•S-video output option
•Simultaneous LCD and CRT display
Connectivity
•High-speed 56Kbps V.92 fax/data software modem
•Ethernet/Fast Ethernet (10/100 Mbps)
•CardBus PC Card slots
•Universal Serial Bus (USB) ports
•IEEE 1394 port option
•Wireless LAN (802.11b) option
Human-centric design and ergonomics
•All-in-one design (CD or DVD in Media bay, floppy drive, and hard disk)
•Sleek, smooth and stylish design
•Full-sized keyboard with wide palm rest
•Ergonomically-centered touchpad pointing device with scroll pad
H3H2.book Page 10 Wednesday, April 3, 2002 3:45 PM
Table of contents