manuals.online logo
Brands
  1. Home
  2. •
  3. Brands
  4. •
  5. Kenmore
  6. •
  7. Washer
  8. •
  9. Kenmore 2718 - High Efficiency 3.1 cu. Ft. Capacity Coin Op Front Load... Operating manual

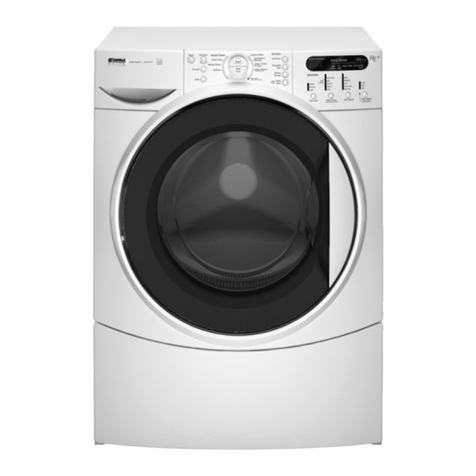
Kenmore 2718 - High Efficiency 3.1 cu. Ft. Capacity Coin Op Front Load... Operating manual

Coin- Operated Commercial
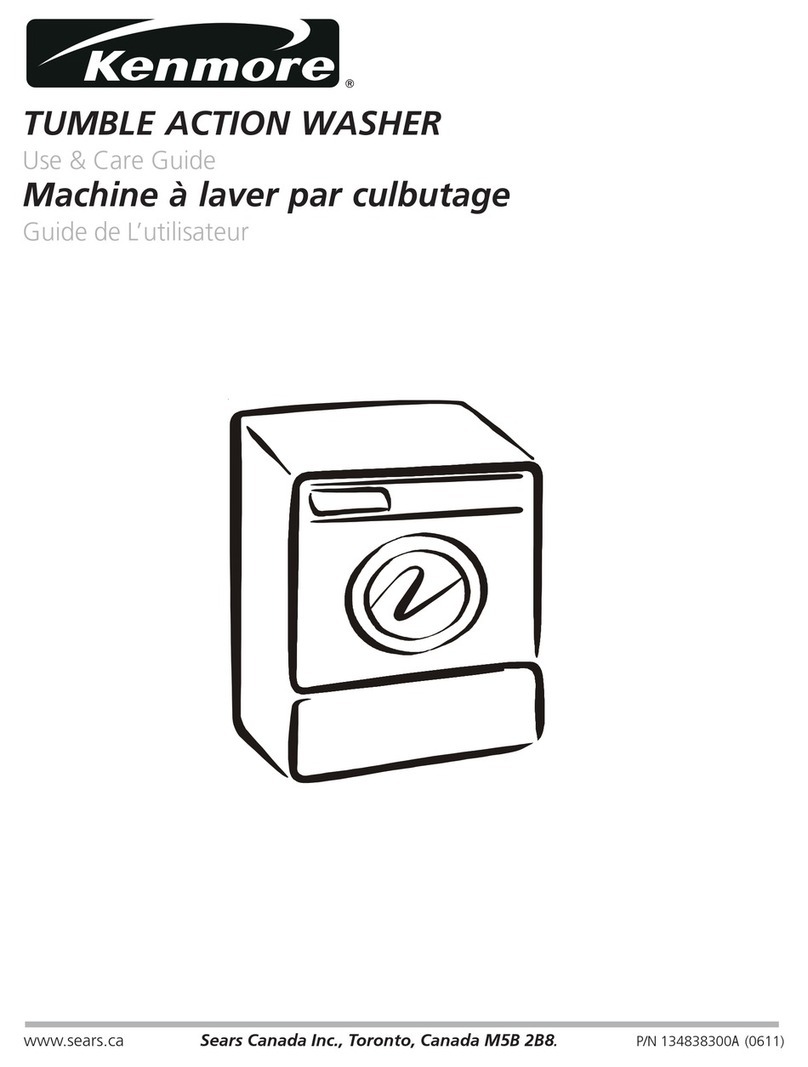
Tumble Action Washer
PIN 134837400A (0703) Sears, Roebuck and Co., Hoffman Estates, IL 60179 U.S.A. www.sears.com
..............................................................................................................................................................................................................................................................................................................................................................................................#iidiiiiiiiii
TABLE OF CONTENTS
Important Safety Instructions .......................................... 3
Pre-lnstallation Requirements ....................................... 4
Electrical Requirements ................................................. 4
Grounding Requirements .............................................. 4
Water Supply Requirements .......................................... 4
Drain Requirements ........................................................ 4
Location Of Your Washer ............................................... 4
Rough-In Dimensions .................................................... 5
Unpacking ....................................................................... 6
Installation ...................................................................... 7
Replacement Parts.......................................................... 8
Coin slide installation ................................................ 8-I 0
Meter case instructions and parts lists................... 11-12
Warranty. ........................................................................ 13
Service............................................................................. 16
illiilliii#iJiJiiiii_##iijiiiiiiii[iJjiiiiiiiiiiiiiiiiiiii[_iJiJiJi[ii_iiJii_ ¸i_ijijijijiiii############_i_#######_JJiiiiiiiiiiiiiiiiiiiiiii[_ijijijiiiiiiiiiiiiiiiiiiiiiiiiiiiiii_Jjijijijii_iYi_i_iiiiiiiiiiiiiiiiiiiiiiiiiiiiiii[_iiiii]JiJ__j_[iif___]__j___________________________________________________________________________________________________________________________________________________________________________________________________________________________j_j_j_____ii#iJiiijiijjiiii[iiiiij[i#jiji#_ii_Jjijijij ji_iij[i_iiiiiiiii[i##i_iiiJi_iiiij[i#jij[_)]ii_)]iijijijijijijiiii_]iiJiJi_)iiiii][iiiiiiiiiiiiiiiiiiiiiiiiiiiiiiiiiiiiiiiiiiiiiiiiiiiiiiiiiiiiiiiiiiiiiiiiiiiiiiiiiiiiiiiiiiiiiiiiiiiiiiiiiiiiiiiiiiiiiiiiiiiiiiiiiiiiiiiiiiiiiiiiiiiiiiiiiiiiiiiiiiiiiiiiiiiiiiiF
Before beginning installation, carefully read
these instructions. This will simplify the
installation and ensure the washer is
installed correctly and safely. Leave these
instructions near the washer after
installation for future reference.
NOTE: The electrical service to the washer
must conform with local codes and
ordinances and the latest edition of the
National Electrical Code, ANSI/NFPA 70.
For Sears warranty information or to contact a Sears Service Center,
call 1-800-4-my-HOME (1-800-46g-4663)
If you need SERVICE or PARTS for your Kenmore
coin-operated washer: be ready to give the model number, serial
number and date of purchase. Record below.
Model number
Serial number
NOTE: The instructions appearing in this
INSTALLATION AND SAFETY INSTRUCTIONS
manual are not meant to cover every possible
condition and situation that may occur. Common
sense and caution must be practiced when
Purchase date
Record Coin Box
Key Number
installing, operating and maintaining any
appliance. Key number is on key and/or coin box.
WASHER SAFETY
Your safety and the safety of others is very important. Welnave provided many important safety messages in the Installation
Instructions/Use & Care Guide and on your appliance. Always read and obey all safety messages.
_Tlnis isthe safety alert symbol. Tlnissymbol alerts you to hazards that can kill or Inurt you or others. All safety messages will be
preceded by tlne safety alert symbol and the word "DANGER" or "WARNING ". Tlnesewords mean:
You can be killed or seriously injured if you don't immediately follow instructions.
You can be killed or seriously injured if you don't follow instructions.
All safety messages will identify the Inazard, tell you Inow to reduce the chance of injury, and tell you what can Inappen if the
instructions are not followed.
Foryour safety the information in this manual must be followed to minimize the risk of fire or explosion or to prevent
_e, personal injury or lossof life.
- Do not store or usegasoline or other flammable vapors and liquid in the vicinity of this or any other appliance.
-WHAT TO DO IF YOU SMELL GAS
.Do not try to light any appliance.
. Do not touch any electrical switch; do not use any phone in your building.
Clear the room, building or area of all occupants.
Immediately call your gas supplier from a neighbor's phone. Follow the gassuppliers instructions.
If you cannot reach your gas supplier, call the fire department.
Installation and service must be performed by a qualified installer, service agency or the gas supplier.
Your washer isequipped with a door safety interlock. Verify proper operation of interlock system daily, using the following procedure:
1.With thewasher door open, insertthe required numberofcoins and presstheSTARTbutton. THEWASHERMUSTNOTSTART!
2. Close the washer door. Pressthe STARTbutton again to start the machine. Attempt to open the door, without exerting excessive
force. THEDOORMUSTNOTOPEN!
IF THE WASHER STARTS WITH THE DOOR OPEN, OR THE DOOR CAN BE OPENED WHILE THE WASHER IS OPERATING, THE
MACHINE MUST IMMEDIA TELYBE TAKEN OUT OFSERVICE.DISCONNECT THEPOWER CORD,AND MARK THEMACHINE "OUT
OF ORDER", UNTIL THE INTERLOCK SYSTEM IS REPAIRED,AND OPERATESAS DESCRIBEDABOVE.
Avoid fire
hazard or electrical shock.
Do not use an adaptor plug
or extension cord or
remove grounding prong
from electrical power cord.
Failure to follow this
warning can cause serious
injury, fire or death.
Grounding type wall receptacle
CORRECT Use this way ONLY
_Do not use or mix
liquid chlorine bleach with
other household chemicals
such as toilet cleaners, rust
removers, acid or products
containing ammonia. These
mixtures can produce
dangerous fumes which can
cause serious injury or death.
Important Safety Instructions Read all instructions before using this washer.
You can be killed or seriously injured if you don't follow these Important Safety Instructions:
To reduce the risk of fire, electrical shock, or injury to persons when using this washer, comply with the basic warnings listed below.
Failure to comply with these warnings could result in serious personal injuries.
Prevent Fire
Do not wash items that have been previously cleaned in, soaked in, or spotted with gasoline, cleaning solvents, kerosene, cooking
oils, waxes, etc. Do not store these items on or near the washer. These substances give off vapors or chemical reactions that could
ignite or explode.
Do not put oily or greasy ragsor clothing on top of the washer. Thesesubstances give off vapors that could ignite the materials.
Do not add gasoline, cleaning solvents, or other flammable or explosive substances to the wash water. These substances give
off vapors that could ignite or explode.
FOR YOUR SAFETY Do not store or use gasoline or other flammable vapors or liquids in the vicinity of this or
any other appliance.
Under certain conditions, hydrogen gas may be produced in a hot water system that has not been used for 2 weeks or more.
HYDROGEN GAS IS EXPLOSIVE. If the hot water system has not been used for such a period, before using the washer, turn
on all hot water faucets and let the water flow from each for several minutes. This will release any accumulated hydrogen gas.
Hydrogen gas is flammable; do not smoke or use an open flame during this time.
Failure to comply with these warnings could result in fire, explosion, serious bodily injury and/or damage to the rubber or plastic
parts of the washer.
Protect Children
Do not allow children to play on or in the washer. Close supervision of children isnecessary when the washer isused near children.
As children grow, teach them the proper, safe use of all appliances.
Destroy the carton, plastic bag and other packing materials after the washer isunpacked. Children might usethem for play. Cartons
covered with rugs, bedspreads or plastic sheets can become airtight chambers.
Keep laundry products out of children's reach. To prevent personal injury, observe all warnings on product labels.
Before the washer is removed from service or discarded, remove the washer lid to prevent accidental entrapment.
Failure to comply with these warnings could result in serious personal injuries.
Prevent Injury
• Test door interlock system daily. Follow instructions on previous page.
To prevent shock hazard and assurestability during operation, the washer must be installed and electrically grounded by aqualified
service person in accordance with local codes. Refer to INSTALLATION AND SAFETYINSTRUCTIONSfor detailed grounding
procedures. If the washer is moved to a new location, have it checked and reinstalled by a qualified service person.
• To prevent personal injury or damage to the washer, the electrical power cord of the washer must be plugged into a properly
grounded and polarized 3-prong outlet. The third grounding prong must never be removed. Never ground the washerto
a gas pipe. Do not use an extension cord or an adaptor plug.
Follow package directions when using laundry products. Incorrect usage can produce poisonous gas--resulting in serious injury
or death.
- Do not combine laundry products for use in I load unless specified on the label.
-Do not mix chlorine bleach with ammonia or acids such as vinegar.
To prevent serious personal injury and damage to the washer:
-All repairs and servicing must be performed by an authorized servicer unless specifically recommended in this
INSTALLATION AND SAFETY INSTRUCTIONS manual. Use only authorized factory parts.
-Do not tamper with controls.
-Do not install or store the washer where it will be exposed to the weather.
To reduce the risk of electric shock, disconnect this appliance from the power supply before attempting any user maintenance.
Turning the controls to the OFF position does not disconnect this appliance from the power supply.
To prevent injury, do not reach into the washer while parts are moving. Before loading, unloading or adding items, push in the cycle
selector knob and allow the tub to coast to a complete stop before reaching inside.
Failure to comply with these warnings could result in serious personal injuries.
• This washer is equipped with an electrical overload protector. The motor will stop if it becomes overheated. The washer will
automatically restart after a cool down period of up to 30 minutes, if the washer has not been manually turned off during this time.
SAVE THESE INSTRUCTIONS
3
PRE-INSTALLATION REQUIREMENTS
Tools Required for Installation:
I. 1/4 in. nut driver
2. 3/8 in. socket with ratchet.
3. 3/8 in. open end wrench.
4. 7/16 in. socket with ratchet.
5. 9/16 in. open end wrench.
6. Channel-lock adjustable pliers.
7. Carpenter's level.
ELECTRICAL REQUIREMENTS
CIRCUIT-Individual, properly polarized and grounded 15 amp.
branch circuit fused with 15 amp. time delay fuse or circuit breaker.
POWER SUPPLY- 2 wire, with ground, 120 volt, single phase, 60
Hz,Alternating Current. NOTE:The useof this washer with power
created by gas powered generators, solar powered generators,
wind powered generators or and other generator other than the
local utility company is not recommended.
OUTLETRECEPTACLE- Properly grounded 3-prong receptacle to
be located sothe power supply cord isaccessiblewhen the washer
is in an installed position. NOTE:GFI (Ground Fault Interrupter)
receptacle isnot required.
DRAIN REQUIREMENTS
Models equipped with drain pump:
I. Drain MUST be capable of eliminating 17 gals (64.3 L) per
minute.
2. A standpipe diameter of 1-1/4 in. (3.18 cm) minimum.
3. The standpipe height above the floor should be:
__ BACK
.-- _ .._..----
96 in.
(244 cm)
Max.
24 in.
(61 cm)
Mino
GROUNDING REQUIREMENTS
Improper connection of the equipment grounding
conductor can result in a risk of electrical shock. Check with a
licensed electrician if you are in doubt asto whether the appliance
isproperly grounded.
1. The washer MUST be grounded. Inthe event of malfunction
or breakdown, grounding will reduce the risk of electrical
shock by a path of least resistance for electrical current.
2. Since your washer is equipped with a power supply cord
having an equipment-grounding conductor and a grounding
plug, the plug MUSTbe plugged into an appropriate, copper
wired receptacle that is properly installed and grounded in
accordance with all local codes and ordinances or in the
absence of local codes, with the National Electrical Codes,
ANSI/NFPA 70 (latest edition). If in doubt, call a licensed
electrician.
DO NOTcut off or alter the grounding prong on the power supply
cord. Insituations where a two-slot receptacle is present, it isthe
owner's responsibility to have a licensed electrician replace it
with a properly grounded three prong grounding type
receptacle.
WATER SUPPLY REQUIREMENTS
Hot and cold water faucets MUST be installed within 42 inches
(107 cm) of your washer's water inlet. The faucets MUST be 3/4
inch (1.9 cm) garden hose type so inlet hoses can be connected.
Water pressure MUSTbe between 10 and 120 pounds per square
inch (maximum unbalance pressure, hot vs. cold, 10 psi.) Your
water department can advise you of your water pressure.
NOTE:
Drain hose attached to the washer can reach a 58 in. (147 cm)
high standpipe. For higher standpipe use hose P/N 134592701,
available from an authorized parts distributor. If drain is less
than 24 in. (61 cm), install a siphon break kit, available at your
local hardware store.
Models equipped with gravity drain:
1. FloordrainMUSTbecapableof eliminating 17gals(64.3 L)
per minute.
2. Floor drain diameter must be at least 1/2 inch larger than
drain hose.
LOCATION OF YOUR WASHER
DO NOTINSTALL YOUR WASHER:
I. In an area exposed to dripping water or outside weather
conditions. The ambient temperature should never be below
60 degrees F(15.6 degrees C) for proper washer operation.
2. In an area where it will come in contact with curtains or
drapes.
3. In an area (garage or garage-type building) where gasoline
of other flammables are kept or stored (including
automobiles).
4. On carpet. Floor MUST be solid with a maximum slope of
I/2 in. per foot (1.27 cm per 30.5 cm). Toensure vibration or
movement does not occur, reinforcement of the floor may
be necessary.
IMPORTANT MINIMUM INSTALLATION CLEARANCES
When installed in alcove: Sides, Rear,Top = 0 in (0 cm).
When installed in closet: Sides, Rear, Top = 0 in (0 cm),
Front = 1 in (2.54 cm).
Closet door ventilation openings required: 2 louvers each 60 in2
(387 cm2)- 3 in (7.6 cm) from top and bottom of door.
4
¼,...__,
(1.9_ _'
ROUGH-iN DiMENSiONS
. 17 60
1243,4 J_,, 1 /
q(62.9) -I-'(2.54)
SIDE
1½
(3"11)
_ POWER
,CORD
( )
inch (cm)
43/8
(11.2)....._>
36
(91.5)
JNDER
3OUNTER
34%
(87.9)
26%
-_ _-- (67.9) /__.,
_ J
BACK
2%
(7.3)
WATER
INLETS
31%
(80.3)
inch (cm)
UNPACKING 7.
1. Cut the shipping carton along the dotted line along the base
of the unit. 8.
2. While in the carton carefully lay the washer on its back
side.
3. Removethe styrofoam base.
4. Carefully return the washer to an upright position and remove
the carton.
5. Carefully move the washer to within 4 feet (122cm) of the
final location.
6. Remove the following from the back side of the washer:
3 bolts,
3 yellow plastic spacers,
2 or 3 metal "P" clamps.
Remove the service panel from the front of the washer.
Remove the 4 nuts and 6 large washers that attach the 2
yellow shipping braces to the drum and the base. Lift up on
the drum and remove the braces (ayellow ribbon surrounds
the items to be removed). These braces must be removed
to allow the power supply cord to be released from the
shipping ring.
®
©
BOLT
P" CLAMP
g.
10.
11.
/
//
/
Remove the large styrofoam block located under the drum.
Lift up on the drum, tilt the base of the foam block inwards
toward the rear of the washer until free, then pull it out.
Remove and discard the yellow ribbon and label from the
front of the washer.
From the rear of the washer, carefully pull out the power
supply cord through the hole in the backsheet.
12. Replace the service panel and screws.
NOTE: If the washer isto be transported at a later date, the
shipping support hardware must be reinstalled to prevent
shipping damage.
.
.
.
.
.
INSTALLATION
Run some water from the hot and cold faucets to flush the
water linesand remove particles that might clog up the water
valve screens.
Remove the inlet hoses and rubber washers from the plastic
bag and install the rubber washers in each end of the inlet
hoses.
Carefully connect the inlet hose marked "HOT" to the outside
"H" outlet of the water valve. Tighten by hand, then tighten
another 2/3 turn with pliers. Carefully connect the other
inlet hoseto the inside "C" outlet of the water valve. Tighten
by hand, then tighten another 2/3 turn with pliers. Do not
crossthread or over-tighten these connections.
Connect the inlet hose ends to the HOT and
COLD water faucets tightly by hand, then
tighten another 2/3 turn with pliers. Turn the
water on and check for leaks.
On machines equipped with drain pump, form
a U shape on the end of the drain hose, with
the hose pointed toward the drain.
NOTE: If the drain hose isplaced in a standpipe
without forming a Ushape, a siphoning action
could occur. There must be an air gap around
the drain hose. A snug hose fit can also cause
a siphoning action.
Cable
_e
6. Carefully move the washer to its final location.
NOTE: Do not use the dispenser drawer or door to lift washer.
7. With the washer in its final position, place a level on topo f
the washer. Adjust the front leveling legs up or down to ensure
the washer is resting solid. Turn the lock nuts oneach leg up
towards the base of the washer and snug with a wrench.
NOTE: Keep the leg extension at a minimum to prevent
excessive vibration. The farther out the legs are extended the
more the washer will vibrate. Rear leg adjustments are also
accessible through the front service panel.
8. Models equipped with drain pump: Placethe formed end
of the drain hose in a laundry tub or a standpipe and secure
with the cable tie provided in the enclosure package. NOTE:
Thedrain pipe or floor drain, into which the drain hoseisplaced,
MUST be at least 1/2 inch larger in diameter than the drain
hose. This will insure that the sewer line cannot back up into
the washing machine.
9. Plug the power cord into a grounded outlet.
NOTE: Check to ensure the power is off at the circuit breaked
fuse box before plugging the power cord into an outlet.
10.Turn on the power at the circuit breaker/fuse box.
11.Besure you have read the "Important Safety Instructions"
before operating this washer.
12.Run the washer through a complete cycle. Check for water
leaks and proper operation.
13. Keep these instructions for future reference.
NOTE: A wiring diagram is located inside the washer on the
side panel.
Note: If the slide mechanism hasalready been installed, skip
this step.
Install Coin Slide
1. Remove the access panel from the top of the meter case by
unlocking the service lock with the key taped to the front of
the coin box.
2. Deposit coins in the coin slide and push the coin slide all the
way in. Hold coin slidein extended position and insert through
opening in he front of the meter case.
3. From inside the meter case, place the threaded end of the
bolt through the center mounting hole in the front of the meter
case,
Instructions for Changing Vend Price
TOOLSNEEDED
Medium sized slotted screwdriver
* Small slotted Phillips screwdriver
Placeallscrews and other itemsremoved from coin slideassembly
on a cloth sothey will not get lost.
STEP1
Remove slide mechanism from meter case
(see FUGURE1).
FIGURE 1
4. While holding the bolt in place, guide the coin slide
mechanism onto the threads and into the guide holes in the
front of the meter case.
5. Tighten the bolt as you guide the coin slide mechanism into
place.
6. Tighten the bolt using a ratchet and a 5/8-in. socket until the
slide mechanism is secure and does not move.
COIN BOX ADJUSTMENT
Tile tight fit of tile money box isset at tile factory. Customer may
loosen fit as desired by loosening the slotted nuts. See FIG.2.
FIGURE2
Keep A record of all coin-box key numbers,
A lost key can only be replaced by ordering the key numbers
from the place were the unit was purchased. The key number is
located both on the key and behind the end panel of the coin
box. If the key number is not available, the lock must be drilled
out to remove the coin box. 8
STEP2
Remove the coin slide extension from coin slide by removing
two mounting screws and spacers
(see FIGURE2).
(2) Mounting Screws
and _
FIGURE 2
/
Slide Return Spring
STEP3
Remove coin slide from coin chute:
,,Unhook and remove the coin slide return spring
(see FIGURE2).
Turn coin slide mechanism upside down.
Remove coin slide stop by taking out two screws to the chute
bottom (see FIGURE3).
(2) Slide Stop Screws
FIGURE 3
• Pull coin slide out of coin chute (seeFIGURE4).
FIGURE4
STEP4
Turn coin slide upside down and remove screw that holds coin receiver block
(see FIGUREB).
(1) Receiver
Block Screw
Spare Parts
FIGURE 5 Compartment
and Screw
STEP5
Remove coin receiver block from coin slide
(see FIGURE 6):
Turn coin slide right side up. Keep coin receiver block in place with your fingers.
Carefully lift coin slide from coin receiver block. If necessary,shake coin slide gently
to loosen block.
STEP6
Set new vend price by adding or
removing the appropriate block-out
keysand/or dime inserts according to
th Tableof Vend Prices
(see FIGURE7).
NOTE: Black colored slots are closed
off by block-out key.
FIGURE 7
TABLEOF VEND PRICE
VEND
PRICE
o
$.1o
$.2o
$.25
$.35
$.45
$.5o
$.6o
$.70
$.75
$.8s
$.95
$1.oo
$1.1o
$1.2o
$1.25
$1.35
$1.45
$i,5o
$1.6o
$i .70
$i .75
$i.85
$2.00
COIN SLOTS
12345678
||||||||
u|||||||
un||||||
||D|||||
DHDH||||
DF1D|||||
||DDHHH|
DHDDH|||
DnF1FI||||
||BBBHH|
nHDDDHH|
DUDDDHH|
||rlDDD||
D|E] rlDIq| |
UUF1F1BFI| |
|BBBBB||
U|E]rl rl rl E]|
u n F1rl F1F1rl |
|BE]BE]BE]|
nBB rlrlrlB|
DDB r]r]BBB
|DDDDDDD
DIqDDDDDD
| D E]E]r]r]E]E]
FIGURE 6
To remove block-out keys, pull straight up.
NOTE: Be sure block-out keys and/or dime inserts are seated
properly and ratchet dog is in place with irs spring connected
(see FIGURE8).
Be sure the proper coin sizing block is in place.
Block-Out
Keys
FIGURE8
Ratchet
Dog and
Change coin sizing block:
• Removetwo screws that hold upper coin chute cover.
Remove cover (see FIGURE9).
(2) Upper Coin
Chute Cover
Anti-Cheat
Gate
(2) Coin Sizing_
Block Screws
Coin Sizing
Block
• Remove two screws that hold coin sizing block to upper coin
chute cover cover (see FIGURE10).
• Put new coin sizing block in place. Reinsert and tighten
mounting screws.
• Replace coin chute cover. Reinsert and tighten screws.
STEP7
Replace coin receiver block into slide:
• Hold coin receiver right side up in the palm of one hand.
• Lower coin slide until coin receiver block fits into the coin
slide cavity. CAUTION: Do not dislodge ratchet dog and
spring.
• Hold coin receiver block in place with your fingers and turn
slide upside down.
• Insert and tighten screw.
STEP8
Install slide into coin chute. Slide can only be pushed in if the
anti-cheat gate in flange is pushed to the left. (seeFIGURE9).
STEP9
Replace coin slide stop with two screws. Replace coin slide
return spring. Replace coin slide extension with two screws (be
sure spacers are in place).
STEP10
Replacecoin slidemechanism in meter case. Replaceand tighten
coin slide mounting bolt.
NOTE: It may be easierto insert coin slide mounting bolt if you
remove the timer from the mounting screws temporarily.
REPLACEMENT PARTS
If replacements parts are needed for your washer, call Sears
Parts and Service TollFreeNumber 1-800-4-MY-HOME (1-800-
469-4663).
Forcoin box parts, call 1-800-221-0982, Greenwald Industries.
Destroy the carton and plastic bags after the
washer isunpacked. Children might usethem for play. Cartons
covered with rugs, bedspreads, or plastic sheets can become
airtight chambers causing suffocation. Placeall materials in a
garbage container or make materials inaccessible to children.
The instructions in this manual and all other
literature included with this washer are not meant to cover every
possible condition and situation that may occur. Good safe
practice and caution MUSTbe applied when installing,operating
and maintaining any appliance.
Maximum benefits and enjoyment are achieved when all
the Safety and Operating
instructions are understood and practiced as a routine with
your laundering tasks.
10
Meter Case Instructions
INSTRUCTIONS TO CHANGE THE NUMBER OF COIN SLIDE INSERTIONS TO START APPLIANCE.
1. Disconnect powerfrom machine.
2. Turn Shaft & Cam Assembly in a clockwise direction until switch lever arm drops into cam notch (Fig. 1).
3. Lift Adjusting Tab away from cam with finger and turn Tab to desired number. Make sure Tab\ locks into place in new
position.
4. Turn Shaft & Cam Assembly in a clockwise direction until switch lever arm is on top of Tab to assure that both
mechanism switches are open (Fig. 2).
5. Reconnect power to machine. USEFINGER
CAM NOTCH TO LIFTPAD
EXAMPLE:
To change from
$1 to $2 move tab
from 1 to 2.
ADJUSTMENT
TAB
CLOCKWISE
DIRECTION
TO LIFT
FIGURE 1
Parts List for series 7682 "Quick-Chanqe" Start Mechanism
LEVERARM
FIGURE 2
)
Item 27A: Models 76-1030-21 (115v-60Hz),
76-1030-22 (230v-60Hz)
Item 27B: Models 76-1030-11 (115v-60Hz),
76-1030-12 (230v-60Hz)
iTEM REQ'D PART NO DESCRIPTION
1 2 00-7185 #4-40 SELF-TAPPING SC.
2 1 76-6009-* TIMER MOTORASS'Y
3 1 76-1037 SWITCH & BRACKET SUB-ASS'Y
4 1 76-5014 DRIVE SELEEVE
5 1 76-2033 SLEEVE
6 1 00-8149 TORSION SPRING
7 3 00-7070 RETAINING RING
8 2 76-5013 DRIVE BUSHING
9 1 00-8003 SPRING
10 1 76-1036 RACTHETARM & PAWLASS'Y
11 1 76-5017 RACHETWHEEL
12 1 76-2003 WASHER
13 1 59-204 SPRING
14 1 76-5012 CAM
15 1 76-5010 ADJUSTER TAB
16 1 00-7055 SPRING WASHER
17 1 00-7047 WASHER
LT.Fd_ _ PARTNO
I8 1 76-2026
I9 2 00-7458
20 2 00-7097
21 1 00-6189
22 1 00-6190
23 1 76-5009
24 1 76-2035
25 1 76-6000
26 2 02-0810-00
27A 1 76-2059
27B 1 76-2027
28 1 59-0314
29 1 58-I72-*
30 1 00-7558
9
DRIVE SHAFT
#4-40 3/16 PAN HD SC.
#4 SPLIT LOCKWASHER
SNAP SWITCH
SNAP SW. & LEVERARM ASS'Y
SWITCH INSULATOR
NUT PLATE
WIRE HARNESSASS'Y
#8-32x5/16 SEMS SCREW
MOUNTING BRACKET
MOUNTING BRACKET
CABLE TIE
GROUND WIRE
WASHER
V8 Parts List
DESCRIPTION
SCREW (METRIC)
SCREW (METRIC)
TOP HOUSING
SHIM
3OIN SIZING BLOCK
GATE COVER
GATE
SLIDE STOP DOG
DOG SHAFT
DECAL,CASTING
BODY CASTING
COIN SLIDE
DECAL, SLIDE
20-3000
2 00-9724 00-7924
2 00-7938 00-7938
1 20-3019 20-3002
2 20-2042
1 20-3008 20-3008
1 20-2043 20-2008
1 20-2035 20-2000
8 20-2011 20-2011
1 20-4004 20-4000
1 00-9905 00-9905
1 20-3020 20-3000
1 20-3021
1 00-9104 00-9104
CHUTE LOCATING SCREW 4 00-7483 61-55
SLIDE RETURN SPRING 1 00-8148 00-8148
20-3000
1 20-2040 20-2001
1 20-2038 20-2007
1 20-2023 20-2005
2 00-7931 00-7931
20-3023 20-500I
2 00-7923 00-7929
I 20-2039 20-2004
I 00-8123 00-8123
20-5002 20-2010
1 20-2041 20-2008
20-2037 20-2003
2 00-7935
1 20-2034
1 20-4005
DESCRIPTION
16 SPRING
17 SPRING PROTECTOR
18 RACK
19 SCREW(METRIC)
20 10¢ INSERTvaries
21 SCREW(METRIC)
22 SLIDE STOP
23 RATCHET DOG SPRING
24 BLOCKOUT KEY varies
25 SLIDE RATCHET DOG
26 STORAGE COMP. COVER
27 SCREW (METRIC)
28 BUFFER
29 RATCHET DOG POST
30 COiN RETAINER optional Opt. 00-8168
12
31
32
33
34
35
37
38
3c
4C
41
DESCRIPTION 20-3000
COIN SIZING BLOCK varies 20-3007 20-3007
PRESSURE SPRING ASM'f Opt 20-1012 20-1012
MAGNET Opt. 00-9256 00-9256
SHIELD Opt. 20-2045 20-2045
COIN RECEIVER BLOCK 1 ......... 20-2003
LOCK WASHER 1 ......... 00-7934
SCREW (METRIC) 1 ......... 00-7933
SCREW (METRIC) 1 ......... 00-7932
SCREW 00-754I 00-7541
TOP HOUSING ASMY 20-1103-1 20-1104-1
NEW VEND PRICE
O _,ii:::__i:!?_¸_¸¸i::::O_li,_iiili
To change vend price, detach and mail the lower portion to:
Customer Service Department
Greenwald industries inc.
212 Middlesex Ave.
Chester, CT 06412
Order required parts using this tear-off. Block-out keys will be
shipped to you at no charge. Follow product information
instructions.
Quantity.
Existing Vend Price
Name
The coin chute has been pre-set at the factory.
When increasing in $.25 pricing
Follow product information instructions; no extra parts required.
When decreasing in $.25 pricing - or -changing to
$.10 pricing.
(Coin sizing block required; see "Changing Vend Price"
section.)
Company
Address
City.
State/Zip.
Daytime phone
Purchase date
SEARS COMMERCIAL WASHER WARRANTY
LIMITED 2-YEAR WARRANTY ON MECHANICAL AND ELECTRICAL PARTS
For two years from the date of purchase, when the washer is installed and operated in accordance with
the instructions in the Installation Instructions/Use & Care Guide, Sears will furnish replacement parts for
all defective mechanical or electrical parts including coin box and chute assemblies. You will be charged
for labor.
WARRANTY SERVICE IS AVAILABLE BY CONTACTING THE NEAREST SEARS SERVICE
CENTER IN THE UNITED STATES.
This warranty applies only while this product is in use in the United States. This warranty gives you
specific legal rights, and you may also have other rights which vary from state to state.
Sears, Roebuck and Co., Dept. 817WA, Hoffman Estates, IL 60179
13
Notes
Notes
Your Home
For repair- in your home - of all major brand appliances,
lawn and garden equipment, or heating and cooling systems,
no matter who made it, no matter who sold it!
For the replacement parts, accessories and
owner's manuals that you need to do-it-yourself.
For Sears professional installation of home appliances
and items like garage door openers and water heaters.
1-800-4-MY-HOME ® (1-800-469-4663)
Call anytime, day or night (U.S.A. and Canada)
www.sears.com www.sears.ca
For expert home solutions advice: www.managemyhome.com
Our Home
For repair of carry-in items like vacuums, lawn equipment,
and electronics, call or go on-line for the location of your nearest
Sears Parts & Repair Service Center
1-800-488-1222 (U.S.A.) 1-800-469-4663 (Canada)
Call anytime, day or night
www.sears.com www.sears.ca
To purchase a protection agreement on a product serviced by Sears:
1-800-827-6655 (U.S.A.)
Para pedir servicio de reparaci6n
a domicilio, y para ordenar piezas:
1-888-SU-HOGAR ®
(1-888-784-6427)
1-800-361-6665 (Canada)
Au Canada pour service en frangais:
1-800-LE-FOYER M°
(1-800-533-6937)
www.sears.ca
Sea//'s
TM SM
® Registered Trademark /Trademark /Service Mark of Sears Brands, LLC
® Marca Registrada /TM Marca de F_brica /s_ Marca de Servicio de Sears Brands, LLC
_,TcMarque de commerce /MDMarque d_pos_e de Sears Brands, LLC ® Sears Brands, LLC

This manual suits for next models

1

Other Kenmore Washer manuals

Kenmore 110.1681 User manual

Kenmore

Kenmore 110.1681 User manual

Kenmore 796.4107 31 Series User manual

Kenmore

Kenmore 796.4107 31 Series User manual

Kenmore 20942 User manual

Kenmore

Kenmore 20942 User manual

Kenmore 110.2942 User manual

Kenmore

Kenmore 110.2942 User manual

Kenmore 29522 User manual

Kenmore

Kenmore 29522 User manual

Kenmore 22902 User manual

Kenmore

Kenmore 22902 User manual

Kenmore 110.29727800 User manual

Kenmore

Kenmore 110.29727800 User manual

Kenmore C48102 User manual

Kenmore

Kenmore C48102 User manual

Kenmore 110.1611 Series User manual

Kenmore

Kenmore 110.1611 Series User manual

Kenmore 417.4194 Series User manual

Kenmore

Kenmore 417.4194 Series User manual

Kenmore 110.44832 200 User manual

Kenmore

Kenmore 110.44832 200 User manual

Kenmore 796.4172 User manual

Kenmore

Kenmore 796.4172 User manual

Kenmore 110.20232710 User manual

Kenmore

Kenmore 110.20232710 User manual

Kenmore Washer User manual

Kenmore

Kenmore Washer User manual

Kenmore 796.488x2800 User manual

Kenmore

Kenmore 796.488x2800 User manual

Kenmore 49699 User manual

Kenmore

Kenmore 49699 User manual

Kenmore 20422 User manual

Kenmore

Kenmore 20422 User manual

Kenmore 23022 User manual

Kenmore

Kenmore 23022 User manual

Kenmore Elite 110.31643 Series User manual

Kenmore

Kenmore Elite 110.31643 Series User manual

Kenmore 796.3143 Series User manual

Kenmore

Kenmore 796.3143 Series User manual

Kenmore 796.4128 Series User manual

Kenmore

Kenmore 796.4128 Series User manual

Kenmore 796.4027 Series User manual

Kenmore

Kenmore 796.4027 Series User manual

Kenmore 2130 User manual

Kenmore

Kenmore 2130 User manual

Kenmore 23732 Owner's manual

Kenmore

Kenmore 23732 Owner's manual

Popular Washer manuals by other brands

Maytag YMHWE251 Series Use & care guide

Maytag

Maytag YMHWE251 Series Use & care guide

LG WM3700HVA owner's manual

LG

LG WM3700HVA owner's manual

Indesit XWE 91482 Instructions for use

Indesit

Indesit XWE 91482 Instructions for use

GIRBAU HS-6008 Installation

GIRBAU

GIRBAU HS-6008 Installation

Koblenz LCK50 Operation manual

Koblenz

Koblenz LCK50 Operation manual

Alliance Laundry Systems F232182R1 Programming manual

Alliance Laundry Systems

Alliance Laundry Systems F232182R1 Programming manual

Samsung WW12H8 Series user manual

Samsung

Samsung WW12H8 Series user manual

Indesit IWB 6085 Instructions for use

Indesit

Indesit IWB 6085 Instructions for use

Sharp ES-HFB914AWA-DE user manual

Sharp

Sharp ES-HFB914AWA-DE user manual

Morris WBS-91427 user manual

Morris

Morris WBS-91427 user manual

Miele TOUCHTRONIC W 4842 OPERATING AND INSTALLATION Manual

Miele

Miele TOUCHTRONIC W 4842 OPERATING AND INSTALLATION Manual

Gorenje PWM110WIT Detailed instructions

Gorenje

Gorenje PWM110WIT Detailed instructions

AEG L 89499 FL2 user manual

AEG

AEG L 89499 FL2 user manual

Electrolux EWF 127410 X user manual

Electrolux

Electrolux EWF 127410 X user manual

Cylinda TVP6182 user manual

Cylinda

Cylinda TVP6182 user manual

LG TROMM F2996NCZ instruction manual

LG

LG TROMM F2996NCZ instruction manual

Schulthess Spirit topLine TA 8320 manual

Schulthess

Schulthess Spirit topLine TA 8320 manual

Electrolux Professional myPRO XL W1100P user manual

Electrolux Professional

Electrolux Professional myPRO XL W1100P user manual

manuals.online logo
manuals.online logoBrands
  • About & Mission
  • Contact us
  • Privacy Policy
  • Terms and Conditions

Copyright 2025 Manuals.Online. All Rights Reserved.