Kennell ZC4-A2001N User manual

IP+HD SDI Integrated Camera
User manual V1.0


Safety Notes
Before installing the device, please read this manual carefully and follow instructions
indicated to ensure proper operation. Please keep this manual for future reference.
Please powering on the device, please check the input power voltage carefully, the camera
accepts DC12V, otherwise, it may cause damage to the camera.
Please put power, video and control cables at safe place in order not to cause malfunction to
the device.
Please put the device into use at required working temperature and humidity, working
condition of the device is 0℃~+40℃,humidity at<90﹪. Please avoid to have unrelated
objects get into the device like corrosive liquid that may cause damage / danger.
Please avoid shock, vibration, soaking may cause to the device when transporting and
installing, otherwise, it may cause damage to the camera.
Please only refer to authorized personnel to repair the device, do not disassemble the
camera by yourself.
Only use shielded control and video cables, and the cables should be connected separately
in order to ensure proper use. Do not aim the camera lens at sunlight or strong lights that
may cause damage to the imaging system of the device.
Please use soft cloth to clean the device, do not use strong or abrasive detergent to clean
that will damage the device’s housing / lens.

Warnings
1.If you need to extend the power cable, please extend the power cable from the part on
below picture (220V/110V), do not extend from part 1 on below picture (DC12V), otherwise
it will cause unexpected damage to the device.
2.To prevent infringement of the rights of others, please confirm that it is installed and used
within the scope permitted by local law!

CONTENTS
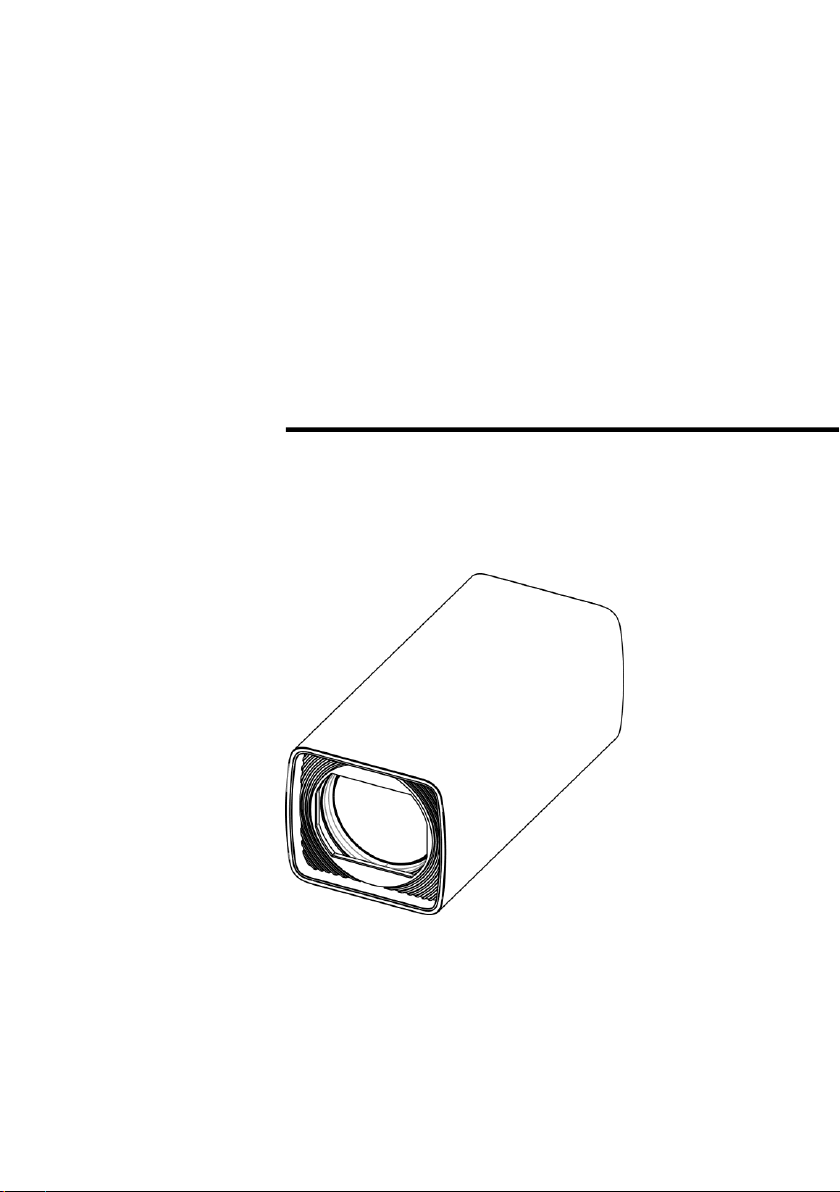
ABOUT THE PRODUCT-------------------------------------------------------- 1
FEATURES -------------------------------------------------------------------------------- 1
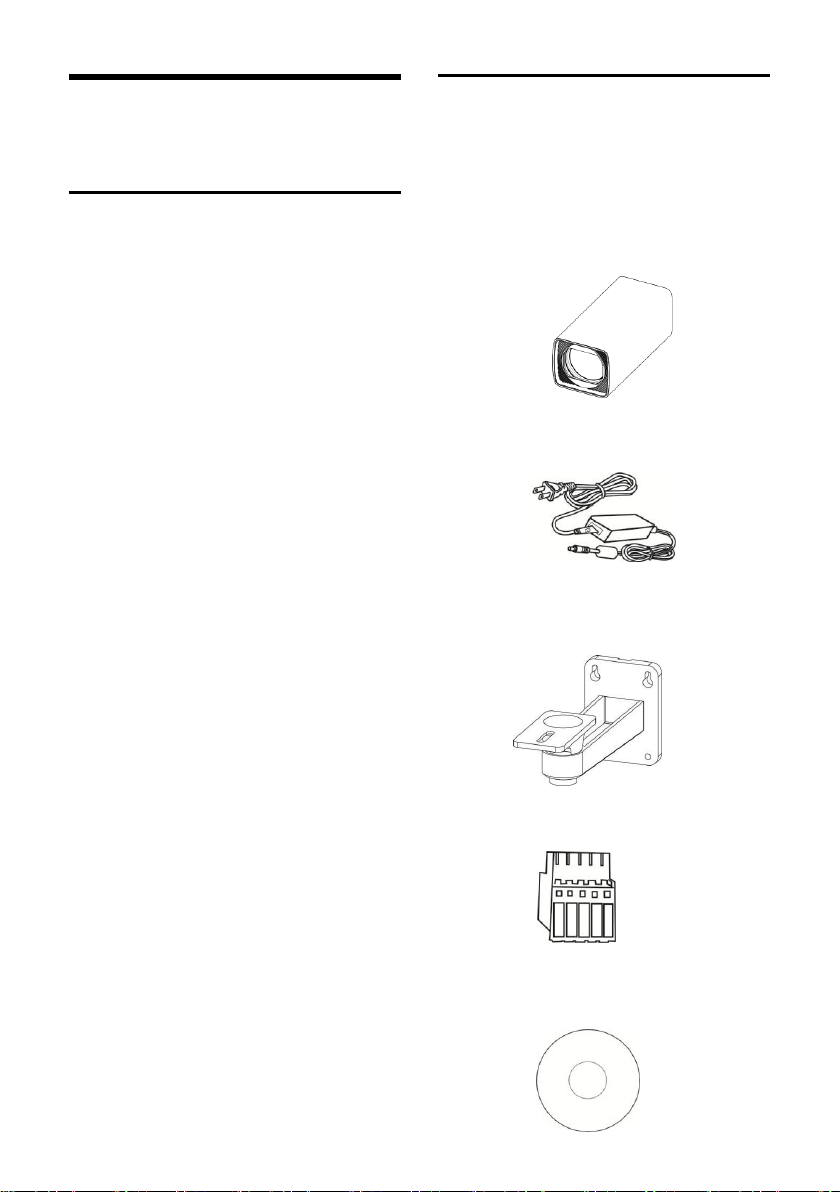
LIST OF PARTS &ACCESSORIES ------------------------------------------------------------ 1
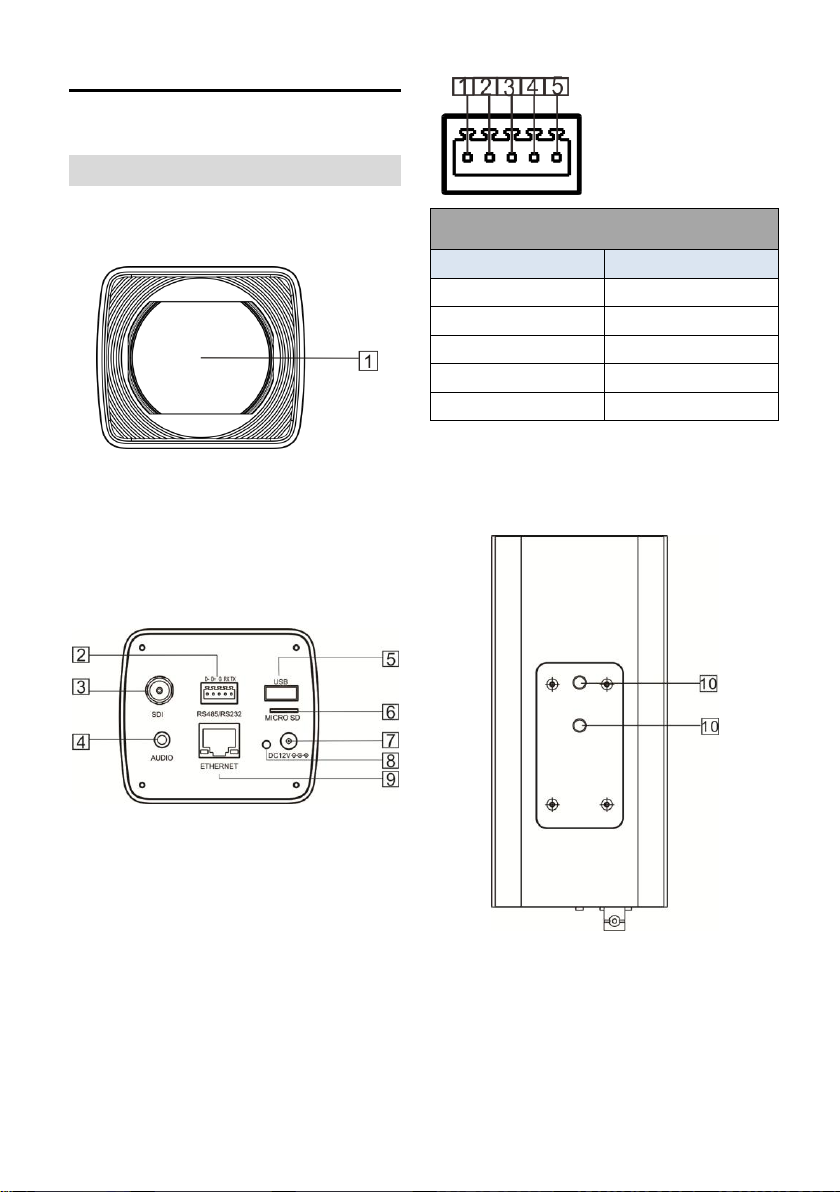
MAIN PARTS &INTERFACES ---------------------------------------------------------------- 2
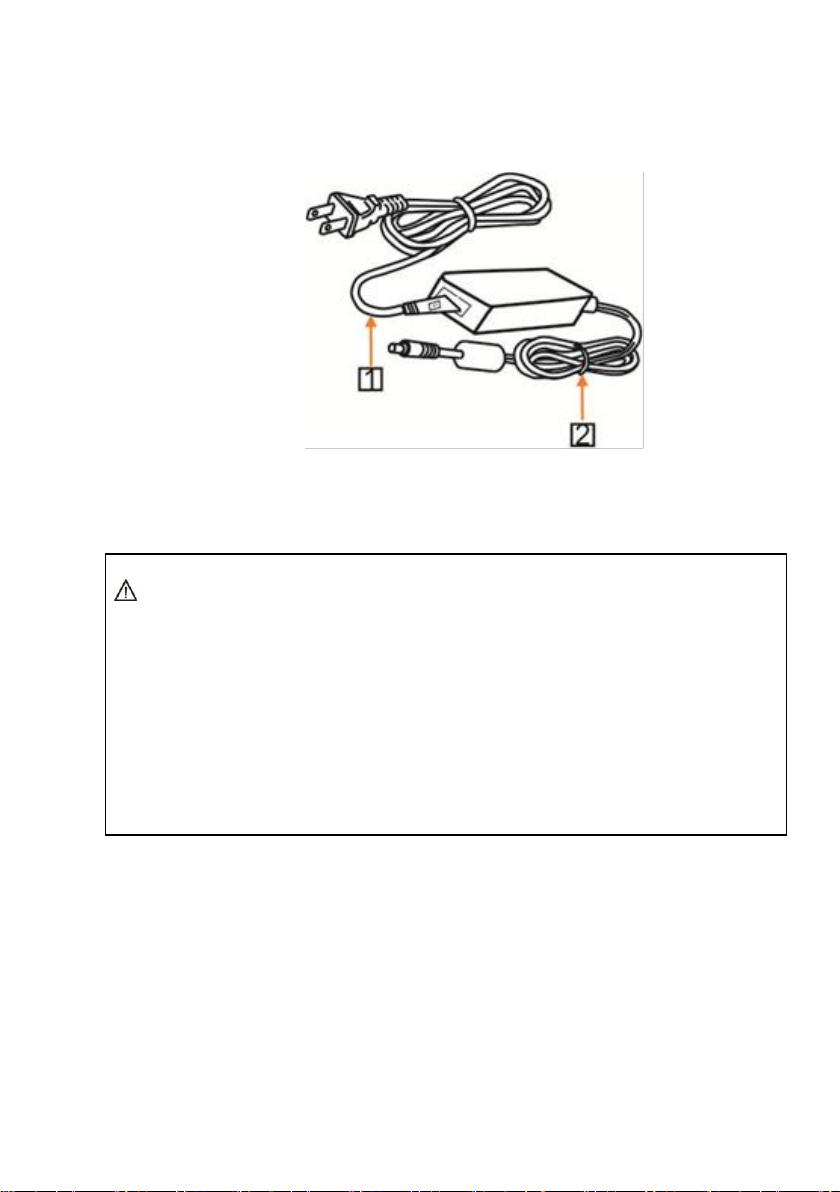
INSTALLATION ---------------------------------------------------------------- 3
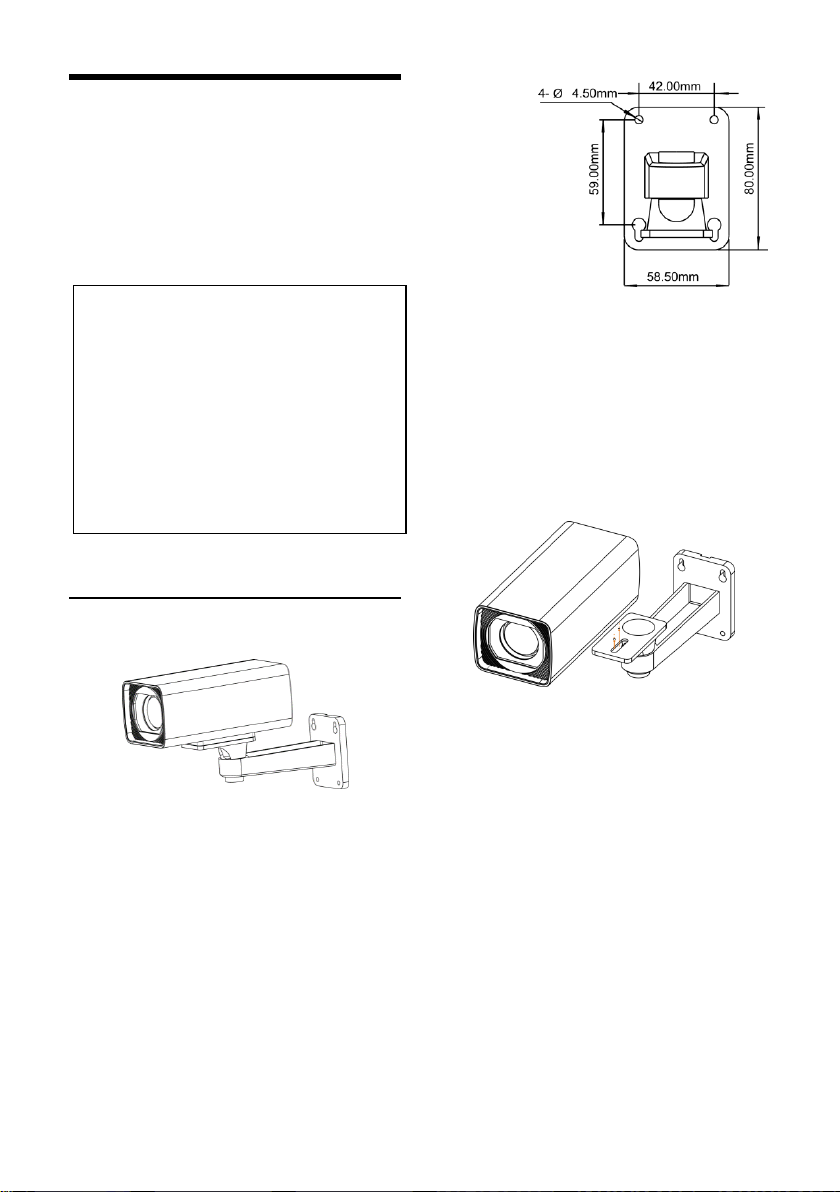
WALL MOUNT------------------------------------------------------------------------------ 3
OPERATION ------------------------------------------------------------------- 4
INTERNET EXPLORER ---------------------------------------------------------------------- 4
MENU------------------------------------------------------------------------------------- 4
SPECIAL PRESETS LIST ------------------------------------------------------ 5
MENU SETTINGS -------------------------------------------------------------- 6
MENU CONFIGURATION--------------------------------------------------------------------- 6
MENU EXPLANATION ----------------------------------------------------------------------- 9
VIDEO ----------------------------------------------------------------------------------- 10
EXPOSURE ------------------------------------------------------------------------------- 10
COLOR----------------------------------------------------------------------------------- 11
ZOOM FOCUS----------------------------------------------------------------------------- 11
SYSTEM---------------------------------------------------------------------------------- 12
STATUS ---------------------------------------------------------------------------------- 12
RESTORE DEFAULTS ---------------------------------------------------------------------- 13
NETWORK SETTING--------------------------------------------------------- 14
QUICK GUIDE ----------------------------------------------------------------------------- 14
IPCAMCONF ------------------------------------------------------------------------------ 15
LOCAL MONITORING AND SETUP ----------------------------------------------------------- 17
ANNEX 1 TECHNICAL SPECIFICATIONS------------------------------------ 29
ANNEX 2 SIZE AND DIMENSION -------------------------------------------- 31
TROUBLE SHOOTING ------------------------------------------------------- 32


1
ABOUT THE PRODUCT
Features
2.14MP, 1/2.8” CMOS;
H.265/H.264 video compression;
Dual stream, provide various video
resolutions;
3G-SDI full HD output at a variety of video
formats;
Built in OSD menu;
Up to 72.5°FOV;
12x/20x optical zoom;
RS-485/RS-232 control interface;
TF card recording;
Image flip.
List of Parts & Accessories
When you open the box, check all accessories
according to the packing list. In case of any
items missing, please contact your supplier.
Camera (1)
Power Adapter (1)
Wall Mount Bracket (1)
RS-232/RS-485 Connector (1)
Software Disc (1)

2
Main Parts & Interfaces
Camera
Front View
1 Camera Lens
Rear View
2 RS-232/RS-485
3 3G-SDI Interface
4 3.5mm Audio
5 USB Interface
6 TF Card Slot
7 Power Input(DC12V)
8 Power Indicator
9 Ethernet
Bottom View
10 Mounting Hole (1/4”)
Pin Definition of Control Port
No
Definition
1
RS-485B
2
RS-485A
3
GND
4
RS-232RXD
5
RS-232TXD

3
INSTALLATION
The installation type of the camera is wall
mount.
Wall Mount
1. According to diameter and position of the
4 installation holes (as shown below on
the bracket ), drill 4 holes on the wall and
fix the bracket onto the wall by using 4
screws, which should be prepared by
yourselves .
2. Use screws to fix the camera on the
bracket, fix the limit screw to lock the
camera. Make sure the camera is tightly
fixed onto the bracket before your hands
leave the camera.
Note
Before installing, make sure there is
enough space to install the camera and its
parts.
Make sure the installed place is strong and
safe enough to hold the camera and
relative parts, it is suggested that the
installed place can withstand 4 times the
weight of the camera and its relative parts.

4
OPERATION
Before operation, make sure all connections
are correct and firm.
Internet Explorer
1.Make sure PC and the camera are in the
same LAN;
2.Open Internet Explorer and enter Internet
options for security setting;
Tick below two options
options:
Meanwhile make sure the following setting
options are ticked;
3. Input IP address+ port number 88 (default is
88) in the IE address bar:http://IP:88, such
as http://192.168.18.229:88;
4.Install plug-in;
5.Name: admin Initial password: No
password.
Menu
Choose 95—Menu in the preset list to open
OSD menu.
Menu Options
In menu, press or to choose a menu
item. Press or to change current value.

5
Menu Confirm
In menu, press to confirm or get into
submenu. Press to return to previous
menu level or exit the menu.
SPECIAL PRESETS
LIST
Preset
Number
Function
95
Enter menu
100
Switch the video format to 1920X1080p50
101
Switch the video format to 1920X1080p25
102
Switch the video format to 1920X1080i50
103
Switch the video format to 1280X720p50
105
Switch the video format to 1920X1080p60
106
Switch the video format to 1920X1080p30
107
Switch the video format to 1920X1080i60
108
Switch the video format to 1280X720p60

6
MENU SETTINGS
Menu Configuration
<VIDEO>
Refer to
P10
SHARPNESS
0, 1, 2, 3, 4, 5, 6, 7, 8, 9, 10, 11, 12, 13, 14, 15
BRIGHTNESS
0, 1, 2, 3, 4, 5, 6, 7, 8, 9, 10, 11, 12, 13, 14
CONTRAST
0, 1, 2, 3, 4, 5, 6, 7, 8, 9, 10, 11, 12, 13, 14
GAMMA MODE
0, 1, 2, 3, 4
2DNR LEVEL
1, 2, 3, 4, 5, OFF
3DNR LEVEL
1, 2, 3, 4, 5, OFF
WIDE DYNAMIC
1, 2, 3, 4, 5, OFF

7
<EXPOSURE>
Refer to P10
MODE
FULL AUTO
MANUAL
GAIN
0, +2, +4, +6, +8, +10,
+12, +14, +16, +18,
+20, +22, +24, +26,
+28,+30
SPEED
1/1, 1/2, 1/3, 1/6, 1/12,
1/25, 1/50, 1/75, 1/100,
1/120, 1/150, 1/215,
1/300, 1/425, 1/600,
1/1000,1/1250, 1/1750,
1/2500, 1/3500, 1/6000,
1/10000
IRIS
F14, F11, F9.6, F8,
F6.8, F5.6, F4.8, F4,
F3.4, F2.8, F2.4, F2,
F1.6, CLOSE
SHUTTER PRI
SPEED
1/1, 1/2, 1/3, 1/6, 1/12,
1/25, 1/50, 1/75, 1/100,
1/120, 1/150, 1/215,
1/300, 1/425, 1/600,
1/1000, 1/1250, 1/1750,
1/2500, 1/3500, 1/6000,
1/10000
IRIS PRI
IRIS
F14, F11, F9.6, F8,
F6.8, F5.6, F4.8, F4,
F3.4, F2.8, F2.4, F2,
F1.6, CLOSE
BRIGHT PRI
BRIGHT
0, 1, 2, 3, 4, 5, 6, 7, 8, 9,
10, 11, 12, 13, 14, 15,
16, 17, 18, 19, 20, 21,
22, 23, 24, 25, 26, 27
EXP-COMP
ON
LEVEL
-7, -6, -5, -4, -3, -2, -1,
0, +1, +2, +3, +4, +5,
+6, +7
OFF
BLC
ON, OFF
ANTI FLICKER
OFF, 50HZ, 60HZ

8
<COLOR>
Refer to P11
WB MODE
AUTO, ATW, ONE PUSH, INDOOR, OUTDOOR,
MANUAL, SODIUM LAMP, FLUO LAMP
SATURATION
0, 1, 2, 3, 4, 5, 6, 7, 8, 9, 10, 11, 12, 13, 14
HUE
0, 1, 2, 3, 4, 5, 6, 7, 8, 9, 10, 11, 12, 13, 14
<ZOOM FOCUS>
Refer to P11
ZOOM SPEED
1, 2, 3, 4, 5, 6, 7, 8
FOCUS SPEED
1, 2, 3, 4, 5, 6, 7, 8
ZOOM TRIG AF
ON, OFF
POWER UP ACTION
PRESET 1, PRESET 2,
PRESET 3, PRESET 4,
PRESET 5, PRESET 6,
PRESET 7, PRESET 8,
PRESET 9, HOME
< SYSTEM >
Refer to P12
ADDRESS 1, 2, 3, 4, 5, 6, 7
PROTOCOL VISCA, PELCO-P, PELCO-D
BAUDRATE 2400, 4800, 9600, 38400
VIDEO FORMAT 1080p60, 1080p50, 1080i60, 1080i50,
1080p30, 1080p25, 720p60, 720p50
MOUNT MODE STAND, CEILING
RS485 PORT HALF-DUPLEX-1, HALF-DUPLEX-2
LANGUAGE ENGLISH
<STATUS>
Refer to P12
ADDRESS 1
PROTOCOL VISCA
BAUDRATE 9600
VIDEO FORMAT 1080p25
MOUNT MODE STAND
FIRMWARE VER V1.0.01
<RESTORE DEFAULTS>
Refer to P13

9
❶
❷
❸
Menu Explanation
Main Menu
Call preset 95 to enter menu.
❶Menu Hint
It displays currently selected menu option.
❷Menu Options
It displays options under current menu hint.
Click or button to select a menu. When
there is an arrow before the menu, it
means it has been selected. Click to
enter.
Submenus
From main menu, navigate to select <EXPOSURE>
menu, click to enter the submenu.
❶❷ Refer to main menu.
❸Set the menu
Press or button to change value.
<EXPOSURE>
MODE FULL AUTO
EXP-COMP 7
LEVEL 0
BLC ON
ANTI FLICKER OFF
[ ]SELECT []BACK
MENU
VIDEO…
EXPOSURE…
COLOR…
ZOOM FOCUS…
SYSTEM…
STATUS…
RESTORE DEFAULTS…
[ ]SELECT [OK]NEXT []EXIT
❶❸
❷
❹

10
Video
VIDEO menu is used to change video value.
SHARPNESS: 0, 1, 2, 3, 4, 5, 6, 7, 8, 9, 10, 11,
12, 13, 14, 15.
BRIGHTNESS: 0,1,2,3,4,5, 6, 7, 8, 9, 10,
11, 12, 13, 14.
CONTRAST: 1, 2, 3, 4, 5, 6, 7, 8, 9, 10, 11, 12,
13, 14.
GAMMA MODE: 0, 1, 2, 3, 4.
2DNR LEVEL: 1, 2, 3, 4, 5, OFF.
3DNR LEVEL: 1, 2, 3, 4, 5, OFF.
WIDE DYNAMIC: 1, 2, 3, 4, 5, OFF.
Exposure
Exposure menu is used to adjust exposure
value.
MODE
FULL AUTO: Gain, Shutter Speed and Iris
value are adjusted automatically as per
working environment.
MANUAL: manually adjust Gain, Shutter
Speed and Iris
GAIN: 0, +2, +4, +6, +8, +10, +12, +14, +16,
+18, +20, +22, +24, +26, +28, +30.
SPEED: 1/1, 1/2, 1/3, 1/6, 1/12, 1/25, 1/50,
1/75, 1/100, 1/120, 1/150, 1/215, 1/300,
1/425, 1/600, 1/1000,1/1250, 1/1750,
1/2500, 1/3500, 1/6000, 1/10000.
IRIS: F14, F11, F9.6, F8, F6.8, F5.6, F4.8,
F4, F3.4, F2.8, F2.4, F2, F1.6, CLOSE.
SHUTTER PRI:Sensitivity and Iris values are
adjusted automatically as per working
environment; shutter speed value is
adjustable manually.
SPEED:1/1, 1/2, 1/3, 1/6, 1/12, 1/25, 1/50,
1/75, 1/100, 1/120, 1/150, 1/215, 1/300,
1/425, 1/600, 1/1000,1/1250, 1/1750,
1/2500, 1/3500, 1/6000, 1/10000.
<EXPOSURE>
MODE FULL AUTO
EXP-COMP 7
LEVEL 0
BLC ON
ANTI-FLICKER OFF
[ ]SELECT []BACK
<VIDEO>
SHARPNESS 8
BRIGHTNESS 7
CONTRAST 2
GAMMA MODE 0
2DNR LEVEL OFF
3DNR LEVEL OFF
WIDE DYNAMIC OFF
[ ]SELECT []BACK

11
IRIS PRI:Gain and shutter speed value are
adjusted automatically as per working
environment; Iris value is adjustable manually.
IRIS: F14, F11, F9.6, F8, F6.8, F5.6, F4.8,
F4, F3.4, F2.8, F2.4, F2, F1.6, CLOSE.
EXP-COMP: When EXP-COMP is on, below
level options become available -7, -6,
-5,-4, -3, -2, -1, 0, +1, +2, +3, +4, +5, +6, +7.
+7 is the max compensation value for bright
exposure while -7 is the max compensation
value for dark exposure.
BLC: ON, OFF Backlight compensation (BLC)
can automatically compensate and correct the
exposure of subjects with a background that is
too bright or dark.
ANTI-FLICKER: OFF, 50HZ, 60HZ
This function is to resolve the problem that the
image flicks when the lighting frequency is
different from the power frequency.
Color
Color menu is used to adjust color related
values. Available options:
WB MODE: AUTO, ATW (auto tracking), ONE
PUSH, INDOOR, OUTDOOR, MANUAL,
SODIUM LAMP, FLUO LAMP.
“ONE PUSH”: In “ONE PUSH TRIGGER”
mode, aim the camera at a pure white
object (say a white paper), then press OK
button.
“AUTO” mode: R.GAIN, G.GAIN and
B.Gain can be chosen from -7~+7.
“MANUAL” mode: R.GAIN and B. GAIN
value can be chosen from 0~255.
SATURATION: 0, 1, 2, 3, 4, 5, 6, 7, 8, 9, 10,
11, 12, 13, 14.
HUE: 0, 1, 2, 3, 4, 5, 6, 7, 8, 9, 10, 11, 12, 13,
14.
Zoom Focus
Zoom focus is used to adjust zoom value:
<COLOR>
WB MODE MANUAL
R.GAIN 7
B.GAIN 7
SATURATION 7
HUE 7
[ ]SELECT []BACK

12
ZOOM SPEED: 1, 2, 3, 4, 5, 6, 7, 8.
FOCUS SPEED: 1, 2, 3, 4, 5, 6, 7, 8.
ZOOM TRIG AF: Turn ON/OFF auto focus
when the camera zooms.
POWER UP ACTION:
PRESET 1, PRESET 2, PRESET 3, PRESET
4, PRESET 5, PRESET 6, PRESET 7,
PRESET 8, PRESET 9, HOME.
System
ADDRESS: 1, 2, 3, 4, 5, 6, 7 (VISCA protocol);
0~255 (PELCO-D).
PROTOCOL: VISCA, PELCO-D, PELCO-P.
BAUD RATE: 2400, 4800, 9600, 38400.
VIDEO FORMAT: 1080p60, 1080p50,
1080p30, 1080p25, 1080i60, 1080i50,
720p60, 720p50.
MOUNT MODE: STAND, CEILING.
RS485 PORT:
HALF-DUPLEX-1,
HALF-DUPLEX-2.
HALF-DUPLEX-1 in VISCA protocol, camera
will not return confirmation, completion or
error messages after commands have been
executed.
HALF-DUPLEX-2: in VISCA protocol, camera
will return confirmation, completion or error
messages after commands have been
executed.
LANGUAGE: ENGLISH.
Status
<STATUS>
ADDRESS 1
PROTOCOL VISCA
BAUD RATE 9600
VIDEO FORMAT 1080p25
MOUNT MODE STAND
FIRMWARE V1.0.01
[]BACK
<SYSTEM>
ADDRESS 1
PROTOCOL VISCA
BAUD RATE 9600
VIDEO FORMAT 1080p25
MOUNT MODE STAND
RS485 PORT HALF-DUPLEX-1
LANGUAGE ENGLISH
[ ]SELECT []BACK
<ZOOM FOCUS>
ZOOM SPEED 8
FOCUS SPEED 1
ZOOM TRIG AF ON
POWER UP ACTION HOME
[ ]SELECT []BACK

13
It displays current camera address, protocol,
baud rate, video format, mount mode and
firmware version number.
Restore Defaults
RESTORE DEFAULTS: This option is used to
reset all menus to default value.
< RESTORE DEFAULTS>
PRESS [OK] CONFIRM
PRESS [BACK] CANCEL
[]BACK

14
Network Setting
Quick Guide
The camera can be accessed and controlled
via the following ways:
Client software IPCamConf: camera search
and control、network setting;
Initial Password: null
VLC: view of main and sub video stream;
Internet Explorer: view of main stream video
stream, camera control, network setting;
Name:admin
Password:null
SDK: To provider the second development
interfaces for camera connection and
control;
Onvif: support Onvif 2.1
Name: admin
password:123456
rtsp
1 Make sure PC and camera in the same
LAN;
2. Main stream:rtsp://IP:port/main.h264;
3 Sub stream:rtsp://IP:port/sub.h264;
4 The IP and port number can be checked
with IPCamConf software.
Internet Explorer
1 Make sure PC and camera in the same
LAN;
2 support Windows 7 and above system,not
support Windows XP;
3 Input IP address+ port number 88 (default is
88) in the IE address bar:
http://IP:88, such as:
http://192.168.18.229:88;
4 Install plugin;
SDK
The disc includes:SDK_Demo, SDK_Doc,
SDK_Lib.
IPCamConf
Please refer to P15.
Table of contents
Other Kennell Security Camera manuals
Popular Security Camera manuals by other brands

Panasonic
Panasonic Super Dynamic III WV-CW974 operating instructions

Panasonic
Panasonic BL-C210 Series operating instructions

epiphan
epiphan VGADVI Broadcaster user guide

American Dynamics
American Dynamics SensorRail IIIe ADRL3TRK Series Service guide

Anker
Anker Eufy T8420 quick start guide

GEV
GEV TITAN 180 LBB 16835 manual