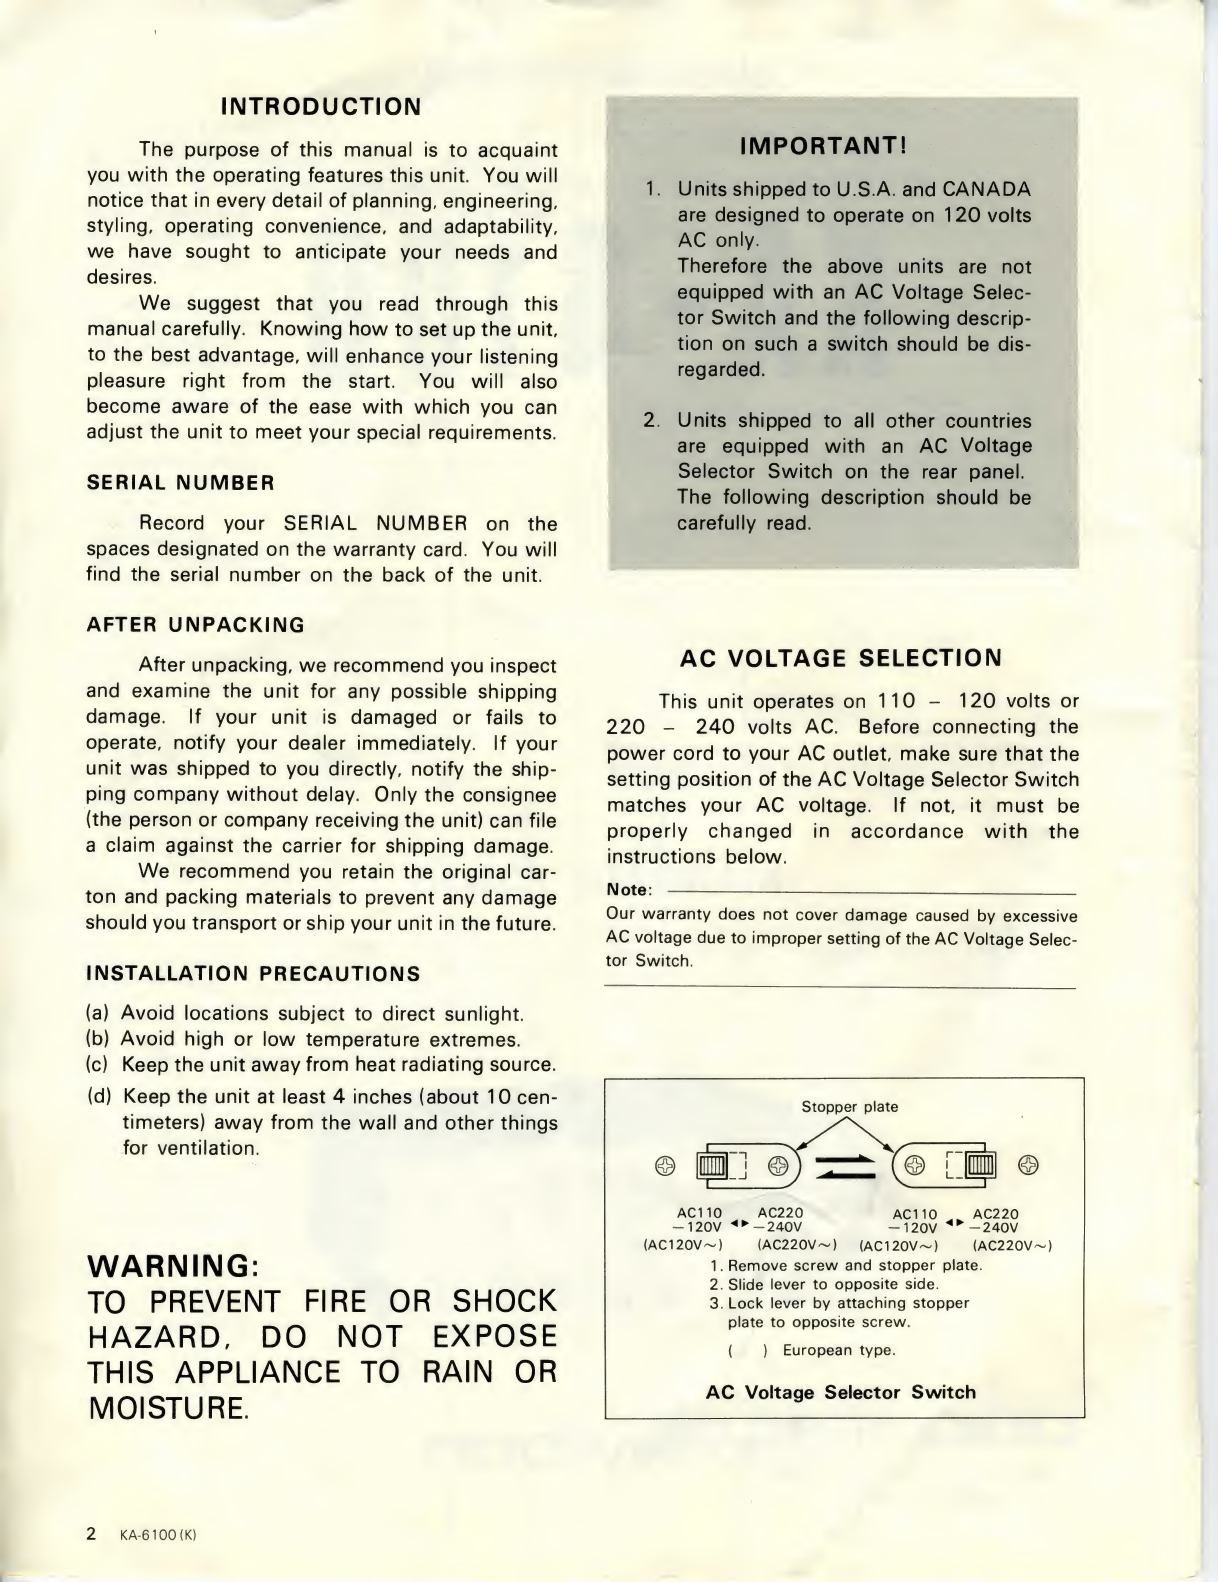
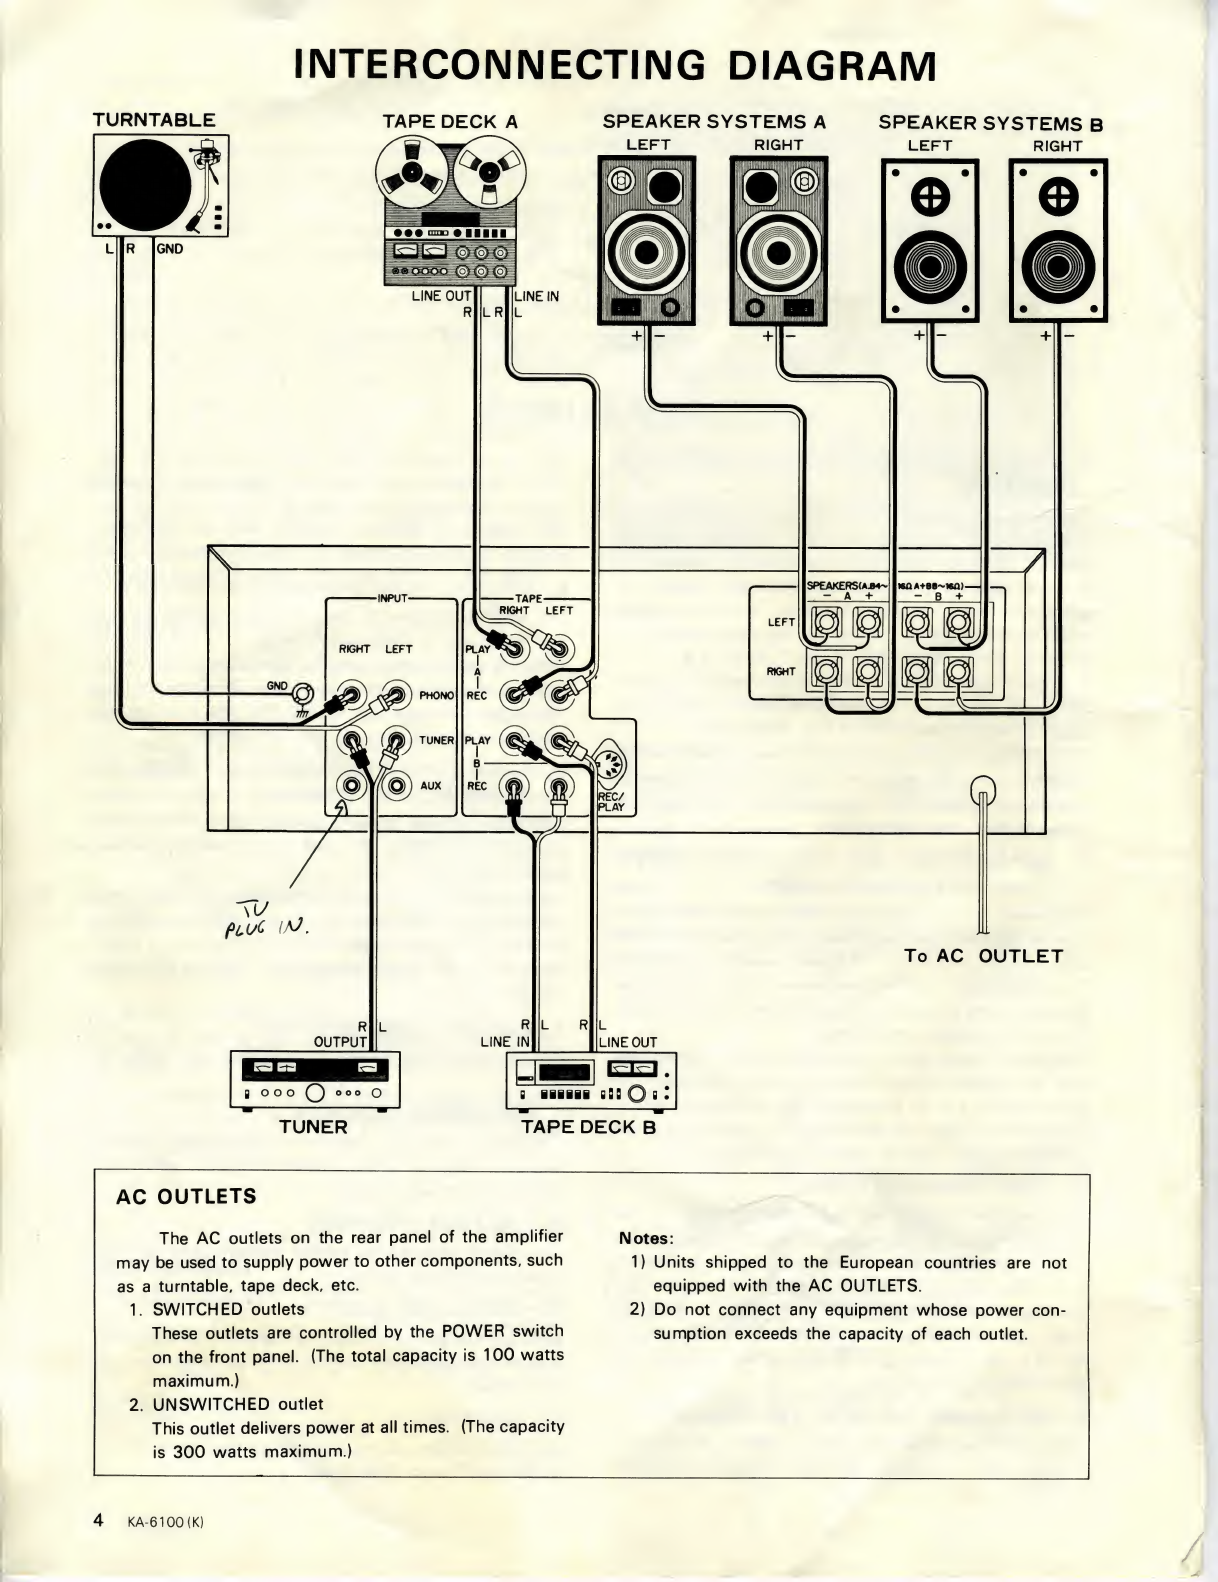
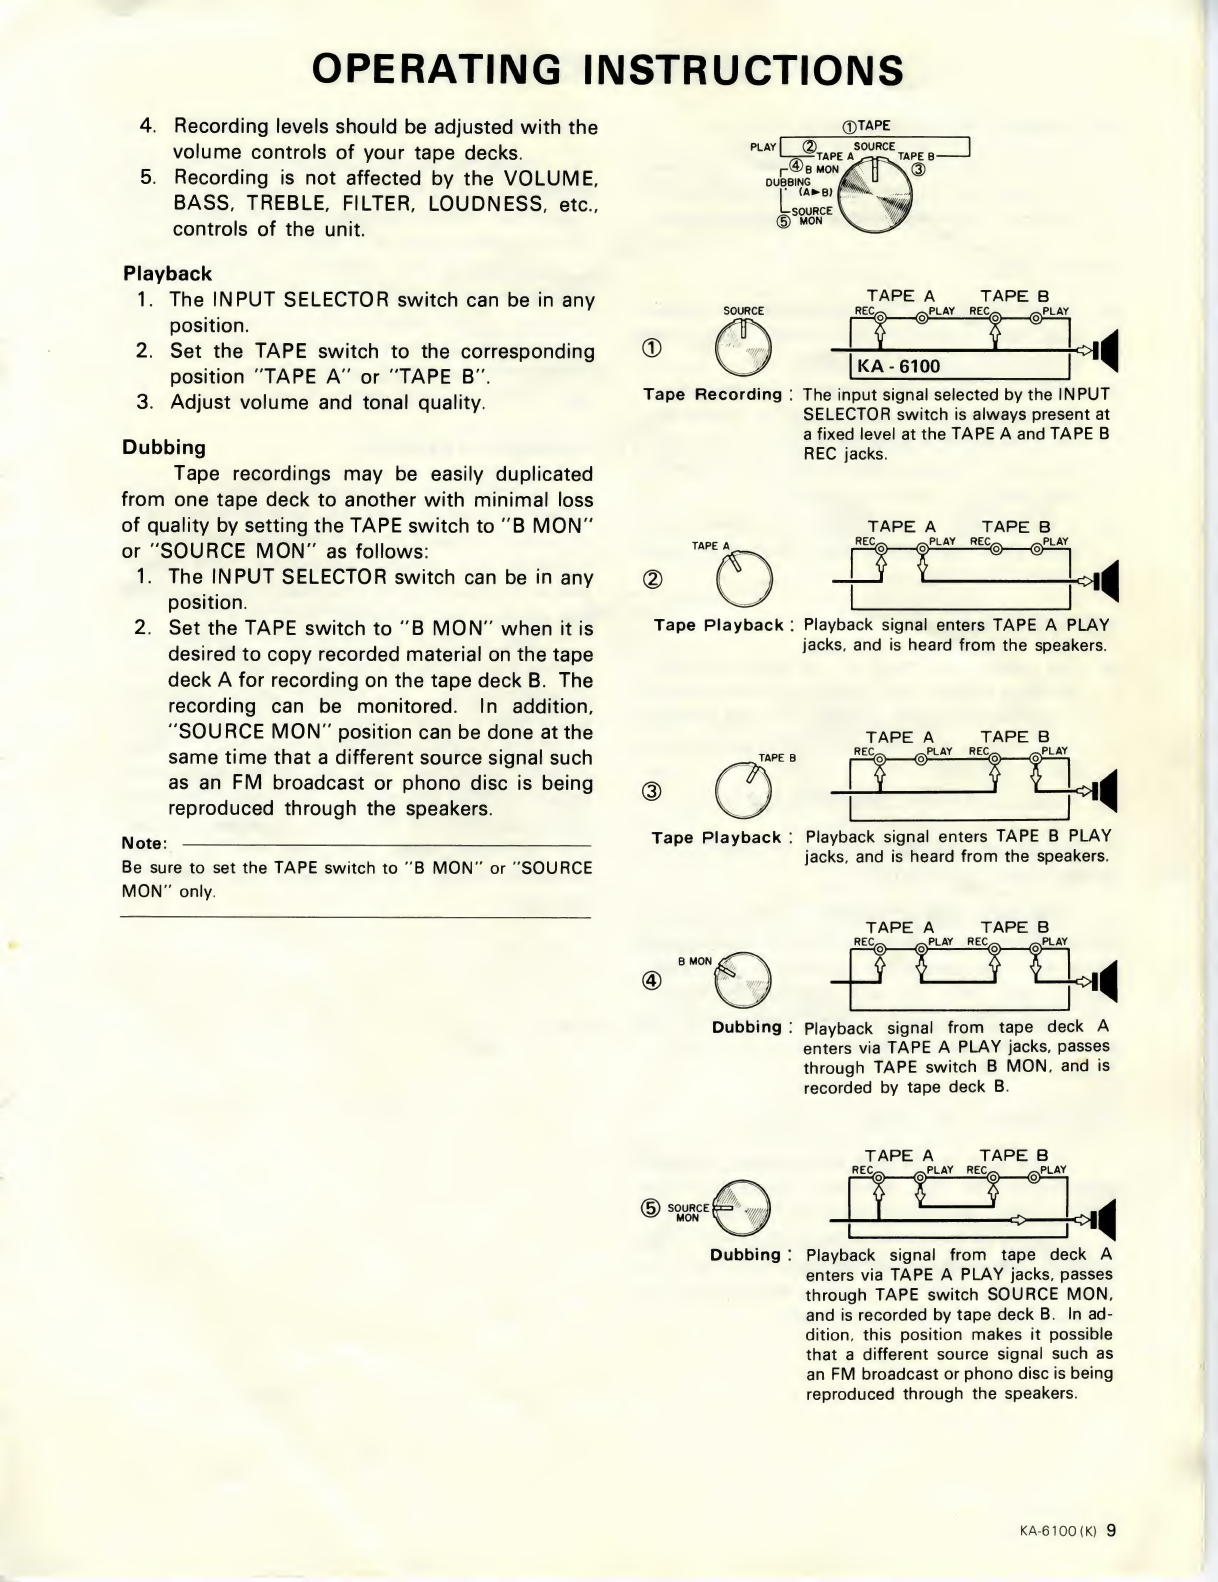
Kenwood KA-6100 User manual
Other Kenwood Amplifier manuals

Kenwood
Kenwood XXV-02A - 25th Anniversary Products... User manual

Kenwood
Kenwood KAC-X401M User manual

Kenwood
Kenwood KAC-PS847F User manual

Kenwood
Kenwood KA 4002 Instruction Manual

Kenwood
Kenwood KM-895 User manual

Kenwood
Kenwood KA-892 User manual

Kenwood
Kenwood KA-893 User manual

Kenwood
Kenwood KAC-626 User manual

Kenwood
Kenwood L-A1 User manual

Kenwood
Kenwood KAC-PS100 User manual

Kenwood
Kenwood 500 User manual

Kenwood
Kenwood KAC-7251 User manual

Kenwood
Kenwood KAC-7405 User manual

Kenwood
Kenwood KAC-941 User manual

Kenwood
Kenwood KAC-7201 User manual

Kenwood
Kenwood KAC-622 User manual

Kenwood
Kenwood KAC-Q62 User manual

Kenwood
Kenwood KAC-X810D User manual

Kenwood
Kenwood KAC-7251 User manual

Kenwood
Kenwood KM-991 User manual