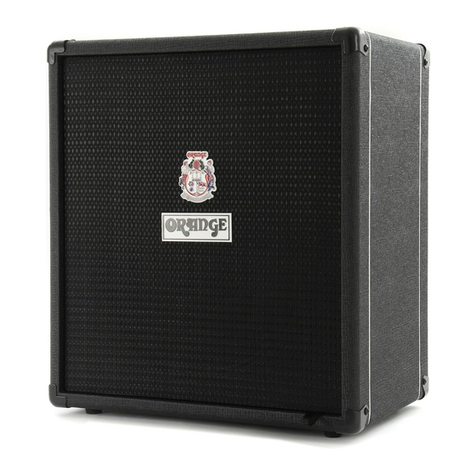
ORANGE BASS 25 User manual

INTRODUCTION
THANK YOU FOR CHOOSING ORANGE
Ever since the founding of the company in 1968, Orange has been a pioneering force in the guitar amplification industry. Today,
with a team of the world’s finest amplifier engineers, Orange continues to push back the boundaries of conventional amplifier
design.
Our commitment to craftsmanship and quality control has allowed our amplifiers to stand the test of time, giving their owners as
much pleasure now, as the day they were bought. To maintain this level of excellence, each Orange amplifier is put through many
rigorous test procedures before leaving the factory.
This manual contains valuable technical and safety information. Please take the time to read this manual as the information may
enhance the sound and performance of your amplifier. We are confident that you will be delighted with your new purchase and
that it will provide you with many years of enjoyment. You are now a member of the Legendary British Guitar Amplifier Owners
Club!
In the interests of product improvement, the contents of this manual may be subject to change without notice.
SAFETY
IMPORTANT SAFETY INFORMATION
1) Read these instructions.
2) Keep these instructions.
3) Heed all warnings.
4) Follow all instructions.
5) Do not use this apparatus near water.
6) Clean only with dry cloth.
7) Do not block any ventilation openings. Install in accordance with the manufacturer’s instructions.
8) Do not install near any heat sources such as radiators, heat registers, stoves, or other apparatus (including amplifiers) that
Manual V1.0
MANUAL DECRUSH BASS 25
Productos Artistas Historia Blog Soporte CONOZCA Tienda global Concesionarios
VOICE OF THE WORLD FOR 50 YEARS
Feedback

Reorient or relocate the receiving antenna.
Increase the separation between the equipment and receiver.
Connect the equipment into an outlet on a circuit different from that to which the receiver is connected.
Consult the dealer or an experienced radio/TV technician for help.
produce heat.
9) Do not defeat the safety purpose of the polarised or grounding-type plug. A polarised plug has two blades with one wider than
the other. A grounding type plug has two blades and a third grounding prong. The wide blade or the third prong are provided for
your safety. If the provided plug does not fit into your outlet, consult an electrician for replacement of the obsolete outlet.
10) Protect the power cord from being walked on or pinched particularly at plugs, convenience receptacles, and the point where
they exit from the apparatus.
11) Only use attachments/accessories specified by the manufacturer.
12) Use only with the cart, stand, tripod, bracket, or table specified by the manufacturer, or sold with the apparatus. When a cart is
used, use caution when moving the cart/apparatus combination to avoid injury from tip-over.
13) Unplug this apparatus during lightning storms or when unused for long periods of time.
14) Refer all servicing to qualified service personnel. Servicing is required when the apparatus has been damaged in any way, such
as power-supply cord or plug is damaged, liquid has been spilled or objects have fallen into the apparatus, the apparatus has been
exposed to rain or moisture, does not operate normally, or has been dropped.
NO USER SERVICEABLE PARTS INSIDE. DO NOT ATTEMPT TO GAIN ACCESS TO THE INTERIOR OF THE PRODUCT. REFER ALL
SERVICING TO AUTHORISED ORANGE SERVICE PERSONNEL
The lightning flash with arrowhead symbol, within an equilateral triangle, is intended to alert the user to the presence of un-
insulated ‘dangerous voltage’ within the product’s enclosure that may be of sufficient magnitude to constitute a risk of electric
shock to persons.
Terminals labelled as “Speaker Outputs” must be connected to a speaker cabinet of the designated load rating using an un-
shielded two conductor cable for speaker use at all times during operation.
The exclamation point within an equilateral triangle and "WARNING" are intended to alert the user to the presence of important
operating instructions. Failure to heed the instructions will result in severe injury or death.
WARNING: To reduce the risk of fire or electric shock, do not expose this apparatus to rain or moisture. For indoor use only. Do not
place liquids, or objects containing liquids on or near the apparatus
Models which use a mains cord/plug to connect to the mains electricity supply must be connected to a mains socket outlet with a
protective earthing connection. The voltage selector switch and mains fuse are set at the factory for the country or region in which
this Orange product is intended to be sold. To prevent serious damage to the product, ensure that the rated AC mains voltage
indicated on the product's rear panel agrees with the mains voltage from your AC mains outlet before connecting the mains
cord/plug.
If the product is to be used outside of the factory set region, ensure the voltage selector switch (found on the rear or side panel) is
set to the correct voltage for the new country/region and that the appropriate mains fuse is fitted in the pull-out fuse tray below
the IEC mains input.
The correct mains fuse rating for your product is printed on the chassis. Use only the same 250V type and rating as specified for
the product. Different operating voltages may require the use of different types of line cord and attachment plugs. If you are
unsure, contact your Orange Dealer.
This Orange product fulfils the requirements of IEC 60065:2001 (Seventh Edition) + A1:2005 + A2:2010 for Audio, Video and Similar
Electronic Apparatus.
This product complies with the WEEE Directive (2002/96/EC) marking requirement. This affixed product label indicates that you
must not discard this electrical/electronic product in domestic household waste. Please contact your local authority for details of
your nearest approved recycling facility.
This device complies with the Canadian Interference Regulations CAN ICES-3(B)/NMB-3(B).
This device complies with Part 15 of the FCC rules. Operation is subject to the following two conditions:
1. This device may not cause harmful interference.
2. This device must accept any interference received, that may cause undesired operation.
Note: This equipment has been tested and found to comply with the limits for Class B digital device, pursuant to Part 15 of the FCC
Rules. These limits are designed to provide reasonable protection against harmful interference in a residential installation. This
equipment generates, uses and can radiate radio frequency energy and if not installed and used in accordance with the
instructions, may cause harmful interference to radio communications.
However, there is no guarantee that interference will not occur in a particular installation. If this equipment does cause harmful
interference to radio or television reception, which can be determined by turning the equipment off and on, the user is encouraged
to try and correct the interference by one or more of the following measures.
Feedback

Changes or modifications not expressly approved by Orange Music Electronic Co. could void the user's authority to operate the
equipment.
CARACTERÍSTICAS DEL PANEL
Potencia
La luz de encendido se iluminará
cuando el interruptor de encendido
(trasero) esté en la posición ON.
Teléfonos
Para utilizar con la mayoría de los
auriculares estéreo con conexión de
6,35 mm. La salida PHONES también
cuenta con Cabsim para un
sonido más auténtico, y puede
utilizarse para enviar una señal a una
consola de grabación/mezclador. El
altavoz interno es
desconectado cuando la salida
PHONES está en uso.
Nota: Para evitar posibles daños
auditivos, no utilice los auriculares a
niveles de volumen elevados durante
períodos prolongados.
Entrada Auxiliar
Para utilizar con reproductores de
MP3, ordenadores portátiles, etc.
mediante un cable de audio de 3,5
mm. La señal de audio se suma
internamente en mono.
Feedback

Volumen
Controla el nivel de volumen de
salida.
Agudos
Ajusta las frecuencias superiores con
hasta 20dB de realce (ajuste máximo)
o corte (ajuste mínimo).
Medio
Controla el efecto del dial FREQ con
hasta 15dB de realce (ajuste máximo)
o corte (ajuste mínimo).
Bajo
Ajusta las frecuencias bajas con
hasta 15dB de realce (ajuste máximo)
o corte (ajuste mínimo).
Entrada
Utilice un cable de instrumento
apantallado de calidad para conectar
su instrumento a la toma INPUT.
El interruptor PAD selecciona el nivel
de entrada correcto para los bajos
con pastillas activas o pasivas. PAD
activado = -6dB.
Frecuencia
Selecciona la frecuencia central del
control MIDDLE, con un barrido de
300Hz (mínimo) a 2,7kHz (máximo).
Nota: Cuando el control MIDDLE está
en el centro (posición de las 12),
mover el control FREQ no tendrá
ningún efecto audible..
Sintonizador
Pulse el botón ON/OFF para activar el afinador cromático integrado.
Ajuste el volumen a cero para una sintonización silenciosa si es necesario.
El LED rojo correspondiente se iluminará en la pantalla para indicar la nota que se está reproduciendo. Si el LED verde # también
se ilumina, esto indica que se trata de una nota cromática, por ejemplo, Fa sostenido (F#).
El LED de la flecha > indica que la nota está afinada con un tono demasiado bajo.
La flecha LED < indica que la nota está afinada demasiado alta.
Ajuste el tono de la cuerda en la dirección indicada por las flechas hasta que se encienda el LED verde OK.
Feedback

1
2
3
4
1. Entrada de la red de CA
Consulte la sección“Antes de utilizar el amplificador“.
Conecte el cable IEC suministrado a la entrada de red de CA.
Asegúrese de que el interruptor de alimentación está en OFF
antes de conectar el cable IEC.
2 Fusible de red
El fusible de red se encuentra en la bandeja extraíble situada
debajo de la entrada de red de CA. Si se funde el fusible de la
red, sustitúyalo sólo por el de la potencia exacta para su
región. Si el fusible de la red eléctrica sigue fundiéndose,
póngase en contacto con su Orange distribuidor.
100V/120V: T2A
230V: T1A
3. Interruptor de selección de voltaje
¡IMPORTANTE!
Consulte la sección“Antes de utilizar el amplificador“.
Ajustado de fábrica a la región en la que se pretende vender
el amplificador.
4. Interruptor de encendido
Asegúrese de que los controles de volumen del amplificador
están a cero antes de conectar la alimentación del
amplificador. Apagar cuando no se utilice.
Estos artículos son compatibles con su producto Orange. Para los clientes de Estados Unidos, haga clic aquí.
ACCESORIOS RELACIONADOS
Feedback

JOIN OUR
NEWSLETTER
Email
Subscribe
ÚLTIMA
ENTREVISTA
Wishbone Ash “Argus”
50 Aniversario
octubre 14, 2022 - 9:00 am
ÚLTIMAS NOTICIAS
EL OR120 DE 1974 –
HISTORIA, LEGADO Y
MANTENIMIENTO,
PARTE 1
octubre 26, 2022 - 8:00 am
O BONES
© Orange Amps | Products can change without notice
Contacta Forum Cookies & Terms
Feedback
Other ORANGE Amplifier manuals
ORANGE
ORANGE CR50BXT User manual
ORANGE
ORANGE OR100 User manual
ORANGE
ORANGE tiny terror User manual
ORANGE
ORANGE CRUSH 12 User manual

ORANGE
ORANGE CRUSH 20RT User manual

ORANGE
ORANGE OV4 User manual
ORANGE
ORANGE OR50 User manual

ORANGE
ORANGE Rockerverb 30 User manual
ORANGE
ORANGE 4 JIM ROOT User manual

ORANGE
ORANGE Tiny Terror User manual
ORANGE
ORANGE MICRO TERROR User manual

ORANGE
ORANGE ACOUSTIC PRE User manual

ORANGE
ORANGE Tiny Terror User manual
ORANGE
ORANGE CR25BX User manual

ORANGE
ORANGE PPC User manual

ORANGE
ORANGE Tiny Terror User manual

ORANGE
ORANGE Bass Butler User manual
ORANGE
ORANGE OB1 Series User manual
ORANGE
ORANGE Crush Mini User manual
ORANGE
ORANGE ROCKER 15 TERROR User manual
