manuals.online logo
Brands
  1. Home
  2. •
  3. Brands
  4. •
  5. Kenwood
  6. •
  7. Car Receiver
  8. •
  9. Kenwood KDC-PS809 User manual

Kenwood KDC-PS809 User manual

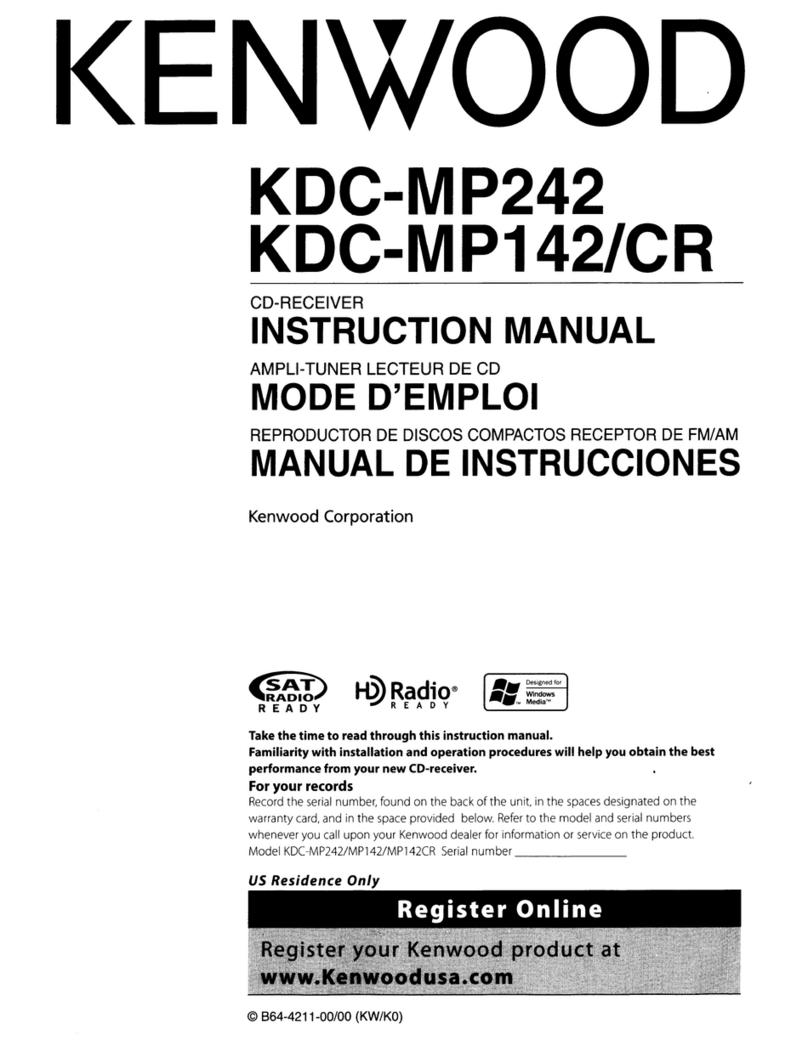
KENWOOD
KDC-PS809
KDC-8009
KDC-7009
RR-500E
_
~
ff
you
usethe
RR-500E
;
With
regard
to
the
displays,
So
aeiens
of
the
operations
and
specifications,
see
the
contents
of
KDC-PS809
in
this
manual.
Si
le
RR-500E
est
utilisé
;
Pour
les
affichages,
les
explications
des
opéra-
tions
et
les
specifications,
voir
la
description
du
KDC-PS809
dans
ce
manuel.
Si
utiliza
el
RR-500E
:
Con
respecto
a
las
indicaciones,
explicaciones
de
funcionamientos
y
especificaciones,
vea
el
indice
del
KDC-PS809
de
este
manual.
CD-RECEIVER
INSTRUCTION
MANUAL
AMPLI-TUNER-LECTEUR
DE
CD
MODE
D’EMPLOI
REPRODUCTOR
DE
DISCOS
COMPACTOS
RECEPTOR
DE
FM/AM
MANUAL
DE
INSTRUCCIONES
KENWOOD
CORPORATION
Take
the
time
to
read
through
this
instruction
manual.
Familiarity
with
installation
and
operation
procedures
will
help
you
obtain
the
best
performance
from
your
new
CD-receiver.
For
your
records
Record
the
serial
number,
found
on
the
back
of
the
unit,
in
the
spaces
designated
on
the
warranty
card,
and
in
the
space
provided
below.
Refer
to
the
model
and
seriai
numbers
whenever
you
call
upon
your
KENWOOD
dealer
for
information
or
service
on
the
product.
COMPACT
Model
KDC-PS809/8009/7009/RR-500E
Serial
number
Oe
©B64-1179-10(KW)
(os)
aE
Contents
‘Before
use
\Warn-ng....
hacen
itd
hd
iudgnd
tat
tsi
haste
iuse.
dead
3
Safety
orecaulios
snincpueed
dais
utes
gies
5
»
Pardinng
Compact
GIGS...
eee
efter
carer
ree
‘Buttons
and
Display
|
IB
ASIC:
OPERATIONS:
oz.
.zctoauiesy
or
ssersiguesss
ncodudtanavd
cb
ott
adv
eo
teanvasteeaatenewensS
‘Tuner
features
sca
tiee
din
ese
cu
iteatiasBouguath
ncwievcdtess
aitivagbuncgesetin
soi
RBDS
features:
sc.
icavlicisicct
ee
isunonok
witand
hentai
Disc
control
features
....
AethcuahicmtPaninhe
ieee.
srecschacegte
Rae
ht
Rte
9
Other
features.......
.
Ad
ice
staghonia
Sane
reidgon
stint atten
tasends
10
REMOTE
cis
cecetccerescecscsssessscessccssestseueess
.
ee
16
‘Basic
operations
Stealth
Retraction
Mechanism.................
fetes
steeds
11
Switering
Modes
ooo...
ce
ccc
ce
eeteeeee
:
12
Volume
oc.
ap
a%83
aigugs;
axanheaathaeste
saqenlaenae
;
12
Louaness
.....
Sten
;
ae aN
enS she
cota
tes
ncaa
12
ATOR
EATON
vice.
ciseciaiapededinsttsncsaerstesheeacameaiaceaks
cstansieees
:
12
Menu
System...
cess
tegend
Os
Aw
Beane
ee
Renee
12
Tuner
features
SUMING
asrsi,
2.06
caeadt
dace
senureatananadoaeeines
Sune
:
Meh
4
Szatior
Preset
Mero
DIS
ccevets
ee
srenatentiat
sa
tnt
Auto
Memory
Entry.......
me
,
Sisdopchen
funy
aiacsesesaas
4
Clean
Receptior
System
Circuit
(CRSC).....
easdatuslante
yds.
trodes
5
Switchirg
D’splay
for
Tuner...
bees
ee
ral
iitc)
Station:
Name*Preset(SNPShs.gi.cissczeserciercateiccou
der
teen
pence
ah
tet
6
Direct
Access
Turing.
hin
eatin
htetn
ty
Ad
pen
eis
ahs
Sewanee
7
Staton
Name
Preset
Pay
(SNPPV
occ
cece
eee
nseveeee
7
‘RBDS
features
RBDS
(Radio
Broaacast
Data
SySIEIDs
PI
GGUT
sods
a.
aria
kates
hreew
pence
deeoees
:
Traffic
Infornat:on
Function...
Program
Type
(PTY)
Funct
on
Radio
Text...
Radio
Text
Seroll
|
Disc
control
features
Playing
CDs......
ibis
visee
mira
euaaeaaiieiaaTe
|
i:
Playing
other
Disc
mode
.......
Fibbduenche
iehd
tisedieebentero
Ll
Lae
Forward
Ing.
ang
Reversing
|
Dise
Play.
tetts
Atala
eS
u
Track
Search..
eiwederineneh
Disc
Search...
Track
/
Disc
Repeat
..
Track
Scan.....
Disc
Scan...
Random
Play
.
,
Magazine
Random
Play...
Switching
Display
for
Discs.
Text
Scroll:
ces
tithanasenenvaraciees
Presetting
Disc
Names
................
Direct
Track
Search............
ee
Direct
Disc
Search........0000000
cee
eee
Disc
Name
Preset
Play
(DNPP)
Other
features
Audio
Control
Settirg...
Sade
eeease
iene
a82
Table
of
Audio
Cortrol
Settir
“g
a
Switching
Preout..
seteeeas
Automatic
Dimmer.
Pade
Selectable
IHuminatior
.............
Touch
Sensor
Tone
.
detieGahusse
Contrast
Adjustment.......0.000....
Switching
Clock
Display
............
Switching
Graphic
Display........
reselaectante
Switching
ee
Anal
yzer
D
>
spy...
thes
Adjusting
Time...
;
e
SOCufity-COdC
3.4.08
ince.
oo
teeter
neat
Basic
operations
of
remote...
Installation
ACCESSONESsotic
cestasca
tein
fence
eA
ealip
ah
ecsneet
tee
Installation
Procedure......
;
Connecting
Wires
to
Terminals.
Installation
(non-Japanese
carst
Removing
the
Unit...
ee
Installation
(Japanese-cars}
Troubleshooting
guide
.....
Specifications
0.000000
eave
st
atsegecrecde
abies
AWarnin
Selecting
fine
audio
equipment
such
as
the
unil
you’
ve
JUST
purchased
is
only
the
start
of
your
musical
enjoyment.
Now
it’s
time
to
consider
how
you
can
maximize
the
fun
and
excitement
your
equipment
offers.
This
manufacturer
and
the
Electronic
Industries
Association's
Consumer
Electronics
Group
want
you
to
get
the
most
out
of
your
equipment
by
playing
it
at
a
sate
level.
One
that
lets
the
sound
come
through
loud
and
clear
without
annoying
blaring
or
distortion
—
and.
most
importantly,
without
affecting
your
sensitive
hearing.
Sound
can
be
deceiving.
Over
time
your
hearing
“comtort
level”
adapts
to
higher
volumes
of
sound.
So
what
sounds
“normal”
can
actually
be
loud
and
harmful
to
your
hearing.
Guard
against
this
by
setting
your
equipment
al
a
safe
level
BEFORE
your
hearing
adapts.
To
establish
a
safe
level:
*
Start
your
volume
control
al
a
low
setting.
*
Slowly
increase
the
sound
until
you
can
hear
ut
comfortably
and
clearly.
and
without
distortion,
Once
you
have
established
a
comfortable
sound
level:
*
Set
the
dial
and
Ieave
it
there.
Taking
a
minute
to
do
this
now
will
help
to
prevent
hearing
damage
or
loss
in
the
future.
After
all,
we
want
you
listening
for
a
lifetime.
We
Want
You
Listening
For
A
Lifetime
Used
wisely,
your
new
sound
equipment
will
prov
ide
a
lifetime
of
fun
and
enjoyment.
Since
hearing
damage
trom
loud
noise
is
often
undetectable
until
it
is
too
fate.
this
manufacturer
and
the
Electronic
Industries
Association's
Consumer
Electronics
Group
recommend
you
avoid
prolonged
exposure
lo
excessive
noise.
This
list
of
sound
levels
is
included
for
your
protection.
Decible
Level
3Q
Quiet
library,
soft
whispers
40
Living
room,
refrigerator,
bedroom
away
from
traffic
50
Light
traffic.
normal
conversation,
quiet
office
460
Air
conditioner
at
20
feet.
sewing
machine
70
Vacuum
cleaner,
hair
dryer,
noisy
restaurant
80
Average
city
traffic.
garbage
disposals,
alarm
clock
at
two
feel.
THE
FOLLOWING
NOISES
CAN
BE
DANGEROUS
UNDER
CONSTANT
EXPOSURE
90
Subway.
motorcyele.
truck
traffic,
lawn
mower
100
Garbage
truck.
chain
saw,
pneumatic
drill
120
Rock
band
concert
in
front
of
speakers.
thunderelap
{40
Gunshot
blast.
jet
plane
180
Rocket
launching
pad
Information
courtesy
of
{he
Deafness
Research
Foundation,
QJ
HISTENING
A
Warning
—
(eee
ACAUTION,
_NOTE
|
or
Tr
s
equipment
as
been
testea
ard
found
to
c
the
mics
fora
Class
a
digital
“tto
Part
15
of
the
FCC
Rules.
:
ered
ta
py
ide
;
reasonab
@
rotec
tor.
against
Par
tul
follow’
ng
are
resroductions
of
sabe's
on,
o°
interfererce
“ares
dental
instalaton.
Tas
13
de
tne
oroduct
relating
to
laser
product
ecupn
armful
:iteference
TO
radio
communications,
f°:
is
not
installed
;
vw
th
the
instructions.
$°o
guarartee
that
Il
not
occur
..r
a
part-cular
stelaton.
H
this
equipire
nt
does
cause
haruf..
imterfercnce
to
‘aaio
or
telev-sion
&
ich
car
he
determined
by
Use
of
contra
s
cr
adjustme:
perforr
narice
of
procedures
othe:
tha
speciies
kerein
may
resi
t
in
hazardous
rad
ation
exposure
In
compliance
wth
|
edera
STO
DAS
ES
an)
|
L
off
anc
on,
the
user
is
1
1,
CPACTES
|
SIBCRAPTLIE
LS
!
‘rect
the
iriertererce
Locat
0:
Bottom
Panel
2
‘rove
of
Ibe
following
measures:
ee
é
tho
rece.virg
anterna.
.
separation
benveen
tho
FCC
WARNING
equipmer
“t
ana
receiver
*
Cop
ect
tae
equium-ent
irte
an
outlet
ona
‘requercy
energy
Be
¢
;
clreutaferert
from:
that
te
which
che
to
ths
equipment
nay
cause
vari
ui
receive!
is
cor“ected.
irterfererce
unless
the
mouiticatans
are
“i
oor
an
experlerced
radio/TV
abprovec
ir
the
irstuct
en
man
nelo
The
user
could
lose
the
authorty
to
©
*his
ecquivm-eat
if
avi
unautoor
zed
chang
nod
f
cation
is
made
“his
cquiom
3.diata
agoarétus
meets
all
Causing
Fquipment
Regulations
Safety
precautions
EOE
TAN,
is
INFORMA
HON:
a
[AWARNING
To
prevent
injury
or
fire,
take
the
following
precautions:
Insert
the
unit
all
the
way
ir
until
it's
fury
jockec
in
p.ace.
Otherwise
t
may
“al.
out
oF
place
wer
‘o.tea
\ihen
exlendirg
ibe
gniior,
battery,
or
ground
wres,
Make
Sure
10
USe
al
Ltorrotive-
grade
wires
or
other
wires
with
a
G.?omrme
iAWIG18)
or
more
to
prevent
wire
deteriorat
on
ard
damage
to
the
«
prevent
4
srort
c.Cuit,
Never
Bul
O°
leave
a
a
meralac
‘onjects
isuch
&8
Cons
er
mielal
oc.s}
inside
tne
unt.
‘the
unit
starts
to
emi
srioke
oO”
Sirarge
smcils,
ture
oif
the
power
iemeciale
¥
and
sorsut
your
Kenwood
dealer
Make
suré
noi
te
get
your
*inge’s
caught
petweer
the
faceplate
anc
tie
unt.
Re
care*ul
rot
te
drop
ire
unit
er
subiect
1
te
strong
shock
The
unit
may
break
or
crack
pec
coiains
glass
parts
Do
not
touch
the
quid
crystai
‘luia
if
tne
LCD
1s
cariageg
or
broker
due
to
shack.
Tre
iqud
crystal
fiuid
may
he
dangerous
to
your
nealth
or
even
fatai
[che
‘iqud
crysta’
fluid
from
che
LCD
contacts
your
boay
or
cloth’ng,
wash
‘t
off
wilh
soap
immed
ately
&
coahad.
|
ACAUTION|
To
prevent
damage
to
the
machine,
take
the
following
precautions:
Viake
sure
to
ground
the
urit
to
4
negative
12¥
OC
power
suvoly.
Do
rol
open
ihe
top
ov
bation
covers
of
Ine
unt
Do
ee
1ST
ell
the
unit'r
a
spot
ex
excegsiv'
30
valu
r
aces
with
tor
oility
of
water
splas
pate
to
exc
3ece
of
3rec
Slon
eGL'pt
rqa
‘use,
crly
use
i
og.
Useng
a
in.
@
your
WNT
te
Do
ret
place
eiy
¢
faceslaie
arc
tie
urit
KDC-
200
/KDC-C300
/
KDC-C400
Use
the
exteisien
cable
and
the
control
90x
allac’
nee
to
the
CD
changer,
ana
toe
optional
CA-DS100
corvenier
cord
KDC-C301
/
KDC-C600
/
KDC-C800
/
KDC-CB01
/
KDC-C401
Use
the
ex
charger,
caivertel
©
s
cn
cable
gtrached
vo
the
CD
the
opt
ona.
CA
DS*
0G
rene
KDC-C100
/
KDC-C302
/
C205
/
C705
/
non-Kenwood
CD
changers
Carre:
be
used
wih
tars
medel
ACAUTION
You
can
damage
both
your
unit
and
the
CD
changer
if
you
connect
them
incorrectly.
English
Safety
precautions
NOTE
I}
you
experence
proolems
during
nstallation,
consult
your
Kenwood
ceae'
IF
the
urit
‘ails
to
operate
broperly,
press
tie
RESET
sutton,
When
the
faceplate
is
rot
ysibe,
oress
“the
touch-sensitive
spor’
at
the
“ear
of
tne
faceplate
las
illustrated
67
p.71!
ta
make
the
faceplate
controi
appear.
The
an
vatuns
to
‘actory
settgs
when
tne
RESE!
button
is
pressed.
If
the
unit
sti
fa's
co
operate
prooerly
after
the
RFSFT
suttor
has
beer
pressed,
contact
your
oca
KENWOOD
dealer
for
assistance.
Press
the
reset
burton
if
the
cise
aLto
changer
-s
“irst
contro!
ed
and
operates
incorrectly.
The
onainal
operat
ng
cordiion
wi
retaun
Reset
button
We
tecommend
the
use
o*
the
Security
Code
funct
04
isee
p.34)
to
prevent
thet:
Cleaning
the
Unit
f
the
frort
panel
gets
drey,
turn
off
tne
power
ard
wipe
the
panel
with
a
dry
silicor
cloth
or
soft
clotn.
ACAUTION
Do
not
wipe
the
panel
witn
a
hard
cloth
ov
a
cloth
dampened
hy
volatile
solvents
such
as
saint
thinres
and
acohol.
Trey
can
seraten
the
surface
of
the
panel
ana/or
cause
the
inaicato’
letters
te
pee
olf.
Cleaning
the
CD
Stot
As
dus?
tends
to
accumulate
in
tae
CD
s
07,
jean
it
every
once
in
a
while.
Your
CDs
car
get
scratched
if
you
put
therr
in
a
dusty
CD
slot.
Lens
Fogging
Right
after
you
turn
on
the
car
heater
-n
cold
weather",
dew
or
condensation
may
form
or
the
lens
nthe
CD
player
of
the
unit.
Caled
lens
fogg-ng,
CDs
may
be
impossible
to
piay.
9
such
@
Situation,
remove
the
disc
and
wat
for
the
cordensation
to
evaporate.
If
the
unt
sti’
does
not
operate
normaiiy
after
a
while,
consult
your
Kenwood
dealer
Handling
Compact
discs
Playing
a
CD
that
is
dirty,
scratched
or
warped
can
cause
the
sound
to
skip
and
the
unit
to
operate
incorrectly,
resulting
in
worsened
sound
quality.
Take
the
following
precautions
to
prevent
your
CDs
from
getting
scratched
or
damaged.
Handling
CDs
*
Oo
not
touch
tne
recorded
side
of
the
cD
ithe
sde
opposite
the
iabel)
when
holding
It.
«
Do
not
stick
tape
on
either
side
of
the
Cb:
Tape
©
Storing
CDs
+
Do
rat
store
CDs
in
aveas
exposed
to
direct
sunught
{Sun
aS
2
Car
Seat
O°
the
dashboard)
or
ore”
hot
olaces.
+
Remove
CDs
from
the
unt
wnen
not
"scening
to
them
for
a
while,
and
put
them
back
‘n
tne
cases.
De
rot
pile
ue
CDs
that
are
removed
from
their
cases
or
orop
them
against
something
Cleaning
CDs
Ifa
CD
has
gotten
dirty,
wipe
it
off
gently
using
a
cornmercially
ava
lable
cleaning
clotn
or
a
soft
cotton
clotn,
starting
frorr
the
center
ofthe
discard
=movrg
outward
Do
not
clean
COs
with
conventora:
record
cleaners,
anti-static
formulas,
or
chemicals
such
as
paint
thinnes
or
berzene.
Checking
New
CDs
for
Burrs
When
playing
a
new
CD
for
the
first
tT
e,
check
that
there
are
not
any
DUIS
sluck
to
the
penmeter
of
the
asc
our
the
central
nole.
CDs
witn
burrs
siuck
a7
Iner
“Tay
rot
load
properly
or
may
sk'p
yerile
olaying
Remove
burrs
using
4
ballpoirt
per
ora
similar
ters"!
Ix
*-
Burrs
y
A
»
4
‘
w
Burrs
a
.
>
4
~
*
Do
Not
Load
CD
Accessories
Do
not
use
cainvercia'y
available
cD
accessories
that
can
de
loaded
inte
tne
cD
pee
ee
slot,
such
as
stabilizers,
protective
sheels,
or
CD
clearing
discs,
since
they
car
cause
the
ur't
to
malfunction
Removing
the
CD
Only
remove
the
CD
fram
the
mach.ne
-1
4
horizonta’
direction,
Poiding
it
iat.
You
may
damage
the
surface
of
the
CD
if
you
try
pulling
it
down
as
't
ejects
CAUTION
|
|
ACAUTION
|
Do
Not
Load
3-in.
CDs
in
the
CD
slot
if
you
try
to
load
&
3
in.
CD
with
its
adapter
into
the
urit,
the
adaptey
might
separace
fron:
the
CD
and
damage
the
unt
Do
Not
Use
Special
Shape
CDs
+
Bo
sure
to
use
round
snane
CDs
only
for
this
unit
ard
ag
pai
use
ary
special
snape
CDs
Use
of
special
shape
CDs
may
cause
the
urt
to
malfurcon
+
Be
sure
10
use
CDs
with
disc
mark
2%
only
for
this
unit
English
Buttons
and
Display
Ww
mM
AUTO/
DISP/
<4
FM
SRC
<<
IE
AME
=NAME.S
SRC
FM
+
jo
lo.%
Zane
|
wa
|
Pane
|
i
Fe
t
ATT/LOUD
MENU
AM
me
for
KDC-8003/7009
for
KDC-8009/70093
Ault
wy
djegaten
Band
desolay
Pressel
tahee
fumes
AUTO
incheator
rr
RBDS
features
;
Disc
control
features
DISP/
<4
PTY
DISP
FM
ltd
IS+/EJECT
NAME.S
SRC
II
”
tN
Se
dal
bay
D.SCNI
MENU
AM/
>»
FM/
SCAN
REP
M.RDM
DISC-
DISC+
for
KDC-8009__
7
;
for
KDC-8009/7009
Track
tines
Band
eel
2
:
ry
SE
|
‘ ?
:
af
-
.
is
:
i
TP
incheator
if
indicater
TEXT
ingeator
IN
&
inaicatar
Dise
sumber
f
}
{7
CCE
DAMS
indicator
TA
indicatar
for
KDC-PS809
TEXT
wndicatar
Band
display
wndheator
i.
Cri
r
FRG-é
mL
rH
|
.
TEXT
tin,
ak,
%
em
Sins:
ae)
rT
Character
display
ATE
i:
ndhicatar
np
Th
aneicator
DIN
f
naicatar
P
mdicatur
English
Buttons
and
Displa
|<<
FM
DISP
Ox:
Si
Wet
omi
[
sac,
for
KDC-8009/7009
P|
AUDIO
CONTROL
indicates
Clock
nispiay
Tona
|
{
7.
7
5
}
rt
ft
th
oe
Be
peta
ean
2
1g
PLL
NS
2s
?
_eN
Graphic
disnia
O
inchcater
for
KDC-PS809
cH
ep
s
a
&
4;
“=
Ee
lee
-=
—_
in
a
a
~
_
_.
'
Ss
D
tedica
—10—
Remote
Optional
for
the
KDC-7009
TUNE
+
TRACK
+
TUNER
#0~9
=
A~Z
KENWOOD.
|
cD
CD-MD
CH
DIRECT
OK
TUNE
-
TRACK
—
Basic
operations
(See
page
8)
2iea
=
A
¢
S.
You
can
help
prevent
theft
of
the
unit
by
reversing
the
faceplate
so
that
the
control
panel
cannot
be
seen,
hiding
the
unit,
and
shutting
off
the
audio.
Power
ON/OFF:
When
you
turn
your
venicie's
ignition
on,
the
un
t's
power
will
also
tun
on,
with
the
faceplate
reversing
to
srow
«he
control
parel.
When
you
turn
your
venic
e's
ignition
off,
zhe
faceo-ate
w
!l
reverse
lo
hide
the
contro
parel,
and
the
urit’s
power
whl
tun
hen
wie
moving
facepiate
is
hit
by
ar
ob-ect,
it
well
stop
and
return
to
its
original
state.
Remove
tre
onject
and
repeat
the
acton.
+
The
status
of
the
Security
Code
Functior
iP.34]
is
displayed
whenever
the
power
is
switcved
on.
‘CODE
ON"
(Security
Coae
has
heen
registerea}
‘CODE
OFF’
iSecur
ty
Code
1as
rot
beer
regis:eredi
ACAUTION
Using
the
Unit
in
Vehicles
with
Covered
Consoles
*
Maxe
sure
“he
console
'$
urcove'ed
wile
t1¢e
facep
ate
is
reversed,
-
Do
rot
exert
any
excess
*orce
on
the
movab
@
paris
of
74¢
Unt,
ircluaing
the
‘aceplate,
as
it
car
cause
failure
in
the
un
2's
mechanism
Hiding
the
unit
with
the
ignition
turned
on
(forced
closing):
Keep
pressing
the
SRC
outton
for
at
east
one
secone
Tre
faceplate
will
reverse,
hiding
the
unit.
The
unit
will
turn
off
NOTE
+
Wher
the
closing
facep
ate
is
hit
oy
an
object,
the
unit
wil
turr
off
w
tiout
the
faceplate
closing
al
the
way.
Renove
the
object
ard
press
the
SRC
buttor
to
turn
tne
unit
pack
on,
then
turn
it
off
again
to
have
t
close
prope'ly.
¢
Wh
ie
tre
cortvol
pane
is
moving,
pressirg
tne
butters
wil
no:
have
ary
effect.
Do
not
:ry
tc
press
the
buttons
on
tne
cortro
bane
as
the
*aceslate
s
mov
ng,
as
excess
ve
force
may
damage
the
urit.
«
During
the
forced
¢
os.ng
of
the
unet
i.e,
having
the
unr’
left
closed
wale
gnition
s
tumed
onl,
the
faceplate
will
net
o9er
No
Mattes
now
otten
the
ghition
:s
turned
on
cr
o*f,
unless
‘the
souch-sens‘t
ve
spor"
a’
the
rear
of
the
‘aceplate
s
press
orcer
to
open
t.
You
can
prevert
tarnpering
of
the
unt
when
ettirg
someone
clse
dr
ve
your
ca"
by
keepirg
it
c
osed
ths
way.
To
cancel
the
stealth
retraction
mechanism
’s
forced
closing
of
unit
and
open
control
panel:
Press
“the
lous
-serisitive
spot”
at
the
rear
of
the
faceplate
fas
iliustrated
Touch-sensitive
spot
NOTE
Touch-sensitive
spot
[he
invis
sle
sw
ich
ss
mdirg
beb-rd
tne
touch
sersitive
spot.
Press
che
Pollow
soor
iinvisitys
seiten!
te
oper
English
Switching
Modes
Attenuator
Basic
operations
(See
page
8)
Switching
Modes:
Each
time
you
oress
tne
SRC
fsourcel
putton,
the
moae
switches
és
follows
¥
Tune"
mode
vv
|
CD
mode
vv
Dise
conrtrol
made
1
[NOTE
|
>
Tre
made
switches
to
tne
rex:
mode
fran
ary
‘ode
whicn
carnot
be
used
*
The
disc
contro
made
will
¢
ffer
ceperang
on
iné€
unit
that
is
connectea
This
function
allows
you
to
turn
down
the
volume
quickly.
Turning
Attenuator
On/Off:
Press
the
ATT
button
to
sw
tch
che
atteruazor
on
and
off,
|
When
the
attenuator
is
on,
the
ATT
inaicator
ol.nks
When
ibe
attenuator
is
off,
the
volune
returns
to
tne
ovigiral
level,
-———,
[Nore
Turning
the
volume
all
‘ne
way
down
deactivates
tne
attenuator
furction
ee
dh
ik
increasing
Volume:
Press
“he
A
buiton
to
turn
Lo
tne
volume.
Decreasing
Volume:
Press
tne
\”
button
to
ture
down
the
volume,
Loudness
This
function
amplifies
low
and
high
tones
when
the
volume
is
turned
down.
The
LOUD
indicator
lights
up
when
the
loudness
function
is
on.
Turning
Loudness
On/Off:
Press
the
LOUD
button
for
st
least
ore
secord
to
switch
the
loudness
on
and
off
‘Ment.System
To
accommodate
a
greater
number
of
functions,
a
menu
system
has
been
employed
for
making
settings.
Press
the
MENU
button
to
enter
the
menu
mode
and
then
display
the
function
to
make
the
setting.
Details
on
each
setting
are
|
explained
separately
in
the
corresponding
function
page.
'
T
Press
the
MENU
butter
for
at
least
one
secona,
i
‘MENU
is
displayed
wher
the
menu
mode
is
entered
;
The
function
that
you
can
adjust
1s
indicatea
w
tn
the
current
settirgs
displayed
=)
2
Selecting
function
to
set
Press
the
mI
button
to
searcn
through
the
funcuors
see
the
ore
you
want
to
adjust
in
the
dispiay
Press
the
I
button
te
search
through
the
*unctors
backward.
Example:
If
you
wart
to
sw
tch
ine
clocs
display
functor
‘rom
on
to
off,
first
search
through
tne
furctions
urtil
you
see
“CLOCK
ON"
in
the
a:splay
MEHU
CLOCK
‘or
KDC-PS809
iH
FLOCK
ON
3
Changing
setting
for
currently
displayed
function
Press
either
the
AM
or
FM
button
The
sett
ng
wii!
change
tor
e
fuietion
Lxample.
Tie
¢
and
“CLOCK
OFF’
:s
discleyea.
CLOCK
ON
—>
_
“CLOCK
OFF
4
Ending
the
menu
mode
Press
the
MENU
button
"NOTE
*
Make
sure
te
erd
the
WL,
PIC
fishes
li
you
fail
te
erd
ine
ren
made.
operate
orapery,
incl.a
ng
the
Tra
‘he
Aarm
function,
*
The
'##'
a
splay
ing
cates
the
setting
va
ue.
ra.
fauecuos
miay
rat
ic
Informanor
function
ard
APU
YOu
for
KDC-86097009
cx
display
function
w
Il
switch
from
on
to
off,
Clock
Display
Swite’
irg
i
Time
Adjustmert
(Manual
Automate
Time
Adjustment
Secur
ty
mode
Selectabie
lium
acer
Cortast
As
ustment
Switching
Grape
Disp
ay
Touca
Serso’
Tone
arg
Precut
Traff
c
Irfarmazor
Furetion
“
ie
EM
“eeeplign
ot
Tuner
made»
Text
Sere
Fr
KDC
-PS&O9
8609
on
yi.
CD
ebanger
mede>
«When
Automatic
Time
Adjustment
is
off>
Varieties
of
settings
for
each
function
(display)
L
CLOCK
or
o>
CLOCK
OFF
CLOCK
ADJST
{T
me
Aqjusiment
mode
entered}
L
SYNC
OFF
&
SYNC
ON
ni:
KDC-PS809:8009
Only
|
|
SECURITY
ib
COLOR
GREEN
«
+
COLO
CONTRAST
&#
*|
KDC-PS$809
On
GRAPHIC
ON
«>
GRAPH'C
OFF
Zan
KDC-8009-7009
Only
BEEP
ON
©
BEEP
OFF
=
RON”
«>
SWP3E
N-FAD
KDC-PS809
Only
7
|
ON
*
KDC-PS809'8009
Only
i
»
CRSC
OFF
<=
SCROLL
MANU
English
Tuner
features
(See
page
8)
Ny
You
can
choose
from
three
tuning
modes:
auto
seek,
preset
station
seek,
and
manual.
The
"“AUTO1"
indicator
lights
up
when
auto
seek
tuning
is
selected,
and
the
"AUTO2"
indicator
tights
when
preset
station
seek
tuning
is
selected.
Selecting
Tuning
Mode:
rress
the
AUTO
button
Each
time
you
ovess
tne
AJTO
butter,
“he
rode
switches
4s
fo'lows
roy
AUIO*
iAuto
Seek
Turenag!
¥
AUTO
2
(Preset
Station
Seek
Iunagi
v
A
MANGA!
(Manual
Tuning)
Tuning
1
Press
tne
SRC
isource!
Button
renestedly
lo
select
the
tune:
mace.
TUNCR'
is
d
sp'ayed
wher
the
tune:
vede
has
beer
selected.
2
Press
either
the
FM
or
AM
butter
to
se'ect
tne
bard
Fach
tne
you
press
the
FM
button,
the
pana
switches
between
the
FM1,
FM?
and
FM3
ivy
e
for
groves
o
preset
stations)
Press
the
AM
butter
to
select
the
AM
band
1
Seek
Tuning
$5
the
mI
buttor
to
sees
righer
frequencies
Press
the
m@<@
button
to
seek
lower
frequencies
*
Preset
station
seek
tuning
Press
the
mm
button
to
mave
to
tne
next
preset
station
{.e.,
the
one
wilh
tne
rex?
highest
nurmberi,
ara
i1¢
Md
butter
ta
‘rove
to
the
last
preset
statior
f.e.,
the
one
with
the
next
lowest
nuloer}
*Vanual
Tuning
Ve
mri
button
tc
nerease
m6
frequency
by
ore
step
‘Pe
dad
button
to
decrease
tre
lrequeracy
by
ore
stop
|
NOTE
the
S™
indigater
|
ghts
uo
wien
stereo
oroeacasts
are
seirg
“BCOVEC
~LatIONn
Frese
BImMc
Store
the
frequency
of
a
station.
You
can
then
recall
that
station
with
a
single
touch
of
a
button.
1
Select
the
bana/station
that
you
want
to
have
stored.
2
Press
the
button
(#1-6}
that
you
want
to
use
for
tke
station,
for
al
least
two
secands.
The
sutton
qumser
blirks
ance
in
the
disp
ay
te
ndicate
trat
the
data
has
beer
scored
Recalling
a
Preset
Station:
Press
‘he
prese:
station
oution
(41-6)
for
the
aesi-ea
station
The
number
of
the
-ecalled
stat
on
‘s
displeyed
You
can
store
s'x
stations
ir
eacn
al
the
£1,
FM2, FM3,
ane
|
AM
baras,
t
wligee
rat)
You
can
automatically
store
all
the
receivable
frequencies
in
the
band
currently
being
listened
to,
and
then
recall
them
with
the
touch
of
a
button
later.
This
function
is
especially
useful
when
you
are
travelling
and
do
not
know
what
stations
are
available.
Up
to
six
frequencies
can
be
stored
this
way.
1
Select
the
nand
for
whicw
you
wart
to
store
stations.
2
Press
the
AME
buttor
fo:
at
least
two
seconds
to
start
auto
remory
entry
i
Tre
numbers
of
the
preset
station
buttons
are
shawn
in
order.
Vnen
al
the
stetors
in
a
certain
bang
are
storca
in
the
preset
|
memory,
the
auto
memory
entry
stops.
Tae
turer
then
plays
|
the
last
station
received.
Recalling
a
Preset
Station:
i
Press
the
preset
stat
or
buttor
(41-6)
for
the
desired
stator
|
Ihe
number
of
the
recal
ed
station
is
d
splayed
—14—
pan
Reception
Syste
it
(CRSC
9
Diss
<
Temporarily
have
reception
switched
from
stereo
to
mono
to
You
can
change
the
display
used
when
listening
to
the
radio.
:
reduce
multi-path
noise
when
listening
to
the
FM
station.
‘
:
The
factory
default
for
this
function
is
ON.
Changing
the
Display:
Laci
ime
you
press
the
DISP
buttor,
:ne
a
splay
charges
as
Turning
CRSC
On/Off:
Obows:
1
Press
the
MENU
button
‘or
at
least
one
second
Be
"MENU'
Is
displayed
and
the
menu
node
5
turied
or
Stat
01
‘requercy
2
Keep
pressing
the
®m
oution
uri:
the
Clean
Recept
on
i
x
}
:
'
ata
ee
a
i
Program:
Serv
ce
rame
(during
323
Z
7
FACEDTION
+
}
System
C
reuit
funct
on
aopears
ir
the
disoiay
i
Br
alae
Carts
iduring
48D5
stat
on
reception
«
KDC
;
Press
the
It
button
co
seared
nie
other
direction
|
arti
fae
ee
Abedin
e8at
Tre
funct
on
setting
is
indicated
ny
'CRSC
ON'
or
‘CRSC
OFF:
eID
st
EOP
eS
eae
BiCSCH
n
the
a
splay,
-ndicat
ng
that
the
CRSC
s
or
or
o*f,
Radio
text
jorly
durng
RBDS
station
reception
:
KDC.
“espectively.
PS809/8009
onlyi
H
¥
3
Switching
settings
ease
:
:
Cock
*XDC-8009/7009
Ori:
i
Press
either
the
AM
or
FM
butter
:
Cock
#<DC-8009/7009
Ory:
The
disp
ay
ane
setting
will
change
4
Press
ne
MENU
button
to
ena
the
meat
mode.
oy
|
‘rar
rece
virg
ar
RBDS
stat
on
to
whch
a
naire
“as
been
NOTE
Station
Nare
Preset.
sw
ichiig
to
tre
program
Strorg
electrical
fields
{suck
4s
from
power
lines!
may
cause
SNPS
spray
will
result
a
me
program
Jrstabie
sound
cual'ty
wher
CRSC
Is
tuvred
or.
In
suck
s
situation,
tura
t
off
th
pricrity
splay
function
(P.31i
3
Gr.
the
A
Alpes
Tuner
features
(See
page
8)
Station
Name
Preset
(SNPS)
|
You
can
assign
names
to
radio
stations
with
the
Station
Preset
Memory.
Up
to
18
FM
stations
and
16
AM
stations
can
be
assigned
names.
1
Adjust
the
frequency
to
the
stat
or
whose
same
you
wart
to
ente’
2
Press
the
NAME.S
buttor
for
at
leas:
-wo
seconds,
“NAME
SET”
is
d
splayed
once
tne
station
nave
oreset
‘nace
‘'s
entered
The
cursor
wil
blirk
nite
pos
tor
where
lotte:s
are
entered
3
Press
either
the
Me
of
MRI
OL
ton
to
Tove
the
curser
to
we
desired
posit
on.
The
Ké<@d
button
moves
the
cursor
to
tng
lett,
ane
the
pep
button
to
tre
right
You
car
aso
move
tre
cursor
le*t
or
rigut
by
pressirg
tie
Md
or
Pm!
buttons,
respectively,
or
the
‘ercle
4
bach
time
the
mI
buttor
is
pressed,
the
craraciers
to
be
entered
change
as
listeo
below
Press
tne
FM
or
AM
button
to
display
the
desired
character
Characters
that
can
be
Wgeaved
are
as
folows
—
A.ohabet
(upper
casel:
A
~
Z
i
Alphabet
tower
casel
a
~
2
1KDC-PS809
Only!
No
mearars
and
eee
“-9O@"
%Rr
P-L
fhe
>
7]
seca
Characters:
:
5668
|_|
"MOTE
Direct
Alphabet
Input
Direct
"put
can
made
of
ietters
fa
ohabeticall
wt
entry
buttons
or
the
remote
Fxample:
Use
the
fo
lowing
tabie
to
erter
the
rame
the
lette-
‘DANCY’
5
De
#3
1
i
oO
Single
|
"N*
#6
?
|
7G”
#2
a
3
ae
ee
2
Contirue
steps
3
and
4
uncti
ai
the
characters
are
chosen
fo:
the
name.
[NOTE
You
can
erter
uo
to
8
characters
‘or
each
rame
|
6
*Assian
1g
Names
{
Py
the
NAMES
button
on
the
unt
or
the
OK
button
or
the
remote
Tig
rame
of
iné
station
is
stored
in
memory,
and
the
Stazor
Name
Preset
noae
erds
¢
Ass
gnirg
Name
and
Storing
Frequency
with
Statian
P-esei
Memory
down
the
desired
preset
button
for
at
least
two
seconas
The
name
of
the
stat
on
is
stored
ane
the
frequency
‘or
the
currert
station
is
stored
in
tne
selected
preset
button.
The
Station
Name
Preset
mode
ends.
Also,
if
you
‘neke
ro
inp:
fer
10
seconds,
tne
rame
vill
be
stored
up
to
the
po:nt
zhat
you
have
enterec,
and
the
mode
ends
|
[Note
+
You
can
ass-gr
names
to
uo
to
18
FM
stations
and
16
AM
—
16—
stations
All
the
statior
rames
wil
be
erased
if
you
press
the
RESET
battor.
*
+f
you
want
to
charge
the
name
of
a
station,
first
display
the
name
of
the
station
ifol
owirg
steps
1
and
?
above),
ther
change
the
‘etter(s}
that
you
want
oy
following
steps
3
ard
4
Function
of
remote
with
number/etter
entry
buttons
(See
page
10)
Ld
2
$
bes!
TEnine
When
you
know
the
frequency
of
the
station
that
you
want
to
listen
to,
you
can
input
it
directly
for
quick
access.
|
4
Select
the
vend
by
oressing
the
FM
or
AM
outton.
2
Press
tne
DIRECT
outzon,
The
frequency
part
of
tie
¢
splay
b
inks
for
10
seconds,
f
you
Make
no
nput
nt
10-
secone
period,
direct
access
tuning
Is
automat
cal
y
canecled
7
ie
3
Enter
the
‘requency
of
the
aes
ea
station
wnile
the
asp
ay
is
blink.1g.
f
you
wan:
to
ister
to.
an
FM
stator
at
92.1
MHz,
for
example,
oress
0,
9,
2,
and
4
f
you
want
<0
listen
to
a1
AM
station
al
810
«Hy,
for
exam
ote,
dress
0,
8,
i,
ard
O.
“NOTE
|
Ver
a
frequency
which
carnot
be
‘cece
ved
is
irout,
th
s
frequency
is
rot
verified
ard
operation
reluers
to
the
org
ne:
:
frequency
input
mode
i
Canceling
Direct
Access
Tuning:
?ress
the
DIRECT
buttor
again
Function
of
remote
with
DNPP
button
(See
page
70)
ion
Mina
im
ee
:
cits
sae
ee
ne
er
eee
ey
is
You
can
Search
for
the
station
for
any
station
if
its
name
has
been
preset
using
Station
Name
Preset.
1
Press
the
DN®P
butter
on:
“SNP
PLAY”
will
oe
display
play
mode
is
entered
Tie
rames
of
the
stauors
sicred
nine
band
cuvrert.y
steed
to
are
displayea
ir
the
fo
lowing
side
tor
five
secor
ds
each:
FMI.
EM?
FM3,
ard
AM
Each
time
you.
press
the
TUNE-+
button,
tne
staon
asp
ay
“witeres
ir
the
*orv
rrecier
s
tne
TUNL—
button,
tic
so
direct
an.
sciave
not
been
stored
w
Il
se
Hon
the
slator
amie
preset
time
You
pr
ches
ir
the
's
ONS
<
as
freq.
Tre
orogram
serv
ce
name
w
|
apvear
foc
RBDS
statians
LNoTE
|
Changing
the
Seee
Band
>ressing
tre
FM
bulter
sv
itch
es
between
tre
'
M1,
FM?,
FMS
ara
AM
ee
oy
WS.
TT
at
G
AM
butte
reverss
a
res
ior
lor
o
spay
Sp
ayed
vitenes
seiweer
the
disslays
ir
tie
SV
2
Once
the
name
is
displayed
for
the
station
you
want
to
listen
to
Press
the
OX
butte
otion
star:
7
oay
mode
wayed
stator,
and
the
slalion
ware
Canceling
mode
during
input:
Press
the
ONPP
9
rath
rela!
“ne
stallion
nee
creset
play
Noce
3
canceicd.,
a
English
RBDS
features
jsSee
page
9}
Funciton
of
the
KDC-PS809/8009
RBDS
is
a
service
used
by
radio
stations
to
transmit
data
outside
normal
radio
broadcast
signals.
When
an
RBDS
station
is
received,
you
can
immediately
find
out
what
kind
of
data
is
being
transmitted
by
looking
at
the
program
service
name,
which
appears
in
the
display
after
the
frequency.
The
AEMBindicator
turns
on
when
an
RBDS
station
is
being
received.
REDS
f
tio
Broedra:
Be
tatoa
hy
Ie
When
an
emergency
transmission
(announcing
disasters,
etc.)
is
made,
the
current
function
will
be
interrupted
to
allow
the
warning
to
be
received
under
the
following
conditions:
during
tuner
reception,
or
when
the
Traffic
Information
function
is
turned
on.
taufffe
information
Fuastign
You
can
listen
to
traffic
information.
If
you
are
listening
to
tapes
or
discs,
they
will
continue
playing
until
a
traffic
bulletin
is
broadcast.
Pits
az
Turning
TI
function
On/Off:
1
5
MENJ
pution
fer
et
least
cne
secora
splayed
and
the
era
rece
‘s
tured
or
°2
Keep
o'essing
the
rl
buttor
arc
the
Traffic
lnfosmiation
‘arctor
appears
in
the
disp.ay,
Press
the
|
button
to
<
Shon
the
ofne:
direct
on
The
function
setting
1s
ira
cated
py
‘TL
ON'
o:
'T.L
OFF
cn
tre
a
spay,
od-cating
that
tie
[1
tunct
ovis
ono:
ott,
resnecivaiy
3
Switching
settings
Press
gither
the
AM
orf
M5
display
and
setung
wil:
ae
the
fun
When
a traff
ang
ior
is
on,
the
Thir
or
»
be
curior.
Wher
rore
is
heirg
re
blink
or
aid
off
fic
bulletin
begins
to
be
ried
ar
sived,
tre
TP
elved,
tre
1
WV
er
a
wil
tier
on
yoaacast,
the
TA
wid
cazor
I*
you
are
listening
to
a
tane
or
d-se
when
a
craffic
pulletin
begins,
they
will
automatically
be
turned
off.
Wren
the
bulletin
erds
of
pco”
receotion
is
experienced,
the
tape
or
disc
will
begin
playirg
agair
4
Press
the
MENU
button
to
end
the
menu
node
NOTE
Switching
to
a
Different
Traffic
information
Station:
Use
the
<d
/
m1
buttors
to
mace
ar
auto
seex
of
the
TI
stations
Ir
a
certa'n
band
|
NOTE
f
"
you
are
listening
to
a
tape
or
dise,
you
carnot
enange
to
another
Tl
station.
i
turr
on
tne
Tl
function,
the
motorized
antenra
wil
rato
netical
y
ere
536
7
¢
Conduct
auto
seek
tuning
only
on
those
stations
with
selected
kinds
of
programs.
To
enter
the
program
type
selection
mode:
1
Press
the
PTY
button
"PTY"
1s
disa
ayea
once
the
vrogram
type
selection
mode
is
ertlered
NOTE
You
cenrot
use
this
furction
while
the
traffic
nformatior
func-
tian
is
turnec
on
2
Select
the
type
of
program
to
be
received
*
Press
cher
the
FM
or
AM
buttons
rcpeatedly
to
select
the
type
sragrami
you
want
to
listen
te
eas
oS
A
The
selection
includes:
Speech
«>
1.News
«>
2.
Information
«>
3.Sports
«>
4.Talk
«>
5
Rock
«>
6.Classic
Rock
«>
7.Adult
Hits
«*
8.
Sat:
Rock
«>
9.Fop
40«+
10
Country
«*
11.
Oldies
+>
12.Soft
+>
13.Nosta-gia
+>
14.Jaze
«+
15.Classical
«+»
76.Rhytirm
&
Blues
<«*
17.Soft
R&B
<>
18.
Foreigr
Larguage
<*
19.Religious
Music
+>
20.Religious
Talx
« »
2°
Personal
ty
<>
22
Puolic
«>
Musics
>
Speech
«>
iSee
age
20;
(Speech.....1~4,
18,
20~22,
Musie.....5-17,
19}
*
You
can
select
the
type
of
progran
directly
by
pressing
a
preset
button.
The
buttons
are
factory-set
to
the
fo
lowing
type
of
orograms:
1.
Music
4.
Sports
LNoTE
|
Changing
the
Preset
Button
Settings
for
Program
Type
‘ter
selecting
the
type
of
program
to
be
stored
na
certain
sreset
button,
hold
down
that
pulton
for
at
east
two
seconds.
The
previousiy
stored
data
for
that
outtan
are
eased
and
the
ew
orogram
type
is
storec.
3
Seeking
the
Selected
Program
Type
Press
the
4
or
mm!
button
to
make
a
seek
of
frequercies
wtn
your
selected
type
o*
orogram
Tne
d
splay
blinks
ana
the
seek
starts
If
your
selected
type
of
program
s
four,
tre
rare
cr
the
frequency
of
the
statior
is
displayed
and
the
stat
ons
tunes
IrtC
“PTY”
blnks
nthe
a
splay
for
asout
30
secerds
I’
you
make
ro
key
nput
n
30
secords,
“he
PTY
seiecticr
riode
will
turn
off
automatically.
NOTE
i}
io
program
can
be
found,
'NO
PTY‘
is
displeyed
IF
you
wart
te
se
ect
arother
type
of
program,
repeat
steps
2
3
above
2
?.
Speech
3:
5.
Classical
6.
Nows
Jazz
and
Switching
to
Other
Stations
with
the
Same
Type
of
Program:
Wore
"PTY'
is
blirking
in
the
display,
der‘orm
aute
seek
‘using.
The
tunes
scans
for
ancther
station
with
the
same
type
of
nrogram
i
|
i
Press
the
PTY
buttor.
Confirming
Program
Type:
Press
the
D!S®
buttor
The
progre'r
type
of
the
stat
on
current
y
wunec
displayed
for
f
ve
seconds.
During
‘hat
time,
°C
display
NOTE
If
you
tune
to
lrecuec’es
for
wh
ch
no
pvogram
‘ype
has
teen
stored,
‘NO
EN?
RY’
well
pe
displayed.
To
register
a
non-ABDS
station
as
a
program
type:
radio
ta
the
rov-REDS
station
trat
you
wart
to
regiszer
as
the
program
type.
2
Pross
the
PTY
butlor
lo
enter
‘ke
mode
Canceling
Program
Type
Function
During
Its
Operation:
|
to
wi
he
wil
blink
in
the
TV
lune
your
program
type
select
on
3
Press
the
FM/AM
button
to
select
the
program
type
yo
to
registe.
Foiow
the
nstuctions
ir
?
to
enter
the
i
type
select-ou
niece.
:
4
Press
che
DISP
buctos
for
at
least
two
secords.
Tre
stat
on
wil
be
be
tie
target
af
fre
red
a8
a
srogram
type,
allow
i
seeks
just
as
RBDS
stators
are
You
ca
sar
Store
uo
to
48
sz
IF
you
try
10
Store
a
497"
program
tyne
the
frequency
anid
ie
apoear
aitermately
ir
/
that
case,
9
a
Won
TIAT
yOu
¥
aga
1
‘or
at
‘east
two
sé
thus
be
sicied
and
ther
press
the
BISP
vo.
ords.
Tre
newey
errered
staan
w
5
Press
ne
PTY
burton
ta
end
the
crogram
type
select
on
maga
English
RBDS
features
jsce
page
9}
Funciton
of
the
KDC-PS809/8009
Program
Type
Display
Program
type
number
KDC-PS809
KDC-8009
B
1
?
INrOnM
3
SPORTS
4
IAL
‘|
5
ROCK
|
6
“CUS
ROCK
:
7
Adult
Hits
ADLT
AT
|
|
g
“|
Sati
Ross
SOFT
ACK
i)
Tos
40
TOP
40
iC
Courty
COUNTRY
|
Ones
OLDIES
2
Sot
SOFT
‘|
3
Nostalcta
NOSTALGA
[
a
1
Jazz
JAZZ
1d
'
Classical
CLASSICI
iO
Rhythm
anc
Slies
R&B
7
Soff
R&B
SOk7
R&S
8
Fore;gr
Larguage
|
ANGUAGE
[
9
Religious
M
REL
MUSS&
20
Rel
gious
Tak
REL
IALK
71
Persorality
PERSNI
TY
22
Public
PUBLIC
~
Al
Music
~
MUSIC
All
Speech
SPELCH
¥,
Hes
weet
se
You
can
display
textual
information
being
transmitted
by
RBDS
stations.
Turning
on
Radio
Text
Display
Mode:
Pressing
the
DISP
button
sw'tches
tne
splay
as
fo'lows.
Select
the
Rado
Text
Display
mode
—
Statier
Pequency
-
|
Progren’
Sev
ce
rams
1a
©
text
tlae
k
(KOC-8009
Or'yi
the
psBDS
currerny
tuned
70
1S
transmitiag
no
text
lo
the
Rag
3
ay
mode
is
turred
on,
'NO
TEXT
wi!
ile
awa
ting
reception,
WAITING’
wil
play
Itcning
Clock
cisp.ay
funct
on
iP.31)
is
an,
the
[AWARNING
|
To
prevent
eceidents,
dr'vers
snould
not
look
at
the
display
while
ov
ibe
road
—
20
—

Other manuals for KDC-PS809

2

This manual suits for next models

3

Other Kenwood Car Receiver manuals

Kenwood KCA-R71FM User manual

Kenwood

Kenwood KCA-R71FM User manual

Kenwood KRC-235 User manual

Kenwood

Kenwood KRC-235 User manual

Kenwood DPX-8030MD User manual

Kenwood

Kenwood DPX-8030MD User manual

Kenwood KDC-MP925 User manual

Kenwood

Kenwood KDC-MP925 User manual

Kenwood KDC-BT460U User manual

Kenwood

Kenwood KDC-BT460U User manual

Kenwood KDC-BT610U User manual

Kenwood

Kenwood KDC-BT610U User manual

Kenwood KDC-V6017 User manual

Kenwood

Kenwood KDC-V6017 User manual

Kenwood KDC-X494 User manual

Kenwood

Kenwood KDC-X494 User manual

Kenwood CKDC-392V/VA User manual

Kenwood

Kenwood CKDC-392V/VA User manual

Kenwood KDC-5001 User manual

Kenwood

Kenwood KDC-5001 User manual

Kenwood KVC-1000 User manual

Kenwood

Kenwood KVC-1000 User manual

Kenwood KRC-803 User manual

Kenwood

Kenwood KRC-803 User manual

Kenwood KDC-BT952HD User manual

Kenwood

Kenwood KDC-BT952HD User manual

Kenwood DDX6027Y User manual

Kenwood

Kenwood DDX6027Y User manual

Kenwood DPX-MP2090U User manual

Kenwood

Kenwood DPX-MP2090U User manual

Kenwood DDX6015BT User manual

Kenwood

Kenwood DDX6015BT User manual

Kenwood KDC-M7024 User manual

Kenwood

Kenwood KDC-M7024 User manual

Kenwood H2EC Operating instructions

Kenwood

Kenwood H2EC Operating instructions

Kenwood KRC-705 User manual

Kenwood

Kenwood KRC-705 User manual

Kenwood KRC-S105 User manual

Kenwood

Kenwood KRC-S105 User manual

Kenwood KDC-3047M User manual

Kenwood

Kenwood KDC-3047M User manual

Kenwood DPX701 User manual

Kenwood

Kenwood DPX701 User manual

Kenwood Z910DVD User manual

Kenwood

Kenwood Z910DVD User manual

Kenwood KDC-MP538U User manual

Kenwood

Kenwood KDC-MP538U User manual

Popular Car Receiver manuals by other brands

Pioneer DEH-X6600DAB owner's manual

Pioneer

Pioneer DEH-X6600DAB owner's manual

LENCO CS-410 instruction manual

LENCO

LENCO CS-410 instruction manual

Alpine CDE-7853E owner's manual

Alpine

Alpine CDE-7853E owner's manual

Alpine CDE-141 Quick reference guide

Alpine

Alpine CDE-141 Quick reference guide

Sony MEX-BT4000P operating instructions

Sony

Sony MEX-BT4000P operating instructions

Planet Audio P385UA user manual

Planet Audio

Planet Audio P385UA user manual

JVC KD-LX3R instructions

JVC

JVC KD-LX3R instructions

Ssl SD990TS instructions

Ssl

Ssl SD990TS instructions

Daewoo AKD-0275 Series Service manual

Daewoo

Daewoo AKD-0275 Series Service manual

JVC GET0199-001A instructions

JVC

JVC GET0199-001A instructions

Blaupunkt London MP37 Operating and installation instructions

Blaupunkt

Blaupunkt London MP37 Operating and installation instructions

Kriesler Rambler Hornet R004-21-43 Service sheet

Kriesler

Kriesler Rambler Hornet R004-21-43 Service sheet

Jensen DV352 owner's manual

Jensen

Jensen DV352 owner's manual

Audiovox MP6610 owner's manual

Audiovox

Audiovox MP6610 owner's manual

JVC KD-G140J Service manual

JVC

JVC KD-G140J Service manual

Pioneer DEH P4100UB Operation manual

Pioneer

Pioneer DEH P4100UB Operation manual

Phonocar VM063 instruction manual

Phonocar

Phonocar VM063 instruction manual

JVC KD-T801BT quick start guide

JVC

JVC KD-T801BT quick start guide

manuals.online logo
manuals.online logoBrands
  • About & Mission
  • Contact us
  • Privacy Policy
  • Terms and Conditions

Copyright 2025 Manuals.Online. All Rights Reserved.