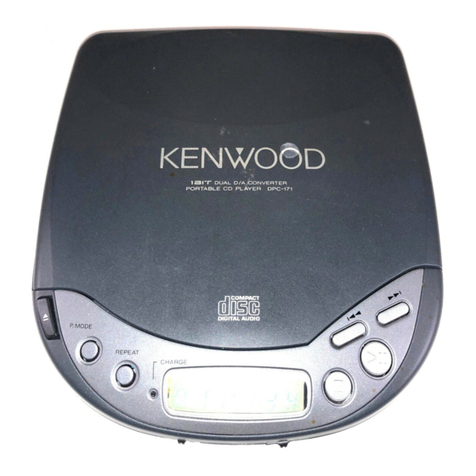
Kenwood DPC-92 User manual

GOO/ANS>)I
DPC-92
PORTABLE
COMPACT
DISC
PLAYER
INSTRUCTION
MANUAL
(PAGE
6
~
22)
LECTEUR
CD
PORTABLE
MODE
D’EMPLOI
(PAGE
23
~
38)
TRAGBARER
CD-SPIELER
BEDIENUNGSANLEITUNG
(SEITE
39
BIS
54)
PORTABLE
COMPACT
DISC
SPELER
GEBRUIKSAANWIJZING
(BLZ.
55
~
70)
LETTORE
PORTATILE
PER
COMPACT
DISC
MANUALE
DI
ISTRUZIONI
(PAGINE
71
~
86)
KENWOOD
CORPORATION
COMPACT
DIGITAL
AUDIO
Keep
this
manual
handy
for
future
reference.
For
your
records
Record
the
serial
number,
found
on
the
bottom
of
the
unit,
in
the
spaces
designated
on
the
warranty
card,
and
in
the
space
provided
below.
Refer
to
the
model
and
serial
numbers
whenever
you
call
upon
your
dealer
for
information
or
service
on
this
product.
Model
DPC-92
Serial
number
©PRINTED
IN
JAPAN
860-0534-08(P,E)(T)
91/12
111098

Precautions
for
use
To
maintain
the
high
performance
and
reliability
of
this
unit,
avoid
using
or
storing
it
in
the
follow-
ing
conditions.
Précautions
a
l’emploi
Pour
préserver
les
hautes
performances
et
la
fiabilité
de
cet
appareil,
éviter
de
I'utiliser
ou
de
|'en-
treposer
dans
les
endroits
suivants:
Zur
Beachtung
Um
stérungsfreien
Betrieb
und
beste
Ergebnisse
zu
gewahrieisten,
dieses
Gerat
nicht
an
folgen-
den
Orten
aufstellen:
Voorzorgsmaatregelen
Om
een
optimale
prestatie
en
betrouwbaarheid
van
het
apparaat
te
waarborgen,
dient
het
ap-
Paraat
niet
op
de
volgende
plaatsen
te
worden
gebruikt
of
opgeborgen:
Precauzioni
per
I’uso
Per
assicurare
sempre
il
miglior
funzionamento
di
questo
apparecchio,
evitare
di
usarlo
o
conser-
varlo
nei
seguenti
luoghi:
@
Dusty
places.
@
In
high
humidity
areas
such
as
the
bathroom.
©
Emplacements
poussiéreux.
©
Dans
une
piéce
trés
humide,
telle
qu‘une
salle
de
bain.
®@
An
staubigen
Platzen.
@
An
Orten
mit
hoher
Luftfeuchtigkeit
wie
im
Badezimmer.
©
Stoffige
plaatsen.
®
Op
vochtige
plaatsen
zoals
in
de
badkamer.
®
Luoghi
polverosi.
@
Luoghi
particolarmente
umidi,
come
la
sale
da
bagno.
®
Near
heat
sources
such
as
stoves,
etc.
@
Prés
de
sources
de
chaleur
comme
un
radiateur,
etc.
@
In
der
Nahe
von
Warmequellen
wie
Heizungen
usw.
©
In
de
buurt
van
een
varmtebron
zoals
een
kachel
e.d.
®
Vicino
a
sorgenti
di
calore,
ad
esempio
caloriferi,
ecc.
@
Places
exposed
to
direct
sunlight,
especially
in
a
closed
car.
®
Endroits
exposés
directement
au
soleil,
en
particulier
dans
une
voi-
ture
fermée.
@
Platze,
die
direkter
Sonnenbestrahlung
ausgesetzt
sind,
insbeson-
dere
in
einem
geschlossenen
Automobil.
®
Op
plaatsen
die
blootstaan
aan
direkt
zonlicht,
vooral
in
een
in
de
zon
geparkeerde
auto
waarvan
de
raampjes
gesloten
zijn.
@
Luoghi
esposti
a
luce
solare
diretta
e
Specialmente
automobili
chiuse
d’estate.
Extremely
cold
places.
Endroits
extrémement
froids.
Extrem
kalte
Platze.
Extreem
koude
plaatsen.
Luoghi
estremamente
freddi.
pPc-92
2

Rear
side
Arriére
vorne
Seite
Achter
zijkant
Lato
posteriore
-O
O-O
}
Lbett
g
[AZ
}
.
AC
adaptor
Fig
4
Adaptateur
secteur
Abb.
4
Netzadapter
Lichtnetadapter
Afb.
4
Adattatore
di
corrente
alternata
To
AC
outlet
Prise
secteur
zur
Netzsteckdose
Naar
stopkontakt
Ad
una
presa
di
corrente
alternata
Fig.
5
Abb.
5
ppc-92
3

To
AC
outlet
Prise
secteur
zur
Netzsteckdose
Naar
stopkontakt
Ad
una
presa
di
corrente
alternata
Fig.
7
Abb.
7
Afb.
7
Amplifier
.
Amplificateur
Fig.
8
Verstarker
Abb.
8
Versterker
Atb.
8
Amplificatore
Cassettedeck
Magnétophone
oO
Kassettendeck
Kassettedeck
Registratore
White
plug
to
Left
input
La
fiche
blanche
doit 6tre
branchée
sur
|’entrée
pour
la
voie
gauche
WeiRer
Stecker
fur
linker
Eingang
Witte
plug
op
"'L”
ingang
Spina bianca
all'ingresso
sinistro
LINE
OUT
Red
plug
to
Right
input
La
fiche
rouge
doit
étre
branchée
sur
l’entrée
pour
fa
voie
droite
roter
roter
Stecker
fir
rechten
Eingang
Rode
plug
op
‘'R’’
ingang
Spina
rossa
all‘ingresso
destro
When
using
an
adapter
plug
(3.5
mm
mono
«
»
pin
plug)
optionally
available
in
audio
stores,
remove
the
protection
cap
from
the
DIGITAL
OUT
jack.
Retirer
le
cache
qui
protége
la
prise
DIGITAL
OUT
avant
de
brancher
ta
fiche
d’adaptation
(diamétre
3,5
mm).
Bei
Verwendung
eines
Zwischensteck-
ers
(3,5
mm
Mono
«
»
Cinch),
der
als
Sonderzubehér
im
Audiofachhandel
Amplifier,
etc.,
with
coaxial
digital
input
Amplificateur
pourvu
d’une
prise
d’antrée
numé-
rique
et
coaxiale
Verstarker
usw.
mit
Koaxial
Digitaleingang
Versterker,
enz.
met
coax
digitale
ingangsaansluiting
Amplificatore,
ecc.,
con
ingresso
coassiale
digitale
g
-ao
Also
use
an
adapter
plug
DIGITAL
DIGITAL
OUT-Buchse
abziehen.
erhattlich
ist,
die
Schutzkappe
von
der
|
for
input
connection
to
the
OUT
portable
DAT.
Bij
gebruik
van
een
los
in
de
handel
Utiliser
une
fiche
d‘adaptation
verkrijgbare
adapterplug
(3,5
mm
pour
la
liaison
&
un
DAT.
mono
steekplug)
dient
de
bescherm-
Fir
den
Eingangsanschlu
an
dop
van
de
DIGITAL
OUT
aansluiting
den
tragbaren
DAT-Recorder
~
3 ;
:
te
worden
verwijderd.
erforderlichentalls
einen
Portable
DAT
Digital
connection
cord
(optionally
available)
Se
usate
un
adattore
(3,5
mm
mono
Zwischenstecker
verwenden.
DAT
portatif
Cordon
de
liaison
numérique
(disponible
«>
spinotto}
disponibile
opzi-
Digitaal
verbindingssnoar
tragbarer
DAT-
dans
le
commerce)
onalmente,
togliete
il
cappuccio
di
i
(los
verkrijgbaar)
Recorder
Digital-AnschluBkabel
{Sonderzubehér)
protezione
daila
presa
DIGITAL
OUT.
|
Dr:
DAT-
Gebruik
een
extra
adapterptug
voor
aans-
Usate
un
adattatore
all’in-
luiting
op
de
draagbare
DAT-recorder.
es
recorder
Bai
dal
registratore
DAT
Registratore
Cavo
di
collegamento
digitale
(opzionale}
ortatile.
.
DAT
portatile
4
ppc-92

Fig.
9
Abb.
9
Afb.
9
Car
audio
system
Autoradio/lecteur
de
cassette
Auto-Kassettengerat
Auto-audiosysteem
Sistema
audio
per
automobile
wae
il
V7
5
ppc-92

Unpacking
Unpack
the
unit
carefully
and
make
sure
that
all
accessories
and
cables
are
put
aside
so
they
will
not
be
lost.
Examine
the
unit
for
any
possibility
of
shipping
damage.
If
your
unit
is
damaged
or
fails
to
oper-
ate,
notify
your
dealer
immediately.
If
your
unit
was
shipped
to
you
directly,
notify
the
shipping
company
without
delay.
Only
the
consignee
(the
person.
or
company
receiving
the
unit)
can
file
a
claim
against
the
carrier
for
shipping
damage.
We
recommend
that
you
retain
the
original
carton
and
packing
materials
for
use
should
you
transport
or
ship
the
unit
in
the
future.
CAUTION:
Use
of
controls
or
adjustments
or
performance
of
procedures
other
than
those
specified
herein
may
result
in
hezardous
radi-
ation
exposure.
In
compliance
with
Federal
Regulations,
fol-
lowing
are
reproductions
of
labels
on,
or
in-
side
the
product
relating
to
laser
product
safety.
Location:
Inside,
surface
of
disc
lid.
CAUTION:
INVISIBLE
LASER
RADIATION
WHEN
OPEN
WTERLOCKS
DEFEATED.
AVOID
EXPOSURE
TO
BEAM.
ATTENTION:
RAYOM
LASER
A
L.OUVERTURE
ET
A
LINHIBITION
OU
VERROUILLAGE.
EVITER
TOUTE
EXPOSITION
AL
FAISCEAU
VORSICHT
:
UNSICHTBARE
LASERSTRAHLUNG
TRITT
AUS
WENN:
DECKET
GEDFFNET
UNO
WENN
SICHERHEITSVERRIEGELUNG
(BERBRUCKT
IST.
NICHT
DEM
STRAHL
AUSSETZEN.
WARNING:
TO
PREVENT
FIRE
OR
ELECTRIC
SHOCK,
DO
NOT
EXPOSE
THIS
APPLIANCE
TO
RAIN
OR
MOISTURE.
Precautions
for
use
@
This
unit
uses
a
mag-
net.
Do
not
place
a
floppy
disk,
cassette
tape,
etc.
on
the
unit.
Location:
Bottom
panel
CAUTION
AGAINST
HIGH
TEMPERATURE
DO
NOT
LEAVE
THIS
CD
PLAYER
IN
A
PLACE
SUBJECT
TO
HIGH
TEMPERATURE,
SUCH
AS
IN
DIRECT
SUNLIGHT,
IN
A
CAR
WITH
THE
WINDOWS
CLOSED
ATTENTION
A
LA
HAUTE
TEMPERATURE
NE
PAS
LAISSER
CE
LECTEUR-CD
DANS
UN
ENDROWT
SUJET
A
HAUTE
TEMPERATURE,
COMME
SOUS
LES
RAYONS
DIRECTS
DU
SOLEIL,
DANS
UNE
VOITURE
AUX
FENETRES
FERMEES,
OU
PRES
D'UNE
SOURCE
DE
CHALEUR.
(UNE
TEMPERATURE
EXTREMEMENT
HAUTE
PEUT
DEFORMER,
DECOLORER
LAPPAREIL,
OU
EN
CAUSER
DES
FUNCTIONNEMENTS
DEFECTUEUX
}
OR
NEAR
A
HEATER.
{EXCESSIVELY
HIGH
TEMPERATURE
MAY
CAUSE
A
CHANGE
OF
SHAPE,
COLOR
OR
MALFUNCTION.)
CAUTION
FOR
APPLICATION
NEVER
USE
EITHER
ANY
AC
OR
CAR
BATTERY
ADAPTOR
OTHER
THAN
AS
SPECIFIED.
PRECAUTION
NE
PAS
UTILISER
LES
ADAPTATEURS
DE
COURANT
CERTIFIED
ONLY
TO
CANADIAN)
ALTERNATIF,
OU
LES
ELECTRICAL
CODE
ADAPTATEURS
DE
BATTERIE
D'
AUTOMOBILE,
QUI
NE
SOIENT
CERTIFIE
EN
VERTU
DU
CODE
CANADIEN
DE
LU’
ELECTRICITE
SEULEMENT
KENWOOD
COMPACT
DISC
PLAYER
DPC-92
DE
NOTRE
DESIGNATION.
MANUFACTURED
SERIAL
NO.
KC
KENWOOD
CORPORATION
DC
7.5V
(EXCLUSIVE
AC
ADAPTOR)
|
sive
giBuVA-KU
DC
GV
iLR6.
“AA”.
AM3)x4
TOKYO
150,
JAPAN
MADE
IN
JAPAN
KENWOOD
CERTIFIES
THAT
THIS
EQUIPMENT
CONFORMS
TO
DHHS
REGULATIONS
21
CFR
CHAPTER
I
SUBCHAPTER
J.
WARNING
NOTICE:
IN
MOST
CASES
IT
IS
AN
INFRINGE-
MENT
OF
COPYRIGHT
TO
MAKE
Co-
PIES
OF
TAPES
OR
DISCS
WITHOUT
THE
PERMISSION
OF
THE
COPYRIGHT
OWNERS.
ANYONE
WISHING
TO
COPY
COMMERCIALLY
AVAILABLE
TAPES
OR
DISCS
SHOULD
CONTACT
THE
MECHANI-
CAL
COPYRIGHT
PROTECTION
SOCI-
ETY
LIMITED
OR
THE
PERFORMING
RIGHTS
SOCIETY
LIMITED.

@
Condensation
(dew)
@
When
the
unit
is
placed
in
a
humid
place
or
just
after
heater
is
turned
on,
condensation
may
form
inside
the
unit
and
unit
may
not
function
correctly.
At
that
time,
press
the
[
ll
]
(STOP)
button
twice
to
turn
off
the
unit
(when
the
button
is
pressed
once,
the
unit
only
enters
stop
mode),
leave
the
unit
for
about
1
hour,
then
load
a
disc
and
start
play.
@
Using
headphones
®
CD
players
have such
a
low
noise
level
that
listeners
often
tend
to
overly
increase
the
sound
volume.
Set
the
sound
volume
to
an
appropriate
level
to
protect
your
ears
from
excessive
shock.
®
For
your
safety
and
the
safety
of
others,
do
not
use
headphones
while
driving
a
car
or
other
type
of
vehicle.
®
Be
careful
not
to
fall
asleep
while
listening
to
music
using
headphones.
@
Continuous
use
of
headphones
for
long
periods
may
hurt
your
ears.
Controls
and
connectors
<rig.
1>
@)
[OPEN]
button
@
[>i]
[<4]
SKIP,
SEARCH
button
@)
[REPEAT]
button
@)
Display
©
TIME
BUTTON
Time
display
indicator
selector
switch/TIMER
alarm
button
©
[SCENE]
select
button
@
[GENRE/CHG]
GENRE
select/CHARGE
button
Display
section
<rig.
2;
1.
[REPEAT]
mode
indicators
(ONE)
.....
““REPEAT-one”’
play
(ALL)
.....
““REPEAT-all’’
play
(RND)
.....
“RANDOM”
play
(INT)
.....
“INTRODUCTION”
play
.
[P.MODE]
indicator
.
[EDIT]
mode
indicator
.
[LAST
MEMO]
indicator
-
[HOLD]
indicator
.
It
blinks
when
the
batteries
are
run-
ning
out.
It
also
blinks
at
relatively
long
intreval
during
recharging.
Oahwn
[
@
]/[OFF/CHG}
button
STOP/
POWER
OFF/CHARGE
button
®
[>
1N/[ON]
button
PLAY/PAUSE/POWER
ON
button
[HOLD/LAST
MEMO]
select
switch
@)
[PHONES]
jack
@®
[VOLUME]
UP/DOWN
button
@
Remote
control
receptor
[DC
IN]
jack
(8)
[DIGITAL
OUT]
jack
[LINE
OUT]
jack
7.
Timer
Alarm
Indicator
8.
Total
elapsing
time
and
total
remain-
ing
time.
9.
[SCENE]
indicator
10.
[REMAINING
TIME]
indicator
11.
[HIT
MASTER]
indicator
12.
[GENRE]
indicator
13.
Elapsing
time,
total-recording
time
and
remaining
time
display.
14,
Track
number
display
ppc-92
7

i
Wireless
Remote
Control
Unit
<Fig.
3>
®@
Buttons
marked
with
an
asterisk
(*)
will
perform
the
same
function
as
those
on
the
player.
Buttons
without
an
asterisk
are
buttons
only
on the
remote
control.
@
This
remote
control
is
not
fitted
with
a
player
power
button.
@
Before
use,
pull
out
and
remove
battery
preserver
sheet
located
at
the
rear
panel.
®
Replacement
batteries
for
the
remote
control
are
available
at
retail
stores.
Ask
for
CR
2025
type
batteries.
@
[H.MASTER]
HIT
MASTER
button
©
»*
[GENRE]
button
©
*
[REPEAT]
button
@
[P.MODE/EDIT]
PROGRAM/EDIT
button
@©
*
[PP]
button
@
*
[4]
button
@®
Direct
music
selection
button
(0
~
9)
(@®
Direct
music
selection
button
(+
10)
@
*
[M1]
STOP
button
@
*
[>
II]
PLAY/PAUSE
button
«k)
*
[VOL.]
Volume
UP/DOWN
button
@
*
[SCENE]
Select
button
@
Remote
Control
Unit
Operating
Range
@
The
diagram
below
indicates
the
operating
range
of
this
remote
control
unit.
Caution:
@
Allow
at
least
one
second
between
pressing
keys
when
using
the
remote
control.
@
When
the
compact
disc
player
is
placed
in
direct
sun-
light
the
user
may
experience
difficulty
using
the
remote
control.
Power
source
@
Use
in
the
following
method:
Household
AC
Power
Source
Use
the
provided
AC
adaptor.
Alkaline
dry
Battery
Use
size
AA
alkaline
dry
batteries
which
are
available
in
the
general
market.
Rechargeable
Battery
(Provided)
Charge
with
the
provided
AC
adaptor
before
use.
Car
Battery
8
ppc-92
Use
the
optional
car-battery
adaptor
DC-C6
(exclusive
for
12-V
car).

M@
How
to
use
the
main
unit
with
the
provided
AC
adaptor
<Fig.
4>
@
When
this
provided
AC
adaptor
is
used,
the
power
source
can
be
supplied
from
household
outlets.
Insert
the
plug
of
the
AC
adaptor
into
the
[DC-IN]
terminal,
then
connect
the
AC
adap-
tor
to
a
household
outlet.
@
Pull
out
the
AC
adaptor
from
the
outlet
when
it
is
not
in
use.
Conduct
insertion
into
or
pulling
out
from
the
power
source
terminal
after
pressing
the
STOP
[
]
button
twice
in
order
to
turn
the
main
unit
into
‘‘POWER
OFF”’
condition.
@
How
to
use
the
unit
with
the
provided
rechargeable
batteries
or
alkaline
dry
batteries
The
usable
rechargeable
batteries
are
only
the
provided
rechargeable
batteries.
Generally
marketed
rechargeable
batteries
and
manganese
dry
batteries
cannot
be
used.
Do
not
use
the
rechargeable
batteries
together
with
the
dry
batteries.
Be
sure
to
replace
the
4
batteries
with
the
same
type
ones
simultaneously.
®
How
to
Insert
the
batteries
into
the
battery
compartment
<Fig.
5>
@)
Open
the
battery
cover.
@)
Insert
the
batteries.
Insert
the
four
provided
rechargeable
batteries
or
alkaline
dry
batteries
into
the
battery
com-
partment
surely
by
paying
attention
for
correct
polarity.
@)
Close
the
battery
cover.
Fit
the
hook
of
battery
cover
into
the
specified
position.
Be
sure
to
fit
it
into
the
specified
position
until
it
clicks
and
gets
locked.
Charge
the
provided
rechargeable
batteries
for
6
hours,
if
you
use
them
for
the
first
time.
©
How
to
Recharge
<Fig.
6>
Turn
the
Power
off
and
insert
provided
rechargeable
batteries
into
the
battery
compartment,
then
connect
an
AC
adapter
to
the
main
unit.
Press
the
[OFF/CHG]
button
to
switch
the
power
OFF.
Then,
while
holding
the
[GENRE/CHG]
button
depressed,
press
the
[OFF/CHG]
button
again.
During
recharging,
the
<&J
mark
blinks
slowly.
Recharging
is
canceled
automatically
by
the
built-in
and
6-hour
timer
when
recharging
is
com-
pleted.
1.
Recharging
will
be
canceled
when
PLAY/PAUSE
[>
If]
button
or
STOP
[
J]
button
is
pressed
during
recharging.
Other
operations
cannot
be
conducted.
2,
The
CHARGE
button
do
not
functions
when
the
HOLD
switch
is
turned
ON.
3.
Recharging
is
canceled
when
the
AC-adaptor
plug
is
pulled
out
an
outlet
while
recharging
is
being
conducted,
or
when
power
supply
is
cut.
ppc-92
9

@
How
to
Recognize
the
Recharging
Time
In
the
normal
use,
4
hours
of
recharging
allows
continuous
play
for
about
2
hours.
Recharge
them
for
about
6
hours,
however,
if
they
are
not
used
for
a
long
period
of
time.
©
How
to
make
batteries
stand
up
to
long
use
lf
recharge
is
repeated
for
the
provided
batteries,
where
as
the
power
of
batteries
is
still
re-
mained,
the
batteries
may
not
be
recharged
enough
as
their
property.
In
such
a
case,
use
up
the
power
of
them
before
conducting
recharging,
which
allows
them
for
normal
recharging.
@
Service
Life
of
Rechargeable
Battery
Rechargeable
battery
has
a
life.
After
about
500
times
of
recharging,
its
performance
(operating
time)
is
halved
as
compared
to
a
new
battery.
If
operating
time
shortens
considerably
although
you
have
charged
your
bat-
tery
properly,
four
rechargeable
batteries
for
replacement.
Cautions:
®
Do
not
recharge
the
manganese
or
alkaline
dry
batteries.
©
Be
sure
to
use
only
the
provided
AC
adaptor
for
recharging.
It
is
dangerous
if
you
use
other
kind
of
AC
adaptor.
@
Avoid
adverse
recharging
or
short
circuit.
They
result
in
causing
of
such
troubles
as
deteriora-
tion
of
rechargeable
batteries
and
generation
of
heat.
®
Do
not
disassemble
or
modify
it
by
yourself.
@
Do
not
touch
the
CD
player
or
AC
adaptor
with
wet
hands.
@
Battery
life
indicator
The
CHARGE
indicator
<9
starts
blinking
at
fast
speed
when
the
remaining
battery
life
comes
to
around
30
minutes.
In
this
case,
replace
the
alkaline
dry
batteries
with
new
ones
or
recharge
the
rechargeable
batteries.
Refer
to
pages
9
and
10
for
the
method
of
replacing
batteries
or
recharging
batteries.
Simple
care
and
maintenance
@
Cleaning
the
cabinet
When
the
cabinet
gets
dirty,
wipe
it
with
a
dry
cloth.
If
the
stain
is
so
serious
that
it
cannot
be
removed
with
a
dry
cloth,
moisten
the
cloth
with
a
small
amount
of
water.
After
wiping
with
the
moistened
cloth,
do
not
forget
to
remove
the
moisture
with
a
dry
cloth.
@
Cleaning
the
lens
Clean
the
lens
carefully,
using
a
commercially-available
camera
lens
blower,
etc.
@
Care
and
maintenance
of
discs
If
dirt
or
dust
is
attached
to
the
playing
surface
of
a
disc,
clean
it
carefully
using
a
commercially-
available
CD
cleaning
cloth,
etc.
When
wiping
the
disc,
be
sure
to
wipe
it
in
a
radial
direction.
(Do
not
use
a
record
cleaner
for
ordinary
discs.)
Avoid
leaving discs
under
direct
sunlight
or
in
a
place
where
the
temperature
is
high.
When
a
disc
is
not
to
be
used
for
a
long
period
of
time,
do
not
leave
it
in
the
CD
player.
10
oec-s2

Listening
through
headphones
<ris.
7>
®
Connect
the
headphone
plug
with
the
‘‘PHONES”’
jack.
Conduct
the
pull-in/out
operation
of
the
jack
during
Power
is
OFF.
@
Adjust
the
volume
with
the
VOLUME
control.
Notes:
—
@
Keep
the
plug
of
headphone
clean
all
the
time.
Non-clean
plug
may
cause
noise.
®@
Avoid
using
the
headphone
when
you
drive
a
car
and
so
on
for
traffic
safety.
®@
Be
careful
not
to
fall
asleep
with
the
headphone
on.
As
a
Compact
Disc
contains
very
little
noise,
a
sudden
loud
sound
could
be
output
if
the
VOLUME
control
is
adjusted
too
high:
this
could
cause
serious
damage
to
your
ears.
Playback
through
a
home
audio
system
(analog
input)
@
Playback
using
the
‘’LINE
OUT’’
output
<Fig.
8>
@
Using
the
provided
audio
connection
cord,
connect
the
3-pin
miniplug
to
‘‘LINE
OUT’
termi-
nal
of
this
unit.
Connect
the
other
end
of
the
cord
to
the
amplifier’s
external
input
jacks
(AUX
jacks,
TAPE
PLAY
jacks,
etc.).
Connect
the
red
plug
to
the
‘‘R’’
(right
channel)
input
jack
and
the
white
plug
to
the
‘’L”’
(left
channel)input
jack.
@
Set
the
player
volume
control
to
maximum.
Adjust
the
sound
volume
using
the
amplifiers
volume
control.
@
When
the
direct
input
from
the
main
unit
to
a
tape
deck
is
to
be
made,
adjust
the
volume
with
volume-level
adjuster
(REC
LEVEL)
of
the
tape
deck.
Caution:
——--—-
;
©
Before
making
connections,
be
sure
to
turn
the
amplifier
power
off.
Do
not
connect
the
main
unit
to
the
PHONO
terminal
of
the
amplifier.
Playback
through
a
home
audio
system
(COAXIAL
digital
input)
®@
Using
a
digital
connection
cord
optionally
available
in
audio
stores,
connect
the
DIGITAL
OUT
jack
of
this
unit
with
an
amplifier
equipped
with
a
coaxial
digital
input
jack.
@
Adjust
the
sound
volume
using
the
amplifier’s
volume
control.
Caution:
aa
.
@
Before
making
connections,
be
sure
to
turn
the
amplifier
power
off.
ppc-92
11

CD
playback
in
an
automobile
<ric.
95
@
Use
in
the
car
audio
cassette
adaptor
CAC-1
@
When
the
power
source
is
taken
froma
cigar
socket
of
a
car,
use
the
car
battery
adaptor
DC-C6.
It
allows
you
to
enjoy
listening
to
music
for
a
long
time
without
worrying
about
the
battery
consumption.
@
Insert
the
plug
of
car
audio
cassette
adaptor
CAC-1
into
the
“LINE
OUT”’
terminal
of
the
main
unit.
Insert
the
CAC-1
to
the
car
component
deck,
and
turn
the
car
component
deck
into
the
PLAY
mode.
@
Adjust
the
sound
volume
using
the
volume
control
of
the
car
stereo.
Notes:
©
Since
car
battery
adaptors
available
in
the
market
have
different
polarity
and
voltage,
they
may
result
in
troubles.
.
(Be
sure
not
to
use
a
car
battery
adaptor
other
than
the
DC-C6.)
In
case
the
unit
is
used
in
a
car,
install
it
taking
the
safety
in
consideration,
so
that
it
does
not
interfere
with
the
driving
operations.
The
CAC-1
cannot
be
used
with
some
car
audio
cassette
models.
Do
not
leave
the
unit
in
a
closed
automobile
where
the
temperature
is
expected
to
be
high.
Place
the
unit
on
a
soft
place
where
automobile
vibrations
are
not
easily
transmitted.
If
any
sound
skipping
occurs
due
to
vibrations,
turn
on
the
[HOLD]
switch
to
reduce
the
sound
skipping.
*
The
DC-C6
Car
Battery
Adaptor
is
an
optional
accessory.
*
The
CAC-1
Audio
Cassette
Adaptor
is
an
optional
accessory
with
the
UK
and
Europe
type
models.
8
cm
CD
single
can
also
be
played
This
unit
can
play
8
cm
CD
singles
directly
without
using
an
adaptor.
Caution:
®
Do
not
use
an
adaptor
sold
for
other
models
(otherwise
the
CD
or
this
unit
may
be
damaged).
12
bec-g)

How
to
play
(Manual
play)
@
Manual
Play
(Basic
Operation)
QO@O®
Leave
the
HOLD/LAST
MEMO
switch
turned
OFF.
C)
Push
the
OPEN
button.
(2)
Open
the
lid:
Lightly
lift
the
lid
near
the
OPEN
button.
(3)
Insert
the
disk:
Be
sure
to
keep
the
label
side
of
the
disc
upward.
(4
Close
the
lid.
(5)
Push
the
PLAY/PAUSE
[>
[]]
button:
The
unit
starts
playing
automatically
after
scanning
the
data
of
the
disc.
(6)
Adjust
the
volume.
When
PLAY/PAUSE
[>
II]
button
is
When
the
unit
starts
playing
auto-
Jn
the
event
that
data
is
not
read
or
pressed
to
POWER
ON.
matically.
a
disc
is
not
inserted.
(It
will
turn
out
to
be
POWER
OFF
after
elapsing
of
VALLE
RG,
three
minutes.)
ona
=
L
Luu
Gogg
—
PE
ETELVAS
S
‘
a
Blink
Track
being
played
Elapes
playing
time
Orie
PAUSE
MODE
STOP
MODE
pe
a
Nt,
Micasacal
|
iT
ur.
i
428
2:5
§-
uo
Yhes
L
eitedar
ia
obs)
=
Track
being playe
=
Playback
time
blinks
here.
Total
number
of
tracks
Total
playing
time
M@
To
operate
temporary
stop
(pause)
Push
PLAY/PAUSE
[>
II]
button:
If
you
press
it
once
more,
the
unit
starts
playing
from
the
paused
position.
@
To
stop
Push
the
STOP
[
M@
]
button:
@
If
the
STOP
[
™
]
button
is
pressed
once,
the
unit
is
put
in
the
stop
mode.
If
it
is
pressed
once
again,
the
unit
is
turned
out
to
be
POWER
OFF.
@
If
the
stop
mode
lasts
for
3
minutes
or
more,
the
unit
is
turned
out
to
be
POWER
OFF.
Notes:
@
If
the
HOLD
switch
is
being
turned
ON,
PLAY/PAUSE
[>
]i]
operation
cannot
be
activated
even
the
button
is
pressed.
@
When
the
[HOLD/LAST
MEMO]
switch
is
set
to
LAST
MEMO,
the
play
starts
at
the
beginning
of
the
track
being
played
before
the
unit
stops.
@
If
the
lid
is
open,
all
the
functions
do
not
work.
@
if
the
PLAY/PAUSE
[>
4J]
button
is
pressed
during
the
stop
mode,
the
unit
starts
playing
from
the
first
track.
@
When
the
[OPEN]
button
is
pressed
with
the
power
is
supplied,
the
settings
of
the
volume
level,
[GENRE]
and
[SCENE]
are
stored
and
others
are
erased.
@
When
the
music
is
played
until
the
final
track
and
the
player
has
naturally
entered
the
STOP
Mode,
it
indicates
the
total
playing
time.
®
Be
sure
not
insert
the
disc
up
side
down.
If
the
disc
is
inserted
into
the
unit
with
reverse
side
up,
the
unit
can
not
start
playing.
@
Do
not
insert
anything
other
than
the
disc
into
the
disc
tray.
ppc-92
13
i
i

ENGLISH
@
Volume
Control
Adjust
the
[VOLUME]
level
by
pressing
the
‘UP’
and
‘“‘DOWN”
buttons.
@
The
player
will
set
itself
to
—
16dB
(approximately
1/6
maximum
volume}
as
soon
as
the
pow-
er
is
switched
on.
The
player
will
reset
itself
to
—
16dB
when
the
power
is
switched
off.
Raise
the
volume
by
pressing
the
‘‘UP’’
button
once
for
each
unit
increase
in
sound.
Lower
the
volume
by
pressing
the
DOWN"
button
once
for
each
unit
decrease
in
sound.
Keep
the
button
held
down
for
larger
changes
in
the
volume
level.
Correct
operation
of
the
above
steps
will
change
the
volume
level
output
from
both
[PHONES]
and
[LINE
OUT).
#
To
skip
to
the
beginning
of
desired
track
(Skip
feature,
<4,
>),
to
search
in
the
forward
or
backward
direction
(Search
feature,
<<,
>
P|)
@
The
skip
function
is
activated
with
one
press
of
button
and
the
search
function
is
activated
with
continuous
press
of
button.
©@
Operate
during
play
(Basic
Operations
(8),
(@)),
or
stop
mode
(Basic
Operation
(8)).
(9)
To
skip
to
the
beginning
of
the
track
being
played:
Tap
the
Ké4
button
for
an
instant.
To
skip
to
the
beginning
of
the
next
track:
Tap
the
1
button
for
an
instant.
@
When
you
wish
to
skip
back
to
the
previous
music,
press
the
kf
button
once
more.
©
The
first
music
is
caused
to
play
if
>
button
is
pressed
while
the
last
music
is
being
played.
@
if
you
press
Kt
button
during
the
stop
mode,
the
last
music
is
activated
to
play.
How
to
operate
the
quick
return
with
the
main
unit:
Push
4
button
continuously.
How
to
operate
the
quick
traverse:
Push
1
button
continuously.
@
If
you
release
the
quick
return
and
quick
traverse
buttons,
the
unit
plays
the
music
from
that
position.
@
If
an
operation
is
made
during
the
pause
mode,
the
music
is
paused
at
the
position
where
the
button
is
released.
How
to
Play
(Direct
Play)
@
Direct
Play
®
This
function
can
be
operated
only
by
the
remote
controller.
(RC-P200)
©
By
just
pressing
the
direct
music
selection
button,
the
selected
music
is
played
immediately.
@
Operation
can
be
performed
during
the
play
or
stop
mode
(when
the
unit
is
stopped
with
a
disc
inserted).
@
If
the
number
larger
than
the
number
of
musics
in
the
disc
is
selected,
it
is
not
accepted.
(1)
In
case
of
selecting
either
one
of
Musics
1
through
9:
Push
either
of
Buttons
1
through
9.
In
case
of
selecting
either
one
of
Musics
20
and
beyond:
Push
either
one
of
Buttons
O
through
9
after
pressing
the
+
10
Button
twice.
14
ppc-92

How
to
play
(Repeat
play)
@
Repeat
play
@
If
the
REPEAT
button
on
the
main
unit
is
pressed
during
play
or
stop
mode
{basic-operation
(8)),
repeat
play
will
be
activated.
Every
time
the
button
is
pressed
(==
REPEAT-one
REPEAT-all
RANDOM
PLAY
INTRO:
PLAY
Cancellation
of
REPEAT
play
DUCTION
It
turns
off
tion
of
REPEAT.
How
to
Stop
Play
Press
the
STOP
[
Ml]
button
on
the
main
unit.
the
indica-
Repeatedly
plays
the
music
played
or
selected.
Be
EN
ton
.
a
fi
-|
aan
cg
(eS
Bee
oe.
;
REPEAT-Ail
Repeatedly
plays
all
the
musics
or
all
a
ie
ree
the
programmed
(reserved)
musics
in
R
Ltotumere
pa
During
random
track
search
RAND
OE
es
ay
iad?
ae
ee
L
i.
Track
Nos.
light
in
order.
The
CD
player
selects
tracks
in
a
ran-
eee
nerden
play
dom
order
among
all
tracks
on
a
disc
fe
9438
or
all
tracks
in
a
program.
=
=e
@
When
the
Random
mode
is
initiated
during
play,
the
random
track
search
starts
with
the
next
track
to
the
track
being
played.
When
forward
skip
is
initiated
by
pressing
the
[1]
button
dur-
ing
Random
play,
random
track
search
starts.
When
backward
skip
is
initiated
by
pressing
the
[4]
button
during
Random
play,
random
track
search
starts
from
the
be-
ginning
of
the
track
being
played.
Random
play
continues
until
the
REPEAT
button
is
pressed
to
cancel
it.
The
direct
music
selection
buttons
on
the
remote
control
unit
cannot
be
used
during
Random
play.
INTRO
PLAY
mt
ud
AND
The
first
15
seconds
of
every
track
on
a
disc
is
played
in
sequence.
This
func-
tion
is
convenient
for
checking
the
tunes
recorded
on
a
disc.
mic
;
|
weogoig
|
wr
When
the
introduction
mode
is
set
in
the
stop
mode
and
the
play
is
started,
introduction
play
starts
from
track
No.
1.
When
the
Introduction
mode
is
initiated
during
play,
Introduc-
tion
play
starts
with
the
next
track
to
the
track
being
played.
When
the
[®
[I]
button
is
pressed
during
introduction
play,
the
unit
is
put
in
the
pause
mode.
If
it
is
pressed
once
again,
in-
troduction
play
restarts.
When
the
[1]
button
is
pressed
during
introduction
play,
the
track
being
played
is
skipped
and
introduction
play
of
the
next
track
starts.
When
the
[
@€]
button
is
pressed
during
introduction
play,
in-
troduction
play
restarts
from
the
track
being
played.
Introduction
play
continues
until
the
REPEAT
button
is
pressed
to
cancel
it.
pec-92
15

How
to
Play
(Program
Play)
®
Operate
during
the
stop
mode
(Basic
operation
(8)).
It
cannot
be
operated
if
the
mode
is
in
other
than
the
stop
mode.
@
24
favorite
musics
can
be
programmed
(reserved)
in
the
order
you
like
to
listen
to.
®
After
completion
of
the
programming
(reservation),
play
is
activated
if
[
1]
button
is
pressed.
@
How
to
Program
with
Direct
Music
Selection
(Remote
controller
only)
(Basic
Operations
(1)
-
(6)
are
omitted.)
<Fig.
10>
(i2}
Push
P.MODE/EDIT
button
on
the
remote
controller.
@
It
enters
the
program
input
mode.
aa
[
cle
|
r
aoe
j
(13)
Select
the
track
(music):
(Select
the
music
with
the
direct
music
selection
button
on
the
remote
controller.
Follow
the
procedures
in
(1).)
Reservation
is
completed
by
selecting
the
music.
®
Completion
of
reservation
of
Music
1
(P-01).
Select
the
track
(music)
{from
Program
number
2, 3,
...
24):
©
Repeat
the
operation
in
(3).
By
repeating
music
selection,
the
reservation
can
be
made
one
after
another.
(5)
Push
PLAY/PAUSE
[>
[I]
button:
starts
to
play.
@
Operate
with
the
HOLD/LAST
MEMO.
switch
in
the
OFF
condition.
@
How
to
program
with
the
SKIP
button
<Fig.
11>
Push
P.
MODE/EDIT
button
on
the
remote
controller.
@
Enters
the
program
input
mode
(the
same
operation
as
in
(12)).
Select
with
the
Skip/Search
[<<
>>]
button
(Program
number
1):
Push
the
P.MODE/EDIT
button
on
the
remote
controller.
Select
the
music
(from
Program
2,
3,
...
24):
®@
Repeat
the
operation
in
and
(18).
Push
PLAY/PAUSE
[>
]]]
button:
starts
to
play.
®
Operate
with
the
HOLD/LAST
MEMO.
switch
in
the
ros
OFF
condition.
@
The
maximum
number
of
input
tracks
for
program
is
24.
The
indication
shown
in
the
right
is
displayed
after
those
24
tracks
are
input.
@
During
the
programmed
play,
the
unit
is
in
the
auto
space
mode.
Then,
the
four-second
pause
is
inserted
between
the
tracks.
@
If
the
STOP
[
MI]
button
is
pressed
during
programming,
the
player
will
switch
to
the
program
Standby
mode.
If
the
STOP
[
ll
]
button
is
pressed
when
the
player
is
in
the
program
standby
mode,
the
program
will
be
cancelled.
@
Ifthe
skip
[<4
>]
button
is
pressed
during
the
programmed
play,
skip
search
can
be
made
only
with
the
programmed
track.
@
When
the
program
is
called
during
the
program
standby
mode
and
the
PLAY/PAUSE
[>
I}
button
is
pressed
with
HOLD/LAST
MEMO.
OFF
(See
Page
18),
the
player
will
play
from
the
first
track
programmed,
not
the
track
whose
number
is
indicated
now.
16
pPc-92

i
Introduction
program
entry
<Fig.
12>
:
This
function
allows
to
program
only
desired
tracks
while
listening
to
the
beginning
of
every
track
by
Introduction
play
(refer
to
page
15).
®
The
direct
music
selection
buttons
on
the
remote
control
unit
cannot
be
used.
(21)
Push
the
REPEAT
button
Four
times.
Pups
ae
tat
ee
etal
ine
(22)
Push
the
P.
MODE/EDIT
button
on
the
remote
controller
to
start
the
INTRODUCTION
play.
jr
ei
Biink
Rs
WEP
(3)
When
a
track
you
want
to
program
is
played,
press
the
P.MODE/EDIT
button.
=
i
see,
m1
c
alot
Blinkers
HT
@
During
Introduction
program
entry,
the
»P1
and
Kt
buttons
can
be
used
to
skip
tracks
as
required.
@
The
search
function
(FF/REV)
and
the
pause
function
do
not
work
during
Introduction
pro-
gram
entry.
@
Confirmation
of
the
programmed
contents
@
This
function
can
be
operated
when
the
disc
is
programmed
and
stopped.
ay
ae
peroem
ft_rrove
Push
the
P.MODE/EDIT
button
on
the
remote
controller.
@
Indicates
the
Program
number
1.
Track
programmed
Program
No.
(25)
If
the
P.
MODE/EDIT
button
is
pressed
repeatedly:
@
Then
the
programmed
contents
are
indicated
in
order.
@
If
the
music
orders
are
indicated
until
the
last
programmed
track,
the
indication
returns
to
Program
number
1.
@
How
to
cancel
all
the
programs
Put the
unit
to
POWER
OFF
or
open
the
lid:
@
Push
the
STOP
[
ff]
button
once
when
the
musics
are
is
programmed
and
the
disc
is
stopped
in
order
to
enter
the
unit
into
the
stop
mode,
or
press
the
STOP
[
lf
]
button
twice
during
play
in
order
to
put
the
unit
to
POWER
OFF.
@
How
to
change
the
contents
of
the
program
Call
the
program
number
to
be
changed
by
pressing
the
P.
MODE/EDIT
button
on
the
re-
mote
controller.
Example:
When
you
wish
to
change
the
music
in
Track
11
of
the
Program
Number
2
to
Track
8,
call
the
Program
Number
2
by
pressing
the
P.
MODE/EDIT
button.
Enter
the
track
number
either
by
using
the
numeric
keys,
or
by
using
the
>
and
buttons
and
pressing
the
P.MODE/EDIT
button.
ro
sa
SN
Ae
!
ea
i}
P-ge
suay-oe
mc
terre
ua
P-oe
Track
No.
Program
No.
ppc-92
17

EDIT
Function
<rig.
13>
EDIT
function
is
the
function
to
edit
by
fully
making
use
of
the
recordable
time
of
a
tape
when
a
CD
is
dubbed
into
a
tape.
@
In
the
stop
mode,
you
can
select
EDIT
modes
by
pressing
the
P.MODE/EDIT
button
twice.
Push
the
P.MODE/EDIT
button
on
the
remote
controller
twice.
@
In
the
program
stand-by
mode,
this
operation
can
not
be
made.
Input
the
accommodating
time
of
the
tape
with
the
direct
music
selection
buttons
(0
-
9)
and
(+10).
(1)
Push
the
P.MODE/EDIT
button.
oe
®
Each
tracks
to
be
recorded
is
assigned
automatically
to
side
[A]
or
side
[B|
of
tape,
and
the
following
displays
appear.
cor
@
In
4
sec.
‘ox
tor
@
‘
a
_
pee
sit
sNMae
a
_!
Meir
m1
i
eft
nt
Cladus
|
Lb
oueeou
Remaining
time
of
side
A
Remaining
time
of
side
B
Patins
@
Arrange
the
musics
from
the
initial
music
of
a
CD
in
order
so
as
to
accommodate
them
within
the
designated
accommodating
time
of
Side
A
of
a
cassette
tape,
and
select
the
most
suitable
music
within
its
remaining
time
for
the
last
music.
®
Arrange
the
musics
in
order
for
Side
B
excluding
the
musics
programmed
into
Side
A,
and
select
the
most
suitable
music
for
the
last
music
on
Side
B.
@
When
all
the
musics
are
recorded
into
Side
A,
‘‘no-FILE”’
is
indicated
on
the
display
and
pause
is
activated
at
the
first
music
on
Side
A.
@
When
the
recording
of
Side
A
is
completed,
the
unit
enters
the
pause
mode
at
the
beginning
of
Side
B.
@
When
the
playing
operation
is
completed
up
to
the
end
of
Side
B,
the
normal
stop
mode
is
automatically
activated.
Convenient
functions
@
Prevention
of
misoperation
[HOLD]/Reduction
of
sound
skip
[Anti
shock]/
Last
memory
function
@
This
unit
has
the
HOLD
function
to
prevent
misoperation,
the
anti-shock
function
to
reduce
the
sound
skipping
and
the
LAST
MEMO.
function
to
memorize
the
musics
until
the
power
is
turned
off.
When
the
unit
is
used
in
the
car
or
elsewhere
where
there
is
big
vibrations,
the
sound
skipping
is
reduced.
Turn
on
the
HOLD
switch:
©
If
the
‘HOLD’
is
turned
on
in
the
POWER
OFF
mode,
the
unit
will
not
be
turned
to
the
POWER
ON
mode
even
though
the
PLAY/PAUSE
[™
[I]
button
is
pressed.
®@
if
the
‘‘HOLD’’
is
turned
on
during
the
play,
the
button
switches
other
than
the
‘‘OPEN”’
but-
ton
can
not
be
operated.
@
This
operation
can
also
be
carried
out
with
the
remote
control
unit.
18
ppc-92

When
the
LAST
MEMO.
switch
is
turned
on,
the
following
operations
are
made:
@
When
the
power
is
turned
on
from
the
off
condition,
the
player
starts
to
play
the
track
from
the
beginning
part
of
the
track
where
the
present
location
of
the
pick-up
is
read.
@
If
the
STOP
[
ME]
button
is
pressed
and
the
PLAY/PAUSE
[>
II]
button
is
pressed
again,
the
player
starts
to
play
from
the
beginning
part
of
the
stopped
track.
(When
it
is
paused
at
the
near
end
of
a
track,
it
may
start
playing
from
the
beginning
part
of
the
following
track.)
@
If
the
SKIP
button
[Kt]
is
pressed
during
the
stop
mode,
the
player
starts
to
play
the
track
previous
to
the
track
for
which
the
STOP
[
&
]
button
is
pressed.
@
If
the
SKIP
button
[>I]
is
pressed
during
the
stop
moae,
the
player
starts
to
play the
track
next
to
the
track
for
which
the
STOP
[
Mf]
button
is
pressed.
@
The
Last
track
memory
function
also
work
even
in
the
Hold
ON
status.
HOLD
indicator
Last
track
memory
indicator"
eal
‘
me
YAS
TIME
Button
Press
the
[TIME]
button
both
for
information
on
track
times
and
to
use
the
TIMER
alarm.
Each
press
will
move
the
operation
sequence
in
the
order
shown
below.
Track
1
(current)
|
Track
1
{current}
=
=
=
:
rbised
Tine.
1
anening
tine
E>
[
Total
Elapsed
Time
|
=>
[
Total
Time
Remaining
|
<>
[Timer
]
<>
Start
|
Function
Selection
Shown
in
the
TIMER
Alarm
Function
Liquid
Crystal
Display
@
The
operating
mode
in
which
the
player
is
currently
set
will
determine
the
type
of
track
time
information
displayed.
These
display
sequences
are
shown
below.
Le)
Liquid
Crystal
Display
Sequence
@
When
the
player
is
in
PLAY
or
PAUSE
mode
eae
Talia
Haeron
tine
=>
Total
Elapsed
Time
<>
Total
Remaining
Time
=>
TIMER
<>
Start
(Display)
s--+-++-++-++-e
{REMAIN}
light
on
---
{TOTAL}
light
on
.........
(TOTAL)
(REMAIN)
light
on.
@
When
the
player
is
in
the
STOP
mode
Total
Remaining
Time
DispAlay
{Total
Number
of
Tracks
Display)
<>
TIMER
<>
Start
@
When
the
player
is
in
the
PROGRAM
PLAY
mode
The
display
will
show
the
Total
Elapsed
Time
and
the
Total
Remaining
Time
for
only
those
tracks
which
have
been
programmed.
®
Random
Play
Track
1
(current)
Elapsed
Time
<>
Track
1
(current!
Remaining
Time
<>
TIMER
display
<>
Start
®
During
PROGRAM
ENTRY
mode
Track
1
(current)
Remaining
Time:
shows
the
time
remaining
of
the
track
now
be-
ing
entered
(track
number
will
light
up).
Total
Remaining
Time:
shows
the
total
time
remaining
before
the
track
being
entered
and
the
tracks
already
entered
finish.
®
40
or
more
tracks:
note
that
track
times
may
not
be
shown
when
40
or
more
tracks
have
been
entered.
ppc-92
19

TIMER
Alarm
This
player
has
a
built
in
TIMER
alarm.
The
TIMER
alarm
lets
the
user
enjoy
music
while
keeping
an
ear
on
the
time.
1.
Press
the
TIME
button
and
set
so
that
“’
3)
“lights
in
the
display.
Press
4
times
when
starting
from
the
very
beginning.
2.
Adjust
the
alarm
period
by
pressing
the
PI
and
<4
buttons.
The
alarm
period
is
initially
set
for
2
hours.
Each
button
press
will
adjust
the
period
by
1
minute
intervals.
Shorten
the
time
period
using
the
button;
lengthen
period
using
the
1
button.
The
TIMER
can
be
set
for
periods
of
up
to
2
hours.
3.
Activate
the
TIMER
by
pressing
the
TIME
button
after
setting
the
timer
period,
The
display
will
return
to
the
original
display
sign
and
will
light
up.
@
An
alarm
will
ring
for
10
seconds
when
the
timer
period
set
by
the
user
has
elapsed.
@
Turn
alarm
off
during
ringing
by
pushing
any
button.
When
the
alarm
is
ringing,
every
button
is
an
alarm
OFF
button;
normal
button
functions
can-
not
be
used.
@
If
the
alarm
is
not
switched
off
by
pressing
a
button,
it
will
ring
for
10
second
intervals
every
alternate
minute.
When
the
alarm
rings
3
times,
the
power
is
automatically
turned
off.
®
The
timer
setting
will
be
canceled
if
the
power
is
switched
off.
HIT
MASTER
<r.
145
The
HIT
MASTER
function
enables
the
volume
level
of
the
vocal
parts
of
digitally
recorded
compact
discs
to
be
lowered.
@2
When
[H.
MASTER]
button
is
pressed
once,
the
HIT
MASTER
function
is
activated.
When
the
button
is
pressed
again,
the
function
is
cancelled.
®
Note
that
the
[HIT
MASTER}
function
may
not
be
used
simultaneously
with
either
[GENRE]
and/or
the
[SCENE]
functions.
Both
[GENRE]
and
[SCENE]
functions
will
be
canceled
automatically
when
the
[HIT
MASTER]
function
is
selected.
Sound
Quality
Adjustment
This
player
incorporates
a
built-in
digital
signal
processor
(DSP).
The
DSP
allows
the
user
to
use
an
operation
sequence
to
select
sound
quality
settings
appropriate
for
both
the
music
genre
and
the
place
where
the
music
will
be
heard.
These
controls
must
be
selected
prior
to
playing.
M@
GENRE
button
Pressing
the
GENRE
button
will
display
the
operation
sequence
shown
below.
NORMAL
<>
FUSION
=>
POPS
<>
ROCK
<>
JAZZ
<>
NORMAL
NORMAL:
Sound
without
enhancement,
sound
as
it
is;
appropriate
for
classical
music.
FUSION:
Sound
projecting
a
broad
central
range
suitable
for
fusion
and
similar
music.
POPS:
Clear
and
crisp
sound
appropriate
for
popular
music.
ROCK:
Sound
with
punch
and
clarity
from
middle
to
low
ranges
through
to
high
sounds.
JAZZ:
Clear
sound
with
a
full
and
broad
treble
range.
20
ppc-92
Table of contents
Languages:
Other Kenwood CD Player manuals

Kenwood
Kenwood DPC-885 User manual

Kenwood
Kenwood KDC-C601 User manual

Kenwood
Kenwood KDC-CPS87 User manual

Kenwood
Kenwood KDV-C810 User manual

Kenwood
Kenwood KDC-C461 User manual

Kenwood
Kenwood C907 User manual

Kenwood
Kenwood DVF-3500 User manual

Kenwood
Kenwood DPC-X301 User manual

Kenwood
Kenwood DPF-1010 User manual

Kenwood
Kenwood DP-7010 User manual

Kenwood
Kenwood DP-R895 User manual

Kenwood
Kenwood LVD-300 User manual

Kenwood
Kenwood DPC-141 User manual

Kenwood
Kenwood CD-3260M User manual

Kenwood
Kenwood DP-R4450 User manual

Kenwood
Kenwood DPC-MP727 User manual

Kenwood
Kenwood KDC-CX82 User manual

Kenwood
Kenwood DP-M7750 User manual
Kenwood
Kenwood DP-M960 User manual

Kenwood
Kenwood CD-203 User manual