manuals.online logo
Brands
  1. Home
  2. •
  3. Brands
  4. •
  5. Kenwood
  6. •
  7. Mini Disc Recorder
  8. •
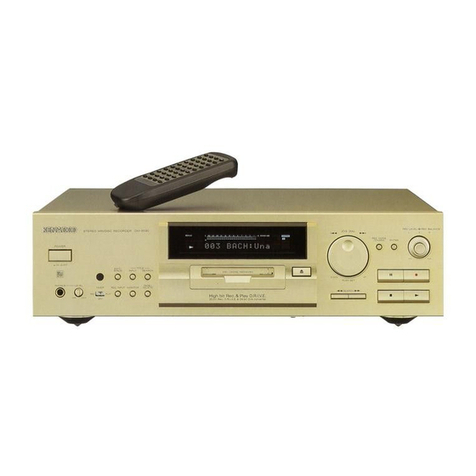
  9. Kenwood DMF-9020 User manual

Kenwood DMF-9020 User manual

KENWOOD
STEREO MINIDISC RECORDER
DMF-9020
MD-2070
INSTRUCTION MANUAL
KENWOOD CORPORATION
This instruction manual is used to describe multiple models listed above.
Model availability and features (functions) may differ depending on the country and sales
area.
860-4101-00 00 @ (K,P,T) i.@ 9606
JgyyC~. ?. ^& &$,? .’ ;, “’ *
or operation as follows.
U.S.A. and Canada ..,,...................,................................................,...,....................................................,.......,.....,...,............AC 120Vonly
U.K............................................................................................................................................................................................AC230 Vonly
For the United Kingdom
Factory fitted moulded mains plug
1.The marns plug contains a fuse. For replacement, use only a 13. Amp ASTA-approved (BSI 3621 fuse.
2. The fuse cover must be refrtted when replacrng the fuse rn the moulded plug
3. Do not cut off the marns plug from thrs equrpment. If the plug frtted ISnot suitable for the power pornts rn your home or the cable IStoo short to
reach a power pornt, then obtarn an appropriate safety approved extensron lead or adapter, or consult your dealer If nonetheless the marns plug
IScut off, remove the fuse and drspose of the plug rmmedrately, to avord a possrble shock hazard by Inadvertent connectron to the marns supply
IMPORTANT :
The wires rn the marns lead are coloured rn accordance wrth the followrng code
Blue: Neutral
Brown : Live
Do not connect those leads to the earth termrnal of a three -pin plug
!$@#!w : ^: air L <+;@
WARNING: T’O PREVENT FIRE OR ELECTRIC SHOCK, DO NOT EXPOSE THtS
APPLIANCE TO RAIN OR MOISTURE.
CAUTION TO REDUCETHE RISKOF ELECTRIC SHOCK, DO NOT REMOVE COVER (OR BACK) NO
USER-SERVICEABLE PARTS INSIDE, REFER SERVICING TO QUALIFIED SERVICE PERSONNEL
THE LIGHTNING FLASH WITH ARROWHEAD SYMBOL, WITHIN AN EQUILATERAL TRIANGLE, IS INTENDED TO ALERT
THE USER TO THE PRESENCE OF UNINSULATED “DANGEROUS VOLTAGE” WITHIN THE PRODUCT’S ENCLOSURE
THAT MAY BE OF SUFFICIENT MAGNITUDE TO CONSTITUTE A RISK OF ELECTRIC SHOCK TO PERSONS
AL
THE EXCLAMATION POINTWITHINAN EQUILATERALTRIANGLE IS INTENDEDTOALERTTHEUSERTOTHE PRESENCE
OF IMPORTANT OPERATING AND MAINTENANCE (SERVICING) INSTRUCTIONS IN THE LITERATURE ACCOMPANYING
THE APPLIANCE
^,- .-
The marking of products using lasers
(Except for some
areas)
The markrng ISlocated on the rear panel and says that the component
uses laser beams that have been classrfred as Class 1. It means that
the unrt is utrlizrng laser beams that are of a weaker class. There is no
danger of hazardous radiatron outsrde the unrt.
.-- ~ -
REQUIREMENTBYNEDERLANDGAZEmE
Batteries are supplied with thus product When
they empty, you should not throw away. Instead,
hand them rn as small chemrcal waste.
Contents
Caution : Read the pages marked A carefully to ensure safe operation.
::.,~21
g.gy,‘“““%~*-- . 3.
Introduction.. .............................. ...*................... -.................................................................................. 2
a Before applying power ..................................................................................................................... 2
A Safety precautions ............................................................................................................................ 2
. Contents ........................................................................................................................................... 3
Accessories ....................................... .......................................................... ................................... 4
Special feature ................................................................................................................................. 5
B IMPORTANT SAFEGUARDS .....
.......... .
.......
.....
......
........ ...
....
..
.
.......... .
................. ............................... 6
Information that you should know ..,...,,,.,..........,,, ....,.,......e,..............,,.....,,......,, .............................. 8
Safety Precautions.. .......................................................................................................................... 8
Marntenance ..................................................................................................................................... 9
System connections ............. ............................................................ ..................... .............. .............. IO
Names and functions of parts ..................... *..................... ................. .............................................. 12
Drsplay/Main unit ............................................................................................................................ 12
Remote control unit ...................................................................................................................... 14
Operation of remote control unit.. ................... ......................... ............. .............. ........................ .... 15
Playback of Mini Disc ........................................................................................................................ 16
Playing tracks in order from track No. 1 ...................................... .................................................. 16
Searching a desired track by its title (TITLE SEARCH) ................................................................. 17
Playback from desired track ........................................................................................................... 18
Random playback ........................................................................................................................... 18
Programming ..................................................................................................................................... 20
Programming tracks In a desired order ................................................................................. ........ 20
Repeated playback ......................................................................................................................... 22
Recording-related keys ,......,,..,..,...,........,......,,.................................,.,............,............................., .. 23
AUTO/MANU. key .................................................................................................................. .... 23
MONITOR key ................................................................................................................................ 23
REC MODE key ......................................... .................................................................................... 23
Automatically starting recording when the track starts (SOUND SYNCHRO REC) ....................... 25
Automatically pausrng recordrng when the track ends (REC AUTO PAUSE). ................................ 25
Starting recording from the sound before the current sound (MEMORY REC) ........................... 25
Recording (ANALOG input) ............................................................................ ..”............................... 26
ANALOG recording ........................................................................................................................ 26
Recording (DIGITAL input). ................................................ ,........., .......................................... .......... 28
DIGITAL recording ............................................................................................ ............. .............. 28
Synchro recording with CD playback ............................................................................................. 30
DIGITAL recording and
SCMS
............................................................................................. ......... 30
Editing.. ............................................................................................................................................... 31
Selecting the edrtrng functron type.. .............................................................................................. 31
Moving the track being played (TRACK MOVE) ................................................... ....................... 32
Moving several tracks at a time (QUICK MOVE). .......................................................................... 34
Dividing the track being played (TRACK DIVIDE) ......................................................................... 36
Combinrng the track being played (TRACK COMBINE) ............................................ .................... 38
Erasrng the track being played (TRACK ERASE) ............................................................................ 40
Erasing one or more track at a time (QUICK ERASE) .................................................................... 42
Editing titles .................................................................................................................................... 44
CD text display and copy ......................... ,,.......,.,,....., ................................................. ........... .......... 48
Changing the displayed contents ................................. .............................. ................ ................. ..
.. 49
TIME DISPLAY key ....................................................................................................................... 49
METER key .................................................................................................................................. 49
Timer operations .....................................
.......... ..,.,...................................................., ...................... 50
Timer playback, trmer recording .................................................................................................... 50
In case of difficulty ..,,,...,..,....,.......,,....,....,...,......................................, ............................................. 51
Specifications ..................................... ..~...........,.........,................,.....,,.....,................................,...., ...
54
UMWO&/MD2070 (tnj
Unpack the unit carefully and make sure that all accessones are put asrde so they wrll not be lost
Examrne the unrt for any possrbtlrtyof shipping damage. If your unrt is damaged or falls to operate, notrfy your dealer rmmedrately. If your unrt was shopped
to you drrectly. notrfy the shrpprng company without delay. Only the consrgnee (the person or company recewrng the unit) can file a clarm agarnst the
carrier for shrpprng damage
We recommend that you retarn the orrgrnal carton and packing materials for use should you transport or shopthe unit rn the future.
Keep this manual handy for future reference.
Check that the following accessories are present.
Audro cord (2) System control cord (1) Optrcal fiber cable (Ii
Remote control unit iI) Batterres (2) (For remote control unrti
RGM0905 R03 (“AAA”-we) batteries
This unrt is audro equrpment based on the Mrnr DISCformat. The Mint DISC(MD) ISan applrcatron of the optical and magneto-optrcal technology and
has the capabilrty to record signals on discs.The operability of the MD ISequrvalent to the Compact DISC(CD). The MD uses optronal non-contact
system so the recordings are not degraded by eternal factors and the discs are never scratched or damaged rn playback.
This unit incorporates the KENWOOD-original “24-bit REC D.R.I.V.E.Il”
system to allow high-quality 24-bit recording of CD as well as analog
sources such as a tuner and analog disk turntable.
The playback circuitry incorporate the KENWOOD-original “24-bit D/
A converter” for high-quality playback.
(D.R.I.V.E.:Dynamlc Resolution Intensive Vector Enhancement)
The sampling rate converter incorporated in this unit is compatible
with all digital sources (32 kHz, 44.1 kHz, 48 kHz).
048 kHz : Standard mode of DAT. For recording of B mode broadcastrng of BS
tuner, etc.
044.1 kHz: Standard mode of DAT. For recordrng of CD, MD, etc.
032 kHz : Standard mode and long-hour mode of DAT. For recordrng of A mode
broadcastrng of BS tuner.
In addition to the conventional editing functions (MOVE, DIVIDE,
COMBINE and ERASE), this unit provides more versatile editing
functions such as the QUICK MOVE function for moving desired tracks
at once or the QUICK ERASE function for erasing desired tracks at
once.
This unit is equipped with the “SOUND SYNCHRO REC” and “AUTO
CUT” functions for automatically starting and pausing recording
simultaneously with the sound input, the “REC AUTO PAUSE” func-
tion for automatically stopping recording when the end of one track
on the CD is reached, and the “MEMORY REC” function for starting
recording from approximately 6 seconds before the current sound.
This unit is capable of adjusting the recording level during record-
ing from a digital source as well as from an analog source. The fade-
in/out functions can also be used.
The “Title input” function allows to assign disc and track titles simply
using the multi-jog dial, the “Title search” function allows to find the
desired track title by checking every title, the “Title copy” function
allows to copy the CD text while recording a CD and the “Preset title”
function allows to preset frequently used titles.
A Caution :Read this page carefully to ensure safe operation.
Please read all of the safety and operattng rnstructions before
,,.L~’operating this appliance. Adhere to all warnrngs on the applrance
and In the instructron manual. Follow all the safety and operattng
Instructions. These safety and operatrng rnstructrons should be
retained for future reference.
1. Power sources - The applrance should be connected to a
power supply only of the type described rn the rnstructron
manual or as marked on the applrance. If you are not sure of
the type of power supply to your home, consult your applrance
dealer or local power company. For applrances Intended to
operate from battery power, or other sources, refer to the
rnstructron manual.
2. Power-cord protection - Power-supply cords should
be routed so that they are not likely to be walked on or
prnched by Items placed upon or agarnst them, pay
particular attention to cords at plugs, convenience
receptacles, and the pornt where they exit from the
appliance.
Never
pull
or stretch
the cord.
3. CAUTION
- Polarization - This applrance may be
equipped wrth a polarized alternatrng-current line plug ia plug
having one blade wrder than the other). Thus plug WIII fit Into the
power outlet only one way. Thus is a safety feature. If you are
unable to Insert the plug fully Into the outlet, try reversing the
plug. If the plug should stall fall to fit, contact your electrrcran to
replace your obsolete outlet. Do not defeat the safety purpose
of the polarized plug.
4. Ventilation - Slots and openrngs In the cabinet are provided
for ventilation and to ensure relrable operation of the appliance
and to protect It from overheatrng, and these openings must
not be blocked or covered. The appliance should be srtuated so
that its location or posrtron does not Interfere with Its proper
ventrlation.
To maintatn good ventilation, do not put records or a table-cloth
on the applrance. Place the applrance at least 10 cm away from
the walls.
Do not use the appliance on a bed, sofa, rug or similar surface
that may block the ventilation openings. This appliance should
not be placed in a built-In installation such as a bookcase or rack
unless proper ventrlatron is provided or the manufacturer’s
tnstructrons have been adhered to.
5. Water and moisture - The appliance should not be
used near water -for example, near a bathtub, washbowl,
kitchen sink, laundry tub, In a wet basement, or near a
swimming pool, etc.
Temperature- The applrance may not function properly
If used at extremely low, or freezing temperatures. The
Ideal ambrent temoeratum
IS
above +5”C 141°F).
Heat -The appliance should be srtuated away from heat
sources such as radiators, heat registers, stoves, or
other appliances (rncludrng amplrfrers) that produce heat.
Electric shock- Care should be taken so that objects do
not fall and lrqurd IS not spilled Into the enclosure
through openrngs. If a metal objects, such as a hair pm
or a needle, comes Into contact with the Inside of thus
appliance, a dangerous electric shock may result. For
famrlres with chrldren, never permit chrldren to put
anythrng. especially metal, rnsrde thus applrance.
Enclosure removal - Never remove the enclosure. If
the Internal parts are touched accrdentally, a serious
electric shock might occur.
lO.Magnetic fields- Keep the appliance away from sources
of magnetic fields such as TV sets, speaker systems,
radios, motorized toys or magnetized objects.
ll.Cleaning - Unplug thus appliance from the wall outlet
before cleaning. Do not use volatile solvents such as
alcohol, paint thinner, gasoline, or benzene, etc. to clean
the cabrnet. Use a clean dry cloth.
12.Accessories- Do not place thisapplrance on an unstable cart,
stand, tripod, bracket, or table. The applrance may fall, causing
serious Injury to a child or adult, and serious damage to the
appliance. Use only with a cart, stand, tripod, bracket, or table
recommended bythe manufacturer, or sold wrth theappliance
Any mounting of theapplranceshould follow the manufacturer’s
rnstructrons, and should use a mountrng accessory
recommended by the manufacturer An appliance and cart
combrnatlon should be moved with care. Quack stops, excessive
force, and uneven surfaces may cause the appliance and cart
combrnatron to overturn.
13.Lightning
- For added protectron for thus applrance durrng a
lightning storm, or when it IS left unattended and unused for
long periods of time, unplug rt from the wall outlet and
disconnect the antenna or cable system. Thus WIII prevent
damage to the appliance due to lrghtnrng and power-lrne
surges.
14.Abnormal smell
- If an abnormal smell or smoke IS
detected, rmmedrately turn the power OFF and unplug
the appliance from the wall outlet. Contact your dealer or
nearest servrce center.
POWER OFF!
15.Damage requiring service
- The applrance should be
serviced by qualtfred service personnel when:
A.
The power-supply cord or the plug has been damaged.
6. Objects have fallen, or liqurd has been sprlled Into the
appliance.
C. The applrance has been exposed to ram or water.
D.
The appliance does not appear to operate normally by
following the Instruction manual. Adjust only those controls
that are covered by the rnstructron manual as an Improper
adjustment of other controls may result rn damage and WIII
often require extensive work by a qualrfred technrcran to
restore the appliance to Its normal operatron.
E.
The applrance has been dropped, or the enclosure
damaged.
F.
The appliance exhibits a marked change In performance.
16.Servicing
- The user should not attempt to servrce the
applrance beyond that descrrbed rn the instruction
manual. All other servicing should be referred to qualrfred
servrce personnel.
17.Outdoor antenna grounding
- If an outside antenna IS
connected to the applrance. be sure the antenna system
IS grounded so as to provide some protectron agarnst
voltage surges and burlt up statrc charges. Article 810 of
the National Electrrcal Code ANSVNFPA 70. provrdes
information wrth respect to proper groundrng of the
mast and supporting structure, groundrng of the lead-in
wrre to an antenna drscharge unit, srze of groundrng
conductors, locatron of antenna discharge unrt,
connection to grounding electrodes, and reaurrements
for the grounding electrode. See Figure
l&Power lines
- An outsrde antenna system should not be
located rn the vrcrnrty of overhead power lines or other electric
light or power crrcurts, or where it can fall Into such power lrnes
orctrcurts. When rnstallrng an outsrde antenna system, extreme
care should be taken to keep from touching such power lanes
or crrcurts as contact with them mrght be fatal.
19.AC outlets
- Do not connect other audio equipment
wrth a power consumptron larger than that specrfred to
the AC outlet on the rear panel. Never connect other
electrrcal applrances, such as an Iron or toaster, to rt to
prevent fire or electric shock.
20. Overloading
- Do not overload wall outlets, extensron cords,
or Integral convenience receptacles as thus can result In a risk
of fire or electrrc shock.
21. Attachment
- Do not use attachments not recommended by
the applrance manufacturer as they may cause hazards
22. Replacement part-
When replacement parts are requrred.
be sure the service technrcran has used replacement parts
specrfred by the manufacturer or have the same characterrstrcs
as the ongrnal parts. Unauthorized substrtutrons may result In
fire, electric shock, or other hazards.
23. Safety check
- Upon completron of any servrce or repairs to
thrs applrance, ask the servrce technrcran to perform safety
checks to determine that the appliance
IS
rn proper operatrng
conditron.
1 item 3 ISnot requrred except for grounded or polarrzed equrpment.
2 Item 17 and 18 are not required except for unrts provrded with antenna
termrnals
3. lterr 17 complres wrth UL in the U.S.A.
Care
Wipe penodrcally dust and dart attached on the cartridge wrth a dry
cloth
Write protect tab
Do not touch the disc directly.
Do not touch the drsc by openrng the shutter wrth your hand. The
cartndge will be damaged If it ISforced open
To protect recorded contents against accidental erasure, set the write
protect tab of the disc open. Return the tab to the ongrnal posrtron
when you want to record srgnals on the disc
Storage position
Do not leave Mrnr DISCSrn place where the temperature and/or
humrdrty are extremely hrgh (for example, rn a place subject to drrect
sunlrght).
IRecordrng
dmbledl iRecordlng enabled)
Note related to transportation and movement
Before transporting or moving this unit, carry out the
following operations.
1. Set the POWER key to ON without loading a Mini Disc.
*Check that no drsc ISpresent rn the unrt
2. Wait a few seconds and verify that the display shown
appears.
3. Set the POWER key to OFF.
i,j :-:
j .j I...: p; ‘” f:’ (7
L.’ .i. .... .....
The MD recorder ISvery sensrtrve to vrbratrons. It should be rnstalled
rn a positron subject to as small vrbratron as possrble The shutter of the drsc cartndge ISpermanently open while the drsc
ISloaded rnthe set. Therefore, to prevent dust from penetrating Inside
the disc, take the drsc out of the unrt tmmedrately after completron of
recordrng or playback.
Maintenance
Maintenance of the set
When the front panel or case becomes dirty, wrpe wrth a soft, dry
cloth. Do not use thinner, benzene. alcohol, etc for these agents may
cause drscoloratron
In regard to contact cleaner
Do not use contact cleaners because It could cause a malfunctron. Be
specrally careful not to use contact cleaners contarnrng 011,for they
may deform the plastrc component
* ,,x ..
Reference notes
Caution on condensation
Condensatron (of dew) may occur rnsrde the unrt when there ISagreat
drfference rn temperature between thus unrt and the outside.
Thus unrt may not function properly rf condensatron occurs In this
case, leave the unrt for a few hours with the power left ON, and
restart the operation after the condensatron has dried up.
Be specially cautious against condensation in a follow-
ing circumstance:
When thus unit IS earned from a place to another across a large
drfference rntemperature, when the humrdrty rn the room where this
unrt IStnstalled Increases, etc.
CD TEXT
CD TEXT ISa system that ISstandardrzed to allow the drsplay of text
data (drsc name or song trtle. artrst name etc.) that ISrecorded on CDs
rn addmon to musrc
By drgrtally connecttng thusunit with a CD player (CDTEXT compatrble),
the text data of a CD can be copred to an MD.
Presently, however, some CDs are equipped wrth a copy preventron
code that prohrbrts the copyrng of thus data. In the case of such CDs,
copyrng of text data ISnot possrble
On CDs that do not rnclude the text data copy preventron code, the
operatron of
“CD text display and copy” IS
possrble - !22
~_
Memory backup
The typrcal period for whrch the memory can be backed up while the
power cord ISunplugged or the
POWER
key ISset to the
OFF
posttron
IS about 3 weeks, though thus may be variable dependrng on the
surroundrng environment
In case of long hours of power farlure or slrppmg out of the power cord,
the data related to recordrng and edrtrng (that ISusually recorded at the
moment the Mrnr DISCISelected) may be cleared or destroyed before
rt ISwrrtten rn the Mrnr DISC Remember that the data lost cannot be
recovered.
After recording or edrtrng, be sure to eject the Mrnr DISCso that the
recordrng or edrtrng data can be wntten rr the drsc
US and foreign patents lrcensed from Dolby ILaboratorres Lrcensrng
Corporatron
.. -i- __”
DMF-902O/MD2070 IEn1
Make connection as shown below. When connecting
tta the related system components, refer also to the in- Malfunction of microprocessor
struction manuals of the related components.
If operation IS not possible or erroneous display ap-
Caution: Do not plug in the power lead until all connec-
tions are completed.
properly, reset the microprocessor referring to “In
I I T I
MD recorder
w g;ow ~cnc.. -- -I
DIGITALinput/output jacks
(OPTICAL)
Remove pfotectwe caps ~Jsc-j-
from digital input/output
jacks before use
TO WALL
OUTLET .AC
*Be careful not to lose the protectwe caps *When connecting the audio cords (cords wth pin plugs on each end), insert
the white plugs Into the L (Left1 lacks and red plugs into the R iRIght) lacks.
. If the system components are equipped wth more than one system control
cord connectors, any one of the connectors can be used.
1 Connect all cords firmly If connections are loose, there could be loss of sound or noise produced.
2 When plugglny and unplugging connection cords, be sure to first remove the power cord from the AC outlet. Plugglnglunplugglng
connection cords wthout removal of the power cord call cause malfunctions or damage to the unit.
DMF-9020/MD2070 IEn1
About the system control connections
Connecting system control cords after connecting a Kenwood audio component system lets You take advantage of
convenient system control operations.
There are two Kenwoood system control modes. Make connections according to the groups of terminal symbols shown
below.
[XS81 Mode : lets you combine x, m, and MI terminals
EL161 Mode : for EL161 terminals only
This unit is &LW compatible.
You can connect this unit via system control if all other equipment using system control connections are set to the EL161
mode.
1 fSL161 equipment cannot be combrned with [XRI, [XSI, and [XSBI eqwpment for system
operatrons. If Your equrpment consrsts of this krnd of combrnatron, please do not connect
any system control cords. Even wrthout system control cords, normal operations can be
camed out wrthout affectrng performance.
2. Even if your amplrfrer or recwer does not have a system control termrnal, the system
control functions between other components can be Implemented partrally byconnectrng 1
system control cords to the system control termrnals of other components. (CD TEXT)
3. Do not connect system control cords to any components other than those specrfred by
Kenwood. It may cause a malfunctron and damage your equrpment.
4. Be sure the system control plugs are Inserted all the way rnto the system control termrnals.
(See the figure at right.)
About the system control operations
Remote Control
Lets you operate this unit with the system remote supplied with the amplifier or receiver.
Automatic Operation
Automatically switches the input selector on the amplifier or receiver when you start playback from this unit.
Synchronized Recording
When recording a CD after setting the amplifier’s input selector to CD, starting playback on the CD player allows to
start recording automatically in an interlocked operation.
. Do not operate the CD player during recordrng of a drgrtal source other than CD; otherwrse malfunctron may occur.
l
Synchronized recording ISnot possrble whrle the SOUND SYNCHRO REC, AUTO CUT and REC AUTO PAUSE functron ISoperatrng.
-M-!2Q
Note on connection of optical-fiber cable
The optical-fiber cable is designed for use in the connection
. Insert the optrcal-fiber cable strarght Into the connector until It clrcks.
of the CD player (optional). The digital signal transmission
. Be sure to attach the protectron cap when the connector ISnot used.
makes it possible to record the high-quality sound of CDs
*Never bend or bundle the optrcal-fiber cable.
without degradation.
*AlI of the commerctally-available optrcal fiber cables cannot be used
with these unrts. If there IS an optrcal fiber cable whrch cannot be
connected to your component, please consult your dealer or nearest
KENWOOD agent.
\
D.R.l.VE.II(Dynamic Resolution Intensive VectorEnhancement) system
This unrt rncorporates the KENWOOD-ongrnal “24-brt RECD.R.1 V.E.II” system so that, not to mention the CD, analog sources such as the tuner and
analog disk turntable can also be recorded wth hrgh-qualrty 24-brt recordrng
The drgrtal Inputs rnclude both optrcal and coaxral input lacks so that high-quality recordrng ISpossrble from any drgrtal equrpment.
1 The reproducrbrlrty of small signals IS Improved drastrcally for an excellent reproductron of fine reverberatrons of musrc. The excellence ISalso
remarkable rn the feeling of stabrlrty, presence, attack sound and bass reproductron.
Z The D.R.I.V.E.II system marntarns the correlatron between the musrcal components of the Input and output srgnals and does not cause any sound
degradatron from the pnncrple.
MONITORfunction
Thus unrt can be used as a 24.brt D/A converter by setting the MONITOR key
\ Refer to “MONITOR key”. -@
DMF-9020/Ma2070 IEnl
REPEAT lndlcator
PGM IProgram, Indicator FADE, IN, OUT and peak level lndlcators
ANALOG Input lndlcator
Operation lndlcators
. REC lndlcator
I
SINGLE, TOTAL and
REMAIN lndlcators Character InformatIon II ’
A PAUSE lndlcator
COPY lndlcator
MANUAL lndlcator
MONITOR lndlcator
Listening through headphones
Plug the stereo headphones lwth standard-plug) avaIlable v- audio
stores Into the
PHONES
jack and adjust the llstenlng volume with the
PHONES LEVEL
control on the front panel.
Standby mode
While the standby indicator of the unit is lit, a small amount of current is flowing into the unit’s internal circuitry to back up the
memory. This condition is referred to as the standby mode of the unit. While the unit is in the standby mode, it can be turned
ON from the remote control unit.
De&iption of main unit keys
0 POWER key
: Press to turn the unit ON and OFF
: The unrt may enter the standby mode when the
POWER
key
is pressed to turn It ON. Thus IS because the unit holds the
memory that it has been put to the standby mode by the
remote control unit In the last operation.
@Remote control sensor
0 EDIT/SPACE key
EDIT
: Press to swatch the edrtrng mode ON/OFF.
SPACE
: Press to Insert a blank space character during the trtle Input
operatron.
OTITLE INPUT key
: Press to switch the title Input mode ON/OFF.
0 TITLE SEARCH key -LlS -m
-
Press to switch the title search mode ON/OFF.
: During title edrting, press to swatch the title change Input
mode between the “overwrrte mode” and “Insert mode”.
0 JOG DIAL -2;rs
- -25 -@a
^-
Skip down k+4/ Skip up(m) knob
During playback, rotate to skrp tracks
Before starting recording In record mode, rotate toselectthe
recordrng setting adjustment mode
: During trtle search, rotate to select a track number.
During title Input, rotate to select a track number or a
character.
: During edrtrng, rotate to select the edrtrng mode or a track
number.
PUSH SET knob -
$2:
: For use rn settrng the edrtrng result and Input trtle In rnernz?.
: When pressed In the recordrng pause mode, the MEMORY
REC functron
IS
set and recordrng starts from the sound
approxrmately 6 seconds before the current sound.
@REC MODEICHARAC. (Character) key
REC MODE
: Press to switch the recordrng settrng adjustment modes
(record modes) ON/OFF.
CHARAC.
: Press to select a character group during the title Input
operatron.
0 ENTER/TIME DISPLAY key
ENTER
: For use In executing the edrtrng and title Input operatrons.
TIME DISPLAY
: Press to switch the time and trtle display.
OREC LEVEL knob
: Rotate to adjust the analog recording level.
0 REC BALANCE knob
: Rotate to adjust the analog recordrng balance.
--.
-27’
-a
@Keyboard connector - LEJ -
;4g
-
: Connect an IBM PC compatrble keyboard (optronal) here.
@PHONES jack
: Connect stereo headphones (optronal) here.
@PHONES LEVEL knob
Rotate to adjust the volume of the headphones.
@TIMER switch
: This swatch is used In timer playback and timer recording.
@ REC INPUT key -@j-@g
: Press to swatch the recordrng input line betwezdigxl
(optrcal/coaxiali, analog and monaural.
@MONITOR key -m
: Press to monrtor the sound being input from the source
while the unit IS In stop mode.
@ FADE/DELETE key
FADE -m-m
--
: Press to switch the fade mode ON/OFF.
DELETE
: During title editing, press to delete a character. During track
edrting, press to delete a track.
@Mini Disc insertion slot
: When a Mrnr Disc IS inserted while the unit IS in the standby
mode, rt IS turned ON automatically.
@Eject (9 key
: Press to eject the Mrnr DISC.
@Manual search down (-1 key -@Q-m
: This key also functrons as the fast reverse ke\/duzg
playback.
: During an edmng mode, press to move the title input
cursor or to scroll the track trtle drsplay to the left.
@Manual search up (-1 key -m-m
: Thrs key also functrons as the fast forward key%&-
playback.
: Durrng an edrtrng mode, press to move the title input
cursor or to scroll the track tttle drsplay to the right.
@IPause 01) key
: Press to let playback or recording pause temporarily.
@Stop (=I key
: Press to stop playback or recordrng.
@Play (~1 key
: Press to start playback.
@Record (01 key
: Press to start recording.
In stop mode
-!m-@-@ii
-
: When the l key ISpressed while a recordable disc is present
In the unrt. It enters record-pause mode.
(It enters record-pause mode at the position immediately
after the last exrstrng track.)
In record-pause mode
: When the l key
IS
pressed, the SOUND SYNCHRO REC
standby mode is set.
: In the SOUND SYNCHRO REC standby mode, the set
functions In the same way as In the normal recording pause
mode.
DMF-9020/MO-2070 IEn1
_. (,~ . e I I.a’
The remote control unit incorporates the basic operation keys as well as a variety of applied operation keys so that it can be
used in a wide range of purposes.
The keys on the remote control unit with the
same names as on the main unit have the same function as the keys
on the main unit.
I
OON~TANDBY key
Press to turn the unit between ON and
STANDBY (l/O) modes.
@Character editing keys
TIME DISPLAY key
Press to switch the time and title display.
CHARA. (Character)/ P.MODE (Play
Mode) key
CHARA.
: Press to select a character group dur-
Ing the title Input operation.
P.MODE
Press to lnltlata the program mode.
DELETE / CLEAR key
DELETE
During title Input. press to delete a
character
CLEAR
During edltlng, pressto clear aselected
track number
In program mode, press to clear the
program
SPACE / CHECK key
SPACE
Dunngtltlelnput, presstolnserta blank
space character
CHECK
In program mode, press to check the
program contents
t9~0NlT0R key
Press to monitor the sound being Input
from the source while the unit ISIn stop
mode
METER key
Press to switch the level meter display
contents
RANDOM key
Press to lnltlate the random play mode.
REPEAT key
Press to switch the repeat modes for
repeat playback
0 Basic operation keys
. Play key
~1 , -I Skip down/up keys
l
Record key
n
Stop key
II Pause key
@-
e
e-
Model: RC-MO905
Infrared ray system
-0
-0
-Q
0
0
0
BRecording-related keys
REC MODE key
Press to switch the recording setting ad-
lustment modes ON/OFF
AUTO/MANU. key
Selects whether the track numbers are
to be marked automatically during re-
cording (AUTO) or to be marked manu-
ally after It (MANUAL)
AUTO PAUSE key
When this key IS pressed, the pause
mode IS lnltlated automatlcally at the
point where the track number changes
during playback.
When pressed Inthe recording or record-
Ing standby mode, the AUTO RECPAUSE
mode ISturned on.
REC INPUT key
: Press to switch the recording Input line
between digital ioptlcal/coaxlal), analog
and monaural.
OCURS~R / 44, b+ shuttle
CURSOR
: During title Input, rotate to move the
cursor.
-.-
: Use this during playback for forward and
reverse search.
@EJECT (9 key
OEditing mode keys
EDIT CANCEL key
: Press to cancel the edltlng operation.
TITLE INPUT key
: Press to switch the title input mode ON/
OFF.
TITLE SEARCH key
Press to switch the title search mode
ON/OFF.
During trtle edrtlng, press to switch the
title change Input mode between the
“overwnte mode” and “insert mode”.
SET key
: This key ISused In the title assignment or
edltmg operations.
When pressed In the recording pause
mode, the MEMORY RECfunction is set
and recording starts from the sound ap-
proximately 6 seconds before the cur-
rent sound.
ENTER key
Press to execute editing or enter the
Input title In memory.
EDIT key
: Press to switch the edlttng mode ON/
OFF.
0 Numeric keys
o-9
Press when selecting a track number
directly.
+lO
Press when selecting a track number 10
or more
+I00
: Press when selectmg a track number
100 or more.
These keys are also used to select a
character or symbol during title editing
.-
Remove the cover. Insert
batteries.
Close the cover.
. Insert two R03 (“AAA’-srze) batteries followrng
the polarrty rndrcatrons
Plug the power cord into a power outlet, then turn on the
main unit’s POWER key to turn the power on. (If in the
standby mode, press the ON/STANDBY key on the remote
control unit.) Once the power has been switched ON, press
the desired operation key.
*When pressrng more than one remote control keys successrvely. press
the keys securely by leaving an Interval of 1 second or more between
pressrng of keys
6m
Reference operating range
Model RC-MO905
Infrared ray system
1 The provided batteries are Intended for use rn operation checking, and therr servrce lrfe may be short.
2 When the remote controllable drstance becomes short, replace all batteries with new ones.
3 If drrect sunlight or the light of a hrgh- frequency fluorescent lamp (rnverter type, etc.) ISrncrdent to the remote sensor, malfunction may
occur In such a case, change the rnstallatron posrtron to avord malfunctron.
DMF-9020/MD2070 IEnl
,,
: ,,
Use the following procedure to play an MD in the original
order of tracks from track No. 1.
Before playing an MD
Set the TIMER switch to OFF.
TIMER
OFF
Disc recorded in monaural mode
This unit is capable of playing a Mini Disc recorded in the
“monaural long-play mode.” As the “monaural long-play
mode” requires half the amount of data required for
stereo mode recording, the playing time (recording time)
of the disc is doubled (to max. 148 minutes) from that in
the stereo mode.
*A Mm DISCrecorded rn the “monaural long-play mode” cannot be
played normally wrth equipment which IS not compatrble wrth
monaural playback.
Ia
Load a Mini Disc.
In the direction of the arrow
a
Start playback.
*Insert a Mm DISCInto the slot securely.
.“READING”blrnks while the unrt checks the contents of the disc.
*If a title has been assrgned to the disc, that trtle will be displayed.
SMoLE:.yi :-:; .]
i::,r i.‘i ;:;i :: f-g :‘S
... 2. ..... :: r . p’:
... ...
. If the “PGM” rndrcator
IS
Irt. press the
CHARA.
/ P.MODEkey of the
remote control unrt to turn it off
I I
. In a few seconds, playback starts from track No, 1
Track No being played Elapsed tme of track
being played
DMF-9020/MD2070 IEn1
Preparation 0 Put the MD recorder in stop mode.
0 Checkthetrackmode.(“PGM”goes
Off1
q
Press the TITLESEARCHkey.
Pressing the
TITLE SEARCH
key agaln cancels the
title serach mode.
El
Select the desired title.
Pressing the
TITLE SEARCH
key agaln cancels the
title serach mode.
Eli
Start playback.
. With a track to which no title has been asslgned, the track number and
“. .” are dlsplayed
*Title search ISpossible in either stop or play mode.
Selected track
Characters flow toward the left.
f
Characters flow’toward the left
Lc.2.10 m.21.1s .5.,,.3., I 1 I 1 O”lP.+a,
------------
~- - - - - _ _ - _ _ _ - - _ _
IlNGY ..“. ..“. ..r ..< ii .I .‘:;
“i’ il .; .iL,
I
Trach No bmg played Elapsed tome of track
bmg played
.Playback starts I” a few seconds.
I
OMF-9020/M&2070 IEn1
I
I
i Pla
i 3J(eb;\ Jr’.*-.
:*p;=
$‘;‘:;‘&;s~>
2,”,.“e”‘,
El
Enter the track mode.
Each press switches the mode.
/ , c I Track mode PGM goes off
Press in stop mode. 2 Program mode PGM lights up
“PGM” goes off
I
CHARA. L-c.-.Y II 21IS.15.I>.* 1 , , 1 aOVTI~IB,
I- .- r--
_-A ..... .-..
I::: (:::( .i i:::; ii i”i ;‘>
2. ..,,. ii ::-: ::“:
ca
Select the desired track
number.
Press the numeric keys as shown below....
To enter track No. 23 : 1+101,1+101./g
To enter track No 40 : 1+101,1+1oj,[+101,1+101,~
To enter track No. 212 :1+100) .m.m.!q
To start playback directly from a part of a track....
Early part of track No. 7 (7.2) ‘rn@lEl
Middle part of track No. 7 (7.5) ~IZIIEIEI
Latter part of track No 7 17.8) : pJ/iJlg
Mlddle part of current track 1.5)
q q
When an IBM PC compatible keyboard (optional) is connected....
To enter track No 23
q ,[Fl,lziiq
To enter track No. 212 lg. lg3. m,e,,,l
Middle part of track No. 7 (7.5) :
q
, a, @
*If a track NO. which does not exist on the disc IS selected while
“READING” ISbllnklng, the last track on the disc wtll be played.
Gl
Enter the track mode.
Press in stop mode.
CHARA.
Ia
Press the RANDOM key.
RANDOM
=c-
Each press switches the mode.
r ; Track mode : PGM goes off
? Program mode : PGM lights up
“PGM” goes off
*Random playback ISnot possible in the program mode.
elf the RANDOM key IS pressed during random playback, random
playback IScancelled and normal playback continues fromthat point. (If
pressed near the end of the track, playback may skip to the begInnIng
of the next track.)
l
If the RANDOM key ISpressed during normal playback, playback of the
current track stops and random playback beglns.
/I
Skipping tracks
r1Main unit 1 l
The track rnthe drrectronof the pressed key ISskrpped, and the selected
track will be played from the begrnning.
l
When the m key IS pressed once during playback, the track being
To skip -= To skrp
backward forward
)Remote control unit]
To skrp To skrp
backward forward
El.* cg,m
played wrll be played from the beginnrng.
*To return to the begrnnrng of the previous track to the current track,
press the H key rn less than about 2 seconds after the restart of the
current track.
I 1Remote control unit j
Reverse Forward
search search
. SEARCH H
l
Playback restarts from the posrtron wrth whrch the key ISreleasedorthe
fog dral operatron IStermrnated. (If the key was pressed in the pause
mode, the unrt returns to the pause mode at that position.)
. Sound ISoutput when usrng forward or reverse search during playback.
l
If forward or reverse search ISstarted during play-pause, the drsc can
be searched at a high speed but sound ISnot output.
. When the reverse search ISstarted during the program mode and the
begrnnrng of the current track rs attarned. It wril be played from the
begrnnrng. -Ez
Topause playback Tostop playback
I
IMain/
/ 1Remote control unit 1
I i j-ii%Gq I 1Remote control unit 1
I
l
Each press pauses and plays the MD alternately
Ejecting the disc
Mini DISChas been ejected
AUTOPAUSEkey (Remote”:ontrol unit only)
When the AUTO PAUSE key is pressed, playback pauses
after every track. This function is convenient for learning a
foreign language or when time is required after each track.
7
..I. ..-. .-..
II j/r g/g .
..... ..“. i:. 12 ij ..-. .y:.
121i:$ IlPA”IT
Q-
--
“A. PAU.SE”II~~~S up
.Press the + key to resume playback.
l
When this functron ISnot requrred, be sure to press the AUTO PAUSE
key so that the “A. PAUSE”indrcator is extingurshed.
Use the following procedure to program desired tracks in a
desired order. (up to 32 tracks)
20, -I
Preparation
0 Load a disc.
0 Put the MD recorder in stop mode.
DMF-9020/MD2D70 IEn1
a
Initiate the program mode.
c- ,
Each press switches the mode.
c
1 Track mode : PGM goes off
CHARA. 2 Program mode : PGM lrghts up
I-.---
=Yl-
“PGM”
lights up
L__.U.S.2>.1% 85.12.J ,.I.I.>.~O”ER,4D,
/
Select track
numbers
in the order you want to play them.
@Selectthetracknumbertobeplayed.
@Set the input track number.
Repeat steps 0 and 0 trll the desrred tracks have
been programmed, rn the desired order.
E3
Startplayback.
‘----ET
Press numeric keys rn the followrng order
To select track No. 12:
Press rn order of m, @ key.
S&&d track Programmed order
*Up to 32 tracks can be selected. “FULL” ISdrsplayed when no more
track can be programmed.
elf you made a mistake, press the DELETE I CLEARkey and enter the
track No again.
aAn extremely shot track cannot be programmed.
.“- ** : H” IS drsplayed when the total programmed period has
attarned 256 mrnutes or more
*The Input operatron IS aborted If the CHARA. / P.MODEkey IS not
pressed while the rndrcator IS blrnkrng
L--.- 1o_.~a_.~~~-“‘~s;~’ 9 1 I I.I.IO”lll,dB,
- I/----___--_---
.-:: .j ...>
b ‘0’AL :.‘: . .
C... .i A.. “” i:::i ii .-.. ..I.
....i ..“. .. .i: i:?
I I
Track No bang played Total rema,n,ng trne of the
programmed tracks
*Tracks wrll be played rn the order they are programmed.
*When the w or w key IS pressed during playback, tracks wrll be
skrpped rn the drrectron of the pressed key.

Other manuals for DMF-9020

4

This manual suits for next models

1

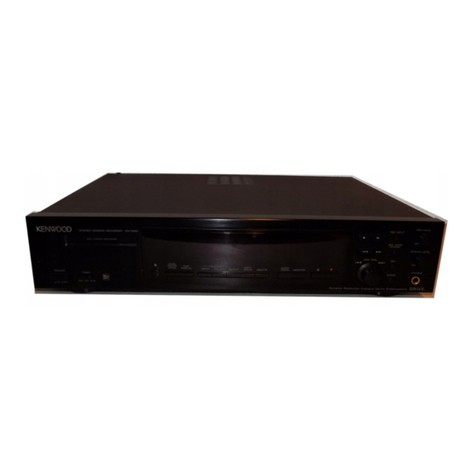
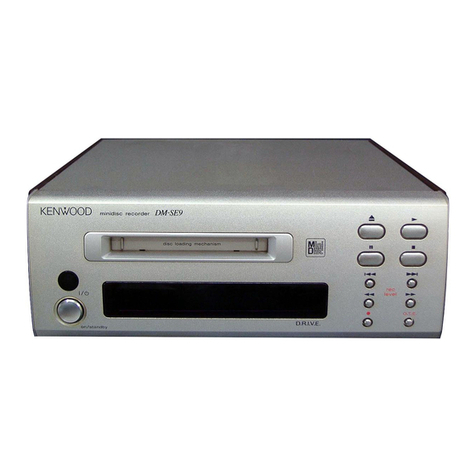
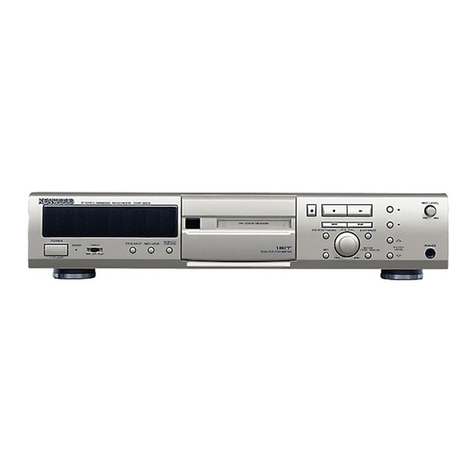
Other Kenwood Mini Disc Recorder manuals

Kenwood DM-VH7 User manual

Kenwood

Kenwood DM-VH7 User manual

Kenwood DMF-5020 User manual

Kenwood

Kenwood DMF-5020 User manual

Kenwood DM-VH7 User manual

Kenwood

Kenwood DM-VH7 User manual

Kenwood 1050MD User manual

Kenwood

Kenwood 1050MD User manual

Kenwood DM-SE7 User manual

Kenwood

Kenwood DM-SE7 User manual

Kenwood DMF-3020 User manual

Kenwood

Kenwood DMF-3020 User manual

Kenwood DM-B9 User manual

Kenwood

Kenwood DM-B9 User manual

Kenwood DM-9090 User manual

Kenwood

Kenwood DM-9090 User manual

Kenwood DM-SE7 User manual

Kenwood

Kenwood DM-SE7 User manual

Kenwood 1050-DM User manual

Kenwood

Kenwood 1050-DM User manual

Kenwood 1090MD User manual

Kenwood

Kenwood 1090MD User manual

Kenwood DM-SE7 User manual

Kenwood

Kenwood DM-SE7 User manual

Kenwood DMF-3020 User manual

Kenwood

Kenwood DMF-3020 User manual

Kenwood DMC-J7R User manual

Kenwood

Kenwood DMC-J7R User manual

Kenwood DM-SG7 User manual

Kenwood

Kenwood DM-SG7 User manual

Kenwood DMC-G7R User manual

Kenwood

Kenwood DMC-G7R User manual

Kenwood DMF-3020 User manual

Kenwood

Kenwood DMF-3020 User manual

Kenwood DM-5090 User manual

Kenwood

Kenwood DM-5090 User manual

Kenwood DM-S500 User manual

Kenwood

Kenwood DM-S500 User manual

Kenwood 1090MD User manual

Kenwood

Kenwood 1090MD User manual

Kenwood DMF-3020 User manual

Kenwood

Kenwood DMF-3020 User manual

Kenwood DMF-9020 User manual

Kenwood

Kenwood DMF-9020 User manual

Kenwood 1050MD User manual

Kenwood

Kenwood 1050MD User manual

Kenwood 1050MD User manual

Kenwood

Kenwood 1050MD User manual

Popular Mini Disc Recorder manuals by other brands

Panasonic SJ-MR100 Service manual

Panasonic

Panasonic SJ-MR100 Service manual

Sharp MD-SR60 Service manual

Sharp

Sharp MD-SR60 Service manual

Aiwa AM-F5 Service manual

Aiwa

Aiwa AM-F5 Service manual

Sony Walkman MZ-G755 operating instructions

Sony

Sony Walkman MZ-G755 operating instructions

Sony MDS-101 operating instructions

Sony

Sony MDS-101 operating instructions

Sony MDS-B5 Operation manual

Sony

Sony MDS-B5 Operation manual

Sharp MD-DR370H Operation manual

Sharp

Sharp MD-DR370H Operation manual

Pioneer MJ-L5 Service manual

Pioneer

Pioneer MJ-L5 Service manual

JVC 0200JTMMDWJSCEN instructions

JVC

JVC 0200JTMMDWJSCEN instructions

manuals.online logo
manuals.online logoBrands
  • About & Mission
  • Contact us
  • Privacy Policy
  • Terms and Conditions

Copyright 2025 Manuals.Online. All Rights Reserved.