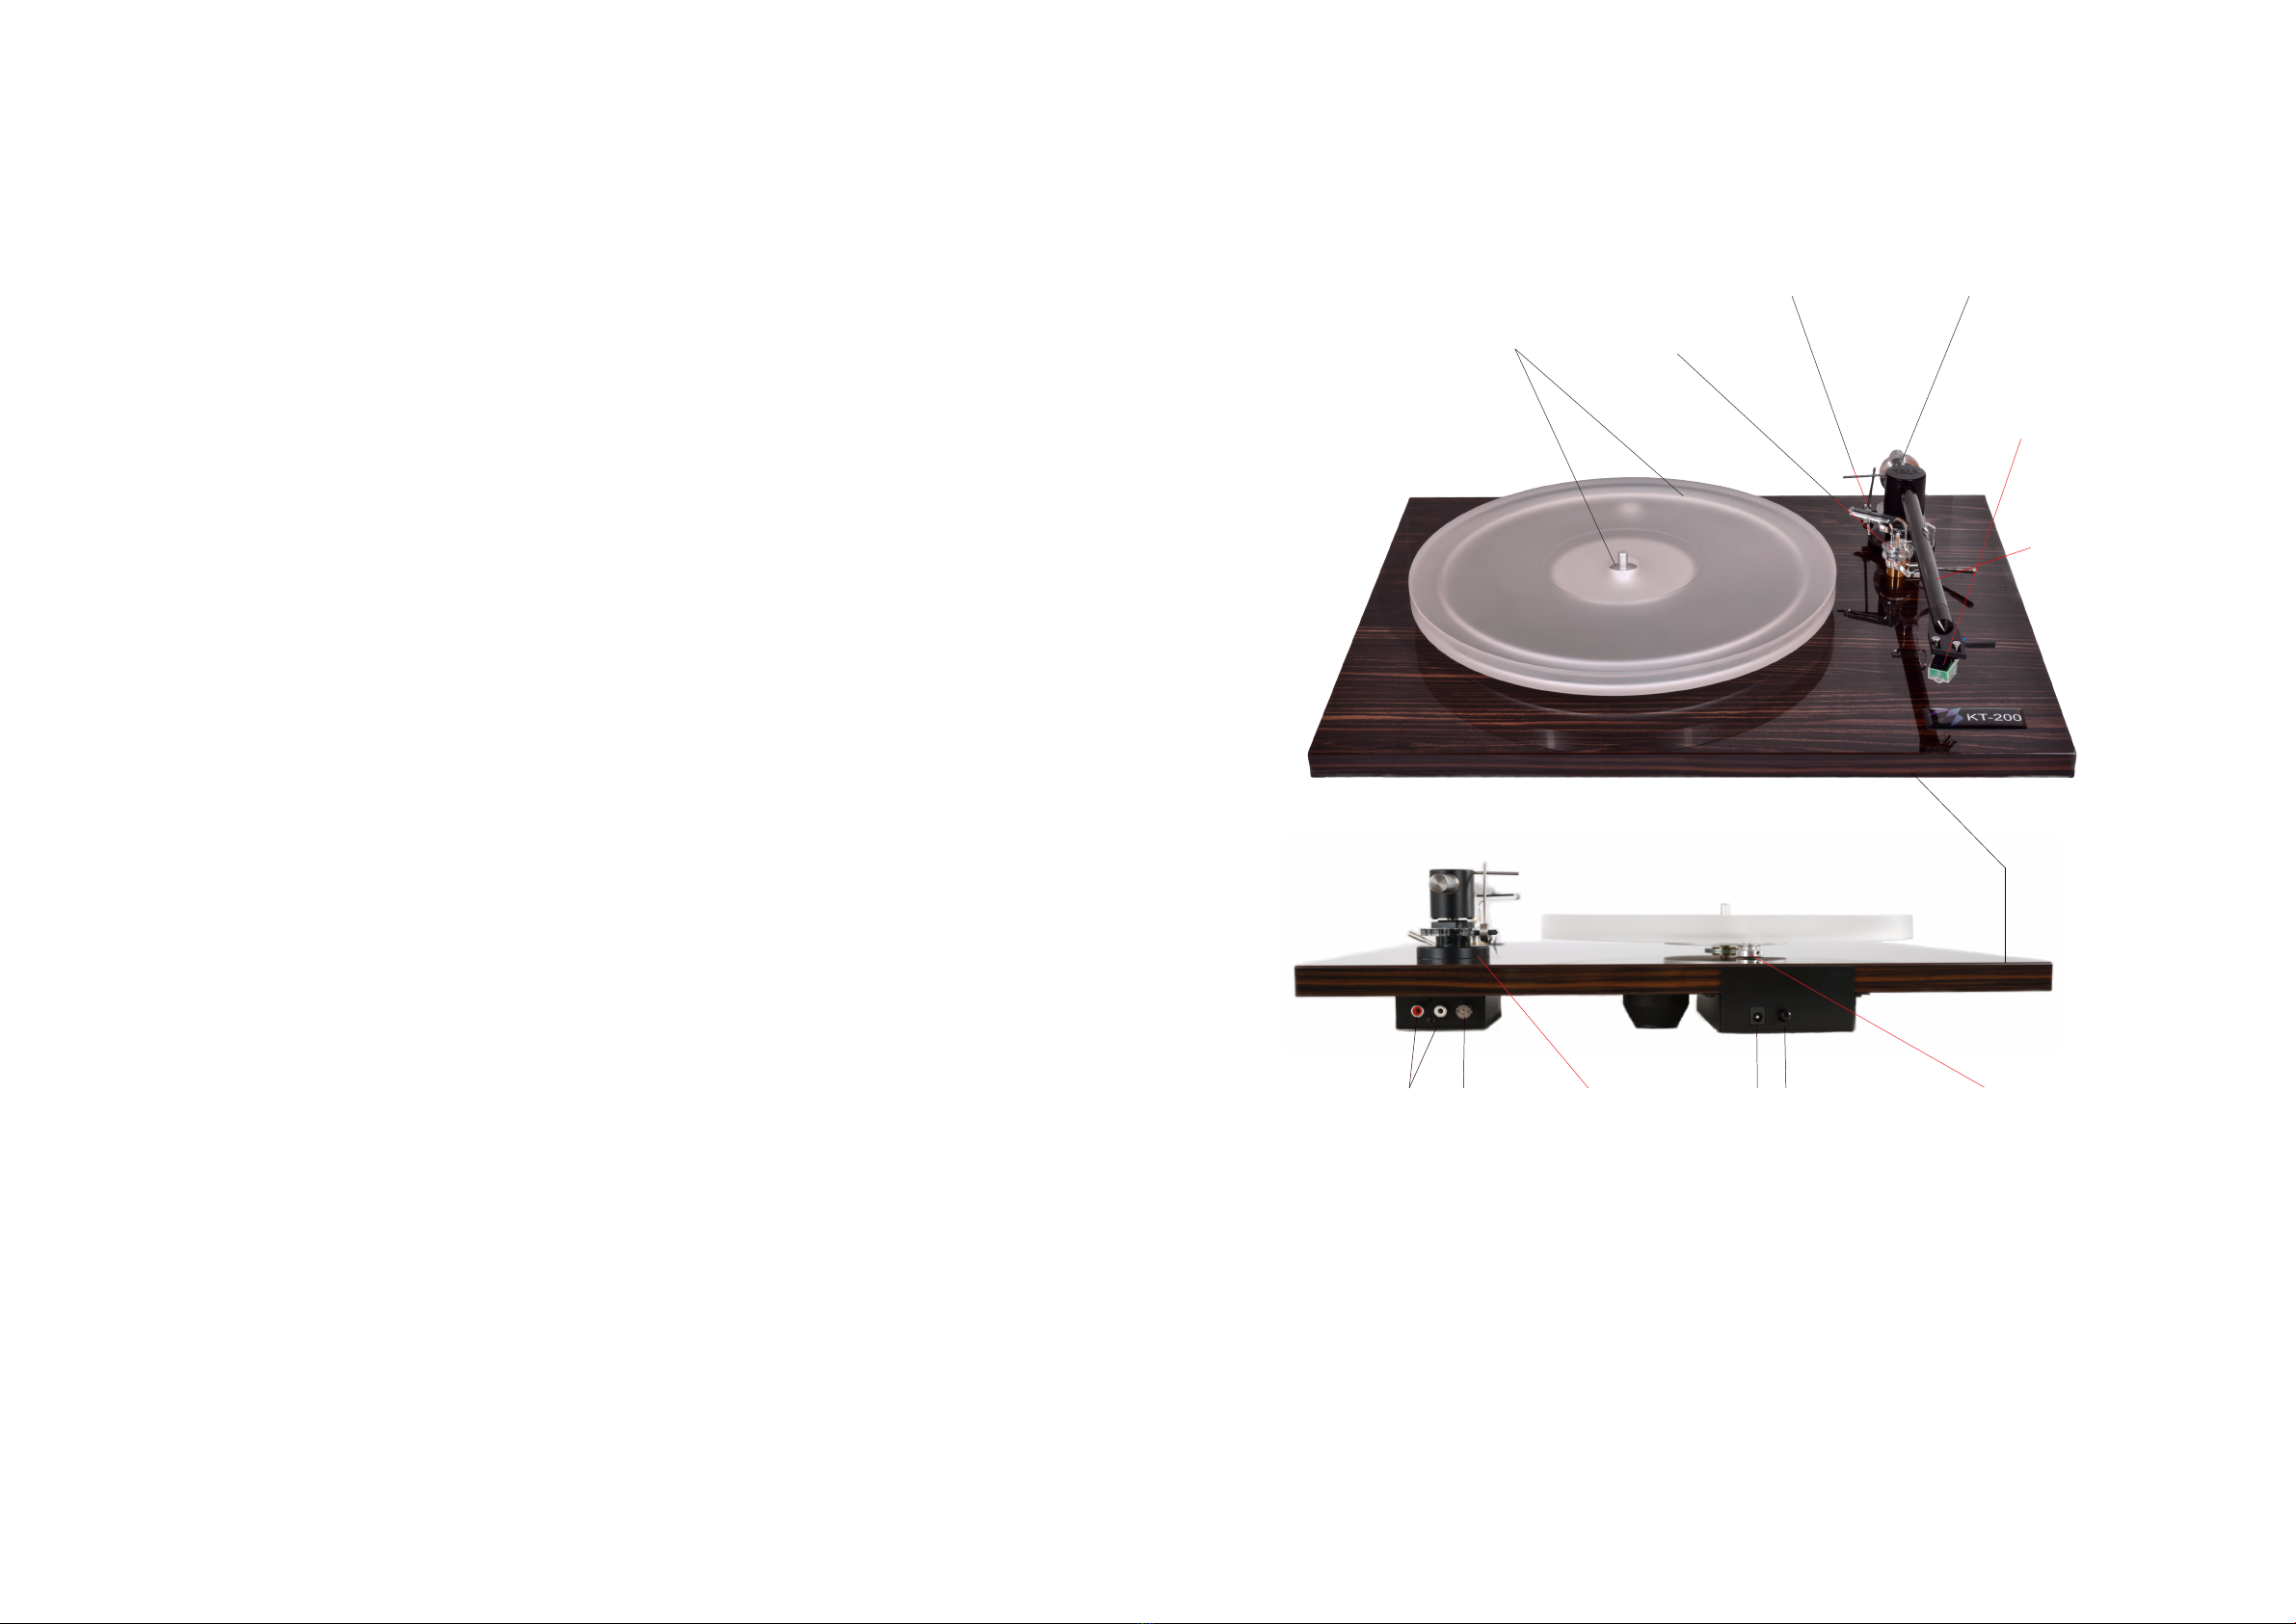
CONNECTIONS
POWER
Plug the supplied plug top PSU into your AC mains wall socket (having already checked that the voltage of your
local supply matches the label on the PSU). Then push the 2.1mm plug into the socket on the rear.
TO YOUR AMPLIFIER
Next plug the RCA phono cable and the separate Earth connector to either the PHONO input of your amplier (if it
has a phono stage tted ) or to your outboard phono stage such as the Kestrel Audio K-MM1 or K-MM2 ,
depending upon which type of cartridge you have tted. If you do not have a phono stage or a phono input in your
amplier, you will need to obtain one in order to use the turntable, these are available from your dealer.
UPGRADES
The use of our aftermarket electronic speed controller, the Kestrel Audio KSPEED-1, which is a simple plug and
play device, in place of the plug top PSU will bring about improved performance and convenience of push button
speed change and far superior speed accuracy. These are highly recommended for best performance.
ARM CARTRIDGE SETUP
In most cases your dealer may have already tted a cartridge for you, or it will have been tted at the factory, in
which case you can skip this section and move on to the section on setting the tracking weight.
To t the cartridge can be quite dicult, especially if you have not done it before, however if you follow this step by
step guide you should have no problems.
TOOLS
You will require a small pair of long nosed pliers and a 2mm allen (hex) key (supplied) to tighten the mounting
bolts, these are usually supplied with your cartridge of choice.
STEP 1 -
Remove your cartridge from the supplier packaging being very careful not to damage the stylus. With the stylus
guard ON connect the 4 coloured wires in the tonearm to the equivalent coloured pin on the back of your
cartridge, if there are no coloured rings then please refer to the cartridge manual for the markings and colour
code. The standard code is Red = Positive Right channel, White = Positive Left channel, Green = Negative Right
channel, and Blue = negative Left channel.
HINT by using the long nosed pliers to hold the at on the connection tab whilst pushing the tab over the pin you
will nd it easier to attach the wires.
Do the top two pins rst. It is OK to allow the cartridge to hang at this Point.
STEP 2 -
Next you need to mount the cartridge into the tonearm, using the screws provided with your cartridge, place the
screws through the mounting holes such that the head on the screw is towards the plinth of the turntable and the
other end is free to point upwards and through the slots in the headshell, (In some cases you may need to remove
the stylus cover to do this, but we recommend that you replace the guard as soon as possible to avoid accidental
damage), it is easiest to do this one at a time, you can then place the nut on to the screw such that the ats of the
nut are on the top of the headshell, DO NOT tighten the cartridge up at this point. Now align the front of the
cartridge to be parallel with the angled front of the headshell.
ALIGNMENT -
Place the alignment protractor over the spindle and MAKE THE ARROW point towards the pivot point of the arm.
Next, remove the stylus guard, being very careful not to damage the stylus/cantilever move the arm across to the
rst marked position. Move the cartridge, ALWAYS AT RIGHT ANGLES TO THE FRONT OF THE HEADSHELL in
the slots until the stylus is in the middle of the cross and tighten the mounting screws, ensuring that the cartridge
does not twist and is still in line with the front of the headshell. Re-check that the stylus is still on the cross and
then go to the second point (if provided) and conrm that it is OK, KEEP RE-ADJUSTING UNTIL IT IS CORRECT.
VERTICAL ARM HEIGHT ADJUSTMENT (VTA) -
The arm should be parallel with the record surface when playing a record, you can increase or reduce the height
at the rear of the arm by using the supplied 2.5mm allen key in the arm collar locking bolt. Loosen this and move
the arm up or down by holding the arm by the clear acrylic platform and lock it o when happy that it is horizontal.
LIFT LOWER ADJUSTMENT -
If you nd that when using the arm lift lever it does not raise the arm high enough from the record, or if its too
high, you can easily adjust this by using the spanner to loosen the top locking nut, adjust the lift lower height using
the knurled lower ring, and the, when you are happy lock it o with the locking nut. There is a more detailed video
about this on the setup up video mentioned above.
TRACKING WEIGHT ADJUSTMENTS -
With the stylus guard removed, gently move he counter weight on to the rear of the arm and push it forward until
the desired tracking weight is indicated by your stylus balance (NOT Provided) add the required tracking weight
for the cartridge in use by moving the counterweight forward until the correct weight. Start with the recommended
tracking force but feel free to experiment as dierent pressures will change the sound quality, however we do
suggest that you only change it by a maximum of +/-0.3 grams from the recommended force to avoid any long
term damage to your records and or cartridge
BIAS ADJUSTMENT -
Bias can now be adjusted by unlocking the small weight via the locking screw and moving it to the desired
position by rotating it on its thread. It was pre-set at the factory for an average tracking fore of 1.8g so it is NOT
usual to need to adjust this. If you have a test record you should set the bias using this but these are only a guide
and not absolute. - If in ANY doubt leave it as factory set.
UNPACKING
Inside the outer carton you will nd two boxes, the larger one contains the turntable and the smaller box contains
all of the parts required to assemble the turntable.
FIRST check that the label on plug top PSU, found in the smaller box, corresponds to the local AC power supply
and that the AC plug shape is correct for your wall sockets, If it does not please contact your dealers or supplier
for a suitable replacement.
The turntable is mostly already pre-assembled, all you need to do is remove the pieces from the smaller box and
add them to the turntable in the following order. Take the hub, remove the tape from the top of the bearing
housing and gently insert the hub into the bearing. It may take a while to go down. DO NOT FORCE IT DOWN.
When settled place the belt around the hub and motor pulley, in the top position ( for 33.3 RPM) and add the
platter, FLAT side (without record label recess) to the hub. Now we need to set up the arm.
Put the bias (anti-skate) wheel with the three rods and weight, which are already assembled on the the bias AXEL
with the weight pointing TOWARDS the FRONT of the turntable, slide it on and put the retaining rubber sleeve on
the end of the axel, allow the arm free movement. Next add the 2mm bias rod to the bell housing, there is a small
2mm threaded hole into which it inserts, screw it in tightly. Then place the actuator rod on the REAR of the bias
rod such that the wants to move to the right, or away from the platter. The point of bias or anti-skate is to counter
the centrifugal force cause by the record spinning.
If the cartridge came with a tted cartridge, then you will have a small spacer made from acrylic in your pack.
Place this around the back of the bell housing and place the counterweight on to the stub and move it until it
touches the back of the spacer and tighten in position. You are now ready to play a record.
SPEED SELECTION
To adjust the speed, remove the platter and move the belt to the alternate position, the smaller (top) position is 33
1/3 the lower is 45. Speed - 33.3/45RPM +/- 1% (I.E.32.97-33.6 or 44.55-45.45)
IF USING THE external speed controller please use the belt in the 33 1/3 (top) position.
CLEANING
To clean ngerprints we recommend that you use a quality Isopropyl Alcohol or furniture polish suitable for wood
with a lint free cloth or soft kitchen towel.