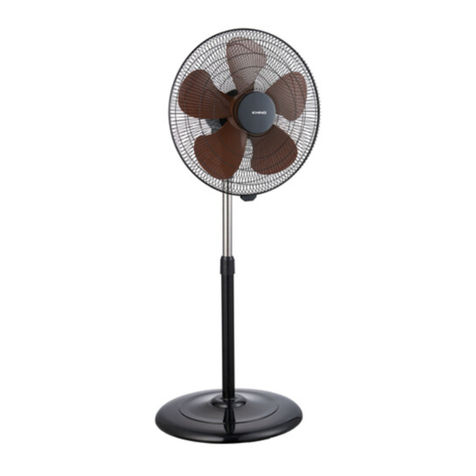
KHIND SF161ME User manual

STAND FAN
SF161ME
P/N: 40-51692-00
1Year
Warranty
General
3Year
Warranty
On Motor
+
1 800 88 0032
KHIND CARE Mobile App
1-800-88-0032
khind.com.my
Download to register for
E-Warranty & enjoy hassle-
free after-sales services.
USER MANUAL
Please read this manual carefully before operating this product.
Keep this manual handy for further reference.
IMPORTANT

1. Ensure that the fan is switched off from the supply mains before removing the fan guard for
cleaning.
2. Use this fan with specified voltage as stated on the rating sticker. Before connecting fan to
the AC mains, make sure the voltage specified corresponds to the AC supply to your house.
3. Do not insert finger or other objects into the fan guard.
4. Do not attempt to repair the fan.Always return to our authorised service agents for repairs.
5. Do not immerse the motor assembly or any parts of the fan inside the water or other
liquids.
6. This appliance is intended for household use only. Do not use the appliance outdoors or
near windows. Rain drops may cause electrical hazards.
7. If the supply cord is damaged, it must be replaced by the manufacturer, its service agent
or similarly qualified persons in order to avoid a hazard.
8. Do not operate this appliance without a fan blade, broken or bent fan blade.
9. Handle fan blade with care during cleaning.
10. This appliance is not intended for use by persons (including children) with reduced
physical, sensory or mental capabilities, or lack of experience and knowledge, unless they
have been given supervision or instruction concerning use of the appliance by a person
responsible for their safety.
Children should be supervised to ensure that they do not play with the appliance.
11. The ventilation holes of rear motor cover must be free of dust & dirt. Please use a soft cloth
or vacuum cleaner to clean it frequently.
WARNING: Do not use this appliance high temperature and high humidity
1. Keep the fan clean. Use it in dry place.
2. Do not bend the blades when installing & maintaining.
3. Wipe away dirt with clean soft cloth, soap & water to clean the fan. Wipe until dry.
4. Do not use the following as cleaning solvents: petrol, thinner or benzene for cleaning.
5. Use mild soap with damp cloth or sponge to clean the plastic parts.
Cleaning & Maintenance
1. Unblock the guard ring lock by removing the safety screw.
2. Remove the front fan guard
3. Remove the blade locking screw.
4. Detach the fan blade.
5. Remove the rear fan guard by removing 4 screws.
6. Wash detached components with soft cloth and mild soap or mild detergent.
7. Wipe dry with a soft cloth. Note that excessive rubbing with a soft cloth may scratch the
components.
8. Clean dust and dirt that have accumulated on the motor shaft.
Clean Fan Guards & Fan Blades
Safety Precaution Information1 2
1. Fan Head
Assembly
2. Blade Nut
3. Fan Blade
4. 4pcs Screw
5. Rear Guard
6. Rear Guard
Screw
7. Motor Housing
8. ON/OFF/Speed
Knob
9. Tilt Adjust Knob
10. Inner Tube
11. Height Adjustment
Screw
12. Outer Tube
13. Base
14. Base Washer
15. Base Small Washer
16. Base Thumb Screw
17. Tilt Range Knob
18. Tilt Adjustment Bolt
19. Tilt Range Screw
20. Fixed Screw
Parts Identification
* Pictures are for illustration purpose only.
16
15
14
12
11
10
9
8
75
4
321 6
13
19
20
17
18

3 4
How to Use
Model SF161ME
Voltage 220-240V ~ 50/60Hz
Power 50W
Blade Size 16 Inches
Blade Type ABS
Blade Quantity 5
Effective Area 20m
Oscillation Degree 70˚
Revolution Per Minutes High Speed: 1133rpm
Low Speed: 870rpm
Air Delivery 64.33m /min ; 2271CFM
Noise Level 58.4dB
Net Weight 6.4kg
Product Dimension (LxWxH) 450 x 400 x 1200mm
Height Adjustment Low: 900mm
Height: 1200mm
Specifications
* Specifications are subject to change without prior notice.
3
2
Assembly
1. Loosen the screw on the base by turning it counter clockwise from
the base pipe, remove it and insert the base pipe into the base.
2. Then secure base pipe by turning the base screw
clockwise to the bottom of the base using the base
washer and the base tightening ring.
3. Loosen the lock regulator of the base pipe, pull the inner tube out, and then tighten again.
When you have completed the assembly or the base of the fan to the base pipe place
the appliance on a flat surface.
4. Loosen the locking regulator located on the small motor shaft and the align the small
motor shaft with the socket on the wood en inner tube. turn the locking regulator until it
locks into place.
Depression
Depression
this side
5. Each side of the post top section has a small
horizontal open slot and horizontal depression as per
shown.
6. Place and position the head assembly on the post
top section matching open slot and depression.
Note: It is important that the post and fan head are
assembled correctly.
7. Slide the Tilt Adjustment Bolt all the way through as
per shown.
8. Screw in the Tilt Range Knob as per shown.
9. Using a screwdriver, screw in the small Tilt Range
Screw and tighten up.
10. Screw on the Tilt Adjustment Knob as per shown.
Open
Slot

5 6
1. 拆卸风扇护罩进行清洁前,确保电风扇已切断电源。
2. 按照额定标签上的规定电压使用风扇。将风扇连接到交流电源之前,确保指定的电压与家用交流电源
相对应。
3. 请勿将手指或其他物体插入风扇保护罩内。
4. 请勿尝试自己修理风扇。请返回指定授权服务代理处进行修理。
5. 不要将电机组件或风扇的任何部件浸入水或其他液体中。
6. 此设备仅供家庭使用。请勿在户外或靠近窗户处使用。雨水可能会引起电器危险。
7. 如果电源线损坏,必须由制造商、服务代理商或专业修理人员更换,以避免危险。
8. 请勿在没有风扇叶片、叶片断裂或叶片弯曲的情况下使用本设备。
9. 清洁时小心处理风扇叶片。
10. 本设备不适合用于身体,感官或精神状态不佳,或缺乏相关经验和知识的人(包括儿童),除非安全
人员为他们对设备的使用进行监督或指导。
儿童应受到监督,以确保他们不玩此电器。
11. 确保后方电机盖的通风口不堵塞灰尘和污垢。请经常使用软布或吸尘器进行清理。
警告: 请勿在高温高湿的环境下使用本产品。
1. 保持风扇清洁,在干燥的地方使用。
2. 安装和保养时,不要弯曲叶片。
3. 用干净的软布、肥皂和水擦去风扇上的污垢,保持干燥。
4. 请勿使用下列溶剂作为清洁剂: 汽油、稀释剂或苯用于清洁。
5. 用温和的肥皂和湿布或海绵清洁塑料部件。
1. 通过拆卸安全螺丝来打开防护环锁。
2. 拆卸前风扇护罩
3. 拆卸叶片锁紧螺丝。
4. 拆卸风扇叶片。
5. 拆卸4个螺丝,取下后风扇护罩。
6. 用软布和温和的肥皂或洗涤剂清洗分离的部件。
7. 用柔软的布擦干。注意,过度摩擦可能会划伤部件。
8. 清洁电机轴上积聚的灰尘和污垢。
清洁风扇护罩和风扇叶片
Oscillation
1. Press the clutch knob down to activate the oscillation functions.
The fan head will swing from side to side whilst blowing air.
2. To stop oscillation, pull the clutch knob up when the fan head move
into desired position.
Care & Cleaning
1. Turn off and unplug the unit prior to cleaning.
2. The fan guard can be cleaned by vacuuming with a brush attachment.
3. To clean the blade, remove the Fan Head Assembly by
unscrewing the small screws around the edge of Rear
Guard.
4. Wipe the blade with slightly damp sponge or cloth.
5. Clean the motor housing and body assembly with a
clean damp cloth and wipe again with dry cloth for
drying purpose.
6. Never spray any liquids on the fan or rinse in water.
7. Do not use flammable liquids, chemicals, abrasive creams, steel wool or scouring pads for
cleaning.
8. After cleaning, install the Fan Head Assembly and ensure all the screws and washers are
well inserted and tighten.
Operation
1. The head assembly can be tilted up and down to your desired angle.
2. To adjust the tilt angle, loosen both the larger Tilt Adjustment Knob and
the smaller Tilt Range Knob then tilt the head to the desired angle and
then tighten both knobs tight.
Fan Power & Speed Control
1. Rotate the knob located on the rear of motor housing to the
following position for power and speed control.
2. Position 0 : Switch Off,
Position 1 : Low Speed,
Position 2 : Medium Speed and
Position 3 : High Speed.
安全注意事项
清洗及保养

7 8
1. 风扇头组件
2. 叶片螺母
3. 风扇叶片
4. 4颗螺丝钉
5. 后盖
6. 后盖螺丝钉
7. 电动机外壳
8. 开/关/速度圆头旋钮
9. 倾斜度圆形旋钮
10. 伸缩支撑柱内管
11. 高度调节螺丝钉
12. 伸缩支撑柱外管
13. 底座
14. 底座垫圈
15. 底座小垫圈
16. 底座拇指螺丝
17. 倾斜度圆头
18. 倾斜度调节螺栓
19. 倾斜度调节螺丝
20. 固定螺丝
零件名称
*图片仅供参考。
*规格如有更改,恕不另行通知。
型号 SF161ME
电压 220-240V ~ 50/60Hz
功率 50W
叶片尺寸 16 英寸
叶片类型 ABS
叶片数量 5
面积 20平方米
摆动角度 70˚
转速 高速: 1133转/分钟
低速: 870转/分钟
送风量 64.33立方米 /分钟 ; 2271CFM
噪音水平 58.4dB
净重 6.4公斤
产品尺寸 (LxWxH) 450 x 400 x 1200毫米
高度调节 低: 900毫米
高度: 1200毫米
3
2
规格
组装
1. 将底座上的螺丝顺时针旋转松开,取下,将伸缩支撑柱插入底座。
2. 将伸缩支撑柱固定到底座。使用底座垫圈和底座拧紧环,
顺时针旋转底座螺丝,直到拧紧。
3. 松开底座管的锁紧调节器,将内管拔出,再拧紧。组装完成后,请将底座放置在平地上。
使用方法
16
15
14
12
11
10
9
8
75
4
321 6
13
19
20
17
18

910
4. 松开位于小电机轴上的锁紧调节器,并将小电机轴对准木制内管上的底座。转动锁紧调节器,直到
锁紧。
凹槽
凹槽
5. 立柱顶部分的每一侧都有一个小的水平开槽和水平凹陷
如图所示。
6. 将头部组件放置在与开口槽和凹槽相匹配的立柱顶部。
注意: 确保立柱和风扇头正确组装。
7. 滑动倾斜度调节螺栓。如图所示。
8. 拧紧倾斜度圆头旋钮,如图所示。
9. 使用螺丝刀将小螺丝拧紧。
10. 拧紧倾斜度调节旋钮,如图所示。
开槽
振荡控制
1. 按下离合器旋钮,启动摇头功能。吹风时,风扇头会左右摇摆。
2. 拉起离合器按钮,风扇头会停止摇摆。
保养和清洁
1. 在保养和清洗前,断开电源。
2. 风扇保养可以通过用刷子吸尘清洁。
3. 清洁风扇叶片时,可以拧开后挡板边缘的小螺丝,拆下风扇头。
4. 用湿布或海绵擦拭叶片。
5. 用干净的湿布擦拭电机外壳和车身组件,然后再用干布擦拭,
保持干燥。
6. 请勿在风扇上喷洒任何液体或用水冲洗。
7. 不要使用易燃液体、化学品、磨砂剂、钢丝绒或者百洁布进行
清洁。
8. 清洗后,安装风扇头,确保所有的螺丝和垫圈插入良好并拧紧。
使用说明
1. 头部组件可以上下调节倾斜角度。
2. 若需调节倾斜角度,请先断开电源,松开锁紧螺栓,将风扇头调整到理想位置,
然后拧紧锁紧螺栓。
风扇功率和速度控制
1. 可旋转电机外壳后部的旋钮至以下位置,进行动力和速度控制。
2. 位置0: 关闭,
位置1: 低速,
位置2: 中等速度
位置3: 高速。

11 12
* Gambar adalah untuk tujuan ilustrasi sahaja.
1. Pastikan kipas dimatikan daripada bekalan utama sebelum menanggalkan pelindung
kipas untuk pembersihan.
2. Gunakan kipas ini dengan voltan yang tertentu seperti yang dinyatakan pada pelekat
penilaian. Sebelum menyambungkan kipas ke saluran kuasa AC, pastikan voltan yang
dinyatakan sepadan dengan bekalan AC ke rumah anda.
3. Jangan masukkan jari atau objek lain ke dalam pelindung kipas.
4. Jangan cuba membaiki kipas. Sila sentiasa kembali kepada ejen servis kami yang sah
untuk pembaikian.
5. Jangan rendam pemasangan motor atau mana-mana bahagian kipas ke dalam air atau
cecair lain.
6. Perkakas ini bertujuan untuk kegunaan dalam rumah sahaja. Jangan gunakan perkakas
di luar rumah atau berhampiran tingkap.Air hujan boleh menyebabkan bahaya elektrik.
7. Jika kabel bekalan rosak, ia mesti diganti oleh pengilang, ejen perkhidmatannya atau
pihak berkelayakan yang serupa untuk mengelakkan bahaya.
8. Jangan kendalikan perkakas ini tanpa bilah kipas, bilah kipas yang patah atau bengkok.
9. Uruskan bilah kipas dengan berhati-hati semasa pembersihan.
10. Perkakas ini bukan untuk digunakan oleh orang kurang upaya (termasuk kanak-kanak)
fizikal, deria atau kemampuan mental, atau kurang pengalaman dan pengetahuan,
melainkan mereka dikawalselia atau mendapat tunjuk ajar yang sewajarnya berkaitan
penggunaan perkakas ini oleh orang yang bertanggungjawab terhadap keselamatan
mereka.
Kanak-kanak perlu dikawalselia bagi memastikan mereka tidak bermain dengan
perkakas ini.
11. Lubang pengudaraan penutup motor belakang mestilah bebas daripada habuk &
kotoran. Sila gunakan kain lembut atau vakum untuk membersihkannya dengan kerap.
AMARAN: Jangan gunakan perkakas ini pada suhu tinggi dan kelembapan yang tinggi.
1. Pastikan kipas bersih. Gunakannya di tempat yang kering.
2. Jangan bengkokkan bilah kipas semasa pemasangan & penyelenggaraan.
3. Lap kotoran dengan kain lembut yang bersih, sabun & air untuk membersihkan kipas. Lap
sehingga kering.
4. Jangan gunakan bahan berikut sebagai pelarut pembersih: petrol, penipis atau benzena
untuk pembersihan.
5. Gunakan air sabun yang lembut dengan kain lembap atau span untuk membersihkan
bahagian plastik.
1. Buka gegelung kunci penghadang dengan menanggalkan skru keselamatan.
2. Tanggalkan pelindung kipas depan.
3. Tanggalkan skru pengunci bilah.
4. Keluarkan bilah kipas.
5. Tanggalkan pelindung kipas belakang dengan menanggalkan 4 skru.
6. Bersihkan komponen yang ditanggalkan dengan kain lembut dan air sabun yang
lembut atau detergen yang lembut.
7. Keringkan dengan kain lembut. Sila ambil perhatian bahawa gosokan berlebihan
dengan kain lembut boleh mencalarkan komponen.
8. Bersihkan habuk dan kotoran yang terkumpul pada shaf motor.
Membersihkan Penghadang Kipas & Bilah Kipas
1. Pemasangan Kepala
Kipas
2. Skru Bilah
3. Bilah Kipas
4. 4 Biji Skru
5. Pelindung belakang
6. Skru pelindung
belakang
7. Motor
8. Tombol Kelajuan
ON/OFF
9. Tombol Laras Condong
10. Tiub Dalaman
11. Skru Pelarasan
Ketinggian
12. Tiub Luaran
13. Tapak
14. Pencuci Tapak
15. Pencuci Kecil Tapak
16. Skru Tapak Ibu Jari
17. Tombol Julat
Kecondongan
18. Bolt Pelarasan Kecondongan
19. Skru Julat Kecondongan
20. Skru Tetap
16
15
14
12
11
10
9
8
75
4
321 6
13
19
20
17
18
Maklumat Langkah-langkah Keselamatan
Pembersihan & Penyelenggaraan
Pengenalan Bahagian

13 14
Model SF161ME
Voltan 220-240V ~ 50/60Hz
Kuasa 50W
Saiz Bilah 16 Inci
Jenis Bilah ABS
Kuantiti Bilah 5
Kawasan Berkesan 20m
Darjah Ayunan 70˚
Revolusi Per Minit Kelajuan Tinggi: 1133rpm
Kelajuan Rendah: 870rpm
Penghantaran Udara 64.33m /min ; 2271CFM
Tahap Kebisingan 58.4dB
Berat Bersih 6.4kg
Dimensi Produk (PxLxT) 450 x 400 x 1200mm
Pelarasan Ketinggian Rendah: 900mm
Tinggi: 1200mm
Spesifikasi
3
2
Pemasangan
1. Longgarkan skru pada tapak dengan memutarnya melawan arah
jam dari paip asas, keluarkannya dan masukkan paip asas ke dalam
pangkalan.
2. Kemudian ketatkan paip asas dengan memutar skru
tapak mengikut arah jam ke bahagian bawah tapak
menggunakan mesin basuh asas dan gelang pengetat
tapak.
3. Longgarkan pengatur kunci paip asas, tarik tiub dalam keluar, dan kemudian ketatkan
semula.Apabila anda telah menyelesaikan pemasangan atau tapak kipas ke paip asas
letakkan perkakas di atas permukaan yang rata.
* Spesifikasi tertakluk kepada perubahan tanpa notis terlebih dahulu.
Cara-cara Penggunaan
4. Longgarkan pengatur pengunci yang terletak pada shaf motor kecil dan selaraskan shaf
motor kecil dengan soket pada tiub kayu dalaman. Putar pengatur pengunci sehingga
ia terkunci pada tempatnya.
Lekukan
Lekukan di
sebelah sini
5. Setiap sisi bahagian atas pos mempunyai slot kecil
terbuka yang mendatar dan lekukan mendatar
seperti yang ditunjukkan.
6. Tempatkan dan letakkan pemasangan kepala pada
bahagian atas tiang yang sepadan dengan slot
terbuka dan lekukan.
Nota: Ia adalah penting untuk memasang tiang dan
kepala kipas dengan betul.
7. Luncurkan Bolt Pelarasan Kecondongan sepenuhnya
seperti yang ditunjukkan.
8. Skrukan Tombol Julat Kecondongan seperti yang
ditunjukkan.
9. Dengan menggunakan pemutar skru, skrukan Skru
Julat Kecondongan kecil dan ketatkan.
10. Skrukan Tombol Pelarasan Kecondongan seperti yang
ditunjukkan.
Slot
terbuka

15 16
Ayunan
1. Tekan tombol klac ke bawah untuk mengaktifkan fungsi ayunan.
Kepala kipas akan berayun dari sisi ke sisi sambil meniup udara.
2. Untuk menghentikan ayunan, tarik tombol klac ke atas apabila
kepala kipas bergerak ke kedudukan yang dikehendaki.
Penjagaan & Pembersihan
1. Matikan dan cabut palam unit sebelum dibersihkan.
2. Pelindung kipas boleh dibersihkan dengan vakum yang dilampirkan dengan berus.
3. Untuk membersihkan bilah, tanggalkan Pemasangan
Kepala Kipas dengan membuka skru kecil di sekeliling
tepi Pelindung Belakang.
4. Lap bilah dengan span atau kain yang lembap sedikit.
5. Bersihkan perumah motor dan pemasangan badan
dengan kain lembap yang bersih dan lap sekali lagi
dengan kain kering untuk tujuan pengeringan.
6. Jangan sesekali menyembur sebarang cecair pada kipas atau bilas dengan air.
7. Jangan gunakan cecair mudah terbakar, bahan kimia, krim pelelas, bulu keluli atau pad
penyental untuk pembersihan.
8. Selepas pembersihan, pasangkan Pemasangan Kepala Kipas dan pastikan semua skru
dan pencuci dimasukkan dengan baik dan ketatkan.
Operasi
1. Pemasangan kepala boleh dicondongkan ke atas dan ke bawah
mengikut sudut yang anda kehendaki.
2. Untuk melaraskan sudut kecondongan, longgarkan kedua-dua Tombol
Pelarasan Kecondongan yang lebih besar dan Tombol Julat Kecondo-
ngan yang lebih kecil kemudian condongkan kepala ke sudut yang
dikehendaki dan kemudian ketatkan kedua-dua tombol dengan ketat.
Kuasa Kipas & Kawalan Kelajuan
1. Putar tombol yang terletak di bahagian belakang perumahan motor
ke kedudukan berikut untuk kawalan kuasa dan kelajuan.
2. Kedudukan 0 : Matikan,
Kedudukan 1 : kelajuan rendah,
Kedudukan 2 : kelajuan sederhana dan
Kedudukan 3 : kelajuan tinggi
Table of contents
Languages:
Other KHIND Fan manuals
Popular Fan manuals by other brands

Ebmpapst
Ebmpapst S3G450-AO02-30 operating instructions

Ebmpapst
Ebmpapst K1G200-AD49-04 operating instructions

New Air
New Air NMF8K7BK00 owner's manual

Ebmpapst
Ebmpapst A2E300-AA01-01 operating instructions

Ebmpapst
Ebmpapst G4E250-FA15-03 operating instructions

Ama Tech
Ama Tech Tank Fan installation guide

Ebmpapst
Ebmpapst R4E450-AB09-06 operating instructions

HAMPTON BAY
HAMPTON BAY HAWKINS YG204I-TB-D Use and care guide

Ebmpapst
Ebmpapst R2E225-BE51-09 operating instructions

Ebmpapst
Ebmpapst S4E450-AO09-01 operating instructions

Ebmpapst
Ebmpapst R2E225-BD92-37 operating instructions

Ebmpapst
Ebmpapst K3G220-RC05-01 operating instructions