Kinefinity TERRA 4K User manual

[TYPE HERE]
For KineOS 5.0
KINEFINITY INC.
TERRA 4K
For KineOS 6.2
OPERATION MANUAL

[TYPE HERE]
TERRA 4K BRIEF INTRODUCTION
Kinefinity Inc. has been developing cameras covering optical design to FPGA, circuits and software, with
assistance from filmmakers, broadcasting industry and academic schools.
Large format MAVO LF and flagship S35 camera MAVO 6K are the latest 6K cameras with high performance.
TERRA 4K is the entry-level cinema camera but as easy as DSLR for video shooting. Employing sub S35 frame
CMOS imaging sensor, TERRA 4K records up to 4K+ resolution, with 4K wide up to 100fps and 2K wide up to
240fps, can shoot either ProRes or RAW.
Sub S35 3:2 CMOS imaging sensor: crop factor is 1.85; but it is 1.3 if with KineEnhancer;
Dual ISO: 3200/800, low noise level and high latitude image no matter low light or regular shoot;
ProRes: ProRes recording at full resolution, in-camera oversampling 4K to 2K, super image quality;
Compressed RAW cDNG: The compression ratio of cDNG can be set to 3:1, 5:1, or 7:1, which is
supported by DaVinci Resolve for editing or grading;
Compressed RAW KRW 2.0: It might be enabled in firmware in 2019;
240 fps: Up to 240fps@2K Wide; up to 150fps@3K Wide; up to 100fps@HiSpeed 4K Wide;
Low rolling effect: Image quality is still high even for moving shoot;
13+ stops with KineLOG3: Preserve highlight and shadow perfectly, provide maximum room for
post;
Custom LUT: Support third-party 3D LUT from shooting to post;
2.5-inch 7mm professional KineMAG SSD as Record Media, compatible with consumer-type SSD;
KineMOUNT (Interchangeable mounting system) supports PL/EF/Sony E Mount and even EF/PL
Mount with e-ND;
Multiple monitoring outputs: Video port x2 and HD output x1 on the body; 3G SDI output X2
through KineBACK-W.
This is TERRA, a high-performance sub S35 cinema camera with such a compact body, no boundaries for
creating: suitable for both one-man job and film crew shoot without limitation; ProRes codec enables fluent
post workflow. With professional ports, TERRA is a powerful cinema camera offering amazing footages while
supporting effective post workflow.

TERRA 4K Operation Manual(KineOS 6.2)
©2019 Kinefinity Inc. Page 3 / 60
SAFETY TIPS
Please read all contents of the manual carefully:
Pay attention to the CAUTION and NOTE;
Do not use the camera near water in case of water droplets splash on the camera body;
Do not expose the camera to severe vibration;
Do not use camera under direct sunlight; operating temperature should be from 0 ℃ to 40℃;
Do not use the camera near strong magnetic field, pretty dust, high humidity or lighting storm places;
Avoid condensation during transportation or transitions;
Do not block the vent, or it will cause overheating and damage to the camera;
Do not face the LCD/OLED screen to direct sunlight, and do not squeeze or hit the monitor in case of
any damage to the screen;
Only use accessories recommended by Kinefinity.
While using the camera, please:
Please turn off the camera when you try to attach or detach a lens Mount, KineBACK-W or HDMI
monitor;
Avoid touching the OLPF when attach or detach an adapter, as the optical element is fragile. TERRA 4K
delivered after May 2018 is with new structure, and OLPF can be changed by customers;
KineMOUNT plus EF mounting adapter is a lever-locking (cine-type) EF mount. When mounting a lens
to the camera, the position of red dot in the mount is DIFFERENT from DSLR camera. Secondly, it is
LOCKING RING rotation, NOT lens rotation to make sure EF lens locked firmly and to be contacted well
with pogo-pin contact inside of EF mount in any case (According to the direction of the arrow);
Hold tight the lens to prevent dropping when loosening the locking ring to remove the lens.
Strongly recommend inserting or removing the SSD after camera powers down. If you like to hotswap,
you must Deactivate the SSD at first (SSD section in UI shows SSD: Ins), and then push up the SSD latch
to get the SSD out.

TERRA 4K Operation Manual(KineOS 6.2)
©2019 Kinefinity Inc. Page 4 / 60
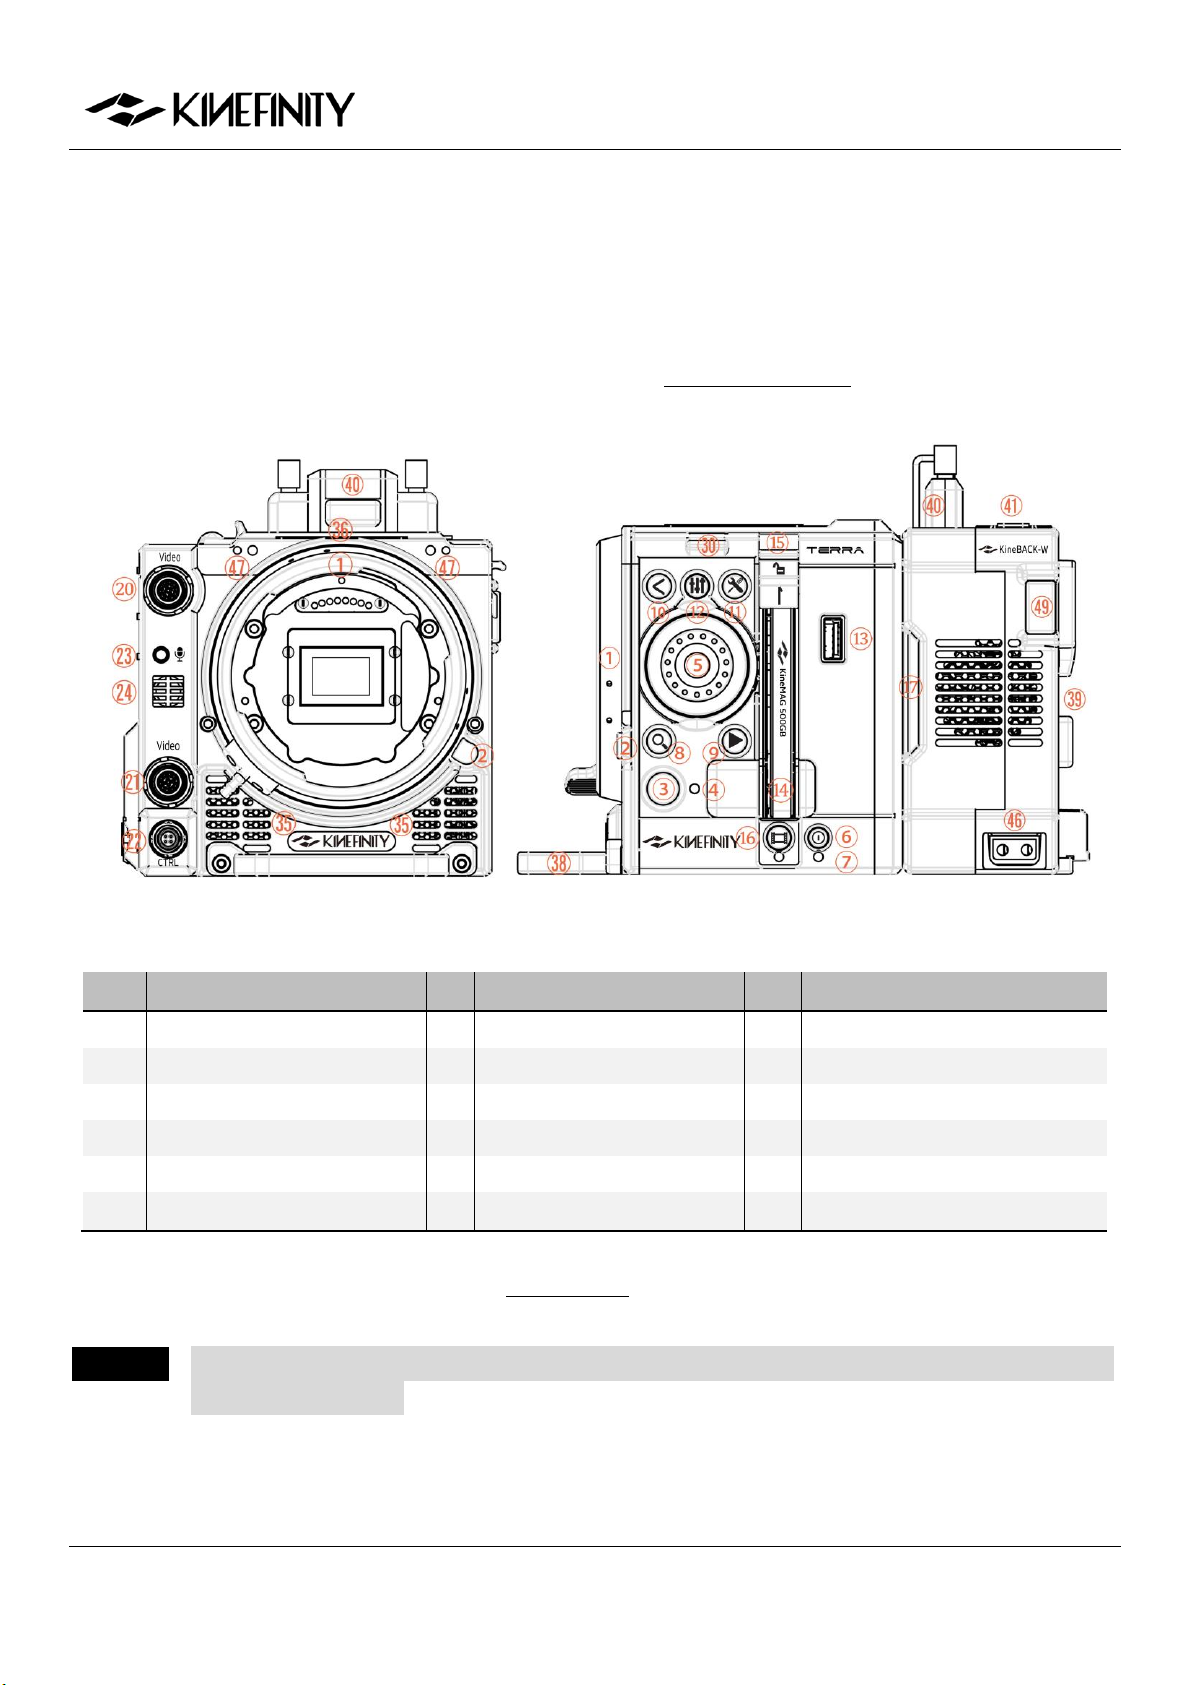
CONTENTS
TERRA 4K BRIEF INTRODUCTION .................................................................................................................................2
SAFETY TIPS ..........................................................................................................................................................................3
1. OVERVIEW ........................................................................................................................................................................6
1.1 Interfaces and Buttons...........................................................................................................................................6
1.2 Functions of Buttons...............................................................................................................................................8
1.3 Interface and Parameters......................................................................................................................................9
1.4 Default Settings..................................................................................................................................................... 10
2. QUICK GUIDE................................................................................................................................................................ 11
2.1 Power Supply.......................................................................................................................................................... 11
2.2 Mount........................................................................................................................................................................ 12
2.3 Lens............................................................................................................................................................................ 13
2.4 Monitoring .............................................................................................................................................................. 14
2.5 Record Media SSD................................................................................................................................................ 15
2.6 Audio......................................................................................................................................................................... 17
2.7 Playback.................................................................................................................................................................... 17
2.8 Codec ........................................................................................................................................................................ 18
2.9 Downscale and Crop Mode............................................................................................................................... 19
2.10 Access clips on PC/MAC ..................................................................................................................................20
3. SETTINGS AND ADVANCED OPERATIONS ........................................................................................................22
3.1 Footages and Slate...............................................................................................................................................22
3.2 Exposure and White Balance ............................................................................................................................ 23
3.2.1 Color Temperature List................................................................................................................................23
3.2.2 Auto White Balance ......................................................................................................................................23
3.2.3 Waveforms....................................................................................................................................................... 24
3.2.4 Zebra..................................................................................................................................................................25
3.2.5 e-ND...................................................................................................................................................................25
3.3 Slow-Mo and Quick-Mo..................................................................................................................................... 26
3.3.1 Two Types of FPS........................................................................................................................................... 26
3.3.2 User-defined Sensor FPS............................................................................................................................. 26
3.4 Custom LUT............................................................................................................................................................. 27
3.4.1 Upload Custom LUT...................................................................................................................................... 27
3.4.2 Erase Custom LUT..........................................................................................................................................27

TERRA 4K Operation Manual(KineOS 6.2)
©2019 Kinefinity Inc. Page 5 / 60
3.5 Firmware Update and Option Upgrade........................................................................................................ 28
3.5.1 Firmware Update ...........................................................................................................................................28
3.5.2 Black Balancing............................................................................................................................................... 29
3.6 TimeCode and SYNC............................................................................................................................................30
3.6.1 TC port and TC cord .....................................................................................................................................30
3.6.2 External TC ....................................................................................................................................................... 31
3.7 Configure Camera................................................................................................................................................. 32
3.7.1 Preset .................................................................................................................................................................32
3.7.2 Shutter Display Mode ..................................................................................................................................32
3.7.3 Camera Fan and Core Temperature........................................................................................................33
3.7.4 ISO....................................................................................................................................................................... 34
3.8 Control Cameras with iPad (KineRemote)....................................................................................................35
3.9 3D and SYNC .......................................................................................................................................................... 36
3.9.1 Steps to set the two cameras....................................................................................................................36
3.9.2 Playback and Change Parameters ........................................................................................................... 37
3.9.3 Clip Name for Post Workflow....................................................................................................................37
3.10 Anamorphic Lens Support And 4:3 Recording ........................................................................................38
4. FAQ................................................................................................................................................................................... 39
5. TECH & SPEC AND CONNECTORS ....................................................................................................................... 42
5.1 Tech Parameters.................................................................................................................................................... 42
5.2 Connectors ..............................................................................................................................................................44
5.2.1 DC IN..................................................................................................................................................................44
5.2.2 CTRL.................................................................................................................................................................... 44
5.2.3 EXT ...................................................................................................................................................................... 45
5.2.4 TC.........................................................................................................................................................................45
5.3 Mechnaical Drawings........................................................................................................................................... 46
5.3.1 Physical Parameters for Body with KineMOUNT................................................................................46
5.3.2 Body with KineMOUNT and EF Mounting Adapter (with KineBACK-W) ................................... 50
5.3.3 Body with KineMOUNT and E Mounting Adapter (with KineBACK-W)......................................53
5.3.4 Body with KineMOUNT and PL Mounting Adapter (with KineBACK-W)................................... 56

TERRA 4K Operation Manual(KineOS 6.2)
©2019 Kinefinity Inc. Page 6 / 60
1. OVERVIEW
1.1 Interfaces and Buttons
The native mount is KineMOUNT, which works together with Mounting Adapters for different lenses, but
only the lenses that are tailored for KineMOUNT can be mounted directly.
Front View (KineMOUNT) Left View of Body with KineBACK-W (KineMOUNT)
#
Name
#
Name
#
Name
1
KineMOUNT
7
Power Status LED
13
USB Port
2
KineMOUNT Release Button
8
Zoom Button
14
SSD Slot
3
REC Button
9
Playback Button
15
SSD Latch
4
Tally LED
10
Shortcut List / Play Button
16
SSD Button
5
Multifunction Wheel
11
Configuration / Play Button
17
Air Intake (Rear)
6
Power Button
12
Audio Button
18
KineBACK-W Port
More details about the professional ports on KineBACK-W is introduced in the buttons review.
CAUTION Keep clear of the air intakes at both front and rear of the body as well as the air vents at top and
right side of the body.

TERRA 4K Operation Manual(KineOS 6.2)
©2019 Kinefinity Inc. Page 7 / 60
CAUTION Cameras delivered after May 2018 is with the new quick release port, which is for the KineBACK-
W. It is easy to mount it on the body, but please also be careful when you do it. While other
TERRA is with old version port and KineBACK instead of the quick and hard connection,
therefore, please follow the instructions and be cautious when you install/remove KineBACK
to/from camera body.
Back View Right View of Body with KineBACK-W (KineMOUNT)
#
Name
#
Name
#
Name
19
KineBACK-W Screw Holes
(M3)
31
Optical Mark (M2.5)
41
Audio XLR Port x2 (KineBACK-W)
20/21
Video Port
32
HD Type-A port
42
3G-SDI Port x2 (KineBACK-W)
22
CTRL Port
33
WIFI Antenna Port
43
SYNC Port (KineBACK-W)
23
3.5mm MIC Port
34
DC Input
44
EXT Port (KineBACK-W)
24
In-camera MIC
35
Air Intake (Front)
45
TC Port (KineBACK-W)
25
3.5mm Headphone Jack
36/37
Side Air Vent
46
D-Tap Power Output x2 (KineBACK-W)
26
SideGrip Port
38
Front Support
(Detachable)
47
KineMON Screw Holes (M3)
27/28
SideGrip Screw Holes (M2.5)
39
V-mount Battery
Plate (KineBACK-W)
48
KineBACK-W Positioning Hole
29/30
Shoulder Strap Hole
40
DT Wireless Card Slot
49
Battery Release Button (KineBACK-W)
For the definition of ports, please refer to 5.2 Connectors. SYNC and Video Ports are proprietary.
NOTE TERRA 4K cameras shipped before Dev. 2018 only have one Video port.

TERRA 4K Operation Manual(KineOS 6.2)
©2019 Kinefinity Inc. Page 8 / 60
1.2 Functions of Buttons
Under Liveview Mode, set the parameters by [Multifunction Wheel]; under Playback Mode, select and switch
between clips by [Multifunction Wheel]. Detailed instructions as follows:
Operation
Function
Note
Rotate
Iris
Control/Select
Only for Lenses in White List
Cental Button
Switch Displays
Display with core parameters ->
Display with Waveform , or Confirm
Press Left Once
ISO/EI
Set ISO/EI Value
Press Right Once
ND
Set ND (only with e-ND adapter)
Press Up Once
Shutter
Shutter Angle or Speed
Press Down Once
Color Temp
Set Complete List by menu
Press Left Twice
FPS
Shooting (Sensor) FPS different from
Project FPS
Press Right Twice
LUT
Choose LUT (with e-ND adapter)
Press Up Twice
N/A
Press Down Twice
Resolution
HS stands for HiSpeed Mode
Buttons and wheel on SideGrip are basically the same as on the body,
functions:
Button
Function
Note
REC
REC; Switch from Playback to Liveview
<
Preset List
Also play footage under Playback or
cancel operation
Zoom
Switch between 1:1/1:2/1:8, or disable
the zoom in menu; press for 3 seconds
to enter/quit lock mode
Playback Mode
Configuration Menu
Also play footage under Playback mode
Volume
Press twice to set audio
Sleep Mode
Only on SideGrip, low-power standby
mode
SSD Button
Activate, deactivate or format SSD
Power on/off
Press twice to power off; press for 5 sec
+ to power off compulsorily
NOTE SSD Button is only on camera body; Sleep Mode Button is only on SideGrip.

TERRA 4K Operation Manual(KineOS 6.2)
©2019 Kinefinity Inc. Page 9 / 60
1.3 Interface and Parameters
Once the camera is powered on, it enters into the Liveview mode right away: parameters of current scene are
displayed on the top and bottom. Press [Multifunction WheelCentral Button] to show/hide Waveform.
#
Name
#
Name
1
Display Mode: Liveview/Playback/REC
11
Highlight Stops
2
Imaging Format
12
ND Value (only with e-ND adapter)
3
Record Resolution
13
Clip Name
4
CMOS Imaging Sensor FPS
14
SSD Status/Capacity
5
Shutter Speed/Shutter Angle
15
Record Format/Codec
6
Iris Number (If Applicable)
16
Time Code
7
Monitoring LUT
17
Real-time Power Voltage
8
Color Temperature
18
Real-time Core Temperature
9
Exposure Mode
19
VU meter
10
ISO ASA
20
Waveform
NOTE CMOS Imaging Sensor FPS is the actual capturing FPS of the sensor, set by [Multifunction
Wheel]; Project FPS is the playback FPS in post work, set by [Configuration].
NOTE EF Iris control is only for lenses in the White list; other lenses might not be recognized or
controlled.

TERRA 4K Operation Manual(KineOS 6.2)
©2019 Kinefinity Inc. Page 10 / 60
1.4 Default Settings
The list below is the default setting of TERRA:
Type
Name
Default
Type
Name
Default
Shooting
Image Format
sub S35
Settings
SSD System Format
HFS
Resolution
4K 4096*2160
Time Code
Free Run
Sensor FPS
25fps
ND set
0.03
Project FPS
25fps
WIFI Power
ON
Shutter
1/50s
Threshold Voltage
13.3V
ISO
ISO 800
Language
English
Highlight Stops
4.3
Start Display
Brief
Color Temperature
5600K Daylight
Fan Speed
40%
LUT
KC_NEUT
Fan Stop
Never
Codec
ProRes 422HQ
Clip End
Loop
Active Mount
Enhanced
SYNC
Tally Lamp
ON
Project Blanking
None
Beeper
ON
Liveview
Video Output FPS
60P
Audio
MIC Level
30dB
Waveform
LUT
Playback/Monitoring
Level
0dB
Zebra Pattern
90%
KineAudio
OFF
Color Temperature List
Brief
Phantom 48V
OFF
Shutter Mode
Time
KineAudio Source
CH1/CH2
Anamorphic Lens
None
KineAudio Level
30dB
NOTE When the camera is powered with an e-ND adapter attached, default value will be 0.6 (2 stops).
How to restore to factory settings:
[ConfigurationSystemFactory Reset]
NOTE When the camera is powered with a USB storage device plugged in before powering the camera,
it will automatically revert to factory settings while booting.

TERRA 4K Operation Manual(KineOS 6.2)
©2019 Kinefinity Inc. Page 11 / 60
2. QUICK GUIDE
2.1 Power Supply
The camera allows different types of power supplies:
GripBAT 45Wh (compatible with BP-U30) fits TERRA with SideGrip.
Single GripBAT 45Wh is able to power TERRA for 100 mins. SideGrip is
connected to the "SideGrip Port" on camera body by three M2.5
screws, which enables a kind of “DSLR”shooting style.
Supper Compact V battery KineBAT 120Wh (compatible with V-
mount batteries) fits TERRA with KineBACK-W. Single KineBAT 120Wh
can power TERRA for more than four hours. KineBACK-W only comes in
a V-mount version, and does work with other V-mount batteries.
KineBACK-W has one EXT port providing 12V outputs and two D-TAP
ports. For the definition of EXT port, please refer to Chapter 5.2.3.
Use different power cords to the 2-pin power port of camera body:
D-Tap Power Cord: connect the D-Tap plug to the D-Tap socket of battery/battery plate, and
connect 2-pin push-pull plug to the 2-pin power socket of camera body;
XLR Power Cord: connect the 4-pin standard XLR plug to the XLR socket on storage battery
(11~19V), and connect the 2-pin push-pull plug to the 2-pin power port on camera body;
Kine AC Power Adapter: connect the adapter to a power bar, and plug 2-pin push-pull plug to the
2-pin power socket of camera body.
CAUTION The input range for TERRA is 11~19V, or the camera might be burned.
CAUTION Please pay attention to the direction of 2-pin DC IN port on camera body when pull/plugging the
power cords: align the red dots.
NOTE A V-mount to Anton-Bauer Plate Adapter is needed if you want to use Anton-Bauer (golden
mount) broadcast battery.
NOTE When two of the three power supplies are available at the same time, TERRA will automatically
choose the source with higher voltage, and allows hot-swap of batteries.
NOTE To save power, use other power supply for monitors and turn off WIFI.
NOTE Since KineOS 6.2, if the voltage detected is too low to continue shooting, the camera will
automatically stop recording to avoid damage on the clip. But for sudden power failure due to
accident during the recording of a file, the last clip might be damaged, and please refer to
Chapter 2.5 SSD MAG.
DC IN
1. DC IN as VDD
2. Ground
1
2

TERRA 4K Operation Manual(KineOS 6.2)
©2019 Kinefinity Inc. Page 12 / 60
2.2 Mount
TERRA is designed with original KineMOUNT, which needss a Mounting Adapter II before attaching a lens.
The adapters include EF Mounting Adapter II, EF Mounting Adapter II with KineEnhancer, EF Mounting
Adapter II with e-ND, PL Mounting Adapter II, PL Mounting Adapter II with e-ND, and also SONY E Mounting
Adapter.
There are only three steps to install adapter II to the KineMOUNT, take EF adapter as an example. Turn off
the camera and then:
1. Release: keep pressing the KineMOUNT Release Button and rotate the locking ring of KineMOUNT
counter-clockwise, then take off the KineMOUNT cover;
2. Install: there is a positioning slot above the electronic contacts of KineMOUNT, please match the
arcuate protrusion on the adapter with the locating slot of KineMOUNT when attaching the
mounting adapter to the camera;
3. Lock: rotate the locking ring of KineMOUNT clockwise to fasten the adapter to KineMOUNT firmly.
Power on TERRA after mounting the adapter. Press "CONFIG" and check the bottom of this menu, if it
presents EF sys 9(or other number), it means you have mounted the adapter successfully.
CAUTION Power off camera when swapping different adapters, else camera or adapters may get burned.
CAUTION As the FFD of KineMOUNT is very short, please don't try to attach any lens directly to
KineMOUNT, or it will cause permanent damage to CMOS imaging sensor and OLPF, except
lenses tailored for KineMOUNT.
NOTE TERRA's New KineMOUNT only works with Mounting Adapter II.
NOTE When install the EF Mounting Adapter II with KineEnhancer or e-ND, please don't touch the
optical glass. Any damage caused to the glass is irreversible, and the glass has to be replaced.

TERRA 4K Operation Manual(KineOS 6.2)
©2019 Kinefinity Inc. Page 13 / 60
2.3 Lens
No matter attaching a DSLR still lens or PL cine lens, TERRA employs Lever-locking (Cine-style) mounting
system, rather than DSLR camera mount.
Steps to attach EF lenses
1. Release: Rotate the locking ring of the EF mount clockwise, take off the cover and lens cover;
2. Install: Align the "red dot" on the lens with the "red dot" on the mounting adapter. Make sure that
the pin on mount engages with the hole in the mount of the lens. For EF-S lens, align the white
square on lens with the one on the mount.
3. Lock: Rotate locking ring (NOT lens) counter-clockwise (follow the arrow of "lock sign" on mount)
until it is fastened firmly.
CAUTION The mounting adapter might be burned if a lens/adapter with all-metal rear end is attached
directly to the camera body. In this case, please keep electronic iris control off:
[ConfigurationSettingActive MountDisable].
NOTE The following mount lenses with electronic contacts: Sigma18-35 T2.0 and Canon18-80 T4.0,
may show iris value on UI, but please do not change the value by the Wheel, or it will cause the
malfunction of the camera or the lens, we strongly recommend turning off the electronic iris
control. [ConfigurationSettingsActive MountDisable].
KineEnhancer
TERRA 4K can use adapters with KineEnhancer and turns sub S35 into a larger format than S35 (crop factor is
1.3) with shallower depth of field, and even one more stop on max aperture.
NOTE EF-S lens can NOT be used on KineEnhancer as it has longer rear end than EF lens and will touch
and damage the optical glass. Lenses that need to move the rear under for focusing also can
NOT be used on KineEnhancer.

TERRA 4K Operation Manual(KineOS 6.2)
©2019 Kinefinity Inc. Page 14 / 60
2.4 Monitoring
Please choose recommended EVF or Field Monitor with Video, 3G-SDI (Not HD-SDI) or HD digital input, and
connect the input port of EVF or monitor to output port of the camera body with a high quality cable.
Suggestions for monitoring:
KineMON 5″ Full-HD Monitor: with the Kine Video Cord our monitor gets both power supply and
video signal through the same cable. There are many appropriate accessories available to firmly
mount the monitor according different needs.
SmallHD Monitors 500 series and 700 series: can be connected to the HD Type-A port and two 3G-
SDI ports on KineBACK-W.
FSI broadcasting/cine monitor or other monitor with 3G-SDI port as director monitor or DIT monitor.
For the current firmware, HD Type-A port is only for video monitoring, but SDI port also supports audio
signal: output audio during the playback of files.
CAUTION Connect the monitors to the camera by HD video cable or SDI cable (75Ω) before they are turned
on, and please also pay attention to the direction of D-TAP cord.
NOTE Please choose the LP-E6 Battery Coupler (7.4V) when using the 3rd-party monitors,.
NOTE TERRA video output is only for monitoring, not recording. The monitoring FPS is different from
CMOS imaging sensor FPS; therefore, the external recorder cannot get the clips with the same
FPS and resolution as CMOS imaging sensor.
Functions of Buttons on KineMON
PEAK: peaking focus, show the red line peaking and black-and-white screen;
CLIP: marks clip exposure, show the overexposure and underexposure area;
False: marks false color exposure: overexposure/underexposure areas and the area between;
Wheel: press the wheel to trigger backlight setting, and rotate the wheel to set the level of backlight.
NOTE Turn off the KineMON to save the power for longer duration.

TERRA 4K Operation Manual(KineOS 6.2)
©2019 Kinefinity Inc. Page 15 / 60
2.5 Record Media SSD
Please insert the KineMAG 500G/1T SSD or other 2.5" 7mm SSD to SSD slot before powering the camera.
SSD slot has a secure latch: push the latch upwards before inserting or pulling out the KineMAG. Button
under the slot controls the operation of KineMAG, and the LED indicator beneath the button shows the
status of KineMAG.
Check the SSD status on the monitoring screens:
Blinking red [No SSD]: the SSD indicator is off, which means that there is no SSD in the slot, you can
not shoot. Insert the SSD into the slot and reboot the camera;
Blinking yellow [SSD: Ins]: the SSD indicator is red now, which means that there is a SSD detected but
hasn't been activated, you still can't shoot under this status. You need to:
Activate the SSD: press [SSD] button, and choose [SSD Maintenance Activate] or twice-
quick press on SSD button; if the SSD has been formatted into HFS or NTFS, it will be
activated successfully showing SSD capacity and green [SSD: Act].
Rebuild SSD: if fail to activate SSD, please rebuild it in camera. Press [SSD] button, choose
[SSD Maintenance Rebuild]. Then activate SSD, SSD status displays green [SSD: Act.
Green [SSD: Act] with SSD available capacity and total capacity: SSD indicator is Green which means
the SSD is ready for shooting and the clips will be recorded into it.
Please make sure that the SSD is deactivated before taken out: pressSSD button [SSD Maintenance
Deactivate] or press the SSD button twice, SSD status turns into [SSD: Ins], then push the latch upward and
pull out the SSD.
CAUTION Data can't be recovered after the SSD is rebuilt/formatted; please backup all data before
formatting.
CAUTION Due to the protrusion on case of Samsung 860 Pro, the door of SSD slot may be damaged when
taking this SSD from the slot.
NOTE Please do insert the SSD before the camera is powered on, or the SSD will not be detected.
NOTE Only recommend KineMAG. Performance of 3rd-partyon data spec are not guaranteed. No
technical support or help on recording issues such as frame drop or data loss for 3rd-partySSD.
NOTE Please prepare backup SSD cards for backup in case of emergency on the set.
NOTE If it shows red "Flush" during recording, please try a KineMAG. If the issue still exists, please

TERRA 4K Operation Manual(KineOS 6.2)
©2019 Kinefinity Inc. Page 16 / 60
SSD File System Formats: NTFS & HFS
TERRA supports both NTFS and HFS format for SSD. The default format is HFS, but for Windows platform,
you can set to NTFS by:
[ConfigurationSettingsSSD File System] choose NTFS
Then reboot the camera and rebuild the SSD in camera, the file system of the SSD will be NTFS.
NOTE For Mac platform, you can still use NTFS: since MacOS 10.12 Sierra, MacOS can access NTFS files.
Do not write data or format SSD on Mac or Windows.
NOTE Rebuild/format the SSD in camera ONLY.
NOTE When the file system format of the camera is set to NTFS, the SSD of HFS can not be activated in
the camera. Here are two solutions for such situation: change the format of the camera into HFS
and then reboot to take effect; or back up your SSD on a computer, and then rebuild/format the
SSD in camera as NTFS. MAKE SURE to backup your clips before you format SSD.
NOTE If there is power failure accident while recording, the NTFS SSD may not be activated when the
camera is powered on again. Please back up your clips and then rebuild the SSD, or you have to
use another SSD to continue the shoot. While HFS SSD can be activated after powering the
camera, but the last clip may need to be recoverd by special software in Windows.
NOTE To recover the cDNG/ProRes clip damaged by power failure, please refer to Chapter 4.13.

TERRA 4K Operation Manual(KineOS 6.2)
©2019 Kinefinity Inc. Page 17 / 60
2.6 Audio
There are three audio recording methods:
In-camera MIC: record audio using the in-camera MIC even if there is no KineAudio or 3.5mm MIC;
3.5mm Plug-in-power port: suit for 3.5mm MIC;
KineAudio dual XLR ports with Phantom 48V: KineAudio is a high quality pre-amp audio module with
Phantom 48V, and it is integrated into KineBACK-W. Also it has dual industry-standard XLR ports for
professional shotgun microphone. KineAudio CH1 and CH2 channel can be set independently since
KineOS 6.112.
If the camera has no KineBACK-W or KineAudio is disabled, audio is recorded by 3.5mm MIC if a microphone
is connected to the 3.5mm port; if no microphone is connected, audio will be recorded by the in-camera
MIC.
NOTE The audio will be packed into mov file only when the project FPS is the same as sensor FPS, or it
will be recorded into a separate mov file. For example, if the project FPS is 25.000, when the
sensor FPS is set to 30.000, it will show yellow 30.000 on the UI.
KineAudio and Phantom 48V
If a microphone needs Phantom 48V, you need to set the KineAudio: press the [Audio] button twice
[Audio ButtonAudio Management] [KineAudio: ON] and [Phantom 48V: ON]
Three modes for audio tracks:
Two audio tracks as CH1: recorded two tracks as CH1;
Two audio tracks as CH2: recorded two tracks as CH2;
Stereo: recorded two tracks as CH1(Defaut: left track) and CH2 (Default: right track) separately.
Generally, the camera audio can be set as one input if just using one MIC.
CAUTION When using microphones that don't need Phantom power, please turn off the Phantom 48V.
2.7 Playback
While in Liveview mode, press [Playback] button and enter into Playback mode, and [Preset List] button and
[Configuration] button act as Play/Pause button. Playback of the current clip is looped by default. Press
[Multifunction WheelRight Button] to the next clip; press [Multifunction WheelLeft Button] to the
previous clip. You can also fast forward or fast reverse by [Multifunction Wheel]. Please note that the
parameters in Playback mode are different from the ones in Liveview mode. Press [REC] button or [Playback]
to switch back to Liveview mode.

TERRA 4K Operation Manual(KineOS 6.2)
©2019 Kinefinity Inc. Page 18 / 60
2.8 Codec
TERRA has two in-camera recording codecs in current firmware, set the default codec:
[ConfigurationShootingDefault CODECProRes (.mov) /cDNG(.dng)]
Recommend shooting ProRes as TERRA supports in-camera ProRes recording at all resolution and fps:
4K/3K/2K even 4K Wide 100fps. TERRA keeps all dynamic range of ProRes clips with KineLOG3, while the
monitoring LUT will not be burned into the clips.
TERRA also can in-camera record compressed RAW with cDNG format, and the compression ratio is
configurable, from 3:1, 5:1 to 7:1. DaVinci Resolve natively supports cDNG, so that you can directly import,
edit and grade the cDNG footage shot by the camera in DaVinci Resolve! No matter what compression ratio
3:1, 5:1 or 7:1, every format is able to achieve super high quality image and room for post-production.
NOTE No need to reboot the camera when switching between codecs, but the screen will be black with
a cross in the center for 5 seconds during the switch.
NOTE Supports 422HQ/422/LT/Proxy in-camera recording.
Duration Reference
Settings
Duration
@KineMAG 500GB
Duration
@KineMAG 1TB
2K@25fps ProRes422HQ
5 hours and 30 mins
11 hours
3K@25fps ProRes422HQ
2 hours and 50 mins
5 hours 20 mins
3K@25fps cDNG(7:1)
5 hours 20 mins
11 hours
4K@25fps ProRes422HQ(.mov)
1 hour 20 mins
2 hours 40 mins
4K@25fps cDNG(7:1)
2 hours and 40 mins
5 hours 20 mins

TERRA 4K Operation Manual(KineOS 6.2)
©2019 Kinefinity Inc. Page 19 / 60
2.9 Downscale and Crop Mode
TERRA 4K doesn't have HiSpeed mode compared to TERRA 6K, but has lower rolling effect, which shows the
feature of high speed and low noise.
Oversampling/Downscale
Oversampling/Downscale: recording (output) resolution is less than actual sampling resolution by COMS
imaging sensor, while the image format of recording is the same with the image format of sampling. As all
effective area of imaging sensor is used, there is higher resolution but lower noise level. Oversampling at sub
S35 is 2K.
For most cases, downscale 4K/2K ProRes at sub S35 is recommended.
NOTE Due to the downscale in-camera process, there is no 2K KRW RAW at sub S35.
Cropping Mode
Cropping means that the CMOS imaging sensor only utilizes a center part of the image as effective sampling
area. Cropping mode can boosts frame rate higher than full resolution sampling:
Output 4K Wide full resolution sampling, up to 100fps;
Cropping Mode, 3K Wide (sub M4/3), up to 150fps;
Cropping Mode, 2K Wide (sub S16), up to 240fps.
Oversampling + Cropping = infinity combination of resolution, fps and framing. Select Cropping Mode by:
[Preset List(<)] Button or [ConfigurationShootingImage Format]

TERRA 4K Operation Manual(KineOS 6.2)
©2019 Kinefinity Inc. Page 20 / 60
2.10 Access clips on PC/MAC
Access SSD on PC/MAC
To access Clips from SSDs on PC or MAC, a SATA to USB3.0 reader is used to connect SSD to workstation or
laptop:
MAC platform (MacOS Sierra) can access SSD with either NTFS or HFS file format;
Windows platform can only access SSD with NTFS file format (format must be set as NTFS in camera).
NOTE Only the reader that supplied by Kinefinity is recommended to access SSD as some 3rd-party
reader may not work.
Play Clips on PC/MAC
All dynamic range of KineLOG3 ProRes clips is retained, and monitoring LUT will not be burned into the clips.
Therefore, LOG clips retain all of their dynamic range and color information. While playbacking the footage
at a computer use the LUT file that was used inside the camera and the image looks identical to the one
while monitoring during the recording.
When using Windows you need to install Quicktime7 to access ProRes mov file, while other DI softwares
such as SCRATCH, DaVinci Resolve do not need to install Quicktime7 to work with those files. MAC platform
can access or play ProRes files without other software tools.
Clip Folder
Each clip is saved in the SSD. The folder name is nearly the same as the clip name, but no file extension, eg:
folder PRJ-0002-003-A2_5D8A (meaning of clip name, see 3.1 Footages and Projects Information) includes:
PRJ-0002-003-A2_5D8A.mov: is ProRes mov file.
PRJ-0002-003-A2_5D8A-L.wav and PRJ-0002-003-A2_5D8A-R.wav: are the uncompressed audio files
of CH1 and CH2.
***.cube and ***.look are the LUT while monitoring, format is cube or look format.
PRJ-0002-003-A2_5D8A_snapshot.bmp: the snapshot of this clip, resolution 1/2x1/2.
PRJ-0002-003-A2_5D8A -slate.txt: contains most of the information when shooting the clip, like
shutter speed, ISO, highlight, color temp, etc.
0.mt: internal camera information when recording.
Please send slate.txt and 0.mt to Kinefinity if clip files show abnormal.
Table of contents
Other Kinefinity Digital Camera manuals