King Pigeon W22 User manual

Page 1 of 8 Ver 1.0 User manual.
Hd WiFi
Water-Proof IR camera
operating instructions
720P HD image,Support IOS, Android
Resolution of real output image up to
720P (1280*720)
Combines remote video, on-site record
and alarm
Supports wire and wireless wifi connect
Cloudlink P2P network transmission
technology
H.264 Main Profile
compression,clearer, smoother
User Manual
Ver 1.0
Date Issued: 2016-03-09
All rights reserved.
King Pigeon Communication Co., Ltd.
W22

Page 2 of 8 Ver 1.0 User manual.
Hd WiFi Water-Proof
IR camera operating instructions
I. HD Pan/Tilt Networok Camera

Page 3 of 8 Ver 1.0 User manual.
II. Interface definition and connection diagram
Network Interface: When using a network cable connected to the Internet use;
WIFI antenna: WIFI signal reception;
Memory card socket: Insert the memory card, support 32G; the device can store videos /
pictures;
Power Interface; connect the power adapter (the product use DC5V, 2A current input);
III. Mobile phone Software Download
To better experience the convenience of this product, before using this product, please download
the Phone app:
1. Mobile phone software download:
iOS users can go to the APP Store to search “Yoosee” and download.
Andriod users can visit the website( https://yoosee.co ) to download and install Yoosee.
Also can input http://yoosee.co/ in the explorer to download it in the PC, Android version and
iOS version can scan the QR code to download the software directly, PC click CMS to download
directly.
2. Mobile phone ID register
Note: first open the Yoosee software, user need register one ID as the following:
Select the bottom right "using a mobile phone registered" or "use registered mail" click to enter
Enter the phone number or email address, click "Next"

Page 4 of 8 Ver 1.0 User manual.
Enter the verification code, click "Next" (such as mobile phones registered, SMS verification
code will be sent to your phone within 180 seconds; registered mail, you do not need to enter
this code)
As registration is successful, it will pop-up "Congratulations, registration is successful," while
the system automatically assigns you an ID, please remember this ID, used as a login user name,
click on "OK", and then enter the password you just set , you can log in normally.
3. Network connect
Users can access the device via the Internet in two ways:
Wired Connect: After switching on the camera power, connect one end of the network cable to
the camera network interface, and the other end connected to the router LAN interface (make
sure the router is turned on DHCP function), the network light will be normally on after
connection successfully.
WIFI Connect: The users can follow the below ways if they wants to starts using WIFI to get
connection with the camera when the camera is wired connection:
1. Please add the device to the Yoosee device list: "Add Device", Please view the fifth part for the
detail steps.
2. Open software Yoosee, Please choose "device", click on the device name, select "Settings" ,then
Select "Network Settings" (Please don’t choose “WIFI” directly at the moment) the following
will search all of the WIFI signal near it automatically, choose your WIFI ID,4,input WIFI
password password, open WIFI successfully.
3. Set WIFI by intelligent online: Details refer to 4. add device on mobile phone.
4. Add device on mobile phone

Page 5 of 8 Ver 1.0 User manual.
How to add the device to device list:
in the device list interface of the “Yoosee” software, when the camera is in network and the
phone is in the same WIFI, both of them are on one LAN, The software will find all devices
automatically, and only need choose, add and set the access password is ok.
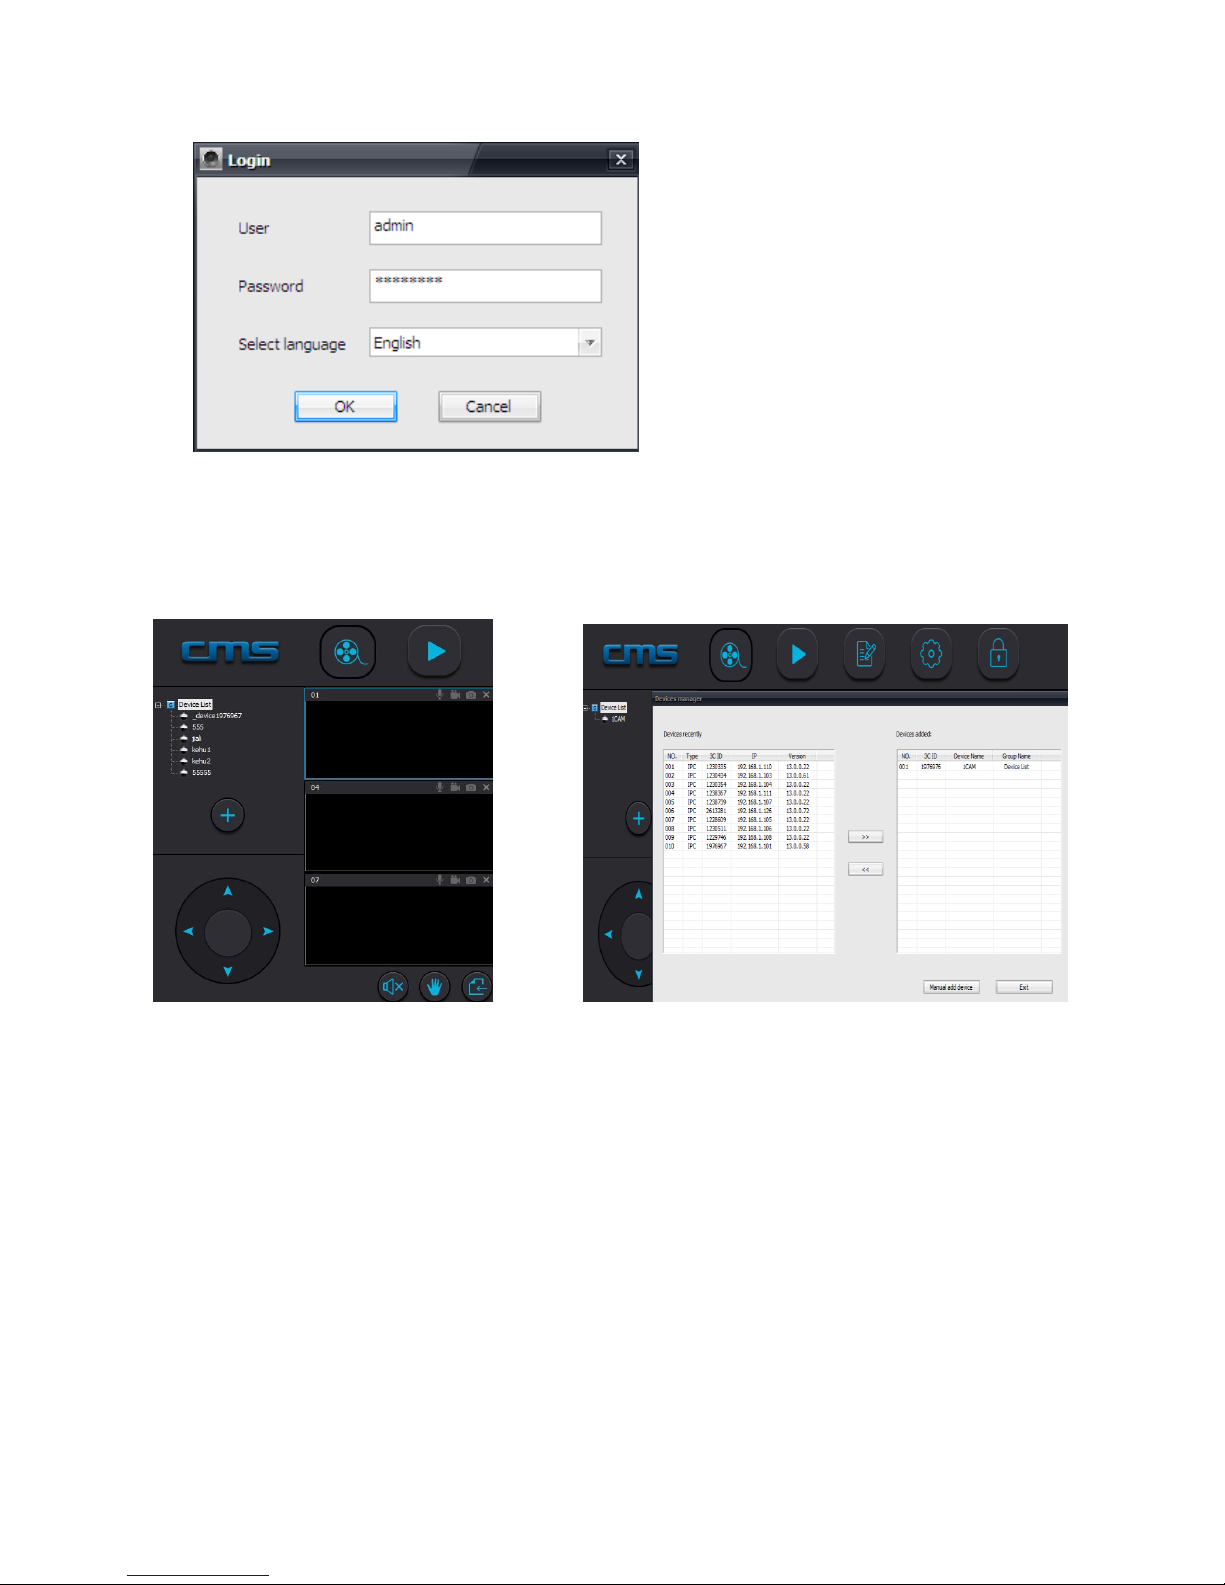
Intelligent online: open the Yoosee software, click ”Device”, choose the “+”button, choose
“intelligent online”. click next and then choose the WIFI and WIFI password you need, click the
“next” again, connect the device.
Add device manually: in the device interface of Yoosee software, click the “+”,input ID and password
is ok.
5. Device Monitoring
Contact person, click the device icon that has been added in device list to entry the monitor mode.
6. Video settings
Video: This device can support 32GB TF card in max, if need record video, please insert the
memory card at first, and open the Yoosee: click Device->Device name->settings->video settings,
user can choose record video manually, alarm video, timing video.
Playback: This device support playback in mobile phone, open the Yoosee software: click
Device->Device name->playback, user can find the playback files according to the data, then
play it directly.
7. Zone Set
Alarm equipment, learning the code
Note: This function is optional, please make sure your device has this function.
This device supports 8pcs remote control, 8X8 = 64 wireless alarm (433 frequency), supports 8
groups.
Learning the code as follows
1. Please add device to device list in the Yoosee software.
2. Click Device->Device name -> Settings ->Defence Area settings.
3. For example, you want to learn one door sensor that installed in the hall, the serial number is
1.click “hall”-click number 1,pop-up:
Click confirm and trigger the alarm ,you will learn at the same time(take the door sensor as example,
separate the door sensor will trigger the alarm),if match code successfully, the words will be turn
blue from gray, and will Pop-up; learn successfully.
4. Back to device list interface, click the right lock key of the device,“ ” Arming, “ ” Disarm, the

Page 6 of 8 Ver 1.0 User manual.
alarm will be effective if match code successfully after arming 15secs.
5. "Remote control" is special designed for remote control alarm, the ways of matching code is the
same as "A, B, C", the function is equal to the right key of the device list in the Yoosee
software, it can be used as ”arming,disarming”, but it need match with device learning.
Delete match code, click the access number that had learned, confirm delete is ok.
Alarm settings:
1. Arming: There are two ways, one is through the press the infrared remote control arming
key(lock key) that has learned successfully; two is the arming keys(Lock key) in the back of the
APP contact list, after arming, when there is a case, the device will send the alert to the APP
actively, and send captured images to the alarm mail at the same time.
2. Push account, alarm-mail: Click a device name -> Settings -> Alarm settings: add receiving alert
APP ID in binding account(open Yoosee software, can be found after clicking on the
first ”settings” button from right in the lower, can add up to five account),alarm write the
receiving alarm email address.
3. Motion detection: alarm as soon as the scene change.
4. Buzzer: Open the buzzer, when there is alert, the device will sirens screaming until” disarming”.
8. equipment upgrade
Click on a contact name -> Settings -> Check for Device Update. it will remind the new version
number if have the new version.
IV. The software operation in PC.
Download software to PC.
Input http://yoosee.co/ in the PC explorer, click the icon CMS to download directly.
Log account in PC.
1. There are two ways to log in, select “remote login”, use the ID(email/phone number/Yoosee
account ID) that register in the mobile phone to login directly, no need to register again.
2. When the PC software choose” log on locally”. the account is:admin,password:00000000

Page 7 of 8 Ver 1.0 User manual.
3. Computer terminal network connection.
4. Add the device to PC.
How to add the device to the device list, in fact, there are many kinds of ways to achieve, specific
methods, please refer to: in the left side of the “CMS” software interface, click the button +, input
device name and ID and password and click ok;
5. Device monitor in PC,
Open the CMS software, right click device name->>start monitor, as following picture;

Page 8 of 8 Ver 1.0 User manual.
6. The video setting in PC.
Video, this device can store the video in the computer’s hard disk, right click on the monitor screen,
select” start video”(note: be sure only in the computer monitoring condition, the video can be
stored in the computer’s hard disk.)
Playback: this device can playback the video from computer, open the CMS software, choose
“playback” , user can find the playback files according to the data, the play it directly.
(Note: the video in computer hard disk only can be played in PC, does not support playing in mobile)
V. Restore factory settings
Reset will erase all user settings: including WIFI information, access password, alarm information,
arming zones information
The steps: find the reset hole at the button of the device, and then use needle to insert it, press it
more than three seconds after hearing “di” sound, when hearing the sound like” draw the sword”
reset successfully.
Table of contents