Kittec X Series User manual

U s e r s M a n u a l
Kittec
X-Line

- 1 -
Contents
Page
Table of contents 1
About this Users Manual 2
Use of the kiln
2
Safety
2
Safety ti s 3
Installation and O eration 4
Storage and trans ort
4
Installation
4
Electrical connection
5
Connection of exhaust i e
5
The first firing
6
The firing rocess 7
General
7
Su ly air bottom valve
7
Biscuit firing
7
Glaze firing
8
Reduction Glaze firing
8
Maintenance and care 9
Troubleshooting 10
What if … ?
10
Firing record tem late 11
Data sheet X-LINE 12
Warranty certificate 13

- 2 -
About this Users manual
With the help of this Users manual we will introduce
your new Kittec
-X-LINE kiln.
Please read this Users manual before your first firing to
familiarise yourself with the operation of the kiln and the
controller. Please take particular note of the Safety ti s
and Advice to guarantee successful and safe firing.
Should there still be a problem, we have listed some
possible solutions in another section entitled “What if
.?”
Use of the kiln
The electric Kittec
-
X-LINE kilns are built in
accordance with German Law VDE (association for
electrical, electronic and information technologies) ,
exclusively for the purpose of firing, thermal treatment
and/or melting of ceramics, china, enamel, glaze and/or
glass. The maximum temperature in the firing chamber
of the kiln is 1300°C.
The melting temperature of glazes and the vitrification
temperature of the clays used will dictate the firing
temperature required, invariably less than 1300 °C.
Safety tips
Do not open when hot! Hot surface
(firing chamber > 50 °C)
Before opening Dangerous electric

- 3 -
Safeguards
The following Safeguards need to be observed for trouble-free and safe work with the kiln.
Non-compliance could result in health hazards.
• For safety reasons the kiln should only be installed in a dry and ventilated room of
adequate size.
• Fire regulations should be observed especially if working in a garage or boiler room.
• Please observe the installation advice for the kiln in the section entitled Installation and
Operation.
• Caution! In use the surfaces of the kilns could reach a temperature of more than 75°C.
Do not obstruct the surfaces.
• The kiln may only be used for the purpose stated. Other applications, particularly the
storage, production, cooking, warming and/or drying of food and/or other
misappropriations are not allowed. In any case do not put flammable materials into the kiln.
• Use only authorized raw materials and glazes in your kiln. Ask your supplier for information
on the correct use of the materials, safety data sheets and relevant specialist literature
about firing temperatures, maximum temperatures and resulting gases and vapour relating
to the materials you wish to use.
• For health reasons it could be necessary to draw off the fumes when the kiln is firing.
Please take note of the advice given for the installation of an exhaust pipe from the kiln
room to outside in the chapter installation and operation.
• The lid of the kiln must not be used as a table, even not if the kiln is not in use (the
mechanical lid should not be put under any pressure and in use the heat given off could
present a hazard). Nothing flammable should be left on or close to the kiln.
• The kiln must not be opened during use or until the firing chamber reaches a temperature
of less than 50 °C. The escaping hot air is a fire and health hazard. The lid catch has the
facility to be secured with a small padlock. This is strongly recommended to prevent
unauthorised opening of the kiln, perhaps by young children.
• The very hot air, which escapes, leads to fire and violation danger.
• Under no circumstances use extension leads to connect your kiln to the power supply.
• During maintenance, disconnect the kiln from the power supply (pull the plug or if
applicable turn off the isolator switch).
• The whole electrical circuit must be checked by a service engineer before the first use of
the kiln, after maintenance and repairs and at least every 4 years.

- 4 -
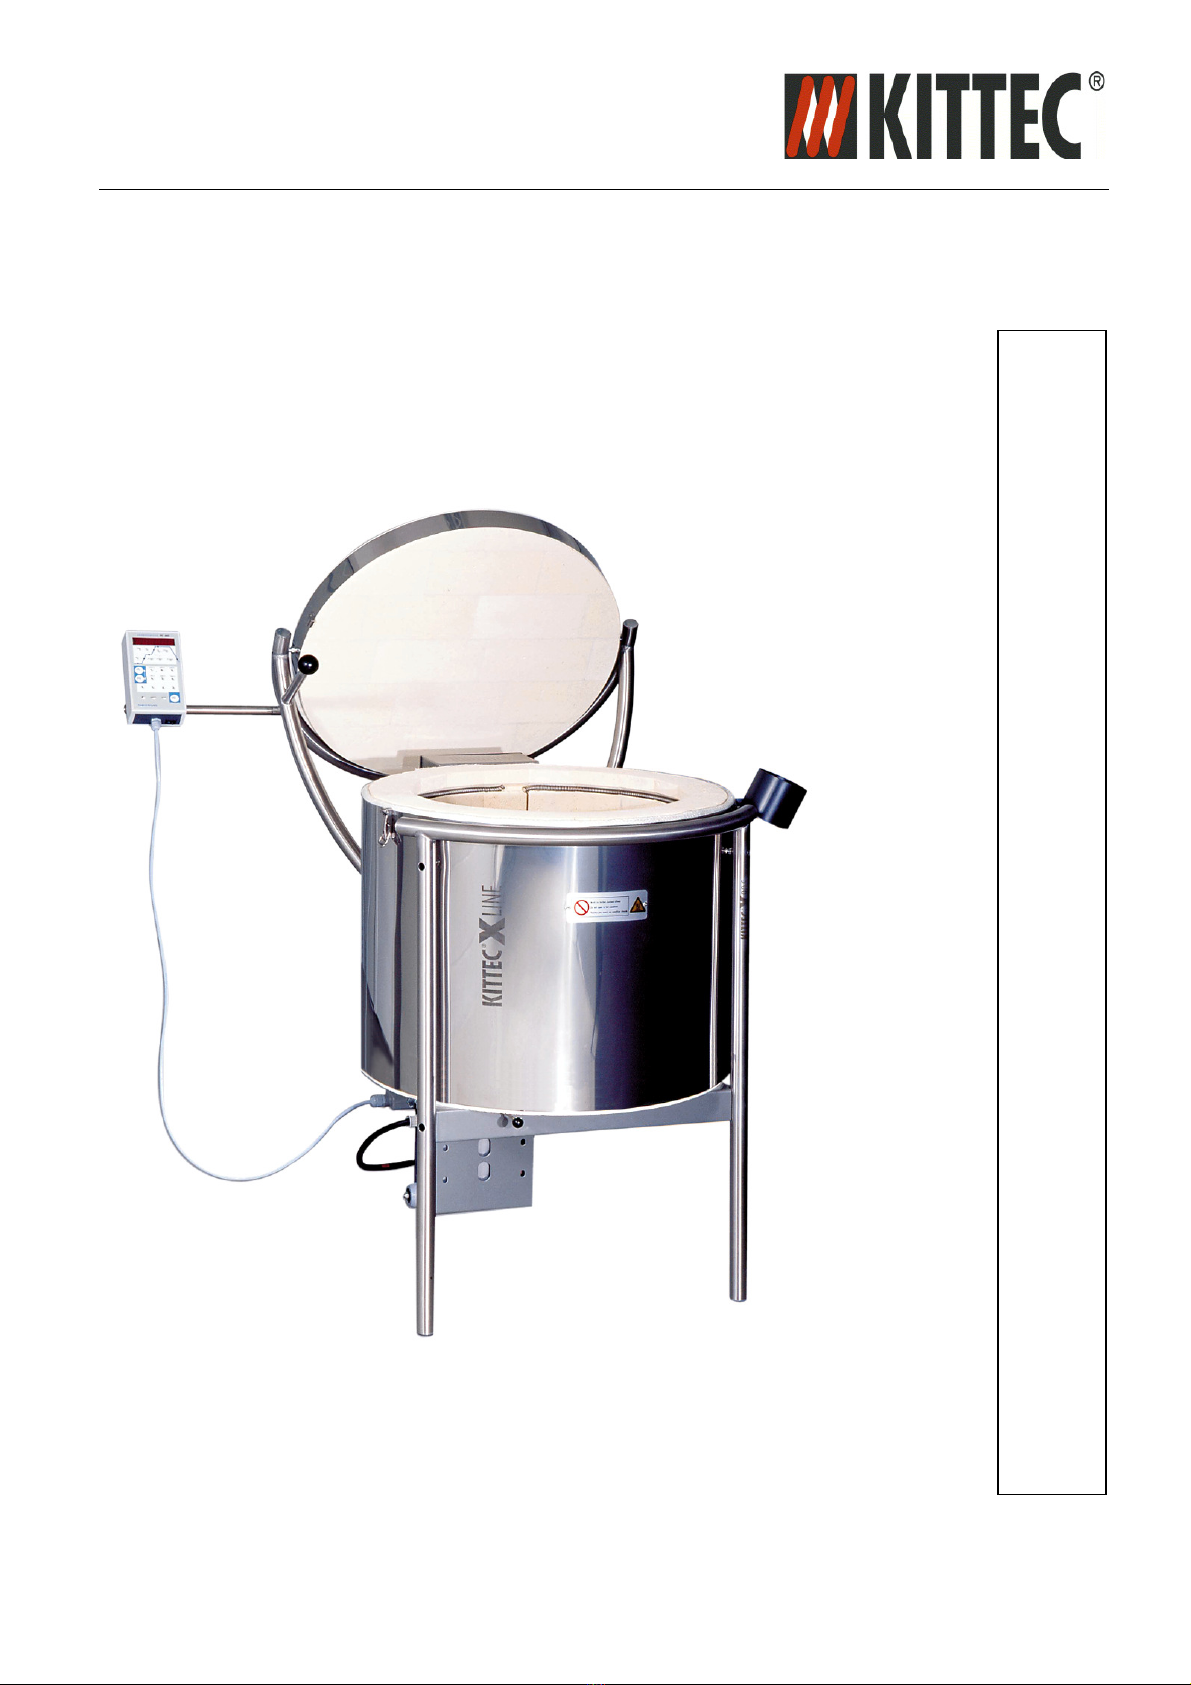
Installation and getting started
Storage and trans ort:
The kiln should be positioned in a dry room with
humidity of less than 80 % to avoid the insulation bricks
absorbing moisture. The kiln should be moved in an
upright position with a fork-lift truck or suitable lifting
equipment. Lifting equipment must not be fixed onto the
body, only onto the frame of the kiln.
Installation:
The kiln should only be installed and operated in a
suitable room. The most important requirements are:
• The size of room must be adequate, dry (humidity <
80 %) and ventilated. Rule of thumb: Room volume >
600 times firing chamber volume.
• The floor should be of stone, concrete or a material of
similar strength and heat resistance.
• The floor should be smooth and even. The authorized
area loading must not be exceeded.
• Floors of wood, carpet, plastic or other flammable
materials which deform and/or inflame with
temperatures < 75°C are not authorized.
• Ceilings and walls must not be of inflammable
materials like wood, carpet or other materials which
deform and/or ignite at temperatures < 75°C are not
suitable.
• Ceilings and walls must not be of flammable materials
like wood, carpet or other materials which deform
with temperatures lower than 250°C. Otherwise fire-
proof insulation should be mounted on the ceiling,
above the kiln, which exceeds the outer dimensions of
the kiln 1 m in each direction. A minimum distances of
1,0 m from the ceiling and 0,2 m from the wall is
necessary.
•
In order that the surrounding materials do not ignite,
suitable fire-proof materials of low heat conductivity
should be used. Calcium Silicate insulation boards are
particularly suitable, and are available from builders &
merchants.
Electrical connection
The electrical connection of the kiln should be checked
by an electrician prior to use. An electrician should also

- 5 -
check existing electrical installations (fuse box, supply
and sockets) and for sufficient size of fuse and thickness.
To guarantee a fast and easy disconnection from the
power supply for the kiln in case of emergency, the
main isolator switch on the electrical supply should be
readily accessible within the kiln room.
Do not connect kilns with 230 volt nominal capacity to
any socket, before an electrician has checked all the
above mentioned points. For kilns with 400 volt nominal
capacity different regulations apply. Check with your
electrician.
Under no circumstances use an extension lead!
Connection of exhaust i e:
All kilns with 400 volt nominal capacity are supplied with
exhaust pipe which should be fixed with two threaded
screws with the sloped side in front of the side
ventilation hole. A minimum 2 m long (chimney effect)
stovepipe (e. g. flexible aluminium pipe ∅ 70 or 80 mm
available from builders & merchants) can be connected
to the end of the exhaust pipe (suitable size metal hose
clamp) and passed through to the other side of the wall
or ceiling to open-air in an upward direction. Precautions
should be taken to prevent rainwater entering the
exhaust pipe and to prevent the flue being influenced by
bad wind conditions .
The first firing (test firing)
Each new kiln has to be fired empty prior to normal use.
This is necessary for three reasons:
• Checking the function of the kiln and controller
• To extend the life of the heating elements they need
the protection of an oxide layer provided by an empty
first firing.
• The insulating fire bricks of the kiln may still contain
moisture residue, which has the opportunity to dry
during the slow increase in temperature during this
first firing.

- 6 -
The first firing is carried out em ty of ware but
including kiln furniture.
Our ti :
Load the kiln furniture su lied with the kiln into
the kiln for the first firing
To open the kiln release the lock and lift up the lid until
it comes to rest. Close the lid with the lock on the body.
Screw on the arm for the controller to the left of the lid
frame. Mount the controller to the bracket provided and
connect the controller plug to the multipin socket on the
bottom of the power box at the rear of the kiln, bringing
down the fixing catch.
Insert the electric power plug into a correctly installed
and checked socket, or wire the kiln cable directly into
an isolator switch. Turn on the power switch of the
controller and start a firing program: first firing program
5 (see controller manual for how to call up a program
Exam le first firing rogram:
60-100°C/h until 600°C => afterwards
Ski (fast heating) until 1200°C,
60 min. dwell
During all programs the noise of the protectors in the
power box is clearly audible.
Watch out !
Under no circumstances o en the hot kiln when
the firing chamber tem erature > 50°C.
Always switch off the controller at the power switch, if
the kiln is not in use. For a longer period out of use the
electric power plug should be disconnected at the mains
isolator switch.

- 7 -
The firing rocess
General
Open the kiln lid and distribute the ware evenly in the
kiln. Advice for the stacking of ware will be found in the
following sections. Fill the whole firing chamber to avoid
energy wastage. Then close the lid with the lock on the
body. For starting the firing process select the desired
firing programme and start the kiln (see users manual
for the controller).
Su ly air bottom valve (o tionally)
The supply air bottom valve can be opened with
1. dry firing to draw off humidity
2. decor and gold firing, because of solvents
3. with desired faster cooling process
Biscuit firing
Biscuit firing is the first firing of ceramics, that means
the firing of the dry, unglazed piece. Care should be
taken when loading the kiln not to touch kiln walls or
elements. In a biscuit firing the arrangement of the ware
in the kiln is not crucial. The pieces may touch each
other and may be stacked. If there is not enough surface
area several levels may be filled by the use of props and
one or more kiln shelves.
Ti :
When firing large, smooth lates use grog or sand
as roaming su ort, this works like a lubricant on
the ware.
When firing very large pieces, the increase in
temperature should be slow, e. g. 60-120°C/h. In this
way cracking should be avoided. Pieces which are not
completely dry can be prepared for firing with a drying
program.

- 8 -
Glaze firing
In glaze firing the even temperature distribution is of
vital importance for the fired appearance of the ware,
because glazes are very sensitive to temperature
differences. Therefore distribute the ware evenly in the
kiln. Fire similar pieces on one level. The minimum
distance between the pieces should be three to five cm,
that is also advised for the distance to the wall.
The base of each piece should not be glazed or it should
be supported on stilts to protect the surface of the kiln
shelf.
The kiln shelves may be spread with suitable protective
batt wash, as protection from accidental glaze runs.
Reduction glaze firing
Reduction firing should be avoided in electrically heated
kilns, because the protecting oxide layer on
the heating elements will be reduced and their life
shortened.
Firing records
To reach reproducible results firing records are an
important aid. On page 11 of the users manual you will
find a template.
Load with shelf props

- 9 -
Maintenance and care
Watch out
!
For safety reasons the electric ower lug has to
be ulled or the isolator switch turned off, as
a ro riate before all maintenance work.
To guarantee safe use the electrical installation has to be
checked every four years by a specialist. Otherwise
maintenance of your Kittec
-X-LINE is restricted to
regular cleaning. Sweep the kiln and afterwards clean
the grooves in which the heating elements sit with a
vacuum cleaner. Once used the heating elements get
very brittle and break easily, so they should not be
touched with the vacuum cleaning pipe.
Should glaze make contact with the insulation bricks, it
should be removed with a suitable tool, e.g. a spatula.
With further firings the glaze would damage the
brickwork more. After each firing check the firing
chamber for damage by accidental glaze spillage or runs.
If more than 2 cm of the brick is eroded, the area of
brickwork should be repaired.
• First make the damaged spot rectangular
• Tidily shape a new piece insulating brick
• Clean the damaged area with a vacuum cleaner and
• put in the replacement piece with kiln mortar
Any spare parts and repairs mentioned are available
from Kittec
or can be carried out by your service
engineer.
Advice
Hairline cracks in insulating bricks are a result of
high tem eratures, are quite normal and will not
affect the o erating efficiency of your kiln.

- 10 -
Troubleshooting
What if ...
... on the dis lay of the electronic controller the
error F is shown?
• The regulation found an error in the program
sequence. The meaning of the error and its correction
are described in the controller users manual.
... if the firing chamber does not heat u ?
Possible causes are:
• The lid is not closed completely. Then the safety
switch could be activated to switch the kiln off. The lid
should be adjusted by your service engineer.
... the firing chamber heats too slow or the kiln
does not reach the set tem erature?
• One or more heating elements are defective. Firstly,
check the elements visually for breaks.
• If you cannot find a break, flow of current through the
elements can be checked with a suitable meter.
Broken heating elements should be changed by your
service engineer.
• The voltage supply to your kiln could be below 230V.
This can be checked by your service engineer.
... the glaze did not melt enough or the kiln
switched off before reaching the set tem erature?
• Power failure during the firing
• Lid was not fully closed
If you are still unable to locate the error despite these
tips please get in contact with your service engineer or
with our service department.
The Kittec
address can be found on the warranty
certificate page 13.

- 11 -
Firing record
Time Tem erature
Difference
quota-
current
Power
Volt-Am ere
Remarks

- 12 -
Technical Data X-LINE Models New Edition
X-Line TYPE
Firing chamber ø
[mm]
Firing chamber
height [mm]
Volume [l]
External ø without
frame [mm]
External width incl.
frame [mm]
Depth closed
[mm]
Depth with open lid
[mm]
Max. Temperature
[°C]
Power rating [kW]
Input voltage [V]
Amps [A]
approx. weight
[kg]
X 45 1320 3,6 230 N~ 16 70
X 45 S
325 47
1320 4,4 400 2N~
2x10 CEE16 70
X 55 1280±30
3,6 230 N~ 16 85
X 55 S
400 58
1320 4,4 400 2N~
2x10 CEE16 85
X 65 1250±30
3,6 230 N~ 16 90
X 65 S
480 69
1320 5,6 400 2N~
2x12 CEE16 90
X 75 1200±30
3,6 230 N~ 16 95
X 75 S
430
555 79
625
700
785
1030
1320 5,6 400 2N~
2x12 CEE16 95
X 85 1200±30
3,6 230 N~ 16 90
X 85 S
400 82
5,6 400 2N~
2x12 CEE16 90
X 100 S 480 98 100
X 115 S
510
555 113
695
780
865
1110
1320 6,8 400 3N~
3x10 CEE16
110
X 135 S 480 132 8,2 3x12 CEE16 125
X 170 S 630 172 140
X 195 S 710 194 155
X 215 S
590
780 213
775
860
945
1180
1320 11 400 3N~
3x16 CEE16
170
X 240 S 645 241 14 3x20 CEE32 175
X 270 S 710 266 16 3x23 CEE32 195
X 300 S
690
780 292
895
980
1085
1320
1320
18
400 3N~
3x26 CEE32 215
We reserve the right to make technical changes as necessary. Stand: 1/2015
Kittec
GmbH
Uhlandstr. 5a
D-83024 Rosenheim
Phone: +49 (0) 8031/892462 Fax: +49 (0) 8031/892779

- 13 -
Kittec
GmbH
Uhlandtr. 5a
D-83024 Rosenheim / Germany
Warranty certificate for kiln:
Type: Serial number:
Company:
Area of business:
Name:
Address:
Date of delivery:
Dealer:
Further details (not necessary for guarantee, but help us to reach you faster if necessary):
phone: + ( ) / (with dialling code)
Fax: + ( ) / (with dialling code)
eMail: @
Warranty regulations:
We grant three years guarantee on kiln and controller, excluding heating elements.
Please send this form back for registration!
eMail: [email protected]
Fax: +49 (0) 8031 / 892779
This manual suits for next models
19
Table of contents
Popular Ventilation Hood manuals by other brands

Electrolux
Electrolux EI30WC60GS Installation, use & care guide

Fisher & Paykel
Fisher & Paykel HPB6028-1 installation guide

Dacor
Dacor ERV30 installation instructions

Franke
Franke Maris Built Under FCBU 1204 2M C WH Instructions for use and installation

AEG
AEG 9600 D OPERATING AND INSTALLATION Manual

AEG
AEG 230 D Notice d'utilisation et d'installation