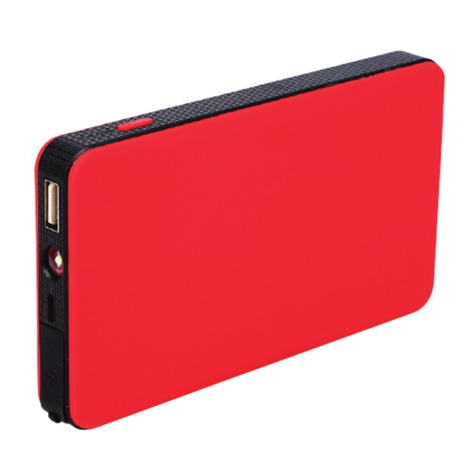
KJM JC20 User manual

JC20
Universal Jump Starter Charger
Operation Guide
KJM’s line of 12V lithium-polymer multi-function jump
starter/chargers work with all vehicles powered by a
12V lead-acid battery. KJM jump starters/chargers in-
clude connectors to charge cellphones, computers and
tablets. Also included is a high intensity LED flashlight
with SOS Strobe and hazard modes.

Contents
01
THANK YOU FOR PURCHASING
A KJM PRODUCT
KJM is dedicated to providing the finest in
Marine and Outdoor equipment. Our products
are built to withstand the harshest environ-
ments, and designed by people with over three
decades of industry experience.
Warning 12VDC vehicles ONLY! DO NOT use on
6V, 24V or 32V systems.
1Features 02
2 Supplied with 02
3Connections 03
4 LED Charge Indicator 04
5Charging 04
6 Jump Starting 05
7 Charging a cell phone 08
8 Multi-mode Flashlight 08
9Specifications 09
10 Warranty & Contact 10

1. Features › 2. Supplied with
110VAC Charger 12VDC Car Charger
Jumper Cables
JC20
Multi-adapter
Cable
19V Power
Cable
19V Power
Adapters
› Two (1A and 2A) USB Outputs for cell phones,
tablets and other 5V devices
› One 19VDC 3.5A Output for Laptops
with eight adapters
› One 12VDC 10A Output
› LED Flashlight with SOS Alert, Hazard Strobe,
High and Low modes
› LED battery capacity/charging Indicator
1. FEATURES
2. SUPPLIED WITH
02

e
a
d
c
b
i
h
g
f
03
3. Connections
3. CONNECTIONS
aLED Charge Indicator
bJumper Cable Port
c5V 1A USB Output
d5V 2A USB Output
eLED Flashlight
f110VAC/12VDC Charger Input
g12V 10A Output
h19V 3.5A Output
iFunction Switch

4. LED Charge Indicator › 5. Charging
04
Press Switch to check the JC20 battery condition
45% 2 LEDs 85% 3 LEDs 100% 4 LEDs
0% 0 LEDs 1% 4 Blinking 25% 1 LED
4. LED CHARGE INDICATOR
When charging the Jump Starter, the LED Charge
Indicators located on the top of the device will ash.
Charging is complete when all 4 LEDs are illuminat-
ed. Charge only at ambient temperatures between
-20° and 60°.
1.Plug the home adapter into an AC outlet or plug the
car adapter into the car’s cigarette lighter socket
2. Connect the plug on the other end of the adapter
to the Input 15V 1A port
3.Typical charge time for a discharged battery is 8hrs
5. CHARGING

6. Jump Starting
05
6. JUMP STARTING
Warnings
› Never connect the Red and Black jumper
cable clamps together
› Do not allow the device to become wet
or immersed in liquids
› Do not operate in explosive atmospheres,
such as near flammable liquids or gases
› Make sure the jumper cable is tightly connected to the
jump start socket before jump starting the vehicle
› Do not disassemble JC20 as there are no
serviceable components inside
› Shock hazard, keep away from children
› Jump starting an engine should never be tried for more
than 15 sec. at a time or the jumper cables will over-
heat. If the engine does not start within 15 sec. there
may be another problem preventing it from starting
› Do not use the JC20 where there are flammable
fumes or gases, such as an inadequately vented
bilge of a boat
› Prop. 65 Warning: This product contains a chemical
known to the State of California to cause cancer and
birth defects or other reproductive harm

6. Jump Starting Continued
06
Before you begin
› Turn off all systems in your vehicle (lights, air
conditioner, heater, stereo, etc.) to ensure the KJM
Jump Starter will provide maximum current to
start the vehicle
› Properly clean the battery terminals if necessary
› Press the Function Switch and confirm the battery
charge shows at least 3 LEDs
Jumper cable status LEDs
The Jumper cable has two status LEDs, Red and Green:
› Green and Red blinking: Ready to connect
to the vehicle battery
› Green on: Connection correct
› Red on: Connection reversed or short-circuit
› No LEDs indicate the Jump Starter's battery is low,
or the jumper cables are not properly connected

6. Jump Starting Continued
07
Jump start vehicle
instructions
1.Connect the JC20
red jumper cable to
the Positive (+) and
black jumper cable to
the Negative (-) poles
of the 12V battery
2. Connect the jumper
cable plug to the JC20
3.Conrm the Green
LED on the jumper
cable is illuminated
4.Turn the key to start
the vehicle
5.Once the vehicle
starts, remove the
jumper cable plug
from the JC20
one
four
two
five
three

7. Charging a cell phone or tablet › 8. Multi-mode Flashlight
08
7. CHARGING A CELL PHONE OR TABLET
Charging or suppling 12/16 or 19V to electronics
1.Plug the black 19V power cable (see connection
section) to the JC20 Output
2. Select appropriate adapter and connect
to the black double ended cable, then
connect to Laptop
3.Press the Function Switch to start
powering the device
8. MULTI-MODE FLASHLIGHT
How to use the multi-mode ashlight
1.Press and hold the Function Switch button until
the LED light turns on
2. To selec t modes, momentarily press the Func-
tion Switch button
3.Short presses will select; Bright, Dim, Hazard
Strobe, SOS signal and OFF

9. Specifications
09
Performance specications are nominal and
unless otherwise indicated, are subject to change
without notice. At the end of their useful life,
please discard the appliance with due care for
our environment.*
BATTERY CAPACITY 20,000MAH (66.6WH)
SIZE 8.1” X 3.1” X 1.3” (206 X 79 X 33MM)
WEIGHT 14.6 OZ
CHARGE INPUT DC15V 1A
OUTPUTS USB 5V: 1A AND 2A - TABLET PC
AND CELL PHONE
12V: JUMP START (ENGINE START),
12V: 10A / 19V/3.5A - LAPTOP
STARTING CURRENT 300A
PEAK CURRENT 600A
OPERATION TEMP -20°~60° / -4°~140°
FULL CHARGING TIME 8 HOURS
CYCLE TIME >3000 TIMES
9. SPECIFICATIONS
* Seriously, we mean it!

10. Warranty & Contact
10
10. WARRANTY & CONTACT
KJM warrants its products to be free of defects
in materials and workmanship for 2 years. KJM's
obligation under this warranty is limited to repair
or replace defective products. No material will be
repaired or replaced without written authorization
from KJM. Repair or replacement will be made only
after an examination indicates defective material
or workmanship at time of manufacture. KJM is in
no event liable for consequential damages, instal-
lation costs or other costs of any nature incurred
as a result of the use of the products manufac-
tured by KJM, whether used in accordance with
instructions or not. All shipping costs on returned
material are the responsibility of the purchaser.
KJM is not liable for repair or replacement of any
product damaged by lightening, other natural
phenomenon’s or incorrect installation including
reverse polarity connections. This warranty is in
lieu of all others, either expressed or implied. Proof
of purchase is required.
KJM-Holdings
Info@KJM-Holdings.com ∙www.KJM-Holdings.com

KJM-Holdings is dedicated to providing products
built to withstand the harshest environments
Info@KJM-Holdings.com ∙www.KJM-Holdings.com
MORE HIGH QUALITY KJM PRODUCTS
A430-VSS 3' 3dB VHF Stainless Steel Whip Antenna
A430-V 4' 3dB Marine VHF Antenna
A430-AIS 4' 3dB Marine AIS Antenna
A861-V 8' 6dB Marine VHF Antenna
A861-AMFM 8' Marine AM/FM Antenna
A1790-V 17' 9dB Marine VHF Two Piece Antenna
ANTENNAS
C30 Mini Bullet Camera
C55 Mini Dome Camera
C70 Varifocal Dome Camera
CAMERAS
SL100 212K LED Searchlight
FL100 830 lumen, 5 mode LED Flashlight
LED LIGHTS
Table of contents
Popular Remote Starter manuals by other brands

Prestige
Prestige APSRS Quick installation guide

Jump n Carry
Jump n Carry JNC318 Operator's manual

Directed Electronics
Directed Electronics 50.7X owner's guide

Linear
Linear AKR-1 Installation and programming instructions

Prestige
Prestige PE5B Operator's manual

NORAUTO
NORAUTO BOOSTER COMPACT LITHIUM450 manual