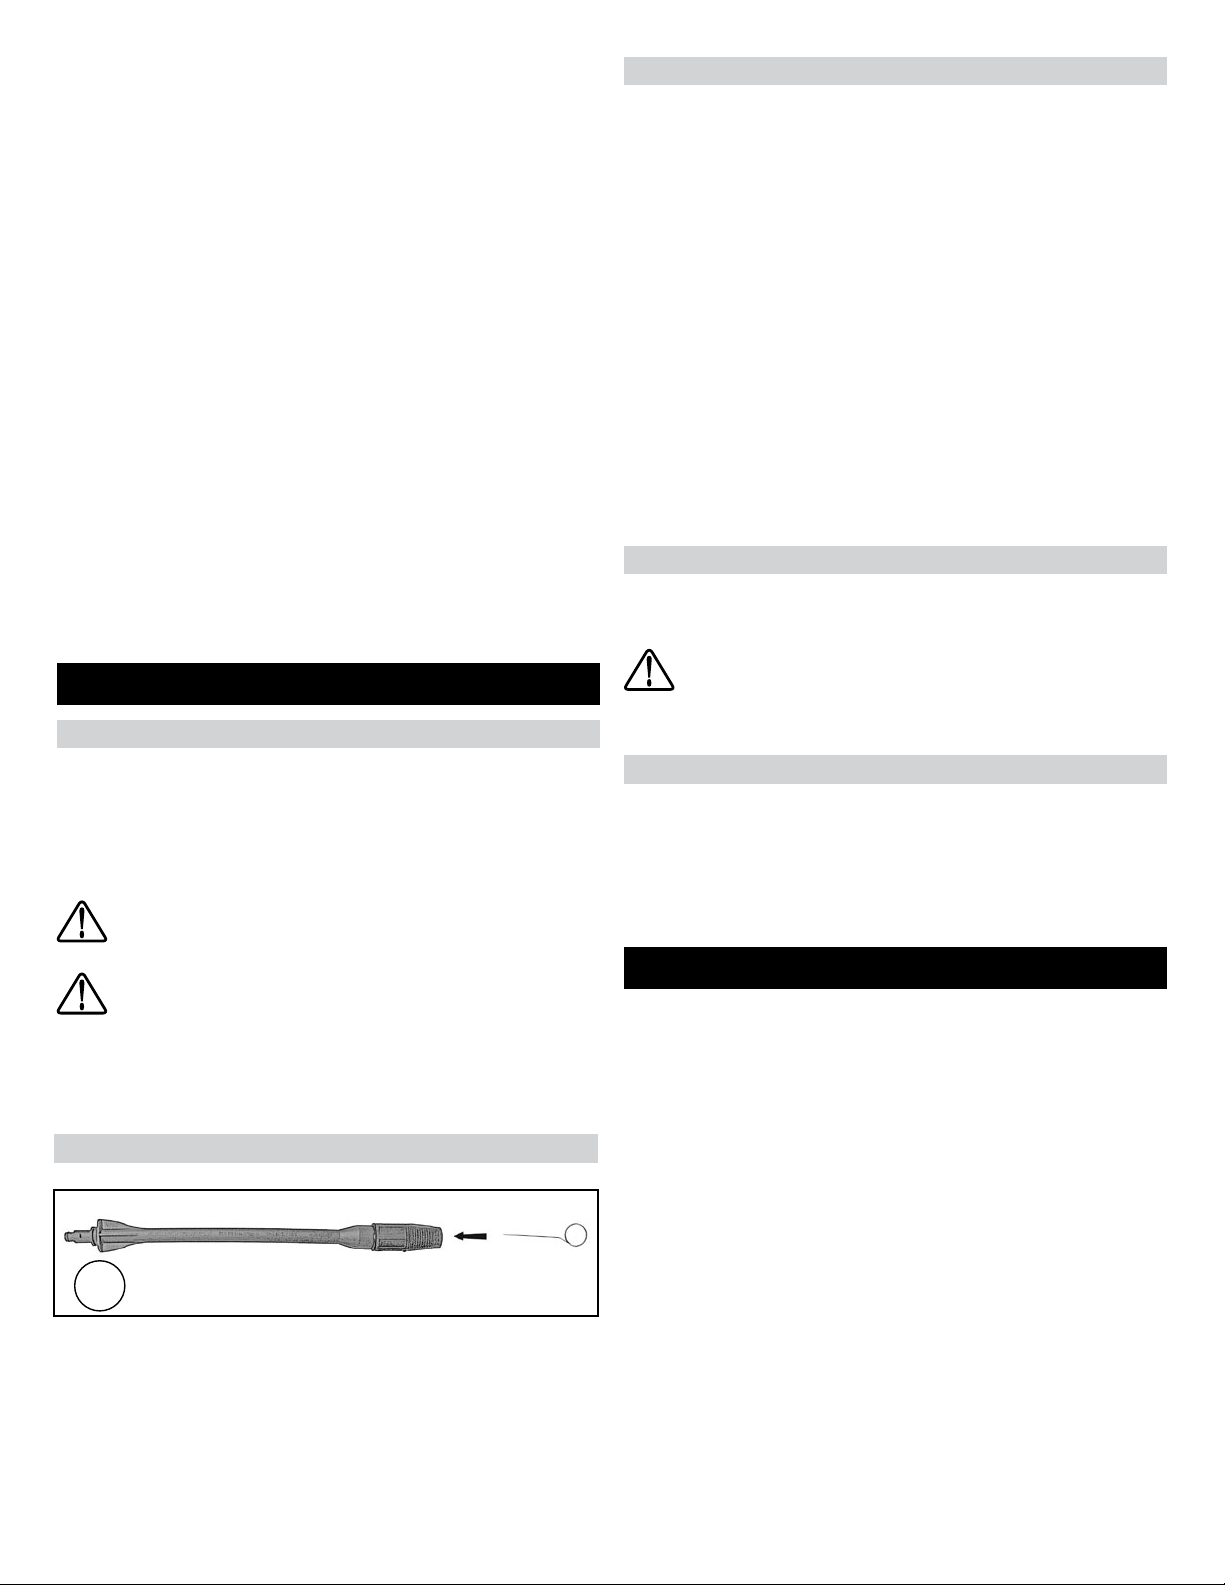
Cleaning the nozzle
Remove the spray wand from the hand spray gun (fig. N-11).
Clean dirt from the nozzle opening using the nozzle cleaner
provided (fig. N-14).
Cleaning the water filter
The pressure washer le equipped with a water inlet filter to
protect the pump (sea fig. E-6).
To clean the internal water filter, remove the garden hose con-
nector and dismount the filter from the pump inlet.
Rinse with water in the reverse direction to clean the filter.
Ra-insert the filter and garden hose connector to prevent for-
eign particles from entering into the pump.
If the filter is not cleaned, the water flow in the pressure wash-
er la reduced and the pump becomes damaged.
Be careful not to damage the filter when removing or cleaning
it. Any foreign particles that enter the pump can damage it.
Cleaning the housing
Use clear water to clean the housing and a soft cloth to dry it.
Harsh detergents are not recommended.
CAUTION Only work on the unit when it is turned off
and unplugged.
Lubrication
The unit is equipped with a permanent lubrication system.
Conventional oil checks and oil changes are therefore not
necessary.
Minor oil leaks are normal.
STORAGE YEAR-ROUNd
Store your pressure washer in en area with a room tempera-
ture of at least 0°C. The pump in the unit can be permanently
damaged if it freezes.
FROST DAMAGE 18 NOT COVERED BY THE
WARRANTY
If it la necessary to store your pressure washer in an area
where the temperature falls below 0°C, you can reduce the
risk of damage by taking the following measures:
Turn the pressure washer off.
Press and hold the trigger on the spray gun until all the water
has been emptied from the spray gun and the hose.
Remove the supply hose and high-pressure hose.
Turn off the pressure washer and let it run for a short time (ap-
prox. 5 seconds) until no more water comes out of the high-
pressure outlet.
11 14
N
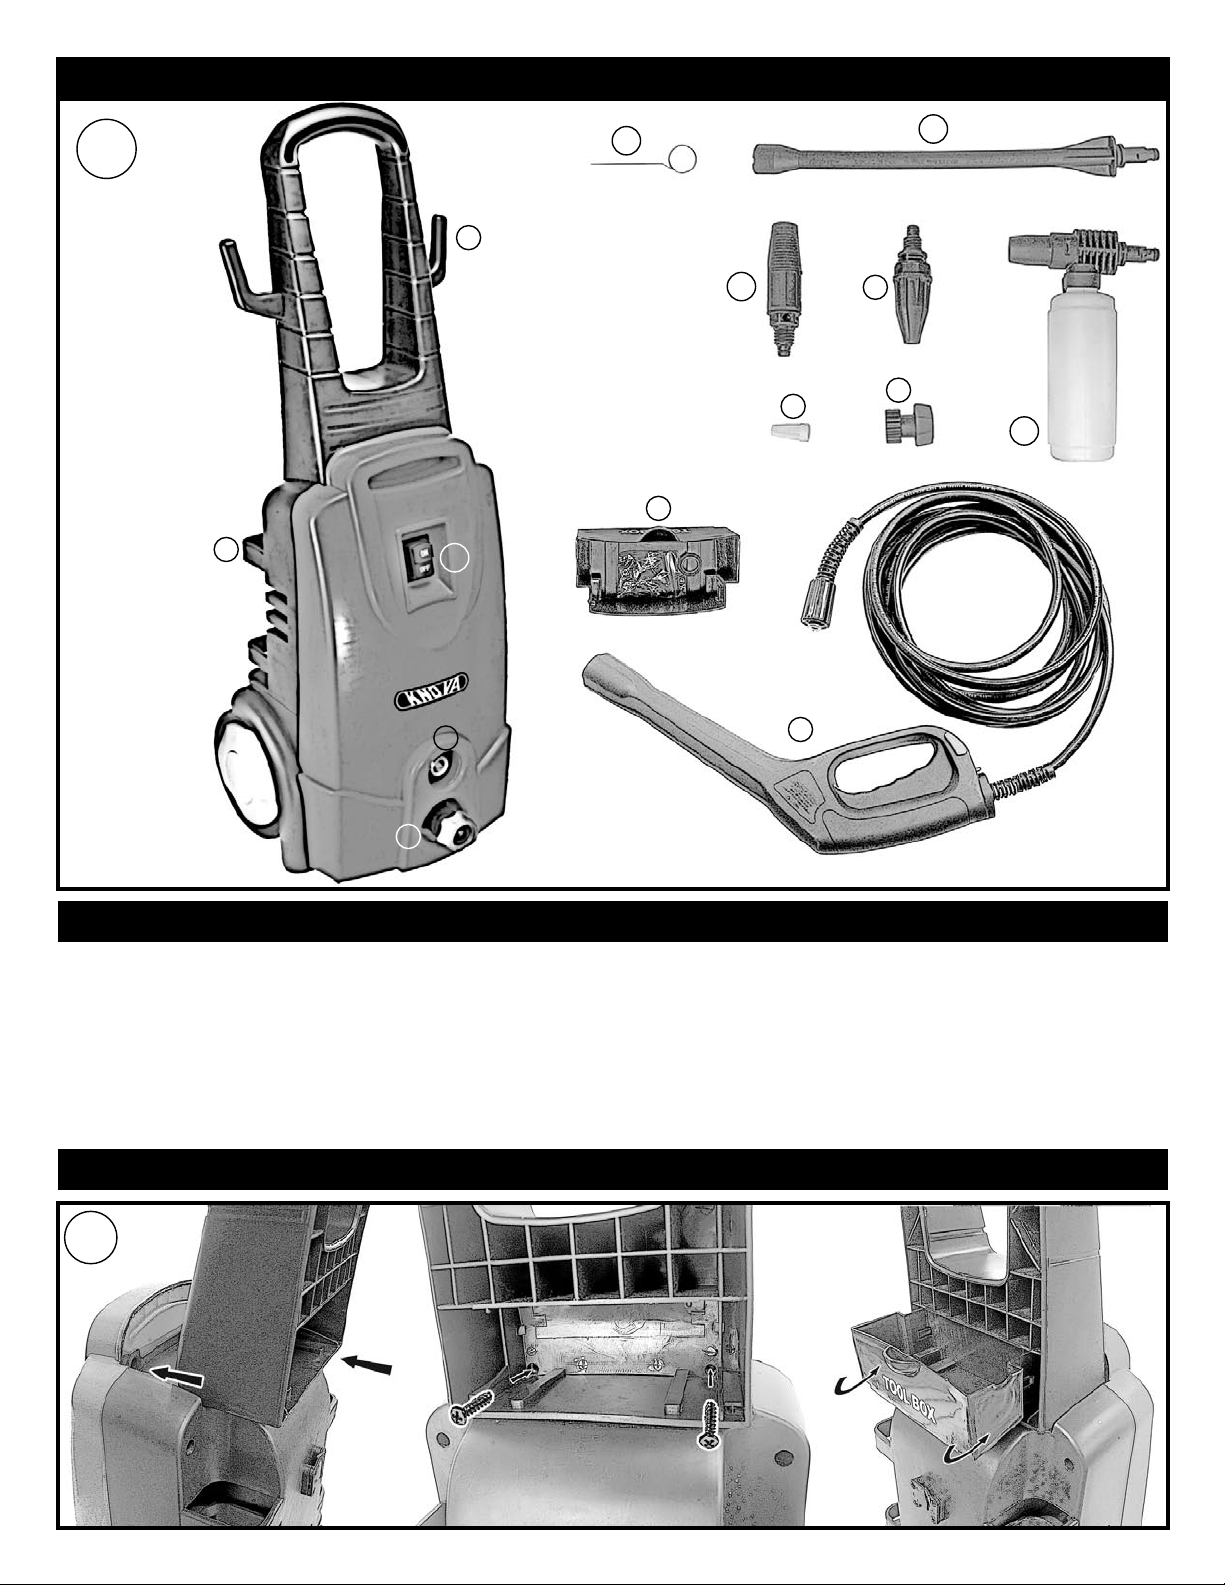
UNIT MAINTENANCE
Cleaning the cooling system
Clean the vents on the outer area of the pressure washer with
a damp cloth. In order to ensure that the air-cooling system
works property while in operation, do not allow the vents to
clog. Never clean the pressure washer directly with the jet
spray.
Unplug the mains plug before beginning to clean!
WARNING NOTICE:
Avoid allowing water to permeate through the vents of the
pressure washer to minimise the risk of electric shock or dam-
age to the unit.
Chemicals can damage painted surfaces. Wash and rinse
small test surfaces immediately prior to working en the whole
surface. Avoid working on hot surfaces or in direct sunlight.
The detergent injection system must be completely dean be-
fore you change detergents:
Ensure that the pressure washer is turned off and the electri-
cal cable is removed from the power socket.
Ensure that the water supply is cut off and press the trigger to
allow me unit to depressurise.
• Detach the spray nozzle from the spray wand.
• Clean the nozzle.
• Rinse the nozzle with water in the reverse direction.
• Re-attach the nozzle to the spray wand.
Turn the nozzle on the spray wand until it locks into place
completely. Re-attach the pressure washer, turn it on, and
press the trigger on the spray gun. If the pressure is still too
high, repeat the last steps 1-4 above.