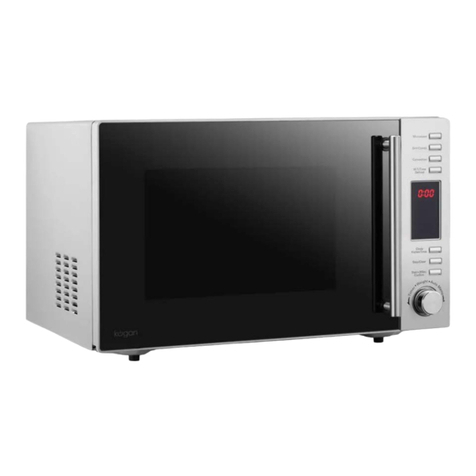
Kogan KAMWO30GRLA User manual

Attention
Please handle this product with care and inspect it regularly to
ensure it is in good working order.
If the product, power supply cord or plug shows any signs of
damage: stop use, unplug and contact Kogan.com support.

Table of Contents
Safety & Warnings..................................................................................................................1
Specifications.........................................................................................................................2
Installation...............................................................................................................................3
Product Overview..................................................................................................................3
Product Operation.................................................................................................................5
leaning and are.................................................................................................................8
Troubleshooting.....................................................................................................................9
Safety & Warnings
• Read all instructions before using the appliance.
• Use this appliance only for its intended use as described in this manual. Do not use corrosive
chemicals or vapours in this appliance. This type of oven is specifically designed to heat, cook or
dry food. It is not designed for industrial or laboratory use.
• Do not operate the oven hen empty.
• Do not operate this appliance if it has a damaged cord or plug, if it is not orking properly or if
it has been damaged or dropped. If the supply cord is damaged, it must be replaced by a
qualified service agent at the instruction of Kogan.com.
• When heating food in plastic or paper container, keep an eye on the oven due to the possibility
of ignition.
• Remove ire t ist-ties from paper or plastic bags before placing bag in oven.
• If smoke is observed, s itch o or unplug the appliance and keep the door closed in order to
stifle any flames.
•D o not use the oven for storage purposes. Do not leave paper products, cooking utensils or
food in the cavity hen not in use.
• Liquids or other food must not be heated in sealed containers since they are liable to explode.
• Micro ave heating of beverages can result in delayed eruptive boiling; therefore, care has to be
taken hen handling the container.
• Do not fry food in the oven. Hot oil can damage oven parts and utensils and even result in skin
burns.
• Eggs in their shell and hole hard-boiled eggs should not be heated in micro ave ovens, as
they may explode even after micro ave heating has ended.
• Pierce foods ith heavy skins such as potatoes, hole squashes, apples and chestnuts before
cooking.
• The contents of feeding bottles and baby jars should be stirred or shaken and the temperature
should be checked before serving in order to avoid burns.
• Ensure all utensils used are suitable for use in micro ave oven and note cooking utensils may
become hot because of heat transferred from the heated food. Potholders may be needed to
handle the utensil.
• This product is a Group 2 Class B ISM equipment. The definition of Group 2 hich contains all
ISM (Industrial, Scientific and Medical) equipment in hich radio-frequency energy is
intentionally generated and/or used in the form of electromagnetic radiation for the treatment
of material, and spark erosion equipment. For Class B equipment is equipment suitable for use
in domestic establishments and in establishments directly connected to a lo voltage po er
supply net ork hich supplies buildings used for domestic purpose.
• This appliance is not intended for use by persons (including children) ith reduced physical,
sensory or mental capabilities, or lack of experience and kno ledge, unless they have been given
supervision or instruction concerning use of the appliance by a person responsible for their
safety.
• Children should be supervised to ensure that they do not play ith the appliance.
• The micro ave oven is only to be used hile freestanding.
• The micro ave oven shall not be placed in a cabinet.
• The door or the outer surface may get hot hen the appliance is operating.
1

• The appliance should not be placed against a all.
• Never remove the distance holder in the back or on the sides, as it ensures a minimum distance
from the all for air circulation.
• When moving the appliance, ensure the turn table is secure.
• WARNING: Do not install oven over a range cook top or other heat-producing appliance. If
installed could be damaged and the arranty ould be avoid.
• WARNING: If the door or door seals are damaged, the oven must not be operated until it has
been repaired at the instruction of Kogan.com.
• CAUTION: The accessible surface may become hot during operation.
• CAUTION: Steam ill escape hen opening lids or rapping foil.
Specifications
Po er Consumption: 230V-240V~50Hz
1400W(Micro ave)
1050W(Grill)
Micro ave Po er Output: 900W
Operation Frequency: 2450MHz
Outside Dimensions: 300mm(H)×539mm(W)×442mm(D)
Oven Cavity Dimensions: 240mm(H)×354mm(W )×358mm(D)
Oven Capacity: Compact 30 Litres
Net Weight: Approx.16.4kg
Installation
• Ensure that all the packing materials are removed from the inside of the door.
• WARNING: Check the oven for any damage, such as misaligned or bent door, damaged door
seals and sealing surface, broken or loose door hinges and latches and dents inside the cavity or
on the door. If there is any damage, do not operate the oven and contact the Kogan.com
Support team.
• This micro ave oven must be placed on a flat, stable surface to hold its eight and the
heaviest food likely to be cooked in the oven.
• Do not place the oven here heat, moisture, or high humidity are generated, or near
combustible materials.
• For correct operation, the oven must have sucient airflo . Allo 20cm of space above the
oven, 10cm at back and 5cm at both sides. Do not cover or block any openings on the appliance.
Do not remove feet.
• Do not operate the oven ithout glass tray, roller support, and shaft in their proper positions.
• Make sure that the po er supply cord is undamaged and does not run under the oven or over
any hot or sharp surface.
• The socket must be readily accessible so that it can be easily unplugged in an emergency.
• Do not use the oven outdoors.
2

Product Overview
ookware Material Overview
ookware Microwave Grill ombination*
Heat–Resistant Glass Yes Yes Yes
Non Heat–Resistant Glass No No No
Heat–Resistant Ceramics Yes Yes Yes
Micro ave–Safe Plastic Dish Yes No No
Kitchen Paper Yes No No
Metal Tray No Yes No
Metal Rack No Yes No
Aluminum Foil & Foil Container No Yes No
Part List
1. Door Safety Lock System
2. Oven Window
3. Shaft
4. Roller Ring
5. ontrol Panel
6. Wave Guide
(DO NOT REMOVE OR TAMPER WITH)
7. Glass Tray
8. Grill Heater
9. Metal Rack
3

ontrol Panel
Menu Screen
Displays cooking time, po er, action indicators and clock.
Power Level
Press this button to toggle the micro ave cooking po er level.
Grill / ombination
Press to set grill programme or press to set combination programme.
Speed Defrost
Speed defrost function.
Auto Defrost
Auto defrost function.
Preset
Preset cooking function.
lock / Weight
Set clock time.
Input eight / servings.
Menu / Time
Turn the knob to select the time.
Turn to enter auto-cooking menu.
Pause / ancel
Press to cancel input commands or cooking progress.
This button is also used to set the child lock.
Start / Quick Start
Press to start cooking programme. Press ith no input to cook
immediately at full po er level (micro ave function). Multiple presses
increase cooking time.
4
Speed Defrost Auto Defrost
Power Level Grill / Combination
Preset Clock / Weight
enu Time
Pause / Cancel Start / Quick Start
enu

Product Operation
Setting the ontrols
When the oven first plugged in, beep ill sound and the display ill sho and “1:01”.
During the setting mode, the system ill return to aiting mode if there is not any operation
ithin 25 seconds.
During cooking, if the PAUSE/CANCEL control is pressed once or the door is opened, the
programme ill be paused. Pressing START/QUICK START again ill resume, but if it is pressed
t ice, the programme ill be cancelled.
After cooking is completed, the screen ill display End ith sound every t o minutes until user
press PAUSE/CANCEL pad or open the door.
Setting lock Time
This is a 12 or 24 hour clock. To check the time hile the oven is operating, press the
CLOCK/W EIGHT button, then the time ill be displayed briefly on the display screen.
FOR EXAMPLE: Suppose you ant to set the oven clock time to 8:30.
Press CLOCK/W EIGHT button once or t ice to select 12 or 24 hour clock cycle
• Turn MENU/TIME knob to set hour digit 8.
• Press CLOCK/WEIGHT button once to confirm the hour setting.
• Turn MENU/TIME to set minute digit 30.
• Press CLOCK/WEIGHT button once to confirm the setting.
Quick Start
When this option is selected, the oven ill cook food automatically at HIGH po er (100% po er
output).
Press the START/QUICK START to start and press successively to increase the cooking time. The
maximum cooking time you can enter is 10 minutes.
Microwave Function
For micro ave cooking, simply press the POWER LEVEL button a number of times to select a
cooking po er level, and then use the MENU/TIME knob to set a desired cooking time. The
longest cooking time is 95 minutes. During cooking, you can check the po er level by pressing
POWER LEVEL.
Po er
Button
1 press 2 presses 3 presses 4 presses 5 presses 6 presses
Po er 100% 80% 60% 40% 20% 0%
Grilling Function
The oven allo s you to grill food based on the time entered by user. The longest cooking time is
95 minutes.
• Press GRILL/COMBINATION button once.
• Turn MENU/TIME knob to enter cooking time.
• Press START/QUICK START.
5

Microwave + Grill Function
This feature allo s you to combine grill and micro ave cooking on t o dierent settings. The
longest cooking time hich can be set is 95 minutes.
OMBINATION 1
30% of time for micro ave cooking, 70% for grill cooking. Useful for fish, potatoes or cooking au
gratin.
As an example, setting combination 1 cooking for 25 minutes:
• Press GRILL/COMBI. button t ice.
• Turn MENU/TIME knob to enter cook time.
• Press START/QUICK START button.
OMBINATION 2
55% of time for micro ave cooking, 45% for grill cooking. Useful for pudding, omelets, baked
potatoes and poultry.
As an example, setting combination 2 cooking for 12 minutes:
• Press GRILL/COMBI. button three times.
• Turn MENU/TIME knob to enter cook time.
• Press the START/QUICK START button.
Auto Defrost
The oven allo s you to defrost food based on the eight entered. The defrosting time and
po er level are automatically set once the food category and the eight are programmed. The
frozen food eight ranges from 100g to 1800g.
• Firstly, press AUTO DEFROST once.
• Press CLOCK/WEIGHT to select the eight of the food to be defrosted.
• Press START/QUICK START.
NOTE: The oven stops during defrosting to let the user to turn food over for uniform defrosting
and then press START/QUICK START to defrost for the remaining time.
The oven ill not function optimally eight is entered in excess of the maximum.
Speed Defrost
This option defrosts at maximum speed based on time. The longest defrost time it can be set to
is 95 minutes.
• Firstly, press SPEED DEFROST once.
• Turn MENU/TIME to enter defrost time.
• Press START/QUICK START.
NOTE: The oven stops during defrosting to let the user to turn food over for uniform defrosting
and then press START/QUICK START to defrost for the remaining time.
Preset
This function allo s you to set the oven to start a cooking programme at a later time.
• Place food inside oven first.
• Enter desired cooking programme.
• Press PRESET once.
• Rotate the MENU/TIME dial to set hour digit
6

• Press PRESET once.
• Rotate the MENU/TIME dial to set minute digit
• Press PRESET once.
Note: Defrost and Quick Start cannot be preset. In preset mode, check the preset time by
pressing PRESET and cancel preset by pressing STOP/CANCEL ithin 5 seconds.
hild Lock
Use to prevent unsupervised operation of the oven. The CHILD LOCK indicator ill sho up on
display screen, and the oven cannot be operated hile the CHILD LOCK is set.
• To set the CHILD LOCK: Press and hold the PAUSE/CANCEL button for 3 seconds, a beep
sounds and lock indicator lights.
• To cancel the CHILD LOCK: Press and hold the PAUSE/CANCEL button for 3 seconds until lock
indicator on display turns o.
Automatic ooking
For the follo ing foods or cooking operation, you do not need to input cooking po er and time.
Try to focus on telling the oven hat you ant to cook and ho much the food eighs. The oven
starts to ork after you pressing the START/QUICK START.
For example:
• Firstly, turn the MENU/TIME dial anti-clock ise to select food code to specify the food to be
cooked.
• Press CLOCK/WEIGHT button a number of times to indicate the desired eight.
• Press START/QUICK START button.
ode Food NOTE: For items 1 and 4, the screen ill sho
the number of serving instead of food eight
hen pressing CLOCK/W EIGHT button.
NOTE: For item 7~9, the oven stops during
defrosting to let the user to turn food over for
uniform defrosting and then press
START/QUICK START to finish the remaining
time
The result of auto cooking depends on factors
such shape and size of food, personal
preference certain foods and the amount placed
in the oven. Adjustment to cooking time may
need to be made.
1 MILK/COFFEE (200ml/cup)
2 RICE (g)
3 SPAGHETTI (g)
4 POTATOES (each 230g)
5 AUTO REHEAT (g)
6 FISH (g)
7 CHICKEN (g)
8 BEEF/MUTTON (g)
9 SKEWERED MEAT(g)
7

leaning and are
• Turn o the oven and remove the po er plug from the all socket before cleaning.
• Keep the inside of the oven clean. When food splatters or spilled liquids adhere to oven alls,
ipe ith a damp cloth. Mild detergent may be used if the oven gets very dirty. Avoid the use of
spray and other harsh cleaners as they may stain, streak or dull the door surface.
• The outside surfaces should be cleaned ith a damp cloth. To prevent damage to the operating
parts inside the oven, ensure ater does not seep into the ventilation openings.
• Wipe the both sides of the door and indo , the door seals and adjacent parts frequently ith
a damp cloth to remove any spills or spatters. Do not use an abrasive cleaner.
• Do not allo the control panel to become et. Clean ith a soft, damp cloth. When cleaning
the control panel, leave oven door open to prevent oven from accidentally turning on.
• If steam accumulates inside or around the outside of the oven door, ipe ith a soft cloth. This
may occur hen the micro ave oven is operated under high humidity condition and it is normal.
• It is occasionally necessary to remove the glass tray for cleaning. Wash the tray in arm sudsy
ater or in a dish asher.
• The roller ring and oven floor should be cleaned regularly to avoid excessive noise. Simply ipe
the bottom surface of the oven ith mild detergent. The roller ring may be ashed in mild sudsy
ater or dish asher. When removing the roller ring from cavity floor for cleaning, be sure to
replace in the proper position.
• Remove odours from your oven by combining a cup of ater ith the juice and skin of one
lemon in a deep micro aveable bo l, micro ave for 5 minutes. Wipe thoroughly and dry ith a
soft cloth.
• The oven should be cleaned regularly and any food deposits removed. Failure to maintain the
oven in a clean condition could lead to deterioration of the surface that could adversely aect
the life of the appliance and possibly result in a hazardous situation.
• When the micro ave oven ith grill function is first used, it may produce slight smoke and
smell. This is a normal phenomenon because the oven is made of a steel plate coated ith
lubricating oil, and the ne oven ill produce fumes and odour generated by burning the
lubricating oil. This phenomenon ill dissipate naturally after a period of use.
Troubleshooting
If the oven fails to operate:
• Check to ensure that the oven is plugged in securely. If it is not, remove the plug from the
outlet, ait 10 seconds, and plug it in again securely.
• Check for a blo n circuit fuse or a tripped main circuit breaker. If these seem to be operating
properly, test the outlet ith another appliance.
• Check to ensure that the control panel is programmed correctly and the timer is set.
• Check to ensure that the door is securely closed engaging the door safety lock system.
Other ise, the micro ave energy ill not flo into the oven.
If the above issues do not resolve the issue, contact the Kogan.com Support team.
User manual is subject to change ithout notice. For the latest version of your user manual, please visit
https:// .kogan.com/usermanuals/
8
Other manuals for KAMWO30GRLA
1
Table of contents
Other Kogan Microwave Oven manuals

Kogan
Kogan KAMWO25GRLA User manual

Kogan
Kogan KAMWO25CONA User manual

Kogan
Kogan KAMWO30GRLA User manual

Kogan
Kogan KAMWO28CSSB User manual

Kogan
Kogan KAMWO32CSSA User manual

Kogan
Kogan KGNMWC30VAA User manual

Kogan
Kogan KAMWO28CSSA User manual

Kogan
Kogan KAMWO30CONA User manual

Kogan
Kogan KGNMWC25VAA User manual

Kogan
Kogan KAMWO34LSL User manual