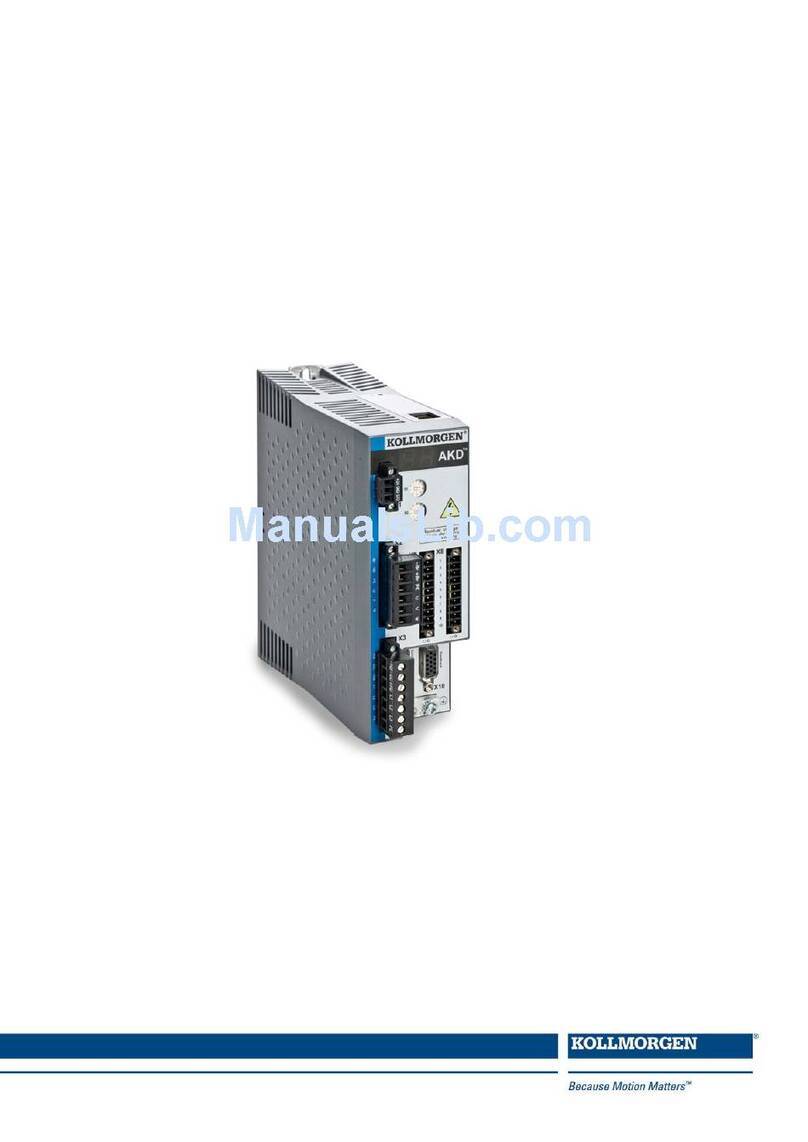
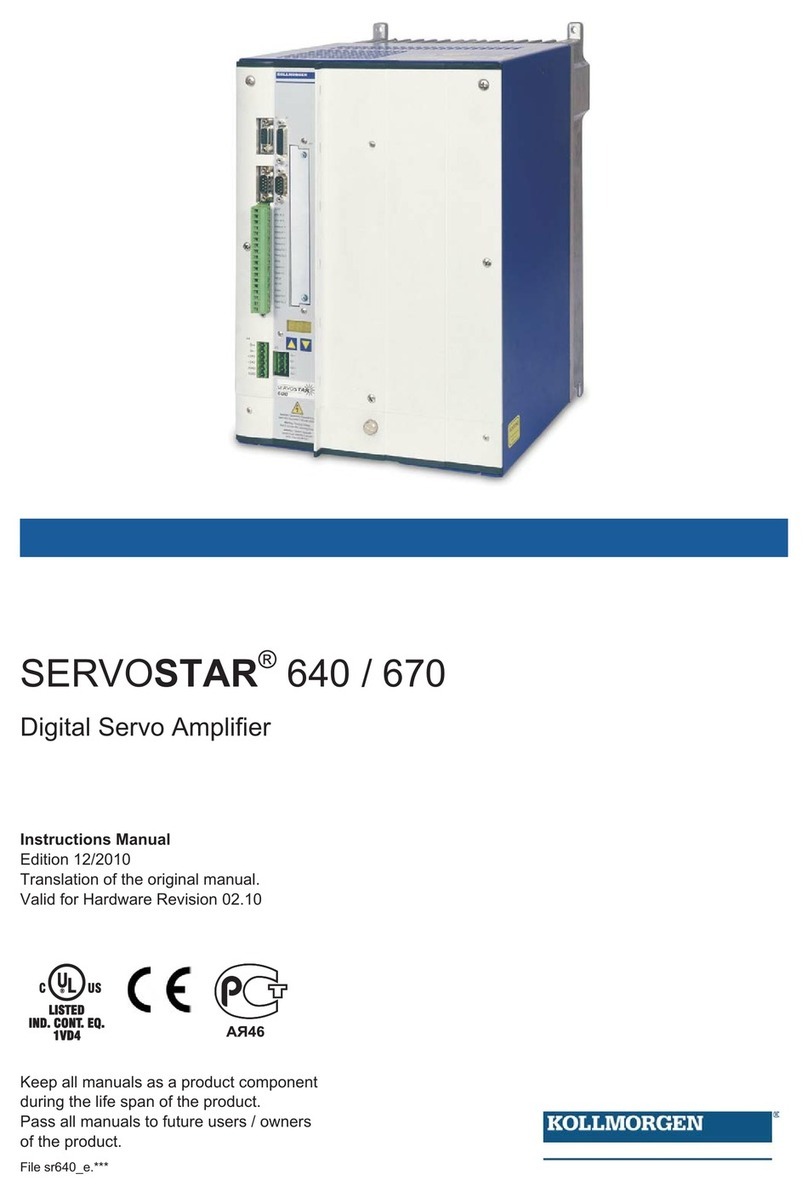
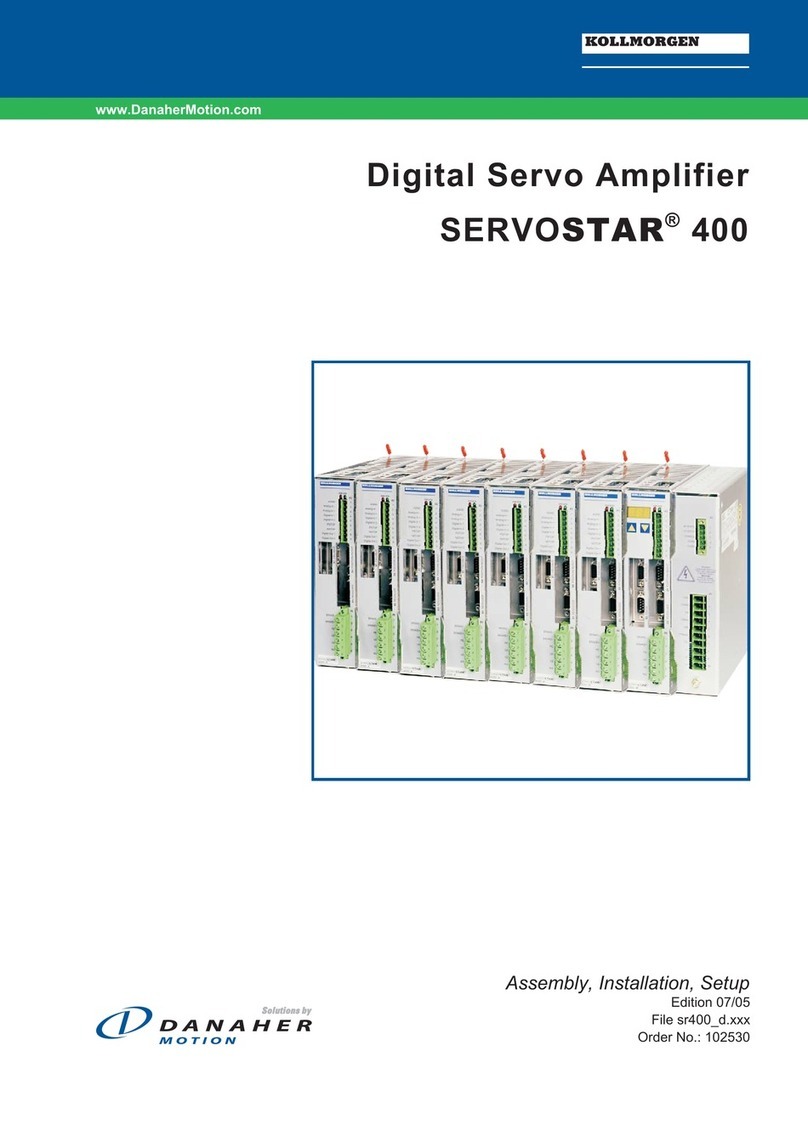
Kollmorgen SERVOSTAR 614 User manual

-~
ARTISAN
®
~I
TECHNOLOGY
GROUP
Your definitive source
for
quality
pre-owned
equipment.
Artisan Technology
Group
Full-service,
independent
repair
center
with
experienced
engineers
and
technicians
on staff.
We
buy
your
excess,
underutilized,
and
idle
equipment
along
with
credit
for
buybacks
and
trade-ins
.
Custom
engineering
so
your
equipment
works
exactly as
you
specify.
•
Critical
and
expedited
services
•
Leasing
/
Rentals/
Demos
• In
stock/
Ready-to-ship
•
!TAR-certified
secure
asset
solutions
Expert
team
ITrust
guarantee
I
100%
satisfaction
All
tr
ademarks,
br
a
nd
names, a
nd
br
a
nd
s a
pp
earing here
in
are
th
e property of
th
e
ir
r
es
pecti
ve
ow
ner
s.
Find the Danaher Motion / Kollmorgen SERVOSTAR 614-AS at our website: Click HERE

Instructions Manual
Edition 07/2010
Translation of the original manual.
Valid for Hardware Revision 05.20
SERVOSTAR®601...620
Digital Servo Amplifier
File sr601_e.***
Keep all manuals as a product component
during the life span of the product.
Pass all manuals to future users / owners
of the product.

Previous versions :
Edition Remarks
05/1998 First edition
08/1998 a few corrections
09/1998 various minor corrections, parameter description removed, parameter setting for multi-axis systems and
on/off switching behavior added, Installation/setup divided into two chapters
01/1999 614 added, various minor corrections
02/1999 Interface relay for digital outputs (pages 26, 43)
06/1999 various corrections, cables and connectors removed, choke box added
08/1999 24V tolerance, encoder wiring, ventilation
11/1999 Packaging, brake resistor
12/1999 Option -AS- integrated, ground-bolt, master-slave
04/2000 various corrections, setup software on CDROM only, motors 6SM27LL and 6SM37VL added
06/2000 Wiring diagrams electr. gearing, warning and error messages, recommended torque
08/2000 Wiring diagram in chapter III.9.2 corrected
07/2001
S610-30 and options -I/O-14/08- and -2CAN - incorporated, hardware-description incorporated for
PROFIBUS and SERCOS, nameplate, motor list and connector assignment corrected, LED-display cor-
rected, error messages expanded
02/2002 Dimensions BAR corrected
06/2002 Frontpage new design, corrections to US English, motor table removed, order numbers added,
last page new design and contents, new; connection to diff. mains supply networks, block diagram to ch.III
07/2003 several corrections, DeviceNet expansion card added, directives and standards page revised, cover design
09/2003 Ethernet expansion card and Single axis controller expansion card added
03/2004 new brake resistors BAR(U), several corrections
02/2006
Company name updated, expansion cards updated, new sections on EtherCAT and SynqNet, chapter l re-
structured, new sections on motor chokes, Encoder power supply and encoder termination, various error
corrections, new ordering codes, Feedback section revised, BAR removed, cross section (awg)
09/2006 Hardware Revision, disposal acc. to WEEE-2002/96/EG, new structure+cover pages, Quickstart integrated
04/2007
Part number scheme, servo system graphics expanded, shock-hazard protection new, BISS feedback,
feedback expanded, enc. emulation, switch-on/off behavior and AS updated, accessories removed,
DC-Bus link expanded, fuses brake resistor
07/2007 Timing diagramm motor brake, motor connector, example cat.3 to EN954-1
06/2008 Repair, deinstallation, syntax: "regen" => "brake", EMC standards, Hiperface, CE declaration
08/2008 SCCR->42kA
07/2010 Logo, Repair, Disposal, safety symbols acc. to ANSI Z535, GOST-R, HWR 5.20, holding brake hints, WIKI
links updated
Hardware Revision (HWR)
Hardware Rev. Firmware Rev. DRIVE.EXE Rev. Remarks
05.10 >= 5.76 <= 5.53_284 Firmware >=6.68 required with BISS
05.20 >=5.81 >= 5.53_285 CAN Controller neu, Standard
>= 6.86 >= 5.53_285 CAN Controller neu, BiSS/EtherCAT Support
WINDOWS is a registered trademark of Microsoft Corp.
HIPERFACE is a registered trademark of Max Stegmann GmbH
EnDat is a registered trademark of Dr. Johannes Heidenhain GmbH
EtherCAT is a registered trademark of EtherCAT Technology Group
SERVOSTAR is a registered trademark of Danaher Motion
Technical changes which improve the performance of the equipment may be made without prior notice !
Printed in the Federal Republic of Germany
All rights reserved. No part of this work may be reproduced in any form (by printing, photocopying, microfilm or any other
method) or stored, processed, copied or distributed by electronic means without the written permission of Danaher
Motion GmbH.

1 General
1.1 About this manual ....................................................................... 7
1.2 Target group ........................................................................... 7
1.3 Hints for the online edition (PDF format) ...................................................... 7
1.4 Symbols used........................................................................... 8
1.5 Standards used ......................................................................... 8
1.6 Abbreviations used....................................................................... 9
2 Safety
2.1 Safety Instructions ...................................................................... 11
2.2 Use as directed ........................................................................ 12
2.3 Prohibited use ......................................................................... 12
3Approvals
3.1 Conformance with UL and cUL ............................................................ 13
3.2 EC conformance ....................................................................... 13
3.2.1 EC Declaration of Conformity......................................................... 14
3.2.2 European Directives and Standards for the machine builder ................................. 15
3.3 GOST-R Conformance................................................................... 16
4 Handling
4.1 Transport ............................................................................. 17
4.2 Packaging ............................................................................ 17
4.3 Storage .............................................................................. 17
4.4 Maintenance........................................................................... 17
4.5 Disassembling ......................................................................... 18
4.6 Repair ............................................................................... 18
4.7 Disposal .............................................................................. 18
5 Package
5.1 Package supplied....................................................................... 19
5.2 Nameplate ............................................................................ 19
5.3 Part number scheme .................................................................... 20
6 Technical description
6.1 The SERVOSTAR 600 family of digital servo amplifiers ......................................... 21
6.2 Technical data ......................................................................... 23
6.2.1 Recommended torque .............................................................. 24
6.2.2 Fusing .......................................................................... 24
6.2.3 Ambient conditions, ventilation, mounting position......................................... 24
6.2.4 Conductor cross-sections............................................................ 25
6.3 LED display ........................................................................... 25
6.4 Control for motor holding brake ............................................................ 26
6.5 Grounding system ...................................................................... 27
6.6 Electrical Brake circuit ................................................................... 27
6.7 Switch-on and switch-off behavior .......................................................... 29
6.7.1 Behavior in standard operation ....................................................... 30
6.7.2 Behavior in the event of an error (with standard setting) .................................... 31
6.8 Stop/Emergency Stop Function to EN 60204.................................................. 32
6.8.1 Stop: Standards ................................................................... 32
6.8.2 Emergency Stop: Standards ......................................................... 33
6.9 Shock-hazard protection ................................................................. 34
6.9.1 Leakage current ................................................................... 34
6.9.2 Residual-current circuit breakers (FI)................................................... 34
6.9.3 Isolating transformers .............................................................. 34
7 Mechanical Installation
7.1 Safety Instructions ...................................................................... 35
7.2 Guide to mechanical installation............................................................ 35
7.3 Assembly ............................................................................. 36
7.4 Dimensions ........................................................................... 37
SERVOSTAR®601...620 Instructions Manual 3
Kollmorgen 07/2010 Contents
Page

8 Electrical Installation
8.1 Safety Instructions ...................................................................... 39
8.2 Guide to electrical installation.............................................................. 40
8.3 Wiring................................................................................ 41
8.3.1 Safety Instructions ................................................................. 41
8.3.2 Technical data for connecting cables................................................... 42
8.3.3 Shielding connection to the front panel ................................................. 42
8.3.4 Motor connector with shieldplate ...................................................... 43
8.4 Components of a servo system ............................................................ 44
8.5 Block diagram ......................................................................... 45
8.6 Pin assignments........................................................................ 46
8.7 Connection diagram (overview) ............................................................ 47
8.8 Power supply .......................................................................... 48
8.8.1 Connection to various mains supply networks ............................................ 48
8.8.2 Mains supply connection (X0) ........................................................ 49
8.8.3 24V auxiliary supply (X4) ............................................................ 49
8.8.4 DC bus link (X7)................................................................... 49
8.9 Motor connection with holding brake (X9) .................................................... 50
8.10 External brake resistor (X8) ............................................................... 50
8.11 Feedback ............................................................................. 51
8.11.1 Resolver (X2) ..................................................................... 52
8.11.2 Sine Encoder 5V with BiSS (X1) ...................................................... 53
8.11.3 Sine Encoder with EnDat 2.1 or HIPERFACE (X1) ........................................ 54
8.11.4 Sine Encoder without data channel (X1) ................................................ 55
8.11.5 Incremental encoder / sine encoder with Hall (X1)......................................... 56
8.11.6 Incremental Encoder (X5) ........................................................... 57
8.12 Electronic Gearing, Master-slave operation ................................................... 58
8.12.1 Connection to a SERVOSTAR master, 5 V signal level (X5) ................................. 59
8.12.2 Connection to encoders with 24 V signal level (X3) ........................................ 59
8.12.3 Connection to a sine-cosine encoder (X1) ............................................... 60
8.12.4 Connection to an SSI encoder (X5) .................................................... 61
8.12.5 Connection to stepper motor controllers (step and direction)................................. 61
8.12.5.1 Step/Direction with 5 V signal level (X5) ............................................. 62
8.12.5.2 Step/Direction with 24 V signal level (X3) ............................................ 62
8.13 Encoder emulations ..................................................................... 63
8.13.1 Incremental encoder output - A quad B (X5) ............................................. 63
8.13.2 SSI output (X5) ................................................................... 64
8.14 Digital and analog inputs and outputs ....................................................... 65
8.14.1 Analog inputs (X3) ................................................................. 65
8.14.2 Analog outputs (X3) ................................................................ 66
8.14.3 Digital inputs (X3).................................................................. 67
8.14.4 Digital outputs (X3) ................................................................ 68
8.15 RS232 interface, PC connection (X6) ....................................................... 69
8.16 CANopen Interface (X6).................................................................. 70
4 SERVOSTAR®601...620 Instructions Manual
Contents 07/2010 Kollmorgen
Page

9Setup
9.1 Safety Instructions ...................................................................... 71
9.2 Setup software ......................................................................... 72
9.2.1 General ......................................................................... 72
9.2.1.1 Use as directed ................................................................ 72
9.2.1.2 Software description ............................................................ 72
9.2.1.3 Hardware requirements.......................................................... 73
9.2.1.4 Operating systems ............................................................. 73
9.2.2 Installation under WINDOWS......................................................... 73
9.3 Quickstart Guide ....................................................................... 74
9.3.1 Preparation ...................................................................... 74
9.3.1.1 Unpacking, Mounting and Wiring the Servo Amplifier ................................... 74
9.3.1.2 Documents ................................................................... 74
9.3.1.3 Minimum Wiring for Drive Test .................................................... 75
9.3.2 Connect ......................................................................... 76
9.3.3 Important Screen Elements .......................................................... 77
9.3.4 Basic Setup ...................................................................... 78
9.3.5 Motor (synchronous) ............................................................... 79
9.3.6 Feedback ........................................................................ 80
9.3.7 Save Parameters and Restart ........................................................ 81
9.3.8 Jogging the Motor (Speed Control) .................................................... 82
9.3.9 Status........................................................................... 83
9.3.10 Monitor.......................................................................... 83
9.3.11 Additional Setup Parameters ......................................................... 83
9.4 Multi-axis systems ...................................................................... 84
9.4.1 Node address for CAN-bus .......................................................... 84
9.4.2 Baud rate for CAN-bus.............................................................. 84
9.4.3 Example of connections for multi-axis system............................................ 85
9.5 Key operation / LED display............................................................... 86
9.5.1 Key operation..................................................................... 86
9.5.2 Status display..................................................................... 86
9.5.3 Standard menu structure ............................................................ 87
9.5.4 Extended menu structure ............................................................ 87
9.6 Error messages ........................................................................ 88
9.7 Warning messages ..................................................................... 89
9.8 Removing faults/warnings ................................................................ 90
10 Expansions / Accessories
10.1 Option -AS-, restart lock for personal safety................................................... 91
10.1.1 Safety instructions ................................................................. 91
10.1.2 Use as directed ................................................................... 92
10.1.3 Block diagram .................................................................... 92
10.1.4 Functional description .............................................................. 93
10.1.5 Signal diagram (sequence) .......................................................... 93
10.1.6 Functional test .................................................................... 94
10.1.7 Connection diagram (principle) ....................................................... 94
10.1.8 Application example category 1 according to EN954-1 ..................................... 95
10.1.8.1 Control circuit ................................................................. 95
10.1.8.2 Mains supply circuit............................................................. 95
10.1.9 Application example category 3 according to EN954-1 ..................................... 96
10.1.9.1 Control circuit ................................................................. 96
10.1.9.2 Mains supply circuit............................................................. 96
10.1.9.3 Flow chart .................................................................... 97
10.2 Expansion Cards ....................................................................... 98
10.2.1 Guide to installation of expansion cards................................................. 98
10.2.2 Expansion card -I/O-14/08- .......................................................... 99
10.2.2.1 Front view .................................................................... 99
10.2.2.2 Technical data................................................................. 99
10.2.2.3 Light emitting diodes (LEDs) ...................................................... 99
10.2.2.4 Select motion task number (Sample) ............................................... 99
10.2.2.5 Connector assignments......................................................... 100
10.2.2.6 Connection diagram ........................................................... 101
SERVOSTAR®601...620 Instructions Manual 5
Kollmorgen 07/2010 Contents
Page

10.2.3 Expansion cards -PROFIBUS-....................................................... 102
10.2.3.1 Front view ................................................................... 102
10.2.3.2 Connection technology ......................................................... 102
10.2.3.3 Connection diagram ........................................................... 102
10.2.4 Expansion card -SERCOS- ......................................................... 103
10.2.4.1 Front view ................................................................... 103
10.2.4.2 Light emitting diodes (LEDs) ..................................................... 103
10.2.4.3 Connection technology ......................................................... 103
10.2.4.4 Connection diagram ........................................................... 104
10.2.4.5 Modifying the station address .................................................... 104
10.2.4.6 Modifying the baud rate and optical power .......................................... 104
10.2.5 Expansion card -DEVICENET- ...................................................... 105
10.2.5.1 Front view ................................................................... 105
10.2.5.2 Connection technology ......................................................... 105
10.2.5.3 Connection diagram ........................................................... 105
10.2.5.4 Combined module/network status-LED............................................. 106
10.2.5.5 Setting the station address (device address)......................................... 106
10.2.5.6 Setting the transmission speed ................................................... 106
10.2.5.7 Bus cable ................................................................... 107
10.2.6 Expansion card -EtherCAT- ......................................................... 108
10.2.6.1 Front view ................................................................... 108
10.2.6.2 LEDs ....................................................................... 108
10.2.6.3 Connection diagram ........................................................... 108
10.2.7 Expansion card -SYNQNET- ........................................................ 109
10.2.7.1 Front view ................................................................... 109
10.2.7.2 NODE ID Switch .............................................................. 109
10.2.7.3 Node LED table .............................................................. 109
10.2.7.4 SynqNet Connection, Connector X21B/C (RJ-45)..................................... 109
10.2.7.5 Digital inputs/outputs, connector X21A (SubD 15-pin, socket) ........................... 110
10.2.7.6 Connection diagram digital inputs/outputs, connector X21A .............................110
10.2.8 Expansion module -2CAN-.......................................................... 111
10.2.8.1 Installation ................................................................... 111
10.2.8.2 Front View ................................................................... 111
10.2.8.3 Connection technology ......................................................... 111
10.2.8.4 Connector assignments......................................................... 112
10.2.8.5 Connection diagram ........................................................... 112
10.3 Special Accessories .................................................................... 113
10.3.1 Power Supply SINCOS ............................................................ 113
10.3.2 Terminating adapter for encoder cables................................................ 113
10.3.3 Hall Dongle ..................................................................... 114
11 Appendix
11.1 Glossary............................................................................. 115
11.2 Order numbers........................................................................ 117
11.2.1 Servo amplifiers .................................................................. 117
11.2.2 Expansion cards ................................................................. 117
11.2.3 Connectors...................................................................... 117
11.2.4 Special accessories ............................................................... 117
11.3 Repair-/Disposal request Telefax form...................................................... 118
11.4 Index ............................................................................... 119
6 SERVOSTAR®601...620 Instructions Manual
Contents 07/2010 Kollmorgen
Page

1General
1.1 About this manual
This manual describes the digital servo amplifiers of the SERVOSTAR®600 series
(standard version, 1.5 to 20 Amps nominal current). Servoamplifiers of the SERVOSTAR 640/670
series are described in additional manuals.
SERVOSTAR 601 is sold in Europe only.
A more detailed description of the expansion cards which are currently available and the digital
connection to automation systems can be found on the accompanying CD-ROM in Acrobat-Reader
format (system requirements: WINDOWS with Internet browser, Acrobat Reader) in several lan-
guage versions. Technical data and dimensional drawings of accessories such as cables, brake
resistors, mains supplies, etc., can be found in the accessories manual.
You can print this documentation on any standard printer. A printed copy of the documentation is
available from us at extra cost.
More background information can be found in the "Product WIKI", please check
www.wiki-kollmorgen.eu.
1.2 Target group
This manual addresses personnel with the following qualifications:
Transport : only by personnel with knowledge of handling electrostatically sensitive
components.
Unpacking: only by electrically qualified personnel.
Installation : only by electrically qualified personnel.
Setup : only by qualified personnel with extensive knowledge of electrical
engineering and drive technology
The qualified personnel must know and observe the following standards:
IEC 60364 and IEC 60664
national accident prevention regulations
During operation there are deadly hazards, with the possibility of death, severe injury or
material damage. The operator must ensure that the safety instructions in this manual are
followed. The operator must ensure that all personnel responsible for working with the
servo amplifier have read and understood the instructions manual.
1.3 Hints for the online edition (PDF format)
Bookmark:
Table of contents and index are active bookmarks.
Table of contents and index in the text:
The lines are active cross references. Click on the desired line and the appropriate page is indi-
cated.
Page/chapter numbers in the text:
Page/chapter numbers with cross references are active. Click at the page/chapter number to reach
the indicated target.
SERVOSTAR®601...620 Instructions Manual 7
Kollmorgen 07/2010 General

1.4 Symbols used
Symbol Indication
Indicates a hazardous situation which, if not avoided, will result in death or
serious injury.
Indicates a hazardous situation which, if not avoided, could result in death
or serious injury.
Indicates a hazardous situation which, if not avoided, could result in minor
or moderate injury.
Indicates situations which, if not avoided, could result in property damage.
This is not a safety symbol.
This symbol indicates important notes.
1.5 Standards used
Standard Content
ISO 4762 Hexagon socket head cap screws
ISO 11898 Road vehicles — Controller area network (CAN)
ISO 13849 Safety of machinery: Safety-related parts of control systems
(former EN 954)
ISO 12100 Safety of machinery: Basic concepts, general principles for design
IEC 60085 Electrical insulation - Thermal evaluation and designation Maintenance
IEC 60204 Safety of Machinery: Electrical equipment of machinery
IEC 60364 Low-voltage electrical installations
IEC 60439 Low-Voltage Switchgear and Controlgear Assemblies
IEC 60664 Insulation coordination for equipment within low-voltage systems
IEC 60721 Classification of environmental conditions
IEC 61000 Electromagnetic compatibility (EMC)
IEC 61131 Programmable controllers
IEC 61491 Electrical equipment of industrial machines – Serial data link for real-time com-
munications between controls and drives.
IEC 61508 Functional safety of electrical/electronic/programmable electronic
safety-related systems
IEC 61800 Adjustable speed electrical power drive systems
IEC 62061 Functional safety of electrical/electronic/programmable electronic
safety-related systems
IEC 62079 Preparation of instructions - Structuring, content and presentation
ANSI Z535 Product safety (symbols, colors, information)
UL 840 UL Standard for Safety for Insulation Coordination Including Clearances and
Creepage Distances for Electrical Equipment
UL 508C UL Standard for Safety Power Conversion Equipment
ANSI American National Standard Institute, Inc.
IEC International Electrotechnical Commission
ISO International Organization for Standardization
UL Underwriters Laboratories
8 SERVOSTAR®601...620 Instructions Manual
General 07/2010 Kollmorgen

1.6 Abbreviations used
The abbreviations used in this manual are explained in the table below.
Abbrev. Meaning
AGND Analog ground
AS Restart Lock, option
BTB/RTO Ready to operate
CAN Fieldbus (CANopen)
CE Communité Européenne (EC)
CLK Clock signal
COM Serial interface for a PC-AT
DGND Digital ground
DIN German Institute for industrial Standards
Disk Magnetic storage (diskette, hard disk)
EEPROM Electrically erasable programmable memory
EMC Electromagnetic compatibility
EMI Electromagnetic interference
EN European standard
ESD Electrostatic discharge
F-SMA Fiber Optic Cable connector according to IEC 60874-2
IEC International Electrotechnical Commission
INC Incremental Interface
ISO International Standardization Organization
LED Light-emitting diode
MB Megabyte
NI Zero pulse
NSTOP Limit-switch input for CCW rotation (left)
PELV Protected low voltage
PGND Ground for the interface
PSTOP Limit-switch input for CW rotation (right)
RAM Volatile memory
RBBrake (regen) resistor
RBext External brake resistor
RBint Internal brake resistor
RES Resolver
ROD 426 (EEO) A quad B encoder
PLC Programmable logic controller
SRAM Static RAM
SSI Synchronous serial interface
UL Underwriters Laboratory
VAC AC voltage
VDC DC voltage
VDE Verein deutscher Elektrotechniker
XGND Ground for the 24V supply
SERVOSTAR®601...620 Instructions Manual 9
Kollmorgen 07/2010 General

This page has been deliberately left blank.
10 SERVOSTAR®601...620 Instructions Manual
General 07/2010 Kollmorgen

2Safety
2.1 Safety Instructions
During operation there are deadly hazards, with the possibility of death, severe injury or
material damage. Do not open or touch the equipment during operation. Keep all covers and
cabinet doors closed during operation. Touching the equipment is allowed during
installation and commissioning for properly qualified persons only.
— During operation, servo amplifiers may have uncovered live components,
depending on their level of enclosure protection.
— Control and power connections may be live, even though the motor is not rotating.
— Servo amplifiers may have hot surfaces during operation.
Surface can reach temperatures above 80°C.
There is a danger of electrical arcing with damage to contacts and personal injury. Never
undo any electrical connections to the servo amplifier while it is live.
Wait at least five minutes after disconnecting the servo amplifier from the main supply
power before touching potentially live sections of the equipment (e.g. contacts) or undoing
any connections.
Capacitors can still have dangerous voltages present up to five minutes after switching off
the supply power. To be sure, measure the voltage in the DC Bus link and wait until it has
fallen below 40V.
Incorrect handling of the servo amplifier can lead to personal injury or material damage.
Read this documentation before carrying out the installation and commissioning. It is vital
that you keep to the technical data and information on connection requirements (nameplate
and documentation).
Only properly qualified personnel are permitted to carry out activities such as transport,
installation, commissioning and maintenance. Properly qualified persons are those who are
familiar with the transport, assembly, installation, commissioning and operation of the
product, and who have the appropriate qualifications for their job. The qualified personnel
must know and observe the following standards:
— IEC 60364 and IEC 60664
— national accident prevention regulations
The manufacturer of the machine must produce a hazard analysis for the machine and take
appropriate measures to ensure that unforeseen movements do not result in personal injury
or material damage.
Check the Hardware Revision Number of the product (see product label). This revision
number must match the Hardware Revision Number on the cover page of the manual.
The servo amplifiers contain electrostatically sensitive components which may be damaged
by incorrect handling. Discharge your body before touching the servo amplifier. Avoid
contact with highly insulating materials (artificial fabrics, plastic film etc.). Place the servo
amplifier on a conductive surface.
SERVOSTAR®601...620 Instructions Manual 11
Kollmorgen 07/2010 Safety

2.2 Use as directed
lThe servo amplifiers are components which are built into electrical equipment or machines,
and can only be used as integral components of such equipment.
lThe manufacturer of the machine must generate a hazard analysis for the machine, and take
appropriate measures to ensure that unforeseen movements cannot cause injury or damage to
any person or property.
lThe SERVOSTAR 600 family of servo amplifiers (overvoltage category III acc. to EN
61800-5-1) can be connected directly to symmetrically earthed (grounded) three-phase indu
-
strial mains supply networks [TN-system, TT-system with earthed (grounded) neutral point, not
more than 42,000 rms symmetrical amperes, 480VAC maximum].
Connection to different mains supply networks (with additional isolating transformer) ðp.48.
lPeriodic overvoltages between outer conductor (L1, L2, L3) and housing of the servo amplifier
may not exceed 1000V (peak value).
Transient overvoltages (< 50µs) between the outer conductors may not exceed 1000V.
Transient overvoltages (< 50µs) between outer conductors and housing may not exceed
2000V.
lIf the servo amplifiers are used in residential areas, or in business or commercial premises,
then additional filter measures must be implemented by the user.
lThe SERVOSTAR 600 family of servo amplifiers is only intended to drive specific brushless
synchronous servomotors, with closed-loop control of torque, speed and/or position. The rated
voltage of the motors must be at least as high as the DC bus link voltage of the servo amplifier.
lThe servo amplifiers may only be operated in a closed switchgear cabinet, taking into account
the ambient conditions defined on page 24 and the dimensions shown on page 36. Ventilation
or cooling may be necessary to prevent enclosure ambient from exceeding 45°C (113°F).
lUse only copper wire. Wire size may be determined from EN 60204 (or table 310-16 of the
NEC 60°C or 75°C column for AWG size).
lConsider the specifications on page 92 when you use the optional personnel safe restart lock
-AS-.
2.3 Prohibited use
lOther use than described in chapter 2.2 is not intended and can lead to damage of persons,
equipment or things.
lThe use of the servo amplifier in the following environments is prohibited:
- potentially explosive areas
- environments with corrosive and/or electrically conductive acids, alkaline solutions,
oils, vapours, dusts
- directly on non-grounded supply networks or on asymmetrically grounded supplies
with a voltage >240V.
- on ships or off-shore applications
lCommissioning the servo amplifier is prohibited if the machine in which it was installed,
- does not meet the requirements of the EC Machinery Directive
- does not comply with the EMC Directive or with the Low Voltage Directive
- does not comply with any national directives
lThe control of holding brakes by the SERVOSTAR 600 alone may not be used in applications,
where personnel security is to be ensured with the brake.
Safety instructions
12 SERVOSTAR®601...620 Instructions Manual
Safety 07/2010 Kollmorgen

3Approvals
3.1 Conformance with UL and cUL
This servo amplifier is listed under UL file number E217428.
UL (cUL)-certified servo amplifiers (Underwriters Laboratories Inc.) fulfil the relevant U.S. and Cana-
dian standard (in this case UL 840 and UL 508C).
This standard describes the fulfilment by design of minimum requirements for electrically operated
power conversion equipment, such as frequency converters and servo amplifiers, which is intended
to eliminate the risk of fire, electric shock, or injury to persons, being caused by such equipment.
The technical conformance with the U.S. and Canadian standard is determined by an independent
UL (cUL) inspector through the type testing and regular check-ups.
Apart from the notes on installation and safety in the documentation, the customer does not have to
observe any other points in direct connection with the UL (cUL)-certification of the equipment.
UL 508C
UL 508C describes the fulfilment by design of minimum requirements for electrically operated power
conversion equipment, such as frequency converters and servo amplifiers, which is intended to
eliminate the risk of fire being caused by such equipment.
UL 840
UL 840 describes the fulfilment by design of air and insulation creepage spacings for electrical
equipment and printed circuit boards.
3.2 EC conformance
Conformance with the EC EMC Directive 2004/108/EC and the Low Voltage Directive 2006/95/EC
is mandatory for the supply of servo amplifiers within the European Community. Product standard
EN 61800-3 is applied to ensure conformance with the EMC Directive
Concerning noise immunity the servo amplifier meets the requirements to the 2nd environmental
category (industrial environment). For noise emission the amplifier meets the requirement to a prod-
uct of the category C3.
This product can cause high-frequency interferences in non industrial environments which
can require measures for interference suppression.
The servo amplifiers have been tested in a defined configuration, using the system components that
are described in this documentation. Any divergence from the configuration and installation
described in this documentation means that you will be responsible for carrying out new measure
-
ments to ensure conformance with regulatory requirements. The standard IEC 61800-5-1 is applied
to ensure conformance with the Low Voltage Directive.
SERVOSTAR®601...620 Instructions Manual 13
Kollmorgen 07/2010 Approvals

3.2.1 EC Declaration of Conformity
14 SERVOSTAR®601...620 Instructions Manual
Approvals 07/2010 Kollmorgen

3.2.2 European Directives and Standards for the machine builder
Servo amplifiers are components that are intended to be incorporated into electrical plant and
machines for industrial use. When the servo amplifiers are built into machines or plant, the amplifier
must not be used until it has been established that the machine or equipment fulfills the require-
ments of the
lEC Machinery Directive (2006/42/EC)
lEC EMC Directive (2004/108/EC)
lEC Low Voltage Directive (2006/95/EC)
Standards to be applied for conformance with the EC Machinery Directive (2006/42/EC)
EN 60204-1 (Safety and Electrical Equipment in Machines)
EN 12100 (Safety of Machines)
The manufacturer of the machine must generate a hazard analysis for the machine, and
must implement appropriate measures to ensure that unforeseen movements cannot cause
injury or damage to any person or property.
The machine/plant manufacturer must check whether other standards or EC Directives must
be applied to the machine/plant.
Standards to be applied for conformance with the EC Low Voltage Directive(2006/95/EC)
EN 60204-1 (Safety and Electrical Equipment in Machines)
EN 60439-1 (Low Voltage Switchgear Combinations)
Standards to be applied for conformance with the EC EMC Directive (2004/108/EC)
EN 61000-6-1 / 2 (Interference Immunity in Residential & Industrial Areas)
EN 61000-6-3 / 4 (Interference Generation in Residential & Industrial Areas)
The manufacturer of the machine/plant is responsible for ensuring that it meets the limits required
by the EMC regulations. Advice on the correct installation for EMC (such as shielding, grounding,
treatment of connectors and cable layout) can be found in this documentation.
We only guarantee the conformance of the servo system with the standards cited in this chapter if
the components (motor, cables, chokes etc.) are those supplied by us.
SERVOSTAR®601...620 Instructions Manual 15
Kollmorgen 07/2010 Approvals

3.3 GOST-R Conformance
Certificate for servo amplifiers and accessories (cover page).
16 SERVOSTAR®601...620 Instructions Manual
Approvals 07/2010 Kollmorgen

4Handling
4.1 Transport
lOnly by qualified personnel in the manufacturer’s original recyclable packaging
lAvoid shocks
lTemperature –25 to +70°C, max. 20K/hr rate of change
lHumidity max. 95% relative humidity, no condensation
lThe servo amplifiers contain electrostatically sensitive components which can be da-
maged by incorrect handling. Discharge yourself before touching the servo amplifier.
Avoid contact with highly insulating materials (artificial fabrics, plastic films etc.). Place
the servo amplifier on a conductive surface.
lIf the packaging is damaged, check the unit for visible damage. In this case, inform the shipper
and the manufacturer.
4.2 Packaging
lCardboard box, can be recycled
lDimensions: SERVOSTAR 601...610 (HxWxD) 125x415x350 mm
SERVOSTAR 614 / 620 (HxWxD) 170x415x350 mm
lLabeling : nameplate outside at the box
4.3 Storage
lStorage only in the manufacturer’s original recyclable packaging
lMax. stacking height 8 cartons
lStorage temperature -25 to +55°C, max. rate of change 20°C / hour
lStorage humidity 5 ... 95% relative humidity, no condensation
lStorage duration Less than 1 year without restriction.
More than 1 year: capacitors must be re-formed before setting up and operating the servo am-
plifier. To do this, remove all electrical connections and apply single-phase 230V AC for about
30 minutes to the terminals L1 / L2.
4.4 Maintenance
The instruments do not require any maintenance, opening the instruments invalidates the warranty.
Cleaning : — if the casing is dirty: clean with Isopropanol or similar
Note: do not immerse or spray
— if there is dirt inside the unit it must be cleaned by the manufacturer
— dirty protective grill on fan must be cleaned with a dry brush
SERVOSTAR®601...620 Instructions Manual 17
Kollmorgen 07/2010 Handling

4.5 Disassembling
Observe the sequence below, if a servo amplifier has to be disassembled (e.g. for replacement).
1. Electrical disconnection
Switch off the main switch of the switchgear cabinet and the fuses that supply the system.
Wait at least eight minutes after disconnecting the servo amplifier from the main supply
power before touching potentially live sections of the equipment (e.g. contacts) or undoing
any connections. To be sure, measure the voltage in the DC Bus link and wait until it has
fallen below 40V.
Remove the connectors. Disconnect the earth (ground) connection at last.
2. Check temperature
During operation the heat sink of the servo amplifier may reach temperatures above 80°C
(176°F). Before touching the device, check the temperature and wait until it has cooled down
below 40°C (104°F).
3. Disassembling
Remove the fan housing and disassemble the servo amplifier (reverse of the procedure described
in chapter "Mechanical installation).
4.6 Repair
Repair of the servo amplifier must be done by the manufacturer. Opening the devices means loss of
the guarantee. Use the telefax form on page 118 for repair request. You'll receive the current dis-
patch information.
Disassemble the equipment as described in chapter 4.5 and send it in the original packaging to the
address given in the dispatch information.
4.7 Disposal
In accordance to the WEEE-2002/96/EC-Guidelines we take old devices and accessories back for
professional disposal. Transport costs are the responsibility of the sender. Use the telefax form on
page 118 for disposal request. You'll receive the current dispatch information.
Disassemble the equipment as described in chapter 4.5 and send it in the original packaging to the
address given in the dispatch information.
18 SERVOSTAR®601...620 Instructions Manual
Handling 07/2010 Kollmorgen

5Package
5.1 Package supplied
When you order a SERVOSTAR 600 series amplifier (order numbers ðp.117), you will receive:
— SERVOSTAR 6xx
— mating connectors X3, X4, X0A, X0B, X7, X8
The mating SubD connectors and motor connector X9 are not part of the package!
— Assembly, Installation and Setup Instructions (Instructions Manual)
— Online documentation on CD-ROM
— Setup software DRIVE.EXE on CD-ROM
Accessories: (must be ordered separately; description see accessories manual)
— AC synchronous servomotor (linear or rotary)
— motor cable (pre-assembled), or both motor connectors separately, with motor cable as a
cut-off length
— feedback cable (pre-assembled or both feedback connectors separately,
with feedback cable as length
— Power supply for encoders with a power consumption of more than 150mA (ðp. 113)
— Terminating adapter for encoders with no terminating resistors (ðp. 113)
— motor choke 3YL for cable length above 25m
— external brake resistor BAR(U)
— communications cable to the PC(ðp.69) or Y-adapter (ðp.84) for setting parameters of up
to 6 servo amplifiers from one PC
— power cable, control cables, fieldbus cables (as lengths)
5.2 Nameplate
The nameplate depicted below is attached to the side of the servo amplifier.
The information described below is printed in the individual fields.
SERVOSTAR®601...620 Instructions Manual 19
Kollmorgen 07/2010 Package
CommentsSerial number
Servo amplifier type
max. ambient
temperature
Output current
in S1 operation Hardware Revision
Enclosure Rating
Electrical supply
Installed load
This manual suits for next models
7
Table of contents
Other Kollmorgen Amplifier manuals

Kollmorgen
Kollmorgen SERVOSTAR S300 User manual

Kollmorgen
Kollmorgen SERVOSTAR SBD Series User manual

Kollmorgen
Kollmorgen SERVOSTAR S300 User manual

Kollmorgen
Kollmorgen SERVOSTAR 300 User manual

Kollmorgen
Kollmorgen AKD series User manual

Kollmorgen
Kollmorgen S700 Series User manual

Kollmorgen
Kollmorgen SERVOSTAR 400 User manual

Kollmorgen
Kollmorgen S70601-SE User manual

Kollmorgen
Kollmorgen SERVOSTAR 640 User manual

Kollmorgen
Kollmorgen S772 User manual