- 2 -
D
V O R DE M AU F B AU
V o r d em Auf b au so l l t en Si e un b ed i n g t I hr e ö r t l i che Reg i er un g sb ehö r d e ko n t akt i er en um her aus-
zunden, ob ie eine augenehmigung bentigen. ergeissern ie sich, dass ie dieses e-
nutzerhandbuch vollstndig gelesen und verstanden haben. s enthlt ichtige nformationen und
hilfreiche ipps, die den Aufbau einfacher und angenehmer machen.
E R F O R DE R L ICHE W E R KZ E U GE
B enutze rhandbuch
ieses andbuch enthlt alle erforderlichen Aneisungen und Produtangaben. Lesen ie die
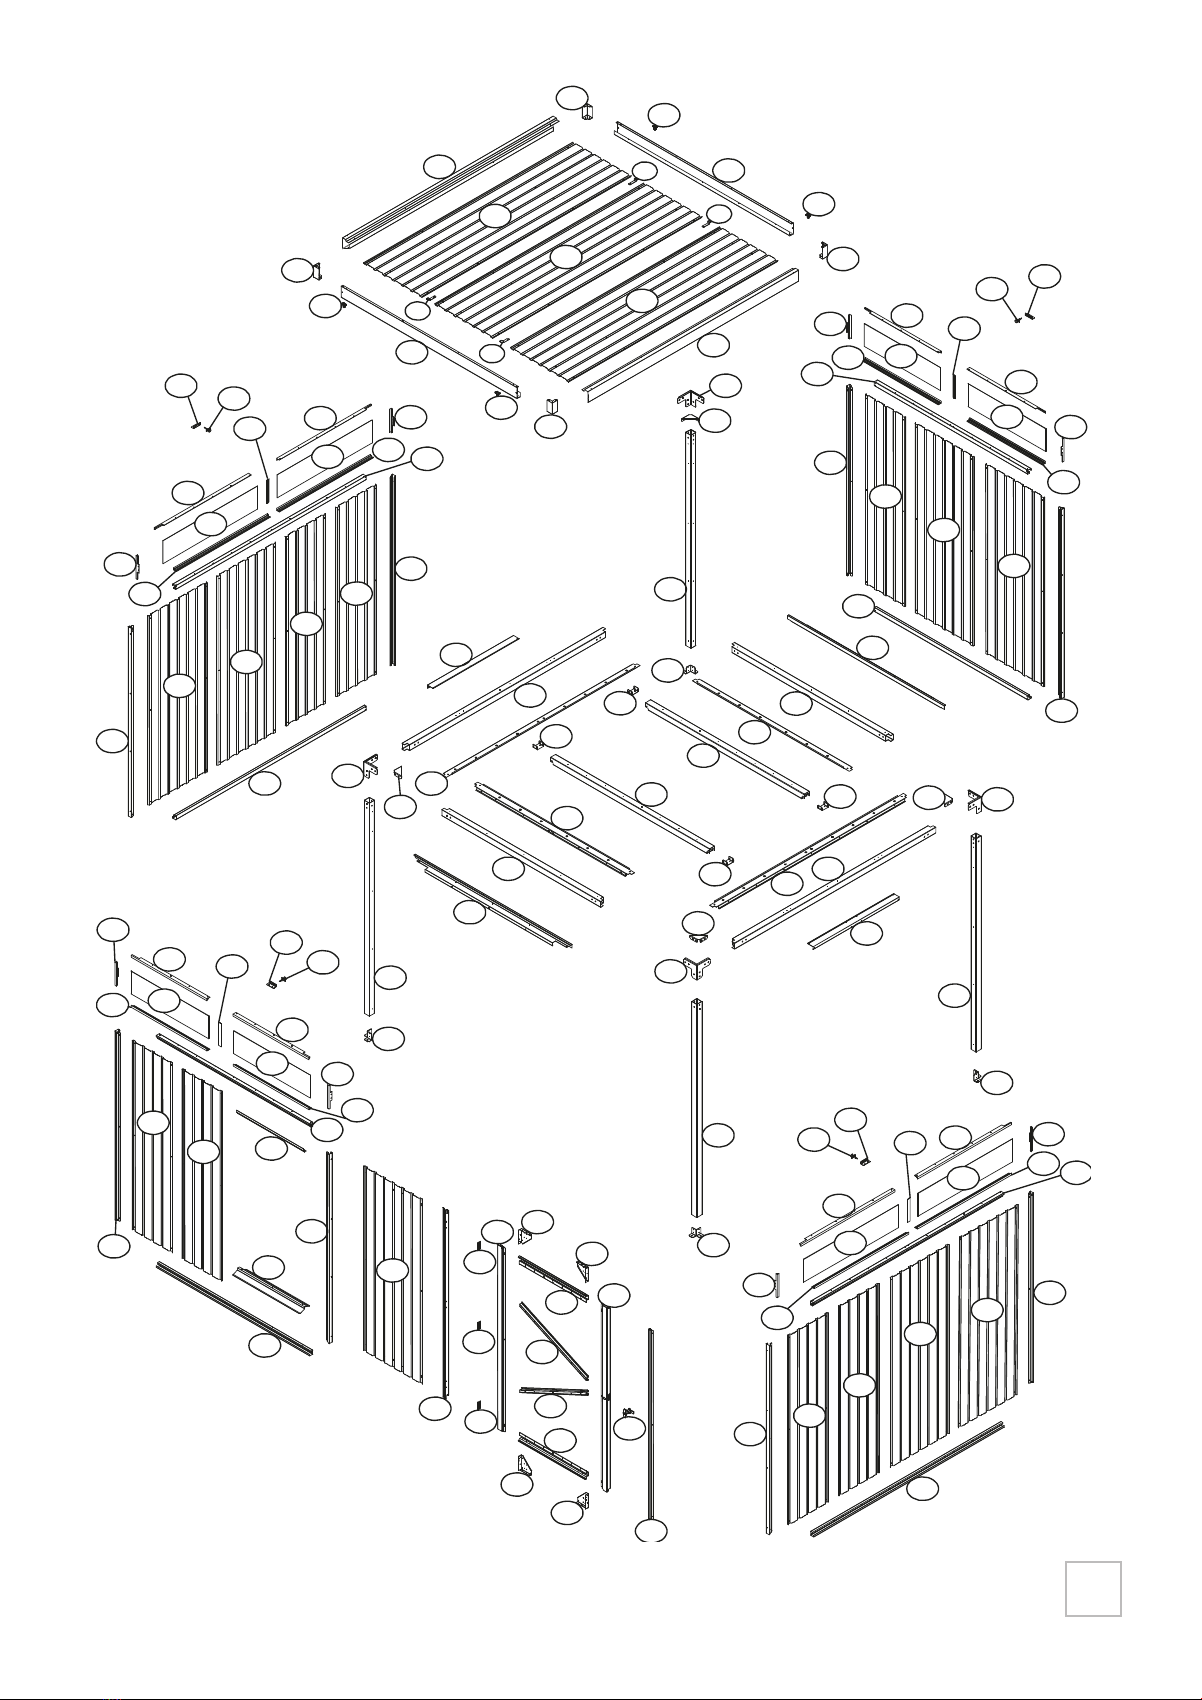
gesamte Anleitung, bevor ie mit dem Aufbau beginnen. alten ie sich beim Aufbau genau an
die vorgegebene eihenfolge, um ein gutes rgebnis sicherzustellen. itte beachten ie ei
Personen brauchen fr den Aufbau eta einen ag.
Auf bauanleitung
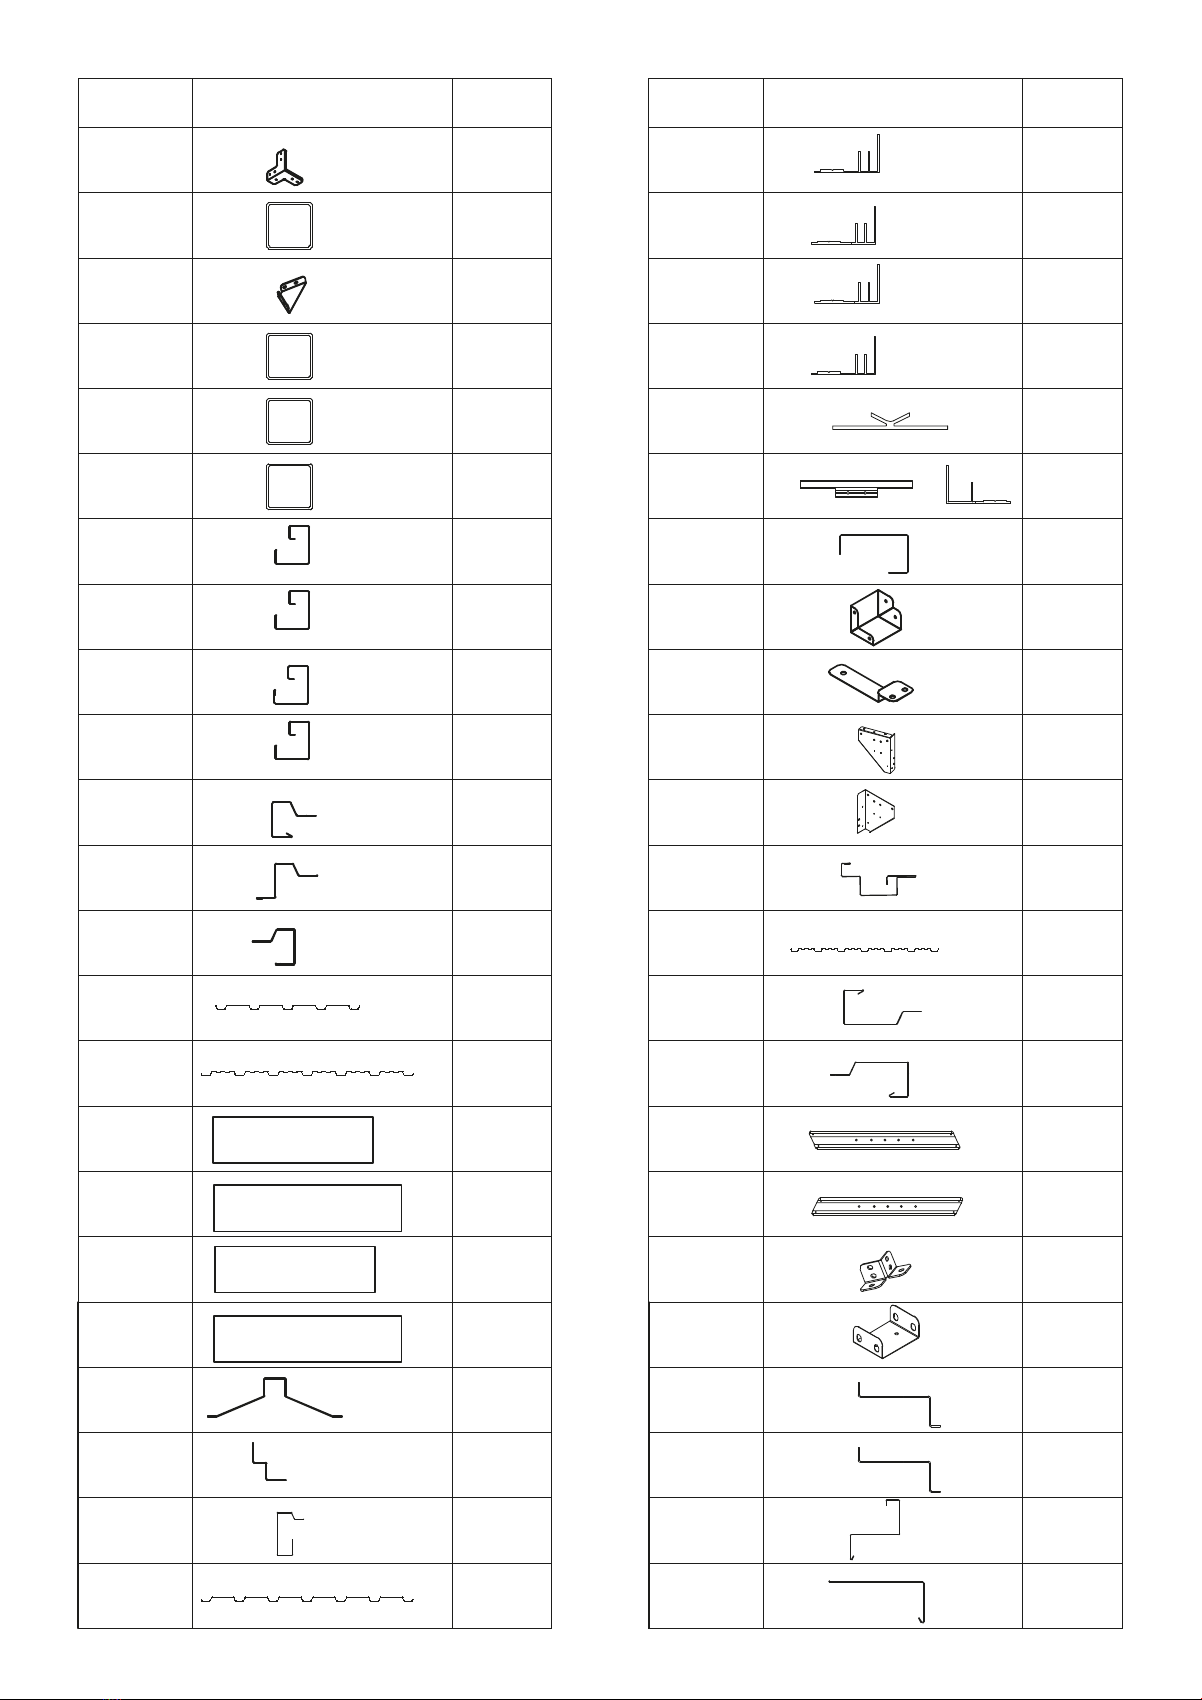
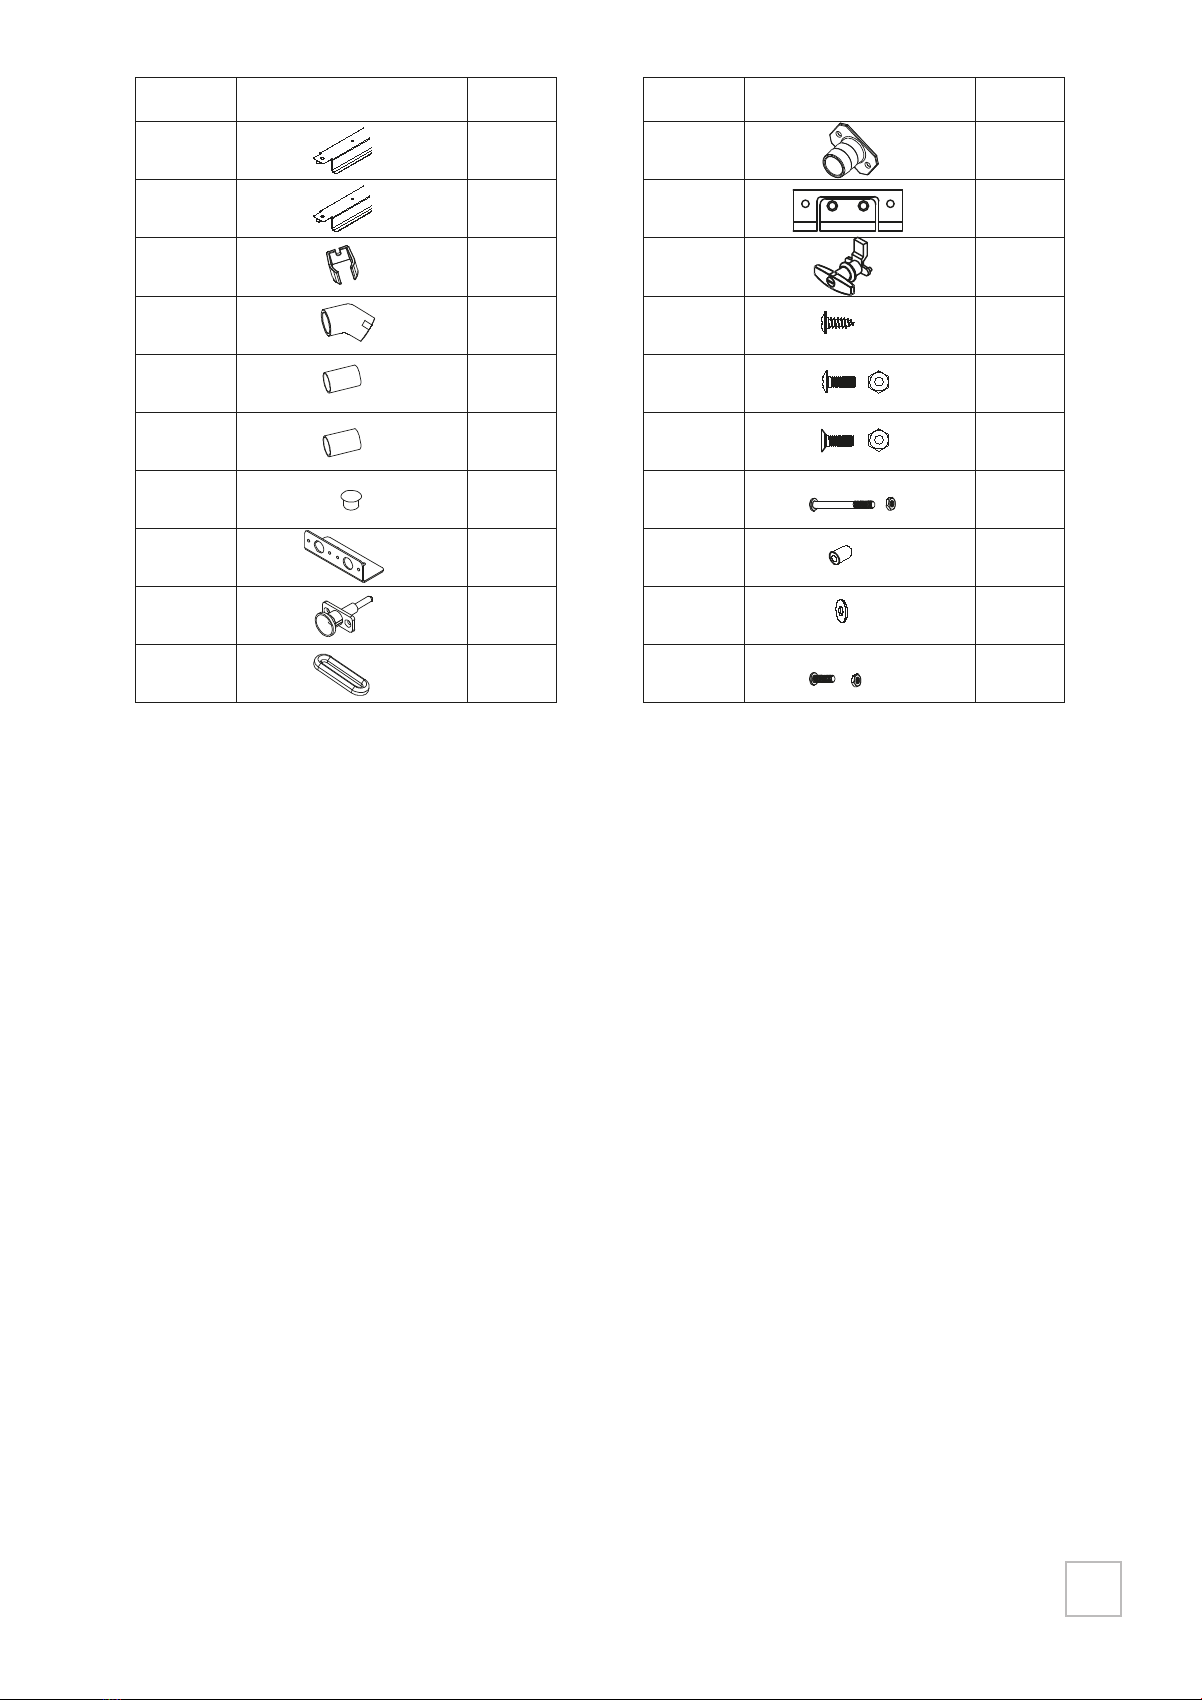
ergeissern ie sich, dass ie alle fr den Aufbau erforderlichen eile haben. ortieren ie den
nhalt des artons entsprechend der eilenummern und gleichen ie ihn mit der eileliste ab.
achen ie sich vorab mit den aterialien und erbindungselementen vertraut, um den Aufbau zu
erleichtern. iese eile sind im Lieferumfang enthalten. itte beachten ie, dass im Lieferumfang
zustzliche erbindungselemente als rsatz enthalten sind.
Teile
P L AN U N G
ei Personen bentigen fr den Aufbau
einen ganzen ag.
B eim U mgang mit Stahl- und Kehlblechen sollten Sie f este Schutzh andschuhe tragen.
Achten Sie auf das W etter:
hlen ie fr den Aufbau einen trocenen,
indstillen ag. V ersuchen Sie N ICHT, die B ox
bei W ind auf zu bauen, da es sonst zu esch-
digungen an den lechen und zu erletzungen
ommen ann. ei nassem oder schlammigem
ntergrund ist orsicht geboten.
Teamwork:
ie ox sollte mglichst von mindestens zei
Personen gemeinsam aufgebaut erden. o
ann eine Person die eile und leche in Posi-
tion halten, hrend die andere Person
d i e V er b i n d un g sel em en t e an b r i n g en un d m i t
erzeugen arbeiten ann.
BEFORE YOU START
Owner's Manual
Prior to installation, it is important that you contact your local government authority to
determine if building approval is required. Study and understand this owner's manual.
Important information and helpful tips will make your construction easier and more
enjoyable.
Assembly instructions
Instructions are supplied in this manual and contain all appropriate information for your
building model. Review all instructions before you begin. During assembly, follow the
step sequence carefully for correct results .Please be aware: this unit takes two people
about one full day to complete.
Parts
Check to be sure that you have all the necessary parts for the building.
Separate contents of the carton by the part number while reviewing parts list.
Familiarize yourself with the hardware and fasteners for easier use during
construction. These are packaged within the carton. Note that extra fasteners have been
supplied for your convenience.
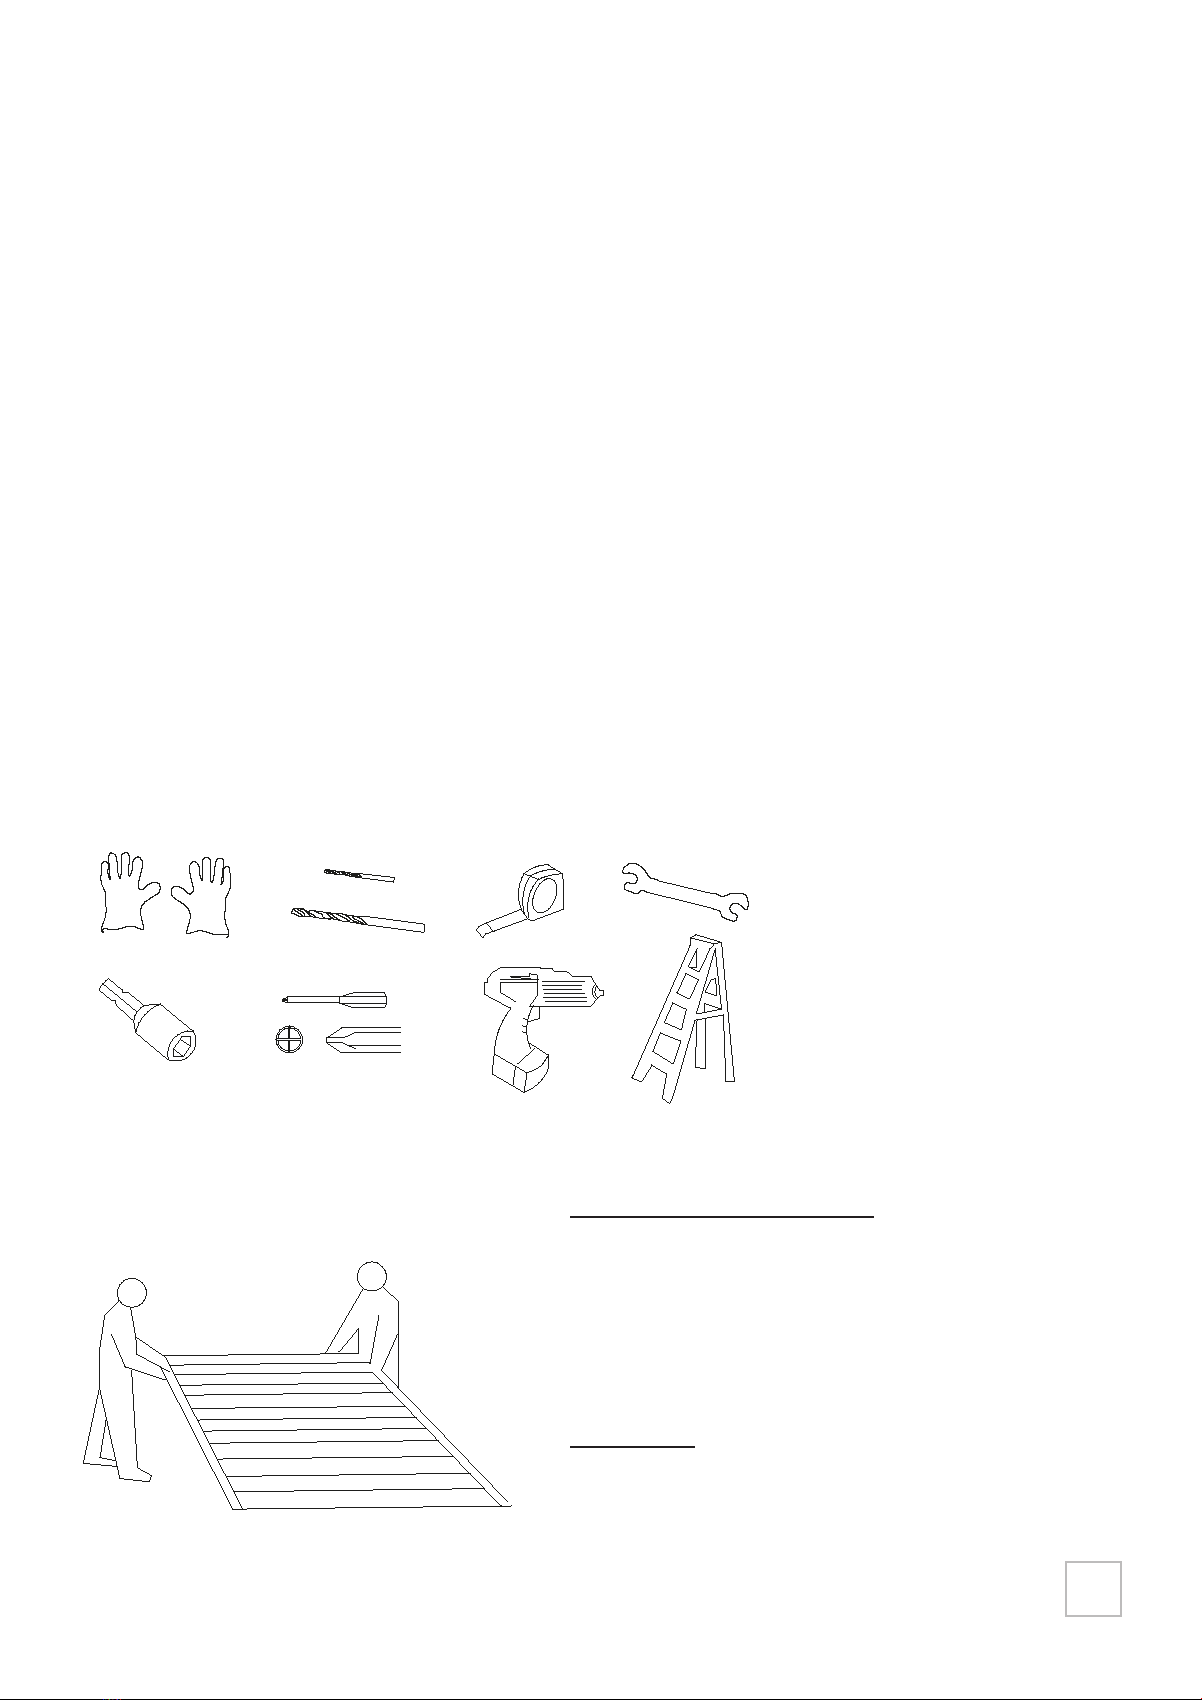
TOOLS MAY REQUIRED
Use heavy duty gloves when handling steel sheets and flashing
PLAN AHEAD
Watch the weather:
Please be sure the day you select for installation is dry and calm.
DO NOT attempt to assemble your shed in windy weather
because of risk of damage to panels, or personal injury. Be careful
of wet or muddy ground.
Teamwork:
Whenever possible, two or more people should work together to
assemble the building. One person can position parts or panels
while the other is able to handle the fasteners and the tools.
It requires two people a full
day to complete installation
BEFORE YOU START
Owner's Manual
Prior to installation, it is important that you contact your local government authority to
determine if building approval is required. Study and understand this owner's manual.
Important information and helpful tips will make your construction easier and more
enjoyable.
Assembly instructions
Instructions are supplied in this manual and contain all appropriate information for your
building model. Review all instructions before you begin. During assembly, follow the
step sequence carefully for correct results .Please be aware: this unit takes two people
about one full day to complete.
Parts
Check to be sure that you have all the necessary parts for the building.
Separate contents of the carton by the part number while reviewing parts list.
Familiarize yourself with the hardware and fasteners for easier use during
construction. These are packaged within the carton. Note that extra fasteners have been
supplied for your convenience.
TOOLS MAY REQUIRED
Use heavy duty gloves when handling steel sheets and flashing
PLAN AHEAD
Watch the weather:
Please be sure the day you select for installation is dry and calm.
DO NOT attempt to assemble your shed in windy weather
because of risk of damage to panels, or personal injury. Be careful
of wet or muddy ground.
Teamwork:
Whenever possible, two or more people should work together to
assemble the building. One person can position parts or panels
while the other is able to handle the fasteners and the tools.
It requires two people a full
day to complete installation
_00953_Stahlgeratehaus- SX-FS78.indd 2 14.07.20 12:43