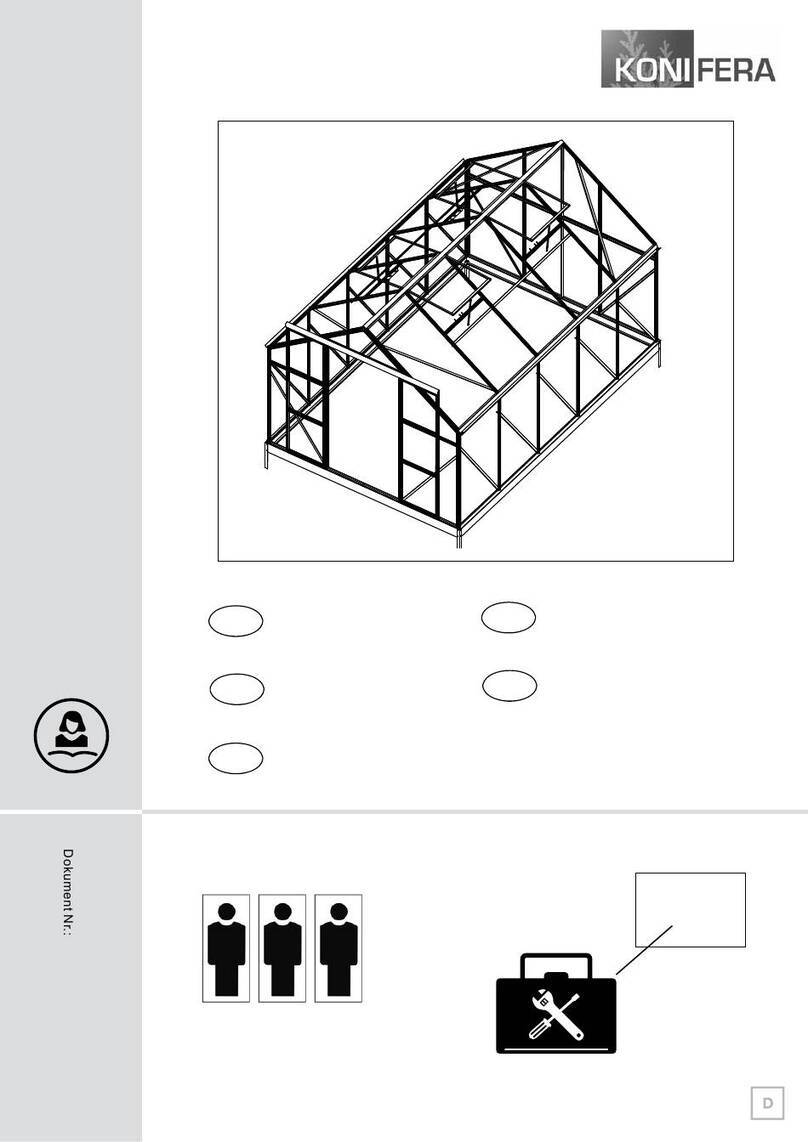
Konifera SR-B43 User manual

- 1 -
Dokument Nr. AS5050
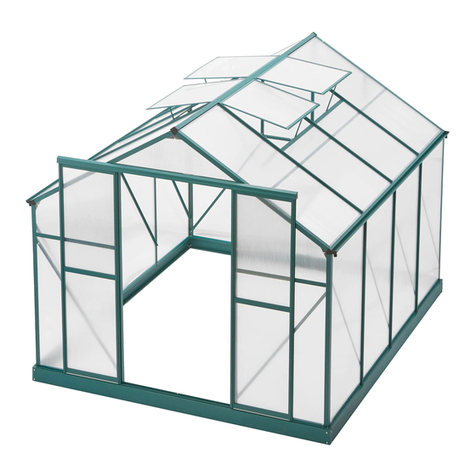
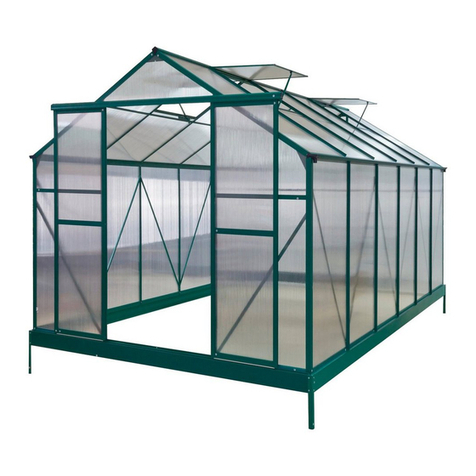
Greenhouse 16'x8'ft
Assembly Instructions
AS510
size: 510Lx245Wx230Hcm 12.5m²
You must read these instructions carefully before you start to assemble this greenhouse.Please
ensure that you find all parts in the carton box in the correct type and quantity as mentioned in
the list illustrated in every page accordingly.
Please carry out the steps in the order set out in these instructions.
Do not tighten the steps in the greenhouse until completing on the assembly of the poly carbon
ate panels.Keep these instructions in a safe place for future reference.
IT Istruzioni di montaggio
GB Assembly instructions
DMontageanleitung
NL Montagehandleiding
FNotice de montage
GEWÄCHSHAUS
AS5050 SET
D
SR-B43
Flexible Terrassenüberdachung
Anleitung
ABMESSUNGEN: L392xB305xH208/H262cm
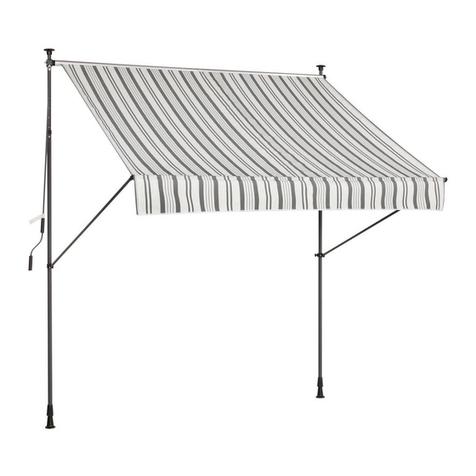
Sliding roof canopy
Instruction manual
SR-B43
SIZE:L392xW305xH208/H262cm
IMPORTANT
You must read these instructions carefully before you start to assemble this Sliding roof canopy .Please ensure
that you find all parts.
in the carton box in the correct type and quantity as mentioned in the list illustrated in every page accordingly.
Please carry out the steps in the order set out in these instructions.
Do not tighten the steps in the Sliding roof canopy until completing on the assembly.
Keep these instructions in a safe place for future reference.
Dokument Nr: SR-B43
WICHTIG
Bitte lesen Sie diese Anleitung gut durch, bevor Sie mit dem Aufbau der Terrassenüberdachung
beginnen. Vergewissern Sie sich, dass alle Teile entsprechend der Abbildungen auf den einzelnen
Seiten korrekt und in der vorgesehenen Anzahl vorliegen. Halten Sie sich beim Aufbau genau an die
in der Anleitung vorgegebene Reihenfolge. Ziehen Sie die Verbindungselemente der
Überdachung erst am Ende des Aufbaus fest.
Bewahren Sie diese Anleitung zum späteren Nachschlagen gut auf.

- 2 -
!
SAFETY ADVICE
We strongly recommend the use of work gloves during assembly.
Do not attempt to assemble the Sliding roof canopy in windy or wet conditions,
Do not touch overhead power cables with the aluminum profiles.
Always wear shoes and safety goggles when working with extruded aluminum.
Dispose of all plastic bags safety-keep them out of reach of small children.
The Sliding roof canopy must be positioned and fixed on a flat level surface.
Do not lean against or push the Sliding roof canopy during construction.
Keep children away from the assemble area.
Do not position your Sliding roof canopy in an area exposed to excessive wind.
Do not attempt to assemble this Sliding roof canopy if you are tired ,have taken drugs or
alcohol or
if you are prone to dizzy spells.
If using a step ladder or power tools ensure that you follow the manufactures safety advice.
Hot items such as recently used grills, blowtorches etc.must not be stores in the Sliding roof
canopy .
Ensure there are no hidden pipes or cables in the ground before inserting the pegs.
GENERAL ADVICE
This is a multi-part assembly, Allow at least 180 minutes for assembly.
Selecting a site-choose a sunny level position away from overhanging trees.
If you are fixing your Sliding roof canopy directly to a solid concrete foundation use
the
pre drilled holes in the metal base supplied.
The component parts should be checked and laid out close at hand.
Keep all small parts(screws etc)in a bowl so they do not get lost.
Note that the door is hinged on the right hand side and therefore opens tothe right.
Keep roof clear of snow and leaves.
CARE & MAINTENANCE
When your Sliding roof canopy needs cleaning, use a mild detergent solution and
risen
with cols clean water.
Do NOT use acetone, abrasive cleaners or other special detergents to clean the
clear panels.
TOOLS & EQUIPMENT REQUIRED
Protective Equipment:
1.Helmet
2.Glove
3.Long Sleeve Cotton Overalls
4.Emergency Medicine Cabinet
5.Eye Shield
Measure (metric):
1.The Tape (5 m)
2.Angle Square
3.Level Meter
-2-
Installation Tool:
1.Triangle Stairs≈2m Height
2.Spanner 10mm (Ratchet Wrench is better)
3.Spanner 14mm (Install the expansion screw)
4.Hexagon wrench 5mm
5.Electric screwdriver+4mm Hexagon wrench
(suggest)
6.Wooden Mallet
7.Marking Pen
8.Percussion bit(8mm and 10mm)
9.Knife
10.Phillips screwdriver
Ø3
SICHERHEITSHINWEISE
Es wird dringend empfohlen, beim Aufbau Arbeitshandschuhe zu tragen.
Versuchen Sie nicht, die Terrassenüberdachung bei Wind oder Nässe aufzubauen.
Achten Sie darauf, dass Sie mit den Aluminiumprolen keine elektrischen
Oberleitungen berühren. Bei der Arbeit mit extrudiertem Aluminium sollten Sie stets
Schuhe und eine Schutzbrille tragen.Entsorgen Sie alle Plastikverpackungen sicher
und passen Sie auf, dass diese nicht in die Hände von kleinen Kindern gelangen.
Die Überdachung muss auf einer ebenen, waagerechten Fläche aufgestellt und
verankert werden. Während des Aufbaus sollten Sie sich nicht gegen die
Überdachung lehnen oder sie verschieben. Kinder sollten aus dem Arbeitsbereich
ferngehalten werden. Bauen Sie die Überdachung nicht an einem Ort auf, an dem sie
starkem Wind ausgesetzt ist.
Versuchen Sie nicht die Überdachung aufzubauen, wenn Sie müde sind, Drogen oder
Alkohol konsumiert haben oder zu Schwindelanfällen neigen.
Bei der Verwendung von Trittleitern und Elektrowerkzeugen sind die Sicherheitshin-
weise des Herstellers zu beachten.
Heiße Gegenstände wie z.B. kürzlich verwendete Grills, Schweißbrenner usw. dürfen
nicht unter der Terrassenüberdachung aufbewahrt werden.
Vergewissern Sie sich, dass sich im Untergrund keine verdeckten Rohrleitungen oder
Kabel benden, bevor Sie die Befestigungselemente in den Boden treiben.
ALLGEMEINE HINWEISE
Der Aufbau umfasst diverse Schritte. Planen Sie für die Montage mindestens 180
Minuten ein.
Wahl des Standortes: Wählen Sie einen sonnigen, ebenen Ort an dem es keine
überhängenden Bäume gibt.
Nutzen Sie die vorgebohrten Löcher im unteren Metallteil, wenn Sie die Überdachung
direkt mit einem massiven Betonfundament verbinden möchten.
Alle Bauteile sollten überprüft und in Reichweite bereitgelegt werden.
Bewahren Sie Kleinteile (Schrauben usw.) in einer Schale auf, damit sie nicht verloren
gehen.
Halten Sie das Dach frei von Schnee und Laub.
PFLEGE & INSTANDHALTUNG
Verwenden Sie bei Bedarf eine milde Reinigungslösung, um Ihre Terrassenüber-
dachung zu reinigen und spülen Sie sie mit kaltem, sauberem Wasser ab.
Verwenden Sie KEIN Aceton, Scheuermittel oder andere spezielle Reinigungsmittel
zum Reinigen der transparenten Platten zu reinigen.
BENÖTIGTE AUSRÜSTUNG
& WERKZEUGE
Schutzausrüstung:
1. Schutzhelm
2. Arbeitshandschuhe
3. Baumwolloverall mit langen Ärmeln
4. Erste-Hilfe-Kasten
5. Schutzbrille
Messwerkzeuge (metrisch):
1. Maßband (5 m)
2. Winkelmesser
3. Wasserwaage
!
SAFETY ADVICE
We strongly recommend the use of work gloves during assembly.
Do not attempt to assemble the Sliding roof canopy in windy or wet conditions,
Do not touch overhead power cables with the aluminum profiles.
Always wear shoes and safety goggles when working with extruded aluminum.
Dispose of all plastic bags safety-keep them out of reach of small children.
The Sliding roof canopy must be positioned and fixed on a flat level surface.
Do not lean against or push the Sliding roof canopy during construction.
Keep children away from the assemble area.
Do not position your Sliding roof canopy in an area exposed to excessive wind.
Do not attempt to assemble this Sliding roof canopy if you are tired ,have taken drugs or
alcohol or
if you are prone to dizzy spells.
If using a step ladder or power tools ensure that you follow the manufactures safety advice.
Hot items such as recently used grills, blowtorches etc.must not be stores in the Sliding roof
canopy .
Ensure there are no hidden pipes or cables in the ground before inserting the pegs.
GENERAL ADVICE
This is a multi-part assembly, Allow at least 180 minutes for assembly.
Selecting a site-choose a sunny level position away from overhanging trees.
If you are fixing your Sliding roof canopy directly to a solid concrete foundation use
the
pre drilled holes in the metal base supplied.
The component parts should be checked and laid out close at hand.
Keep all small parts(screws etc)in a bowl so they do not get lost.
Note that the door is hinged on the right hand side and therefore opens tothe right.
Keep roof clear of snow and leaves.
CARE & MAINTENANCE
When your Sliding roof canopy needs cleaning, use a mild detergent solution and
risen
with cols clean water.
Do NOT use acetone, abrasive cleaners or other special detergents to clean the
clear panels.
TOOLS & EQUIPMENT REQUIRED
Protective Equipment:
1.Helmet
2.Glove
3.Long Sleeve Cotton Overalls
4.Emergency Medicine Cabinet
5.Eye Shield
Measure (metric):
1.The Tape (5 m)
2.Angle Square
3.Level Meter
-2-
Installation Tool:
1.Triangle Stairs≈2m Height
2.Spanner 10mm (Ratchet Wrench is better)
3.Spanner 14mm (Install the expansion screw)
4.Hexagon wrench 5mm
5.Electric screwdriver+4mm Hexagon wrench
(suggest)
6.Wooden Mallet
7.Marking Pen
8.Percussion bit(8mm and 10mm)
9.Knife
10.Phillips screwdriver
Ø3
D
Montagewerkzeuge:
1. Stehleiter ≈ 2 m hoch
2. Schraubenschlüssel 10 mm
(besser: Ratschenschlüssel)
3. Schraubenschlüssel 14 mm
(zum Einbau der Dehnschraube)
4. Sechskantschlüssel 5 mm
5. Akkuschrauber + 4 mm Bit für Sechskantschrauben
6. Holzhammer
7. Markierstift
8. Schlagbohrer
(8 mm und 10 mm)
9. Cuttermesser
10. Kreuzschlitzschraubendreher
!
SAFETY ADVICE
We strongly recommend the use of work gloves during assembly.
Do not attempt to assemble the Sliding roof canopy in windy or wet conditions,
Do not touch overhead power cables with the aluminum profiles.
Always wear shoes and safety goggles when working with extruded aluminum.
Dispose of all plastic bags safety-keep them out of reach of small children.
The Sliding roof canopy must be positioned and fixed on a flat level surface.
Do not lean against or push the Sliding roof canopy during construction.
Keep children away from the assemble area.
Do not position your Sliding roof canopy in an area exposed to excessive wind.
Do not attempt to assemble this Sliding roof canopy if you are tired ,have taken drugs or
alcohol or
if you are prone to dizzy spells.
If using a step ladder or power tools ensure that you follow the manufactures safety advice.
Hot items such as recently used grills, blowtorches etc.must not be stores in the Sliding roof
canopy .
Ensure there are no hidden pipes or cables in the ground before inserting the pegs.
GENERAL ADVICE
This is a multi-part assembly, Allow at least 180 minutes for assembly.
Selecting a site-choose a sunny level position away from overhanging trees.
If you are fixing your Sliding roof canopy directly to a solid concrete foundation use
the
pre drilled holes in the metal base supplied.
The component parts should be checked and laid out close at hand.
Keep all small parts(screws etc)in a bowl so they do not get lost.
Note that the door is hinged on the right hand side and therefore opens tothe right.
Keep roof clear of snow and leaves.
CARE & MAINTENANCE
When your Sliding roof canopy needs cleaning, use a mild detergent solution and
risen
with cols clean water.
Do NOT use acetone, abrasive cleaners or other special detergents to clean the
clear panels.
TOOLS & EQUIPMENT REQUIRED
Protective Equipment:
1.Helmet
2.Glove
3.Long Sleeve Cotton Overalls
4.Emergency Medicine Cabinet
5.Eye Shield
Measure (metric):
1.The Tape (5 m)
2.Angle Square
3.Level Meter
-2-
Installation Tool:
1.Triangle Stairs≈2m Height
2.Spanner 10mm (Ratchet Wrench is better)
3.Spanner 14mm (Install the expansion screw)
4.Hexagon wrench 5mm
5.Electric screwdriver+4mm Hexagon wrench
(suggest)
6.Wooden Mallet
7.Marking Pen
8.Percussion bit(8mm and 10mm)
9.Knife
10.Phillips screwdriver
Ø3

- 3 -
!
OTHER CAUTIONS
1. 3 people required, one is for measuring & taking marks
to ensure the installation dimension ,the second person is
responsible for the installation and the last one do as
assistant and assure the safety.
2. Firstly, make sure the wall is strong enough for
installation. A brick concrete structures is the best choice.
3. High-power electric tools are required, ensure the
normal work of them and highly pay attention to electric
safety.
4. Be careful when using the kind of blunt tools, like
hammer.
5. Wearing long sleeve cotton overalls,gloves and helmet
during installation and wear safety glasses when using
power tools .
6.No up watching when working height, or the drop
screws may hurt your eyes and suffocation causing
accidentally when fall into your mouth.
7. No climbing, No standing on the tent to avoid falling
down.
8. If injuries immediately, using the first-aid kit to stop
bleeding, bind up, In case of emergency, taken
immediately to a nearby medical institutions.
PRODUCT SIZE
Make sure a good installation location
-3-
392cm
305cm
208cm 223cm
262cm
PRODUKTABMESSUNGEN
Vergewissern Sie sich, dass der ausgewählte Ort für den Aufbau geeignet ist
WEITERE VORSICHTSMAßNAHMEN
1. Für den Aufbau sind 3 Personen erforderlich: Eine Person sollte Maß
nehmen, Markierungen aufbringen und die Maße im Blick behalten, die
zweite Person ist für den Aufbau zuständig und die dritte Person assistiert
und achtet auf Sicherheitsvorkehrungen.
2. Stellen Sie vor dem Aufbau zunächst sicher, dass die Wand stabil genug
ist. Eine Ziegel- oder Betonkonstruktion ist am besten geeignet.
3. Für den Aufbau werden leistungsstarke elektrische Werkzeuge benötigt.
Vergewissern Sie sich, dass diese sich in einem einwandfreien Zustand
benden und achten Sie besonders auf die elektrische Sicherheit.
4. Seien Sie bei der Verwendung von stumpfen Werkzeugen, wie z.B.
einem Hammer, vorsichtig.
5. Tragen Sie während des Aufbaus einen Baumwolloverall mit langen
Ärmeln, Handschuhe und einen Schutzhelm sowie eine Schutzbrille bei der
Verwendung von elektrischen Werkzeugen.
6. Schauen Sie nicht nach oben, wenn Sie über Kopf arbeiten.
Herunterfallende Schrauben können Ihre Augen verletzen und versehentlich
verschluckte Schrauben können Ersticken hervorrufen.
7. Um Stürze zu vermeiden, sollten Sie nicht auf die Konstruktion klettern
oder auf ihr stehen.
8. Verwenden Sie bei Verletzungen den Erste-Hilfe-Kasten, um Blutungen
sofort zu stoppen. In Notfällen muss die verletzte Person sofort in eine
medizinische Einrichtung in der Nähe gebracht werden.
D

- 4 -
PARTS LIST
-4-
SKELETON
NO. Qty.
1 1 2870mm
2870mm
6 2
9 1
5 1
7 1
NO. Qty.
CONNECT
2870mm
B1 4
3914mm
3914mm
2100mm
3914mm
2531mm
2 2
3 2
NO. Qty.
B2L
B2R
B3L
B3R
1
1
1
1
SCREW
1
1
B5L
B5R
B6L
B6R
1
1
S4 4
88
S1 2
S2 2
S3 5
B7 1
NO. Qty. NO. Qty.
F4 1
F6 16
Fixed screw should be purchased
according to different ground.
B11 4
B2L B2R
B3L B3R
B5L
B6R
B6L
B5R
F8 16
F9 38
F8-1 16
F2-1 10
F3 58
TEILLISTE
GRUNDKONSTRUKTION VERBINDUNGSELEMENTE
NR. ANZ. NR. ANZ. NR. ANZ.
SCHRAUBEN
NR. ANZ. NR. ANZ.
Je nach Untergrund müssen Sie ggf. geeignete
Schrauben kaufen, um die Überdachung im Boden
zu verankern.
D

- 5 -
Towards the white film side to the sun as it is UV-protected.
SUMMARY STATEMENT FOR POLYCARBONATE PANEL
UV
x6
-5-
Install schematic diagram of Alu.frames
Window A Window A
Window B
Window B
Window C
Window C
WINDOW A x2
WINDOW B x2
WINDOW C x2
WINDOW
1
WINDOW C
WINDOW A
WINDOW B
9
5
7
2
2
3
3
B1
B1
B1
B1
B2L
B2R
B5R
B5L
B3L
B3R
S4
S4
S1
S1
6
6
B6L
B6R
B11
B11
S4
S4
S2
S3 S3 S3
S3
WINDOW C
WINDOW A
WINDOW B
FENSTERSCHEIBEN
ÜBERSICHT DER POLYCARBONAT-SCHEIBEN
SONNE
Montage-Diagramm für den
Aluminium-Rahmen
Die mit UV-Schutz ausgestatte Seite ist mit einer weißen Folie beschichtet.
Diese muss in Richtung der Sonne zeigen.
FENSTER A x2
FENSTER B x2
FENSTER C x2
FENSTER A FENSTER A
FENSTER B FENSTER B
FENSTER C FENSTER C
FENSTER A
FENSTER B
FENSTER C
FENSTER A
FENSTER B
FENSTER C
D

- 6 -
2 x2
-6-
Do not tighten the screws.
!
!
Drain outlet facing forward.
B2L
B5L
B2R B5R
2
2
2
B2R
B5R
B5L
B2L
2
F8 x6
F8-1 x6
F8
F8
F8
F8
F8
F8 F8
F8
F8
F8-1
F8-1
F8-1
F8-1
F8-1
F8-1
F8-1
F8-1
F8-1
F8
F8-1
B2L B2R B5L B5R
Die Ablauföffnung muss nach vorne zeigen.
Ziehen Sie die Schrauben noch nicht fest.
D

- 7 -
-7-
S1 x2
S1
S1
2
2
x2
Silicon
x2 Ⅱ
Silicon
Ⅰ
S1
2
Silikon Silikon
D

- 8 -
-8-
Do not tighten the screws.
!
3 x2
F8 x6
F8-1 x6
3
3
F8-1
F8-1
F8-1
F8-1
F8-1
F8-1
F8
F8 F8
F8
F8
F8
B3L B3R
B6L B6R
B6R
B6L
B3L
B3R
B6L
B3L
B6R
B3R
33
F8-1
F8-1
F8
F8 F8
F8
F8-1
F8-1
Ziehen Sie die Schrauben noch nicht fest. D

- 9 -
8 x8
6 x2
1
8
8
88
8
8
6
1
x2
Ⅱ
Ⅰ
-9-
Knife
Cuttermesser
D

- 10 -
F2 x6
-10-
7
1
6
6
7
7
7
7
6
6
1
F2
F2
F2
D

- 11 -
Make sure the frame on the ground,
then install the windows.
x2
x2
Window A
Window B
Window C
x2
6
Window A
61 6
Window A
Window B
Window C
Window B
Window C
Ⅱ
Ⅰ
Ⅲ
Window A
Window B
Window C
6
6
1
7
Window A
Window B
Window C
-11-
Legen Sie den Rahmen auf einen ebenen Untergrund, um die
Scheiben einzusetzen.
FENSTER A FENSTER A
FENSTER B FENSTER B
FENSTER C FENSTER C
FENSTER
FENSTER
FENSTER
FENSTER
FENSTER
FENSTER
FENSTER
FENSTER
FENSTER C
D

- 12 -
-12-
Ø3
F3 x10
1
7
6
6
x2
7
Window A
Ⅰ
Ⅲ
Ⅱx4
Ø3
0.5cm
Ø3
0.5cm
Ø3
0.5cm
Ø3
0.5cm
1
66
77
7
77
7
6
1
6
F3 F3
F3
FENSTER A
D

- 13 -
F2 x6 S3 x5
-13-
9
F2
9
6
S3
Ⅰx5 6
6
1
9
6
6
1
F2 F2 F2
9
Ⅱ
S3
S3
S3
S3
S3
D

- 14 -
-14-
S4 x4 F4
F3 x2
S4
6
C
B
F3
1
S4
B
C
F4
1
F4
BB
CC
AA
S4 S4
S4
6
C
B
F3
1
6
6
Window B
Window C
Window B
Window C
S4
S4
S4
Window A
Window A
FENSTER A
FENSTER A
FENSTER C
FENSTER C
FENSTER B
FENSTER B
D

- 15 -
-15-
F3
5
S3
5
F3 x6
5
Ⅰ
5
9
5
F3
F3
F3
9
1
6
6
D

- 16 -
Do not tighten the screws.
!
-16-
F3 x12
F2 x6
F2-1 x6
B2L
B5L
B5R
B2R
9
9
6
6
6
9
F8 x2
F8-1 x2
ⅠB2L B5L
9
F8-1
B2L
B5L
9
F8-1
F2-1
F2
F2-1F2
Back
6
F8-1
F8
F2
F2 F2-1
F8-1
F8
F2
F2
F2-1
Ⅱ
F3
F2
F8
F2
F8
B5L
B2L
B5R
B2R
F3
Ziehen Sie die Schrauben noch nicht fest.
D

- 17 -
Do not tighten the screws.
!
-17-
F3 x12
F2 x4
F2-1 x4
F8 x2
F8-1 x2
33
B3L
B6L
B6R
B3R
6
6
B3L
B6L
F8-1
B6R
B3R
F8-1
F8 F8
F2
B6L
B3L
B6R
B3R
F3
F8 F8
F2 F2 F2 F2
F3
F2
33
33
Ziehen Sie die Schrauben noch nicht fest.
D

- 18 -
-18-
Ø3
F3 x12
B11 x4
UP
F3x3
F3x3
F3x3
F3x3
B11 B11
WINDOW C
WINDOW C
B11 B11
6
61
F3 B8 Window C
x2
130mm
130mm
130mm130mm
Window C
Ø3 90
90
If the (window C) has 6 holes, you can ignore this step.
Window C
B8
B8
F3 F3 F3
F3 F3 F3
x2
Diesen Schritt können Sie auslassen, wenn sich in Fensterscheibe „C“ 6
Löcher benden.
FENSTER C
FENSTER C FENSTER C
FENSTER C
D

- 19 -
-19-
F3 x4
S2 x2 B7
S2 S2
Ø3
3
3
33
10cm
10cm
F3 F3
S2 S2
Ⅰ
B7
S2
3
D

- 20 -
-20-
B1
!
B1 x4 F6 x16
1.Choose the location of the installation.
2.Make No. 2 and No. 3 vertical to the ground.
3.Mark the position of No. 2 and No. 3 on the ground, then move away the canopy.
4.Put B1 on the position of No. 2 and No. 3, then mark 4 hole site as picture.
5.Drill holes on the ground by machine, then install F6 on B1.
3
3
2
2
Ⅰx4 Ⅱx4
F6
B1
B1
2
F2
F2 F2
F2
Ⅲx2
B1
3
F2
F2 F2
F2
Ⅳx2
F2 x16
1. Wählen Sie den Ort für die Montage aus.
2. Positionieren Sie die Teile Nr. 2 und 3, sodass sie aufrecht stehen.
3. Markieren Sie die Positionen der Teile Nr. 2 und 3 auf dem Boden und stellen
Sie die Überdachung anschließend beiseite.
4. Legen Sie die Teile Nr. B1 auf die Positionen der Teile 2 und 3 und markieren
Sie jeweils die Positionen der 4 Bohrlöcher (siehe Abbildung).
5. Bohren Sie die Löcher in den Untergrund und befestigen Sie die
Teile Nr. B1 mit den Schrauben Nr. F6. D
Table of contents
Other Konifera Garden House manuals
Popular Garden House manuals by other brands

OLT
OLT SunShed Greenhouse 8x12 Assembly manual

Palmako
Palmako PM70-6248 installation manual

vita
vita VA68890 Assembly guide

Palmako
Palmako EL16-2022 Assembly, installation and maintenance manual

Mercia Garden Products
Mercia Garden Products 04DTSTRDPN0804HGS-V1 manual

Best Barns
Best Barns Cypress Assembly Book

Dunster House
Dunster House E10-3050APVC-45 installation manual

USP
USP DuraMax 8 Ft x 8 Ft DuraPlus owner's manual

Palmako
Palmako PAV-5040-1KI-1 installation manual

Décor et Jardin
Décor et Jardin Confort F1/DPV-SPL manual

Palmako
Palmako FR34-4232 installation manual

Keter
Keter Bellevue Assembly instructions