manuals.online logo
Brands
  1. Home
  2. •
  3. Brands
  4. •
  5. Koolatron
  6. •
  7. Wine Cooler
  8. •
  9. Koolatron Elite Series User manual

Koolatron Elite Series User manual

www.koolatron.com
©2020 Koolatron, Inc. All rights reserved.
All specification are subject to change without notice. 09/2020-v1
H1S325
Warranty
This product is warranted to the retail consumer for 90 days from date of retail purchase,
against defects in material and workmanship.
WHAT IS COVERED
- Replacement parts and labor.
- Transportation charges to customer for the repaired product.
WHAT IS NOT COVERED
- Commercial or industrial use of this product.
- Damage caused by abuse, accident, misuse, or neglect.
- Transportation of the unit or component from the customer to Koolatron.
IMPLIED WARRANTIES
Any implied warranties, including the implied warranty of merchantability are also
limited to duration of 90 days from the date of retail purchase.
WARRANTY AND SERVICE PROCEDURE
Keep the original, dated, sales receipt with this manual. If you have a problem with your unit, or you require
replacement parts, please telephone the following number for assistance: 1-800-265-8456
A Koolatron Master Service Centre must perform all warranty work. Service after warranty
may be obtained at a Master Service Centre or at an authorized service dealer. Purchase
Receipt is required to establish warranty eligibility.
Koolatron has Master Service Centres at these locations:
U.S.A. - 4330 Commerce Dr., Batavia, NY 14020-4102
Canada - 139 Copernicus Blvd., Brantford, ON N3P1N4
Please Read These Instructions Carefully Before Use!
User Manual
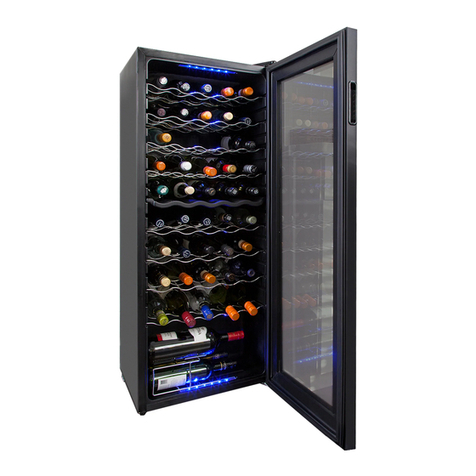
WC33
33-bottle
WINE CELLAR
FEATURES
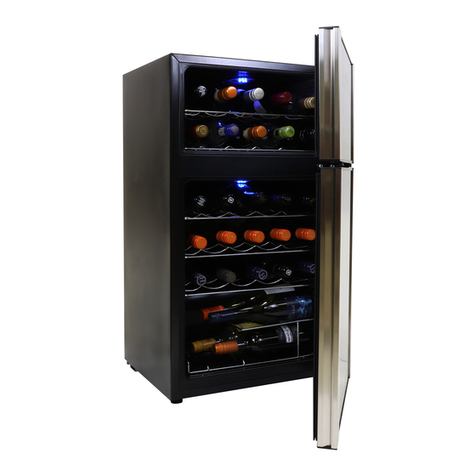
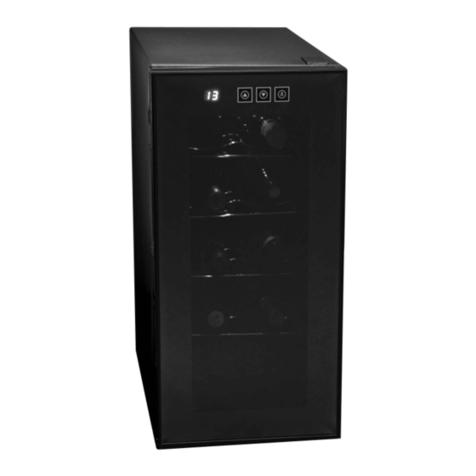
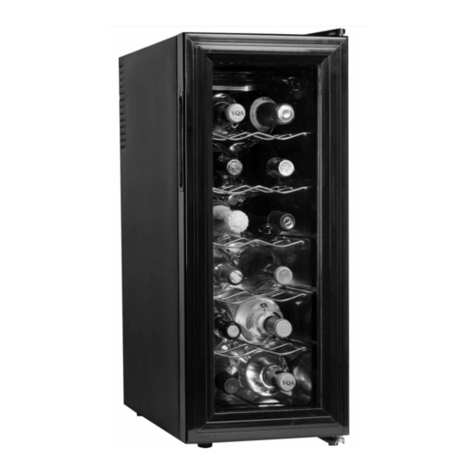
This thirtyfive-three wine cooler is designed to accept 25 oz liq. (750 ml) bottles up to 12.5" (315mm)
tall. The temperature settings are between 39°F and 64°F (4°C and 18°C). Temperature selection, °F or
°C, switchable.
SAFETY
- Household Use Only.
- This unit is an indoor appliance. DO NOT use OUTDOORS.
- There must be at least 5” (127 mm) clearance around the unit to ensure proper ventilation.
- Place unit on a flat surface, away from heat sources
- Do not use the appliance if the plug or cable is damaged. If the power cord is damaged and/or
is malfunctioning, please contact the manufacturer.
- Pull the plug out of the outlet to disconnect. DO NOT pull the cord.
- Do not touch the plug with wet hands.
- Never clean appliance parts with flammable fluids. Do not store or use gasoline or any other
flammable vapors and liquids in the vicinity of this or any other appliance. The fumes can create
a fire hazard or explosion.
- Unplug the appliance when not in use.
USE OF EXTENSION CORDS
Because of potential safety hazards under certain conditions, we strongly recommend against the use
ofan extension cord. However, if you must use an extension cord, it is absolutely necessary that it is
a UL listed (in the United States) or a CSA-listed (in Canada), 3-wire grounding type appliance extension
cord having a grounding type plug and outlet and that the electrical rating of the cord is 15 amperes
(minimum) and 120 volts.
SPECIFICATIONS
Power Requirements: AC 120V 60Hz 1.4A
Capacity: 33 x 750 ml (25.4 oz) bottles
Max. Temp.: 18°C +/- 3°C (64°F +/- 5°F) at 22°C (72°F) ambient air temp.
Min. Temp.: 4°C +/- 3°C (39°F +/- 5°F) at 22°C (72°F) ambient air temp.
Weight: 30.3 kgs / 66.8 lbs
INSTALLATION
• Choose a location where there is an electrical outlet within reach of the power cord. There must be
at least 5” (127 mm) clearance around the unit to ensure proper ventilation. Avoid locations in direct
sunlight, moist or extreme cold areas.
• Before connecting the appliance to the power source, let it stand upright for approximately 4 hours.
This will reduce the possibility of a malfunction in the cooling system from handling during
transportation.
• Clean the interior surface with lukewarm water using a soft cloth.
• The legs must be adjusted during installation in order to function properly. The leveling legs on the
front corners can be adjusted by turning clockwise to raise the appliance, and counter-clockwise to
lower it. Be sure to have the appliance sloped slightly backward to ensure that the door closes tightly.
• Before loading bottles, recommend to cool the unit to the setting temperature, and not to load many
bottles at the same time.
32
1. glass door
2. shelf racks
3. control panel
4. base rack
5. leveling leg
WINE STORAGE
1. The maximum capacity is 33 wine bottles (25.6 oz/750 ml) when placed vertically
as shown in Figures A, B and C.
2. In order to achieve the maximum capacity, arrange the 7 bottles in top rack as shown in Figure A,
arrange the 5 bottles in next four racks as shown in Figure B.
OPERATING INSTRUCTIONS
• Adjust the temperature by using the up and down arrows to various settings.
The temperature range is 39 °F to 64 °F (4 °C to 18 °C).
• Touch the up arrow ( ) and the temperature will increase 1 °F (1 °C).
• Touch the down arrow ( ) and the temperature will decrease 1 °F (1 °C).
• The new desired temperature will flash on the display for five seconds and then
back to the actual temperature which will gradually change until the set point is reached.
• Touch the “°C/°F” and the temperature display will switch between °C & °F.
The suggested temperature range for red wine is 53 °F to 61 °F (11 °C to 16 °C).
The suggested temperature range for white wine is 43 °F to 50 °F (6 °C to 10 °C).
REVERSING DOOR
54
NOTE: Do not tilt the appliance over 45 degree when reversing the door as
possible damage to the sealed system may occur.
1. Remove top hinge cover and 3 top hinge screws which are below it. Then remove top hinge.
2. Remove 1 cabinet plug and 1 door handle plug.
3. Remove the door.
4. Remove right and left leveling legs.
5. Remove the bottom hinge and 3 bottom hinge screws.
6. Install the bottom hinge on the other side of the leveling legs with 3 bottom
hinge screws.
7. Install right and left leveling legs. There are two holes below the wine cooler to fit
the two leveling legs.
8. Install the door.
9. Install the top hinge on the other side with 3 top hinge screws.
10. Install top cover above the top hinge and install 1 cabinet plugs on the
11. Adjust the leveling legs.
1. top hinge cover
2. top hinge screw
3. top hinge
4. cabinet plug
5. bottom hinge
6. door handle plug
7. bottom hinge screw
8. leveling legs
You can solve many common appliance problems easily, saving you the cost of a possible service call.
Try the suggestions below to see if you can solve the problem before calling the servicer.
PROBLEM POSSIBLE CAUSE
Appliance does not operate.
Appliance is not cold enough.
Compressor turns on and off
frequently.
The light does not work.
Moisture forms on the outside.
Moisture forms on the inside.
Vibrations.
The appliance seems to make
too much noise.
The door will not close properly.
Not plugged in.
The circuit breaker tripped or a blown fuse.
Check the temperature control setting.
External environment may require a colder setting.
The door is opened too often.
The door is not closed completely.
The door gasket does not seal properly.
The room temperature is hotter than normal.
The door is opened too often.
The door is not closed completely.
The temperature control is not set correctly.
The door gasket does not seal properly.
Not plugged in.
The circuit breaker tripped or a blown fuse.
The bulb has burned out.
The switch is in the “OFF” position.
This is normal during periods of high humidity. Wipe dry
using a soft cloth.
The door is slightly open.
This is normal during periods of high humidity.
Door is opened too long or too frequently.
Check to assure that the appliance is level and not touching
the wall.
The rattling noise may come from the flow of the refrigerant,
which is normal. As each cycle ends, you may hear gurgling
sounds caused by the flow of refrigerant in your appliance.
Contraction and expansion of the inside walls may
cause popping and crackling noises.
The appliance is not level.
The door was reversed and not properly installed.
The gasket is dirty.
The shelves are out of position.
MAINTENANCE
76
TROUBLESHOOTING GUIDE
CLEANING YOUR WINE COOLER
• Turn off the power, unplug the appliance, and remove all items including shelves and rack.
• Wash the inside surfaces with warm water and baking soda solution. The solution should be about
2 tablespoons of baking soda with a quart of water.
• Wash the shelves with a mild detergent solution.
• Wring excess water out of the sponge or cloth when cleaning area of the controls, or any
electrical parts.
• Wash the outside cabinet with warm water and mild liquid detergent. Rinse well and wipe dry with a
clean soft cloth.
• The door gasket must be kept clean to ensure a proper seal
POWER FAILURE
Most power failures are corrected within a few hours and should not affect the temperature of your
appliance if you minimize the number of times the door is opened. If the power is going to be off for
a longer period of time, you need to take the proper steps to protect your contents.
VACATION TIME
• Short vacations: Leave the Wine Cooler operating during vacations of less than three weeks.
• Long vacations: If the appliance will not be used for several months, remove all items and turn off
the appliance. Clean and dry the interior thoroughly. To prevent door and mold growth, leave the door
open slightly: blocking it open if necessary.
MOVING YOUR WINE COOLER
• Remove all items.
• Securely tape down all loose items (shelves) inside your appliance.
• Turn the adjustable leg up to the base to avoid damage.
• Tape the door shut.
• Be sure the appliance stays secure in the upright position during transportation. Also protect the outside
of the appliance with a blanket, or similar item.
ENERGY SAVING TIPS
The Wine Cooler should be located in the coolest area of the room, away from heat producing appliances,
and out of the direct sunlight
WARNING! This product contains chemicals known to
the State of California to cause cancer, and birth defects
or other reproductive harm. www.P65Warnings.ca.gov
This manual suits for next models

1

Other Koolatron Wine Cooler manuals

Koolatron WC18-DZ User manual

Koolatron

Koolatron WC18-DZ User manual

Koolatron WC45 User manual

Koolatron

Koolatron WC45 User manual

Koolatron KWT10BN User manual

Koolatron

Koolatron KWT10BN User manual

Koolatron WC18-MG User manual

Koolatron

Koolatron WC18-MG User manual

Koolatron KWT10BN User manual

Koolatron

Koolatron KWT10BN User manual

Koolatron KWT10BN User manual

Koolatron

Koolatron KWT10BN User manual

Koolatron WC29 User manual

Koolatron

Koolatron WC29 User manual

Koolatron KBWC7SS User manual

Koolatron

Koolatron KBWC7SS User manual

Koolatron wine cooler Manual

Koolatron

Koolatron wine cooler Manual

Koolatron WC12-35D User manual

Koolatron

Koolatron WC12-35D User manual

Koolatron WC06 User manual

Koolatron

Koolatron WC06 User manual

Koolatron WC06G User manual

Koolatron

Koolatron WC06G User manual

Koolatron WC12-DZ User manual

Koolatron

Koolatron WC12-DZ User manual

Koolatron WC12 User manual

Koolatron

Koolatron WC12 User manual

Koolatron WC12MG User manual

Koolatron

Koolatron WC12MG User manual

Koolatron WC04 Manual

Koolatron

Koolatron WC04 Manual

Koolatron WC06 User manual

Koolatron

Koolatron WC06 User manual

Koolatron wc68dz-b User manual

Koolatron

Koolatron wc68dz-b User manual

Koolatron WC20 User manual

Koolatron

Koolatron WC20 User manual

Koolatron WC24 User manual

Koolatron

Koolatron WC24 User manual

Koolatron WC12-DZ User manual

Koolatron

Koolatron WC12-DZ User manual

Koolatron WC29 User manual

Koolatron

Koolatron WC29 User manual

Koolatron WC12MG User manual

Koolatron

Koolatron WC12MG User manual

Koolatron WC04 User manual

Koolatron

Koolatron WC04 User manual

Popular Wine Cooler manuals by other brands

Professional Series Collezioni PS72082 user manual

Professional Series

Professional Series Collezioni PS72082 user manual

Thor Kitchen TWC1501 Use & care manual

Thor Kitchen

Thor Kitchen TWC1501 Use & care manual

U-Line U-3060FZRS-00A User guide & service manual

U-Line

U-Line U-3060FZRS-00A User guide & service manual

eta 9533 90010F Instructions for use

eta

eta 9533 90010F Instructions for use

Vinotemp VT-34GS instruction manual

Vinotemp

Vinotemp VT-34GS instruction manual

Bosch KSW30V80GB operating instructions

Bosch

Bosch KSW30V80GB operating instructions

Indel B BI 24 HOME PLUS Instructions for use

Indel B

Indel B BI 24 HOME PLUS Instructions for use

Ariston WL 24 A user guide

Ariston

Ariston WL 24 A user guide

Haier HWS84GA user guide

Haier

Haier HWS84GA user guide

VinPodium HC04 Instruction booklet

VinPodium

VinPodium HC04 Instruction booklet

Avanti WCR4600S instruction manual

Avanti

Avanti WCR4600S instruction manual

Viking Designer DDWB300 Specification sheet

Viking

Viking Designer DDWB300 Specification sheet

Avanti WCR684C instruction manual

Avanti

Avanti WCR684C instruction manual

Haier WS53GDA user manual

Haier

Haier WS53GDA user manual

Klarstein SHIRAZ 39 DUO user manual

Klarstein

Klarstein SHIRAZ 39 DUO user manual

Summit ALWC532 owner's manual

Summit

Summit ALWC532 owner's manual

Awanti WC1500DSS instruction manual

Awanti

Awanti WC1500DSS instruction manual

Monogram ZDBR240 owner's manual

Monogram

Monogram ZDBR240 owner's manual

manuals.online logo
manuals.online logoBrands
  • About & Mission
  • Contact us
  • Privacy Policy
  • Terms and Conditions

Copyright 2025 Manuals.Online. All Rights Reserved.