Korg pss-50 User manual
CM
^
PSS-50
PROGRAMMABLE
SUPER
SECTION
OWNER'S
MANUAL
Scan by Manual Manor
http://www.markglinsky.com/ManualManor.html
SUPER
SECTION
PSS-50
PROGRAMMABLE
SUPER
SECTION
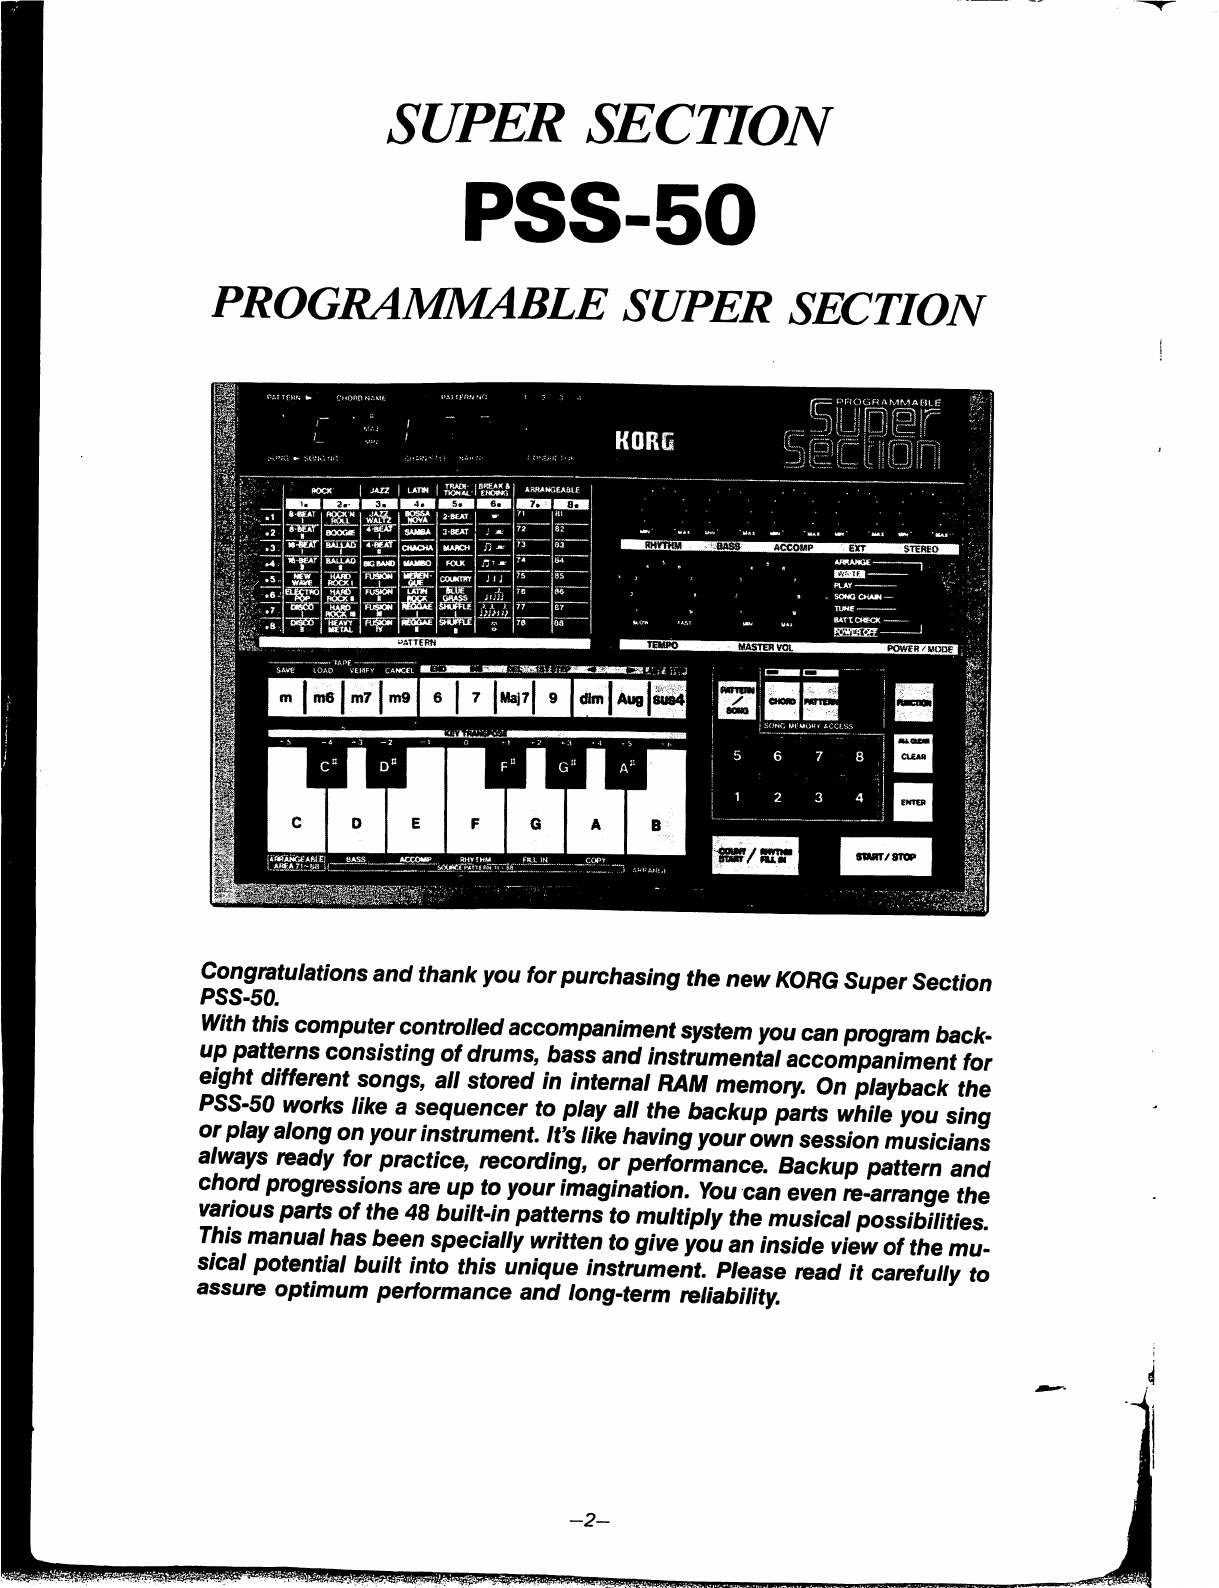
Congratulations
and
thank
you
for
purchasing
the
new
KORG
Super
Section
PSS-50.
With
this
computer
controlled
accompaniment
system
you
can
program
back
up
patterns
consisting
of
drums,
bass
and
instrumental
accompaniment
for
eight
different
songs,
all
stored
in
internal
RAM
memory.
On
playback
the
PSS-50
works
like
a
sequencer
to
play
all
the
backup
parts
while
you
sing
orplayaiong
on
your
instrument.
It's
like
having
your
own
session
musicians
always
ready
for
practice,
recording,
or
performance.
Backup
pattern
and
chord
progressions
are
up
to
your
imagination.
You can
even
re-arrange
the
various
parts
of
the
48
built-in
patterns
to
multiply
the
musical
possibilities
This
manual
has
been
specially
written
to
give
you
an
inside
view
of
the
mu
sical
potential
built
into
this
unique
instrument.
Please
read
it
carefully
to
assure
optimum
performance
and
long-term
reliability.
-2-
Scan by Manual Manor
http://www.markglinsky.com/ManualManor.html

FEATURES
OE
1
There
are
40
preset
backup
patterns
plus
8
break
and
ending
options.
You
have
a
wide
variety
of
styles
to
choose
from
including
heavy
metal
and
reggae.
Change
backup
patterns
every
bar
and
change
chords
(and
fill-in
timing)
every
half
bar.
Each
of
the
eight
song
memories
holds
80
bars
so
you
can
have
up
to
640
different
bars
of
music
at
once,
on
board.
Link
the
eight
song
memories
to
form
a
chain
of
up
to
16
steps,
making
a
complete
1280-bar
composition
for
automatic
playback.
Break
and
ending
patterns
are
included.
Fill-ins
can
be
programmed
for
extra
variety.
New
patterns
can
be
arranged
from
the
bass,
drum,
accompaniment,
and
fill-in
parts
of
preset
patterns.
Percussion
sounds
are
amazingly
accurate
because
the
PSS-50
uses
digital
PCM
technology
for
its
percussion
sound
sources.
Drum
output
is
set
in
a
stereo
array
for
greater
realism.
Tape
interface
lets
you
expand
your
song
library
infinitely.
Entire
PSS-50
memory
contents
can
be
changed
in
a few
seconds.
Parts
of
songs
can
be
rearranged
by
using
the
versatile
electronic
editing
facilities.
3O
-3-
Scan by Manual Manor
http://www.markglinsky.com/ManualManor.html
CONTENTS
■
PRECAUTIONS
5
■
FRONT
PANEL
6
■
DEMONSTRATION
7
■
BASIC
USE
8
■
OVERVIEW
11
I
OPERATION
MODES
12
1.
MANUAL
PLAY
12
2.
SONG
WRITE
13
3.
SONG
PLAY
17
4.
SONG
CHAIN
18
5.
FUNCTIONS
(FRONT
PANEL,
REAR
PANEL,
SIDE
PANEL)
20
6.
TUNING
24
7.
BATTERY
CHECK
&
CHANGING
BATTERIES
25
II
FURTHER
APPLICATIONS
26
1.
ARRANGE
26
2.
KEY
TRANSPOSE
29
3.
EDIT
30
4.
CONTINUE
START
37
5.
TAPE
INTERFACE
37
■
SPECIFICATIONS
43
How
to
Use
the
Rest
of
this
Manual
If
you
have
read
this
manual
from
the
beginning,
you
now
have
an
idea
of
what
you
can
do
with
the
PSS-50.
The
next
section
"OPERATION
MODES"
will
go
into
more
detail
about
the
basic
WRITE,
PLA
Y,
and
CHAIN
modes
of
operation.
The
succeeding
"FURTHER
APPLICATIONS"
section
will
explain
the
more
advanced
aspects
of
the
PSS-50,
going
into
particular
detail
about
the
valuable
edit
ing
features.
-4-
Scan by Manual Manor
http://www.markglinsky.com/ManualManor.html
PRECAUTIONS
Please
read
and
observe
the
following
precautions
to
as
sure
reliability
and
safety.
To
avoid
malfunction
do
not
use
this
unit
in
the
following
locations
for
long
periods
of
time:
*
In
direct
sunlight.
*
Exposed
to
extremes
of
temperature
or
humidity.
*
In
sandy
or
dusty
places.
At
freezing
temperature
(32
degrees
F/0
degrees
C)
and
below,
parts
of
the
control
panel
sheet
may
appear
to
warp
or
swell up.
It
may
be
palyed
under
these
conditions
and
its
appearance
will
return
to
normal
when
brought
back
to
ordinary
room
temperature
(68
degrees
F/2D
degrees
C).
^
teui
*
As
a
digital
device
employing
computer
circuitry,
the
PSS-50
is
subject
to
interference
from
other
electri
cal
devices
and
fluorescent
lamps.
Avoid
use
near
other
applicances,
particularly
those
with
motors
If
operation
becomes
erratic,
turn
off
power,
then
turn
it
back
on.
*
The
PSS-50
body
is
made
of
ABS
plastic
which
may
pick
up
a
static
charge
leading
to
erratic
operation.
Therefore,
connect
to
an
amp
or
other
grounded
device
before
turning
on
PSS-50
power.
1
MEMORY
PROTECTION
.
t
«f>
ij
?<
*
To
protect
your
programmed
memory
contents,
always
leave
batteries
in
the
PSS-50,
even
if
using
an
AC
adaptor.
Batteries
back
up
the
power
supply
to
protect
memory
contents
even
when
power
is
off
Memory
contents
may
be
erased
if
batteries
become
depleted
or
are
not
put
in.
*
Memory
contents
will
remain
protected
if
you
do
not
take
longer
than
five
minutes
to
replace
batteries.
*
If
you
have
saved
your
program
data
on
tape,
then
you can
always
load
that
data
if
memory
is
erased.
The
demo
data
tape
can
be
loaded
in
the
same
way.
..-,
:
^.::£^^
Knobs
and
switches
are
designed
to
provide
positive
operation
with
a
light
touch.
Excessive
force
may
cause
damage.
[MAINTENANCE'
.y
Wipe
the
exterior
with
a
soft,
dry
cloth.
Never
use
paint
thinner,
benzene
or
other
solvents.
XJiti
tlfet^
^
n
Requires
eight
size
SUM-3
(15V)
batteries
or
supplied
AC
adaptor
(KORG
KAC-301
9V).
For
fullest
warranty
protection,
return
your
properly
filled
in
warranty
card.
Store
this
manual
in
a
safe
place
for
future
reference.
-5-
Scan by Manual Manor
http://www.markglinsky.com/ManualManor.html
Table of contents
Other Korg Music Mixer manuals


