K+H O 500 C User manual

K+H Vertriebs- und
Entwicklungsgesellschaft mbH
Auf dem Kessellande 4a • 30900 Wedemark/Germany
Tel: +49 (0) 5130 5848-0
Fax: +49 (0) 5130 5848-11
Email: infoklein-hummel.de
www.klein-hummel.de
www.klein-hummel.com
Digital Studio Monitor
Installation and Operation Manual
O 500 C
058-E0012
V
ersion 021025

Page 2
Fig.1: Front view Fig.2:Rearview
Fig. 3: IR Remote control RC-55

Page 3
Contents:
0 Safety instructions...................................................................................................................4
1 Description
1.1 Advantages of digitally controlled monitor systems...............................................................5
1.2Systemconcept......................................................................................................................6
1.3 Block diagram.........................................................................................................................7
1.4Themodulesofthedigital controller.......................................................................................9
.
2 Installation / Setup
2.1Positioning/Mounting .........................................................................................................12
2.2Connectorsandwiring .........................................................................................................14
2.3VF-display on the front baffle...............................................................................................18
2.4Recallof the loudspeaker parameter setup.........................................................................18
3 Operation / Description of Menus
3.1 Menu structure and concept of operation............................................................................19
3.2MainMenu............................................................................................................................21
3.3 System Menu........................................................................................................................23
3.4EQMenu...............................................................................................................................24
4 Remote Control
4.1Infrared remotecontrol.........................................................................................................26
4.2Controlvia RS-232 or MIDI..................................................................................................27
5 Room EQ setup
5.1RoomEQ..............................................................................................................................30
5.2Parametric EQ(PEQ)...........................................................................................................32
.
6 Calculation of parameters....................................................................................................35
7Technical data.............................................................................................................36

Page 4
0 Safety Instructions
It is absolutely essential that you read these safety instructions carefully before connecting and
using this K+H product. Your safety depends on it. Furthermore, failure to follow these instructions
voids the warranty. To ensure safe operation for years to come, keep these instructions in a safe place for
future reference. K+H has manufactured this product in accordance with IEC 1992 (SEC) 39 standards, then
tested and delivered it in safe operating condition. To maintain it in this condition, you must:
•observe all safety instructions,
•use the product only as described herein,
•have any maintenance, repairs, or modifications performed only by K+H or other authorized personnel,
and
•ensure that the room in which you use this product is wired in accordance with the local electrical code.
Warning!
•When the interior of the cabinet is exposed, touching some parts can lead to an electric shock.
•If you need to gain access to the interior electronics of the unit, always disconnect the unit from any and
all power sources first.
•Any repairs, maintenance, or other service of the unit when its interior compartment is
exposed may only be performed safely (in accordance with VBG 4) by authorized
techniciansfamiliar with allthe risksinvolved.Even inan unplugged state,a fullycharged
capacitor in the unit can zap the unsuspecting.
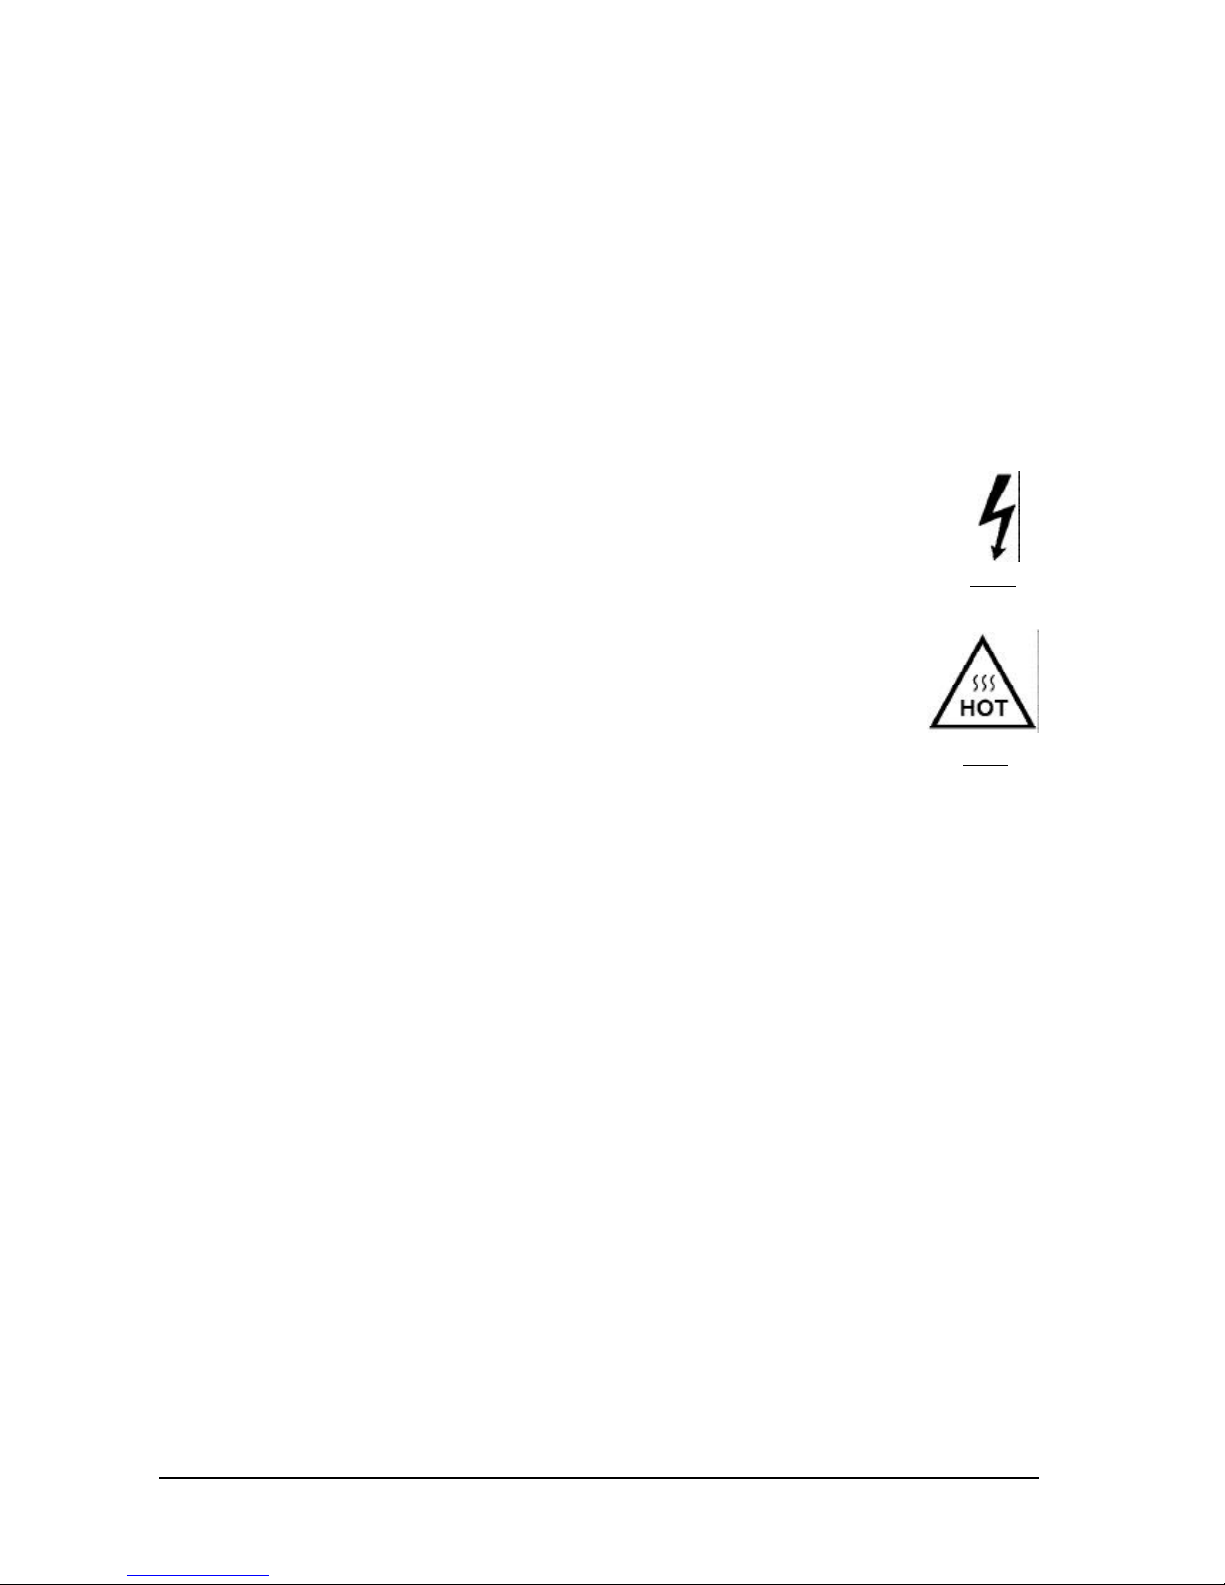
•Loudspeakeroutput jacks labeledwith the IEC 417/5036 emblem (Fig. 10, right)may be
carrying dangerously high voltages. If your unit has this emblem, ensure that any
connections to be made between these jacks and the speakers themselves are made
before powering up the unit, and are done so only with manufacturer-approved
interconnecting cables.
•If you need to replace any fuses, ensure that the replacements are of exactly the same
type, value and voltage as the originals, as spelled out in the technical specifications at
the rear of this manual.
•Do not use "repaired" fuses.
•If you do not have any fuses on hand of the specified size, type, and value, do not hot-
wire the contacts in the holder by short-circuiting them.
•Certain areas of the cabinet, cover, and rear panel can achieve extreme temperatures
and are therefore marked with a "HOT" label (Fig. 11). Refrain from touching any heat
sinkor ventilationgrille.
•High volume levels are known to cause permanent - i.e. irreversible - hearing damage,
especiallywhen listened towithout sufficientbreaks. The higherthe levels,the more frequentand exten-
ded must be the breaks. Avoid standing too close to loudspeakers that are being driven at high levels. If
youmustbeexposedtohigh sound pressurelevelsoveranextendedperiod of time,usehearingprotection.
Mains Connection:
•This unit is designed for continuous operation.
•Ensure that the operating voltage of the unit matches that of the local mains current (AC line voltage).
•Always check before connecting the power cable to the mains socket that the power switch on the unit
itself is set to off ("O").
•Use the power cable or power supply that came with the unit to connect to the mains socket (wall outlet).
•Power supply: a damaged power cable may not be repaired. Use a new cable.
•Avoidpluggingthe mains cableintoa power stripthatalready has severalotherpower-consuming devices
connected to it.
•Avoid using extension cables. The unit must be connected to a mains socket close to it, and that socket
should be freely accessible.
Installation:
•This product may only be placed on a stable, clean, horizontal surface.
•Do not expose this product to vibration.
•Do not operate this product anywhere near water or other liquids. Do not use it near a sink, swimming
pool,bathtub, or inany damp roomor area. Electricalshocks carried throughwater can kill.Do not place
any beverages whatsoever on or near this product, as liquids can kill electronic components.
•Ensure sufficient ventilation around the product to allow for adequate heat dissipation, especially near
the rear panel and the sides of the cabinet (minimum of 8 inches from the nearest wall). The unit may
only be installed in a rack if measures are taken to ensure sufficient ventilation and if the mounting
instructions of the manufacturer are followed. Do not block or cover any heat sink, fan, or vent.
•Do not place the product where it will be in the path of direct sunlight, and keep it a safe distance away
from radiators and other heaters of any kind.
•If you bring this product from a cold environment into a warm one (such as from a vehicle into a studio),
it is quite possible that condensation will form inside the cabinet. Please allow the unit sufficient time for
acclimatisation to room temperature (minimum thirty minutes) before connecting and powering up.
•To avoid accidents, do not use any accessory equipment with this product which is not approved by the
manufacturer, particularly mounting accessories. Do not place this unit on any unstable platform, cart,
stand or table. Should the unit fall, it can cause bodily injury to persons, or can be damaged itself.
•To protect this product from lightning damage during a thunderstorm or from power surges during an
extended absence, disconnect the power cable from the wall outlet.
Fig. 10
Fig. 11

Page 5
1.1 Advantages of Digitally Controlled Monitor Systems
-optimizing of frequency responses, e.g. an absolutely linear adjustment from 30 Hz – 20 kHz.
Any other desired frequency curves can be set/adjusted/stored
-settingof phase response(s) in any combination,suchas linear-phase, minimum-phase, mixed-
phase with the resulting group-delays (constant group delay, continiously decreasing, etc.)
-attack and release times of speakers will be remarkably improved
-more precise stereo-locating, as there is virtually no deviation in a stereo pair
-programmed EQ settings can be recalled instantly for special needs and functions
-a nearly unlimited number of EQ-settings can be stored and switched easily, e.g. for different
listening locations in the same room, second control-room, different operating modes (mixing /
demonstration) etc.
-the delay-times of the speakers can be adjusted and stored for different listening distances
-the monitor can be delayed for optimized sync with analog/digital film/video, as a delay-line in
high-quality multi-speaker setups, concerts, multi-media or surround setups
-the slope at the crossover frequencies can be adjusted up to 96 dB per octave, which can be
said is close to ideal (but never possible with analog designs). In this case the overlapping
frequenciesreproducedfrombothdriversinthex-overareaisonlyafewHzwide,whichhasthe
following advantages:
1. every driver can be used in it’s perfect frequency-response range
2.in the areaof the crossover frequency we can avoidphase-cancellations to alarge extent
3. it is possible to select a perfect horn for every driver with it’s own directivity (individual
depth of the horns can be adjusted by the system).
ðThe directivity can be designed to be almost perfect for the horizontal
and vertical level!
-problems caused by resonances and reflections in control rooms can be minimized and
compensated to a high degree by adjusting the response of the speaker-system in the room.
This will be made in a separate EQ and measuring session in the control-room
-for protection of the drivers fast and efficient limiters are provided which take care of the short-
term max-level and the peak-power capacity of the driver, so in case of a possible overload the
limiterswillredurcethelevels(feedforward limiter) without producing any distortions, as it is the
case in analog limiters.
-Digital and analog audio input connectors
-Infrared remote-control for all parameters (can be selected individually without any PC)

Page 6
1.2 System Concept
-Active 3-way studio monitor with integrated digital controller and high performance amplifiers
with power amplifiers of 400 W RMS for the woofer, 230 W RMS for midrange driver and 290 W
RMS for the tweeter
Concept of Speakers and Cabinet:
-12“woofer with alloy-chassis,forcedaircoolingvoicecoil, highefficiencyandlong,linear excursion
-3“ voicecoil midrange dome in sealed enclosure, with strong magnet and lowest distortion
-1“ titanium dome tweeter with high efficiency and ultra-low distortion
-Cabinetmadeofstrong, resonance free HDF material. It isfittedwithamoulded front-baffle with
integratedhorns and ducted ports for compression-freelowfrequency response, and optimized
horns for midrange/tweeter, offering perfect dispersion for all three speakers by minimizing
interferencesandreflections
-Cabinet comes with multiple fittings for an individual choice of mounting adaptors
Digital Controller:
-Theintegrateddigitalcontroller includes the electronic crossover, the EQ for everydriver-system,
adelayofseveral millisecondsperchassis,alllimiterfunctions,amasterdelay,flexibleadjustments
for local EQ and a fully parametric 10-band EQ
-Independent adjustments for amplitude and phase are provided for every chassis and for the
complete system by the use of digital FIR filter technology (FIR = Finite Impulse Response)
-Unlike other internal or external digital controllers, the controller of the O 500 C is programmed
withindividual filter settingsforeverydriver system whichweremeasuredinan anechoicchamber
and set at the factory. All tolerances of the individual drivers, the power amps and the controller
itself are recorded and will be taken into the calculation for the setup / equalizing of every
specific O 500 C monitor system
-Adjustment for positioning in the control room or studio can be made by the fully parametric EQ
with IIR filters directly in the monitor
-IndividualFIRfilter settings can be madebyaligningthe O 500 C init’sfinal position in the studio
(optional). This way the room specific modes, such as resonances, standing waves etc. can be
compensated
-A precise limiter section will allow for perfect system management by offering a “ look ahead
signal analysis“ of the clipping mode of all power amps, the max. excursion of the drivers and
the long term temperature management and it’s peak allowances
-Theimportant stages inthe signal path of the digital controllerare calculated accuratelywith 48
Bitperformance
-StackedA/Dconverters(gain ranging) in Delta/Sigma technology offer awidedynamicrangeon
the input side, by resulting in ultra-low distortion figures at the same time
-High performance quality D/A converters in Delta/Sigma technology in all input/output stages
-High quality concept for the PSU and fully capsuled controller electronics
-Variety of analog and digital audio connections
-Ergonomic and easy operation via infrared remote-control (no PC needed)

Page 7
-Several levels of protection to avoid accidential mis-settings (user security levels)
-Remote control and link functions of the monitors via RS 232 or MIDI
-An output for an additional subwoofer is provided. FIR filtering for this output is provided inside
the O 500 C.
Poweramplifier:
-The O 500 C is fitted with high-performance, state-of-the-art power amps, which can deliver
clean 400 W RMS for the woofer, 230 W RMS for the midrange dome and 290 W RMS for the
tweeter.
-Stacked power-supply for better amplifier efficiency
-Very low non linear distortions: woofer< -110 dB, midrange < -100 dB, tweeter < -90 dB
1.3 Block Diagram
In Fig. 1.3/1 all modules which are included in the digital active studio monitor O 500 C can be
seen. All modules shown are integrated in the monitor cabinet:
-Digital controller
-Three power amplifiers
-PCB with display, IR-receiver and illuminated logo
-PSU with torrodial transformer, PCB and regulators
-3 drivers
Allaudioparameters,exceptforthepoweramplifiers,arecontrolledbytheinternalDSP.Ananalog
signal,connectedtotheO500 C,willbeA/DconvertedandthenfedtotheDSP,whereallparameters
selectedare processed inthe digital domain. Whenthe signal has passed all stages inthe DSP, it
willbe D/A converted and thensent to the analog poweramplifiers.The analog output signaltothe
external, optional subwoofer can be taken from the transformer-balanced XLR output on the rear
of the monitor. The power amplifiers of the O 500 C have been designed in a bipolar topology and
are built onto one PCB. Heavy-duty alloy heatsinks with a large surface allow for high power
performance under „cool“ conditions.
The digital controller consists of a DSP-PCB, which carries the A/D and D/A converters with the
analog input and output stages, plus the powerful DSP. A further PCB carries the microcomputer
which contains the controller software plus the „core of the system“ the 8 Bit microcontroller.
Both PCB’s are shielded in a MU-metal case to avoid hum and side noises.
The VF display of the digital controller, the limit signalling and the IR receiver are mounted at the
top of the front baffle.
The power supply system has separate voltages for the analog and digital signals, as well as for
thepoweramplifiers.OntheDSPandthemicrocomputerPCB anadditionalstabilisation isprovided,
again separated for the A/D and the D/A signal paths.

Page 8
Fig. 1.3/1: Block diagram of the O 500 C studio monitor
uC
VFL
Display
DSP Board
Power Supply Board
Torroidial
Transformer
Mains
Socket
Microcomputer Board
Power Amplifier Board
IR
Decoder
RS 232 / MIDI
High
Freq.
Driver
Mid Freq.
Driver
Low Freq.
Driver
Display Board
Limit
LED
Speaker Enclosure
DSP
DSP
Main
Switch
I / O - Board
Digital Input
Analog
Input
A/D
D/A
Subwoofer
Output
Digital Controller
High
Mid
Low
Sub
D/A
D/A
D/A

Page 9
1.4 The Modules of the Digital Controller
This is a brief description of the „modules“ provided inside the O 500 C. Please understand that
thesemodulesarenot meant to be physically independent, many of themarepartoftheintegrated
DSP.To keep the descriptionsimple and understandable, itis restricted to themodules which are
important for understanding the internal functions in the signal path.
-Analog Input: The input for the analog signals isbalanced on studio-level ( + 6 dB) and canbe
selected between electronically balanced or transformer balanced by a switch next to the XLR.
-AD Converter: inthis stage of A/D conversion the „gain rangeing“ method was chosen to obtain
themax.possibledynamicintheinputstagebyusingtwoA/D converters. The first A/D converter
isfed directly from the audioinput signal and is setto produce a fixed levelof gain, which is then
processedintothesecondconverter.Thiswayamuchhigherdynamicheadroomandgainthan
in any other A/D design is obtained.
-Digital Input: The O 500 C has digital inputs following the AES/EBU format, connected to a
transformer-balanced XLR socket, and a S-PDIF format connecting to a BNC socket.
-Input Select: The selection of the input-type is made via the remote control in the main menu,
step INPUT SELECT, here shown as a selector switch.
-Digital Output: Thedigitaloutputof the O 500 C is in the AES/EBU format connected to an XLR
socket.Factory preset is parallel „inputtooutput“, i.e. a direct linktothe output, so the signal can
befedtothenextO500C in a stereo setup. In the menu DIGITAL INPUT SELECT you now may
choose the L or R channel from the digital data stream.
.
-EQ Gain: at this stage the digital signal can be reduced or raised by an adjustment of the word
lengthto match thepeaks or dips inthe following parametric EQ. The level selectedat this point
also remains valid, if the PEQ is in EQ OFF. This way it is possible to make A/B comparisons
without level mismatch.
-10-Band parametric IIR EQ: the parametric EQ ( PEQ ) of the O 500 C is designed as an IIR
digital filter and contains 10 fully parametric bands with selectable characteristics. By using
these filters it is possible to obtain a system-EQ separately for the LEFT and RIGHT channel.
The full adjustment procedure of the EQ’s is explained in chapter 5.2
-Room IIR EQ:this room EQisdesigned to be anIIRfilter, just like the PEQfilters. It is designed
forsimplecompensation of typical room influencesandunlinearities. The adjustment is madein
the EQ setting of the EQ menu, as described in chapter 5.1.
-Master Delay:The master delay is thefinalstage in the signal path,beforethe signal is devided
by the 4-way electronic crossover. Adjustment is made in the menu „MASTER DELAY“, the
delaytime selected is effecting all four signals. It can be adjusted in meters or seconds.
In the crossover section there are four identical modules from which the user may select the
wantedparameters. As these paths arealmostidentical, ( the MID, LOW andSUBhave additional
downsamplingfilterstocompensateforcalculation-speed)theHIGH signal to describe the functions
is chosen here.
-High (Mid, Low, Sub) Delay: every signal in the 4-way crossover can be delayed individually.
This can be done in the MAIN menuChannel Delay.
-High (Mid, Low, Sub) X-Over + Speaker EQ:Here the bandpass filters were chosen tobeFIR
digital filters for every driver. Please note that this feature does not only offer an EQ for the

Page10
Input
Transformer
DigitalIn
(S/PDIF)
DigitalIn
(AES/EBU)
DigitalInsert/Trough
(AES/EBU)
Analog In
(XLR-3)
Sub Output
(XLR-3)
ADAD
Dual24 Bit
delta/sigma
ADConverter
InputLevel
LEDBargaphs
transf.
coupled
electr.
symm.
Digital
-Input(internalClock)
-Insert(externalClock
Analog
input
1.)
InputGain
Mute
Analog /DigitalGainOffset
2.)
High (Mid,Low,Sub)Gain
High (Mid,Low,Sub)Mute
=verstärkungsbestimmendes
Element
IIREQ
Gain
Input
Select
+
-
Symmetrical
OutputStage
10 Band
ParametricIIREQ
+
-
Symmetrical
OutputStage
+
-
Symmetrical
OutputStage
+
-
Symmetrical
OutputStage
Peak/Thermo
Limiter
Peak/Thermo
Limiter
Peak/Thermo
Limiter
Peak/Thermo
Limiter
X-over+Speaker
FIR-EQ
Hi
X-over+Speaker
FIR-EQ
Low
X-over+Speaker
FIR-EQ
Sub
ChannelDelay
T
ChannelDelay
T
ChannelDelay
T
ChannelDelay
T
MasterDelay
T
X-over+Speaker
FIR-EQ
Mid
RoomEQ
IIRSection FIRSection
LoudspeakerParameterSetup ofO500 C
High Output
Scaling
MidOutput
Scaling
LowOutput
Scaling
Sub Output
Scaling
fs
fs/4
fs/16
fs/16
fs
(fs/16)*16
(fs/16)*16
(fs/4)*4
fs
fs=System-Abtastfrequenz
A
D
24 Bitdelta/sigma
DA(Dither/N.Sh.)
A
D
24 Bitdelta/sigma
DA(Dither/N.Sh.)
A
D
24 Bitdelta/sigma
DA(Dither/N.Sh.)
A
D
24 Bitdelta/sigma
DA(Dither/N.Sh.)
ToLowPower
Amplifier
ToHigh Power
Amplifier
ToMidPower
Amplifier
OutputRelay

Page11
frequency response, but also for a very complex adjustment of the system, including the phase
adjustments!Furthermorethereactionofthedriversandtheelectric performance of the amplifier
and the digital controller itself are monitored by the controller.
-Gain: Thisfunction adjusts theindividual gain in everysignal path ofthe crossover. The values
of possible parameters are influenced by a multitude of menu settings, which can be selected
individually.
- All adjustments (values set) in the menus INPUT GAIN, MUTE ans ANALOG/DIGITAL
Gain Offset will become effective in every signal path of the crossover.
- In the menus HIGH/MID/LOW/SUBGAINand HIGH/MID/LOW/SUBMUTE it is possible to
selecttheindividualsignalpathinthe crossover,wherethe parameteradjustmentsorchanging
the gain should become active.
-Peak / RMS / Thermo limiter:The following limiter section contains a PEAK/RMS limiter and a
thermo limiter. They have been designed to avoid the clipping of the power amps, a too high
peakpowertothedriversandalimitationofthemax.excursionofthevoicecoilsandcones.The
thermo limiter has been added to avoid a thermal overload of the voice coils.
Allthese parameters areset at the factoryand cannot beadjusted by the user.Only the release
time of the peak limiter can be varied by him.
-High (Mid, Low, Sub) Output Scaling: Thispart of the controller takes a strong influence on the
signallevel,finallydrivingtheD/Aconverter.Thisfunctionis recalled and reset with every LOAD
memory.
-Balanced Output Stage: The analog output driver of the digital controller of a fully balanced
design. In combination with the balanced input stages a very low influence of noises to the
audiosignalisachieved.
-Analog Subwoofer Output Stage:This analog output from the digital controller is on a balanced
XLR socket for direct connection of an optional active subwoofer.

Page12
2.1 Positioning / Mounting
Thestudiomonitor O 500 C has beendesigned
as a Main / Midfield-Monitor, and may be used
as a main monitor in smaller or midsize control
rooms / studios.
The minimum distance to the listening position
should be at least 2,5 meters.
Waysofmounting:
-on a stand with mounting bracket LH35
-on all surfaces with the tilting adaptor LH 36,
in a combination with the TV spigot LH 29, or
the tripod stand adaptor LH 28.
-from the ceiling with mounting bracket LH 35
-free standing on a stand or pedestal
-flush-mount into a wall
-For more detailed information on the many
possibilities and adaptors, please see our
studio catalogue SO1, pages 42 and 43
Forthe bestresultit shouldbetaken intoaccount
that the main direction of dispersion of the O
500Ccorrespondstotheaxis vertically between
midrangesystem and tweeter.
Whenpositioningthemonitorpleasemakesure
toselect therightheightfor thespeakerposition,
which can be adjusted / corrected by using the
tilting adaptor LH 36. Fig. 2.1/1 shows the
dimensionsandthe positioning of the mounting
points on the bottom and the sides.
Mounting on a tripod
Fig. 2.1/2 shows how the O 500 C is mounted
Fig. 2.1/1: The dimensions of the O 500 C
RESET
Rearpanelmay
becometoo hot
totouch
ANALOGINPUT SERIALPORT DIGITALS/P-DIF
INPUT DIGITALAES/EBU
INPUT THROUGH SUBWOOFER Leaveenough
spacefor proper
ventilation
HOT
Thisequipment
is capable of delivering sound pressure
levelsin excess of 90 dB/SPL, which
maycause permanent hearing damage.
CAUTION!
Toprevent the risk of fire and shock hazard don´t expose
thisappliance to moisture and rain.
Donot remove rear panel.
Referto qualified service personnel for service.
Nouser serviceable parts inside.
SB 6,3 A
T3,15 A
CAUTION!
Replacefuse only with same type and rating
transformer
balanced
RS232 IN
MIDIIN / MIDI OUT
electr.
balanced
INPUT
SECTION
PIN1 =
PIN2 =
PIN3 = +
-
Chooseelectronically
balancedinput for
optimizedperformance
PIN 1 =
PIN 2 =
PIN 3 =
HIGHRESOLUTION MIDFIELD REFERENCE MONITOR
3AMPLIFIER POWERED SYSTEM
24BIT, FIR-FILTER-CONTROLLED
MAGNETICALLY SHIELDED
O500C
KLEIN+HUMMEL
KLEIN+HUMMEL GmbH D-73760 Ostfildern
MADEIN GERMANY
GROUND
CONNECTED LIFTED
POWER
AC50 - 60 Hz Max.powerconsumption 1500 VA
MAINS
AC 117 V~
AC 230 V~
WARNING!

Page13
on the tilting adaptor LH36, which is fixed to the
bottom of the cabinet. When adding the TV-
adaptorLH29 or the tripod standadaptorLH28,
themonitor canbemountedonaspeakerstand.
Alternatively it is possible to use the U-shaped
mountingbracketLH35,whichhas its threaded
holes on the side of the cabinet. Here, too, it is
possibletoaddtheLH29andLH28formounting
the monitor on a speaker stand. With the LH 35
mounting bracket it is also possible to have the
O 500 C mounted from the ceiling ( may need
additional adaptors, depending on the
construction ).
Horizontal operation
In some cases a vertical operation of the
monitors may not be possible, due to lack of
spaceor for architecturalreasons. For this case
K+H offers a special version for horizontal
operation ( please specify for horn LEFT / horn
RIGHT ) where the horn is rotated by 90
degrees, and special heatsinks are provided to
follow this type of operation. This way the heat
dissipation from the power amps is maintained
optimized. Monitors in this version have to be
ordered specially at the factory, a local
conversionis not possible.
Flush mount into a wall
The O 500 C can also be flush mounted into a
wall or other areas where limited or no airflow
can be provided. For these cases K+H offers a
special wall-mount adaptor kit, which will
accomodate the O 500 C electronics and an
extensioncable forthespeakerconnectors. Now
the electronics can be mounted in an area with
betteraircirculation.The O500Ccanbeordered
with this option at the factory, but it is also
possibletomakealocalchangeafterinstallation
with the wall mount kit.
Fig.2.1/2: Mounting of the tiltingadaptorLH36

Page14
Fig.2.1/3: Fixing holes formountingLH 35 bracket
2.2 Connectors and Wiring
2.2.1 The connectors on the rear panel
All connectors of the O 500 C are located on
the rear panel, placed in two areas. When
installing the monitor under narrow or tight
conditions, care must be taken for the cables
and their minimal bending radius.
Mains connector, Mains switch,
Groundlift
Fig. 2.2/1 shows the connectors which are
located on the lower part of the monitor.
The connection between the O 500 C and the
mainsis made by astandardsocket, which also
includes the mains fuse.
Abovethe powersocketisthe mainsswitchwith
a built-in controllamp.
Thegroundliftswitchisprovidedto separate the Fig. 2.2/1: The connectors at the lower part of
the rearpanel
CAUTION!
To prevent the risk of fire and shock hazard don´t expose
this appliance to moisture and rain.
Do not remove rear panel.
Refer to qualified service personnel for service.
No user serviceable parts inside.
SB 6,3 A
T 3,15 A
CAUTION!
Replace fuse only with same type and rating
GROUND
CONNECTED LIFTED
POWER
AC 50 - 60 Hz Max. power consumption 1500 VA
MAINS
AC 117 V~
AC 230 V~
Groundlift-Switch Mains Switch with
Power-ON Lamp
Fuse SB 6,3 A
Attention!
Replace only with same Type and Rating!
Fuse Holder Mains Socked Adhesive Label with
Serial No.

Page15
internalground fromthemainsearth, justincase
thereshould beanyhumproblems occuringdue
to different potentials between the connected
units.
Signal connections
Thesignal connections are located inthecentre
of the rear panel, directly under the large
heatsink, please see Fig. 2.2/2 and read the
following description:
Analog Input:
Analog signal sources will be connected to
this XLR socket. Via the selection switch „In-
put Section“ the input stage of the O 500 C
canbeselected for the electronicallybalanced
format,or atransformerbalancedinput stage.
Although the transformer is of very high
quality, the position „electronically balanced“
should be preferred for best signal quality.
Only in case of hum problems or special
installations, where transformer isolation is a
must, the transformer balanced position
should be chosen.
SerialPort:
This connector (SUB-D 25 Pin) has several
functions:
Itcontains the serial RS-232 ports,whichare
Fig. 2.2/2: The signal connectors in the middle of the rear panel of O 500 C
needed to connect an external PC for
downloading the presets into the O 500 C.
In combination with this, a complete MIDI
interface(In,Out,Through)is provided in this
connector, so that several O 500 C monitors
can be interconnected to eachother.
Chapter4 shows the completewiring scheme
of this connector and gives a description of
theconnecting cables needed.
Reset:
TheRESETkey is used to restart theinternal
digital controller without switching OFF the
systemas it is the case with mainsON / OFF.
Digital S/P-DIF Input:
ThisBNC socket isconnected to incoming S-
PDIFaudio signals.Theselectionof thesignal
source is described in chapter 3.2. When
usingthis BNC inputfor digital audio signals,
make sure that no connection is made to the
AES/EBU input!
Digital AES/EBU Input:
Incoming digital signals in the AES/EBU
format are connected to this XLR socket.
When this input is used for digital audio
signals,pleasemake sure that noconnection
is made to the BNC socket!
RESET
ANALOG INPUT SERIAL PORT DIGITAL S/P-DIF
INPUT DIGITAL AES/EBU
INPUT THROUGH SUBWOOFER
transformer
balanced
RS 232 IN
MIDI IN / MIDI OUT
electr.
balanced
INPUT
SECTION
PIN 1 =
PIN 2 =
PIN 3 =
+
-
Choose electronically
balanced input for
optimized performance
PIN 1 =
PIN 2 =
PIN 3 =
Input for Analog
Sources
Selector for Transformer or Electronic
Symmetric Mode of Analog Input Input for Digital
AES/EBU Sources
Output for Digital
AES/EBU Signals
Analog Output for
Optional Subwoofer
Interface
(RS-232, MIDI, Memory Modul) Input for Digital
S/PDIF Sources
Digital Controller
Reset Button

Page16
Digital AES/EBU through:
This XLR socket will carry a parallel digital
output signal, which is fed either to the BNC
or XLR digital input. There will be a format
conversioninsidetheO 500 C, so any S-PDIF
signal in the BNC input will be an AES/EBU
signal on that XLR output. This signal may
nowbefedto a second O 500 C and theuser
may select for the L or R channel from the
digital data stream.
Subwoofer:
This XLR output will carry the analog output
signal from the digital controller, which is
providedfor an external, optional subwoofer.
This output will only be active, if a special 4-
way setup has been loaded for the O 500 C.
2.2.2 Variety of Connections
Cables
Thefigures 2.2/3 to 2.2/5showthe pinning of
the cables which are used in the variety of
connections, described in the following
passages:
Fig. 2.2/3 shows all balanced connections,
such as to a studio console with balanced
outputs, also for the digital AES/EBU
connections. When using AES/EBU-
connections,pleasemakesurethatyourcable
hasacharacteristic impedance of 110Ohms.
Do not use ordinary XLR cables as normally
used for microphones or Line-levels!
To connect the O 500 C to analog sources
fromconsumer / HiFi units, anadaptorcable
as per Fig. 2.2/4 should be used. Although Fig. 2.2/4: Adapter from cinch to XLR
Fig. 2.2/5: Adapter from cinch to BNC
Fig. 2.2/3: XLR standard cable
mostof these units donot have a mainsearth
connection (Euro mainsplug) the receivers,
tuners or TV-systems often are connected to
antennas, which are normally grounded. In
thiscase the groundlift should beswitchedto
ONandtheO500Cinputshouldbeselected
for „transformer balanced input“. If the hum
problem still remains, PIN 3 on the XLR plug
should be disconnected (cut), and the
shielding wire on the cinch plug should not
be connected.
Connectingthe O 500 Cto a consumer /HiFi
unitwithadigitalS-PDIFoutput,aconnection
cableas seen in Fig. 2.2/5isneeded, in case
there is no BNC output on that unit.
Examples for connections
InFig.s 2.2/6to2.2/9are someexampleshow
to connect the O 500 C to various signal
sources.
1 1
2 2
3 3
XLR-3 female XLR-3 male
1
2
3
Cinch XLR-3 male
Break Bridge in Case of Humm & Buzz Problems!
Cinch BNC Jack

Page17
Fig. 2.2/6: Operation of the O 500 C and an optional subwoofer from an analog signal source. For
a balanced connection in a studio-system please use a standard XLR-cable. If the O 500 C is
connectedtoanunbalancedsignalsource,pleasemakesureto use a proper adaptor cable as per
Fig.2.2/4, or have itwiredup that way.
Fig. 2.2/7: The O 500 C connected to a signal source with a digital AES/EBU output. The L or R
channel can be selected separately for every monitor from the digital data stream. Please refer to
„Digital Input Select“ in chapter 3.2
Fig. 2.2/8: Connection of the O 500 C to a source with digital S/PDIF output. To connect a second
O 500 C in the signal chain, either a T-adaptor for the BNC input can be used, or the signal to the
second monitor can be taken from the digital output XLR socket. Please note, that this output is
AES/EBU!The selection for eitherL or R signalfrom the digital datastream ist the sameas before.
Digital Pro
Equipment
(Mixer,
Preamp,
...)
RESET
ANALOG INPUT SERIAL PORT DIGITAL S/P-DIF
INPUT DIGITAL AES/EBU
INPUT THROUGH SUBWOOFER
transformer
balanced
RS 232 IN
MIDI IN / MIDI OUT
electr.
balanced
INPUT
SECTION
PIN 1 =
PIN 2 =
PIN 3 =
+
-
Choose electronically
balanced input for
optimized performance
PIN 1 =
PIN 2 =
PIN 3 =
RESET
ANALOG INPUT SERIAL PORT DIGITAL S/P-DIF
INPUT DIGITAL AES/EBU
INPUT THROUGH SUBWOOFER
transformer
balanced
RS 232 IN
MIDI IN / MIDI OUT
electr.
balanced
INPUT
SECTION
PIN 1 =
PIN 2 =
PIN 3 =
+
-
Choose electronically
balanced input for
optimized performance
PIN 1 =
PIN 2 =
PIN 3 =
AES/EBU
Output
To Optional
Subwoofer To Optional
Subwoofer
Digital
Consumer
Equipment
(Mixer,
Preamp,
...)
RESET
ANALOG INPUT SERIAL PORT DIGITAL S/P-DIF
INPUT DIGITAL AES/EBU
INPUT THROUGH SUBWOOFER
transformer
balanced
RS 232 IN
MIDI IN / MIDI OUT
electr.
balanced
INPUT
SECTION
PIN 1 =
PIN 2 =
PIN 3 =
+
-
Choose electronically
balanced input for
optimized performance
PIN 1 =
PIN 2 =
PIN 3 =
RESET
ANALOG INPUT SERIAL PORT DIGITAL S/P-DIF
INPUT DIGITAL AES/EBU
INPUT THROUGH SUBWOOFER
transformer
balanced
RS 232 IN
MIDI IN / MIDI OUT
electr.
balanced
INPUT
SECTION
PIN 1 =
PIN 2 =
PIN 3 =
+
-
Choose electronically
balanced input for
optimized performance
PIN 1 =
PIN 2 =
PIN 3 =
S/PDIF
Output
RESET
ANALOG INPUT SERIAL PORT DIGITAL S/P-DIF
INPUT DIGITAL AES/EBU
INPUT THROUGH SUBWOOFER
transformer
balanced
RS 232 IN
MIDI IN / MIDI OUT
electr.
balanced
INPUT
SECTION
PIN 1 =
PIN 2 =
PIN 3 =
+
-
Choose electronically
balanced input for
optimized performance
PIN 1 =
PIN 2 =
PIN 3 =
RESET
ANALOG INPUT SERIAL PORT DIGITAL S/P-DIF
INPUT DIGITAL AES/EBU
INPUT THROUGH SUBWOOFER
transformer
balanced
RS 232 IN
MIDI IN / MIDI OUT
electr.
balanced
INPUT
SECTION
PIN 1 =
PIN 2 =
PIN 3 =
+
-
Choose electronically
balanced input for
optimized performance
PIN 1 =
PIN 2 =
PIN 3 =
AlternativeWiring Option
To Optional
Subwoofer To Optional
Subwoofer
To Optional
Subwoofer
To Optional
Subwoofer
Analog Pro/
Consumer
Equipment
(Mixer,
Preamp,
CD Player,
...)
RESET
ANALOG INPUT SERIAL PORT DIGITAL S/P-DIF
INPUT DIGITAL AES/EBU
INPUT THROUGH SUBWOOFER
transformer
balanced
RS 232 IN
MIDI IN / MIDI OUT
electr.
balanced
INPUT
SECTION
PIN 1 =
PIN 2 =
PIN 3 =
+
-
Choose electronically
balanced input for
optimized performance
PIN 1 =
PIN 2 =
PIN 3 =
Left
Output
Analog
Input
Subwoofer (optional)
Left
unbalanced
Output

Page18
2.4 Recall of the Loudspeaker Parameter Setup
The O 500 C is supplied with factory presets of
allloudspeaker-relevantparameterslike speaker
equalization,limiter settings,...whicharestored
inaFlash-ROMofthe digital controller. Additio-
nal parameter presets can be ordered at extra
charge,orcanbedeterminedontheinstallation-
site of the monitors and copied into the Flash-
ROM (Room eqalization).
During the first installation of the monitor it has
tobe checked,whethertheright presethasbeen
activated.If not, the correctLoudspeaker Para-
meter Setup has to be looked up and recalled
into the system.
The O 500 C is operated by the IR-remote
controller RC 55.
The procedure is as follows:
-Switch ON the monitor with the power switch
on the rear panel
-Waituntilthedigitalcontrollerhas booted and
the K + H Logo is illuminated
-Themenu„Input Gain“ appearsinthedisplay,
showing a default dB-value
-By pressing the numeric key „8“ on the RC
55 the menu step 8 Speaker Select will
become active, the display will now show
„Monitor/Subwoofer“.
Fig. 2.3/1: The indicators of the O 500 C
The display on the front baffle is covered with a
tintedplexiglasspanel.Thispanelis right above
theHFdriver.Fig.2.3/1.showsthefunctionsfrom
left to right:
-IlluminatedK+ H Logo as a standbyindicator:
it will only light up, when the digital controller
has booted correctly. This light may be shut
off, see chapter 3.3
-Vacuumflourescent display (blue) with 2x24
digits, can be adjusted in brightness (see
chapter 3.3)
-Infrared receiver for the IR remote control,
which is part of the system
-Indicator„LIMIT“,whichwilllight up when one
ormore limiters ofthe system become active
Note: Ifthismenustepdoesn’t appear, the user
securitylevelhastobechanged, see chapter
3.3, step 3.
-The blinking cursor now can be moved into
the LEFT area of the display ( by pressing the
LEFT cursor button of the RC 55 ) into the
position of „M“ for Monitor.
-By pressing the +/- buttons on the RC 55 the
correct„Monitor“ name isselectedandstored
by pressing ENTER Key
-The flashing dot in the centre of the display
asksfor confirming this choice. Oncedone,it
willpermanently be illuminated.
-By pressing the RIGHT arrow key the cursor
ischangingintothe RIGHT half of the display
to the position of „S“ for subwoofer,
adjustmentsaremade in the same sequence
as above
-Bypressing thenumerickey„3“ ontheremote
controlthesystem changes to the„InputGain“
menu.
-By pressing the +/- keys the desired signal
level can be adjusted
-The O 500 C now is ready to work, and even
after switching OFF/ON all parameters that
weresetpriortoswitch-OFF are active again.
2.3 VF-Display on the Front Baffle
K+H logo with
illumination Infrared receiver
VF-display 2 x 24 digits
LIMIT
LED „Limiter active“
KLEIN + HUMMEL
O 500 C

Page19
3.1 Menu Structure and Concept
of Operation
Theoperation of the O 500Cdigital controller is
based on a special menu structure, where the
individual menu steps have been concentrated
into three main menus:
-Main Menu (Chapter 3.2): This menu
includes the most needed control functions
for the normal operation of the monitor, such
asthelevelsettingforthe inputsignals,setting
and recall of setups, adjustement of internal
delay and finally the choice of the desired
Loudspeaker parameter setups which are
stored in the Flash-ROM.
-System Menu (Chapter 3.3): This menu
contains the basic settings of software and
hardware, which are used occasionally, such
as configuration of the MIDI channel,
passwords for the user levels etc.
-EQ Menu (Chapter 3.4): This menu is
completely reserved for the setups and
adjustments of the integrated Room- and
parametricEQs,wherechangesintheoverall
frequency response can be made, such as
the line-up procedure for adjustments in the
control room.
Recall and adjustments of the individual menus
will be made via the IR-remote control unit RC
55, see chapter 4.1.
-Menu selection keys: Sys - Main - EQ for
selection of the menu
-four ARROW keys: UP - DOWN - LEFT -
RIGHT for navigation through the individual
points within a menu
-the two +/- increment keys located under the
L/R arrow keys will be used for adjusting the
parameters of the selected functions
-The ENTER key in the centre of the arrow-
keys
The other keys of the IR remote control will be
explained in chapter 4.1 .
When selecting any of the menu sections the
system will show the headline of the relevant
menu.WhenpressingtheMAINkey for example
the „K + H O 500 C Main Menu“ headline will
appear in the VF-display of the O 500 C.
From this headline all visible ( activated for the
user ) menupoints can be recalled by pressing
the DOWN arrow-key. to get back to the
headline, simply press the UP arrow key.
When a menu point has been activated, the
name of the menu will appear in the left part of
Fig. 3.1/1: Menu step 4 (Input Gain)
of the main menu
the upper line of the VF-display:
When pressing the +/- increment keys, the
parameters marked by the blinking cursor can
be modified. Here it is either possible to modify
the value of a numerical parameter, or to step
through a list of options. Illus. 3.1/1 shows the
position of the blinking cursor ready to modify
the „Input Gain“ which can be changed by
pressing the +/- incrementkeys.
In some menus the actual changes do not
becomevalidimmediately.Toavoidaccidential
modificationsthesystemwillwait for an ENTER
commandbypressing the ENTERkeyafterthat
modification. Now the setting is stored by the
systemand becomes active.
AnilluminateddotintheuppercentreoftheVF-
display is signalling the following conditions:
A flashing dot signalls waiting for confirming a
settng. When this is done by pressing the
ENTER key, the dot will be ON permanently.
Note:
After a parameter has been changed without
being confirmed by pressing ENTER the
changeswill not becomeactive and the original
setting will remain.
In some of the menus it is possible to modify
several parameters. In these cases all
parameters are shown on the VF-display next
to each other and can be selected by moving

Page20
the blinking cursor with the LEFT and RIGHT
arrow key.
There are some menus which offer a larger
number of parameters which would not fit onto
the VF-display. In these cases the menu is
spreadonto several subpages.
The menu points with a subpage are marked
with an arrow in the upper right corner of the
display, if there are more than one pages there
will be a double arrow shown.
To get to the next subpage the cursor can be
movedbythe LEFT or RIGHT cursor key,which
thenwill be displayed.
Examplesforthesplitting of one menu point into
severalsubpages can be seen inpoints10...13
of the main menu.
Thisgeneral descriptionoftheoperation isvalid
forallmenus.
Remarks:
The listing in the following chapters
contains all menu points of the O 500 C
software. The selected user security level
affects the relevant menus, which can be
displayedand modified (see systemmenu
chapter3.3, step 3). Theseare marked with
an “X” in the following overwiews.
Table of contents