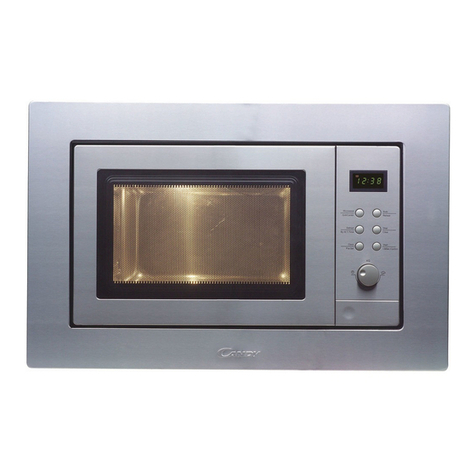
KUEPPERSBUSCH EMWK 870.0 User manual

Instructions
f
or
use
: )
Mikrowellen-Kombigerät
Microwave
oven
)
f
~
EMWK
870.0
0
0
°' .
LO
,......
M
LO
Küppersbusch
ALLERFEINSTE
KÜCHENTECHNIK

)
)

English
Th1s
microwave comb1nation oven will make
it
a pleasure to
cook.
rlease read the operat1ng instructions carefully
in
order to
take
full
advantage of
all
the technical features.
The operating instructions start off with a few important
points on safety.
You
are then familiarized with the individual
parts of your new appl1ance.
We
show you
all
it can
do
and
how
to operate
it.
The charts are designed as a step-by-step guide to making
settings. Here you will also find popular dishes, suitable
utensils, shelf height and optimal settings.
All
of which have,
of course, been tested
in
our culinary studio.
There are also a number of tips on maintenance and
cleaning so that your appliance will keep smart for years
to
come.
Just
in
case there
is
a problem, at the back of the booklet
you will find information on rectifying minor problems your- ·
seif.
lf you
do
have
anY,
questions, first look carefully
in
the index.
You
will soon get your bearings.
And
now
go for it and enjoy thoroughly modern cooking with
your new microwave combination oven.
45

Contents
Page
Points to remember
Disposing of packing
matP-rial
and your old appliance
48
Before connecting your new appliance
48
Safety advice
48
How to avoid damage to the appliance
50
Installation and connection
51
Setting the time
52
Your new appliance
The control panel
Heating modes
Oven and accessories
Before using for the first time
Microwave
Utensils
Setting procedure
Ouick-start feature
Charts for defrosting, heating and cooking
Tips on your microwave oven
Test
dishes
Auto-programmes
Setting procedure
Defrosting chart
Cooking chart
Oven without microwave
Setting procedure
Oven to switch off manually
Oven to switch off automatically
Oven and microwave combined
Setting procedure
46
53
54
55
56
57
57
58
59
64
64
66
67
68
69
69
70

Contents
Page
Charts on baking, roasting
and grilling
Meat, poultry and fish
71
Tips on roasting and grilling 74
Cakes and pastries 76
Bakes and gratins 80
Deep-frozen precooked foods 80
Baking tips
82
Care
83
Problems and repairs
What to
do
if there
is
a problem 85
Repair, E and
FD
numbers 85
47

Disposing of packing
material and your old
appliance
Before connecting
your new appliance
Safety advice
General
Points
to
remember
..J
Dispose of the packing material responsibly.
Our products need good protective packing for transpor-
tation purposes. Any packing
is,
however, kept to an
absolute minimum.
All
packing material used
is
environ-
mentally friendly and is recyclable. Wooden parts are not
chemically treated.80 to 100% ofthe cardboard is made
up of recycled paper. Wrapping is made of polyethylene
(PE),
banding of polypropylene
(PP)
and packing chips
of
CFC-free polystyrene foam
(PS).
Synthetic materials
are
pure hydrocarbon compounds
and can be recycled. Processing and recycling mean
that raw materials can be conserved and the volume
of
waste reduced.
In
Germany, you can return the packing
to the dealer where the appliance was purchased.
O Before disposing of your old appliance,
it
should be ren-
dered unserviceable, after which
it
can be taken
to
the
nearest recycling centre, the address
of
which can
be
obtained from your local authority.
O Before using your new appliance, you should read the
operating instructions carefuily. This booklet contains
important information on safety as weil as instructions on
how to use and look afteryour appliance.
0 Keep the operating instructions
(as
weil as the assembly
instructions
in
the case of built-in appliances)
in
a safe
place for future reference or for a subsequent owner, as
the case may be.
0
Do
not operate the appliance if it has been damaged
in
any
way.
O Ourappliances meet the appropriate safety requirements
for electrical appliances.
Repairs should only be carried out
by
service technicians
trained by the manufacturer. Repair
by
unauthorized per-
sons
is
extremely hazardous, both to the appliance and
to the
user.
CJ
Only use the appliance for preparing food.
::l The suriaces of heating and cooking appliances become
hot when
in
use. The inside of the oven becomes very
hot,
as
do
the elements. Always keep children weil away
from the appliance.
::l Make sure that the connection cords of electrical appli-
ances never get caught
in
the hot oven door. The insula-
tion may become damaged.
48

Microwave
Points
to
remember
:J
lf the oven door
is
damaged,
do
not use the oven until it
has been repaired by an authorized service technician.
There
is
a danger of exposure to microwave energy.
Cl
In
the event of a fault, pull out the plug or shut off power
at the fuse.
::J
Do not store anything inflammable
in
the oven as it could
ignite if the app
lian
ce
is
switched on inadvertently. Do not
place any objects which may catch fire on the hob.
0 Danger
of
burns!
When heating up liquids, always place a teaspoon
in
the
container to prevent delayed boiling, where boiling tem-
perature
is
reached without any of the tell-tale bubbles.
At the slightest movement
of
the container, the hot liquid
can suddenly boil over or erupt. This can cause injury
and burning.
·
--.
~~
.
.<,
·_.
~
~1'°
\
°lf
;'
9~
··
O Baby food:
Never heat baby food
in
jars or bottles with the lid
or
teat
on. After heating the baby food, stir or shake thoroughly
to ensure that the heat is distributed evenly. Always
check the temperature before giving the food to the
child. There
is
a danger
of
burns.
0 Never heat food or drinks
in
sealed containers as they
can explode.
::J
Never overheat drinks containing alcohol
as
they can
explode.
0 Never heat food
in
insulated containers as there
is
a dan-
ger of combustion.
::J
Food sealed
in
plastic film can burst open and the foil
may melt.
0 Never cook eggs in their shells or heat up hard-boiled -
eggs as they can explode. This also applies
to
shellfish
and crustaceans.
In
the case of both fried and poached
egg, always prick the yolk beforehand.
49 Continued on the next page

How to avoid damage
to the appliance
Installation and
connection
Points
to
remember
.:i
In
the case of food with a non-porous skin such as
apples, tomatoes, potatoes and sausages, always prick
the skin before
heat1ng
or
it
may burst.
0 Whenever you are drying herbs, fruit, bread or mush-
rooms, always supervise the operation
as
they could
catch
fire
if
over-dried.
:J
Never heat cooking
oil
in
the microw
ave
oven
as
it
could
ignite.
:J
The handles and lids of porcelain or ceramic crockery
may have miniscule holes
in
which moisture can become
trapped, causing the part to burst.
O Always use the microwave settings and times indicated
in
the operating instructions. lf you use too high a setting
or time, the food could ignite and damage the appliance.
'::l Microwave-heated food conducts heat to the utensils,
which can become very hot as a result. For this reason,
you should always use
an
oven cloth when removing
food.
0 Do not place a baking tray on the floor ofthe oven
or
line
it with aluminium foil
as
this will c2·jse a build-up
of
heat.
Baking and roasting times will be inaccurate and damage
to the enamel may result.
O Never pour water directly into the hot oven as it can
damage the enamel.
O Fruit juice dripping from the baking tray will
leave
perma-
nent stains. lt
is
always advisable to use the glass pan
which
is
deeper.
0 Do not prop yourself up against the oven door or sit on it
when
it
is
open.
O The oven door must shut tightly. Always keep the
door
sealing surfaces clean.
:J
Never switch on the microwave oven without any food
in
the oven compartment. as this would overload the appli-
ance. The only exception to this
is
a short utensil test
(see
notes on utensils).
::J
These operating instructions apply to built-in and table-
top appliances.
:J
Place the table-top appliance on a firm, even surface.
The vents at the
rea
r and base of the appliance must be
kept
free.
:J
lf the appliance
is
tobe
used as part
of
a built-in unit,
please follow the special assembly instructions.
50

1
.-
1
Points
to
remember
~
The appliance
is
supplied with
an
integral plug and
should only be connected to a correctly installed safety
socket. There should be a 16 amp fuse
(UB
auto). The
mains voltage must correspond to the voltage given on
the rating plate.
:l
Always contact a qu;-ilified electrician
if
the outlet has to
be moved or the lead changed. lf the plug
is
no longer
accessible after installation, there must be local means of
isolation
via
an
all-pole isolation switch with a minimum
contact gap of 3 mm.
O Never use multiple plugs, plug connectors or extension
leads. This could cause overloading and ultimately
fire.
Electrical connection. Warning!
All
appliances with a
3 core lead must be earthed.
In
Great Britain appliances with a rated power consumption
higher than
3,
1 kW must have a permanent connection.
Please ensure that the voltage and current indicated on the
rating plate agrees with the voltage of your electricity supply.
220/240 volts -
(i.e
., 220/240 V
AC).
lf your appliance has been equipped with a mains lead with a
moulded-on type plug, you must comply with the following
regulations: The plug moulded on to the cord incorporatesa
fuse. For replacement, use a 13 amp BS 1362 fuse. Only
ASTA
approved or certified fuses should be used. The fuse
cover/carrier must be replaced
in
the event
of
changing the
fuse. The plug must not be used if the fuse cover/carrier
is
lost. A replacement cover/carrier must be obtained from
an
electrical goods retailer. lf the socket outlets
in
your home
are
not suitable for the plug fitted to the appliance, then the
plug must be cut off and
an
appropriate one fitted. When
fitting the plug please note the following points:
lmportant .
The wires
in
the mains lead are coloured
in
accordance with
the following code:
Green and Yellow
Blue
Brown
Earth
Neutral
Live
As
the colours of the wires
in
the mains lead of this appliance
may not correspond with the coloured markings identifying
the terminals
in
your plug, proceed
as
follows:
1. The wire which
is
coloured GREEN and YELLOW must
be connected to the EARTH terminal
in
your plug, which
is
marked with the letter E or by the earth symbol @ or
coloured GREEN, or GREEN and YELLOW.
51

Points
to
remember
Time
When the appliance is
connected
Küppersbusch
90
180
3eO
600
MAX
•
.
90
180
·
360
600
MAX
.>,
. . ' . . •
. ; ·
...
' '·,· '
:;
. ·..· .·\·.
",
\ .
·
,;
.
5
{'·~:v>
· ·
''
'+'
t·
'l'·
) 1 -
~+
.
,
""
,J
\}.
)JL
.11
~"
.f
~
.
,„
. .
i:
;~
~~~;
:
:
~
;~
~~
~~;i
:
:
·~ :
~
~~:
~~
~.·-
~
~:
;~
!
~~;-t
:~
:~~
L
~~
2.
The wire which
is
coloured BROWN must be
co
nnected
to the
LIVE
terminal which
is
marked with the letter L or
coloured
RED
.
3.
The wire which
is
coloured BLUE must
)Je
connected
to
the neutral terminal which
is
marked with the letter N
or
coloured BLACK.
When wiring the plug, ensure that
all
strands
of
wire are
securely retained
in
each terminal. Do not forget to tighten
the
ri1ains
lead clamp
on
the plug.
Warning! A cut off plug inserted into a 13 amp socket
is
a
serious shock hazard. Ensure that the cut off plug
is
dis-
posed off saf
ely.
Voltage 220/240 V AC
Fuse rating 13 amps
Seerating plate for further information.
Pul!
off the protective
foil
from the operating panel.
three zeros will blink
in
the display.
You can set the time as follows:
1. Depress buttons 90 and 600 simultaneously.
2.
Turn the right knob until the correct time appears.
You
can also blank out the time as follows:
1. Depress buttons 90 and 600 simultaneously.
2.
Turn
the right knob past 24.00 and then back to 0.00.
After a few seconds, the display wi
ll
go dark.
Please note:
O The set programme or time may be cancelled due
to
var-
ious causes such
as
a power failure. The zeros w
ill
then
blink
in
the display. Reset the time and the programme.
0 The display dims between 10 p.m. and 6 a.m.
52

The control panel
The adjustment knob and
temperature selector are
retractable, using a push-
and-lock feature. For this to
function, the temperature
selector must be
in
off-
position.
Your
new
appliance
Küppersbusch
"" ""
;--,
1 1 I-
I_/
,
-,
..::
1 •
........
90
160
360
600
MAX
90
180
360
600
MAX
Start button
->-----~
The arrows indicate the
appropriate symbol requiring
setting.
Microwave settings
Cancel button
---
..
,,'
..
J
·©
·
~
·
···
.......,.+
____
Adjustment knob,
Temperature control light
(only lights up while oven
is
heating.
lt
remains off
during grilling)
Details may vary, depending on the appliance type.
53
retractable
Programme button
Heating mode buttons
(d
Top and bottom heat
~
Hot air
00
Fan-assisted grilling
EJ
Grill areas
Temperature selector with
display
~
Oven light
50-250 °C
EJ
Grillstages
1 =low
(1)
II
=medium (2)
III
=high
(3)

Heating modes
EJ
Your
new
appliance
Microwaves
Microwaves
are
converted into heat
in
the food.
Microwave
is
suitable for rapid defrosting, heating, melting
and cooking.
Microwave settings:
MAX for heating liquids
600 W for heating and cooking food
360 W for cooking meat and warming delicate foods
180 W for defrosting and further cooking
90 W for defrosting delicate foods
Microwave and oven combined
In
this mode, a heating system and the microwave function
are engaged simultaneously. Food still turns crisp and
brown, but
it
takes far less time and you save electricity.
Top
and bottom heat
In
this mode, the cake or roast
is
heated evenly from both
top and bottom. This mode will also ensure optimal results
with bread, sponge cake or a juicy fruit cake on one shelf.
Top and bottom heat
is
also excellent for roasting lean
pieces of meat.
Hot air
A fan
in
the back panel distributes the top and bottom heat
evenly
in
the oven. Hot air
is
ideal for baking on
two
shelves
and for many cakes
in
tins. The required oven temperatures
are lower than with top and bottom heat which means that
you can save electricity. Hot air
is
excellent for defrosting.
Fan-assisted grilling
Grill elements and
fan
switch on and off alternately. When
heating stops, the
fan
directs the heat emitted from the grill
around the food, ensuring that the pieces of meat are crisp
and brown on
all
sides.
Fan-assisted grilling
is
particularly suitable for !arge roasts
as
weil
as
for poultry.
Fiat grilling
The entire area beneath the grill element becomes hot,
enabling you to grill steaks, sausages, fish or toast.
54

Your new appliance
Oven with accessories
'
f.
..,__.,,,_,,
....
~-
-
-·-
~
-~
.•„.
•.
_
....
.....-."
-"
.......
.,.....~·
·
-
~
"'
,..,.
/
'
You
have a choice of five different positions for
your accessories.
The oven has a cooling
fan
which may carry on
running even after the oven has been switched
off. For technical reasons, the oven light will
remain on until the
fan
goes off.
With table-top appliances,
it
is
possible to
switch off the fan by pressing the cancel button
twice.
In
the case of built-in appliances, the fan must
continue running
in
order to dry out any mois-
ture and prevent any damage to furniture.
55
Baking tray for cakes and biscuits.
:!.,
•
~
..
' .: ' '
::·.-
"-. .
·,\·,
./~·,
·.
··_:',
_'··,_·,_.
Grid for crockery, cake tins, roasts and food for
grilling. The grid can either be turned upwards
--
or
downwards-.
Glasspan for large roasts, juicy cakes, bakes
and gratins. lt
is
also used as an anti-splash
tray,
if meat
is
tobe
grilled directly on the grid.
Just insert the glass pan at shelf height
1.
Accessories are obtainable from any author-
ized dealer. Please quote your appliances E
and
FD
numbers (product and manufacturing
numbers).

Your
new appliance/Microwave
Before using for the
first time
The microwave
oven
Utensils
Heat the closed. empty oven for 60 minutes.
To
do
this. press button
b)
,setting the temperature selector
to 250. Switch off the temperature selector after 60 minutes.
lt you want the oven to switch off automatically after
60 minutes:
press the button O
as
weil.
You
now have three seconds
in
which to start entering the length of time.
Set 60 minutes using the adjustment knob.
Press the start button.
Do
not switch on the microwave
oven.
A signal
will
sound after 60 seconds.
You
can turn it off ear-
lier by pressing the cancel button or opening the oven door.
lt
is
advisable to air the kitchen due to the resulting smell.
Try
out the microwave oven rightaway. Warm up that coffee,
for example, which has been left from breakfast -it tastes
like it's just been made!
Take a !arge cup without any gold or silver decoration and
put a teaspoon
in
it.
Position the grid
in
the oven at shelf
height
1,
with the cup
in
the middle
of
the grid.
Now
press the MAX button.
Using the adjustment knob, set 1 minute.
Press the start button.
A signal will sound after 1 minute.
You
can cancel this earlier
by pressing the cancel button.
The coffee
is
hot.
This
is
but one of many examples which can be found
in
the
charts.
While you drink your coffee, read the "Safety Advice" once
again
at
the front of the manual. This
is
very importan.t.
Use utensils made of glass, porcelain, ceramic material or
heat-resistant plastic. These materials !et microwaves
through.
This
is
not
so
with metal utensils. Metal does not conduct
microwaves and food
will
therefore stay cold
in
covered
metal containers.
You
can, however, use open, flat metal
containers such
as
aluminium trays. Make sure that no metal
comes too close to the oven wall, otherwise sparking may
occur.
In
the case of metal oven accessories, no sparking will occur
if you use
it
as
indicated
in
the charts. Always place the uten-
sil
on a grid or
in
the glass pan.
56

Utensil test
Setting procedure:
Microwave
In
many cases. you c
an
use serving dishes for heating the
food. This will also make for less washing up.
Only u
se
crockery decorated with gold or silver if the manu-
facturers guarantee that
it
is
suitable for
111icrowave
cookery.
Heated food
g1ves
off heat to the utensil, which can become
very hot as a result. For this reason, you should always use
an
oven cloth when removing food.
For information on your particular dish, please refer
to
the
charts.
The microwave oven should not be switched on without
food inside. The only exception
to
this
is
the following utensil
test, which should be carried out
if
you are not sure whether
your crockery
is
suitable for the microwave oven:
Place the empty utensil for 30 seconds to 1 minute into the
appliance at MAX setting. Check how hot it
is
occasionally.
The utensil should be cold or warm to the touch. lf it is hot
or
there
is
any sparking, it
is
not suitable.
1.
Press the button for the required setting.
You
now
have three seconds
in
which
to
start entering
the time.
2.
Turn
the adjustment knob until the required length
of
time
appears.
You
can
now
enter other settings and times.
3. Pressstart button.
The operation starts.
Once the set time has expired, a signal will sound for thirty
seconds.
You
can turn it oft earlier by opening the
door
or
pressing the cancel button.
Correction:
lf the start button has not yet been pressed, you can correct
entries at any time.
lf the appliance is already
in
microwave mode, press the
cancel button twice and reset.
Cancel:
Press the cancel button twice. The time will reappear.
Please note:
:l
MAX microwave setting can be set for
30
minutes,
600 W for one hour and
all
other settings can be set for
up to 1 hour and 30 minutes.
You
can enter
up
to
3 set-
tings one after the other.
:l
lf you have entered a microwave setting, the arrow will be
il
luminated
in
the display above the selected setting.
::J
lf you have selected several settings, the total time
appears
in
the display.
57 Continued on the next page

Microwave setting
MAX "Quick-start"
Microwave
:J lf you have set more than one hour,
an
"h"
will appear
after the hour readout.
As
soon
as
the cycle has started,
the point behind the
"h"
will start blinking.
:J
Microwave operation
will
be interrupted
as
soon
as
you
open the oven door. Once the oven door
is
shut again,
microwave operation will continue.
There
is
an
extra fast way
in
which to enter the MAX setting
for 1 to 5 minutes.
Setting procedure:
Press the MAX button twice briefly. 1 minute will appear
in
the display. Every time MAX
is
pressed, the readout will
advance one minute to a maximum of 5 minutes if so
required.
Press the start button to start time count-down.
58

Charts
) Defrosting
Defrosting
Grid
at
shelf height 1
Press the start button after
setting
1 chicken
2 ch1ckens
1 capon
1
duck
meat jülnt
Microwave
The
t1mes
ind1cated
1n
the charts
are
approx1rnate and
depend on the quality and type of food.
The charts often refer to time ranges. Select the shortest
time
1nitially
and then extend
it if
necessary.
Whenever quantities differ from those indicated
in
the charts,
the general rule
is
as
fo1iows:
double the quantity double the time.
half the quantity half the time.
Many dishes
ha
ve
to be stirred or turned while they are
cooking. Whenever you open the oven
door
to
do
this, the
microwave oven switches off immediately. lt will continue
running once you close the door.
Deep-frozen food
is
placed
in
as
shallow a dish as possible
or eise on
Ci.
pla.te.
Cover any exposed parts such as chicken drumsticks and
wings or fatty edges of roasts with small pieces
of
aluminium
foil, making sure that the foil does not come into contact with
the walls of the oven.
You
can remove the foil after half the
defrosting time has elapsed.
Turn the food half-way through the defrosting time. Large
pieces
of
food should be turned several times.
Leave the defrosted food to stand for a further 10 minutes
approximately to allow the temperature to stabilize.
In
the
case of poultry, you can then remove the giblets.
Amount Select microwave setting (W)
Set
the
length
of
time (minutes)
1
kg
1
kg
each
1.3
kg
2
kg
750 g
1
kg
1.5
kg
2
kg
59
180
W,
15
min. + 90
W,
15-20
min.
180W,
25
min.+
90
W,
15-25
min.
180
W,
20
min.+
90
W,
20-25
min.
180W.
25
min.+
90
VV,
25-35
min.
180
W,
5
min.+
90
W,
25-35
min.
180
W,
10
min.+
90
W,
25-35
min.
180W, 20
min.+
90
W,
25-35
min. .
180
W,
40
min.+
90
W,
30-40
min.
Cont1nued on the next page

Defrosting
Grid at shelf height 1
Press the start button after
setting
2 steaks
fish
butter
bread
rolls
cake
berries, stone-fruit
Preparing food with the
microwave oven
Amount
600
g
500
g
1 kg
250
g
500
g
1 kg
4
in
no.
250
g
500
g
1 kg
250
g
500
g
Microwave
Select microwave setting (W)
Set the length of time (minutes)
180W,
10
min.+
90W,
5-10min.
180
W,
5 min. +
90
W,
10-15
min.
180
W,
10 min. + 90
W,
15-20
min.
180
W,
3
min.+
90
W,
3-
5 min.
180
W,
8
min.+
90
W,
4-
7 min.
180
W,
10
min.+
90
W,
8-12
min.
180
W,
2 - 3 min.
180
W,
5 - 8 min.
180
W,
9-13
min.
180
W,
14-
18 min.
180
W, 5 - 8 min.
180
W,
10-14
min.
Cream cakes and gateaux are defrosted without
micro-.
wave. Position the gateau at shelf height 1.
Press button
~
and set temperature selector
to
~·
The fan directs the air around the cooking
compartment
and
the food will defrost faster than when left
to
stand.
Always cover the food.
Remove precooked meals from their aluminium packaging
and prepare them
in
a utensil suitable for use
in
the micro-
wave oven. This will allow them
to
heat
up
more rapidly and
evenly.
lf
you warm
up
different f
oo
ds at the same time, they will
heat at different speeds.
Stir or turn the food occasionally while it
is
cooking. This will
allow
it
to heat
up
more rapidly and evenly.
Leave the food
to
stand for a further 1 to 2 minutes after
heating,
to
allow the temperature
to
stabilize.
60

Microwave
Preparing food with micro- Amount Select microwave setting (W)
wave, Grid at shelf height 1 Set the length of time (minutes)
Press the start button after
setting
Vegetables,
add some liquid
Mushrooms,
fresh
cook 250 g 600
W,
6-8
mi
n.
~
Leek, fresh
c~ok
500 g 600
W,
6-8
mi
n.
cook 250 g 600
W,
6-8
min.
Peppers, fresh 500 g 600
W,
9-
11 min.
Peas,
deep-frozen cook 450 g 600 W,
8-10
min.
Mixed vegetables, deep-frozen cook 450 g 600
W,
10-12 min.
Spinach, deep-frozen cook
300g
600
W,
10-13
min.
Vegetables, chilled heat 150 g 600
W,
21/2
-3
1
/2
min.
300 g 600
W,
31/2
-4
1/2min.
Starch foods
Potatoes
add some liquid boil 250 g 600
W,
6-8
min.
500 g 600
W,
8 min. + 180
W,
6-8
min.
750 g 600
W,
9 min. + 360
W,
5-8
min.
Rice,
cook 125 g 600
W,
5
min.
+ 180 W,
15-17
min.
add double the quantity
of liquid 250 g 600
W,
8
min
. + 180
W,
10-12
min.
Starch foods, chilled heat 250 g 600
W,
21/2
-3
1/2min.
500 g 600 W, 6- 8 min.
Coarse ground cereals*, cook 100 g 600
W,
8
min.+
180
W,
20 min.
add three times the quantity of
liquid
* Depending on the type ofcereal, grain and coarse-ground cereals should be allowed
to
soak for
up to
30
min„
61
Continued on the next page

Preparing food with micro-
wave, Grid
at
shelf height 1
Press the start button after
setting
Grain*, P.Q. wheat, speit, unripe
speit grain, oats, barley. Add
double the quantity of liquid
Microwave
Amount
cook 100 g
Select microwave setting (W)
Set the length of time (minutes)
600
W,
6 min. + 90
W,
25 min.
* Depending on the type of cereal, grain and coarse-ground cereals should be allowed
to
soak for
up
to
30 min.
Meat
Cured/smoked pork on the bone
cook
1 kg
360
W,
45-50
min.
Slices
of
meat
in
sauce, heat 400 g
600
W,
13-15
min.
deep-frozen
Slices
of
meat
in
sauce, chilled heat 400 g
600
W,
5-7
min.
Sauce for mince, e.g. Bolognese, heat 300 g
600
W, 8-11 min.
deep-frozen
Sauce for mince, chilled heat 600 g
600
W,
15-18
min.
Soups
Stew, deep-frozen heat 500 g
600
W,
13-17
min.
Stew, chilled heat 500 g
600
W,
5-7
min.
Consomme, deep-frozen heat 400 g MAX,
7-10
min.
One-course dishes
One-course dishes, deep-frozen heat
350-400
g 600 W, 6 min. +
360
W,
6-8
min.
One-course dish, chilled heat
35
0-400
g 600 W,
4-'-
6 min.
Precooked meal, sterilized heat
350-450
g 600 W,
6-8
min.
Desserts
Blancmange cook 500 g 600
W,
6-8
min.
62
Table of contents