tivs
sind
vergròBerte
Aufnahmen
von
Pflanzen,Insekten
und
ahnlichen
kleinenMotivenmòglich.
•Fùr
Makroaufnahmen,
bei
denen
ein
groBer
Abbildungs-
maBstab
und
hohePràzisionerforderlichist,empfiehltsich
die
Verwendung
des
Yashica
AF
Macro-Objektivsf/2,8/60
mm.
Makroaufnahmen
mitden
Objektiven
AF
Zoom
f/3,3—4,5/35—70
mmund
f/4,5—5,6/75—300
mm:Bei
diesenObjektivenkann
das
Objektivdurch
den
gesamten
Makrobereich
focussiertwerden.Zoomen
ist
ebenfallsinner-
halb
des
Makrobereichs
mòglich.
Der
maximaleAbbildungs-
maBstab
wirderzielt,wenn
das
Objektiv
auf
seine
groBte
Brennweite
eingestelltist.
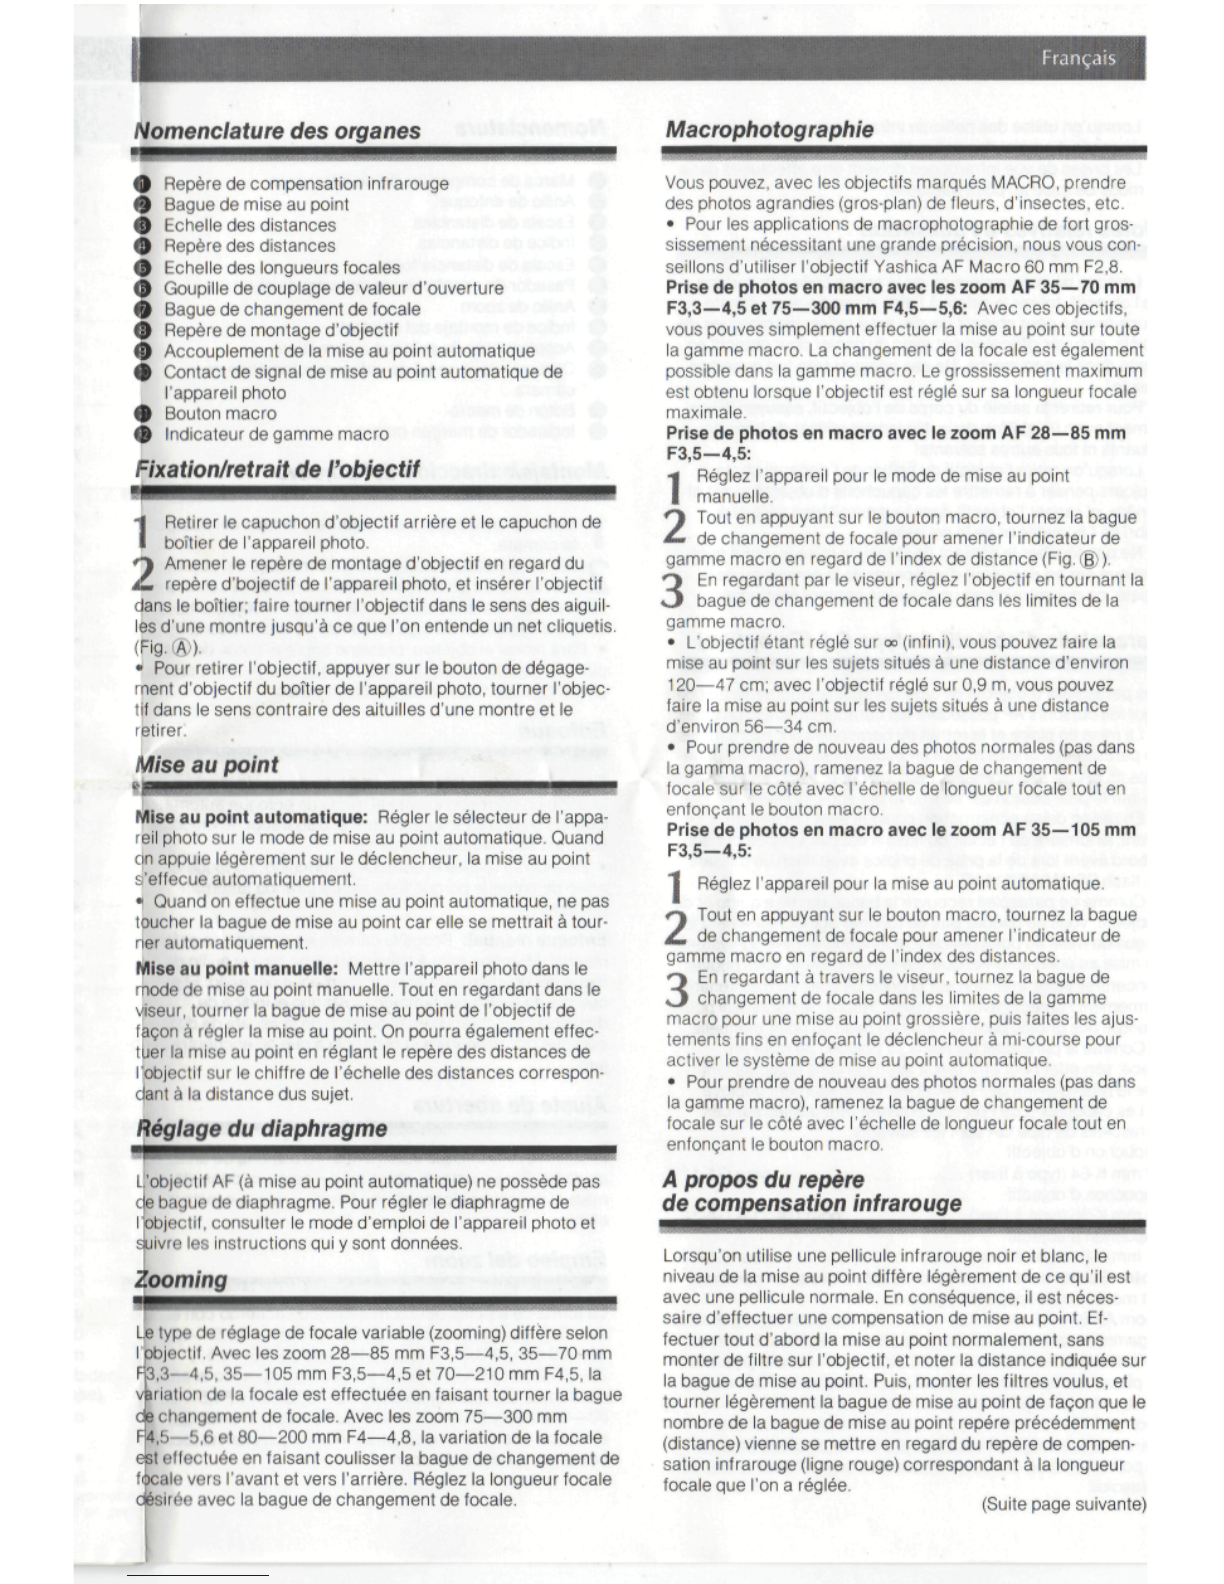
Makroaufnahmen
mit
dem
Objektiv
AF
Zoom
f/3,5—4,5/28-85
mm:
t
stellen
Siedie
Kamera
aufdie
manuelleFokussierbe-
triebsart
ein.
2
Halten
Sieden
Makroknopf
gedruckt
und
drehen
Sieden
Zoomring,
bisdie
Makrobereichsmarke
dem
Entfer-
nungsindex
gegenùberliegt(Abb.
®
).
3
Visieren
Siedas
Motivdurch
den
Sucher
anund
drehen
Sie
den
Zoomring
innerhalb
des
Makrobereiches,
um
das
Objektiv
scharfzustellen.
•Bei
Einstellung
des
Motivs
auf
Unendlichkònnen
Motive
in
einer
Bereich
vonca.
120—47
cm
scharfgestellt
werden;
bei
Einstellung
des
Objektivs
auf0,9m
kann
esauf
Motiveinner-
halbeines
Bereiches
von
56—34
cm
fokussiert
werden
•Um
danach
wiedernormaleAufnahmen
zu
machen,
halten
Sie
den
Makroknopfgedruckt
und
drehen
den
Zoomring
auf
die
Seite
mitder
Brennweitenskalazurùck.
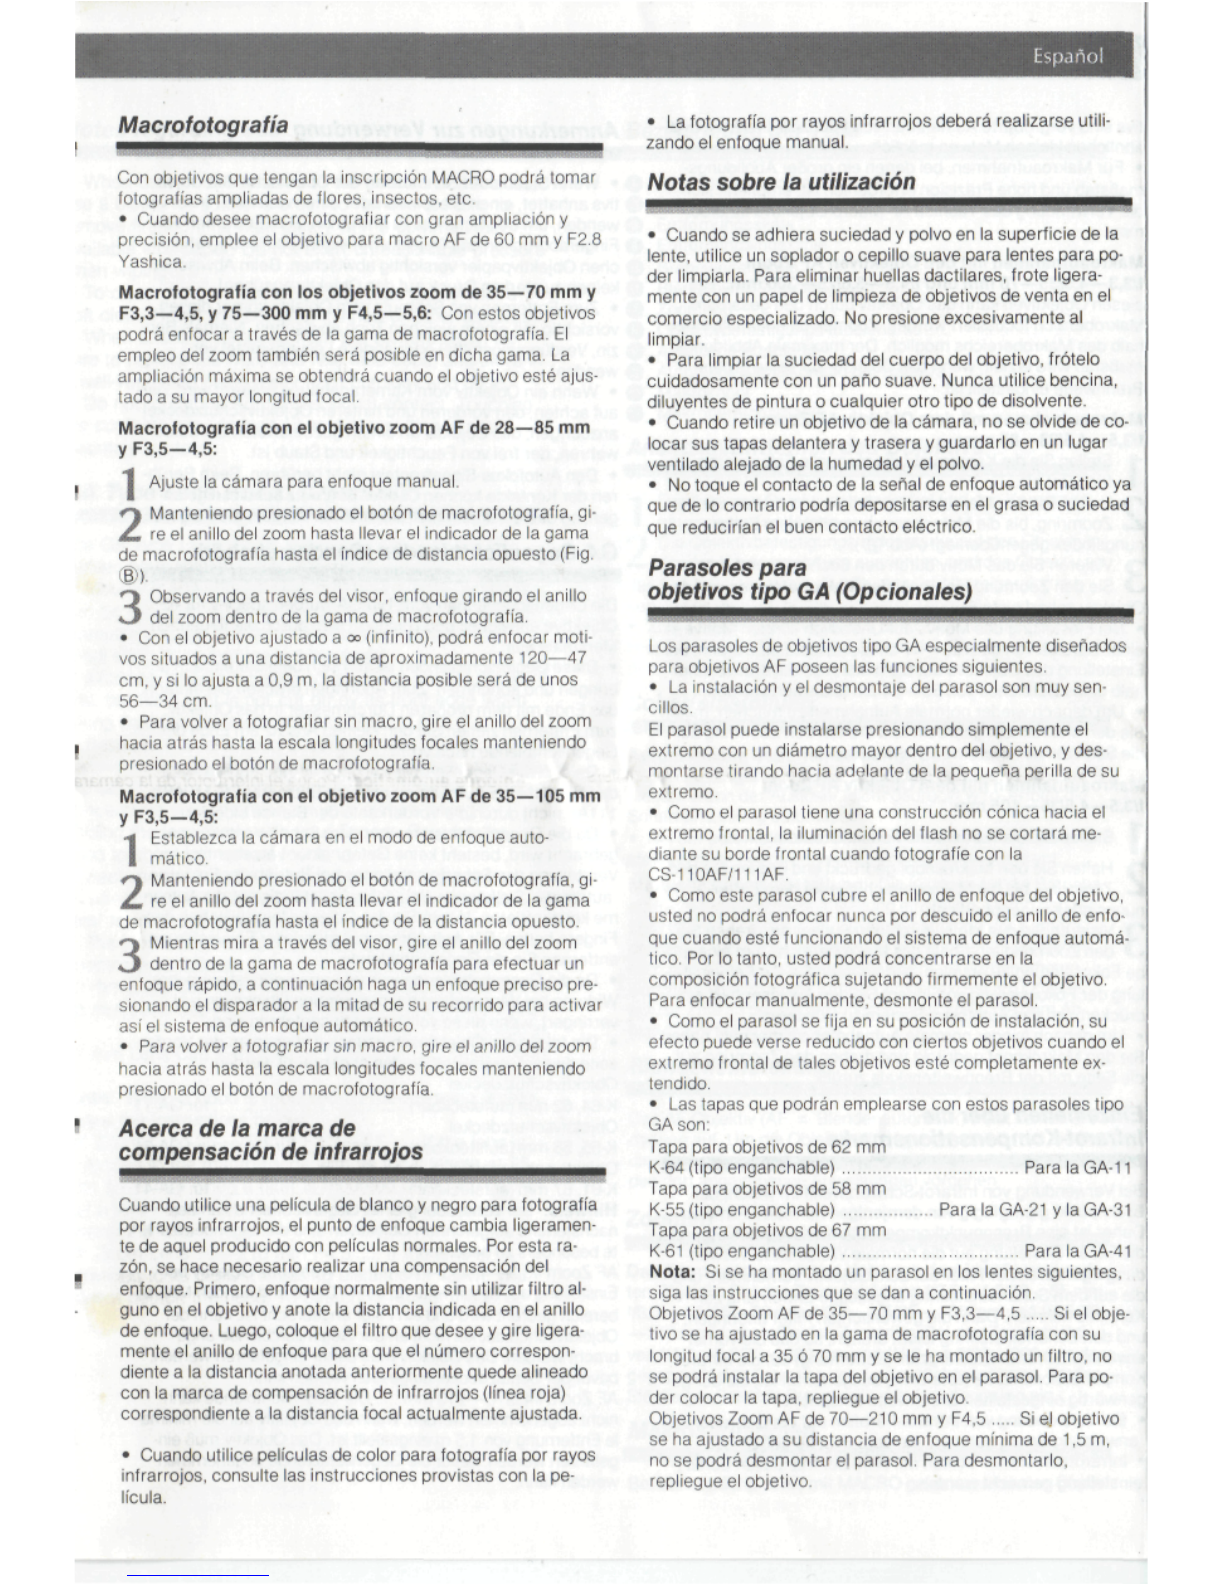
Makroaufnahmen
mitdem
Objektiv
AF
Zoom
f/3,5—4,5/35-105
mm:
I
Stellen
Sie
die
Kamera
auf
Fokussierautomatikein.
2
Halten
Sieden
Makroknopfgedruckt
und
drehen
Sieden
Zoomring,
bisdie
Makrobereichsmarke
dem
Entfer-
nungsindex
gegenùberliegt.
3
Visieren
Siedas
Motiv
durch
den
Sucher
an,
drehen
Sie
den
Zoomring
innerhalb
des
Makrobereichs,
um
einegro-
be
Fokussierung
zu
erzielen,
und
nehmen
Siedie
Feineinstel-
lung
der
Fokussierungvor,
indem
Sieden
Ausloser
halb
ein-
drùcken,
umdas
Autofokus-System
zu
aktivieren.
•Um
danachwiedernormaleAufnahmen
zu
machen,halten
Sie
den
Makroknopfgedruckt
und
drehen
den
Zoomring
auf
die
Seite
mitder
Brennweitenskala
zurùck.
Einzelheiten
i/ber
die
Infrarot-Kompensationsmarke
Bei
Verwendung
von
Infrarot-SchwarzweiBfilm
weicht
der
Brennpunkt
geringfùgig
von
demjenigennormaler
Filme
ab.
Daher
ist
eineBrennpunktkompensationerforderlich.Zuerst
die
Scharfeinstellung
aufdie
normaleWeiseohne
Verwen-
dungirgendwelcherFilter
aufdem
Objektiv
vornehmen,
und
dieaufdem
ScharfeinstellringangezeigteEntfernung
zur
Kenntnis
nehmen.Dann
die
gewunschten
Filteranbringen,
undden
Scharfeinstellringleichtdrehen,
sodaBdie
vorher
erwahnte
Scharfeinstellringzahl(Entfernung)
aufdie
Infrarot-
Kompensationsmarke(roteLinie)ausgerichtetist,
diederge-
genwàrtigeingestelltenBrennweite
entspricht.
•Bei
Verwendung
von
Infrarot-Farbfilm
aufdie
Gebrauchs
•
anweisungBezugnehmen,
diedem
Filmbeigefùgtist.
•
Infrarotaufnahmen
sollten
mit
Hilfe
der
manuellenScharf-
einstellunggemachtwerden.
Anmerkungen
zur
Verwendung
•
Wenn
Staub
oderSchmutz
ander
Oberflàche
des
Objek-
tivs
anhaftet,
einenBlaspinselodereinenweichenPinselver-
wenden,
umden
Schmutz
zu
entfernen;
zum
Entfernen
von
Fingerabdrucken
das
Objektiv
mit
einem
im
Handel
erhaltli-
chen
Objektivpapier
vorsichtig
abwischen.
Beim
Abwischen
keinen
zu
starkenDruck
aufdas
Objektiv
ausiiben!
•Zum
Entfernen
von
Schmutz
vom
Objektivkòrperdiesen
vorsichtig
mit
einem
weichenTuchabwischen.NiemalsBen-
zin,
Verdunnungsmittel
oderandere
Losungsmittel
ver-
wenden!
•
Wenn
ein
Objektiv
vom
Kameragehàuseentferntwird,dar-
auf
achten,
den
vorderen
und
hinterenObjektivschutzdeckel
anzubrigen;
das
Objektiv
an
einem
gut
belufteten
Ort
aufbe-
wahren,
der
frei
von
Feuchtigkeit
und
Staubist.
•Den
Autofokus-Signalkontaktnicht
beruhren.
Beim
Beruh-
ren
der
Kontaktekònnen
Òl
oder
Schmutz
auf
diese
gelan-
gen,
sodaBein
schlechterelektrischerKontakt
die
Folge
ist.
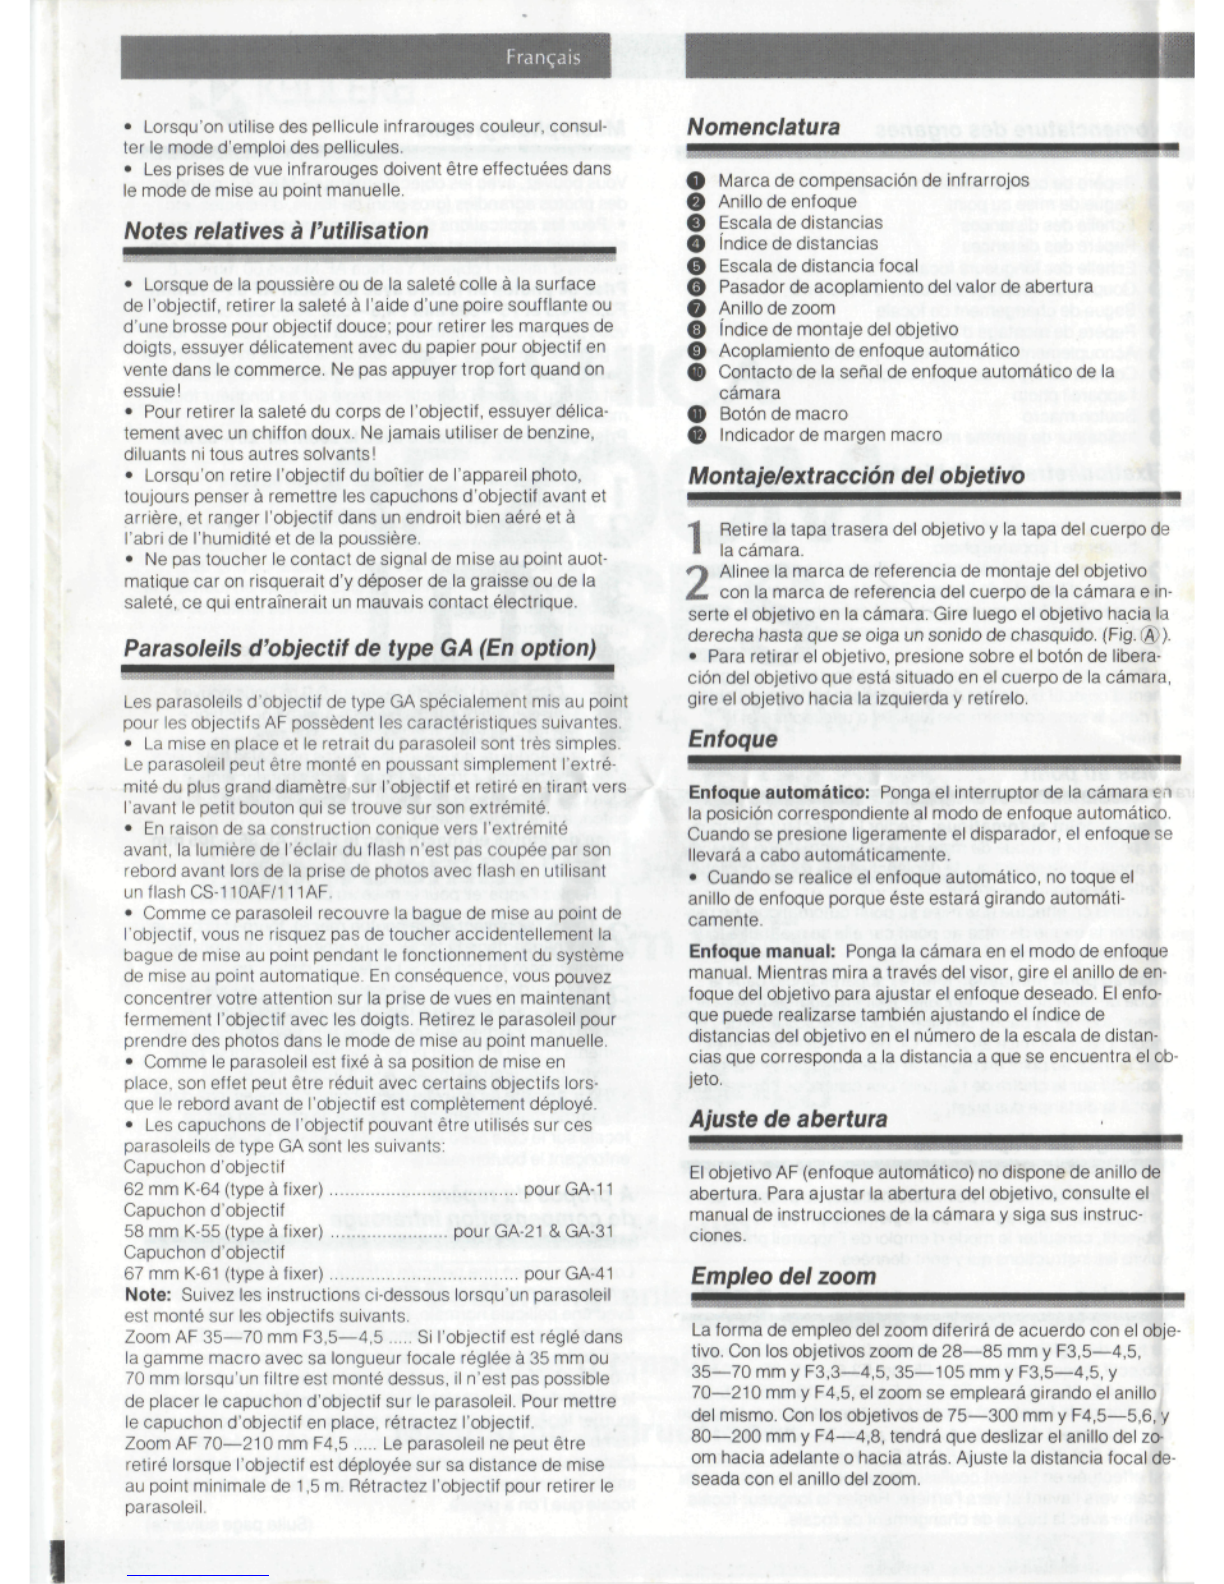
GA-Gegenlichtblenden(Sonderzubehor)
Die
Gegenlichtblenden
vomTypGA
wurden
speziell
tur
AF-
Objektive
entwickelt
und
zeichnensich
durch
die
folgenden
tvterkmale
aus:
•
DieseGegenlichtblendenlassensichdenkbareinfach
an-
bringen
und
abnehmen.
Zum
Anbringendrùcken
Sie
einfach
das
Ende
mitdem
gròBerenDurchmesser
indas
Objektiv,
zum
Entfernenziehen
Sieden
kleinen
Ansatz
am
Ende
der
Gegenlichtblendenachvorn.
•—Da
sich
die
Gegenlichtblende
nach
vorne
verjùngt.
wird
das
Blitzlicht
bei
Aufnahmen
mitdem
BlitzgeratCS-110AF/
111
AF
nichtdurch
die
Vorderkante
der
Blendeblockiert.
•Dadie
Gegenlichtblende
ùber
dem
Scharfeinstellring
an-
gebracht
wird,bestehtkeineGefahreinerversehentlichen
Verstellung
des
Scharfeinstellrings
bei
Betrieb
der
Fokussier-
automatik.
Sie
kònnensichdahervollstàndig
aufdie
Aufnah-
me
konzentrieren,indem
Siedas
Objektiv
test
zwischen
den
Fingernhalten.
Fùr
Aufnahmen
mit
manuellerFokussierung
entfernen
Siedie
Gegenlichtblende.
•Dadie
Gegenlichtblende
in
ihrerLage
fixiert
ist,wirdihre
Wirkung
bei
Verwendung
mit
bestimmtenObjektivenu.U.
verringert,
wenndiesevollstàndigausgefahrensind.
•Die
folgendenObjektivschutzdeckelkònnen
ander
Vorder-
seite
dieserGegenlichtblendenangebrachtwerden:
Objektivschutzdeckel
K-64,62
mm
(aufsteckbar)
furGA-11
Objektivschutzdeckel
K-55,
58mm
(aufsteckbar)
fùr
GA-21
und
GA-31
Objektivschutzdeckel
K-61,
67mm
(aufsteckbar)
fùrGA-41
Hinweis:
Bei
VerwendungeinerGegenlichtblende
anden
nachstehend
aufgefùhrten
Objektiven
sind
die
folgenden
Punk-
te
besonders
zu
beachten:
AF
Zoom
f/3,3—4,5/35—70
mm
Wenn
das
Objektiv
bei
Einstellung
auf
Brennweite
35
oder
70mmundaufden
Makro-
bereich
gedreht
wird
undein
Filter
angebrachtist,kann
der
Objektivschutzdeckel
nicht
ander
Gegenlichtblendeange-
brachtwerden.
Das
Objektiv
muB
dahereingefahrenwerden,
bevor
der
Schutzdeckelaufgesetztwerdenkann.
AF
Zoom
f/4,5/70—210
mmDie
Gegenlichtblendekann
nicht
abgenommenwerden,wenn
das
Objektiv
aufdie
minima-
le
Entfernung
von
1,5
m
eingestelltist.
Das
Objektiv
muB
ein-
gefahren
werden,
bevor
die
Gegenlichtblende
abgenommen
werden
kann.