21.
No naked
llame sources,
such aslightedcandles,
shouldbeplacedonthe apparatus'
22.The apparatus should be used in moderate climate'
23.Theapparatusforusesha||..WARN|NG''andthefo||owingorequiva|ent,,.Toleduce
the risk or electric shock, do not exPosethis apparatus to rain or moisture"'
24.Theapparatussha|lnotbeexposedtodrippingorsp|ashingandthatnoobjectfi||
with liquids, such as vases, shall be placed on the apparatus'
25.Batteriesinsta||edsha||notbeexposedtoexcessiveheatsuchassunsh.ne,fireor
the like.
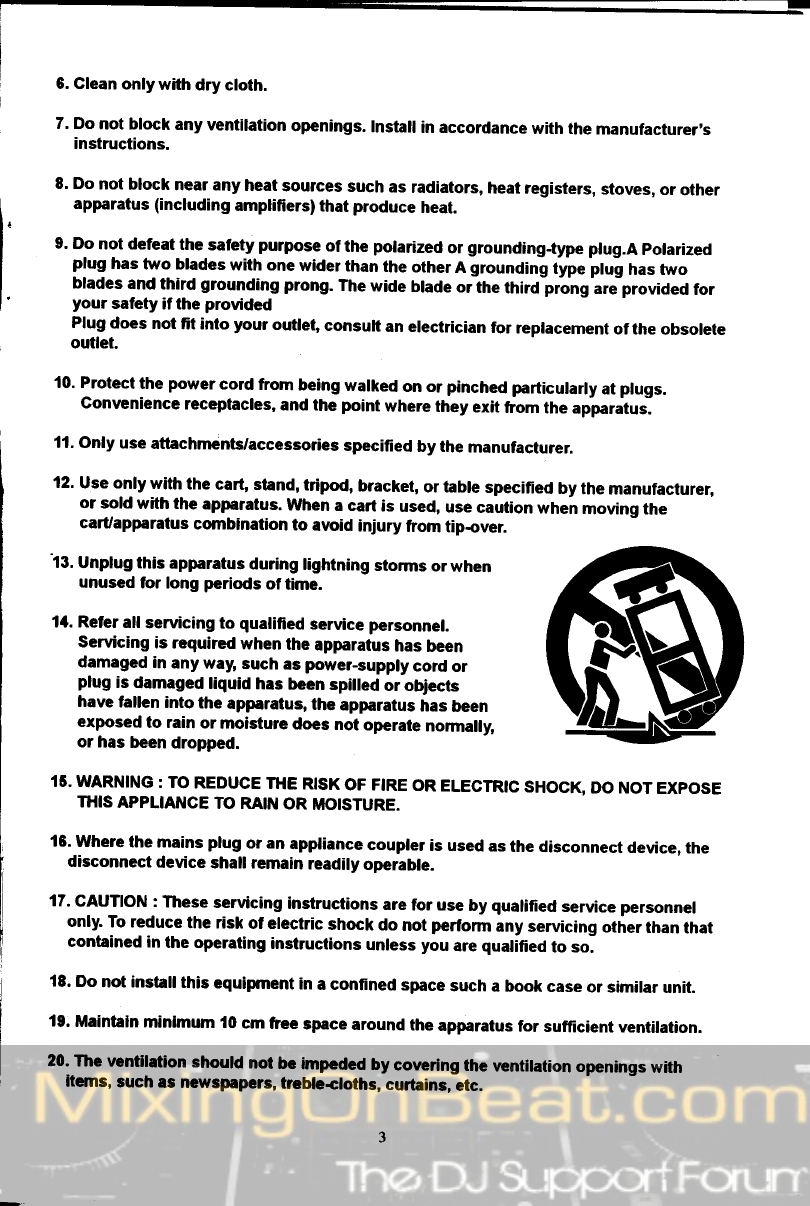
Figure
131.1
ExrmDle of antenna gloundlng a3pol
tt"ttonit Eloctrlcal Cod6, ANSITNFPA
70
AI{TENNA
DISCHARGE
UNIT
(NECSECTION
810-20)
GROUNDING
COI{DUCTORS
(NEC
SECTION
810-21)
NEC
.I{ATIONALELECTRICAL
CODE
s2898A
GROUND
GLATPS
POWER
SERVICE
GROUNDING
ELECTRODE
SYSTET
(NEC
ART 250,PART
H)