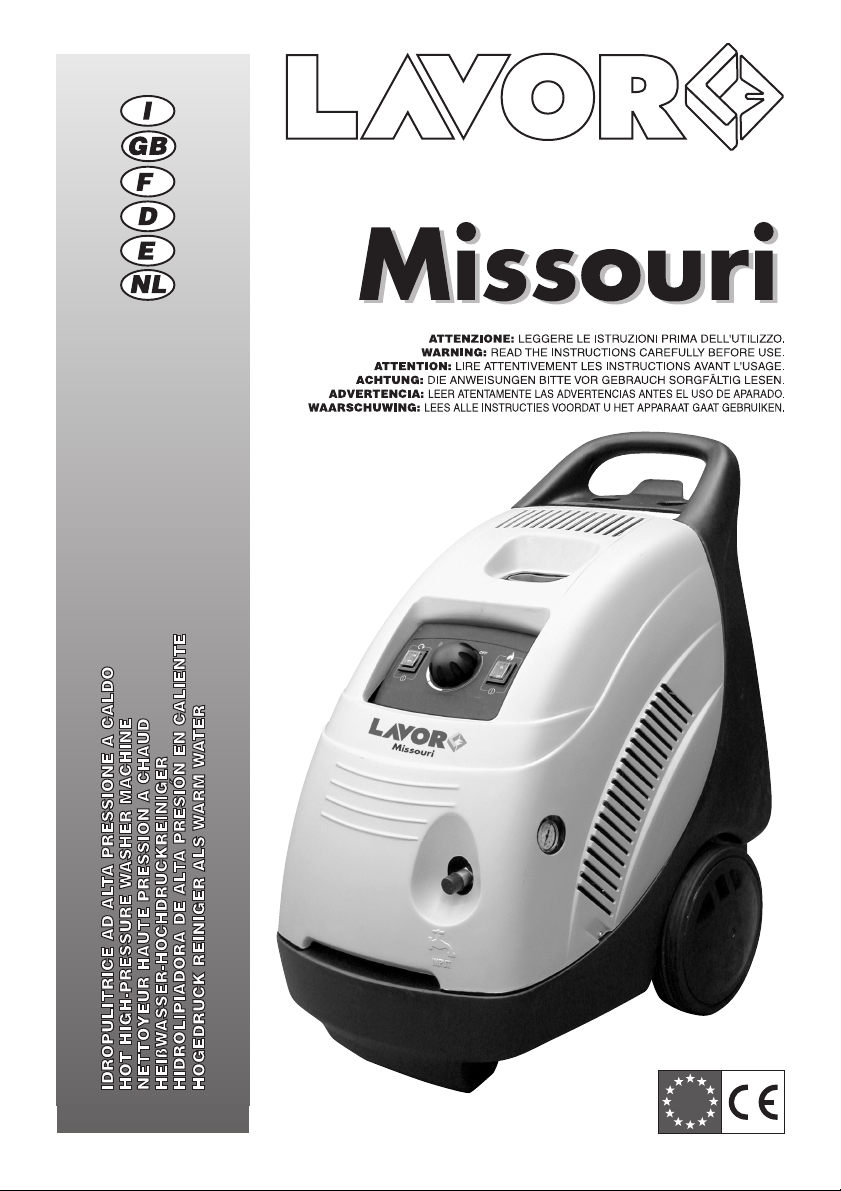
Lavor Missouri User manual


1 • Ugello
2 • Lancia
3 • Pistola
4 • Tubo ad alta pressione
5 • Uscita
6 • Entrata + filtro
7 • Raccordo portagomma
8 • Cavo elettrico con spina
9a • Interruttore elettropompa
9b • Interruttore bruciatore
10 • Regolatore temperatura acqua
11 • Manometro
12a • Serbatoio Gasolio
12b • Serbatoio detergente
1 • Nozzle
2 • Lance
3 • Gun
4 • High pressure hose
5 • Water outlet
6 • Water inlet + filter
7 • Rubber hose fitting
8 • Electric cable
9a • On/Off electropump switch
9b • Burner switch
10 • Water temperature adjusting
11 • Pressure-gauge
12a • Gas oil tank
12b • Detergent tank
1 • Tobera
2 • Lanza
3 • Pistola
4 • Tubo alta presiòn
5 • Salida
6 • Entrada + filtro
7 • Racor del porta manguera
8 • Cable eléctrico con enchufe
9a • Interruptor eléctrobomba
9b • Interruptor quemador
1
0 • Regulador de temperatura agua
11 • Manòmetro
12a • Depósito gasoil
12b • Depósito detergente
1 • Mondstuk
2 • Lans
3 • Pistool
4 • Hogedrukslang
5 • Wateruitgang
6 • Wateringang met filter
7 • Rubberslang verbindingsstuk
8 • Eelectrische kabel
9a • Schakelaar van elektro pomp
9b • Schakelaar van verwarmer
10 • Watertemperatuuregelaar
11 • Manometer
12a • Brandstoftank
12b • Reinigingsmiddel tank
1 • Düse
2 • Lanze
3 • Pistole
4 • Hochdruckschlauch
5 • Auslauf
6 • Einlauf + Filter
7•Anschluß Gummischlauch
8 • Anschlusskabel mit Stecker
9a • Ein-Ausschalter Elektropumpe
9b • Ein-Ausschalter Brenner
10 • Wassertemperaturregler
11 • Manometer
12a • Treibstofftank
12b • Chemie Behälter
1 • Buse
2 • Lance
3 • Pistolet
4 • Flexible H.P.
5 • Sortie H.P.
6 • Entrée d'eau avec filtre
7 • Raccord porte-joint
8 • Cable electrique avec prise
9a • Interrupteur électropompe
9b • Interrupteur brûleur
10 • Reglage température eau
11 • Manometre
12a • Réservoir gasoil
12b • Réservoir du détergent
NL Nederlands
EEspañol
DDeutsch
FFrançais
GB English
IItaliano
4
10
2
1
8
3
fig. 1
12b 12a
5
67
9a 9b
12b
11
2
DOTAZIONE DI SERIE • STANDARD EQUIPMENT • DOTATION DE SERIE
SERIENAUSSTATTUNG • DOTACION DE SERIE • STANDAARDUITRUSTING

CARATTERISTICHETECNICHE •THECNICAL DATA • CARACTERISTIQUESTECNIQUES
TECNISCHE ANGABEN • CARACTERISTICASTECNICAS •TECHNISCHE KARAKTERISTIEKEN
La ditta costruttrice si riserva il diritto di modificare senza preavviso i dati indicati.•The manufacturer reserves the right to modify the declared
data without advance notification.•La maison se réserve le droit de modifier sans préavis les données déclarées.•Das Haus behält sich
das Recht vor, die genannten Angaben ohne Vorankündigung zu ändern.•La empresa se reserva el derecho de modificar sin preaviso
los datos declarados.•De fabrikant behoudt zich het recht voor om de verklaarde gegevens zonder voorafgaand bericht te wijzigen.
l/h
MODELLO • MODEL • MODELE
MODELL • MODELO • MODEL
Pressione max • Pressure max
Pression max • Druck max
Presiòn max • Druk max
Potenza ass.W
Power consump.W
Puissance W
Motor W
Potencia abs. en W
Aansluitvermogen W
Forza di reazione sulla pistola alla pressione di lavoro (max.).
Recoil force of gun at operating pressure (max.).
Force de recul au niveau de la pistolet à la pression de service maxi.
Rückstoßkraft an der Handspritzpistole.
Fuerza de retroceso en la pistola a máxima presión de trabajo.
Terugstotende kracht op het spuitpistool bij werkdruk (max)
Rumorosità • Noise level
Niveau sonore • Betriebsgeräusch
Ruido • Emissiewaarde betrekking
Dimensioni
Dimensions
Dimensions
Abmessungen
Dimensiones
Maten
mm
N
Serbatoio detergente
Detergent tank capacity
Capacité réservoir détergent
Fassungsvermögen Reiniger
Capacidad tanque detergente
Cap. schoonmaakmiddeltank
Collegamento elettrico
Pawer connection
Branchement électrique
Stromanschluß
Conexión a la red eléctrica
Stroomaansluiting
Collegamento idrico
Water connection
Branchement de l'eau
Wasseranschluß
Conexión a la red de agua
Wateraansluiting
Dati di rendimento
Performance data
Caractéristiques de puissance
Leistungsdaten
Potencia y rendimientos
Capaciteit
W
230/240V
Ph.1~50Hz
W
400/415V
Ph.3~50Hz
Motore • Motor • Moteur
Motor • Motor • Motor
kW
C°
Temp. di alimentazione (max.)
Supply temperature (max.)
Temperature maxi. d'arrivée d'eau
Zulauftemperatur (max.)
Máxima temperatura del agua de entrada
Aanvoertemperatuur (màx.)
Portata max
Capacity max
Portée max
Wassermenge max
Caudal máxima
Max capaciteit
l
Kg
dB(A)
Dimensioni• Dimensions • Dimensions
Abmessungen • Dimensiones • Maten
Peso • Weight • Poids
Gewicht • Peso • Gewicht
bar
800 x 553
h 830
2,5 max
3000
-
2,6
570
62
150
MISSOURI
Serbatoio carburante
Gas oil tank capacity
Capacité réservoir gasoil
Fassungsvermögen Treibstofftank
Capacidad tanque gasoil
Cap.do tanque gasoil
30
Temp.Max • Temp.Max
Temp.Max • Temp.Max
Temp.Max • Temp.Max
Potenza bruciatore
Buerner capacity
Puissance do brûleur
Brennerleistung
Potencia del quemador
Verwarmer
C°
kW
l14 max
90
38
27,5
91
Pressione entrata max
Pressure inlet max
Pression entrée max
Druck Einlauf max
Presiòn entrada max
Max Toevoedruk
bar 10
3

AVVERTENZA: Questa idropulitrice é equipaggiata di Automatic Stop System, il quale provvede a spegnere l'idropulitrice
durante la fase di by-pass. Per avviare l'idropulitrice é perciò necessario posizionare l'interruttore su "ON" quindi premere la leva
della pistola, l'Automatic Stop System provvederà ad avviare l'apparecchio rispegnendolo automaticamente qualora venga
rilasciata la leva. Si consiglia perciò di inserire la sicura posta sulla leva della pistola ogniqualvolta si fermi la macchina, per evitare
accensioni accidentali.
• Spontanei avviamenti della macchina senza intervenire sulla pistola sono imputabili a fenomeni quali bolle d'aria
nell'acqua o altro e non a difettosità del prodotto. • Non lasciare la macchina in stand by senza sorveglianza per più di 5
minuti. In caso contrario è necessario, per la protezione della macchina, riportare l’interruttore in posizione “OFF”. •
Verificare che l’accoppiamento del tubo alta pressione con la macchina e con la pistola in dotazione sia correttamente
eseguito, vale a dire senza perdita d’acqua.
PLEASE NOTE: This water cleaner is equipped with the Automatic Stop System, which stops the machine during the
bypass phase.To start the water cleaner, it is therefore necessary to set the switch on position "ON"; after that press the pistol
trigger: the Automatic Stop System will start the machine and will stop it automatically when the trigger is released. It is advisable
to put on the safety of the pistol trigger whenever the machine is stopped, in order to avoid unintentional starting.
• Any automatic start of the machine without pressing the gun trigger is attributable to air bubbles in the water or other
similar phenomena which do not imply the existence of any defects in the machine. • Do not leave the appliance
unattended during the standby for more than 5 minutes. Contrarily, for the safety of the appliance it is necessary to re-
turn the switch into the OFF position. • Please check that the coupling of the high pressure hose with the appliance and
the gun supplied as standard equipment s made correctly, that is to say without any water leak.
AVERTISSEMENT: Ce nettoyeur est équipé de Automatic Stop System qui arrête la machine pendant la phase di by-
pass.Pour démarrer le nettoyeur il faut donc positionner l’interrupteur sur“ON" et appuyer sur le levier du pistolet: de cette façon le
Automatic Stop System fait démarrer la machine et l’arrête automatiquement si le levier est relâché. Afin d’éviter tout démarrage
accidentel du nettoyeur, il est conseillé d’insérer le cran d’arrêt qui se trouve sur le levier du pistolet, à chaque fois que l’on arrête
la machine.
•Tout démarrage spontané pouvant intervenir sans qu'on agisse sur le pistolet doit être attribué à des phénomènes tels
que des bulles d'air dans l'eau ou autres et n'implique aucun défaut de la machine. Ne laissez l’appareil en fonction sans
surveillance pour plus de 5 minutes. Afin de mieux le protéger, arrêtez l’appareil en appuyant sur le bouton OFF. Assurez-
vous que le branchement du flexible avec l’appareil et avec le pistolet soit effectué correctement, sans qu’il y ait fuite
d’eau.
ANMERKUNG: dieser Hochdruckreiniger ist mit dem Automatic Stop System ausgestattet, das die Maschine während der
Bypass-Phase abstellt. Um die Maschine zu starten, positionieren Sie den Schalter auf "ON"; dann drücken Sie den
Pistolenabzug: das Automatic Stop System setzt die Maschine in Betrieb und stellt sie automatisch ab, wenn der Abzug
losgelassen wird. Es ist deshalb ratsam, die Pistole durch die am Abzug angebrachte Vorrichtung zu sichern, jedesmal wenn die
Maschine abgestellt wird, um unabsichtliche Anläufe zu vermeiden.
•Selbststarts der Maschine, ohne die Pistole zu betaetigen sind durch z.B. Luftblasen im Wasser begruendet. Beim
Stillstand fuer mehr als 5 Minuten sollte das Geraet nicht unbeaufsichtigt abgestellt werden. Andernfalls, ist es
notwendig für den Schutz des Gerätes, den Schalter auf OFF Position zu stellen. • Prüfen Sie, daß die Verbindung des
Hochdruckschlauches mit dem Gerät und der als Ausrüstung vorgesehenen Pistole korrekt angeschlossen ist.
ADVERTENCIA: Esta hidrolimpiadora está equipada con el sistema Automatic Stop System, que se ocupa de apagar la
hidrolimpiadora en la fase de by-pass.Por lo tanto, para poner en marcha la hidrolimpiadora es necesario colocar el interruptor en
“ON”, luego apretar la palanca de la pistola y el Automatic Stop System pondrá en funcionamiento el aparato, apagándolo
automáticamente en el caso de que se suelte la palanca. Se aconseja, por este motivo, colocar el seguro sobre la palanca de la
pistola cada vez que se detenga la máquina, para evitar que se encienda accidentalmente.
• Se aconseja no dejar la máquina en stand by, sin vigilancia, más de cinco minutos. Si, por el contrario, esto es
necesario, se aconseja colocar el interruptor en “OFF” para proteger la máquina. • Verificar si el montaje de la manguera
de alta presión con la máquina y la pistola estándard es correcto, es decir sin ninguna pérdida de agua.
LET OP!: deze hogedrukreiniger is uitgerust met een Automatic Stop System, die ervoor zorgt dat de hogedrukreiniger
tijdens de omloopfase uitgeschakeld wordt.Om de hogedrukreiniger te starten dient u de schakelaar op de ON -stand te zetten en
vervolgens op de hendel van het spuitpistool te drukken. Het Automatic Stop System zorgt ervoor dat de machine wordt gestart en
dat deze op het moment dat u de hendel loslaat weer uitgeschakeld wordt. Elke keer dat de machine niet in gebruik is, raden wij u
aan de veiligheidspal, geplaatst op de hendel van het spuitpistool, op veilig te zetten om te voorkomen dat de machine bij toeval
gestart wordt.
• Het uit eigen beweging aanslaan van de machine zonder bemiddeling van het pistooI, is te wylen aan fenomenen zoals
luchtbellen in het water en niet aan een fout van het product. • Laat de machine nooit langer dan 5 minuten in de standby
stand draaien.Voor de veiligheid en de levensduur van de machine is het noodzakelijk de machine uit te schakelen door
middel van de aan/uit schakelaar op de machine. • Controleren of de koppelingen van de slang aan de zijde van de
machine en van het pistool op lekkage. Bij lekkage eerst de koppelingen controlleren en pas als de lekkage is verholpen
kan u de machine gebruiken.
4

1) Il presente manuale è stato redatto per l'UTILIZZATORE.
2) Leggere attentamente le avvertenze contenute nel
presente libretto, in quanto forniscono importanti indicazioni
riguardanti la sicurezza di installazione, d'uso e
manutenzione.
CONSEVARE CON CURA QUESTO LIBRETTO
PER OGNI ULTERIORE CONSULTAZIONE
3)
Prima di collegare l'apparecchio, accertarsi che i dati
di targa siano rispondenti a quelli della rete elettrica
e che la presa sia protetta con un interruttore
magnetotermico differenziale "SALVAVITA" con
sensibilità di intervento inferiore a 0,03 A - 30ms.
4) In casi di incompatibilità tra la presa e la spina
dell'apparecchio, fare sostituire la presa con altra di tipo
adatto da personale professionalmente qualificato.Inoltre
accertarsi che la sezione dei cavi della presa sia idonea
alla potenza assorbita dall'apparecchio. In genere è
sconsigliabile l'uso di adattatori prese multiple e/o
prolunghe.Qualora il loro uso si rendesse indispensabile,
è necessario utilizzare esclusivamente adattatori semplici
o multipli e prolunghe conformi alle vigenti norme di
sicurezza riguardanti la qualità e la portata.
5) Questo apparecchio dovrà essere destinato soltanto
all'uso per il quale è stato espressamente concepito.Ogni
altro uso è da considerarsi improprio e quindi pericoloso.
Il costruttore non può essere considerato responsabile
per eventuali danni derivati da usi impropri, erronei e
irragionevoli.
6) L’uso di qualsiasi apparecchio elettrico comporta
l'osservanza di alcune regole fondamentali.In particolare:-
NONTOCCARE L'APPARECCHIO CON MANI BAGNATE
E A PIEDI NUDI.- NON TIRARE IL CAVO DI
ALIMENTAZIONE O L'APPARECCHIO STESSO PER
STACCARE LA SPINA DALLA PRESA DI CORRENTE.-
NEL CASO IN CUI DURANTE IL FUNZIONAMENTO
VENGA A MANCARE L'ALIMENTAZIONE DI
CORRENTE, PER MOTIVI DI SICUREZZA, SPEGNERE
LA MACCHINA (OFF).
NON PERMETTERE CHE L'APPARECCHIO
VENGA USATO DA BAMBINI O DA PERSONE
NON RESPONSABILI.
7) L’elettropompa deve essere continuamente e
sufficientemente alimentata con acqua (circa 30%
superiore al dato dichiarato nelle caratteristiche tecniche),
Il funzionamento a secco procura gravi danni alle tenute.
8) Non lasciare l'elettropompa esposta a basse temperature,
deve essere protetta dal gelo.
9) Per apparecchi non dotati di total stop, non lasciare
in funzione l'elettropompa più di 1÷2 minuti a pistola
chiusa. L'acqua riciclata aumenta notevolmente la
temperatura provocando danni alle tenute.
Per apparecchi dotati di total stop è buona norma
non lasciarli in stand-by più di 5 minuti
.
10) Durante il funzionamento non collocare la macchina in
zone dove sia precaria l'aerazione e tantomeno coprirla.
11) Durante l'uso utilizzare un abbigliamento adeguato alle
norme di sicurezza vigenti ma in ogni caso fare uso di
occhiali di protezione e calzature in gomma antisdrucciolo.
12) Evitare di disperdere nell'ambiente sostanze inquinanti,
nocive e tossiche.
13) Disattivare l'apparecchio in caso di guasto o di cattivo
funzionamento. Per l'eventuale riparazione rivolgersi
solamente ad un Rivenditore Autorizzato e richiedere
l'utilizzo di ricambi originali. Il mancato rispetto di quanto
sopra può compromettere la sicurezza dell'apparecchiatura
e l'immediato decadimento della garanzia.
14) Qualora l'apparecchio non venga utilizzato per lunghi
periodi disattivare sia il collegamento elettrico che quello
idrico.
15) Non usare l'apparecchio se il cavo elettrico o parti
importanti dell'apparecchio risultano danneggiate, es.
dispositivi di sicurezza, tubo alta pressione pistola ecc.
16) ATTENZIONE: L'azionamento della pistola provoca un
contraccolpo.Perciò tenere ben salde la lancia e la pistola.
17) ATTENZIONE: Questo apparecchio è stato progettato
per essere utilizzato con il detergente fornito o prescritto
dal costruttore. L’impiego di altri detergenti o sostanze
chimiche può compromettere la sicurezza dell’apparecchio.
18) ATTENZIONE: Non utilizzare l’apparecchio in prossimità
di persone, salvo il caso in cui queste indossino abiti
protettivi.
19) ATTENZIONE: I getti ad alta pressione possono essere
pericolosi se usati impropriamente. I getti non devono
essere diretti verso le persone, gli animali, verso le
apparecchiature elettriche vive oppure verso l’apparecchio
stesso.
20) Non dirigere il getto verso se stessi oppure verso altre
persone per pulire abiti o scarpe.
21) Disinserire l’apparecchiatura dalla rete di alimentazione
elettrica ed idrica, prima di effettuare qualsiasi lavoro di
manutenzione.
22)
ATTENZIONE:I tubi flessibili, gli accessori e i raccordi
per l’alta pressione, sono importanti per la sicurezza
dell’apparecchio. Utilizzare solamente tubi flessibili,
accessori e raccordi prescritti dal costruttore (è
estremamente importante preservare l’integrità di questi
componenti evitandone un uso improprio.)
23) Se viene utilizzata una prolunga, la spina e la presa
dovranno essere impermeabili all’acqua
24) ATTENZIONE: Prolunghe inadeguate possono
essere pericolose.
25) La macchina è dotata di un ugello calibrato, il quale
determina le prestazioni nominali della macchina. Ogni
variazione della sezione di tale ugello provoca alterazioni,
relativamente alle prestazioni della macchina.
26) Durante il funzionamento é raccomandabile tenere
l’apparecchio sotto osservazione.
27) Il livello di pressione acustica é 80dB:durante l’utilizzo si
consiglia l’impiego di protezioni auricolari.
28) Riempire il serbatoio con combustibile indicato sulla
targhetta dati tecnici (Diesel) (fig.1).Evitare che il serbatoio
si vuoti durante il funzionamento per non danneggiare la
pompa del gasolio. L’uso di combustibili non adeguati
può causare pericolo.
29) Dispositivi di sicurezza:
pistola dotata di fermo di sicurezza.
macchina dotata di protezione da sovraccarichi elettrici.
pompa dotata di valvola di pressione
AVVERTENZE GENERALI I
5

I
CORRETTO UTILIZZO DELLA MACCHINA
Le prestazioni della macchina sono idonee ad un
utilizzo non professionale.Le tecnologie costruttive
sono state studiate per garantire altissimi livelli di
affidabilità, sicurezza e durata nel tempo.
È assolutamente vietato usare la macchina in
ambienti o zone classificate potenzialmente
esplosive. La temperatura dell'ambiente di lavoro
deve essere compresa tra +5 ÷+50 °C.La macchina
è costituita da un gruppo motopompa protetto da
una carenatura in materiale antiurto. La macchina
è provvista di una lancia con pistola dotata di
impugnatura per favorire una pratica posizione di
lavoro, le cui forme e dimensioni corrispondono alle
norme di sicurezza vigenti. È vietato applicare
protezioni o modifiche sulla lancia ad alta pressione
o agli ugelli di lavaggio. L'acqua di alimentazione
dell'idropulitrice non deve essere sporca, sabbiosa
o contenere prodotti chimici corrosivi per non
compromettere il buon funzionamento e la lunga
durata dell'apparecchiatura. La macchina viene
usata per il lavaggio di serrande, portoni, piastrelle,
automobili, camper ecc.. dove si richieda l'uso di
acqua in pressione per eliminare lo sporco. Con
opportuni accessori opzionali può svolgere lavori di
sabbiatura e lavaggi con spazzola rotativa da
applicare alla lancia.
L'idropulitrice deve essere posizionata su un piano sicuro,
stabile e in posizione orizzontale.
Ogni qualvolta si usa l'idropulitrice ad alta pressione si
consiglia di impugnare la pistola nella posizione corretta,
con una mano sull'impugnatura e l'altra sulla lancia
come rappresentato nella figura 2.
In caso di funzionamento in ambiente chiuso deve essere
assicurata sufficiente aerazione e scarico dei gas.
DISIMBALLO
Dopo aver tolto l'imballaggio, assicurarsi dell'integrità
dell'apparecchio.
- In caso di dubbio, non utilizzare l'apparecchio e
rivolgersi ad un centro specializzato o al rivenditore.
- Per motivi di trasporto e di dimensioni dell'imballo
alcune parti accessorie possono essere fornite
smontate, nel qual caso eseguire il montaggio
seguendo le istruzioni contenute nel presente
libretto.
- Gli elementi dell'imballaggio (sacchetti in plastica,
polistirolo espanso, chiodi, ecc.) non devono essere
lasciati alla portata dei bambini, in quanto potenziali
fonti di pericolo.
Tutti i nostri apparecchi sono stati sottoposti ad
accurati collaudi e sono coperti da garanzia per 12
mesi, da difetti di fabbricazione.La garanzia decorre
dalla data di acquisto. In caso di riparazione
dell’idropulitrice o degli accessori nel periodo della
garanzia, bisogna allegare una copia della ricevuta.
La garanzia vale solo se:
- Si tratta di difetti del materiale o di fabbricazione
(Difetti non chiaramente attribuiti al materiale o a
la fabbricazione verranno esaminati presso un
nostro Centro Assistenza Tecnica o presso la
nostra sede, ed addebitati a seconda delle
risultanze).
- Le istruzioni indicate nel presente manuale sono
state seguite attentamente.
- Le riparazioni sono state effettuate da riparatori
autorizzati.
- Siano stati utilizzati accessori originali.
-L’idropulitrice non sia stata sottoposta a
sovraccarichi quali urti, cadute o gelo.
- È stata usata solo acqua pulita.
- L’idropulitrice non sia stata oggetto di locazione o
in altro modo sia stata oggetto dell’uso
commerciale/professionale.
Sono esclusi dalla garanzia:
- Le parti soggette a normale usura.
- Il tubo ad alta pressione.
- I danni accidentali, per trasporto, per incuria o
inadeguato trattamento, per uso ed installazione
errati od impropri, non conformi alle avvertenze
riportate su Iibretto di istruzioni,
- La garanzia non contempla l'eventuale pulizia degli
organi funzionanti.
Una riparazione da garanzia comprende la
sostituzione di parti difettose, mentre sono esclusi
la spedizione e l’imballaggio.È esclusa la sostituzione
dell'apparecchio ed il prolungamento della garanzia
a seguito di intervenuto guasto.La riparazione viene
eseguita presso un nostro Centro AssistenzaTecnica
Autorizzato, o presso la nostra sede e deve pervenire
in porto franco, e cioè con spese di trasporto a
carico delI'utilizzatore.Il costruttore declina qualsiasi
responsabilità per eventuali danni a persone o cose,
causati da cattiva installazione o imperfetto uso
dell'apparecchio.
fig. 2
I
CONDIZIONI DI GARANZIA
6

ASPIRAZIONE DEL DETERGENTE
DISPOSITIVO DI SICUREZZA PISTOLA
I
MONTAGGIO DELLA LANCIA
Prima di usare l’idropulitrice montare la lancia sulla
pistola e l’ugello sulla lancia (fig. 3).
Per montare la lancia sulla pistola è sufficiente
inserire l'estremità filettata della lancia (fig.6a-6b
pos.1) nel foro presente sulla pistola (fig.4 pos. 2),
avvitare la lancia come indicato dalla freccia (A) fino
a raggiungere il completo accoppiamento (vedi fig.4).
RIFORNIMENTO
Riempire il serbatoio del detergente con prodotti
consigliati adatti al tipo di lavaggio da effettuare
(fig.1).
ATTENZIONE: usare solamente detergenti liquidi,
evitare assolutamente prodotti acidi o molto alcalini.
Vi consigliamo di usare i nostri prodotti che sono stati
studiati appositamente per l'uso con idropulitrici.
ATTENZIONE: Per il corretto uso del serbatoio non
introdurre sostanze infiammabili o chimicamente
aggressive
La testina regolabile permette di selezionare il getto
a bassa e alta pressione.La selezione della pressione
avviene ruotando la testina regolabile.Per aumentare
la pressione ruotare la testina regolabile in senso
orario (fig. 6 pos. A) per diminuire la pressione
ruotarla in senso antiorario (fig. 6 pos.B).
L'aspirazione del detergente avviene
automaticamente quando la testina regolabile della
lancia viene ruotata per il funzionamento a bassa
pressione (in senso antiorario). Accendere
l’apparecchio e la miscelazione del detergente con
l'acqua avvengono automaticamente al passaggio
dell’acqua.
Ogni qualvolta si ha la necessità di fermare la macchina
è importante inserire la sicura (fig.5 posS) presente sulla
pistola per evitare aperture accidentali .
fig. 5
AB
fig. 3
fig. 6
fig. 4
S
1
A
2
7

I
INSTALLAZIONE
MESSA IN SERVIZIO 1°AVVIAMENTO
Per la prima volta o dopo un periodo di lunga inattività
è necessario collegare per alcuni minuti solo il tubo
di aspirazione per fare uscire dalla mandata eventuali
impurità in modo da non intasare l'ugello della pistola.
RIFORNIMENTO
Riempire il serbatoio con combustibile indicato sulla
targhetta dati tecnici (Diesel) (fig. 1).
Evitare che il serbatoio si vuoti durante il
funzionamento per non danneggiare la pompa del
gasolio.
ALLACCIAMENTO ELETTRICO
Controllare che la tensione di rete corrisponda alla
tensione della Vs.macchina indicata sulla targhetta
dati tecnici. Il Vs. impianto elettrico deve essere
eseguito da tecnici qualificati in grado di operare
secondo le disposizioni delle normative in vigore
(messa a terra, fusibile, salvavita ecc...).
In mancanza di una delle norme di cui sopra, il
costruttore declina ogni responsabilità per il personale
addetto e non riconosce alcuna garanzia.
IMPORTANTE: Fare molta attenzione, per motori
trifase, al collegamento del cavo elettrico con la
spina (vedi schema elettrico).
COLLEGAMENTO IDRICO - AVVIAMENTO
(vedi fig. 1)
1)Controllare che l'interruttore di accensione sia
sulla posizione "OFF"(fig. 1 pos.9);
2)Collegare il tubo di alimentazione dell'acqua al
raccordo di aspirazione INLET (fig. 1 pos. 6)
utilizzando un tubo rinforzato con diametro
interno non inferiore a 13 mm (1/2").
3)Inserire la lancia nella pistola (fig.1 pos.2-3);
4)Collegare il tubo alta pressione (fig.1 pos. 4) al
raccordo di mandata OUTLET (fig.1 pos.5)
5)Collegare il tubo alta pressione (fig.1 pos. 4)
alla pistola (fig.1 pos.4-3);
6)Aprire completamente il rubinetto dell'acqua;
7)Premere la leva della pistola (fig.1 pos. 3) in
modo da fare uscire l'aria ed eventuali residui di
pressione dalle tubazioni;
8)Inserire la spina nella presa di corrente
(fig.1pos.8);
9)Accendere l'apparecchio collocando
l'interruttore sulla posizione "ON" (fig. 1 pos. 9).
FUNZIONAMENTO AD ACQUA FREDDA
• Regolare la manopola del termostato sulla
temperatura “min” (fig.1pos.10).
• Commutare l'interruttore del bruciatore su OFF
(fig. 1pos.9b).
FUNZIONAMENTO CON ACQUA CALDA
•Regolare la manopola deltermostato sulla
temperatura desiderata (fig. 1pos.10).
•Commutare l'interruttore del bruciatore su ON (fig.
1pos.9b).
SPEGNIMENTO ACQUA CALDA.
• Portare la manopola del termostato a "OFF"
(fig.1pos.10).
• Far funzionare la macchina fino a quando esce
acqua fredda dalla lancia.
• Spegnere l'interruttore bruciatore (fig.1pos.9b).
IMPORTANTE: l'idropulitrice deve funzionare con
acqua pulita onde evitare danni all'idropulitrice
stessa.
A macchina nuovamente in moto controllare che il
getto sia uniforme, diversamente pulire l’ugello da
eventuali impurità.
ARRESTO DELLA MACCHINA
A fine lavoro spegere la macchina (interruttore
posizione OFF).A macchina ferma scaricare sempre
il tubo della pressione, aprendo la pistola.
Si consiglia di svolgere il tubo completamente prima
di utilizzare la macchina e di riavvolgere il tubo a
macchina spenta, dopo aver premuto la leva della
pistola per scaricare la pressione residua.
8

I
MANUTENZIONE
Prima di effettuare qualsiasi manutenzione alla
idropulitrice scaricare la pressione,togliere il
collegamento elettrico e idrico.
IMPORTANTE: Per tutte le operazioni di
manutenzione della caldaia, della pompa alta
pressione e della macchina è necessario rivolgersi
a personale professionalmente specializzato o a un
nostro Centro di Assistenza autorizzato.
CONTROLLO FILTRO ASPIRAZIONE ACQUA
Ispezionare periodicamente il filtro di aspirazione
per evitare intasamenti e compromettere il buon
funzionamento della pompa (fig. 1).
SOSTITUZIONE UGELLO LANCIA
Sostituire l'ugello qualora la pressione scenda al di
sotto dei normali valori.
PULIZIA FILTRO GASOLIO
Controllare periodicamente il filtro gasolio se
deteriorato o troppo sporco sostituirlo.
SOSTA PROLUNGATA
Se si prevede di conservare la macchina in ambienti dove
esista il pericolo di gelo o di non utilizzarla per un periodo
superiore ai 3 mesi, è consigliabile fare aspirare alla
macchina, prima di riporla, una miscela di liquido antigelo
(simile a quella utilizzata dalle automobili); avendo cura
di scaricare il più possibile il contenuto interno di miscela,
facendo funzionare a secco la macchina per qualche
secondo. Inoltre all'avviamento possono verificarsi delle
piccole perdite dalla pompa, che scompariranno dopo
qualche ora di funzionamento. In caso di perdita maggiore
rivolgersi al Servizio Assistenza Autorizzato.
MOTORE ELETTRICO
Il motore elettrico è protetto contro i sovraccarichi.
Se vi è un’anomalia nel funzionamento del motore
questo si arresta. Attendere 5-10 minuti prima di
rimetterlo in marcia.Se l’anomalia persiste consultare
il capitolo “INCONVENIENTI E RIMEDI”. Se
l’anomalia persiste sospenderne l’uso e rivolgersi
ad un centro di Assistenza
CAVO ELETTRICO
Fare attenzione a non danneggiare il cavo elettrico.
La sostituzione va effettuata solo da personale
professionalmente qualificato. Non effettuare
riparazioni precarie del cavo elettrico.I cavi di
prolunga devono essere impermeabili all’acqua ed
avere le dimensioni indicate nella tabella sotto
riportata:
1,5 mm2max 10 m
2,5 mm2max 30 m
I cavi devono essere tenuti asciutti e sollevati da
terra.Stendere sempre il cavo di prolunga per evitare
danni provocati da fonti di calore.
TUBO ALTA PRESSIONE
ATTENZIONE!
Il tubo ad alta pressione è stato progettato e costruito per
resistere alle alte pressioni.
Esso può essere danneggiato e per questo va trattato con
particolare riguardo.
- Non aggrovigliarlo
- Non passare con autoveicoli sul tubo.
-Non piegarlo ad angolo e non sottoporlo a carichi concentrati.
- Non usare l'idropulitrice se il tubo ad alta pressione non è
completamente steso e srotolato. Se il tubo non viene steso
durante l'utilizzo, il rivestimento esterno si logora facilmente.
Un cattivo utilizzo può generare danni o rotture premature
e causare il decadimento della garanzia.
PULIZIA CALDAIA
La pulizia della caldaia deve essere eseguita
periodicamente ogni 180÷200 ore di lavoro.
Una cattiva regolazione del bruciatore fa aumentare
il consumo di carburante, aggravando inutilmente
l'inquinamento ambientale.
Il trattamento di decalcificazione è da effettuarsi
periodicamente con prodotti specifici consigliati dal
costruttore. La periodicità dipende dalla durezza
dell’acqua.
In un fusto di acqua da 15 litri circa, versare 1 litro
di prodotto decalcificante facendo attenzione ad
attenersi alle specifiche riportate sulla confezione
Staccare la pistola dal tubo ad alta pressione,
immergere l’estremità libera del tubo stesso nel
fusto, in modo da formare un circuito chiuso e far
aspirare il prodotto dalla idropulitrice per almeno 10
minuti.
E’consigliabile che l’estremità del tubo di mandata
scarichi in un sacchetto di tela o di reticella per
evitare di rimettere in circuito il calcare asportato.
Quindi ripristinare il collegamento normale e
sciacquare abbondantemente con acqua fredda.
Si consiglia di far eseguire l’operazione al personale
della nostra assistenza in quando il prodotto
decalcificante può provocare usura dei componenti.
Per lo smaltimento del decalcificante attenersi alle
norme.
DECALCIFICAZIONE (fig.8)
fig. 8 9

INCONVENIENTI E RIMEDI I
Premendo l’interruttore l’elettropompa non
parte.
Il motore si arresta improvvisamente.
L’elettropompa gira ma non va in pressione.
Pressione di lavoro irregolare.
Perdite di acqua dalla macchina.
Rumorosità anomala.
Presenza di acqua nell’olio.
La macchina non aspira detergente.
Azionando l'interruttore bruciatore non si
verifica l'accensione della caldaia.
Acqua non sufficientemente calda.
Eccessivo fumo dal camino.
La spina non è ben inserita nella presa.
La presa elettrica non funziona.
La tensione di rete è insufficiente.
La pompa è bloccata.
La prolunga elettrica è di sezione inadeguata.
Il termico è scattato.
La prolunga elettrica è di sezione inadeguata.
Acqua insufficiente.
Filtro aspirazione intasato.
Valvole aspirazione o mandata intasate o usurate.
Valvola di regolazione di pressione in posizione
di minima pressione
Ugello usurato
Ugello intasato.
Valvole aspirazione o mandata intasate o usurate
Guarnizioni consumate.
Guarnizioni valvola regolazione pressione usurate
Filtro aspirazione intasato.
Perdite dalla pompa.
Perdite dall’avvolgitubo.
Perdite dalla valvola regolazione pressione.
Perdite dai raccordi idraulici.
Valvole aspirazione o mandata intasate o usurate.
Cuscinetti usurati.
Filtro aspirazione intasato.
Temperatura eccessiva dell’acqua di ingresso.
Anelli di tenuta usurati.
Serbatoio del detergente vuoto.
Manopola della lancia in posizione di alta
pressione.
Un tubo del sistema di aspirazione del
detergente è staccato.
Mancanza gasolio.
Filtro gasolio intasato.
Pompa gasolio bloccata o bruciata.
Termostato guasto.
Scarica accensione insufficiente o totalmente
assente.
Elettrodi non a distanza corretta.
Fusibile bruciato.
Filtro dell’ugello del brciatore ostruito.
Filtro gasolio intasato.
Scarso rendimento caldaia.
Serpentina caldaia intasata dal calcare.
Combustione non corretta.
Combustibile alterato con presenza di impurità
o acqua.
Inserire correttamente la spina nella presa di corrente.
Far controllare la presa elettrica.
Far controllare che l’impianto sia adeguato.
Posizionare l’interruttore su ON mentre si tiene
premuta la leva della pistola, se il problema persiste
rivolgersi ad un centro assistenza autorizzato.
Consultare il paragrafo sulla manutenzione.
Lasciare raffreddare il motore per alcuni minuti.
Se l’anomalia persiste rivolgersi ad un centro
assistenza autorizzato.
Consultare il paragrafo sulla manutenzione.
Controllare che la portata sia del 30% superiore al dato
presente nella targhetta dati tecnici dell’apparecchio.
Smontare e pulire il filtro.
Rivolgersi ad un centro assistenza autorizzato.
Aumentare la pressione avvitando la manopola
di regolazione della pressione.
Sostituire l’ugello.
Smontare la lancia e pulire l’ugello con lo spillo
in dotazione.
Rivolgersi ad un centro assistenza autorizzato.
Smontare e pulire il filtro.
Rivolgersi ad un centro assistenza autorizzato.
Serrare i raccordi, se l’anomalia persiste rivolgersi
ad un centro assistenza autorizzato.
Rivolgersi ad un centro assistenza autorizzato.
Serrare i raccordi, se il difetto persiste rivolgersi
ad un centro assistenza autorizzato.
Rivolgersi ad un centro assistenza autorizzato.
Smontare e pulire il filtro.
Portare la temperatura sotto la max temperatura
dichiarata nel presente libretto.
Rivolgersi ad un centro assistenza autorizzato.
Riempire il serbatoio.
Ruotarla in posizione di bassa pressione.
Rimetterlo in posizione.
Verificare il livello nel serbatoio.
Pulire il filtro gasolio.
Rivolgersi ad un centro assistenza autorizzato.
Pulire filtro ugello bruciatore.
Pulire il filtro gasolio.
Rivolgersi ad un centro assistenza autorizzato.
Procedere alla disincrostazione.
Pulire il filtro gasolio.
Pulire la caldaia.
Svuotare il serbatoio e pulirlo accuratamente.
Pulire il filtro gasolio.
INCONVENIENTI CAUSE RIMEDIO
RIPARAZIONI - RICAMBI
Per eventuali inconvenienti non menzionati nel presente manuale o rotture della macchina si prega di
interpellare un centro di Assistenza Autorizzato per la relativa riparazione o per la eventuale sostituzione
di parti di ricambio originali.
Qualora si decida di non utilizzare più la macchina, si raccomanda:
- di renderla inoperante togliendo il cavo di alimentazione dell'energia elettrica;
- di riporla in un luogo fuori dalla portata dei bambini;
- di non utilizzare le parti della macchina rottamate come parti di ricambio
-
di disassemblare la macchina dividendo le parti dello stesso tipo per lo smaltimento in accordo con le leggi vigenti.
ROTTAMAZIONE DELLA MACCHINA
10

GENERAL WARNING GB
1) This manual has been drawn up for:THE USER.
2) Please carefully read the enclosed instructions that include
important points about the safety for the installation, usage
and maintenance.
KEEPTHIS BOOKLET HANDY FOR ANY FURTHER
INFORMATION.
3) Before connecting the unit, check that the data on the
registration plate are the same as those of the electrical
grid and that the socket is protected by a "GROUND
FAULT INTERRUPTER" magnetothermic differential switch
with intervention sensitivity not exceeding 0,03 A-30ms.
4) If the main socket and plug of the machine are incompati
ble, have professionally qualified personnel change the
socket for another of adequate type. Also check that the
section of the socket wires is suitable for the power
absorbed by the machine. It is generally inadvisable to
use adapters, multiple sockets and/or extensions. If their
use is essential, only ever use single or multiple adapters
and extensions that comply with the current safety
provisions governing quality and capacity.
5) This machine has only to be used for the purpose for
which it was specifically designed. Any other use shall
be considered improper and, therefore, dangerous.The
manufacturer shall not be held responsible for any
damages caused by improper, incorrect and irrational
use.
6) Use of any electrical machine implies compliance with
certain fundamental rules. In particular:
- NEVER EVER TOUCH THE MACHINE WITH WET
HANDS OR BARE FEET.- NEVER PULL THE POWER
SUPPLY CABLE OR MACHINE IN ORDER TO
DISCONNECT THE PLUG FROM THE SOCKET.- IF
DURING FUNCTIONING THE POWER SUPPLY RUNS
OUT, FOR SAFETY REASONS TURN THE MACHINE
OFF.
DO NOT ALLOW THE DEVICE TO BE USED BY
CHILDREN OR IRRESPONSIBLE PEOPLE
7) The unit must continuously run with water (approximately
30% higher than the data stated in the technical
characteristics). Dry running will cause serious damage
to the seals.
8) Protect the unit against freezing.Avoid storing the machine
in cold places
9) For devices not equipped with 'total stop', do not leave
the motor pump running with the spray gun closed for
more than 1-2 minutes. Over this time the temperature
of the re-cycled water wiIl increase quickly and could risk
damaging the pump seals. For devices equipped with
'total stop', as a rule, do not leave them on standby for
more than 5 minutes.
For devices equipped with 'total stop', as a rule, do not
leave them on standby for more than 5 minutes.
10) When the unit is working do not use it in a closed place
where ventilation may be insufficient and never cover the
unit.
11) During operation wear suitable clothes complying with
safety norms, and in any case make use of protection
glasses and antislip rubber shoes.
12) Avoid to disperse polluting, noxious and toxic substances
in the environment.
13) Disconnect the equipment in the event of breakdown or
malfuncion.If any repair is needed contact an Authorized
Dealer only and ask that only original spare parts are
used. Failing to observe the above instructions may put
the safety of the equipment at risk.
14) When the equipment remains idle for a long time,
disconnect the electric and water supplies.
15) Do not use the appliance if the power cord or any important
parts of the appliance appear to be damaged, ex.safety
devices, high pressure hose, gun, etc.
16) WARNING:The water jet from the high-pressure nozzle
produces a recoil on the gun.You should therefore hold
the gun and spray lance firmly.
17) WARNING: This appliance has been designed for use
with cleaning agent supplied or recommended by the
manufacturer. The use of other cleaning agents or
chemicals may adversely affect the safety of the appliance.
18) WARNING: Do not use the appliance within the range of
persons unless they wear protective clothing.
19) WARNING:High pressure jets can be dangerous if subject
to misuse.Jets must not be directed at persons, at animal,
live electrical equipment or the appliance itself.
20) Do not direct the jet against yourself or others in order to
clean clothes or footwear.
21) Disconnect the machine from the water and electrical
power supply before carrying out any maintenance
operation.
22) WARNING:High pressure hoses, fittings and couplings
are important for the safety of the appliance. Use only
hoses, fittings and couplings recommended by the
manufacturer; preservation of the integrity of these
components, by preventing improper use, is extremely
important.
23) If an extension cord is used, the plug and socket must
be of waterproof construction.
24) WARNING: Inadequate extension cords can be
dangerous.
25) the appliance is equipped with a calibrated nozzle which
determines the rated performance of the appliance.each
variation of the nozzle’s section causes alterations, as for
the machine performance.
26) The machine must not be left unattend when working.
27) The sound level is 80dB: during operation it is advisable
to use ear protection.
28) Fill up the tank with the fuel indicated on the technical
data plate. (Diesel) (fig. 1) Avoid that the tank is empty
when the machine is running in order not to damage the
fuel pump. Incorrect fuel shall not used as they as
provide hazard.
29) SAFETY DEVICES:
GUN EQUIPPED WITH SAFETY LOCK
MACHINE EQUIPPED WITH ELECTRICAL
OVERLOAD PROTECTION.
WATER PUMP EQUIPPED WITH PRESSURE VALVE
11

After opening the package, check the entire unit.
- In case of problems with this unit do not use it until you have consulted an authorized service/centre.
- Due to transport and packing dimension reasons, some accessories can be supplied disassembled;
in this case the fitting has to be carried out following the instructions on this booklet.
- All possible harmful parts of the package (plastic bags, foamed polystyrene, nails etc.) should be kept
out of children's reach.on ground and take the pallet off .
GB
WARRANTY CONDITIONS
The performance of the machine are suitable for a
non-professional use. Structural technologies have
been studied to assure high reliability and safety
levels, and long life.It is absolutely forbidden to use
the machine in potentially explosive environments
or areas. The working temperature must range
between + 5°and + 50°C.The machine consists of
a motor pump protected by housing of shock resistant
material.
The machine is supplied with a lance with gun,
equipped with a handle to offer a practical working
position; the shapes and the dimensions of the
handle correspond to the safety normes in force. It
is forbidden to apply any protections or modifications
on the high-pressure lance or to the washing nozzles.
The water you use for the washer must not be dirty,
sandy or hold any corrosive chemical products, not
to compromise the good functioning and the long
life of the equipment. The machine is used for
washing rolling shutters, main doors, tiles, cars,
campers, etc., where water pressure is necessary
to remove dirt.With suitable optional accessories,
the machine can carry out, sand blastings and
washings with the rotating brush, which has to be
connected to the lance.
The washer shall be placed on a safe and steady plane
and in horizontal position.
Whenever you use the high pressure washer, we suggest
to grip the gun in the right position, with one hand on the
handle and the other hand on the lance, as shown in the
picture fig. 2.
In case of operation indoors, adequate ventilation and
gas venting must be assured.
All our machines are subjected to strict tests and are
covered against manufacturing defects by a 12 month
guarantee. If your high pressure washer or accessories
are handed in for repair, a copy of the receipt must be
enclosed.
Guarantee repairs are being made on the following
conditions:
-That defects are attributable to flaws or defects in materials
or workmanship. (Defects not clearly attributable to
materials or manufacture shall be examined by our
Technical Assistance Center or in our plant and shall be
charged according to the outcome of the exaicination).
- That the directions of this instruction manual have been
thoroughly observed.
- That repair has not been carried out or attempted by
other than authorized service staff.
- That only orignal accessories have been applied.
- That the product has not been exposed to abuse such
as knocks, bumps or frost.
- That only water without any impurities has been used.
- That the high pressure washer has not been used for
rental nor used commercially in any other way.
The following are not included in the warranty:
- parts subject to normal wear
- the high-pressure tube
- accidental damage, caused by transport, neglect or
inadequate treatment, incorrect or improper use and
installation failing to comply with the indications in the
instruction manual.
- The warranty shall not cover any cleaning operations to
which the operative components may be subjected.
Repairs under this guarantee include replacement of
defective parts, exclusive of packing and postage/carriage.
The warranty shall not cover replacement of the machine
or extension of the guarantee resulting from a breakdown
.Repairs shall be carried out in our Authorized Technical
Assistance Center or in our plant.The machine shall reach
us carriage free, i.e.with transport expenses at the user’s
charge.The manufacturer declines all responsibility for
damage to persons or property caused by bad installation
or incorrect use of the machine.
fig. 2
UNPACKING
CORRECT USE OF THE MACHINE
12

DETERGENT SUCTION
GB
Before using the high pressure cleaner, assemble the
lance onto the spray gun and the nozzle onto the lance
(fig. 3).To fit the lance to the gun, it is sufficient to insert
the threated end of the lance (See fig. 6a-4 pos. 1) into
the hole on the gun (See fig. 4 pos. 2); then screw the
lance as indicated by the arrow (A) till when you have
reached the complete coupling (See fig. 4).
FILLING UP
Fill up the detergent tank with the suggested products,
suitable for the kind of washing to be carried out (fig.
1).
ATTENTION: make use only of liquid detergent,
do not absolutely use acid or too much alkaline
products.
We suggest you to make use of our products, which
have been studied for the use with washer machines.
ATTENTION: For proper use of the tank, do not
introduce flammable or chemically harsh
substances.
The adjusting head allow you to select water jet at
low and high pressure.
The pressure selection is carried out by rotating the
adjusting head.To increase the pressure, rotate the
adjusting head clockwise (fig. 6 Pos. A), to reduce
the pressure rotate it anti-clockwise (fig. 6 pos. B).
The detergent suction is automatic when the adjusting
head of the lance is rotate for low pressure operation
(anti-clockwise). When you start the machine, the
mixing of the detergent with the water is automatic
at the water passage.
Whenever you need to stop the machine, it is necessary
to use the safety lock (S) (fig. 5), placed on the gun, in
order to avoid fortuitous openings.
fig. 4
fig. 5
AB
fig. 3
fig. 6
GUN SAFETY DEVICE
LANCE AND NOZZLZ ASSEMBLY
S
1
A
2
13

1ST. STARTING UP
Before starting the pump, check the oil level in the
pump. If it is the first time that you use the machine
or if you do not operate the machine for a long
period, it is necessary to connect, for some minutes,
the suction hose, in order to let possible impurities
go out, so that the nozzle gun will not become
clogged.
FILLING UP
Fill up the tank with the fuel indicated on the technical
data plate. (Diesel) (fig. 1)
Avoid that the tank is empty when the machine is
running in order not to damage the fuel pump.
ELECTRIC CONNECTION
Check that the line voltage corresponds to the
voltage of your machine, indicated on the technical
data plate.Your electric system has to be carried
out by qualified technicians, who are able to operate
under provisions of the norms in force (grounding,
fuse, ground fault interrupter etc.).
Failing one of the above-mentioned norms, the
manufacturer is not responsible for the employed
personnel and does not recognize any warranty.
IMPORTANT: Regarding three-phase motors, pay
attention to the connection of the electric cable
to the plug (see electric diagram).
WATER CONNECTION AND STARTING UP
(see fig. 1)
1)Check if the ON/OFF switch is in the "OFF"
position (fig. 1 pos. 9a);
2)Connect the water service pipe to the suction
pipe fitting INLET (fig.1 pos. 6) by making use of
a stiffened tube with an inside diameter of at least
13 mm (1/2").;
3)Connect the high pressure hose (ref.1 pos.4) to
the delivery pipe OUTLET (ref.1 pos. 5);
4)Put the lance in the spray gun (fig.1 pos. 2-3);
5)Connect the high pressure line to the spray gun
(fig.1 pos.4-3);
6)Open the water valve completely;
7)Press the gun trigger (fig.1 pos.3), so that the air
and the possible pressure waste go out from the
piping;
8)Connect the plug to the socket (fig.1 pos.8);
9)Start the equipment up, by turning the ON/OFF
switch in the "ON" position (fig.1 pos. 9a).
OPERATION WITH COLD WATER
•Set the thermostat knob on “min” (fig.1pos10).
• Set the burner switch on OFF (fig.pos.9b).
OPERATION WITH HOT WATER
•Set the thermostat knob on the temperature desired
(fig.1pos10).
• Set the burner switch on ON (fig.1pos9b).
SWITCHING OFFTHE HOTWATER
•Turn the thermostat knob to OFF (fig.1pos.10).
•Operate the machine until cold water flows from
the spray rod.
•Turn off the burner switch (fig.1pos.9b).
IMPORTANT:The washer machine has to operate
with clean water, in order to avoid any damages
to the washer machine itself.
When the is even; if not, clean the nozzle from
possible impurities.
SHUT - DOWN
Turn off the machine when finished working (switch
on OFF position).
When the machine is switched off, always discharge
the pressure hose, opening the gun.
We suggest that you uncoil the high pressure hose
completely before using the machine.
When the machine is off, press the trigger gun to
eliminate the remaining pressure, before rewinding
the hose.
GB
INSTALLATION
14

GB
MAINTENANCE
Before to carry out any kind of maintenance to the
washer machine, run the pressure down, take
the water and electric connection out.
IMPORTANT: For all maintenance
procedures on the boiler, high pressure pump and
machine, users must contact professionally
specialized staff or our authorized After-Sales Service
Centre.
WATER SUCTION FILTER CHECKING
Check periodically in order to avoid deposits clogging
it (fig. 1).
REPLACINGTHE SPRAY ROD NOZZLE
Replace the nozzle when the pressure drops below
the normal values.
CLEANINGTHE FUEL FILTER
Check the fuel filter periodically and replace if it has
deteriorated or is excessively dirty.
LONG STORAGE PERIOD
If you forsee/expect to keep the machine in
environments where there is danger of ice/frost or
if you don't use it for more than 3 months, we suggest
to get the machine to intake an antifreeze before
putting it away (similar to that used for cars); making
sure that the internal content of mixture is drained
as thoroughly as possible, allowing the machine to
run without fluid for a few seconds. Furthermore,
when you start the machine up, small leakages can
occur. These leakages will disappear after some
hours of functioning. In the case of more serious
leakage, you should contact the Authorized Customer
Service.
ELECTRIC MOTOR
The electric motor is protected against overloads.
The motor will stop if it overheating.Wait 5-10 minutes
before starting it again. Identify the cause of the
problem.
ELECTRIC CABLE
Pay attention not to damage the electric cable.The
replacement has only to be carried out by qualified
personnel. Do not temporarily repair the electric
cable.Extension cables should be of a watertight
construction and comply with the belowmentioned
requirements for length and cable dimensions.
1,5 mm2max 10 m
2,5 mm2max 30 m
Cable connections should be kept dry and off the
ground.Always uncoil the extension cable completely
to avoid heat damage to the cable.
HIGH PRESSURE HOSE
ATTENTION!
The high pressure hose is specially designed with reinforced
walls to handle high water pressure.
It can be easily damaged and should be stored carefully.
- Do not kink.
- Do not drive vehicles over the hose.
- Do not expose the hose to sharp edges or corners.
- Do not use the hydrocleaner if the hose is not completely
uncoiled and extended.
The external covering wear out quickly if the hose is not
completely uncoiled during operations.
Misuse will lead to ballooning or premature failure and will
invalidate warranty.
CLEANINGTHE BOILER
The boiler must be cleaned regularly every 180-200
working hours. Poor burner settings increase fuel
consumption and generate unnecessary
environmental pollution.
The descaling procedure must be carried out
periodically with specific products.
The interval depends on the hardness of the water.
Pour one litre of product for every 15 litres of water
into a drum containing at least 15 litres of water.
Disconnect the gun from the high pressure line and
place its free end in the drum, in order to form a
closed circuit, and draw the solution into the machine
for at least 10 minutes.
The delivery end of the line should discharge into
a canvas or mesh bag so that the scale removed is
not returned to the circuit.
Then restore the normal connection and rinse with
plenty of cold water.
This operation should be carried out by our after-
sales service, since the descaling product may cause
wear of components.
Comply with the regulations in force when disposing
of the descaling agent.
DESCALING (fig.8)
fig. 8 15

When you decide not to use the machine, we recommend the following:
- Make it inoperative by taking out the electricity supply cable;
- Place it out of the reach of children;
- Do not use the disassembled parts of the machine as spare parts;
- Disassemble the machine for spare parts disposal according to the law in force.
TROUBLE SHOOTING GB
When switch "ON" the machine will not start
working.
The motor stops suddenly.
The pump doesn’t reach the necessary
pressure.
Fluctuating pressure.
Water leak from appliance
Abnormal noise
Water is in the oil.
The machine does not suck wax or detergent
----------
Turning on the burner switch the boiler does
not start.
Water is not hot enough.
Too much smoke from the chimney..
Plug not properly inserted in socket
Electric socket is faulty.
The main voltage is insufficient.
The pump is stuck.
Gauge of extension lead not sufficient
Thermic safety switch has tripped due to the
overheating.
Cable extension seems to be inadequate.
-
Insufficient flow.
Water inlet filter is clogged.
Suction/delivery valves are clogged or worn out.
Pressure regulator valve set on minimum
The nozzle is worn out.
The nozzle is either clogged or deformed.
Suction/delivery valves are clogged or worn out.
Worn gaskets
Pressure regulator valve gaskets worn
The filter is dirty.
Water leaking from the pump.
Leaks from hose reel (if present)
Leaks from pressure regulator valve
Leaks from water unions.
Suction/delivery valves are clogged or worn out.
Worn bearings
The filter is dirty.
Extreme water temperature.
O-rings (water and oil) are worn out.
Tanks empty.
Rod knob on high pressure position.
Disconnected pipe in detergent suction system.
Incrusted injector.
-----
No fuel.
Fuel filter is clogged.
Fuel pump is either blocked or burnt out.
Damaged thermostat.
Ignition spark insufficient or totally lacking.
The space among the electrodes is not correct.
Burn out fuse.
Burner nozzle filter fouled.
Fuel filter is clogged.
Poor boiler performance.
Boiler coil clogged with limestone.
Combustion is not correct.
Impurities or water in the fuel.
Fit plug in power socket correctly.
Have electrical socket checked.
Have a check made on the suitability of the mains system.
Turn switch to ON while keeping nozzle trigger
pressed; if problem persists, contact an
authorised service centre.
Refer to maintenance section
Leave motor to cool for a few minutes. If the
problem persists, contact an authorised service
centre.
Refer to maintenance section
Check that the delivery rate is 30% higher than
the value stated on the appliance’s technical
data plate.
Remove and clean the filter.
Contact an authorised service centre.
Increase the pressure by screwing in the
pressure regulator knob.
Replace the nozzle.
Dismantle the lance and clean the nozzle with
the pin provided.
Contact an authorised service centre.
Remove and clean the filter.
Contact an authorised service centre.
Tighten the unions; if the problem persists,
contact an authorised service centre.
Contact an authorised service centre.
Tighten the unions; if the problem persists,
contact an authorised service centre
Contact an authorised service centre
Remove and clean the filter.
Bring the temperature under 50°.
Contact an authorised service centre.
Replace oil with double frequency that is
suggested.
Fill the tanks.
Return it into position.
Turn it to the low pressure position.
------
Check the level in the tank.
Clean fuel filter.
Contact an authorised service centre.
Clean burner nozzle filter.
Clean fuel filter.
Contact an authorised service centre.
Descaling.
Clean burner nozzle filter.
Clean fuel filter.
Empty the tank and clean it carefully.
Clean fuel filter as well.
FAULT PROBABLE CAUSE REPAIR
DISASSEMBLING OF THE MACHINE
REPAIRS - SPARE PARTS
16
For any further inconveniences, not mentioned this booklet or any demages of the machine, we suggest
you to go to an Authorized Assistance Center for the repair or possible replacement of any original spare
parts.

F
1) Ce manuel a été rédigé pour l'UTILISATEUR.
2) Lire attentivement les instructions contenues dans cette
notice, car elles fournissent des indications importantes
sur la sécurité d’installation, d’emploi et d’entretien.
CONSERVER SOIGNEUSEMENT CETTE NOTICE
POUR TOUTE CONSULTATION ULTERIEURE.
3) Avant de connecter l’appareil, s'assurer que les données
de la plaque correspondent à celles du réseau électrique
et que la prise soit protégée par un disjoncteur magneto-
thermique differentiel avec une sensibilité d'intervention
inférieure à 0,03 A.
4) En cas d’incompatibilité entre la prise et la fiche du
nettoyeur, faire remplacer la prise par un technicien
spécialisé.S'assurer également que la section des câbles
de la prise soit adaptée à la puissance absorbée par le
nettoyeur. En général l’emploi d’adaptateurs prises
multiples et/ou de rallonges est déconseillé. Si leur
utilisation est indispensable, monter uníquement des
adaptateurs simples ou multiples et des rallonges
conformes aux normes de sécurité en vigueur en matière
de qualité et de capacité.
5) Ce nettoyeur doit servir exclusivement pour l’emploi pour
lequel il a été conçu.Toute autre utilisation sera considérée
impropre et donc dangereuse.Le fabricant décline toute
responsabilité pour les dommages qui seraient dus à une
utilisation impropre, incorrecte et irraisonnée.
6) L’utilisation du nettoyeur requiert l’observation de quelques
règles fondamentales, et plus particulièrement:- NE PAS
TOUCHER L’APPAREIL AVEC LES MAINS MOUILLEES
ET LES PIEDS NUS.- NE PAS TIRER LE CABLE
D’ALIMENTATION OU LE NETTOYEUR POUR
DEBRANCHER LA FICHE DE LA PRISE DE COURANT.-
SI DURANT LE FONCTIONNEMENT, IL DEVAIT Y
AVOIR UNE COUPURE DE COURANT, ETEINDRE LA
MACHINE (OFF) POUR DES RAISONS DE SECURITE.-
NE PAS PERMETTRE QUE DES ENFANTS OU
DES PERSONNES NON RESPONSABLES
UTILISENT L’APPAREIL.
7) La pompe devra être continuellement et suffisamment
alimentée en eau 30% environ supérieur à la valeur
déclarée dans les caractéristiques techniques). Le
fonctionnement à sec provoque la détérioration des joints.
8) Ne pas laisser l’appareil exposé à des basses
températures et le protéger du gel.
9) Pour les appareils qui ne sont pas équipés du dispositif
Total Stop, ne laissez pas fonctionner la pompe plus de
1/2 minutes avec le pistolet fermé.Au delà de cette durée,
arrêter l’appareil afin d’éviter un échauffement excessif
de la pompe qui pourrait endommager les joints
d’étanchéité.Pour les appareils équipés du dispositifTotal
Stop, ne les laissez pas en stand-by plus de 5 minutes.
10) Ne pas couvrir l’appareil en fonctionnement et ne pas le
placer à un endroit mal ventilé.
11) Durant l'utilisation de la machine, il est recommandé de
porter des vêtements en conformité avec la législation
en vigueur.De toute façon le port de lunettes de protection
et de chaussures en caoutchouc antiderapantes est
obligatoire.
12) Eviter de jeter n'importe où les substances polluantes,
nocive et toxiques.Respecter la législation en vigueur en
matière de traitement des déchets industriels.
13) Pour l'éventuelle réparation, s'adresser seulement à un
Revendeur autorisé et demander l'utilisation de pieces
de rechange originales. Le non respect de ce qui a été
cité dessus peut compromettre la sécurité de l'appareil.
14) Au cas où l'appareil ne serait pas utilisé pendant de
longues périodes, débrancher la liaison électrique et l'eau.
15) Ne pas utiliser l'appareil si le cable d'alimentation ou bien
d'autres composants importants de la machine resultent
endommages, ex, dispositifs de securitè, tube flexible,
pistolet, etc.
16) ATTENTION: L'actionnement de la lance provoque un
contrecoup.
17) ATTENTION: Cet appareil a été conçu pour etre utilisé
avec le détergent fourni par le constructeur. L’emploi
d’autres détergents ou autres substances chimiques peut
endommager l’appareil.
18) ATTENTION: Ne pas utiliser l’appareil à proximité de
personnes, sauf si elles portent des vetements de
protection.
19) ATTENTION: Les jets haute pression peuvent être
dangereux lorsqu’ils ne sont pas utilisés correctement.
Les jets d’eau ne doivent pas etre dirigés ni vers des
personnes, les animaux, ni vers des équipements
électriques en fonction ni vers l’appareil meme.
20) Ne pas orienter le jet d’eau vers soi, ni vers d’autres pour
laver des vetements ou chaussures.
21) Débrancher l’appareil du reseau électrique ainsi que de
la prise d’eau avant d’effectuer toute opération d’entretien.
22) ATTENTION: Les flexibles, accessoires et raccords
haute pression sont importants pour la sécurité de
l’appareil. N’utiliser donc que les accessoires et les
raccords indiqués par le constructeur. Il est extrêmement
important de préserver l’intégrité de ces composants en
en évitant un usage impropre.
23) Lorsque une rallonge electrique est utlisée, la fiche et la
prise doivent etre rigoureusement étanches.
24) ATTENTION: toute rallonge non conforme peut se
révéler dangereuse.
25) LE NETTOYEUR EST EQUIPE D’UNE BUSE CALIBREE
QUI DETERMINE LES PERFORMANCES DE
L’APPAREIL. TOUTE MODIFICATION DU DIAMETRE
DE CETTE BUSE ENTRAINE DES MODIFICATIONS
DES PRESTATIONS DE L’APPAREIL.
26) Il convient de surveiller l’appareil lors de son
fonctionnement.
27) Le niveau de pression acoustique est de 80 dB : il est
conseillé de porter un protecteur auriculaire lors de
l’utilisation de l’appareil.
28) Remplir le réservoir avec du combustible indiqué sur la
plaquette des données techniques (Diesel) (fig.1). Eviter
que le réservoir se vide durant le fonctionnement afin de
ne pas endommager la pompe à gasoil. L’utilisation de
combustibles non appropries peut endommager
l’appareil.
29) DISPOSITIFS DE SECURITE’:
PISTOLET: EQUIPE’ D’UN ARRET DE SECURITE’
LE MOTEUR ÉLECTRIQUE EST PROTÉGÉ
CONTRE LES SURCHARGES.
POMPE: EQUIPEE DE CLAPET DE PRESSION.
INSTRUCTIONS GENERALES
17

Tous nos nettoyeurs sont soumis à des contrôles et des
essais rigoureux. Ils sont couverts d'une garantie de 12 mois
contre tout vice ou défaut de fabrication.La garantie s’applique
à patir de la date d’achat du produit. Si votre nettoyeur ou
accessoires doit être remis pour une réparation, une
photocopie de la facture devra y être jointe.
Les réparations sous garantie seront réalisées sous
les conditions suivantes:
- Que les defectuosités sont dues à un défaut du matériel
ou de fabrication.(Les défauts qui ne seront pas attribués
clairement aux matériaux la fabrication feront l’objet d’un
examen auprès de notre Centre Après-Vente ou bien de
notre Etablissement; ils seront débités conforrérent aux
résultats.)
- Que les directives données dans le manuel d’instruction
ont été rigoureusement respecter.
- Que l’appareil n’ai pas été contrôlé ou réparé par une
société autre qu’une station SAV agréée .
- Que uniquement les accessoires d’origine ont été utilisé.
- Que le produit n’est pas été soumis à un abus tel que
noeud, gel, frottement, chocs.
- Que uniquement de l’eau sans impuretés a été utilisé.
Dans le cas d’une eau sale ou dure, prendre les précautions
nécessaire.
- Que le nettoyeur haute pression n’ai pas éte utilisé pour
la location ou tout autre application commerciale.
Sont exclus de la garantie :
- Les parties sujettes à normale usure;
- Le tube haute pression.
- Les dommages accidentels dus au transport, à négligence
et à une utilisation incorrecte, provoqués par une mise en
place impropre ou incorrecte, non conforme aux instructions
contenues dans la notice d’utilisation.
- La garantie n’envisage pas le nettoyage des organes de
fonctionnement.
Les réparations sous garantie comprennent le remplacement
des pieces defectueuses hors emballage et transport. La
constatation d’un dommage n’entraîne pas le remplacement
de l’appareil et le prolongement de la garantie.La réparation
sera effectuée auprès de notre Centre Après-Vente Autorisé
ou bien de notre Etablissement;le nettoyeur devra être envoyé
en port franc, c’est-à-dire avec frais de transport à la charge
de l’utilisateur. Le Fabricant décline toute responsabilité en
cas de dommages aux personnes ou aux biens provoqués
par une mise en place erronée ou par une utilisation impropre
de l’appareil.
F
Abb. 2
CONDITIONS DE GARANTIE
Les performances de la machine sont adaptées
pour un usage non professionnel.Les technologies
de construction ont été étudiées pour garantir de
très hauts niveaux de fiabilité de sécurité et de
longévité. Il est absolument interdit d'utiliser la
machine à des endroits ou dans des zones classées
corre potentiellement explosives.La température de
travail doit être comprise entre +5 ÷+50 °C. La
machine est costituée d'un groupe motopompe
protégé par un carénage en matériaux anti-chocs.
La machine est pourvue d'une lance avec pistolet
dotée d'une poignée pour favoriser une position de
travail pratique, et dont les formes et les dimensions
sont conformes à la réglementation en vigueur en
matière de sécurité. Il est interdit d'appliquer des
protections ou sur la lance haute pression ou de
réaliser des modifications des buses de lavage.
L'eau d'alimentation du nettoyeur doit être propre
et ne doit pas contenir de sable, de produits
chimiques ou corrosifs qui pourraient compromettre
le bon fonctionnement et la longévité de l'appareil.
La machine peut être utilisée pour le lavage de
rideaux de fer, portails, carrelages, voitures, camping
car, etc...partout où l'utilisation de l'eau sous pression
est nécessaire pour éliminer la saleté. En montant
les accessoires disponibles en option, l'appareil peut
effectuer le sablage et le lavage des surfaces avec
une brosse rotative à monter sur la lance.
Le nettoyeur doit être posé sur une base sûre, stable et
en position horizontale.
A chaque utilisation di nettoyeur haute pression, il est
conseillé d'empoigner le pistolet correctement, une main
sur le nettoyeur et l'autre sur la lance comme indiqué
dans la fig. 2.
En cas de fonctionnement dans un local fermé, une
aération suffisante et l’évacuation du gaz d’échappement
doivent être prévues.
UTILISATION CORRECTE DU NETTOYEUR
Après avoir enlevé l’emballage, s’assurer de l’intégrité du nettoyeur.
-En cas de doute, ne pas utiliser l’appareil et s’adresser à un centre spécialisé autorisé.
-Pour des raisons de transport et de dimension de l'emballage, certaines pièces peuvent être fournies
démontées. En ce cas exécuter le montage en suivant les instructions contenues dans ce livret.
-Les éléments de l’emballage (sachets en plastique, polystyrène expansé, clous, etc. ) ne doivent pas
être à la portée des enfants, car il s’agit de sources potentielles de danger.
DEBALLAGE
18

AB
fig. 3
fig. 4
ASPIRATION DU DETERGENT
DISPOSITIF DE SECURITE DU PISTOLET
Chaque fois que l’on veut arrêter la machine, il
est important d’introduire la sécurité (fig. 5 pos
S) présente sur le pistolet afin d’éviter toute
ouverture accidentelle.
F
Monter la buse sur la lance (fig.3).
Pour monter la lance sur le pistolet, il suffit d’introduire
l’extrémité filetée de la lance (fig.4 pos. 1) dans le
trou présent sur le pistolet (fig.4 pos.2).
Visser ensuite la lance comme indiqué par la flèche
(A) jusqu’au serrage complet (voir fig.4).
REMPLISSAGE
Remplir le réservoir du détergent avec des produits
conseillés adaptés au type de lavage à effectuer
(fig. 1).
ATTENTION: Utiliser seulement des détergents
liquides, éviter absolument les produits acides ou
très alcalins.
Nous vous conseillons d’utiliser
seulement nos produits qui ont été étudiés exprès
pour ce nettoyeur.
ATTENTION:Pour une utilisation correcte du réservoir,
il est interdit d'y introduire des substances
inflammables ou agressives chimiquement.
La tête réglable permet de sélectionner le jet à basse
et haute pression.La sélection de la pression se fait
en tournant la tête réglable. Pour augmenter la
pression, tourner la tête réglable dans le sens des
aiguilles d’une montre (fig.6 pos.A), pour la diminuer
tourner la tête réglable dans le sens contraire des
aiguilles d’une montre (fig.6 pos.B). L’aspiration du
détergent se fait automatiquement lorsque la tête
réglable de la lance est tournée pour le fonctionnement
à basse pression (dans le sens contraire des aiguilles
d’une montre). Allumer l’appareil et le mélange
eau/détergent s’effectue automatiquement au passage
de l’eau.
fig. 5
fig. 6
MONTAGE DE LA LANCE ET DE LE BUSE
S
1
A
2
19

MISE EN SERVICE 1°DEMARRAGE
Avant la mise en service de ls pompe s’assurer que
l’huile dans le carter soit à son jiuste niveau.
Lors du premier démarrage ou après une longue
période d’inactivité, il faut faire fonctionner le tube
d’aspiration pendant quelques minutes, pour faire
sortir du refoulement les impuretés éventuelles et
éviter ainsi d’obstruer la buse du pistolet.
REMPLISSAGE
Remplir le réservoir avec du combustible indiqué sur
la plaquette des données techniques (Diesel) (fig. 1).
Eviter que le réservoir se vide durant le
fonctionnement afin de ne pas endommager la
pompe à gasoil.
BRANCHEMENT ELECTRIQUE
Contrôler que la tension de réseau correspond à la
tension de la machine reportée sur la plaquette des
données techniques. Votre installation électrique
doit être exécutée par des techniciens qualifiés en
mesure d’opérer conformément aux dispositions
des normes en vigueur (mise à la terre, fusibles,
disjoncteur, etc...). En cas de non respect d’une des
normes mentionnées ci-dessus, le Constructeur
décline toute responsabilité en cas de dommages
ou d’accidents à des personnes ou des biens. La
garantie est aussi automatiquement annulée, dans
ce cas.
IMPORTANT: En cas de moteurs triphasés, faire
très attention au branchement du câble avec la
prise (voir schéma électrique).
RACCORDEMENT D’EAU ET
MISE EN MARCHE
(voir fig. 1)
1)Contrôler que l'interrupteur d'allumage est sur la
position "OFF" (fig. 1 pos.9a);
2)Raccorder le tube d'alimentation de l'eau au
raccord d'aspiration INLET (fig.1 pos.6) en utilisant
un tube renforcé avec un diamètre interne d'au
moins 13 mm (1/2").
3)Introduire la lance dans le pistolet (fig.1 pos.2-3);
4)Raccorder le tube de haute pression au raccord
de refoulement OUTLET (fig.1 pos. 5);
5)Raccorder le tube de haute pression au pistolet
(fig.1 pos.4-3);
6)Ouvrir complètement le robinet de l'eau ;
7)Appuyer le levier du pistolet (fig.1 pos.3), ainsi
que l'air et éventuels résidus de pression sortent
des tuyauteries;
8)Introduire la fiche dans la prise de courant
(fig.1pos.8);
9)Allumer l'appareil en amenant l'interrupteur sur
la position "ON" (fig.1 pos.9a).
FONCTIONNEMENT A EAU FROIDE
•Régler la poignée du thermostat sur “min”.
(fig.1pos.10).
•Commuter l’interrupteur du brûleur sur “OFF”
(fig.1pos.9b).
FONCTIONNEMENT A EAU CHAUDE
•Régler la poignée du thermostat sur la température
désirée (fig.1pos.10).
•Commuter l’interrupteur du brûleur sur “ON”
(fig.1pos.9b).
ARRET DE L’EAU CHAUDE
•Placer la poignée du thermostat sur “OFF”
(fig.1pos.10).
•Laisser la machine en marche jusqu’à ce que
l’eau froide sorte de la lance.
•Eteindre l’interrupteur du brûleur (fig.1pos.9b).
IMPORTANT : pour éviter d’abîmer le nettoyeur,
utiliser seulement de l’eau propre.
Une fois que la machine est remise en marche,
s’assurer que le jet est uniforme.Dans le cas contraire
nettoyer le gicleur d’éventuelles impurités.
ARRET DE LA MACHINE
A la fin de l'utilisation, éteignez l'appareil (interrupteur
sur OFF)
Une fois la machine arretée, décharger toujours le
tube de la pression en ouvrant le pistolet.
Il est conseillé lors de la mise en service du nettuyeur
de dérouler entièrement le flexible haute pression
et, après utilisation, d’appuyer sur la gâchette de la
poignée pistolet pour décompresser le flexible avant
de l’enrouler.
20
F
MISE EN PLACE
Table of contents
Languages:
Other Lavor Washer manuals