LC-POWER LC-PRO-35MPR-HDMI User manual

LC-PRO-35MPR-HDMI
User manual
Thank you for choosing LC-Power. LC-PRO-35MPR-HDMI is a home me ia center that can recor
an play me ia files (movie, au io an photo) on your TV, an when connecte to a PC, it can also
copy an play share files via network.
SAFETY AND OTHER INSTRUCTIONS
Please use the LC-PRO-35MPR-HDMI with caution an rea carefully the following instructions.
► Software, au io, vi eo or any other intellectual properties are protecte by copyright an
international laws. It is the user’s responsibility to take care about these topics when he
repro uces or istributes content(s) with his personal evices.
► This pro uct may not support some me ia formats. Please check the available co ec types.
► Please backup ata store in this pro uct in a safe place. We are not responsible for any
ata loss or amage.
► Safe the LC-PRO-35MPR-HDMI from rops or shocks. This may amage it.
► Do not clean the pro uct using chemical cleaners. This may amage the
LC-PRO-35MPR-HDMI.
► Avoi any contact of the LC-PRO-35MPR-HDMI with water or other liqui s. This may cause
fire or an electric shock. If any con uctive liqui enters, turn off the LC-PRO-35MPR-HDMI an
isconnect the power a apter imme iately.
► Do not place the LC-PRO-35MPR-HDMI near a magnetic fiel . This may cause a
malfunction or amage store ata.
► Do not expose the LC-PRO-35MPR-HDMI to irect sunlight or near a heat source. Do not
keep it for long time in high temperature surroun ings. This may amage it.
► Do not use many electronic pro ucts with one single outlet. Insert the power plug firmly. Do
not unplug it uring a state of operation.

REMOTE CONTROL
Button Function
POWER on or off.
Switch between vi eo output:
NTSC Interlace - NTSC Progressive - PAL Interlace - PAL Progressive.
Mute au io output.
Recor or resume when pause .
Press repeate ly to set the recor ing length: 30mins / 60mins / 90mins /
120mins / 180mins / 240mins / Off.
Browse music, photo an movie files
Enter the timer menu
Copy a file from one evice to another
View the gui e menu
Decrease the volume
Increase the volume
Press to confirm a setting
Navigation buttons
Return to previous list in menu mo e
Change settings
Numeric buttons: to select a channel or for numeric input.
Jump to a specific point
SLOW button: play in slow motion.
Available levels: 3/4, 1/2, 1/4, 1/8, 1/16x
Select the option bar
Begin a playback
Stop a playback
Pause the current playback

Go to the previous title
Skip to the next title
Rewin playback. Press repeate ly to select the spee .
Forwar playback. Press repeate ly to select the spee .
Activate subtitles
Display me ia file information. In vi eo an photo mo e, press to view time,
title or chapter.
Select an au io track
Zoom levels: Photo: 2x, 4x, 8x, 16x; Vi eo: 2x, 3x, 4x, 8x
Pause live TV an resume the program from the point you left. The program
is recor e in available space.
Time Shift mo e remains active until you press “stop” button.
Press to repeat title.
Select file or fol er to rename or to elete.
Select to confirm.

NET WORK ASED DATA SHARING WITH PC
Network-based data sharing with a PC
After the LAN cable is connected according to your system environment, set up
the Windows network as follows.
To establish the network communication between LC-PRO-35MPR-HDMI an your
computer, two requirements shoul be satisfie :
1) Fol er sharing an security setup
2) Using the same IP a ress ban an subnet mask
Data sharing setup for Windows XP
1. Select the fol er you want to share an select “Sharing an security” with right the
mouse button.
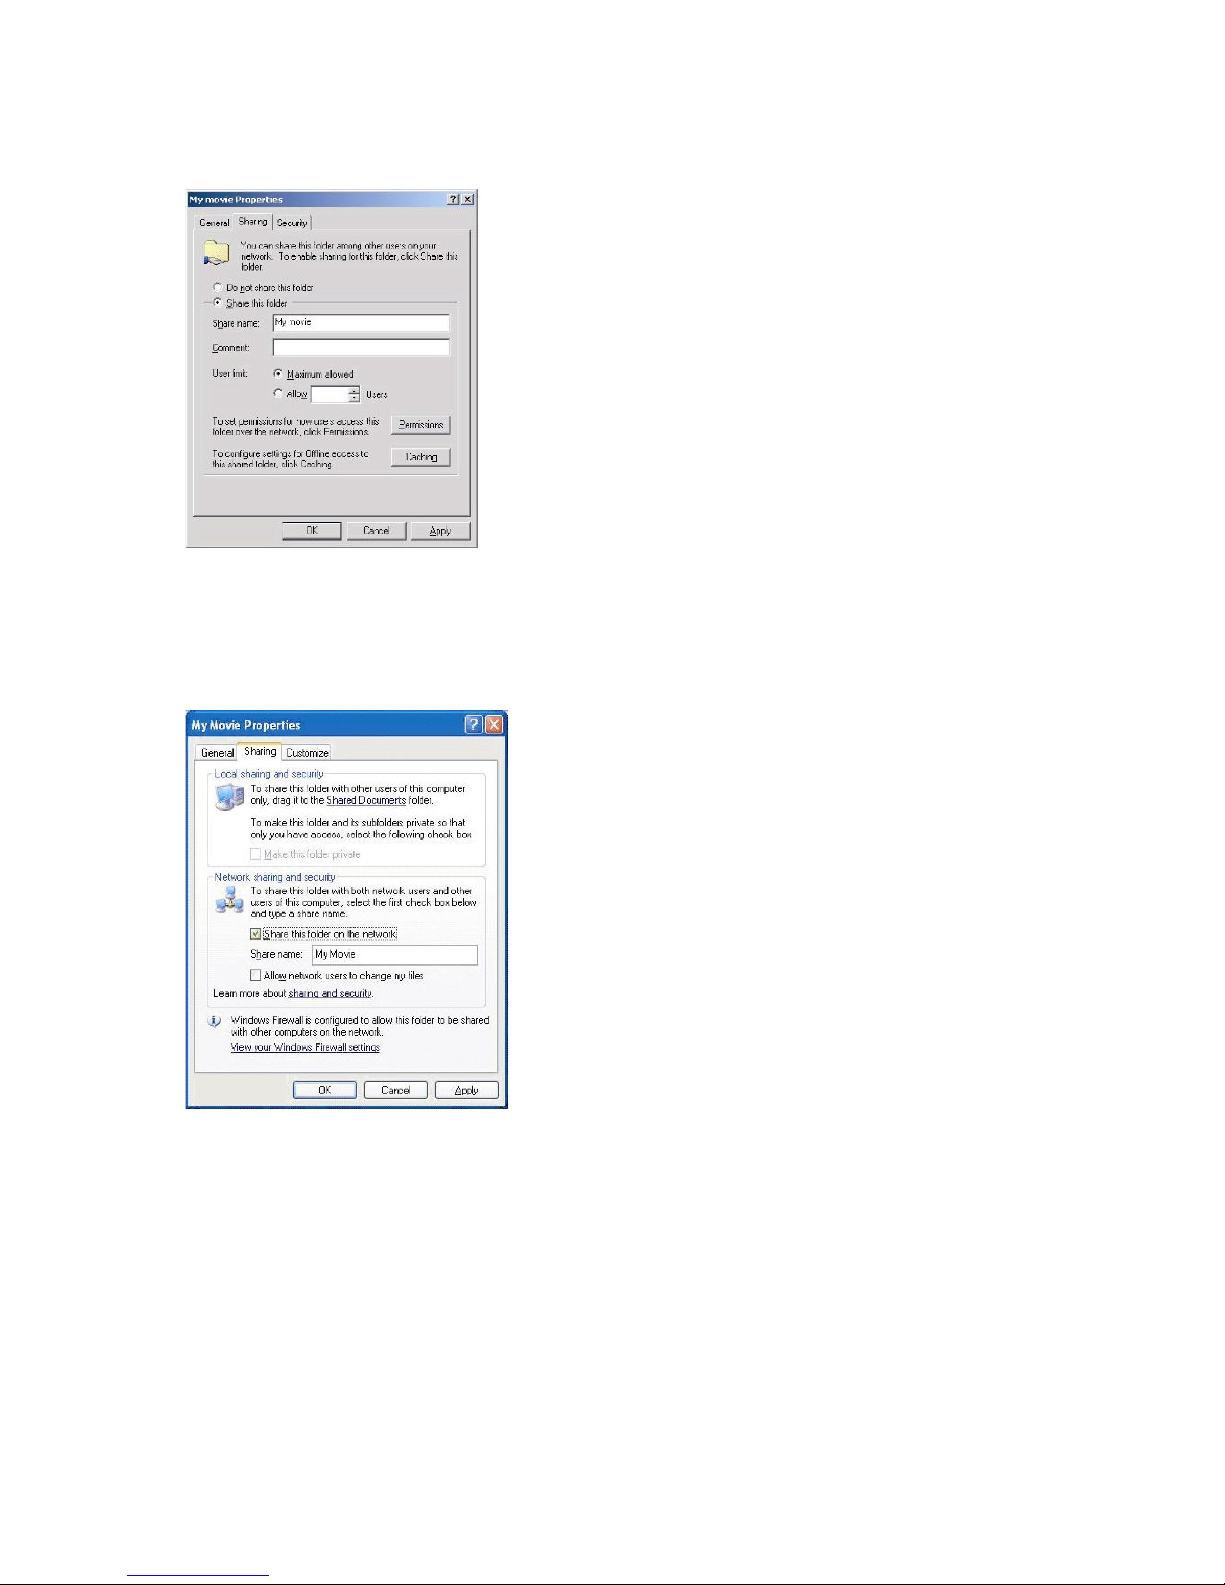
2. Check “Sharing this fol er on the network” an type in the “Share name”.
WARNING! “Share name” should be less than 12 characters.
3. If the fol er is share , you will see a han mark on the fol er icon.
4. Go to “Control Panel - A ministrative Tools - Computer Management - Local users
an group” an among the isplaye items, oubleclick on the “Guest” item.

WARNING!
A permission setting is only required for Windows XP Pro users. If you are a XP
home user, go directly to step “6”.
If you cannot see “Administrative Tools”, click on “Switch to classic view” on the
left corner.
5. After checking “User cannot change passwor ” an “Passwor never expires”, keep
the other checkboxes unchecke .
6. Go to “Control Panel - Network Connections”. Select “Local Area Connections”.
Select “Properties” using the right mouse button.
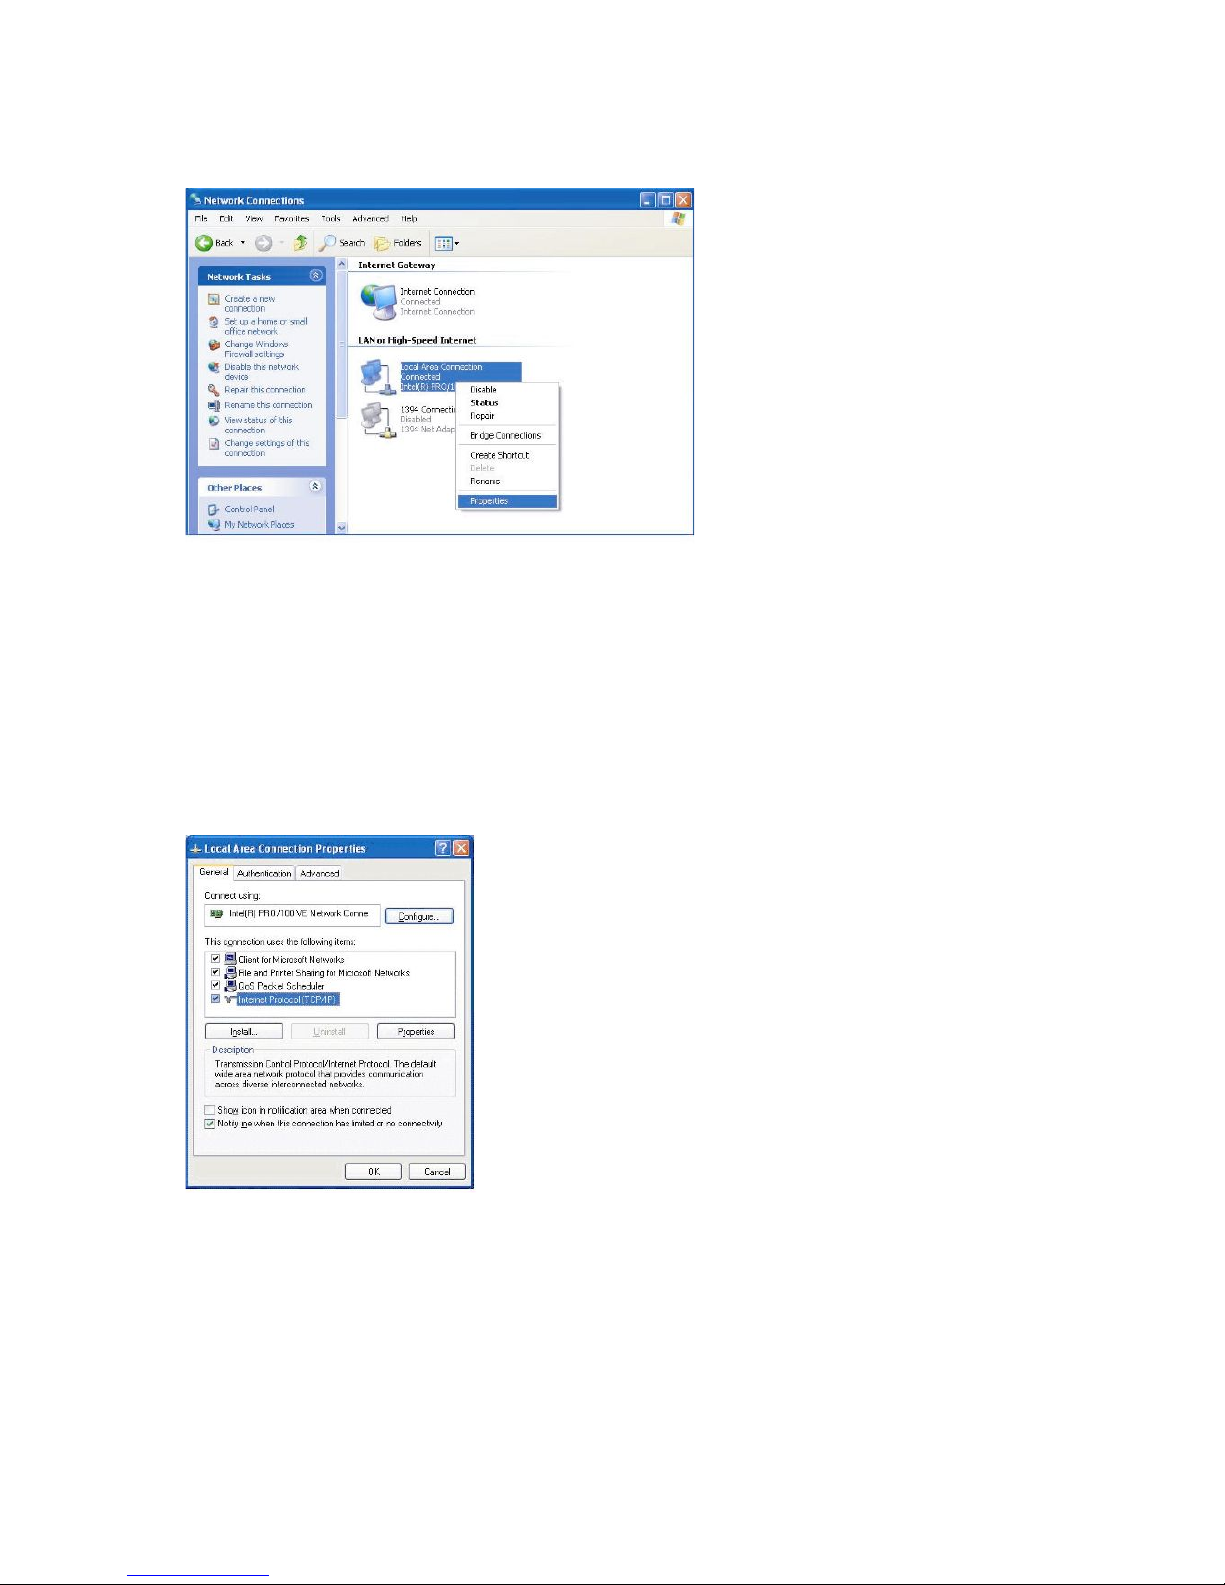
WARNING !
If you cannot see any “Network connections”, click on “Switch to classic view”
on the upper left corner.
If there are more than two “Local Area Connections”, select the LAN card which
is connected to the LC-PRO-35MPR-HDMI.
7. Among the isplaye items, oubleclick “Internet Protocol (TCP/IP)”.
After checking “Specify an IP a ress”, enter your IP a ress an subnet mask.
Example: IP a ress: 192.168.1.3 - Subnet mask: 255.255.255.0.
WARNING!
If your PC already has “Obtain IP address automatically” checked and has
automatically assigned an IP from an internet router or DHCP server, you may not
need this setup. If you want a manual IP setup, please obtain an available IP
address and subnet mask from the router manufacturer or network administrator.

If “Internet connection Firewall” option is checke , cancel this option.
For Win ows Service Pack 2 click on “Settings” in the “Win ow Firewall” section.
After selecting “off”, click on “ok”.
8. Configure the LC-PRO-35MPR-HDMI network environment.
After pressing “Setup”, select “IP SETUP” among the “NETWORK” setup items an set
this to manual setup. Then enter your IP a ress an subnet mask.
Example: IP a ress:192.168.1.10 - Subnet Mask: 255.255.255.0.

MENU INTERFACE
After a few secon s, the system will show the gui e menu.
Selecting the browser
It’s an explorer: browse movie, photo an music files store on your USB, har isk
rive (now referre to as HDD), network an car rea er.
Video In
Select the input source to be recor e .
Selecting Timer Rec
Create, e it an elete recor ing sche ules an view all about the sche ule status an
history.
File Copy
File manager: copy files on USB, HDD, network an car rea er from one me ia to
another.
Selecting Setup
Change settings.
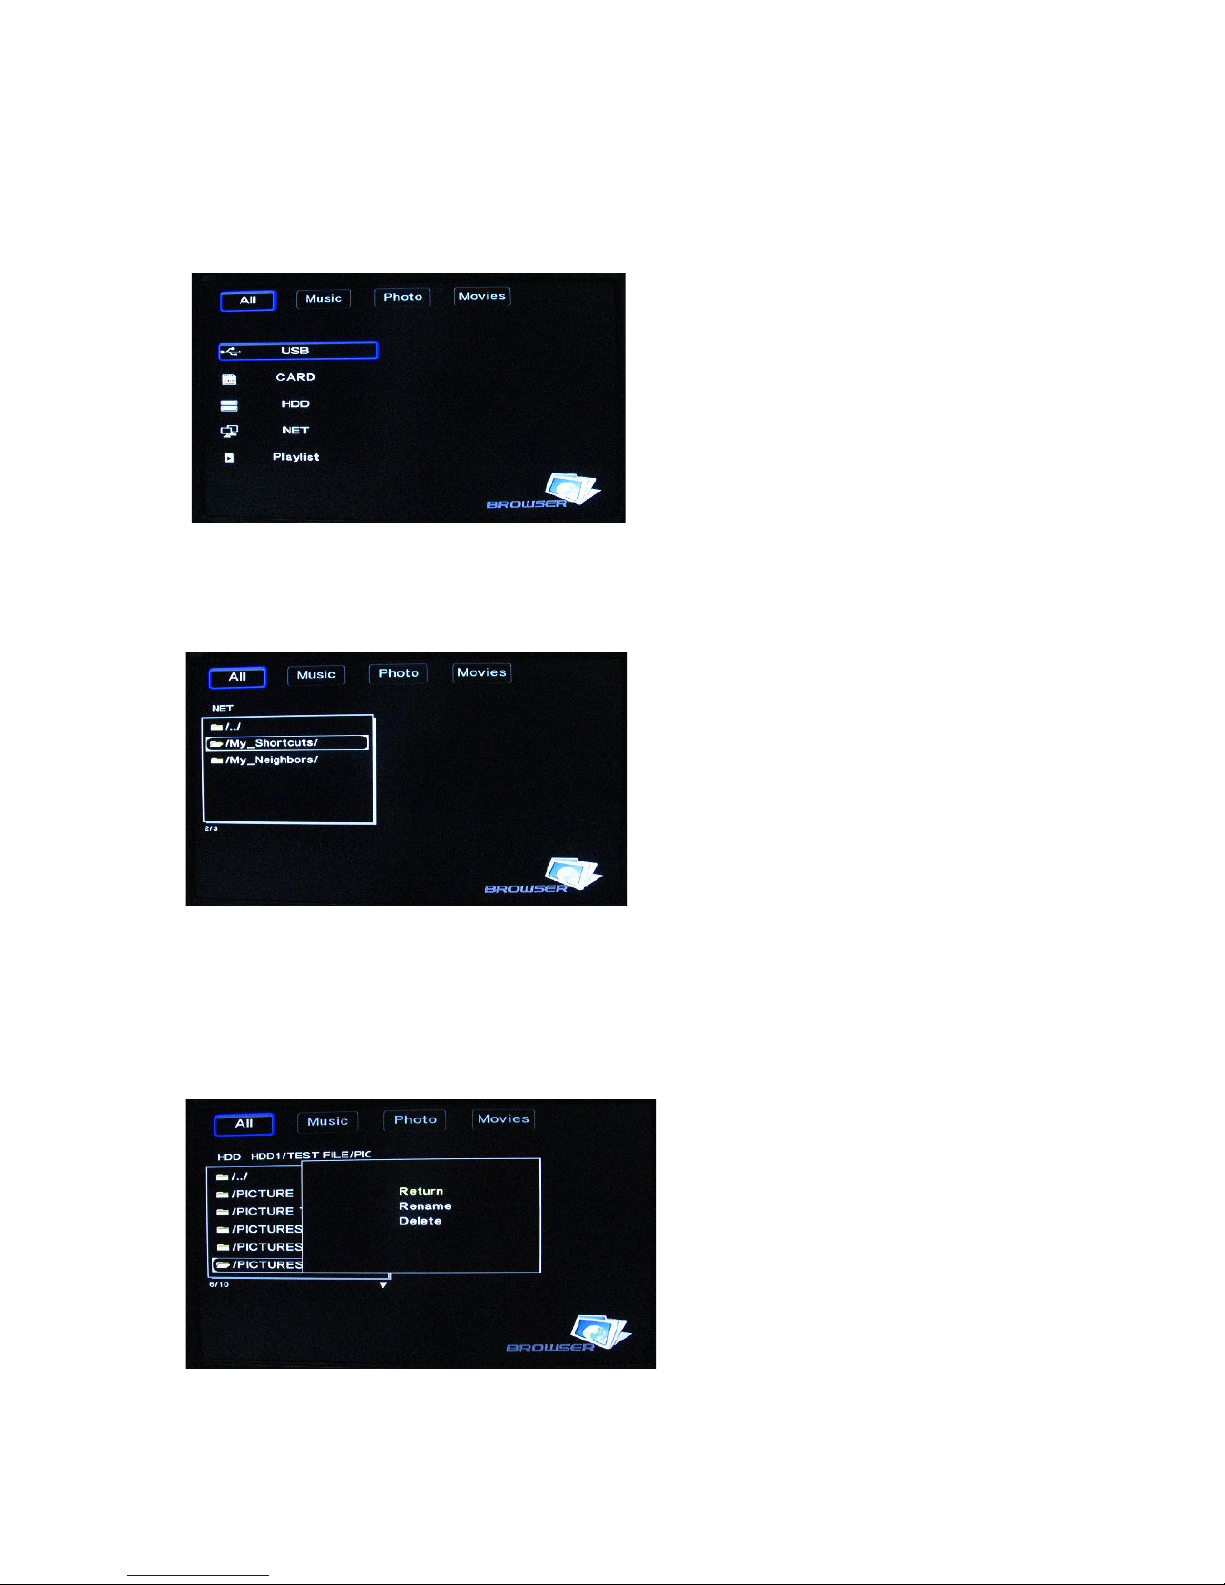
ROWSER MENU
Browse an play music, photo an movie files store on the HDD of your LC-
PRO-35MPR-HDMI or an external USB evice, car rea er, network or playlist.
rowsing all
Select All in menu.
Select fol er(s) containing all files (music, photo an movie). Select the file you want to
view an it will be isplaye .
File Edit Menu
Select the file or fol er an click “E it”.
Return
Select to go back to the main screen.

Rename
To rename a file:
1. Select “Rename” from the menu bar.
2. The “Name entry” screen appears.
3. Use the navigation arrows to select letters an numbers. Select CAPS to toggle
between uppercase an lowercase letters.
4. Once you have entere a new name, select OK to confirm all changes. If you want to
cancel changing the name, press “Return”.
Delete
To elete a title:
1. Select Delete from the menu.
2. Confirm an elete the file.
3. A confirmation message appears.
4. Press “Enter” to elete the selecte file. To cancel the eletion, select Return.
rowse: NET
My_Short Cut
Connect irectly to the PC, you o not nee to access it via the network.

My Neighbors
Connect irectly to a PC’s share fol er.
rowse Music
Select the fol er containing your au io files. A thumbnail strip will appear at the screen
bottom, inclu ing song information.
LC-PRO-35MPR-HDMI supports MP3, WMA, AAC an OGG format.
rowse photos
Select the fol er containing photo files. Select the photo you want to view an it will be
isplaye in full screen mo e.
Note:
1. When the photo is isplaye in full screen mo e, the sli e show starts automatically.
2. While listening to MP3 files, you can browse photos at the same time.
Rotate a photo in any angle with the navigation arrows or zoom in or out the photo,
three levels are available. LC-PRO-35MPR-HDMI supports High Definition photos (JPG,
JPEG).

rowse movies
Select the fol er(s) containing movie files. Select the movie you want to view an it will
be isplaye in full screen mo e.
RECORDING FUNCTION
Video in
Select to recor irectly from AV in.
The system will create a “My Recor ings” fol er on the HDD or USB evice.
Your recor e file will be save in this fol er. The file name will be name accor ing to
the system time.
Timer REC
Plan recor ing sche ules, view status an history.
Create a new schedule
1. Select Edit from the menu.
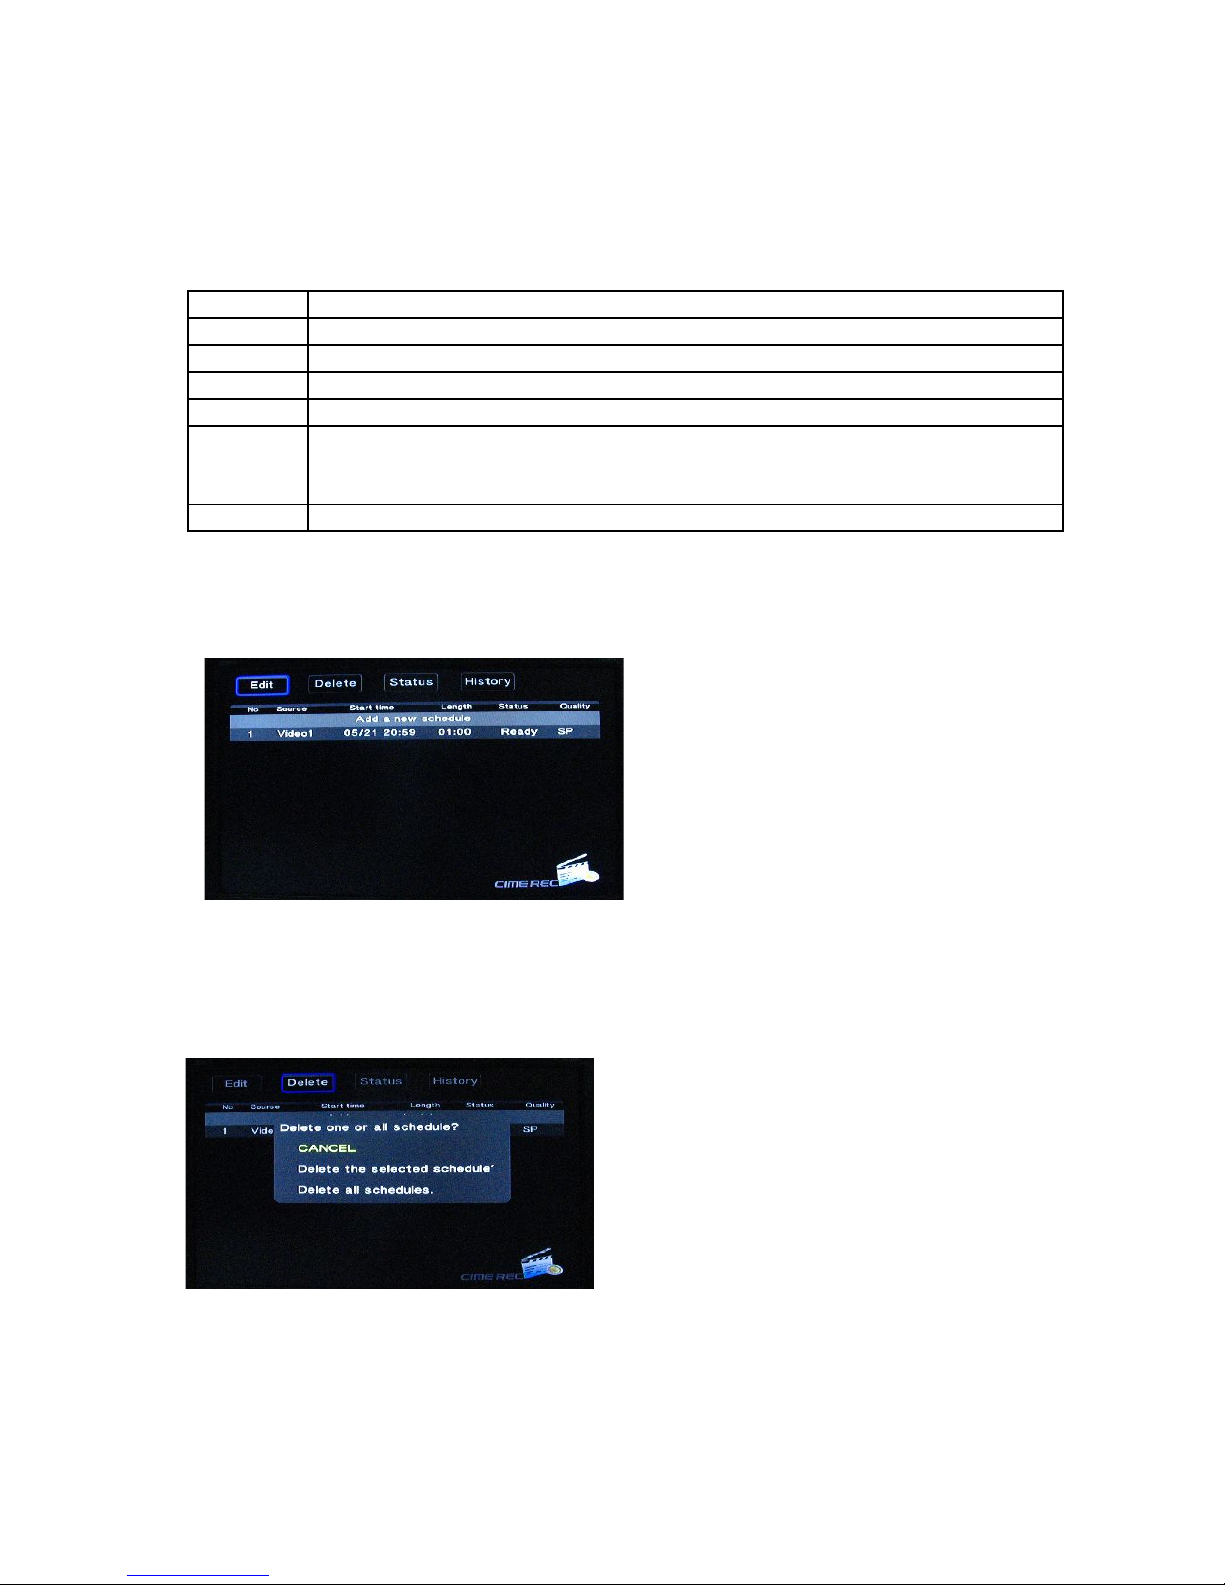
2. Select Add a new schedule an confirm.
A just settings accor ing to:
Source Vi eo
Start time Enter recor ing ate an time.
Length Enter recor ing length
Repeat Program a recor ing sche ule.
Device USB or HDD support regar ing the estination fol er of your recor .
Quality Select the recor ing quality. Choose from HQ, SLP, EP, LP an SP. High
quality level requires more space on the HDD. On the left screen the free
space of the HDD/USB will be shown.
Preview Show the currently selecte channel program.
Edit Schedules
Select the sche ule you want to e it from the list.
Mo ify the sche ule as escribe in “Create a new schedule” on previous page.
Delete schedules
Select the sche ule you want to elete an confirm one, all or cancel.
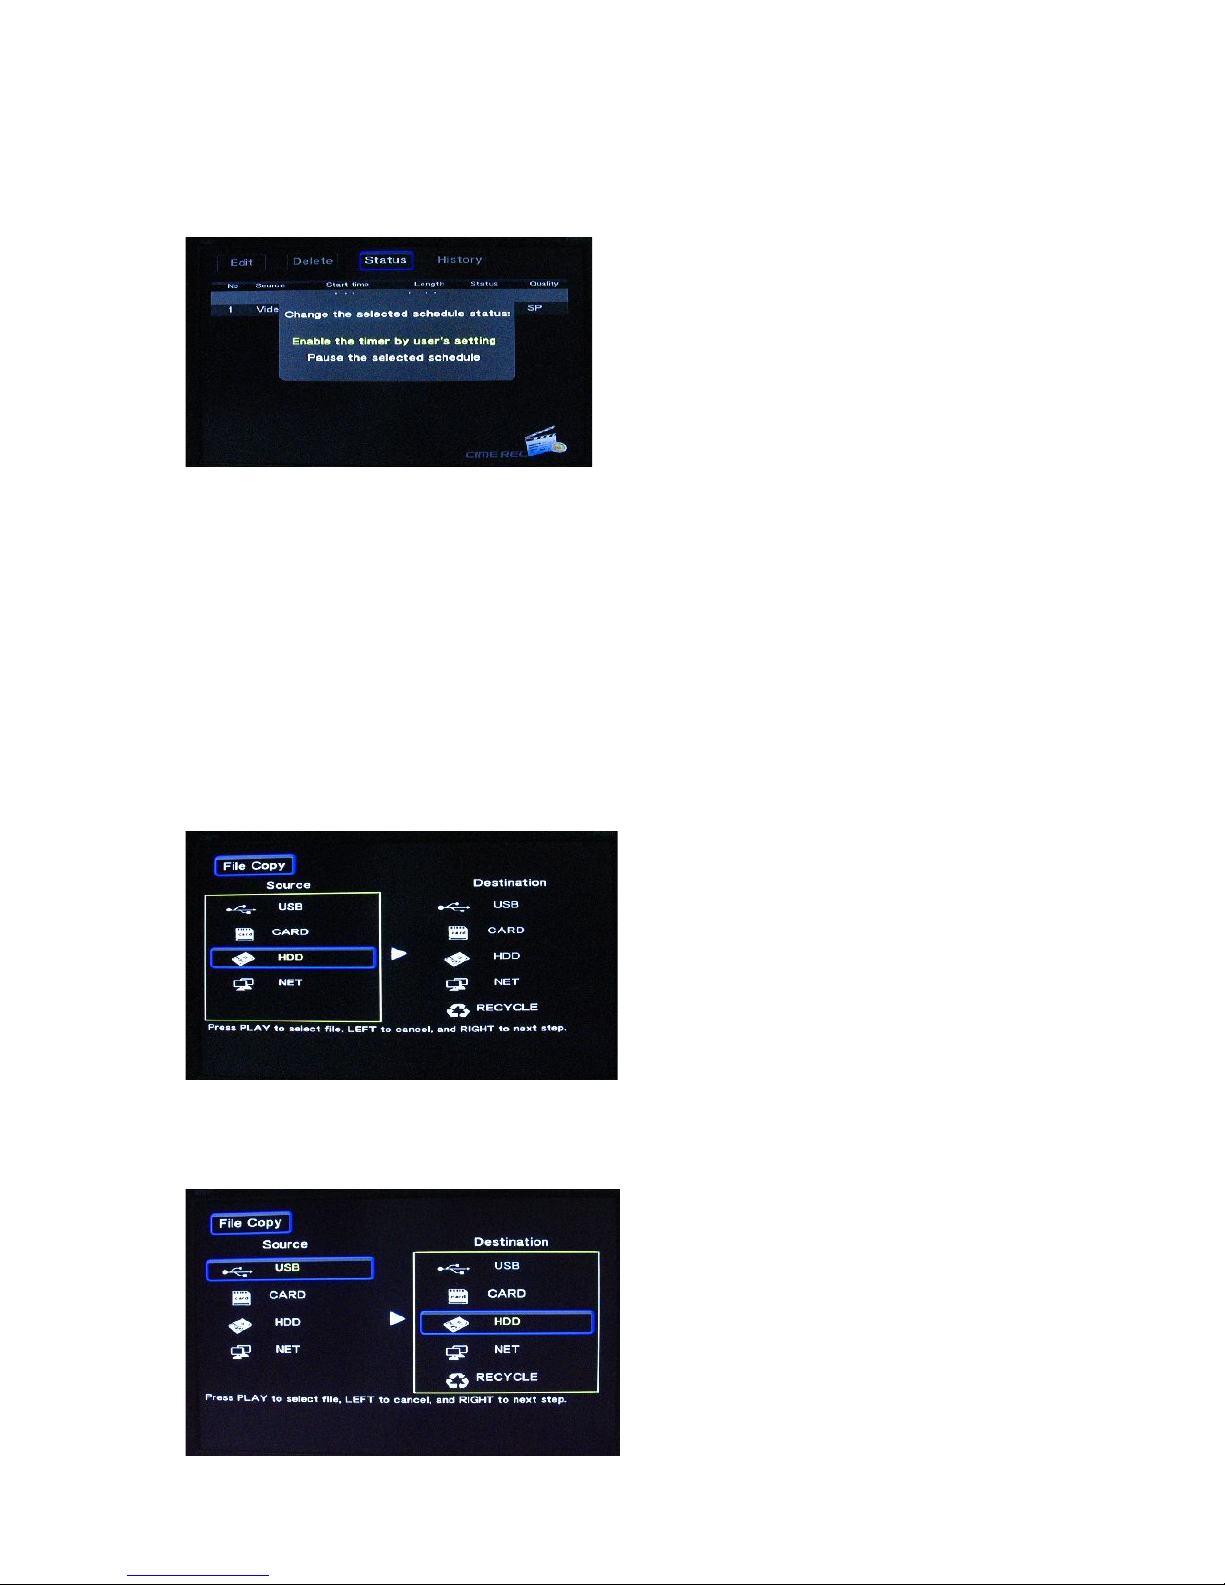
View schedule status
The sche ule list is isplaye .
Enable the timer accor ing to your nee s: by user or stand by.
View the recording history
View a complete history of all set recor ings.
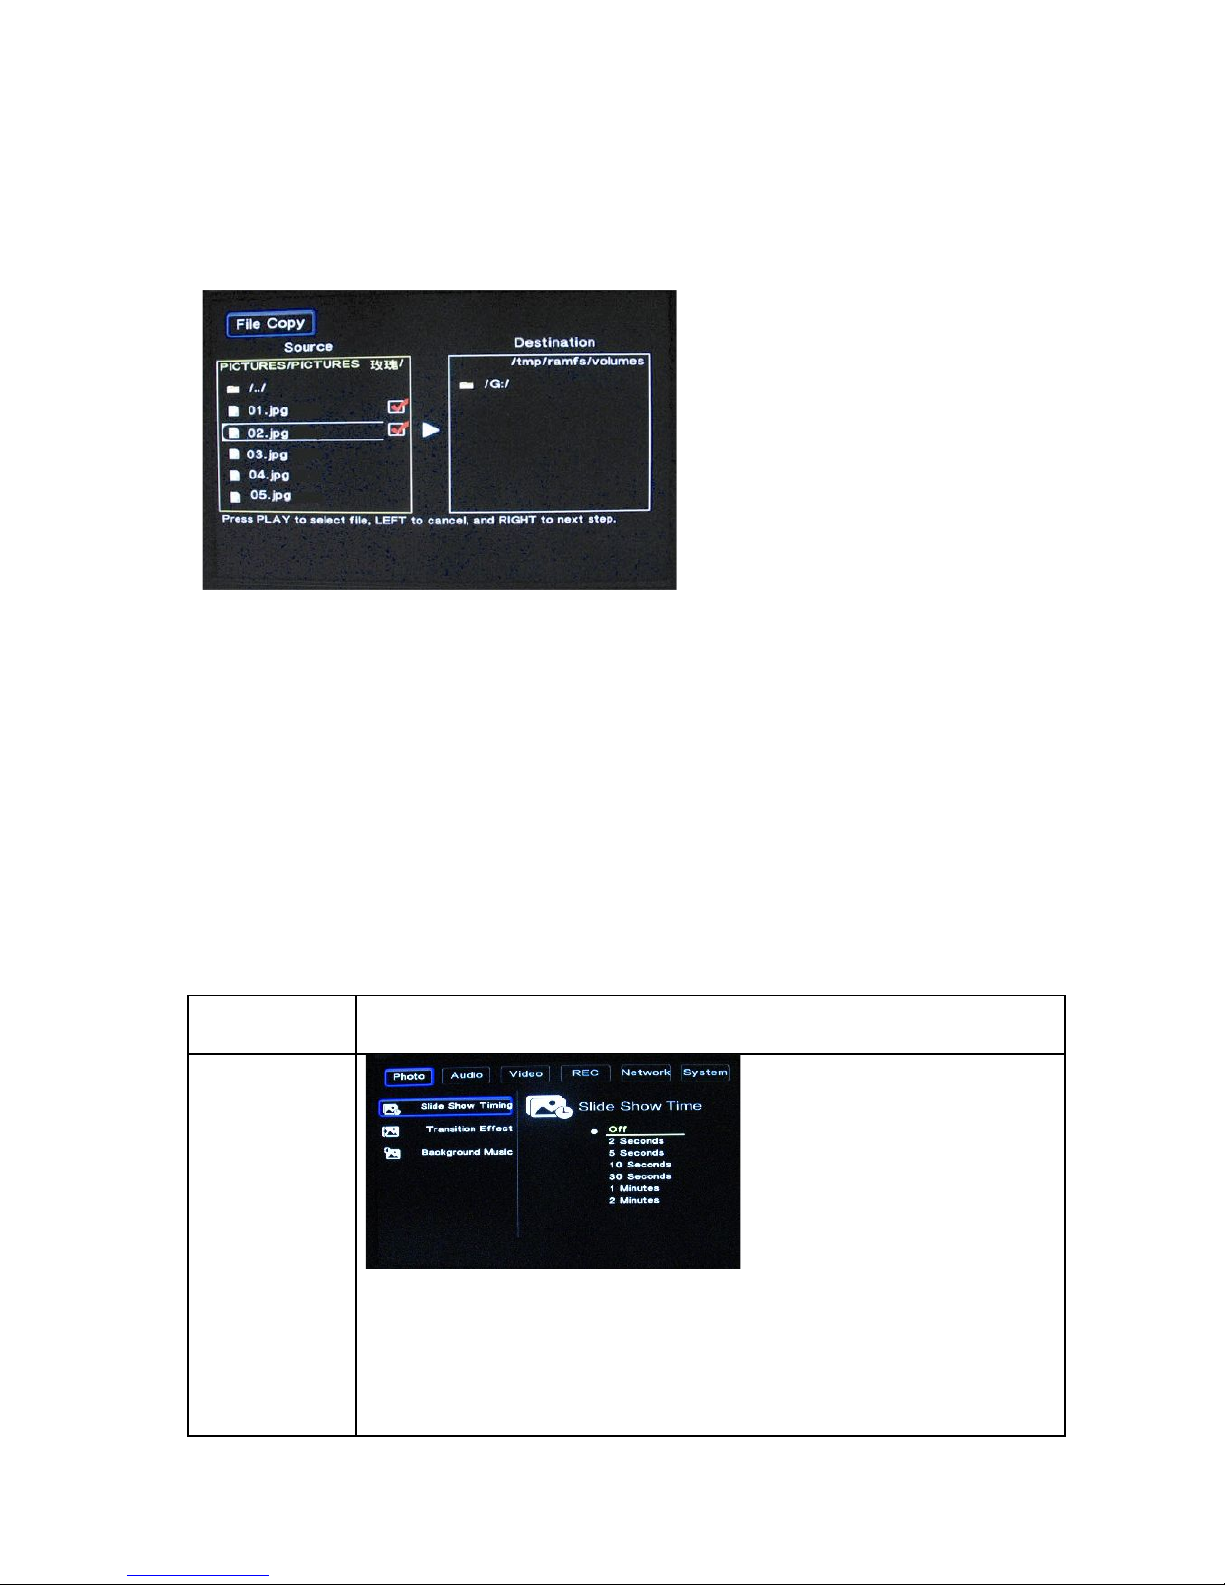
FILE COPY MENU
Copy files from the HDD, network, USB or car rea er from one me ia to another.
Select File Copy from the Guide menu or select COPY on the remote control.
Step 1: Select the source device
Select the evice you want to copy from in the source sector.
Step 2: Select the destination device
Select the estination evice on the right part of the screen.
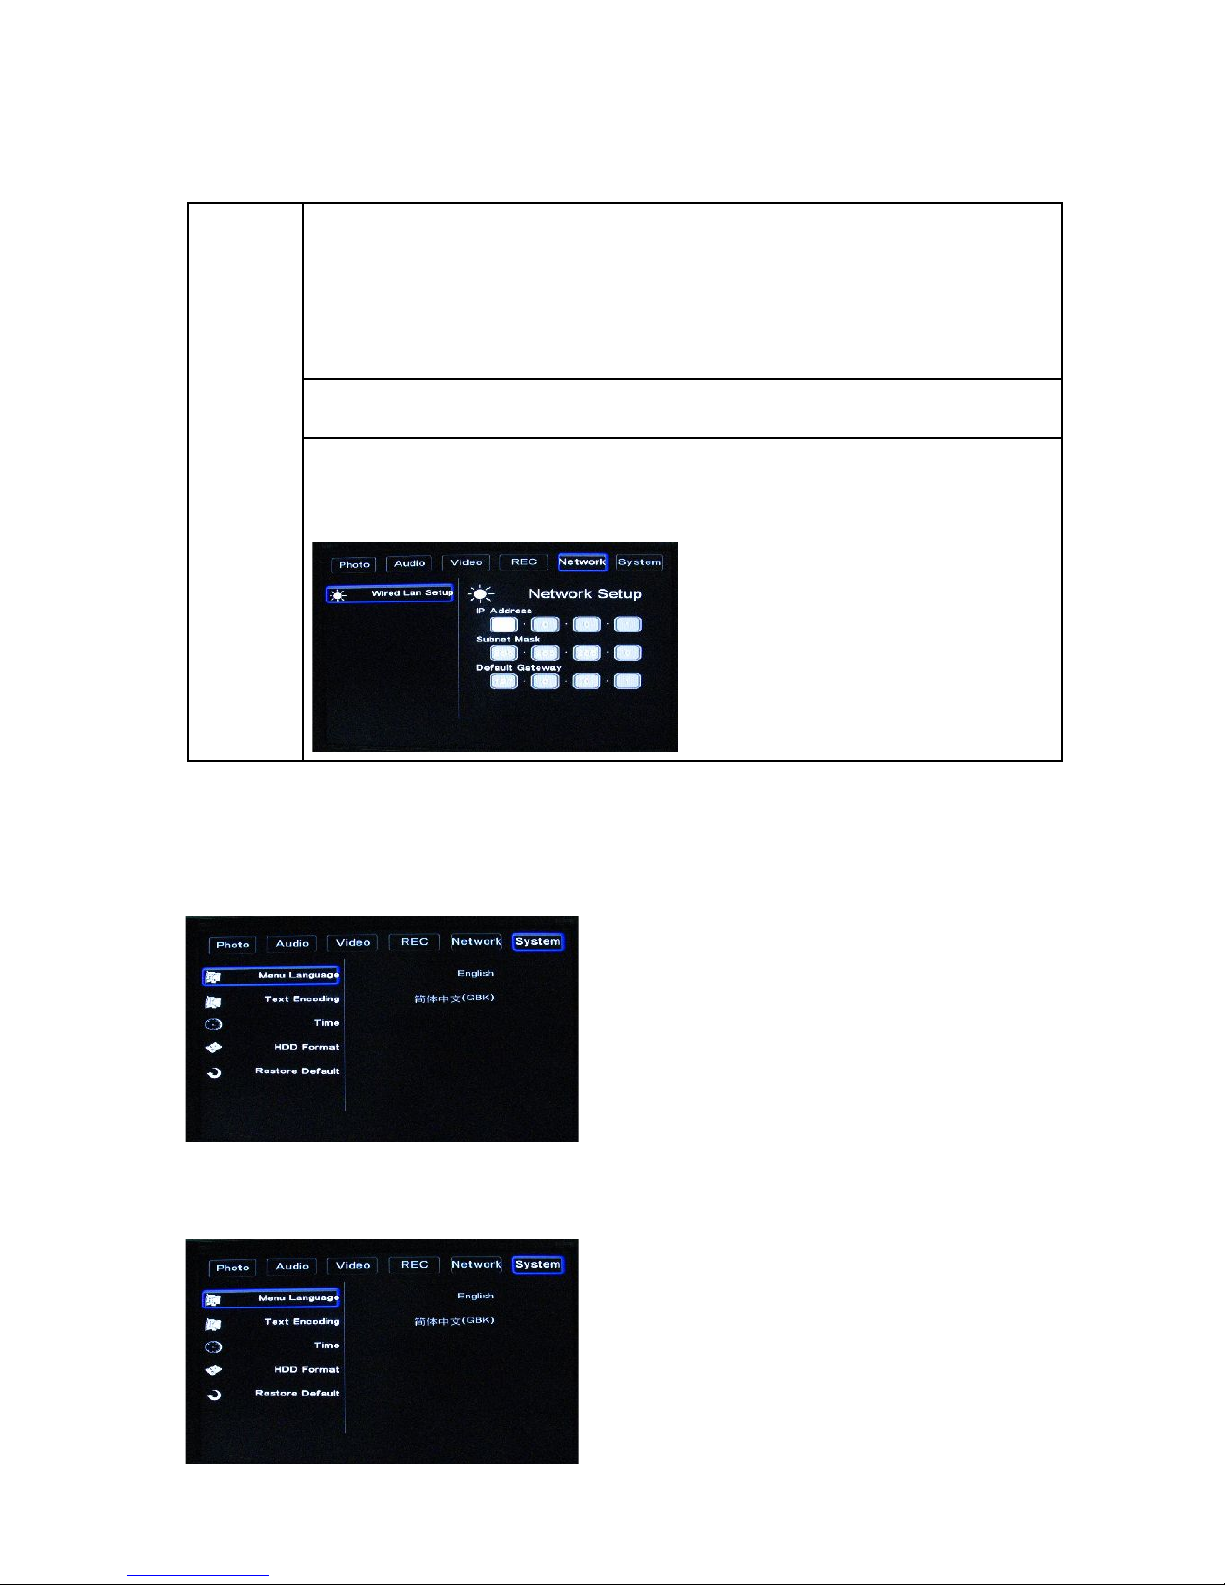
Step 3: Select copy files or folders
In the source sector, select files or fol ers you want to copy. A mention will be isplaye
next to the filne name.
Step 4: Select the folders of destination
In the estination sector, select the fol er where you want to copy your files to.
Step 5: Copy Status
When succee e , the system will isplay “File Copy Complete !”. If faile , the system
will isplay “File Copy faile !”.
SETUP MENU
Configure vi eo, recor ing an system settings.
Photo settings
Slideshow
timing
Set sli eshow time.
Select OFF or the interval you require.
Transition
Effect
Select OFF or one of the following transition effects require :
1) “Cross Fa e” - fa e in an fa e out
2) “Left to Right” - from left to right
3) “Top to Bottom” - from top to bottom
4) “Waterfall” - steep escent of water

5) “Snake” – snake motion
6) “Dissolve” – issolving
7) “Strip Left Down” – strip cover from left top to right bottom
8) “All Effect Shuffle” – shuffle all mentione effects
ackground
music
Play a music file in the same fol er.
Select the backgroun music position. Select “off” to close the
function.
Audio Settings
Night mode: The soun level will be re uce , but it becomes clearer. Select from off /
on / comfort an confirm.
Digital output: Select from HDMI LPCM / HDMI RAW / SPDIF LPCM / SPDIF RAW
an confirm.
Video Settings
Aspect
ratio
Select from: Pan Scan 4:3 / Letter Box 4:3 / 16:9 an confirm.
Pan Scan 4:3: Display a wi e picture on the entire screen.
Letter ox 4:3: Display a wi e picture with two black bor ers on top
an bottom of the 4:3 screen.
16:9: Compresse image to convert the whole image.
rightness Set brightness levels. New setting is previewe on screen.
Contrast Set contrast levels. New setting is previewe on screen.
TV system Select to a just the TV system, epen ing on your preferences.
HDMI settings
Change your TV set to HDMI output to be isplaye on your TV screen.
Record settings
Quality Select to set the efault recor ing quality setting.
The highest quality is HQ an requires more storage
space. Other settings re uce the recor ing quality an
require less storage space.
Permanent
timeshift
Select to set the permanent timeshift feature on or off.
REC device Choose the evice (HDD or USB) to recor on.
Network Settings
Wired
Lan
Setup
Set the network settings. Before you use these functions, please check
the following items:
1) Connect the LC-PRO-35MPR-HDMI to a network first.
2) Please enable “NetBIOS of TCP/IP” on your computer.
3) Please turn off or configure properly your PC’s firewall.
4) Please share fol ers to browse.
DHCP IP(AUTO)
Set DNS server IP a ress automatically.
FIX IP (MANUAL)
You have to enter the following: IP a ress, subnet mask an efault
gateway accor ing to your omestic settings.
System settings
Select System from the menu.
Menu language
Choose the OSD (On Screen Display) language.

Text encoding
Choose the text enco ing language.
Time
Select to set the system time. Enter manual setup.
Enter the system menu: select fiel an a just settings.
HDD format
Warning: Make sure you ma e a backup of your ata before formatting as it will erase
all ata on your har isk rive.
Partitioning
Step 1: A just FAT32 or NTFS partition an capacity accor ing to your nee s. Please
note that some features will show a limite usability in NTFS mo e.
Step 2: Press “Format” to start. Select cancel to return to the previous page.
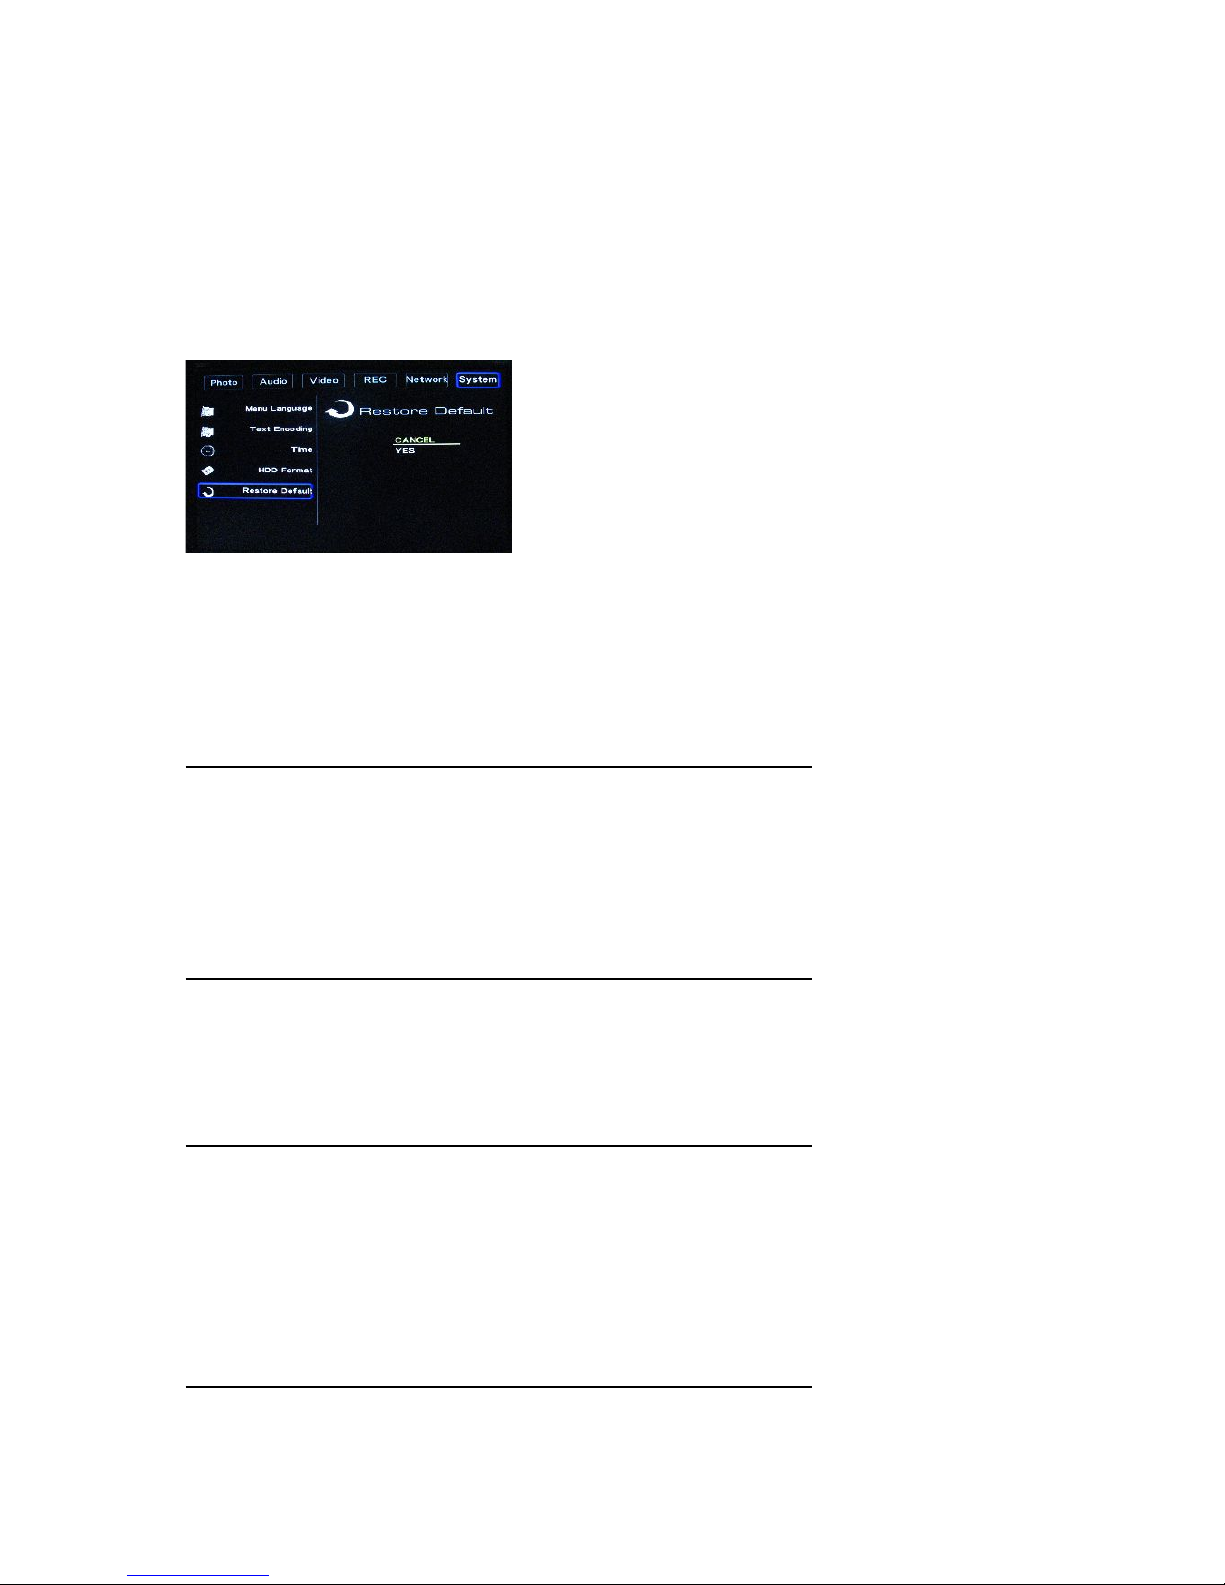
Restore default
Select to restore the factory efault settings.
WARNING: Your personal settings will be cancelle .
Specifications
CONTENT FORMAT SUPPORTED
Vi eo: AVI / MPG / MPEG / MP4 / DAT / VOB
Photos: JPEG / JPG
Au io: MP3 / WAV / WMA / ACC / OGG
Compression rate: between 32 kbps an 320 kbps
RECORDA LE MEDIA SUPPORTED:
HDD (DVD+VR mo e)
USB
VIDEO RECORDING MODE
Mode DVD 320 G HDD 500 G HDD 750 G HDD 1T
HQ 1hr 64hrs 100hrs 150hrs 240hrs High Quality
SP 2hrs 128hrs 200hrs 300hrs 480hrs Stan ar Play
LP 3hrs 192hrs 300hrs 450hrs 720hrs Long Play
EP 4hrs 256hrs 400hrs 600hrs 940hrs Exten e Play
SLP 6hrs 384hrs 600hrs 900hrs 1440hrs Super Long Play
VIDEO RECORDING FORMAT
MPEG2: DVD+VR (HQ/SP/LP/EP/SLP mo e)
Table of contents


