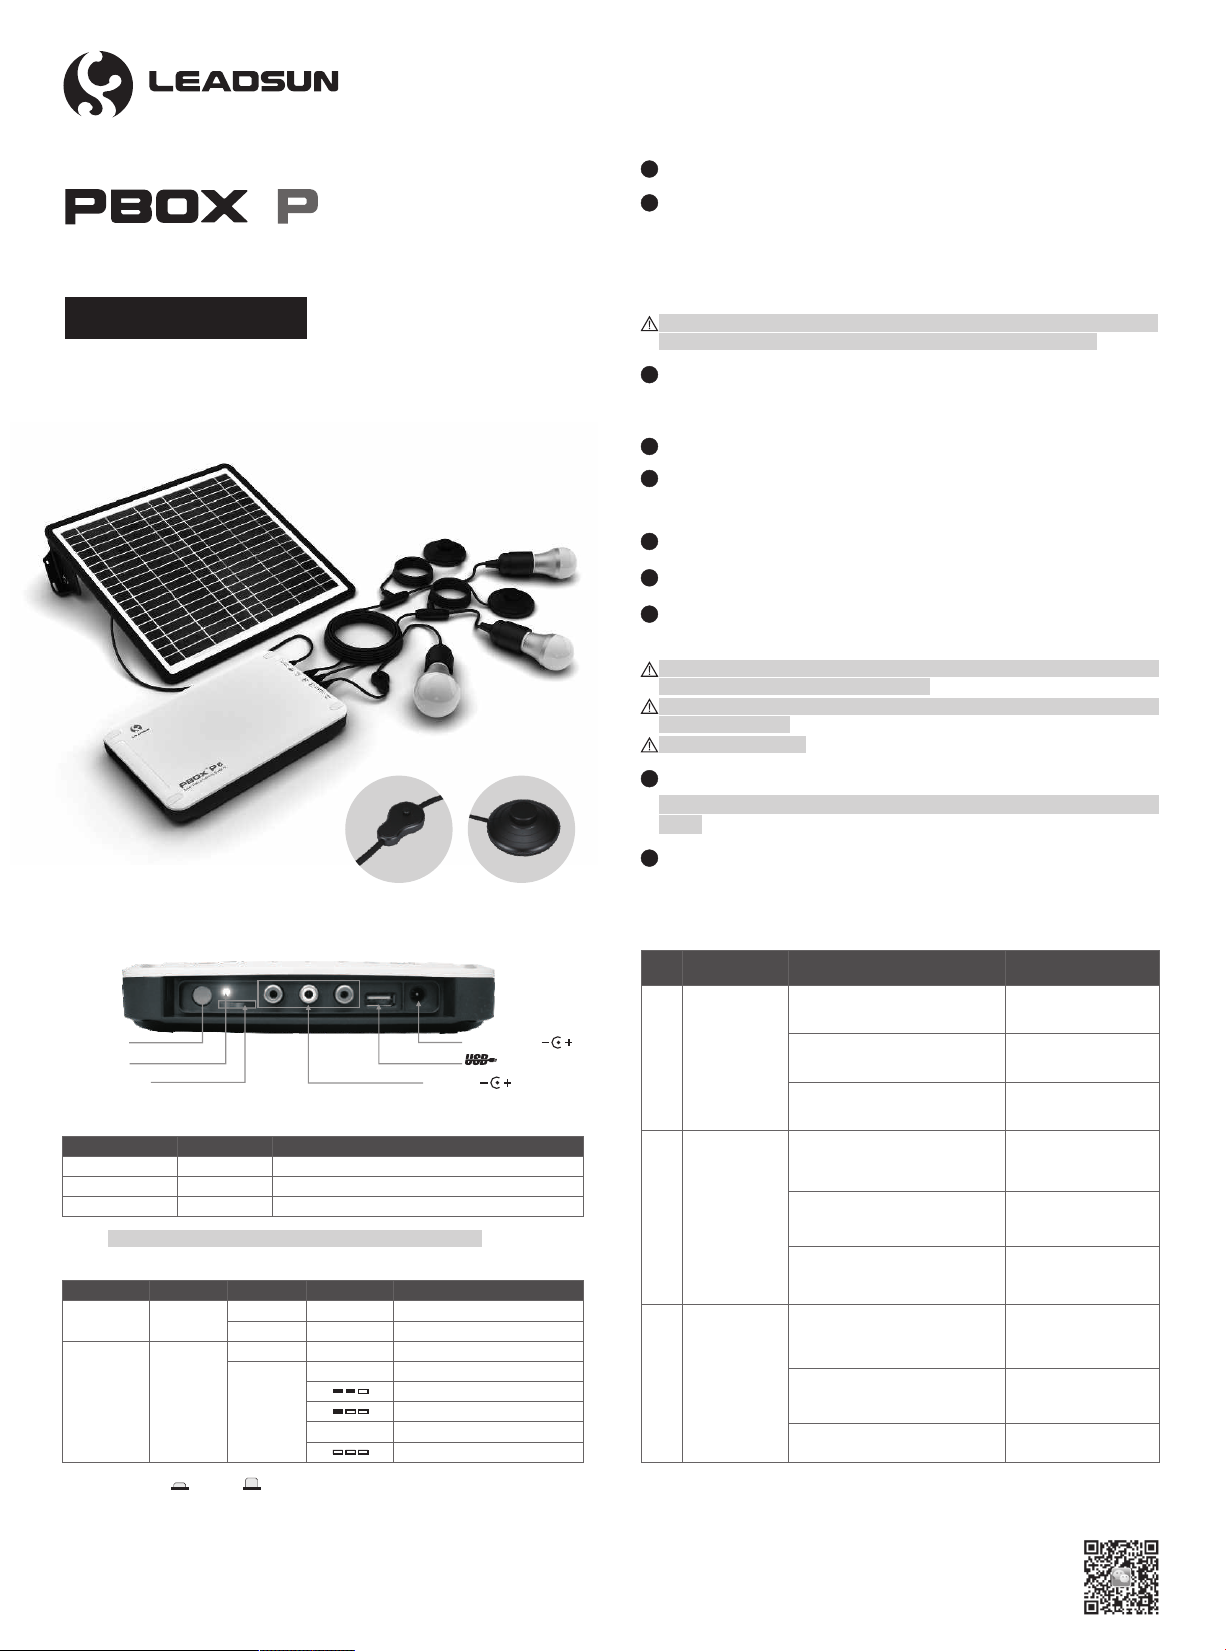
Thank you for choosing PBOX P6 Solar home lighting system. In order to
avoid any incorrect operation, please read this user manual carefully
before installation.
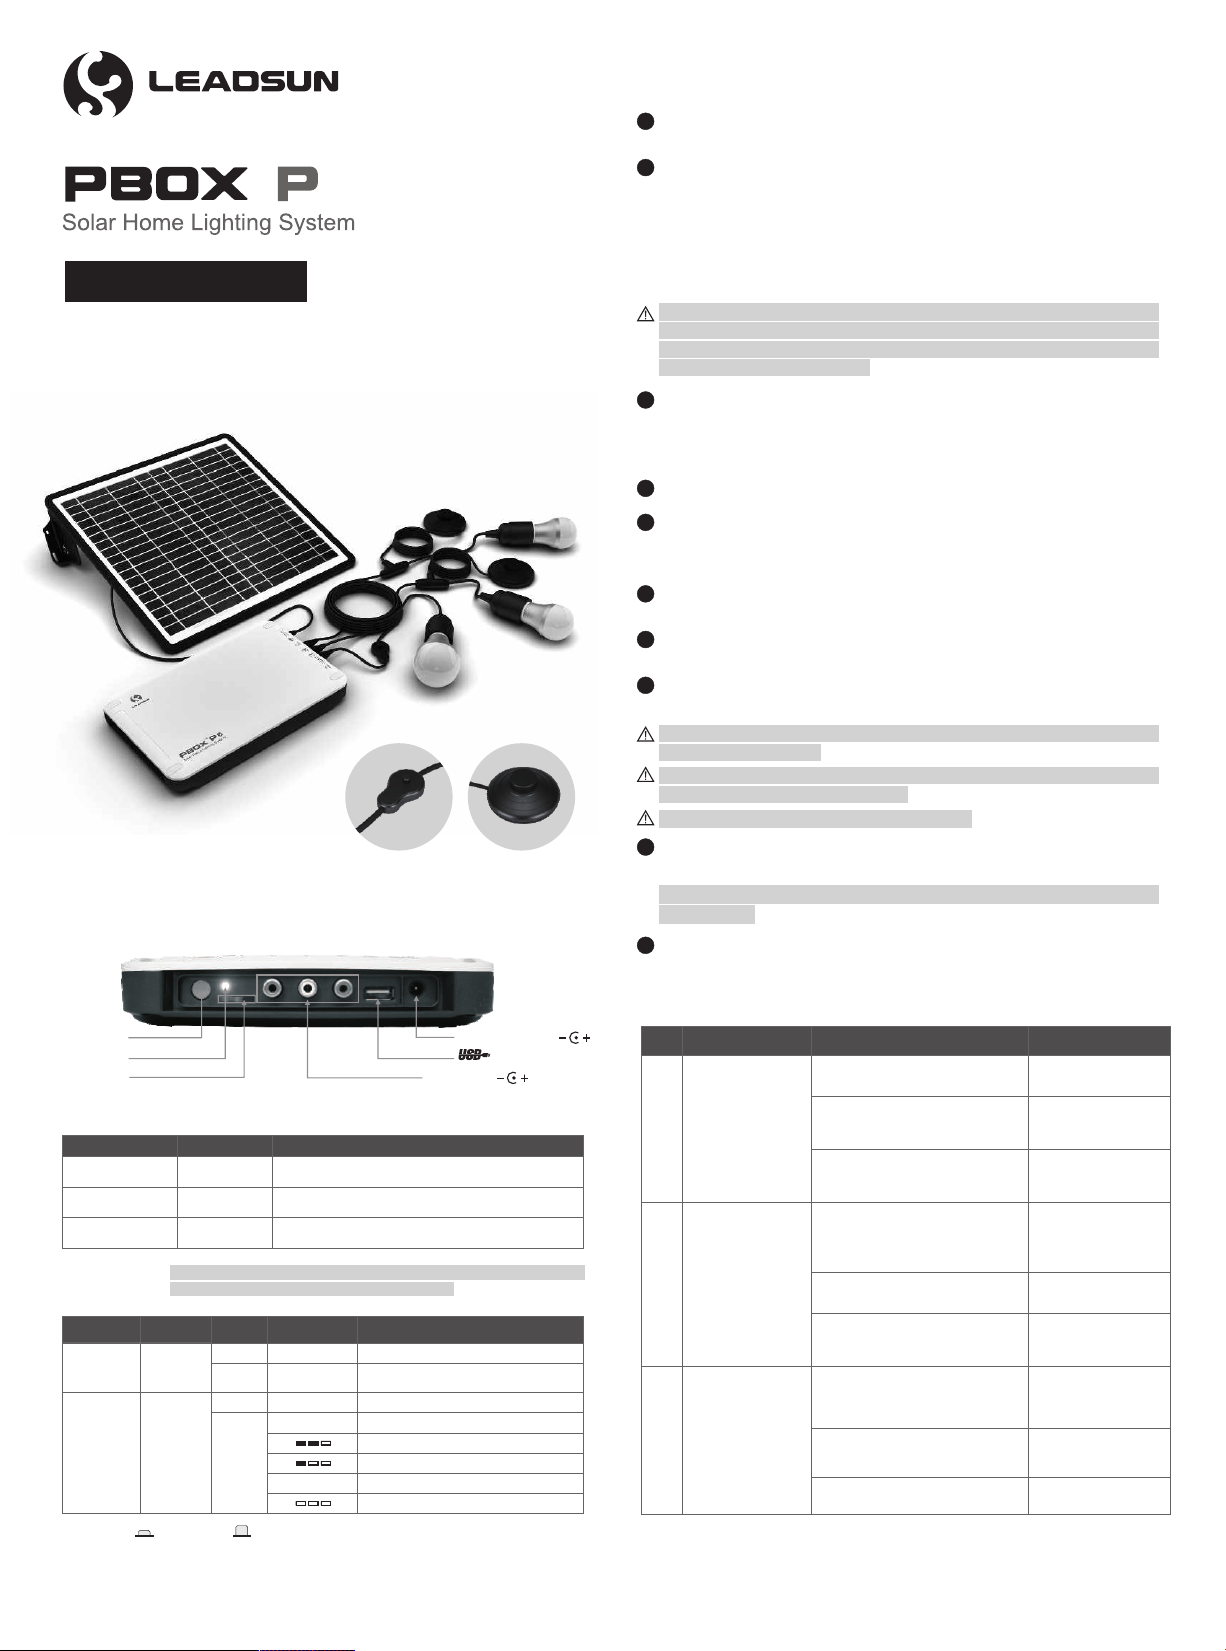
Schematic of interfaces on the controller:
Indicators
Power
indicator
Charging
indicator
Blue LED
Green LED
LED Status
●
○
LED Flowing
■■■
3 LEDs flash
Description of Function
Lamps and USB power on
Charging
Battery capacity ≥80%
Battery capacity between 50%~80%
Battery capacity <20%
Battery capacity between 20%~50%
User Manual
Charging indicator
Solar Charging Input
ON/OFF
Power indicator
5VDC
Lamps Output
Battery capacity <10%
Name of interface
Solar Charging
input ф3.5DC socket Operating voltage: 18VDC;
Max power of solar panel: ≤25Wp
Lamps output RCA socket
5VDC output USB socket
WARNING:
Type Definition and Limit
Working voltage: 12VDC;
Max current: ≤2000mA
Working voltage: 5VDC;
Max current: ≤1000mA
Do not use any equipment that goes beyond the limit of above
statement, or the controller will be damaged.
Lamps and USB power off.
Can be charged only.
* Power ON Power OFF
Installation Guide:
Please check if all parts that are listed in the attached packing
list are included after opening the package.
Mount the solar module.
Mount the solar module on your roof (or other place with sufficient
sunshine) by attaching screws. Make the solar module face to
direction with the strongest sunshine and set its obliquity equal to
latitude of your city. Keep the solar module away from any shadow of
trees, building, cable, etc.
Clean the surface of solar module.
Please clean the surface of solar module after finishing mounted. The
more clean on the surface of solar module, the more energy will be
obtained from sunshine.
Lead the cable of solar module into your room.
Place the controller at a dry and a proper place where allow you easy
operation.
Fix the controller.
Connect the cable of solar module to the Solar Charging Input
socket of controller.
Hang up the lamp holders and connect the cables to the Lamps
Output socket of controller.
Fix the lamps.
WARNING:
Only 12VDC lamps are allowed. And the max power of lamp should
be no more than 24W.
Turn on the controller (if the charging indicator is off or flashing,
means the battery needs to be charged).
TIPS: Turn off the controller while you don't use. This will help to
save energy.
Turn on the lamp switch.
9
10
WARNING:
The controller allows no more than 25W power of the solar module
and the voltage must be no more than 18VDC. Otherwise the
controller will be damaged. We do not suggest users to prepare the
solar module by themselves.
7
The output of the controller is DC voltage. Please pay attention to the
electrodes when you fix the lamps.
1
2
3
4
5
6
8
Do not short circuit the lamps holder output.
Troubleshooting:
Fault
Charging indicator is
OFF during charging
in daytime.
Fault Diagnosis
Item
1
Solution
Follow the step 2
and 3 of installation.
Follow the step 6 of
installation.
Check if there is sunlight
irradiation above the solar module.
Check if the solar module is
connected to the controller
correctly.
Check the ON/OFF switch of the
controller. No charging indication
if it's ON.
Turn off the
controller and check
if it's charging.
Can’t charge mobile
phone
Can't turn on lamps
2
3
Turn on the switch of the
controller. If charging indicator is
flashing or off, means the battery
needs to be charged.
If the charging indicator is on,
check if the lamps switch is on.
If the charging indicator and lamp
switch is on, check if the lamps
and cables are well connected.
Turn on the switch of the
controller. If charging indicator is
flashing or off, means the battery
needs to be charged.
If the charging indicator is on,
check if the USB cable is well
connected.
Charging the battery.
Re-connect USB cable
or change a now one.
Turn on the lamps
switches.
Follow the steps 7 and
8 of INSTALLATION
GUIDE.
Check if the mobile phone is
well-known brand.
ON/OFF
switch
Color
of LED
ON
OFF
OFF
ON
6
TM
THE LEADER IN SOLAR LIGHTING TECHNOLOGY
Charging the battery.
OP6.001-A
www.leadsun.com.cn Tel: +86-756-2289712
Fax: +86-756-8682090
No.1 Pingdong 1st Rd, Nanping
industrial Park, Zhuhai, China.
Leadsun Electronic Technology Co.,Ltd. Add:
In-line Switch