leema-acoustics Sirius User manual

HANDBOOK
MUSIC SERVER
LEEMA ACOUSTICS
SIRIUS
L EEMA A COUST ICS Issue 1

2
Index
Index.............................................................................................................................................. 2
Warranty Regi tration Detail ………………………………………………………………………… 3
Declaration of Conformity........................................................................................................... 4
Introduction, Environmental, WEEE, Made in the UK............................................................... 5
In tallation & Safety Advice........................................................................................................ 6
Rear Panel..................................................................................................................................... 7
Front Panel…………………………………………………………………………………………..…… 8
Siriu Overview............................................................................................................................. 9
Siriu Connection ……………………………..………………………………………………………. 10
Front Panel Operation…………………………………………………………………….……………. 11
Mu ic Playback Software……………………………………………………………………………….12
Control Software...........................................................................................................................13
Da hboard Setting “Sy tem”…………………………………………………………..………….….14
Da hboard Setting “Setting ” ………………………………………………………..…..………….15
Da hboard Setting “Mu ic Library” and “Mu ic Player”....................................................... 16
Da hboard Setting “Di c Ripper”……………………………………………………………….….. 17
Da hboard Setting “Import”………………………………………………………..……………….. 18
Da hboard Setting “Quarantine”…………………………………………………………...………. 19
Da hboard Setting “Mu ic Library”…………………………………………………………...…… 20
Mu ic Player ……………………………………………………………………………………………. 21
Mu ic Player Continued………………………………………………………………………….…… 22

3
Warranty Regi tration
Register your product online at http://www.leema-acoustics.com
Alternatively, use your mo ile phone and a QR code reader for direct access using the code elow.
Proudly Made In Wales

4
EC Declaration of Conformity
In accordance with EN ISO 17070-1:2004
We eema Electro Acoustics imited
of Severn Farm Industrial Estate
Welshpool
Powys
UK
in accordance with the following Directive(s): 2006/95/EC The ow Voltage Directive 2004/108/EC The Electromagnetic Compatibility Directive
hereby declare that: Equipment: Sirius Music Server
is in conformity with the applicable requirements of the following standards
Standard. No. Name International Equivalents
BS EN60065; 2002 Electrical Safety Requirements EN60065; 2002 / IEC60065; 2001
BS EN 55020; 2002 EMC Immunity EN55020; 2002 / CISPR 20; 2002
BS EN 55013; 2001 EMC Emissions EN55013; 2001 / CISPR 12; 2001
BS EN 61000-3-2; 2001 EMC imits for Harmonic Emissions EN61000-3-2; 2000 / IEC61000-3-2; 2000
BS EN 61000-3-3; 1995 EMC imits for Voltage Fluctuations EN61000-3-3; 1995 / IEC61000-3-3; 1994
I hereby declare that the equipment named above has been designed to comply with the relevant sections of the above referenced specifications.
The unit complies with all applicable Essential Requirements of the Directives and Standards.
Signed by: .................................................................................................................................................
Name: Nia Davies
Position: Managing Director
Done at: eema Electro Acoustics td.
On: 02/08/2016
17

5
Introduction
Congratulations on your purchase of a Leema Sirius music server.
The Leema product range has een painstakingly engineered in the United Kingdom to offer
genuine state-of-the-art performance.
Users should read and follow this instruction manual, paying particular attention to the user
installation and safety advice sections.
This manual has een written to ena le you to achieve the very est performance and maximum
listening pleasure from your investment.
We wish you many years of pleasura le listening... Move Your World!
With est regards, The Leema Team.
Environmental I ue
Although Leema electronics operate in stand y mode as opposed to eing fully switched off, the
power drain has een optimised to a negligi le level. Contrary to popular audiophile practice,
we do not recommend leaving our power amplifiers permanently powered.
All Leema amplifiers have een designed to attain full operational specifications and sound quality
within a few minutes of switch-on.
Leema operates a 100% recycling program. All waste materials generated as part of the
manufacturing process at Leema’s headquarters are recycled via a licensed specialist company.
WEEE Scheme
Di po al of Electronic Equipment in the European Union and other countrie with
collection procedure :
The wheelie in sym ol on this product indicates that it shall not e treated as household waste.
It should e disposed of via a collection point for the recycling of electrical and electronic
equipment.
Made in the UK
Your Leema Sirius music server was entirely designed and manufactured in Wales, UK.

6
VERY IMPORTANT
Before connecting your new Sirius music server to the rest of your system, please ensure
all required input/output ca les are connected BEFORE inserting the mains power lead
and powering for the first time.
U er in tallation and afety advice
Please ensure that the mains voltage of your new Sirius music server is correct for your
region. The setting is displayed on a la el next to the mains power inlet.
The mains voltage setting is not user adjusta le, therefore the amplifier must e returned
to the manufacturer if any changes are required.
Ensure the mains supply is switched off at the wall socket, or unplugged efore installing
or moving the amplifier.
Do not use near water, for example do not place a potted plant on top of the unit or allow
drinks to e placed near the unit. If liquid is spilt in to the ca inet, remove the mains lead
from the wall immediately.
The Sirius music server should then e returned to your dealer for safety testing efore
re-use. Failure to do so may result in electric shock or even fire!
Do not use the Sirius music server in damp conditions, for example, outside of the house.
In the event of an electrical storm, remove the mains power lead from the wall outlet.
Keep away from direct sunlight and other heat sources and ensure adequate ventilation
around the Sirius music server to maintain proper cooling.
Units MUST NOT e stacked directly on top of each other.
Never attempt to open the ca inet. There are no user servicea le parts inside and doing
so will invalidate the warranty.

7
USB Connection
The upper USB port is for the
connection of an external DAC
capa le of asynchronous
operation.
The lower port is for a ackup
device such as a hard drive.
Power Inlet
Please ensure that the
specification indicated
adjacent to the connector
is correct for your area.
This will either e
230VAC or 115VAC.
Unbalanced Output .
For an un alanced connection
via RCA/Cinch connector.
LAN (Local Area Network)
Use this RJ45 port to connect the
Sirius to a home network.
Rear Panel
Safety Information
Service Port
Connection point for a
vga monitor….service
only.
Balanced Output
For a alanced connection
via an XLR type connector.
Streamer Port
Not yet implemented

8
Shut down button.
Press once to turn Sirius
on…..stand y light will go out in
centre of utton. Press again to
shut the unit down safely. The
stand y utton will illuminate.
See Page 11
Front Panel
Loading slot for CD drive.
See page 11

9
Siriu Overview
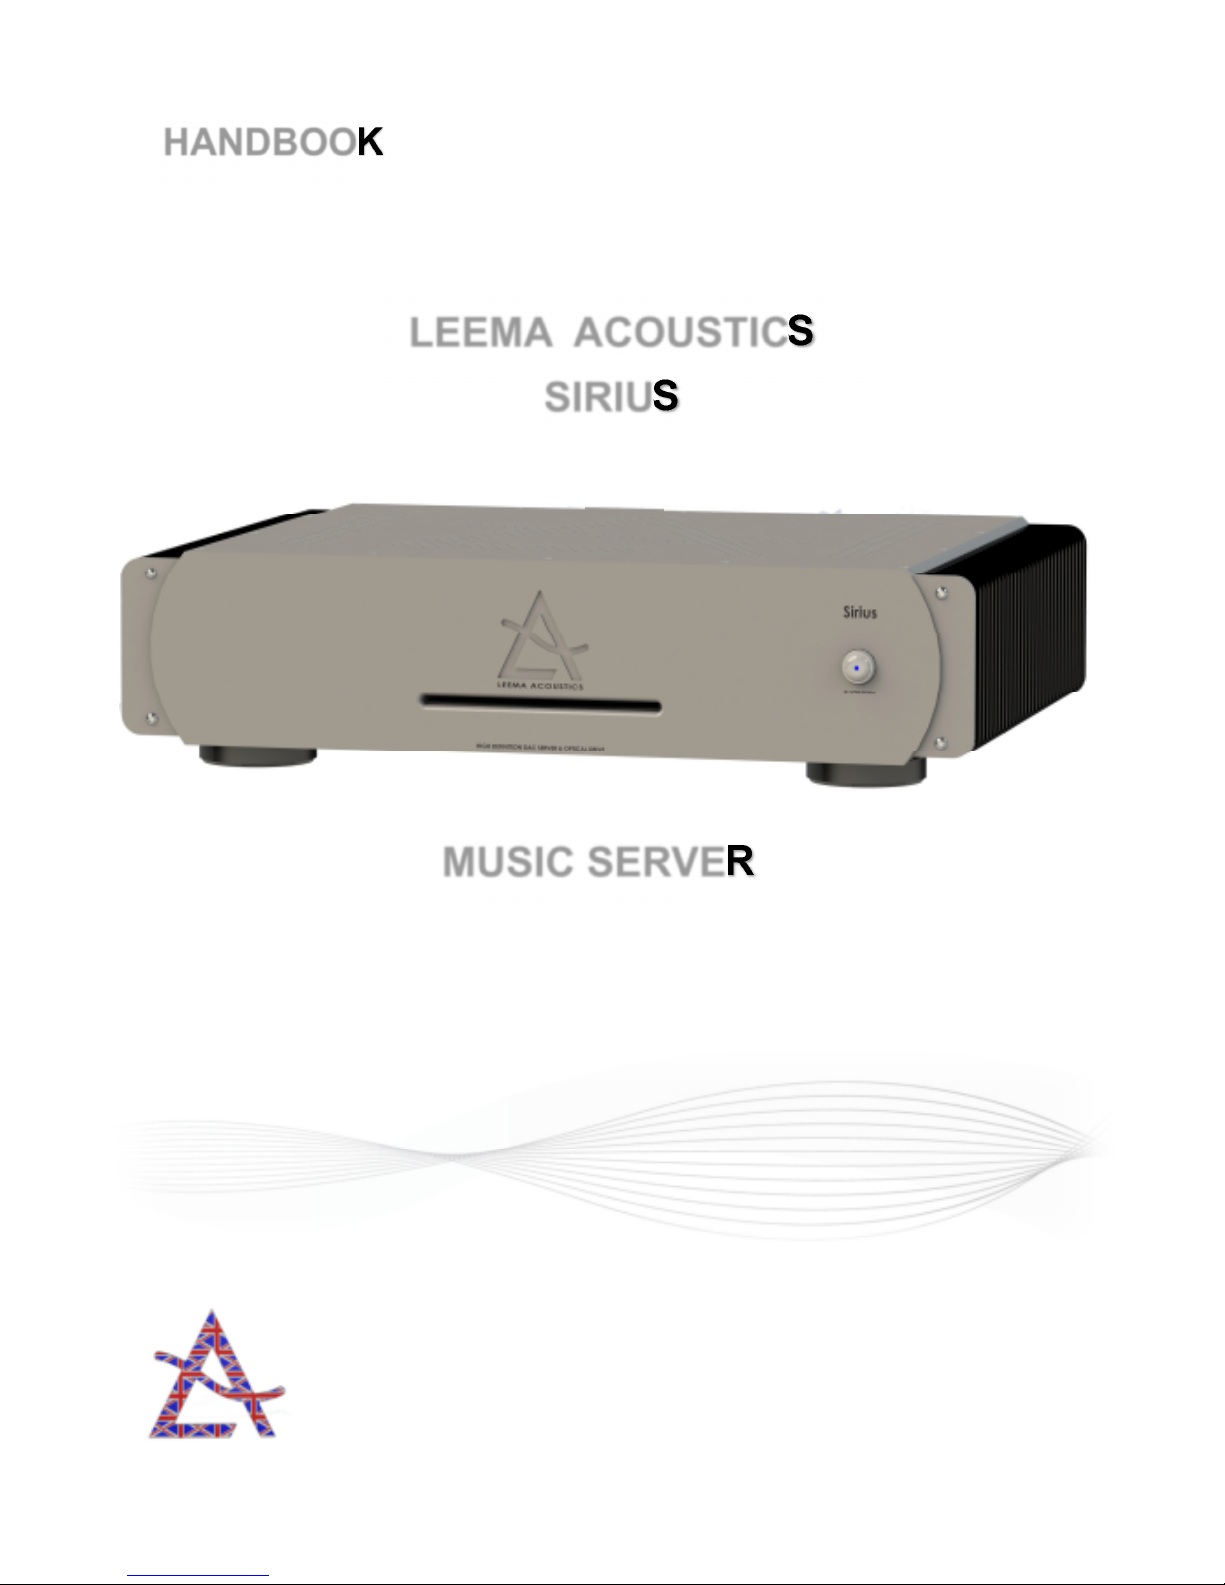
The Leema Sirius music server is a computer ased music play ack system. The main oard is
a server grade model, designed for long duty cycles and relia ility. Music files are stored on
a “Western Digital Red”, server hard drive and CD ackup is via a TEAC optical drive.
The mother oard is fitted with 4g of memory which is used for music play ack. Data is sourced
from the hard drive and uffered in to memory. It is then played out at the correct speed to minimise
jitter.
Sirius features an analogue power supply with a custom wound ultra low noise transformer.
There are many enefits to using a transformer
1. Transformers are excellent at filtering mains orne noise (common mode rejection).
2. Transformers do not generate high frequency switching noise, unlike a switch mode supply.
3. Transformers have very high relia ility
4. Transformers are almost 100% recycla le.
Leema Acoustics have partnered with Innuos ltd to license their super software for use in our
electronics.
Sirius features an internal ESS Sa re 9028 pro DAC chip for superior integrated analogue replay.
However, a USB connection can also e selected if replay is desired via an external DAC
Sirius supports high itrate asynchronous play ack natively.
The play ack path can e selected via the “My Innuos” we page.
In essence, Sirius is designed to replace the CD player in your system, providing high quality
play ack from oth, music files stored on the systems hard disc and from integrated streaming
services such as Tidal, Spotify, Qo uz, Tune in Radio and BBC iPlayer.
Sirius is also DLNA/UPNP compliant, meaning that it can also e used to stream music via the
connected network, to any UPNP/DNLA compliant player.
Control point software such as Bu le UPNP on Android or mConnect on oth Android and iOs,
allow music files to e played from any DNLA/UPNP source to any other DNLA/UPNP player on the
network, including phones and ta lets.
This can e done simultaneously to the Sirius playing locally, in a HiFi system.
As an example, one person could e using the local play ack function to listen to music on their
HiFi system, while another person could stream music from the Sirius to a headless player,
elsewhere in the house, as long as all the devices are connected to the same network.
Sirius owners who may also own a Leema Quasar, can play music remotely from the Sirius to the
Quasar via the network.
In this way, the stored music files held on the Sirius’ hard drive can e remotely accessed y other
compati le devices.

10
Connection
Analogue Output Connection
Analogue RCA > Un alanced amplifier input connection should e via the Sirius’ RCA analogue
output connectors.
Analogue XLR > Balanced amplifier input connections should e via the Sirius’ XLR output
connectors.
Digital Output Connection
USB (upper ocket) > If using an external DAC such as a Leema Li ra, then the upper USB
socket can e used for the connection. Sirius’ operating system is Linux ased so high speed
asynchronous play ack is native to the system and will e implemented once the USB
“handshake” has completed etween the Sirius and the external DAC. See page 16.
Network connection .
RJ45 > There are two RJ45 type network sockets on the Sirius’s rear panel . One is for direct
connection to the users home network, usually via an RJ45 data ca le, in to a socket on a router.
As seen from the rear, the network connection socket is the RJ45 on the left.
The right hand socket is reserved for future expansion
Service Port
The 15 pin VGA type service port is only for trou leshooting or fault finding.
A Word about Cable
Never underestimate the importance of good quality ca les. Cheap ca le, often included with
devices as a “get you going” aid, will not do. Ca les are very synergistic. The higher the system
resolution, the more easily the differences etween ca les can e discerned.
Leema Acoustics recommend the use of Leema ca les which have een designed specifically
to complement Leema components.

11
Front Panel Operation
Shutdown
The Leema Sirius is designed to e left on, so that It is accessi le on the network at any time.
However, if the Sirius is only used for local play ack as part of a larger hifi system then it can e
shutdown etween listening sessions. If the lue LED in the centre of the shutdown utton is lit,
then the unit is in stand y.
Simply press the utton once to start the initialisation process. It will take a out 1 minute for the
unit to e fully powered up and connected to the network.
The lue LED in the centre of the utton will extinguish.
To shutdown, simply press the utton again.
The Sirius is in shutdown when the lue LED in the centre of he utton is illuminated.
Optical Drive
Sirius features a TEAC slot loading CD mechanism. Assuming there is not a disc in the drive
already, gently insert a disc in to the slot at 90 Degrees to the Sirius front panel. Once the disc is
a out half way in, the drive will sense that a disc has een inserted and will draw the disc in
automatically.
If the software has een set to automatically ackup the disc to the hard drive, it will start to copy
the disc and will find the relevant front cover artwork and track listing to insert as metadata.
See page 15 for more details

12
Mu ic playback oftware
There are two separate control interfaces in everyday use, one is concerned with machine setup,
music li rary maintenance, disc copying etc. These have een placed in a separate interface in
order to prevent mishaps in general use.
The setup interface is accessed y typing my.Innuos in to a search engine such as google.
The Sirius dash oard will e presented for use.
The music play ack interface for Android devices is an app called Orange squeeze,
availa le from the Play store. The logo looks like this.
The music play ack interface for Apple devices is called iPeng 9,
Availa le from the apple app store. The logo looks like this.
Please download the app appropriate for your control device.

13
Control oftware
Ensure that the Sirius unit is connected to your local network (ca le only) and switch the unit
on……...the lue stand y light on the power utton will extinguish.
Wait approximately one minute for the Sirius to connect to your network
Select a we rowser such as Google and enter my.Innuos.com in to the search ar……………...
(see fig 1 elow).
Then select my.innuos.com from the list
This process is not currently compati le with Microsoft EDGE rowser.
The dash oard/control panel is local to the Sirius ut a remote site is used to make access easy and
direct from any device.
However, if the we service is unavaila le, simply type the Sirius’ individual IP address in to the top
ar for a direct connection.
Once accessed you should see a page which looks like figure 2.
Figure 1 Figure 2

14
Simply touch the picture of the Sirius from Figure 2,
to open the menu shown in Figure 3.
There are seven selections presented.
Touch the relevant line of text to open the su
menu’s/settings.
So, let’s start with the system setting.
Press “System”.
Figure 3
Figure 4
A menu should open as shown in figure 4.
The top ox shows details of the Sirius,
including the software serial num er and
software version num er.
Below is a heading called “Networking”.
Here you will find the Sirius’ IP address and
Mac address. Please write your addresses in
the two oxes elow for reference later.
IP………...
MAC…….
You can also remotely restart or shutdown
your Sirius…..shown in Orange text in figure 4.
Scrolling down the page will present a further
heading called “Storage”.
Here is a horizontal ar type visual display
showing how much of your system storage has
een used/how much is left and a percentage
used figure. It is worthwhile checking how much
you have left occasionally.
Press the icon at the top of the page to
return to the main menu
Figure 5
Da hboard etting “Sy tem”.

15
Da hboard etting “Setting ”
Scrolling down further rings up the “Music Server” settings.
1. “Set Ripping Mode”…... There are two options which define what
happens when you insert a CD for ackup. Option 1 is Automatic
mode which copies the CD and automatically inserts al um art/
track information and other Metadata. Option 2 is Assisted mode
which gives the user an opportunity to edit the al um art/track
listings and metadata efore the CD is copied.
2. “Set Ripping File Format”…...This selects which file format you
would like your CD duplicates to e converted to. There are 2
options, WAV or FLAC. Wav is an uncompressed file format ut
has poor metadata integration and compati ility with other network
players. Option 2 is FLAC which is a lossless compression system
with excellent metadata integration and network compati ility.
The files will also e a out half the size of their WAV version
3. “Set Ripping Speed”…...Again there are 2 options, Quick mode or
Quiet mode. Quick mode, as it’s name suggests, copies the disk at
high speed ut is noisier. Quiet mode copies at half the speed of
Quick mode ut is much quieter.
4. “Choose Server Integration”…...Sirius can play music files to other
systems, here you can select if you want to play to Sonos and/or
other network players in your system that use the UPNP protocol.
Also, Roon compati ility can e ena led if you use Roon as your
primary music li rary.
Select “Settings” from the main menu to show a list of system settings.
First heading is “System”….
1. Configure “Server Name”, pressing this opens a text ox in which
you can change the name of the music server as presented to other
players on your home network.
2. “Set Timezone”, changes the international timezone your Sirius uses
as it’s clock. Generally your Sirius will e a le to automatically derive
this from your internet connection.
3. “Update system”, selecting this will force the Sirius to check if a
newer version of software is availa le. Your current version is
displayed.
Figure 6
Figure 7

16
Da hboard etting “Mu ic Library” and “Mu ic Player”
Next are the “Music Li rary” settings
1. “Configure NAS shared folders”…..If you have a music collection on
a NAS drive already and would like to play it from the Sirius player
page then enter the Server name and file path here. If your NAS is
UPNP ena led and you have UPNP streaming set in Music Server
Integration then the NAS will already appear in the pull out ta on
the main play ack page. See page 15.
2. “Re uild Music Li rary”…...If your music li rary ecomes corrupted
or has corrupt data, you can force a complete re-scan from here.
3. “Configure Backup” It is prudent to ackup your music li rary in case
of catastrophic data loss. This can e either to a USB Drive, plugged
in to the Backup USB socket on the rear panel, or to a defined folder
on a network machine.
Further down are the “Music Player” settings.
1. “Configure player name”,….Here you can set a different name for the
Sirius’ music player than the server name. This would e useful if
you have multiple servers and players on the network.
2. “Music Player Output”,…...allows you to set the Sirius to use it’s own
internal DAC or to play out to an External USB DAC via it’s upper
USB port on the rear panel.
3. “Configure DSD Mode”,…...Sets what format will e used to play
DSD files to an external DAC. By default, DSD files are transcoded
to FLAC for compati ility, ut if your DAC can handle native DSD
files then they can e played out in their original form. However, the
limit is DSD 256.
4. “Configure USB Latency Mode”,…...Configures the latency mode for
the USB connection to the DAC, oth internal and external. The low-
er the latency the etter, ut some DAC’s require a higher latency
setting to function correctly. Normal is the default.
5. “Configure Tidal”,…...Enter your Username and Password to link
your account to the Sirius’ player.
6. “Configure Spotify”…...As A ove for your Spotify account.
7. “Configure Qo uz”…...As A ove for your Qo uz account.
Figure 8
Figure 9

17
Da hboard etting “Di c Ripper”
Figure 10
Figure 11
Figure 12
Return to the main menu and select “Disc Ripper”.
We are going to copy our first CD on to the system.
A rotating icon (figure 11) will invite you to
inset a CD……...slowly push your chosen
CD in to the slot on the front of the Sirius
……….once the disc is in a out two thirds
of the way, the mechanism will take the
disc the rest of the way.
Sirius will automatically find and display the
cover art/track listings and other data to
attach to the music file.
The track listing will e displayed and a
small progress ar for each track copy will
e shown.
Once the CD is copied, the disc will
automatically eject ready to receive
the next one.
Figure 13

18
Da hboard etting “Import”
Figure 14
Figure 15
Select “Import “ from the main menu page.
Music files in WAV or FLAC and most other formats can also e
imported from external storage to the Sirius’ internal hard drive.
There are three options
1. “From USB drive”…….Insert the drive in to the ottom USB slot on
the ack panel and follow the instructions.
2. “From Network Storage”,…….Enter the name and file path for the
network storage and follow the instructions.
3. “Auto-Import”…...Using the file navigation application on your
computer, locate the file on the Sirius file system called Auto-Import.
Simply copy any music files you wish to import in to the Auto Import
folder and select Import, they will e automatically copied in to the
Sirius system drive.
There is a “learn more” ta in orange against most of the options.
Pressing this will automatically take you through to a detailed
description on how to set-up the importation of music files from
various sources and computer systems

19
Da hboard etting “Quarantine”
Once again, from the main menu, select “Quarantine”.
Here you will find any discs for which there was incomplete metadata
availa le online.
You can insert your own cover art and manually edit track listings and
other information efore including the quarantined file in the main music
li rary.
Figure 16

20
Da hboard etting “Mu ic Library”
Figure 17
From the main menu, select “Music Li rary” and you should see a page
like figure 17.
Selecting an al um via it’s artist listing, al um
name listing or it’s genre will allow all of the
metadata to e edited, including track names/
artwork/genre etc. If no cover art is availa le ut
you have the CD cover, then you can use your
devices camera to snap a picture of the cover
which can e inserted ( see figure 19).
Any of the metadata fields can e edited for
inaccuracies or omissions.
Fields can also e navigated alpha etically
using the scroll ar at the top of the page. Figure 18
Figure 19
Figure 20
Table of contents