5
Adjustable from 20Hz to 250Hz with a slope of 24dB per
octave.This allows for the adjustment of the upper point
of the frequency bandwidth and the respective subwoofer.
Remote Dash-mount Gain Control
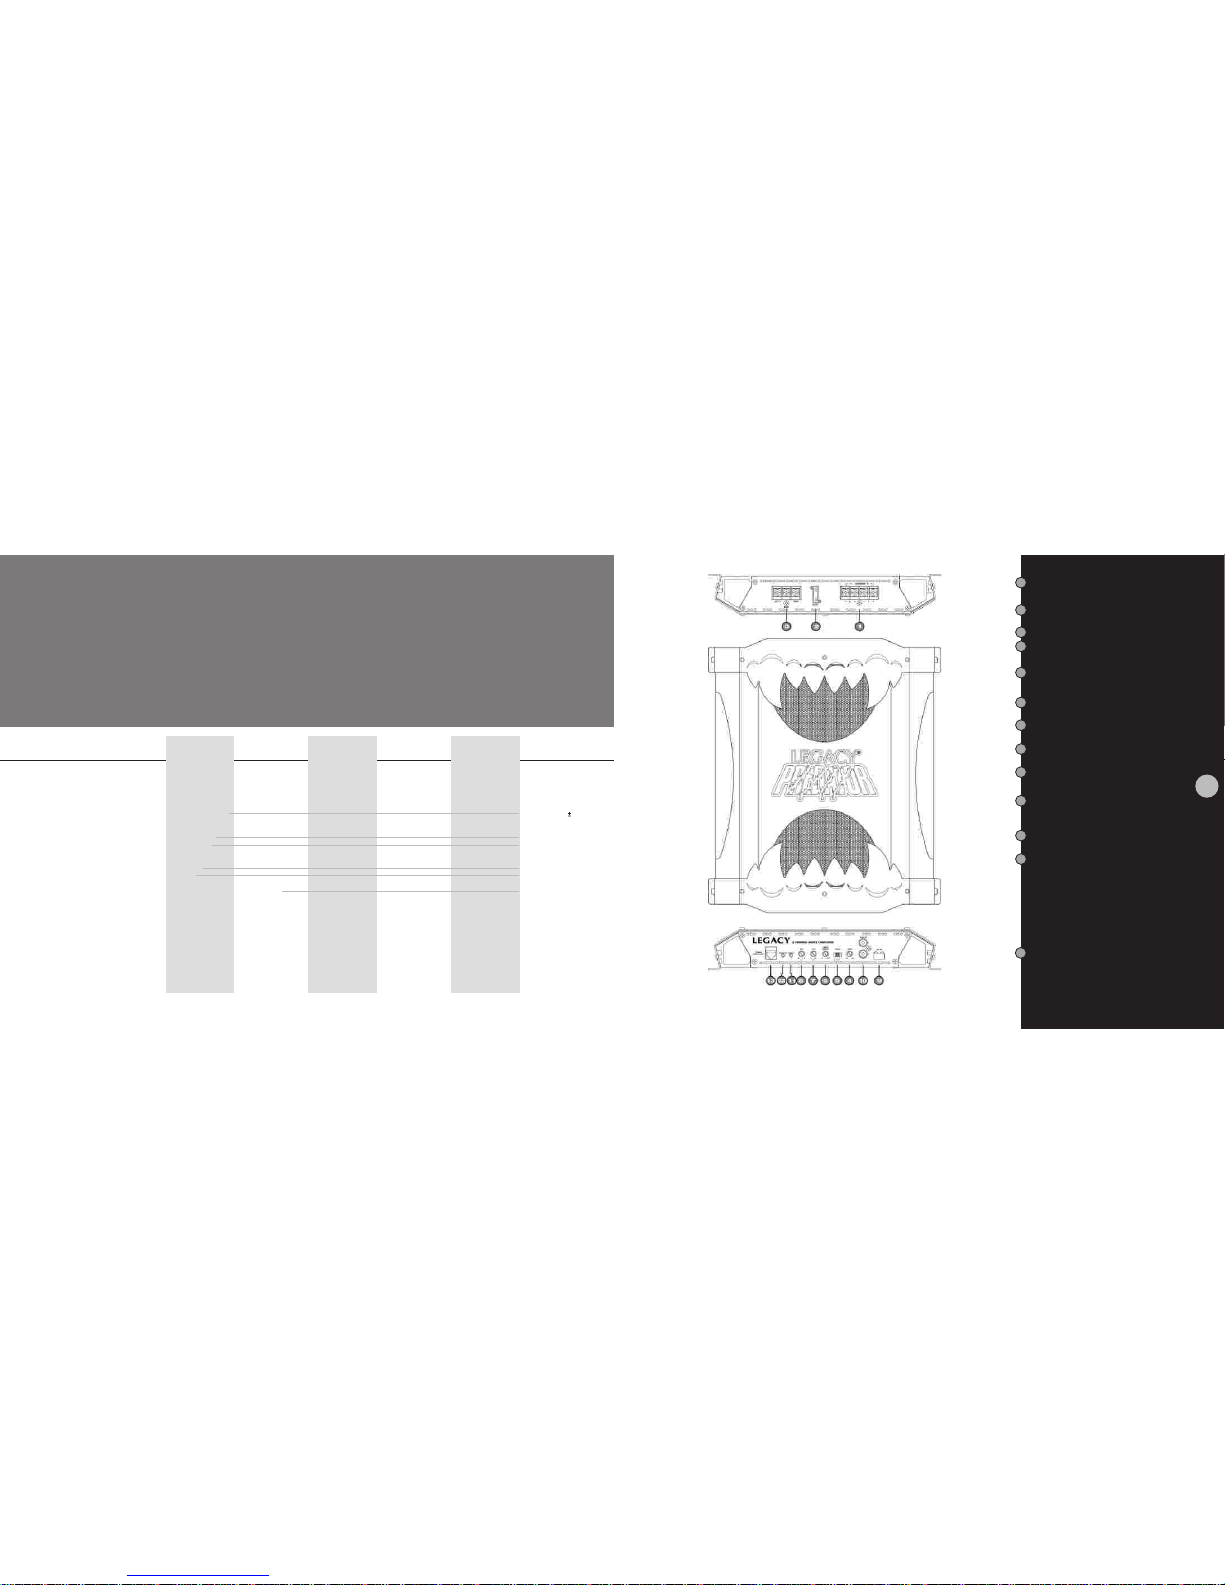
LA-2228
Features and Controls
11
10
9
8
7
6
5
4
3
2
1
1212
Power LED Indicator
This LED is illuminated when the REMOTE ON
system is turned on.
Crossover Low Pass Filter
Adjustable from 15Hz to 40Hz with a slope of 24dB per
octave.This allows for the attenuation of frequencies that
are mostly inaudible and cause unnecessary strain on the
amplifier.
High Pass Subsonic Filter
Phase Shift Switch
Input Level Control
Use this control to match the output of the head unit
to the amplifier. If distortion is present, reduce the
setting of this control.
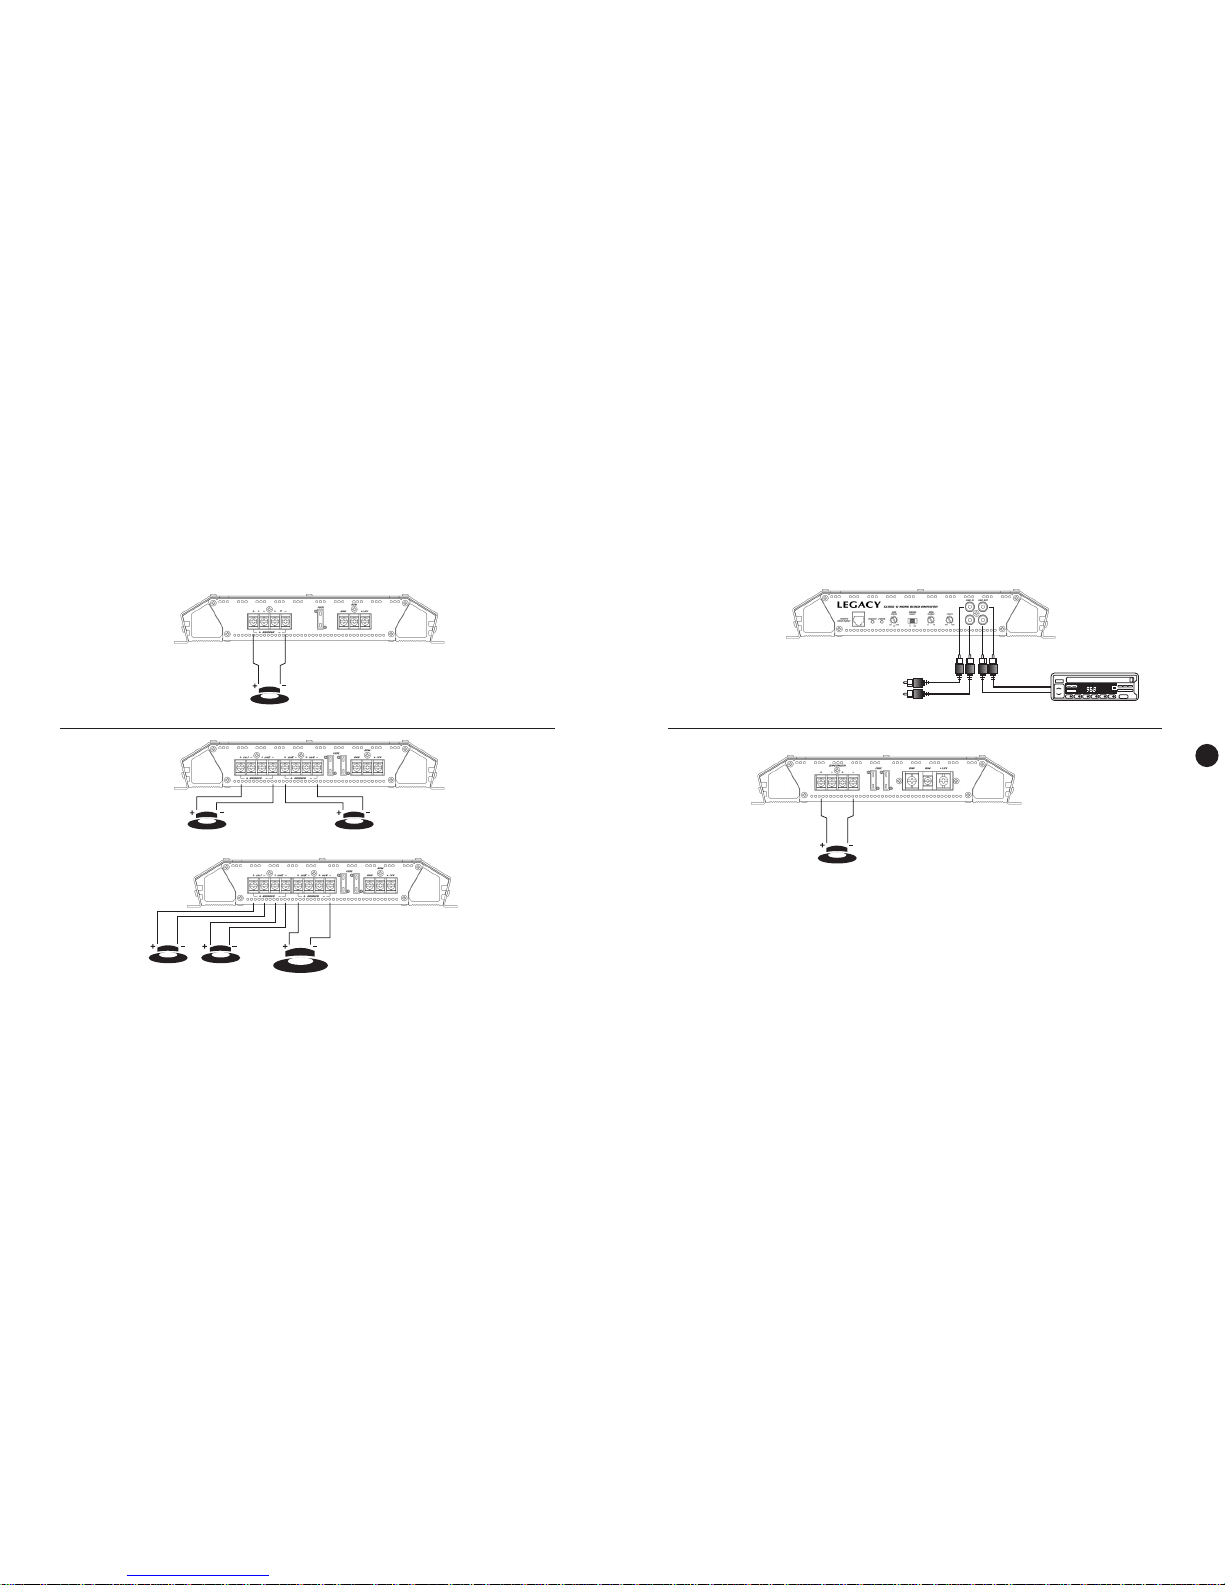
Power Supply Terminals
Protects the amplifier as well as the automobile electrical
system from short circuit conditions.
Fuse
These terminals are 14K Gold plated for high conductivity
and minimum impedance loss. The terminals face
upwards for easy wiring in tight situations.
Speaker Terminals
This unit is provided with gold-plated RCA input
jacks. Using RCA-RCA type patch cords, connect
these inputs to the RCA outputs from your head
unit.
Low Level Input (High Impedance)
This unit is provided with gold-plated RCA Output jacks.
Using RCA-RCA type patch cords, connect these Outputs
to the RCA Inputs for your anyther amplifier.
Low Level Output (High Impedance)
Protection LED Indicator
The protection circuitry in the amp will disable it if it
senses an input overload, speaker short circuit, or
thermal overload conditions. Should this occur, the
PROTECT LED will be illuminated. At that time, it is
important that you check to determine what has caused
the protection circuitry to become activated.
If the amp shut off because of a thermal overload,
allow it to cool down before attempting to restart.
If the shutdown occured because of an input overload,
or speaker short circuit, be sure to correct these
conditions before attempting to restart the amp.
To reset the amp, turn the REMOTE power off and on
again.
This amplifier come complete with a compact remote
GAIN CONTROLLER which can be conveniently mounted
on or under the dashboard of your car.
Allows you to change the phase of your subwoofer
from 0 degree to 180 degrees to help compensate from
timing difference between drivers.
11
10
9
8
7
6
5
4
3
2
1
12
Protection LED Indicator
The protection circuitry in the amp will disable it
if it senses an input overload, speaker short circuit,
or thermal overload conditions. Should this occur,
the PROTECT LED will be illuminated. At that time,
it is important that you check to determine what
has caused the protection circuitry to become
activated.
If the amp shut off because of a thermal overload,
allow it to cool down before attempting to restart.
If the shutdown occured because of an input
overload, or speaker short circuit, be sure to
correct these conditions before attempting to
restart the amp.
To reset the amp, turn the REMOTE power off and
on again.
Power LED Indicator
This LED is illuminated when the REMOTE ON
system is turned on.
This unit is provided with gold-plated RCA input
jacks. Using RCA-RCA type patch cords,
connect these inputs to the RCA outputs from
your head unit.
Low Level Input (High Impedance)
High Level Input (Low Impedance)
Use these if your car stereo does not have
RCA output jacks: connect the speaker output
from the head unit to these inputs
Permits you to adjust the crossover frequency
from 80 Hz to 2.5 kHz to suit the tweeters
High Pass Control
Permits you to adjust the crossover frequency
from 35 Hz to 400 Hz to suit the subwoofers
Low Pass Control
Allows you to increase the bass signal level sent
to the speakers
Bass Boost Control
In a full range system, set this to FULL. If the amp
is being used to power a crossover system, set to
either HPF or LPF as needed.
Crossover Mode Switch
Input Level Control
Use this control to match the output of the head
unit to the amplifier. If distortion is present, reduce
the setting of this control.
Power Supply Terminals
Protects the amplifier as well as the automobile
electrical system from short circuit conditions.
Fuse
These terminals are 14K Gold plated for high
conductivity and minimum impedance loss. The
terminals face upwards for easy wiring in tight
situations.
Speaker Terminals
Remote Bass Boost
Plug in the Remote Bass Boost Control wire in here.
13
LA-668/868/1068
Features and Controls