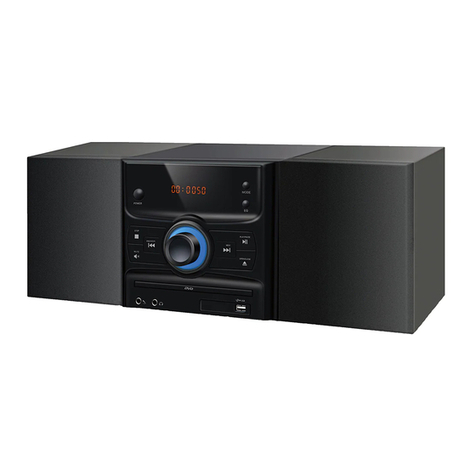
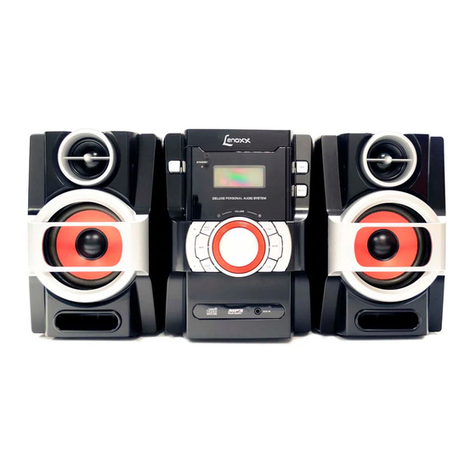
Lenoxx BMV26 User manual

Model no: BMV26
Batch no: PR3802
PLEASE READ AND RETAIN THESE INSTRUCTIONS FOR FUTURE REFERNCE.
The illustrations used in this manual are to illustrate the operation method and product structure of
the product. Where there is a small difference between the physical item and the illustrations,
please take the physical as the standard.

SAFETY INSTRUCTIONS:
WARNING: DO NOT EXPOSE THIS APPLIANCE TO RAIN OR MOISTURE, DUE TO THE HIGH RISK OF FIRE
OR ELECTRIC SHOCK, DO NOT OPEN THE CABINET DANGEROUS HIGH VOLTAGES ARE PRESENT
INSIDE THE ENCLOSURE. ONLY QUALIFIED SERVICE PERSONNEL SHOULD ATTEMPT THIS.
CAUTION: This Digital Video Disc Player employs a Laser System. To prevent direct exposure to the
laser beam, do not try to open the enclosure. Visible laser radiation when open and interlocks
defeated. Use of controls or adjustments or performance of procedures other than those specified
herein may result in hazardous radiation exposure.
DO NOT STARE INTO BEAM.
To ensure proper use of this product, please read this owner’s manual carefully and retain for future
reference. Should the unit require maintenance, contact an authorized service location, or contact
us. Only qualified service personnel should remove the cover.
Do not put batteries from the remote into fire. Please dispose of them appropriately.
Electrical safety and cord handling
• To prevent contact with high voltage components inside, do not attempt to open the equipment.
• Before installing this equipment, make sure your outlet voltage corresponds to the voltage stated
on the appliance rating label.
• When connecting the equipment, align the plug properly and insert it fully to prevent electric
shock.
• Only use this equipment with the cord and plug supplied, and do not overload the power outlet.
• If the power cord is damaged, do not use the equipment. The cord must be replaced by the
manufacturer or similarly qualified personnel to avoid a hazard. Contact the after-sales support line
for advice.
CAUTION:
To reduce the risk of fire or electric shock, do not expose this equipment, the cord or plug to rain or
moisture; do not use it anywhere near water or where water splashes or drips; do not touch the plug
with wet hands. In the event of water or other liquids entering the device, unplug it immediately and
clean and dry it as best as possible. Then have it checked for damage by a qualified technician or
contact the after-sales support line.

• Do not repair the unit yourself. This product has no user-serviceable parts. Only have it serviced by
qualified personnel. Contact the after-sales support line for advice.
• Unplug the unit from the power outlet after use to avoid possible damage during electrical storms,
or when the equipment will be unattended or unused for an extended period.
• Do not let the cord hang over the edge of a table or counter or touch any hot surface. Do not allow
anything to rest on or roll over the power cord and run any cords so that no one steps on or trips
over them.
• Do not run the cord near heat-producing appliances such as radiators, stoves or irons. Excessive
heat could melt insulation and expose live wires.
• Always grasp the plug, not the cord, when disconnecting the unit. Pulling the cord can damage the
internal wires and may cause a fire.
Installation
When installing the unit, make sure to place it:
• Away from heat sources, radiators or other products that produce heat.
• Away from areas with hot temperatures, high humidity or direct sunlight.
• Away from excess dirt and dust.
• Away from open windows and any place where water may get into the unit and damage it.
• Make sure there is free circulation of air around the unit. Do not place it on a thick carpet, a bed or
any place where ventilation holes are obstructed. Leave at least 10cm clearance around the unit.
• Make sure the mains socket is readily accessible at all times.
Usage conditions and restrictions
• Do not place heavy objects on top of the equipment or step on it.
• Do not place objects filled with water (such as vases) or any naked flame sources (such as lit
candles, incense sticks or cigarettes) on top of the unit.
• The equipment is not intended for use by persons (including children) with reduced physical,
sensory or mental capabilities, or lack of experience and knowledge, unless they have been given
supervision or instruction concerning use of the equipment by a person responsible for their safety.
• Young children should be supervised to ensure they do not play with the equipment. Close
supervision is always necessary when an appliance is used by or near children.
• We assume no liability for any damage caused by noncompliance with these instructions or any
other improper use or mishandling of the equipment.
Before First Use
• The unit may become hot during operation. Always leave sufficient space around the unit for
ventilation.
• The voltage supplied to the unit should match the voltage that is printed on the back panel. If you
have any doubts concerning this matter, consult an electrician.
• Avoid placing the unit in direct sunlight or close to any sources of heat. Also avoid locations subject
to vibrations and excessive dust, heat, cold or moisture.
• Do not expose the unit to water.
• Do not place the unit on an amplifier or receiver.
• Do not open the cabinet as this might result in damage to the circuits or an electric shock. If a
foreign object gets into the unit, contact your dealer or service company.
Cleaning
• Unplug the unit from the power outlet before cleaning.
• Do not clean the unit with chemical solvents as this may damage the finish. Use a clean, dry cloth.
• Do not submerge the unit or remote in water.
Discs
• As a disc is rotated at high speed, it is dangerous to play a broken or deformed disc. Do not apply
any tape or glue to the disc as this could lead to damage of the unit. Should there be a strange noise
or vibration whilst playing, if the picture or sound skips, or if the picture is distorted, stop the player
immediately.
Front panel
1. Power button
2. Volume
3. Stop
4. Next/CH-
5. Prev/CH+
6. Mode (DVD/FM/AUX/BT)
7. EQ (Rock/Pop/Classic/Disco)
8. Play/Pause/Search
9. Mute
10. Open/Close
11. Mic input
12. Earphone jack
13. USB port
14. Disc tray
15. Display window

Rear Panel
1. FM antenna
2. AUX in port
3. Y/Cb/Pb/Cr/Pr
4. ML/MR out
5. Video out
6. Speaker out

Connections:
Connecting a TV set

Remote control
Before use:
Insert 2 x AAA batteries to the remote control’s battery compartment as per the polarity indicator.
Batteries not included.

Remote functions
NO
OPERATION
INSTRUCTION
1
POWER
When the unit is on, press to put it in standby mode, press it again
to take it off standby mode.
2
NUMBER BUTTONS
When playing a CD disc or USB stick, press a numbered button to
play that track number.
3
DISPLAY
Press to show information about the time that has been played
back when playing a DVD disc.
4
EQ
Press to change between different EQ modes: rock, pop, classic,
disco when playing a CD disc.
5
REPEAT
Press repeatedly to switch between various repeat modes
depending on the disc type.
6
A-B
To repeat a specific section of a DVD disc:
- Press the A-B button to set POINT A as the starting point.
- Press the A-B button again to set POINT B as the end point.
The part between A and B will be played repeatedly.
Press the A-B button again to cancel this function.
7
SETUP
Press to access the on-screen setup menu.
8
ANGLE
Press to watch a scene on a DVD disc from different angles.
A multi angle icon will be shown on the bottom left hand corner on
the TV screen to prompt you to shift from this angle to another
angle.
9
UP
Directional button, used for navigation in menus.
10
LEFT/ MIC VOL -
Directional button, used for navigation in menus.
Also used to adjust volume for a connected microphone.
11
DOWN
Directional button, used for navigation in menus.
12
CLEAR
Press to remove a selection in some setup functions.
13
TITLE
Press to go back to the title screen when playing a DVD disc.
14
STEP
Press to play a single frame on a DVD disc.
Press repeatedly to move forward to the next frames.
Press the play button to resume normal playback.
15
SLOW
When playing a DVD disc, press repeatedly to slow up playback.
Slow to 1/ 2.1/ 8.1/ 16.1/ 32.
Press the play button to resume normal playback.
16
PLAY/PAUSE
Press to pause playback.
Press again to resume playback.
17
REV/ TUNING -
When playing a DVD disc, press to go backwards.
Press the play button to resume normal playback.
In radio mode, press to manually search for a radio station.
18
STOP
Press to stop disc playback.
Press the play button to resume normal playback.
The player will go into screen saver mode if no button is pressed
within 1 minute. Press any button to go back to normal mode.
19
PREV/ CH -
Press to go back a previous track or chapter.
20
OPEN/ CLOSE
Press to open or close the disc tray.
21
DVD/ USB
Press to change between DVD and USB playback modes.
22
GO TO
Press to jump to a certain time point in a DVD disc. This function
will only work on discs which allow for this.
23
PROGRAM
During playback of a CD disc, press the program button to setup
the playback sequence manually.

E.g.: to play particular songs but not others.
24
SEARCH
For use to search for FM radio stations.
25
L/R
Press to switch between left or right channel speakers.
26
MODE
(DVD/FM/AUX/BT)
Press to change to different playback sources.
27
LANGUAGE
When playing a DVD disc with a multi-language function, press to
change the language.
28
SUBTITLE/ RECORD
When playing a DVD disc with subtitle function, press to display
subtitles.
This button is also used as a record button to copy music files to a
USB stick.
29
RIGHT/ MIC VOL +
Directional button, used for navigation in menus.
Also used to adjust volume for a connected microphone.
30
ENTER
Press to confirm input data or selected options.
31
ZOOM
When playing a DVD disc, press the zoom button repeatedly to
zoom into a picture by x1, x2 or x 4.
32
MENU/ PBC
Press to access the menu interface when playing a DVD disc.
The PBC allows VCD discs to be played. If PBC is on, use the
numerical buttons to select a track but only from the menu. If PBC
is off, the track can only be selected directly.
33
MUTE
Press to mute the sound. Press again for sound to resume.
34
V-MODE
For use with YUV video output on the rear of the unit when
connecting to a TV to make some screen adjustments.
35
VOL +
Press to increase volume.
36
FWD/ TUNING +
When playing a DVD disc, press to fast forward through a disc.
Each time the FWD button is pressed, the fast forward speed
changes.
Press the play button to resume normal playback.
In radio mode, press to manually search for a radio station.
37
VOL -
Press to decrease volume.
38
NEXT/ CH+
Press to go forward to the next track or chapter.
Playback
CD:
1. When the unit is powered on, open the disc tray by pressing the OPEN/CLOSE button on the
remote control or the unit.
2. When the disc tray has opened, add a CD disc to the disc tray and then press the
OPEN/CLOSE button on the remote control or the unit.
3. Wait for a disc to load.
4. Some discs have an auto play feature built in and will begin music playback once they have
loaded.
If a disc does not have an auto play feature, once the discs playback time is displayed on the
screen, press the PLAY button on the remote control or the unit to begin music playback.
DVD:
1. Ensure the unit has been connected to TV via the yellow/red/white connections on the rear
of the unit to the yellow/red/white on the TV ports on the TV.

Ensure the TV is on the correct AV channel. E.g.: AV 1, AV 2.
2. When the unit is powered on, open the disc tray by pressing the OPEN/CLOSE button on the
remote control or the unit.
3. When the disc tray has opened, add a DVD disc to the disc tray and then press the
OPEN/CLOSE button on the remote control or the unit.
4. Wait for a disc to load.
5. The video images from the disc will be shown on the TV screen. Use the buttons on the
remote control to begin playback or access disc menu options.
USB:
1. Ensure the unit is powered on.
2. Connect the USB stick to the USB port.
3. Wait for the unit to detect and then read the USB stick and begin music playback.
4. If there is a DVD disc in the unit, press the DISC/USB button on the remote control to change
the playback mode to USB stick.
AUX IN:
1. When the unit is powered on, press the MODE button on the unit or the remote control to
switch between the different playback modes of the unit (DVD/TUNER/AUX/BLUETOOTH).
2. When AUX is shown on the screen, connect the external music player to the AUX R AND l
ports at the rear of the unit using an AUX-IN lead (not included).
3. Begin music playback on the external music player.
BLUETOOTH:
1. When the unit is powered on, press the MODE button on the unit or the remote control to
switch between the different playback modes of the unit (DVD/TUNER/AUX/BLUETOOTH).
2. When BLUETOOTH is shown on the screen, access the Bluetooth settings on your smart
device to search for devices.
3. Connect with the device named BMV26.
4. After a successful pairing, begin music playback on your smart device.
FM RADIO:
1. To increase radio reception, unwind the wire antenna at the rear or the unit and mount it
upwards. E.g.: on a wall.
2. When the unit is powered on, press the MODE button on the unit or the remote control to
switch between the different playback modes of the unit (DVD/TUNER/AUX/BLUETOOTH).
3. When TUNER is shown on the screen, press the SEARCH button on unit or the remote
control to automatically search and store radio stations.
4. When the search is complete, the unit will play the first stored channel.
5. Press the CH- or CH + button on the unit or the remote control to change between the
stored radio stations.
6. The TUNING - or TUNING + buttons on the remote control can be used to manually tune to
FM radio stations.
Note: stored radio stations can not be manually set.
Other manuals for BMV26
1
Table of contents
Other Lenoxx Stereo System manuals

Lenoxx
Lenoxx TS9114 User manual

Lenoxx
Lenoxx BMV26 User manual

Lenoxx
Lenoxx Lenoxx Sound SL-326 User manual

Lenoxx
Lenoxx DM850 User manual

Lenoxx
Lenoxx Nostalgia CD117C User manual

Lenoxx
Lenoxx BCD118 User manual

Lenoxx
Lenoxx CD114BL User manual

Lenoxx
Lenoxx CD7400 User manual

Lenoxx
Lenoxx MC-261 User manual

Lenoxx
Lenoxx CD114BR User manual