15 16
System Setup/Bluetooth Operation/USB Bluetooth Operation/USB Copy/Common Operation
Disc Playing Operation
Sequence
1. After reading the disc, the unit will automatically
go into sequence play mode.
2. Press 【PLAY/PAUSE】key in pause mode and
play mode will be recovered.
Menu
Press 【MENU】 when using discs with VCD 2.0 or
DV D f or mat . D iffe re nt fo rma ts of di scs ha ve
different menus.
Title
When playing a DVD, you can choose this play
mode.
Record
When playing a VCD, CD or MP4, you can press
“RECORD” key to transfer audio le(s) in MP3
format to the USB.
Please note: During recording, you can open the
microphone to record the sound of the disc mixed
with the sound from microphone onto the USB.
Record only supports USB.
Select
You can press the number keys on the remote to
directly select the required track that you want to
play. When VCD is in MENU mode, the track cannot
be selected and can only be selected when the
MENU mode is off. Different formats of discs have
different selecting approaches(for example press
t h
number key “5” to select the 5 track. When
selecting “23”, press “10+” twice and the screen will
show “20+”; then press number key “3” or try to
press “2” then hold “3” and the unit will select 23).
GOTO
Pre ss 【GOTO】 key on the r emote a nd use
direction keys and number keys to nish time or
track selecting function, then press 【ENTER】key.
Repeat
While pl ayi ng, p res s 【REP EAT】 k ey on the
remote. Different formats of discs have different
repeating approaches to be selected: single cycle,
title cycle or disc cycle.
Slow
During play, press 【SLOW】 key on the remote
control. To go back to the normal speed, press
【PLAY】.
Please note: In this mode, no audio will be heard
and it only affects the video les.
COPY
Please note: For CD and MP3 discs, the unit will
copy in MP3 format onto the USB. For MPEG4
discs, it will copy directly.
Please see Copy Function Introduction for specic
operating instructions.
Function Switching
W h e n y o u t u r n t h e u n i t o n , y o u c a n p r e s s
“F U NC TIO N” t o s wit ch b et w ee n th e di ff ere nt
function modes: FM radio, LINE external audio
input, Bluetooth or DVD.
The unit is set to DVD function as the default.
Pl e a se s ee f unc t ion i ntr o d uc t i on f o r s p eci c
operation of FM and audio input.
Volume Adjustment
Master Volume
Press “VOLUME +” or “VOLUME -” on the remote or
turn the volume control knob on the panel to adjust
the volume.
Low Pitch
1. Press 【VOLUME】key on the panel, select
“LOW PITCH BA” adjusting state; press “VOLUME
+” or “VOLUME-"key on the remote, or turn the
volume control knob on the panel to adjust low
pitch.
2. Press “BASS +” or “BASS -” key on the remote to
directly adjust low pitch.
3. Adjustable range of low pitch: from -14 to +14.
High Pitch
1. Press 【VOLUME】 key on the panel, select
“HIGH PITCH TR” adjusting state; press “VOLUME
+” or “VOLUME -” key on the remote, or turn the
volume control knob on the panel to adjust high
pitch.
2. Press “TREB +” or “TREB -” key on the remote to
directly adjust high pitch.
3. Adjustable range of high pitch: from -14 to +14.
Disc Playing Operation
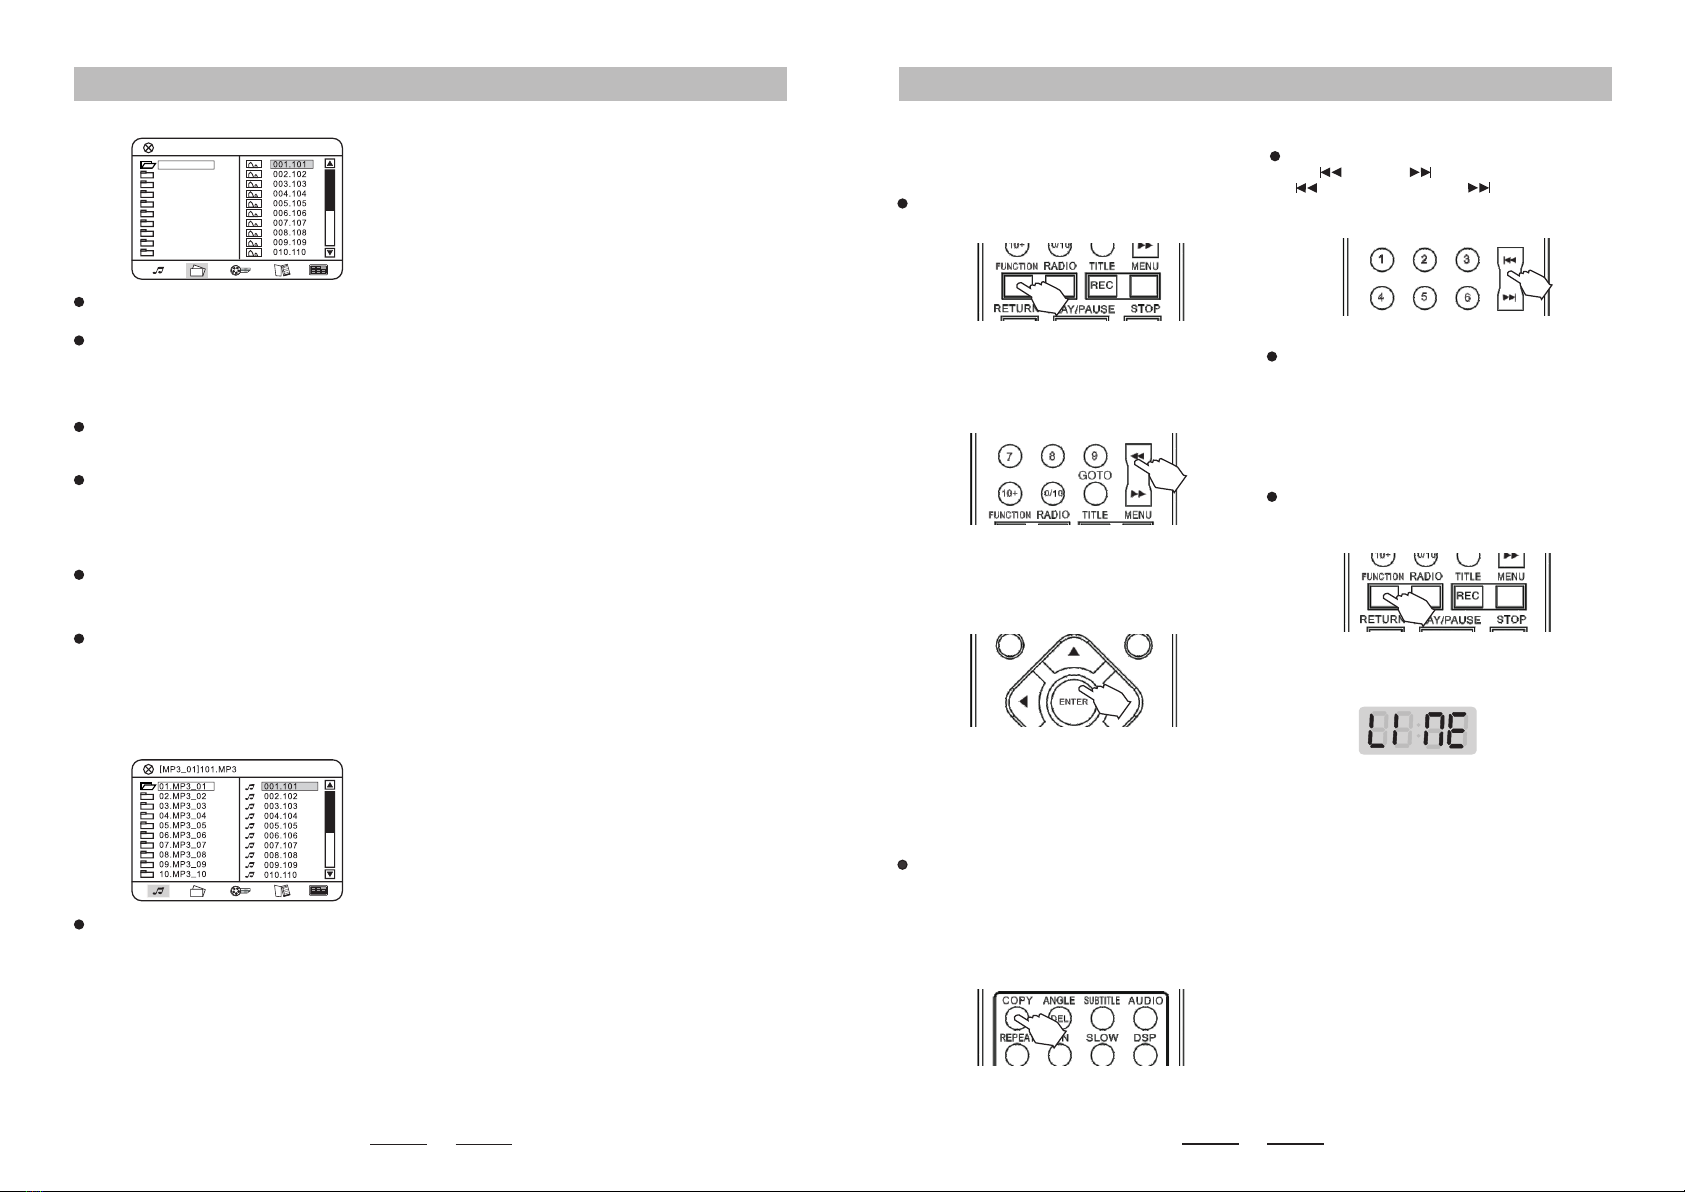
Playing MP3 Disc
After inserting MP3 disc, the system will
automatically search all directories containing an
MP3 le. After searching, the system will enter the
rst directory by preference and play the rst track
of this directory (cursor stops in 01 position).The
unit will play the tracks of this directory in sequence.
At this time, you can press number keys to select
which song you want to play.
When the image is idle and not zoomed in,
press direction keys to rotate the image.
Press 【PLAY】 key to play the image in
sequence.
After entering the le menu on the right hand
side, press up/down keys and the image content
will be shown on the left hand side of the screen.
You can also use this approach to view le(s).
Playing MP3-JPEG Disc
If you want to view images while playing MP3-
JPEG mixed directory discs, use the left/right keys
to select modes then use the direction keys to
move the cursor to the icon of the required image
and press 【ENTER】 to view the image.
111
112
113
114
115
116
117
118
119
120
Directory Selecting/ Press left key to return to
directory list on the left hand side. Then use
up/down keys to select folder directory on the left
hand side. After the selection process is complete,
press 【ENTER】key to enter the playlist of the
f o l d e r a n d t h e t r a c k s o f t h e p l a y l i s t w i l l
automatically be played in sequence; or you can
press number keys to select a specic song.
While playing, press 【 /PREVIOUS】or 【
/NEXT】 key to select the previous or next song.
Press 【REPEAT】 key to select single cycle,
directory cycle or disc cycle modes.
While playing, press 【PAUSE】 key to enter
“Pause" state; press 【PLAY】 key to recover from
that state. Please note: If you press【PAUSE】 key
twice, you will activate the “Pause" function.
Playing JPEG Disc
A f t e r i n s e r t i n g J P E G d i s c , t h e u n i t w i l l
automatically search and stop at the rst image of
the rst directory found. Use up/down keys to
select image les; after you have nished selecting
the images, press 【PLAY】 key to play from the
current image.
Use up/down keys to select image les; after
you have nished selecting the images, press
【ENTER】 key to view the image. At this time, the
image is in an idle state and you can press
【ZOOM】 key to zoom in on the image or press
direction keys to move the image in different
directions.