LEXIBOOK TPC 128K User manual

L
EXiBOOK.
TPC
128K:

TPC
I28K
ORGANIZER
/
TRArVSLATOR
ENGLISH
MANUAL
TABLE
OF
CONTENTS
0.
The Keyboard
. . . . . . . . . . . . . . . . . . . . . . . . . . . . . . . . . . . . . . . . . . . ..‘.............
22
6.6
Deletirlg
Xores
. .
.._............................
I
......................
31
1.
Quick Start and Functions ......................................
22
I.
1
QLlick
Start ..............................................................
22
I
.2
Functions
................................................................
23
2. Translating Words
. . . . . . . . . . . . . . . . . . . . . . . . . . . . . . . . . . . . . . . . . . . . . . . . . . . . .
23
2. I
Selectirlg
Languages . . . . . . . . . . . . . . . . . . . . . . . . . . . . . . . . . . . . . . . . . . . . . . .
23
2.2 Translations
. . . . . . . . . . . . . . . . . . . . . . . . . . . . . . . . . . . . . . . . . . . . . . . . . . . . . . . . . . . .
23
2.3 Conjugating
Verbs
. . . . . . . . . . . . . . . . . . . . . . . . . . . . . . . . . . . . . . . . . . . . . . . . . .
24
2.4 Search
Functions
..-
. . . . . . . . . . . . . . . . . . . . . . . . . . . . . . . . . . . . . . . . . . . . . . . . .
24
2.5 Saving
Words
. . . . . . . . . . . . . . . . . . . . . . . . . . . . . . . . . . . . . . . . . . . . . . . . . . . . . . . . . .
24
2.4 Special characters
. . . . . . . . . . . . . . . . . . . . . . . . . . . . . . . . . . . . . . . . . . . . . . . . . .
25
3. Phrases
. . . . . . . . . . . . . . . . . . . . . . . . . . . . . . . . . . . . . . . . . . . . . . . . . . . . . . . . . . . . . . . . . . . . .
25
3. I Starting the phrase mode
..................
..I................... 25
3.2
General
Phrases
. . . . . . . . . . . . . . . . . . . . . . . . . . . . . . . . . . . . . . . . . . . . . . . . . . . . .
25
3.3
Restaurant Menu
. . . . . . . . . . . . . . . . . . . . . . . . . . . . . . . . . . . . . . . . . . . . . . . . . . . .
25
3.4 Business Phrases
_............................................,......
25
3.5 Quitting the
Phrase
Mode
. . . . . . . . . . . . . . . . . . . . . . . . . . . . . . . . . . . . . .
26
4.
Calculator
................................................................ 26
4.1
Calling
up
the
Calculator.......................................
26
4.2 Memory recall ........................................................
36
-
4.3 Finance manager....................................................
26
4.4
Quitting.. .................................................................
29
5.
Calendar.. .................................................................
29
5.
I
Calling
np
the Calendar.........................................
29
5.2 Operation
...............................................................
29
5.3
Direct Selection ......................................................
30
5.4 Scheduler ................................................................
30
5.5 Clock and Daily Alarm........................................... 30
5.6 Quitting ...................................................................
31
6. Memo
. . . . . . . . . . . . . . . . . . . . . . . . . . . . . . . . . . . . . . . . . . . ..*.................*.......
31
6.
I
Calling up the Memo Mode and Entering Data . . . . . 31
6.2
Searching for Notes . ._...,..... . . . . . . . . . . . . . . . .
,.........,.........
31
-6.3
Editing Data
. . . . . . . . . . . . . . . . . . .
I
. . . . . . . . . . . . . . . . . . . . . . . . . . . . . . . . . . . . . . .
31
.6.4
Special
Charclcters
. . . . . . . . . . . . . . . . . . . . . . . . . . . ..*....*..............
31
6.5 Secret Data
...............
..-...........................................
31
7. Telephone Directory
................................................
32
7.1 Callillg up the Telephone
Director? Mode and Entering Data
.......................
32
7.2 Searching
................................................................
32
7.3
Editing
Data 33
..
...........................................................
:
:
7.4 Special Charccters
..
.................................................
33
. .
.r
::
7.5 Secret Data
33
:I
.............................................................
;i
7.6 Deleting Data
_
........................................................
33
.:
.*!
i:
8. Other Functions ......................................................
33
8.1 Unit
Conversion
.....................................................
33
8.2
Currenq
Conversion..
............................................
34
8.3 Playing artd Learning
.............................................
34
8.4 Set
up
......................................................................
35
8.5 Deleting Data
.........................................................
37
8.6 User Guidance
...
.....................................................
37
8.7
Memoq
Check........................................................
37
8.8 PC link ....................................................................
37
9. Power
SuppZy
...........................................................
39
9.1
Batteries .................................................................
39
9.2 Back-up
Battety..
....................................................
40
IO. Care and
Saji?ty
. . . . . . . . . . . . . . . . . . . . . . . . . . . . . . . . . . . . . . . . . . . . . . . . . . . . .
40
i
1
i
1
.!
1
J
;
i
21

-*
--
0. THE
KEYEOARD
A. General Information
1.
ON/OFF: Turning the unit on and off
2. ENTER:
Confirms selection or saves an entry
3. TRANS: Opens translation menu
4.
PHR: Opens phrase mode
5. CALC: Press once to open Calculator; press twice to open
Finance Manager
6.
TIME/CALD:
Press once to open
Calendar
mode; press
twice to open Date and Time mode
7.
MEhIO/TEL:
Opens Memo or Telephone Directory
mode
8. FUNC: Opens “Other Functions” mode
9. BS: Deletes character to left of cursor
10.
SPACE: Inserts a space
1 1.
CAPS:
Toggles between capitals and small letters
12.
C/CE:
Returns to previous display or clears screen
13. INS: Inserts characters in edit mode; creates new fixed
transactions in Finance Manager
14.
Special Characters of the languages
The special characters which occur in the various
languages are printed in yellow on the number keys.
They are called up in the following way:
SHIFT 1 a,
e,
i, o, u,
=
3,
i$
i’,
6,
ii
SHIFT 6
=
R
SHIFT 2 a, e, i, o, u
=
ai,
4,
i,
6,6
SHIFT 7
=
q
SHIFT 3 a, e,
i,
o, u
=
a,
&,
i,
b,
ti
SHIFT 8
=
ii
SHIFT
4
a, e, i, o, u
=
L,
e,
i,
6,
ti
SHIFT 9
=
ae
SHIFT 5
=
?I
SHIFT 0
=
*
To enter the
‘
A’
character press: SHIFT 5, or to enter
‘
ii
’
press SHIFT 1 u. For
‘
fi
’
press SHIFT 2 a.
B. Translations
1.
A...Z:
Alphabetical keys to enter words for translation
2.
CXE:
Starts a new translation, or calls up phrase category
display
3. SHIFT
+
MARWSMBL:
Saving Words
4.
EDIT: Conjugaison des verbes
5.
d
r:
Moving the cursor up and down in the list of
words and phrases
6.
*
t
:
Calling up a new page in a display. Only possible
if a small arrow appears on the screen
7.
4
1):
Selecting the source and target language
C. Calculator Mode
1.
0...9:
Number keys
2.
C/CE:
Clearing last entry
3. MC: Clearing memory
4.
MR: Memory recall
5.
iU-:
Subtracting a value from memory
6.
&I+:
Adding a value to memory
D.
Memo and Telephone Directory
I. EDIT: Editing a record
:
2.
C/CE:
Back to previous display
3. DEL: Deleting a record
.*-
ar
4.
SHIFT+&IARWS>IBL:
Marking an entry
as
22
“confidential”
5. SHIFT
+
:
Searchin:
for a key-word in an entry
6.
~IXRK/S~IBL:
Callin:
up a list with 35 characters
Rr
symbols
7.
i.
and
-:
Searching for other entries
8.
t
*
:
Calling up next or previous page of an entry
9.4
:
Crie
une
nouvelle
ligne
E.
Symbols in the Display
I.
I)+:
Data overflow to the right or the left
2.
*
l
: Scrolling up or down in order to view further data
for the current screen contents
3. EDIT
:
Editing entries
4. INSERT
:
Inserting letters
5. CAPS
:
Capital letters
6. SHIFT
:
SHIR
mode on
7. MARK
:
Marking entries
8.
4
:
Activating the lock function
9.
.‘:
A beep will sound when a key is pressed
Abbreviations
A
=
adjective
f
=
feminine
N
=
noun m
=
masculine
V
=
verb
n
=
neuter
0
=
adverbs, p
=
plural
pronouns etc.
1.
QUICK START AND
FUNCTIONS
Here is how to start translating straight away with the
TPC
128K.
This is followed by a list of the various menus
with a brief description of the functions.
I.1
QUICK START
-
After unpacking the TPC
128K,
please check if batteries
have been installed. TPC
128K
is usually supplied with
demonstration batteries. Before starting, carefully remove
the protective strip which protrudes from the battery
compartment. Next, press the
(<RESET,,
button on the
back of the unit.
-
There will be a system
initialization
screen. Press
“Y”
to
confirm the system initialization and then press
“Y
”
again.
-
Call
up the Other Functions
menu
with the FUNC key.
Now set the language for the display with point
6. Message language (page
21).
-
Call up the translation menu by pressing the TRANS key.
By pressing the
TRAM
key again you can set the source
and target language of your translation.
-
Select the languages using the
+
and
I)
keys.
-
Press ENTER.
-
Now enter a word and press the ENTER key. The

translation appears on the display.
-
Press the
C/C6
key to clear the display and enter
a
new
word.
-
To enter special characters. first press the SHIFT key and
then the special character desired. These are printed in
yellow on the number keys. Please consult chapter 0 for
the
precise location of these.
The Reset key
You can start your TPC I
ZYK
with the RESET key if it does
not start correctly, for example after changing
the
batteries.
Caution: By pressing the RESET button the data from the
database (memo and telephone directory) is deleted.
I.2
FUNCTIONS
Translating words
Press
:
TRANS
You can translate from and into English, German, French and
Spanish. There are about 100,000 words available for each
language. Additionally, you can conjugate verbs with the
TPC
I28K
and save individual words in your own personal
vocabulary training program.
Translating phrases
Press
:
PHR
You can call up three different types of phrases.
In the general category you will find 200 phrases.
These are subdivided into ten categories.
The second area provides you with terms connected with
eating, and drinking. These are subdivided into nine
categories.
The 1,000 business terms in the third area helps you with
business matters.
Calculator
Press
:
ACCKALC
Calculator with the basic arithmetic functions and memory
recall
Finance Manager
Press
:
ACCKALC
again .
Finance Manager includes recording of pay-in, pay-out,
transfer and fixed transactions.
Calendar
Press
:
TIMEKALD
Calendar
from 1900 to 2099.
Date and
77me
Press
:
TIMEKALD
Displays local date and time with daily alarm function.
Telephone directory
Press
:
MEhIO/TEL
In the telephone directory you can save names, telephone
numbers and addresses of friends and business contacts.
File appointments, birthdays. flight schedules or simply good
ideas.
Other functions
Press
:
FUNC
Here
you can convert currency and units of
mcnsure.
play
and learn. enter a password. change cut-off
date,
change
display language. check memory space and carry out data
communication with the ‘PC Link’.
2.
TRANSLATING WORDS
The TPC
I28K
is a four-language translator for English,
French, German and Spanish. You can also
conjugate
the
verbs in each of these languages.
2.1
SELECTING
LANGUAGES
Press TRANS to open the Translator mode. To choose a
language combination for translation, press TRANS again.
The following selection menu appears:
.
.
_-
.-,.
i
<<LANG;UAGE
T@AN,SLbTOR>>
cd3elect
languag+
_^‘,
:
**,‘I
1
.,
,I
.~
_;
1
..:I’
1
;
:
,.
L
._
:
I..;:
Eng
->Eng
“.
,-;>-z-‘-::.
1
7.
)‘
Frn
Fm
Ger
<y
_-
-.
.Ge,r
.:.,.
_
I
7
Spa Spa
Conj
<-
->
Choose the source language using the
+
key..
The target language is selected using the
I)
key.
After you have made your selection, press ENTER. Now
you can start translating words.
2.2 TRANSLATIONS
After switching on
the
unit, press the
TIUNS
key once. The
language
combination
which will be translated appears at the
bottom-of the screen.
..-
.;
,.(‘.“~>
..,.
,
..,
-‘,
<cLANGiUAGE
TRANSLATOR>>
-
Exemple
:
Tapez
le
mot ‘grateful
‘
et
appuyez
sur
ENTER.
:V
I
f
I
.i
,
:.
.?.
M,emo
P&s
:
MEMO/TEL
again
23

-_-
---
.,
I.
grateful
4
behaviuor (A)
:
dankbar
4
appreciative (A)
:
positiv
:
dank bar
:
erkenntlich
G
Different uses of the word are also translated. First the
general translation appears, This is followed by translations
for certain circumstances
/
other meanings.
The arrow symbols on the screen means there are
even
more
translations. Press the down arrow key
t
to view the
remaining translations. By pressing the up arrow key
4
you
can return to the previous screen.
Press the
C/CE
key to clear the screen
&
translate another
word.
2.3
CONJUGATNVG
VERBS
You can conjugate verbs in all four languages. To do this,
press the EDIT key once in the translation mode. This
enables you to conjugate the verbs in the current target
language.
Conjugating
verbs
in
other languages
If you wish to conjugate verbs in other languages, press the
TRANS
key once. The ‘Select language’ display appears.
Choose the desired language in the left column. In the
column on the right move the arrow to Conj and then press
ENTER.
Use the arrow key
t
to select the next display. All
conjugations are then arranged according to first, second or
third person singular (s) and plural (p).
Use the arrow key
4
to scroll back to the start. Press the
C/CE
key to conjugate a new word.
Two conjugations
for one
verb
A word which has two meanings may also have alternative
conjugations. The German word
‘passierrn’
for example has
:
two meanings which can also be conjugated differently.
If
you enter ‘passieren’ the message
Pril7larY
COlljUgatiOll
._
1.
appears on the screen followed by this display:
passieren
*
infinitiv
:
passieren
partizip prasens
:
passierend
partizipperfekt
:
passiert
\i
The asterisk
(*)
after the basic form of
the
verb indicates that
alternative conjugations are available. Press ENTER
to view the alternative conjugations.
The primary conjugation for ‘passieren’ is formed in the
sense of ‘to happen’. The second conjugation is formed in the
sense of ‘to go across or to pass through’.
Quitting
There are two methods for quitting this translation function.
Simply press
C/CE
and you receive your previous language
combination from the
transla!ion
mode.
If you have used TRANS to set the language for the
conjugation of verbs, you have to press TRANS again in
order to reset the source and target language.
2.4 SEARCH FUNCTIONS
After you have translated a word, you can view the previous
or the next words in alphabetical order. To do this, press the
\.
or key. The source word and the translation appear on
the display.
Wildcard
search
If you do not know exactly how a word is spelt, enter a
question mark
(?)
in place of the character(s) you do not
know. After pressing ENTER, the TPC
l28K
will search for
all possible words that match your entry.
Usually, several different
possibilities
will be listed. Each
word in the list will have a letter shown to it’s left. To
translate the desired word, press the corresponding -letter key.
Press
C/CE
to clear the screen.
fncorrectly
written words
If a word has been entered incorrectly and the translation has
been activated, you receive a list with all words that closely
match the entered word.
Each word in the list will have a letter shown to it’s left. To
translate the desired word, press the corresponding letter key.
2.5 SAVING WORDS
You can also save words which you have translated. Words
which have been saved can be called up again in the ‘Game
and Learn’ mode (chapter
8).
After translating a word, press the
SHIFT
and
MARWSMBL
keys. A message indicates that the data has
been marked.
24


.
.
I
.
.
.
Phrase translation
1. General Phrase
2. Menu
3. Business
By pressing 3 you call up the following display:
Input:
-cc
Business
>>
-
_.
,,
.
.
^.
Operation
There are two methods of operation .
+
.
Firstly you can scroll through all the words in the list using
the
A
or
v
keys.
Secondly you can directly enter the terms you require. After
you have done this press ENTER. The word appears together
with its translation. Press ENTER again to view the
translation in another language.
If the TPC 128K does not know the word you have entered, it
will make its own suggestion.
-.
:
.
._:
. In order to enter a new term or call up another area of
phrases, press
C/CE
once or twice.
3.5
QUlTTlNG
THE PHRASE MODE
You can quit this function by pressing any other function key.
4,
CALCULATOR
You can also use the TPC
128K
as a ten-digit calculator
which includes memory functions.
4.1 CALLING UP THE CALCULATOR
Press the CALC key. The following display appears:
cc
CALCULATOR
>>
-
W
-
01
m
0
.
Votre TPC
128K
fonctionne
maintenant
comme
une simple
calculatrice.
4.2 MEMORY
RECALL
&IC
Clears the memory
MR Incorporates the contents of the memory in a
computation (e.g. 4 x MR
=).
&I+
Adds the value in the display to the contents of
the memory.
&I-
Deducts the value in the display from the contents
of the memory.
Example
for memory
calculation
You press: You see:
4x5=M+
20.
28+2=M+
30.
7
-
2
=
M-
5.
75/5=M+
15.
MR
60.
Press any function key to exit the calculator mode.
4.3 FINANCE MANAGER
Finance Manager is a powerful tool, which allows you to
manage and keep track of your financial position. It has a
rich set of features such as:
-
General transaction:
-
separated into three categories:
-
Payment into an account: PAY-IN, payment out of an
account: PAY-OUT, and transfer of funds between any of
your 5 accounts: TRANSFER.
Statements of each account can be generated to allow you to
check each transaction’s details. The cut-off date for the
statement is easily modified to fit your needs.
It can handle 5 accounts and provide up to date balance at
any time.
Fixed transaction setting allows you to programme periodic
payments into and out of any account. (E.g. you can
programme to have your basic salary to be paid into your
account on the
1%’
of each month.)
A credit limit can be set for individual accounts to
warn
YOU
when you have reached the credit limit: useful for the
tracking your spending with a credit card or charge card.
Each transaction can be marked as an expense to help track
business expenses for example. Statements can be generated
just for expense transactions, making it easy for submitting
your expense claims.
Before you start to use the Finance Manager, there are
several settings that need to be set. Please refer to the
26

following section:
5.5
Clock and Daily Alarm
5.5. I Secret lock (password)
5.5.2 Cut-off date
5.5.3
Currency
‘*
Warning
-
if you have forgotten
the
password.
the
unit has
to be reset and all data will be lost.
*
Before you enter any new entry to the Finance Manager.
you have to ensure the
date
and time are
set
correctly.
<<
FINANCE MANAGER
>>
PASSWORD
I-.
1
._.
To call up the Finance Manager, press
ACCKALC
twice.
You must enter the correct password.
(**
The same
password applies to both Secret data and Finance
Manager.
**)
,.
.,
.
,,
-.
*
. .
. .
:.
-k<
FINANCE MANAGER
:.
-k<
FINANCE MANAGER
.j
-
pay-in
.j
-
pay-in
:,’
.f,;.i’.
:,’
.f,;.i’.
‘
‘
2,
pay-out
-“I;.
.,
il
2,
pay-out
-“I;.
.,
il
:<I_
:
:<I_
:
3. Transfer
-?’
3. Transfer
-?’
4. Statement
,,
.‘,
4. Statement
,,
.‘,
__
,“::
_
.
“.
.‘.:
.’
:
,.
.;
.
1
;
I.d_
:,
~.‘.
”
:‘:
‘I’.’
.
,
:~
>>
,
.
.^
.,.l.
,’
I.
.*
I
There are four different functions: Pay-in, Pay-out, Transfer
and Statement.
You can use the arrow keys 4
t
or press a number from 1
to 4 to call up a function.
4.3.1
Pay-in: Entry
Press 1 to call up PAY-IN. PAY-IN can handle 5 accounts
(defined by you, e.,.
c
Amex, VISA, Savings, Current, and
Cash) and pay-in fixed transactions. The balance of each
account will be shown.
Let’s say you deposit $100 on 0 I July
1997
into ‘AMEX’.
You can move the cursor to “ACCOUNT 1” and press EDIT
to edit the account name.
Change the account name to AMEX and press ENTER to
confu-m.
Press
C/CE
to quit.
-
<c
FINANCE MANAGER
>>
Creditlimit
.
500,oo
account. say
S50O.
and press ENTER to confirm. The
display will show:
<<:
FINANCE MANAGER
>>
Pay-in
AMEX
USD 0
Account 2
USD 0
Account 3
USD 0
$
Use arrow keys to move highlighted bar to AMEX and press
ENTER to open.
Inside the
sub-menu
of AMEX, there are 8 transaction types
(defined by you,
e
.g.
Cash, Cheque). You can move the
cursor to TYPE
I
and press EDIT to edit the payment type as
per editing the account name. Let’s change
TYPEI
to Cash.
Press ENTER to confirm and
C/CE
to quit.
.,
4.)
*I
,”
1
‘.
<<I
FINANCE MANAGER
>>
Tvtie
4
Press ENTER. The current date is defined in the date field.
Enter the desired date, e.g. 0
l/07/97,
and press ENTER to
confirm. Enter the pay-in amount, i.e. $100 and press
ENTER. Then enter the description for this pay-in entry, e.g.
“Sundry deposit”.
.y
G
.
:
I.,
‘<<:
FINANCE MANAGER
>>
.
_
‘
-:....
:
.~
:
.
j&&(
~
.,>
.I’
.,:‘-,c
;”
‘,.
(‘.;-:
,::c
,<.,
j
,-;
_^
::
.:
Cash
“.
01/0~/1997
~~;~+;:.~,‘”
:
-,;-
:‘,
,I
USD
+
JOO.00
;::
-<‘:I
::‘.
:.
1
,.I
Sundry
&posit
‘..,.
~3:.
.’
.
._
.
.
.
.
.
._1
)
Before saving this entry, you can use
A
or
v
to move the
cursor
&
the date, amount and description. Pressing
C/CE
key will quit the entry.
Press ENTER to save this entry and the saved record will be
displayed.
The balance of AMEX changes to $100 credit.
’
You are requested to edit the credit limit of the chosen
27

cc
FINANCE MANAGER
>>
Pay-in
AMEX
USD 0
Account 2
USD 0
Account 3
Press
C/CE
key to return to the main menu of Finance
Manager.
4.3.2 Pay-out
:
Entry
Let’s say you then spend $700 from AMEX on
01
July 1997.
From the main menu of Finance Manager, press 2 to call up
PAY-OUT. The procedure for entering a new pay-out entry is
similar to that for Pay-in. Please refer back to 4.3.1.
If you press SHIFT and
MARWSMBL
key, this pay-in
entry will be marked out in Statements, for example to track
‘expense’ items. After you save this pay-out entry of $700,
the balance of AMEX changes to $600 debit.
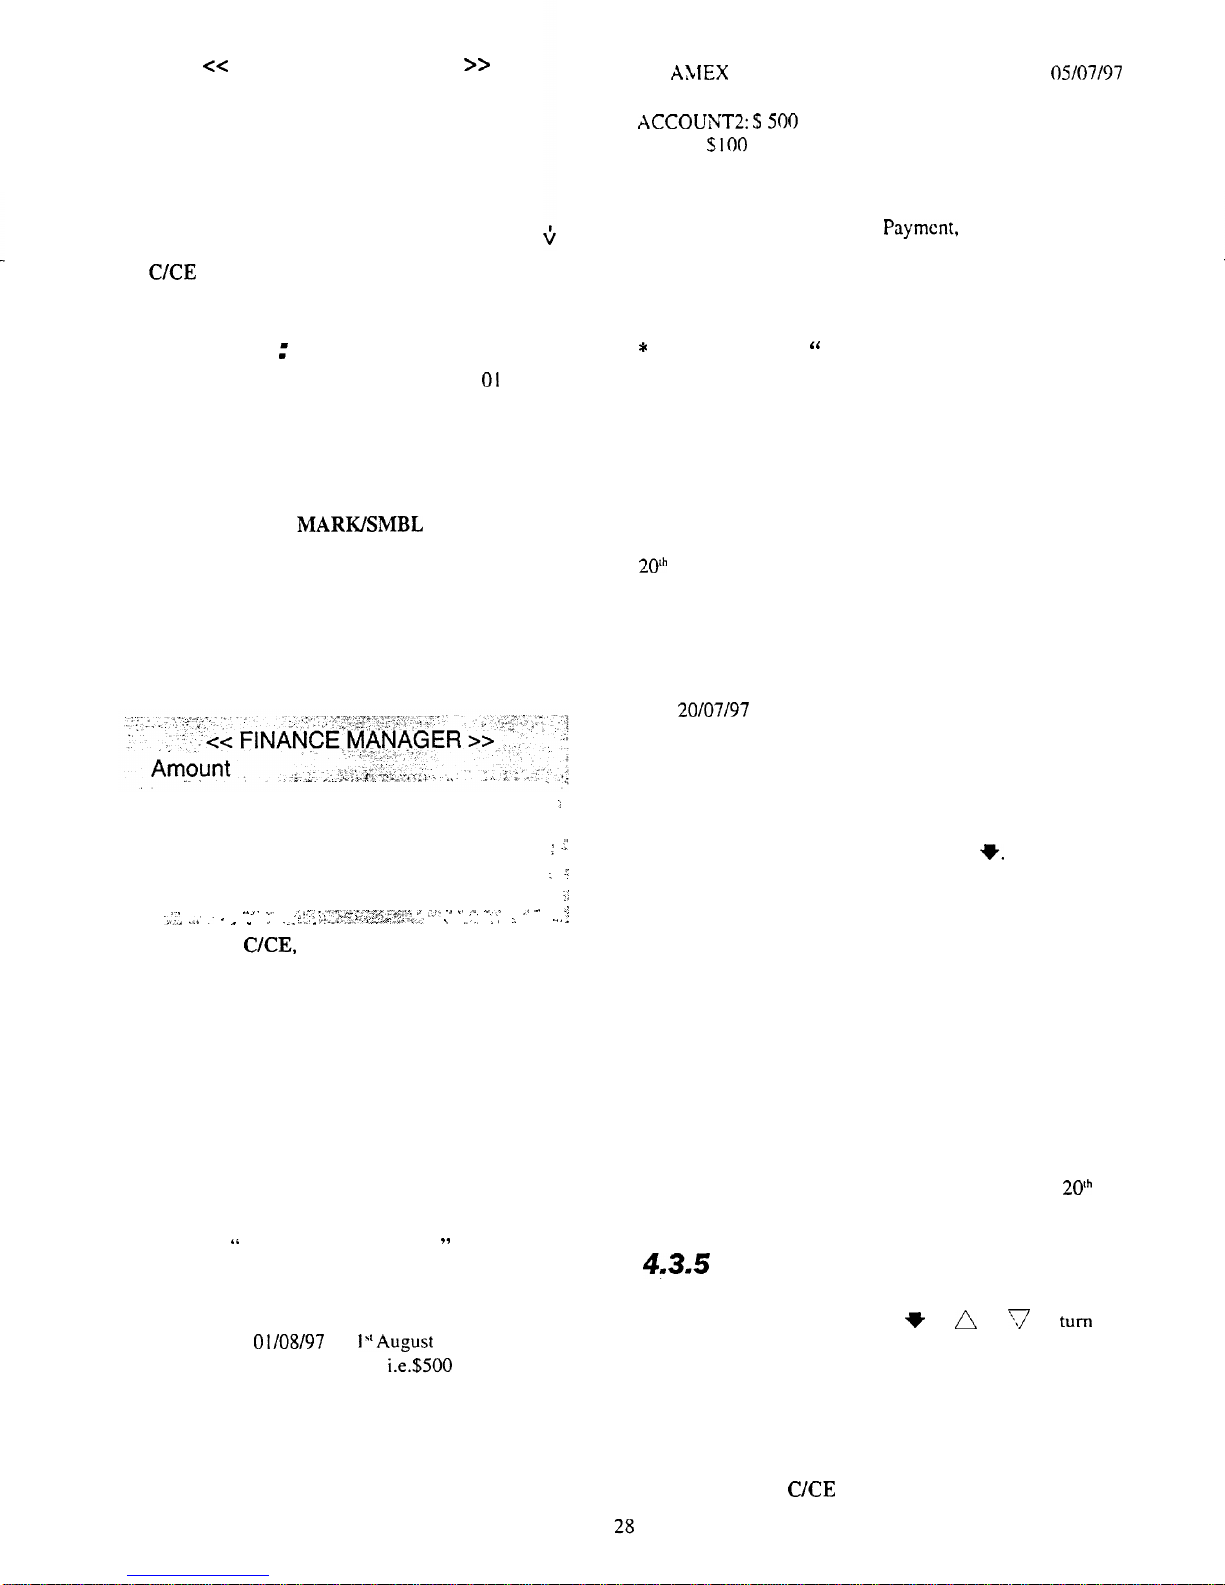
If the account balance exceeds the credit limit (you set $500
before), a warning OVER CREDIT message will appear to
remind you.
:
OVER CREDIT
:
.Z,’
;
;
.
.;
. .
2:
.
..
^..I.
~._
,
,I
“1 -:
..%..A
..*’
:
’
_
,.u<.:>
:.~,“~~;“.~~~,,~~~:‘:1
-
.:,.
-^
~.
,X,
v,,o
_
i
.._
._..
_
>,f-.i~.,C-.
r,......*il:
Y
.,,..
,a I
. . . .
...
:
Press ENTER or
CKE,
the warning message will clear and
the pay-out amount will be accepted.
4.3.3. Transfer Payment: Entry
You may need to book concert tickets using AMEX and have
to deposit more money in your AMEX account as you are
over your credit limit. So, you may transfer $500 from your
ACCOUNT2 to AMEX.
Call up TRANSFER under the main menu.
Choose ACCOUNT2 under “TRANSFER FROM” and press
ENTER and choose AMEX from “TRANSFER TO” and
press ENTER.
“
Fixed Transfer Payment
”
is placed at the
bottom of the account sub-menu.
The date field shows the current date by default. Enter the
desired date,. E.g.
01/08/97
for
l“August
1997 and press
ENTER to confirm. Input amount,
i.e.$500
and press
ENTER. Then input the description of this transfer entry.
Press ENTER to save this entry and the saved record will be
displayed.
After entering this transfer, the balance of the ACCOUNT2
and
A;ClEX
will be updated on the desired date. i.e.
05/07/97
as follows:
ACCOUNT2:
$500
debit.
AMEX:
$100
debit
4.3.4 Fixed Transaction: Entry
In Pay-in, Pay-out or Transfer
Payment,
choose “FIXED
TRANSFER” at the bottom of the account sub-menu. There
will be a browse list showing the description of the fixed
transactions for all 5 accounts.
*
If the list is empty,
”
NOT FOUND!” message appears.
Press INS to create a new fixed transaction.
For pay-in or pay-out, choose the account concerned from
the account sub-menu and then choose the type. For Transfer
Payment, choose an account under “TRANSFER FROM”
and then one under “TRANSFER TO”.
Let’s say you have to withdraw $50 from ACCOUNT2 on
201h
each month to pay for a monthly membership fee.
.
Under the main menu of Finance Manager, choose
PAY-OUT. And choose FIXED TRANSACTION.
Press INS key to create a new fixed pay-out transaction.
Choose ACCOUNT2 and type CASH. Enter the desired date,
E.g.
20/07/97
and press ENTER.
Enter the amount, here $50. The description for the payment
is ‘Member fee’.
Then enter the date, amount and description.
You need to select the frequency of this fixed transaction by
moving the cursor with the arrow keys 4
V.
You have 7
options:
Every week
Every 2 weeks
Every month
Every 3 months
Every 4 months
Every 6 months
Every year
After choosing the frequency, you must enter the starting and
ending date. Press ENTER to confirm and save this entry.
The whole record will then be displayed.
Therefore, $50 will be drawn from ACCOUNT2 on
20’h
each
month to pay out for ‘Member fee’.
4.3.5
To View Fixed Transaction
To view the record of Fixed Transactions, move around the
records using the arrow keys 4
t
or
A
or
‘J
to
turn
over
the page of the browse list.
Press ENTER to view the highlighted records. Details
include the account(s) concerned, payment type, date,
amount, description, frequency and period.
Press ENTER or
C/CE
to quit.

4.3.6. To Edit Fixed Transaction
While
viewing
the details of a fixed transaction. you can
press EDIT to enter the edit mode. Edit the date. amount.
description.
frequency
and
period
one by one and
press
ENTER to save the changes and display
the
edited
record,
4.3.7
Statement
Under
the
main
menu
of Finance
ivlanagcr,
you can view all
the
statements of each account by choosing STATEMENT.
Choose one account from the list.
If “Expense” is chosen, the statement will single out the
entries that have been marked
There are 3 periods for selection:
-
One month before the cut-off date
l From the cut-off date to today
l Tomorrow
Let’s say the cut-off date is set on
15’h
of each month and the
current date is
IST
July. The 3 periods would be
:
“l6/5
-
15/
6”,
‘
16-16
-
Today” and “Tomorrow onward”.
cc
FINANCE MANAGER
>>.
,.j’
,
*‘A,
Period:
:a.
.i_.
.,.
16/05
--
15/06
..;
..,.
.,:,*:..
.
.?i’[,
-~<:
;
I
*_
. .
.:
,
i.
,”
, ,.’
_
.,-j
“‘_
-,,,g
ALL
:‘:;.:
..;
..
,.y
~<i>“$
.
...,
“,
. .
“.__,.
1
-.
. .
..A.
. . . .
I.
WC..
.
i
..,
Choose one period using the arrow keys
4
t
and choose
MARKED ONLY or ALL using
I)
+.
A statement will be generated, listing all the Pay-in, Pay-out,
Transfer Payment and Fixed Transaction entries of the
chosen account within the selected period.
If we generate the ALL statement of AMEX for the period.
I.514
-
Today, we would see:
-
The pay-in entry of $100
The pay-out entry of $700 and
The transfer payment of $500.
If the entry is marked with
@
it is a marked expense.
If there is an
F
it is a fixed transaction entry.
If there is a
*
it is a marked fixed transaction entry.
4.3.8 Record Searching in Statement
In the statement, use the arrow keys to highlight the desired
transaction and open by pressing ENTER. The transaction
details will be shown. When viewing a record’s details, you
can press DEL to delete the record. Press Y to confirm and
the balance will be updated.
2
4.3.9 Pay-in,
Pay-out, Transfer
. .
Ir
Payment: Edit
In
Statcmcnt. choose the highlighted entry by pressing
ENTER. The transaction details
will
be shown. Press EDIT
to edit the
entc.
‘$
If
a
fixed transaction
detailed
record is shown, there will
bc
no
effect
if
user
presses
EDIT. To enter
the
edit
mode
of
fixed transaction.
please
refer to
-l.3.
IO.
After editing the date. amount and description, press ENTER
to save the changes and display the edited record.
The balance will
‘oe
updated automatically.
4.3.10
Fixed Transaction: Edit
In “PAY-IN”,
-‘PAY-OUT” or “TRANSFER PAYMENT”,
choose
“FIX
TRANSFER” at the bottom of the account
sub-menu.
You will see a browse list. You can move the highlighted bar
by pressing
arrow’
keys
4
l or press
.L.
or
‘F/
to turn over
the page of the browse list. Press ENTER to view the details
of the highlighted fixed transaction (in/out/transfer).
When you see the: details including the date, accounts, type,
amount, description, frequency and period, press EDIT to
enter edit mode.
After you enter the new date, amount, description, frequency
and period, press ENTER to save the changes and display
the edited record.
The balance will be updated automatically.
4.4
QU/77llVG
Press any function key to exit the Finance Manager.
!5m
CALENDAR
The electronic calendar covers the period from January 1900
to December 2099.
5.1 CALLING UP
THE
CALENDAR
After switching on the TPC
128K
press
TIMEKALD
once
to call up the calendar mode.
The
calendar last used appears.
**********ir**+***
Calendar;
*ii&t*********
SUMOl’U
WETH FR
SiJ
;
1 2 3
.4”
5 6
7’
8 9
IO
11
.-
7
12 13 14 15 16 17 18 .
j
19
20
;!I
22
23 24 25
26
27
28
29
30
31
1997
<-
->
5.2 OPERATION
Use or
-----
to call up the next or previous month.
29

--
5.3 DIRECT SELECTION
You can also directly select any specific day month or year.
To do this, press EDIT after calling up the calendar. The
following display appears:
x-z
Set calendar
>>
YEAR::
MONTH:
DAY:
.
-,
G
Enter the date desired. On the Year, press number
I
for
19xx
and 2 for
2Oxx.
Enter the desired month and day.
5.4 SCHEDULE
In the Calendar mode, the appointments entered are indicated
by a dot next to the date on the month screen.
To list or to add an entry, press the ENTER key and the
appointment list appears as below:
If
F(
.,
,
.*.::
-.
.
. .
;..
:
;
_’
.
_
*l.I-‘i.
:.*y.,.
*._
.
*
.*;.*,,.,r
i-.2
,=..
I.,.?
i--*.,.‘,...
.
.
there is-no appointment
2
the list, a message
“
NOT
3UND!”
appears at the bottom.
The date, time and description of the previous appointment
will be displayed. To view list, press
k
or
\,/.
54.1
EDITING
APPOINTMENT
In order to edit any appointment, call up the appointment to
be edited and press EDIT. Move cursor using the arrow keys
(4-e+
)
to the desired position. To edit the start and end
time press ENTER. To edit the description of the
appointment press ENTER again. Make your desired
changes and press ENTER to save.
5.4.2
DELETING AN APPOINTMENT
Call up the appointment and press DEL. The following
appears on the screen: DELETE
?
(Y/N)
Press Y if the appointment displayed should be deleted. The
word DELETED appears on the screen as confirmation. By
pressing N the appointment is not deleted.
5.4.3 ADDING AN ENTRY
--
To add an entry, press ENTER key once. Now enter the
desired date (or before you press the ENTER key, use the
.-
3-
arrows key
I)+
4*
to move the cursor to the desired
date). Press ENTER again. Then enter the appointment start
and end time (press
A
for AM and P for PM for
I?-hr
format). You can set the scheduler alarm to remind for the
appointment. To do this. press SHIFT key once and then
“r\”
key when enter-in,
0
the start and end time. Press ENTER
to confirm the time.
Finally. you need to enter the description of
the
appointment.
Press ENTER to save the appointment.
Press
C/CE
key if you wish to cancel the last entry.
5.5
C/o&
and Daily
Alarm
To call up the Clock, press
TIMEKALD
twice.
The following display appears.
Ol/
07
/I
997 (TUE)
02:37AM
To adjust the clock, press EDIT key.
A sub-menu appears with three options.
Set
Set
Set
-
..,.
date
&
time
date
&
time
dailyalarm
:
-
:
Move the highlighted bar by pressing the arrow keys 4
t
and select by pressing ENTER key.
To change the date
&
time format, choose Date
&
Time
Format. You can select D/M/Y
&
M/D/Y date format and
12-
Hr or
24-Hr
time format by moving the highlighted bar by
pressing arrow keys
4-e*.
.
._
. .
~
.
._
.-.,:
,,,
.
x:\
,-,::<
-ri-
;:
‘.S.~
‘,Y,
;
-:_
. . .
:‘,
-’
<-‘->
+
Press ENTER key to confirm and save the setting. Press
C/CE
key to quit without saving.
To adjust the date and time, choose Date
&
Time.
You can set the date and time by moving the cursor with the
arrow keys
I)+4+.
Press ENTER key to confirm and save the setting. Press
C/CE
to quit without saving.
It is important that the date is accurate because there is a
direct relationship
with
the functioning of the Finance
30

Jlanager.
During
normal
use,
if
you change the date to a prior date, it
will ark you to modify the balance to each account.
5.6
QUlm/NG
Press any function key to exit the calendar or schedule mode.
6,
MEMO
This function works like a note book. You can save flight
schedules, birthdays and conference dates.
6.2
CALLING UP
THE
mEm0
moDE
AND ENTERING DATA
In order to call up the memo function, press the MEMO/
TEL key until you see the following display:
“VA,”
Qw
enter the data using the keyboard. Confirm your entry
by pressing ENTER.
After you have done this you can enter new data.
Enter a space by pressing the SPACE key. You can start a
new line by pressing the return
key[d
1,
6.2 SEARCHING FOR NOTES
You can search for notes in three different ways.
Simple search
After calling up the memo function you can scroll in the list
of data using the
v
and
,/\
keys. The data is stored in
chronological order of entry.
Press
A
to scroll downwards.
Press
v
to scroll upwards.
Direct
search
Enter the first word or the first two words of a note. Then
press the
r
key and the entry you are looking for appears on
the screen.
Searching for a key word
If you have forgotten the first word of your note you can use
this function to search for any other word in a note.
To do this, enter the word you are looking for and then press
the SHIFT key. Once you have done this, press the arrow
key
7.
The TPC
I28K
now searches all notes that contain
the entered word. As soon as one is found the note is
displayed.
Scroll the list upwards or downwards using the
1:.
or
-.
keys.
6.3 EDITING DATA
To edit data, call up the desired note. When the note is
displayed. press EDIT.
Move the cursor using the
atrow
keys
(+l)4+)
to the
desired position. You can now edit your text and press
ENTER to save.
6.4 SPECIAL CHARACTERS
Notes can be entered in different languages. You can use
various special characters and symbols.
You can call up 3.5 symbols by pressing the
MARK/SMBL
key. To find symbols not displayed use the arrow keys
+
and
I)
.
If you have chosen a
:;ymbol
press the number in front of the
symbol. The symbol is then inserted in the text.
Special characters can be entered using the SHIFT key as in
the translation mode.
6.5 SECRET DATA
With this function you can mark important notes. Notes
marked in this way cannot be viewed as long as this lock
function is activated.
Marking new notes as confidential
After you have entered the text, press the SHIFT and
MARIUSMBL
keys.
The word
‘$A&‘#K:
appears at the bottom of the screen. Now
press ENTER to save the entry.
Marking o/d
notes as confidential
Call up the note and press EDIT to activate the editing mode.
Press the SHIFT and
YvfIARK/SMBL
keys and press
ENTER to save the edited note.
Removing marking:5
Switch off the lock functions (refer to 8.4.2) and then call up
the desired entry.
Press the EDIT key followed by the SHIFT and
MARWSMBL
keys. ‘The word MARK, disappears from
the bottom of the screen.
Press ENTER to close.
This note is now not protected by the lock function.
6.6 DELETING NOTES
To maintain free space in the memory, it is recommended to
delete your old or unwanted notes from time to time.
Call up the note and
press
DEL. The following appears on
the screen:
31

-
.
Peter Held
HamburgerstraOe
12
23231 Hamburg
DELETE
?
Y/N
Press Y if the note displayed on the screen should be deleted.
The word DELETE
app
ears as confirmation. By pressing
N the note is not deleted.
Please remember if you wish to delete protected data the lock
function must be switched off (chapter 8, page
??).
Alternatively, you can delete all protected data (chapter 8
page
??).
7. TELEPHONE DIRECTORY
YOU
can enter names, telephone numbers and addresses of
friends and business contacts in the telephone directory. The
data can be entered in different languages. The records in the
telephone directory are saved in alphabetical order.
7.1
CALLING
UP THE TELEPHONE
DIRECTORY MODE AND ENTERING
DATA
Press the MEMO/TEL function key to call up the telephone
directory. The following display appears.
Enter the name “John Smith” and press ENTER. The
following is displayed.:
:
‘-.
. .
-.*.
‘,.
.
.
‘_‘.
Type in the telephone number “040 12345” and confirm this
entry again with ENTER.
John Smith
040 12345
ADDRESS?
Enter the address and save it with ENTER.
John
Smith
040 12345
:-
ADDRESS?ADDRESS?
”
I
.,,
,.
,.
Enter the address and save it with ENTER.
John Smith
040
12345
Husume,kveg
12
23456’k)amburg
.-
,’
_..:
.
..~
,:
I
.;,
I
:,
.~
*‘,__
~_
.I...
:
,’
^.
.,
.
.
-..
^
j-
_
.I;..(
,,
.
.
I
.:.
%.
,.
j”.’
.
.
.
..“,.:’
The entry is displayed for a few seconds then the screen for a
new entry appears again.
You can enter a space with the SPACE key. You can create a
new line with the return
key[G
1.
7.2 SEARCHING
Records are sorted alphabetically. You can search for entries
in three different ways.
Simple search
After calling up the telephone directory function you can
scroll in the list of entries using the
A
or
v
and keys.
Press
/i
to scroll from A to Z.
Press
h
to scroll from Z to A.
Direct search
Simply enter the name or the first few letters of the name.
Then press the
v
key and the entry you are looking for
appears on the screen.
Searching for a keyword
If you have forgotten the name of your entry you can use this
function to search for any other word.
To do this. enter the word you are looking for, e.g. the street
name, and then press the SHIFT key. Once you have done
this press the arrow key
.-
again.
32

The TPC
I23K
is now searching all entries that contain the
word which has
heen
entered. As soon
3s
it is found. the
entry is displayed.
delete your
old
or
unwanted
telephone records from time to
time
Here too. you can scroll the list upward or downward using Call up the telephone file and press DEL.
The
following
the
and keys. appears on the screen:
7.3 EDITING DATA
In order to edit data, first call up the desired record. When the
record appears on the screen, press
EDIT.
John Smith
040 12345
Husumerweg12
Move
the cursor using the arrow keys
(+l)r+)
to the
desired position. You can now edit your text and press
ENTER
to save it.
23456Hamburg
DIELETE
?
Y/N
7.4 SPECIAL CHARACTERS
The entries can be entered in different languages. You can
use various special characters and symbols.
The symbols are called up by pressing the MARWSMBL
key. With the
4
and
I)
keys.you
can call up other symbols.
To choose a symbol, press the number in front of it. The
symbol is then inserted in the text.
Press Y if the telephone record displayed on the screen
should be deleted. The word DELETE appears on the
screen as a confirmation. By pressing N the data record is not
deleted.
Please remember if
:/ou
wish to delete protected data the lock
function must be switched off (refer to
84.2).
Alternatively,
you can delete all protected data (refer to 8.4.2).
Special characters can be .entered using the
SHIFT
key as in
8. OTHER FUNCTIONS
,the
translation mode.
7.5 SECRET DATA
You can mark important telephone numbers and addresses.
Marked entries cannot be viewed as long as the lock function
is activated (refer to 8.4.2).
With this menu you can convert measures and currencies,
play and learn, make settings and delete data. The initial
display will show functions
1
to 6 (use the arrow key
\/’
to
view functions 7
&
8). Press a number (1 to 8) to call up a
function.
Marking new entries as confidential
Before you make a new entry press the SHIFT and
MARIUSMBL
keys. The word
‘-mlHk
‘appears
at the
bottom of the screen. Now make your entry and press
ENTER
to save the entry.
Marking old entries as confidential
Call up the telephone file desired and press EDIT to activate
the editing mode. Now press the
SHIFT
and
MARK/SMBL
keys.
8.1
UNIT
CONVERSION
Press
ENTER
to save the entry
REMOVING
MARKINGS
Lengths, areas, volumes, weights and temperatures can be
converted.
Switch off the lock function (refer to 8.4.2) and then call up
the desired entry.
Press the
EDIT
key followed by the
SHIFT
and
MARWSMBL keys. The word
MAQK]disappears
from
the bottom of the screen.
Press
ENTER
to save
&
close.
1
-
LENGTH
-
,:
.;
.-I
‘.T.;:’
.
.~
:
2.
AREA
--
‘.
.”
-,
--,a:
3. VOLUME:
.’
-
4. WEIGHT
5.
TEMPEFlATURE
$6
..This
entry is no longer be protected by the lock function. The following example is used to demonstrate how to use
this function.
7.6 DELETING DATA
To maintain free space in the memory. it is recommended to Press 1 to call up the table of the
LENGTH
measurements.
33

---
LENGTH
1.
MILE
I
.60934
K.METER
1609.34
ME-fER
1
xig.wo317
YARD
sm.wog52
FOOT
63359.65143
INCH
!G
Based on one mile, the screen shows the conversion factor
for the other length units.
If you would like to know what 345 metres are in yards,
move the cursor to METER
[
with the
t
key. Use the up
/
down arrows to highlight the desired source unit. Now enter
345 and press ENTER. The corresponding values for other
units will automatically be converted.
With the
4
and
*
keys you can now move to other lengths
and start a new entry.
Press
C/CE
to return to the previous menu.
8.2CURRENCYCONVERSION
With the TPC
128K,
you can quickly and accurately
calculate the values of other currencies.
Eleven currencies are already specified, five other currencies
can be set by yourself.
At the start of this menu you see the following:
1.
Display
By pressing number
1.
D’l%FLX
the currency rates you
have entered are displayed. With the
&row
keys
+
and
t
you can call up other rates.
2. Edit
Scroll through the list until you have found the desired
currency. Then enter the value for this currency.
Following this, move to other currencies and enter the
conversion rates. Ensure that you enter your home currency
with the value 1.00 as the basis for the conversions.
If you should make an error when entering the data, press
C/CE
once and then enter the new value.
Please note: If you want to convert currencies, the reciprocal
of the currency is used as conversion factor.
If for example your home currency is the Deutschmark and
you want to convert to US dollars or
f
pounds.
proceed
as
follows:
Value:
US%
DM
I
.71
Reciprocals:
1:
1.71
=
0.5547953
Value:
UKE
=
2.84
Reciprocal:
1:2.&l
=
0.3521126
For the rates shown above. the figures underlined must be
entered in the TPC
I28K
as conversion factor.
3.
Calcub
tor
Move down the desired currency using the arrow keys.
Then enter the number which should be converted and press
ENTER.
Other currencies
You can enter five different currencies of your own. Select
2. EDIT . Then move with the arrow keys to the first field
after
Peseta .
._
YEN.;,
,:
.,
<’
C$
‘
;
,,
PESETA
;
,‘>.-~
****
*
._.
./
._;
1
:
I
‘“;:‘
.,
1
.og
‘:
,’
1.00
:
‘1
.og
”
1
..go’
/\
,
,
._
I
_
,V
Press the
4
key, enter the name of the new currency using
the keyboard and press ENTER.
Now you can work with this currency in just the same way as
with all the others.
8.3PLAYlNGANDf.EARNlNG
In the menu, the function “Game
&
Learn” offers you two
games and two learning programs. You can use all four
languages of the TPC
128K
in all of these.
1.
Hangman
_
Game
j’
.*
,*
’
‘.
2.
Scrarrible
-
Game
3. Wordguessing
4. Word learning
. .
\I.-
.’
_,
:.
.
.)
Eng
->
Ger
<-
->
Before you select an option, you should determine the source
and target language. Use the
+
key to change the source
language, and the
I)
key to change the target language.
1.
Hangman
Enter 1 to call up this game. The object of the game is to
guess a word. You are only shown how many letters the word
has.
The word sought after is taken from the language which is
set as the source language. After you have guessed the word.
34

the translation of the word into the target language takes
place automatically.
-
Press a letter, if this letter is in the word, it is entered in
place of a dash.
-
if you choose a letter which does not appear in the word,
this is indicated on the display. Once you have lost nine
chances, the game is
finished
and the word and the
translation are shown automatically.
In order to guess another word press
_
.
ne--2
Correct
:
0
Wrong
:
0
3
In the display above you see that the letters have been
guessed correctly. The next two lines indicate that so far
five
words have been guessed correctly and only one word has
not been guessed. The number 3 in the bottom line shows the
number of chances lost for the current word.
2.
Scramble
game
In this game you have to arrange letters in such a way that
they result in a word. Before starting the game you have to
determine from which language the word sought after should
be taken. After pressing FUNC and 3 for
(<Game
&
Learn>>
the language options appear at the bottom of the screen.
Select the language you want to play by selecting the source
language
(+
key).
,_I/,;.
-.l,.,i...
.;
,I-.
..
-
;.
‘1
_
tyshob-
:_
‘,?
.
-
_‘_
3”$;-‘.-
,
;
_
..
..
.‘,;
-
“.
:*
,
i.
_.-
“_
.-..
.a_ ‘
. . .
-:
.-
----L-m
:“
:
.-
;.,
I
“,
I..,.
*:>...
,
“.‘:
*-
,..
:
‘_,
.5.
$
.
I
:
?
-..
,--.
,..,
~~(+$j
_
;‘::
I
‘:
-;;,:
V$ong;;O
_‘;.
.,
:
.’
.’
j
J.
. . . .
i
.*
.,(
.I’
^,
.-_
_
‘”
A-
\_ .:_
.:.:
‘1
:.
_
I,
*
‘,
The word in the display above is
“bolshy”.
Type the word
and press ENTER The message YOU
@iOIl
appears and then
the translation into the target language.
You have five attempts to guess the word correctly. If you
cannot guess the word, the message
YOU
failed
appears.
:
In order to guess a new word press
?
key, or quit the game
by pressing
CKE.
3. Word
guessing
In
this game you have to guess words from the translation
.-
mode. To help you, the translation appears on the screen.
35
------
q
verabreden
(V)
:
arrange
:
settle
:
plan
0
Type in the word
aid
confirm the entry by pressing ENTER,
If you have typed in the correct word, the message
YOU
WOfl
appea;-s
on the screen. If your word is wrong the
message YOU failed appears.
By pressing ENTER you can display the answer.
You have nine attempts to guess the word. After the ninth
attempt the word appears automatically.
In order to guess a new word, press the
v
key. You can
leave this function by pressing
C/CE.
You can set the source and target language before calling up
this function.
Marking da ta
You can also mark words in exactly the same way as in the
translation mode. These words are then entered in the list for
your personal vocabulary learning program.
In order to mark the data, first you have to find the missing
word. As soon as this is displayed, press the
SHIFT
key and
then
iUARK/SMBL~.
You
receive the
DATA
IS
IhARKED
message.
If the word is already marked or if the memory is full, you
will receive a message to this effect.
4. Word Learning
The words that you marked in the translation mode and
during the word guessing game are stored here in
alphabetical order.
You must set the source and target language before calling up
the word learning mode.
When you have
called
up this mode, the first word in the list
appears. Use the
7
key to call up other words.
In order to delete an entry, call this entry up and then press
SHIFT and
MARWSMBL.
Press
CKE
twice to leave this function and return to the
selection menu for
Other
Functions.
8.4
SET
UP
You can determine
four
different settings
-
the key-tone, the
password, the cut-off date and currency of your accounts.

--
<<SET UP>>
-
1
.
1. Set key-in tone on/off
2. Set
sectre
lock on/off
3. Set sut-off date
4. Set currency
1. SECRET
ON
2. PASSWORD CLEARED
1.
Key-tone Press 1 to switch on the protection. You now receive the
Press 1 to call up the menu.
message
n
SECRET ON
!,j.
Then the selection menu
appears again. A key is visible at the bottom of the screen
I.
Keytone OFF
which indicates that the user lock is switched on.
2.
Keytone
ON
The data marked can now no longer be called up.
If the Key-tone is activated a beep sound is heard each time a
key is pressed.
Press the desired number to switch the beep sound on or off
and then press ENTER or
C/CE.
2. User lock
In the memo, telephone and finance manager directory
modes entries can be marked, Access to these entries can be
prevented by entering a password and activating the
protection.
Entering a password/activating protection
Two steps are needed
to,
protect data. Press
EUNC
then
cc4.Set
up,>
and select
,,2.
S&t
$~,$6$$$~$~,~~
and you will
.I
.*-.
see the following display:
PPlease
enter your password here. It may contain up to five
characters and consist of letters and numbers. Then press
ENTER. The password appears once again at the top of the
screen. By pressing ENTER again you can save the
password. After this first step you see the selection menu
again.
In the second step you now activate this protection. To do
this select 2. Set secret lock again, then the following
screen appears:
Deactivating the protection
If you want to call up marked data, the user lock
(secret lock) must first be deactivated.
For this purpose, call up the selection menu from 4.
Setup.
and select
2. St secret lock..
Now enter your password and press ENTER.
*,..
P
:
‘;
:
;
,-
1, -,
_
.^
,
.
L
-1
,,.
..,I?: :
‘.-
:
:y:.
....
.
”
_..
I.
.:“-.
_,
_*.
1.
i
6
*
;
J^
BLOCAGE
DE
FOND
.
~
‘,:
.-_
:;;;-
._
I
‘.’
‘,..
‘.:
;
_’
:
.
;,‘;.
..’
,,‘.,
-1
‘1
;
:.
,.
__
-.
.‘.;
I
:
;
.,
/I.
‘.II
:-t.:l,
_,.
,
‘i
:
_
:
After entering the correct password, the displays reports
<c
SECRET
6$F,
!
m.
The key at the bottom of the screen
disappears
&d‘&
data can be called up again. The original
password is still valid.
Deactivatinuediting
the password
In order to edit the password, the user lock must be
deactivated..Select
4.
Set
q,
then
2.
Set secret lock and
2.F’A.SSWORD
CLEARED>.
The following display
c>.w:-
appears:
Now enter your
pass\vord.
The message
PASSWORD CLEARED
!
appears. A new password
can be entered as described above.
Forgotten you password?
If you have forgotten your password all protected data must
36

deleted. This is done by pressing function
5. Data deletion.
By using the arrow keys
(+I)).
select the
MARKED
or
UNMARKED
rcccxds
to be deleted.
Keep your password in a safe place to prevent this from
happening. Try not to use obvious passwords such as
names
of close relatives, pets or dates of birth, these can
bc
guessed
too easily by strangers.
If you
select
iClARKED
records, please remember that
all
marked
Finance
.\lanager
and all marked
dara
in
memo
and
telcphonc
directory will
bc
dclctcd.
*
The
conlidential
rtata
must be completely
deleted
if you
have forgotten you: password. The
current
password is
also
dclcted
along with the
protected
data. You can
then
enter
a
new
password
in the
Set
Up mode.
When the confidential data is deleted the password is also
deleted. It can then be re-entered.
3.Cut-off
date
To generate Statements in Finance Manager. you have to set
the desired cut-off date. This is pre-set at the
1
51h
of each
month. If you want a different cut-off date, you need to set
this before you use Finance Manager because changing this
setting may cause your statements to reset and records will
be lost for the previous month.
5. Delete all
:
CAUTION!
ALL THE DATA
(ILIARKED
OR UMARKED) WILL BE
DELETED BY THIS FUNCTION, TO AVOID DELETING
DATA YOU MAY NEED TO KEEP, PRESS N TO LEAVE
WITHOUT DELETION.
8.6 User language
You can set the language in which the screen
messages.are
displayed With the TPC
128K,
you have an option of four
different languages: English, French, German or Spanish.
L
.;I
.
‘
.<Z
..,
I.
*
b.;.
i-
c< Message language
>>
._
;:
To call up the cut-off date, choose number 3 under the Set Up
sub-menu- Change the cut-off date and press ENTER to
confirm.
4. Currency
You define the unit of currency to be used in Finance
Manager. This allows you to customise your own currency
display. The currency is a three-letter representation of your
country’s currency. e.g. GBP for British Pound or USD for
U.S. Dollars etc.
.-
.,
._
,
,,
-
I..
.
.
.
.-..
.
.
.;
To call up the currency setting, choose number 4 under the
Set Up sub-menu. Change the currency and press ENTER to
confirm.
.
.
,.
..:
.
.
_
You can mark the language of your choice with the arrow
keys. As soon as you move to another language the words on
the screen appear in this language. Press
C/CE
to quit this
8.5 DELETING DATA
The data from the memo, telephone, schedule and finance
manager can each be completely deleted. Confidential data is
the data that you have marked in the
MEhiIO,
TEL schedule
and Finance Manager mode.
:
i
function.
8.7 MEMORY CHECK
This shows you how much memory capacity you still have
left.
:
.
3..SCHEDULE (‘-
.4.
FINANCE
MANAGER
s
5. DELETE ALL
:
a.
By pressing a function key or
C/CE
you can quit this
function.
In the
FUNC
menu press 5. Data deletion the 1. MEMO to
delete all data from the
hIEM
directory.
8,8
PC Link
To call up the PC link, choose number 8 in the FUNC menu.
It allows you to have data transfer between the TPC
128K
and the computer.
RECORDS DELETE
m
UNMARKED
n
The
TPCLink
will only work with the
TPCLink
cable and
software.
n Before you use the PC link function, you have to install the
.-
.ar
<-
->
37

TPCLink software in your computer.
l Connect the TPCLink cable to the computer
serial
port.
Ensure that the
TPC-128K
is switched off and then connect
the jack to the TPC
l28K
unit.
l Run
TPClink
software in your computer (Refer to the
TPCLink User manual for instruction).
. Switch on the TPC
l28K
unit.
l Under the PC Link there are two options:-
<< PC Link
>>
Synchronization
System requirements
(
Under normal situation the Synchronization is all you need
to safely backup and update with your computer.) Your PC must meet the following system requirements to
install and operate TPC LINK:
Send
All Dafa
(Transfers data from TPC-128K to the computer. Use if the
data on computer has been lost.)
l Waiting for the response or command from the PC.
l Data is now being transferred from TPC-128K to the PC.
l
The TPC- 128K is now waiting for the data from the PC.
_
.i,
I_
;-:
,,,
)
. . .
‘,
‘,.:.
_
$,
_
‘-.
.i
.
’
1.
_.
l Data is
note
being transferred from the PC to the
TPC-
l2SK.
Synchronization
Link transfer!
Synchronizarion
has been completed successfully,
Synchronization
Link finished!
-
l Windows
3.1x
or Windows 95
l IBM-compatible 386 PC or higher
.4MB
RAM
.
51MB
available hard disk space
l VGA monitor or better
l 3.5” diskette drive
l One available serial (COM) port
installing
the
software
Use the following steps to install the TPC LINK software on
your PC:
1.
Exit all Windows programs.
2. Insert the TPC LINK diskette into your 3.5” diskette drive.
3. In Windows
3.x,
open the
Program
Manager File
menu
and
select
Run. If you
use
Windows
95,
click on the
Start
button and then click Run.
1.
Type
a:Setup
(where
a
is the drive letter of your 3.5”
diskette drive) and press the Enter key or click on OK.
The Setup program will guide you through the installation.
5. The first screen enables you to choose your operating
language. Simply click the desired language and then click
Next
>
to continue
Synchroniztitidn
T
. .
Link waiting.. .
38

6. The next screen shows the directory name wher6. The next screen shows the directory name where the
program will be installed. The default setting isprogram will be installed. The default setting is
C:\7
this is okay click on Next
>
to continue. If youthis is okay click on Next
>
to continue. If you wish
install the program in a different directory, typeinstall the program in a different directory, type in
directory’s path and then click on Next
>.
directory’s path and then click on Next
>.
.e
the
c:\7
wish
in
‘PC.
to
7. The next screen informs you that Setup is about to start
copying files to your hard disk. Click on Setup to
continue.
9. You
should
now
remove
the
diskstte
from
the
drive and
store in a safe
plnce.
Click on OK. You will
SW
the
following screen.
Before launching the TPC LINK program. we recommend
that you read the TPCLink manual in order to
familiarize
yourself with
TPCL:
nk’s feature and operation.
8. The next screen informs you that installation has been
completed.
.-
.,
39
If To open the Manual, double-click on the TPCLink User
Manual icon in the Lexibook Programs folder, or in
Windows95,
you
mz.y
also go to the Start button , select
Programs, Lexibook Programs and then go to TPCLink User
manual.
To launch the TPCLink program, double-click on the
TPCLink icon, or in Windows 95 you may also click on the
Start button, then
Prq,rams,
then Lexibook Programs and
then
TPClink.
When the program opens, you will be asked to enter your
password. Since you. have not set a password yet, simple
chick on OK to
conlinue.
9 POWER SUPPLY
9.1 BATTERIES
Your
TPC
128K receives its operating power from two
alkaline batteries type
“AAA”.
Two demonstration batteries
are included upon delivery.
Inserting new batteries
I
_
Switch off the
TP’C
128K.
2. Open the battery cover on the back to the side.
3. Insert the new batteries as shown on the base of the battery
compartment.
4. Push the cover back into place.
5. If
theTPC
12SK
does not start after changing the batteries
or an incorrect display appears, press the RESET button at
the bottom of the device.
6. After pressing RESET, the screen will display following
message
:System
Initialization
Y/?l
7. Always press
‘.N”,
or you will lose all data.
Caution: If you
pres:;
‘Y’
all data from the telephone
directory, memo, finance manager and schedule are deleted.
Caution:
-
Please only use
the
same type of batteries.
-
Exchange both batteries at the same time.
-
Ensure that the positive poles
(+)
are pointing in the correct
direction. Batteries inserted incorrectly may explode.
-
Never let children play with the batteries. Swallowing
Table of contents
Other LEXIBOOK Organizer manuals