EXTRA RINSE
SANITARY
8
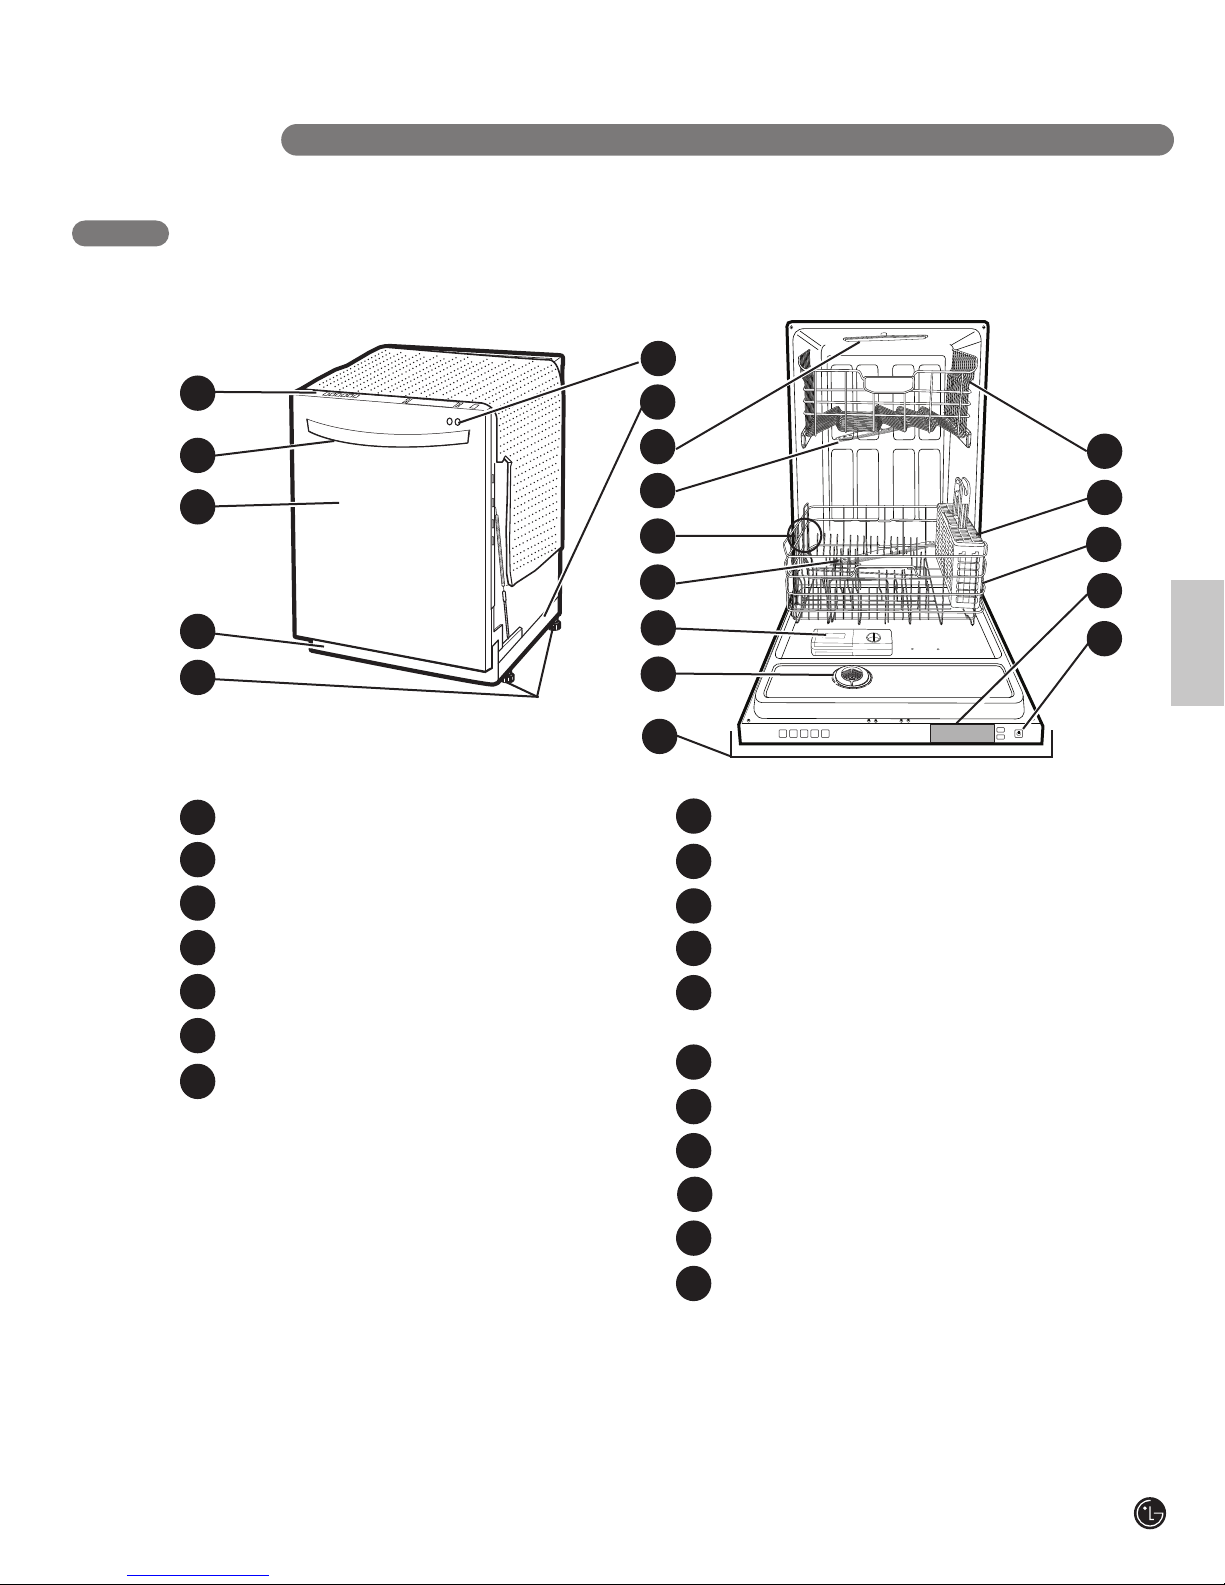
PARTS AND FEATURES
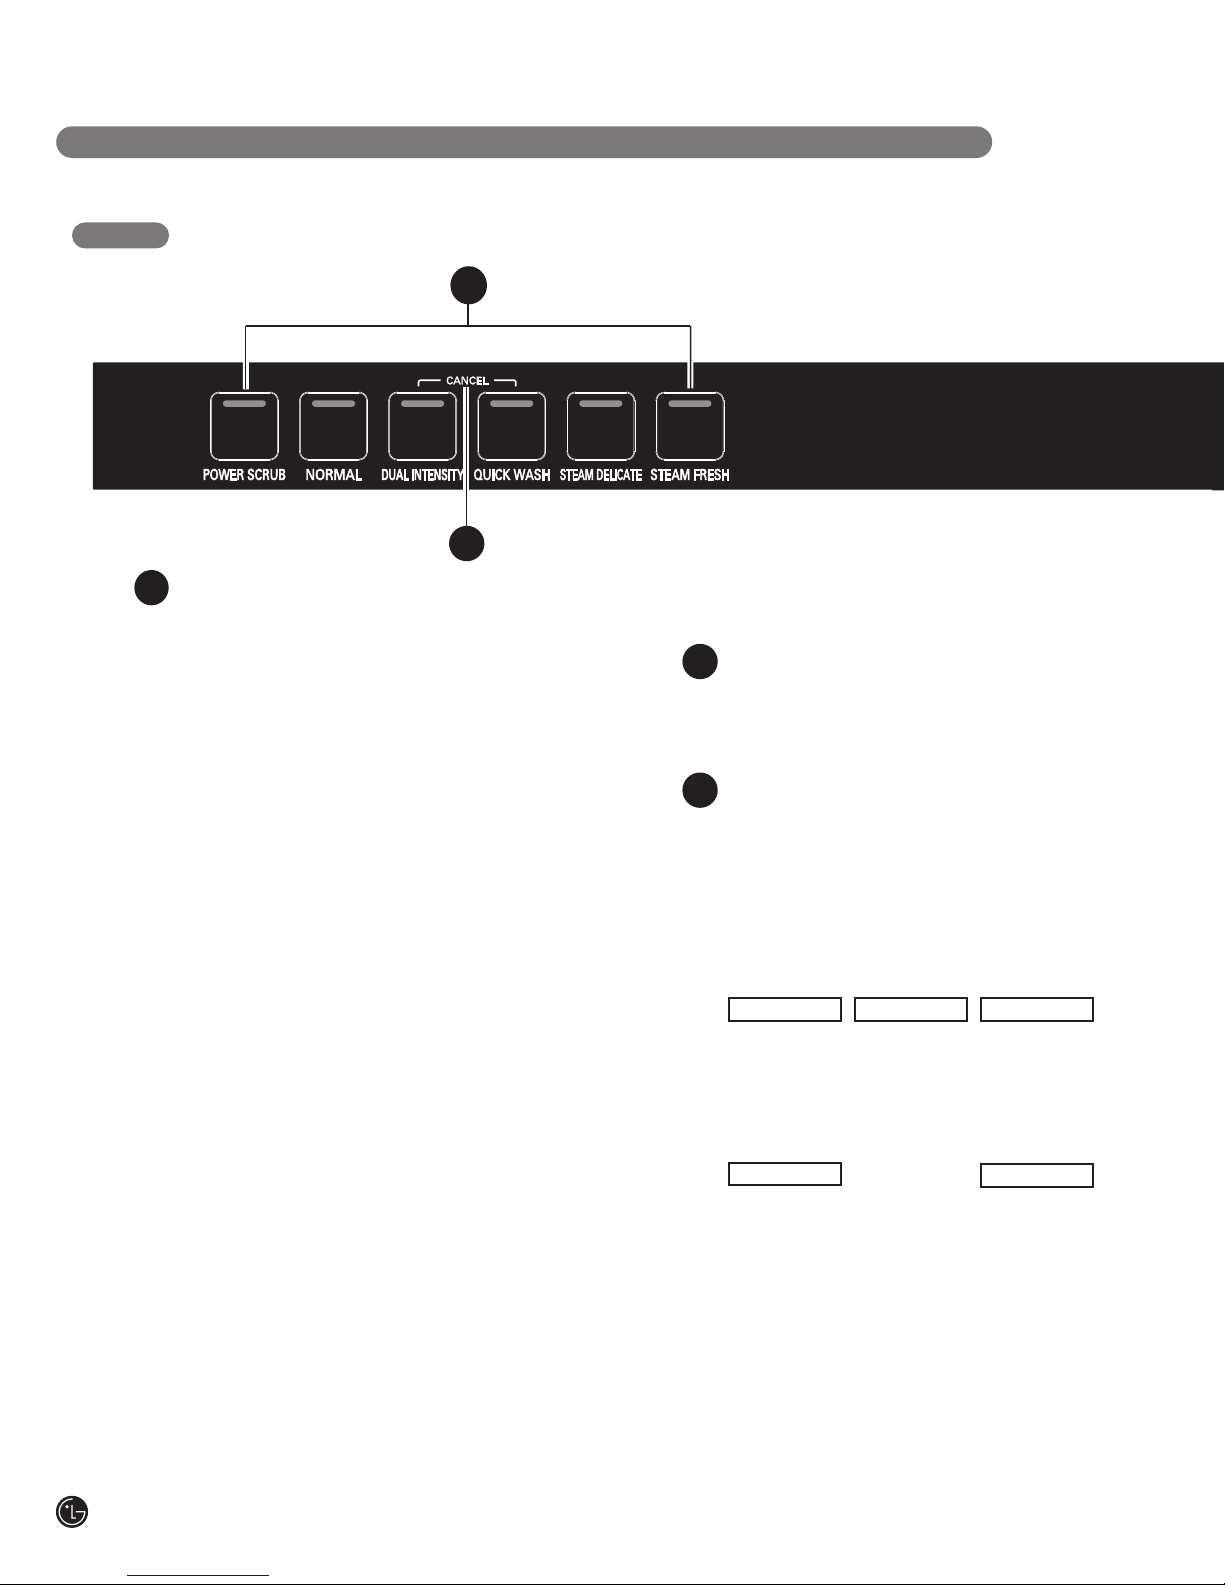
CONTROL PANEL
1
2
1
2
CYCLES
Press the cycle that corresponds to your desired
wash cycle.
POWER SCRUB
This cycle is for very heavily soiled dishes.
NORMAL
This cycle is for normally soiled, everyday loads.
DUAL INTENSITY
This cycle washes the upper and lower racks at
different spray intensities. The lower rack is washed
with a strong spray for hard to clean items, while the
upper rack is washed with a soft spray for more
delicate items. This provides optimum cleaning
performance for mixed loads, including fine china and
stemware. Both the strong and soft spray lights will
stay on to indicate the dishwasher is in the Dual
Intensity cycle.
QUICK WASH
This is a shortened cycle that is perfect for recently
used or lightly soiled loads.
STEAM DELICATE
This cycle adds the gentle power of steam to boost
the cleaning power of the delicate cycle. The cycle is
perfect for effectively cleaning delicate items like fine
china or stemware.
STEAM FRESH
This cycle can be used to freshen up dishes that may
have been stored or not used for a long time.
CHIME ON/OFF
To enable or disable the chime, press and hold the
Quick Wash and Rinse buttons for 2 seconds.
RINSE ONLY
This cycle is a quick rinse for dishes that will not be
washed immediately. No detergent should be used.
To select the Rinse Only cycle, press the Power
button; then press the Rinse button once without
pressing any other cycle buttons.
NOTE: If a main cycle has been selected, the Rinse
Only cycle will not be available without first shutting
the power off.
CANCEL
To cancel a running cycle, open the door and then
press and hold the Dual Intensity and Quick Wash
buttons together for 3 seconds. The drain pump
will be activated and the cycle will be cancelled.
CYCLE OPTIONS AND DISPLAY
Press the desired cycle option buttons to select
and set any of the dishwasher’s options described
below. The display will show the selected cycle
times and cycle options.
SPRAY (INTENSITY)
Repeated pressing of the Spray button will select
the desired spray. The strong, medium, or soft light
will show in the top left portion of the display.
RINSE
Repeated pressing of the Rinse button will select
the desired Rinse option. The Sanitary, Extra Rinse,
or Sanitary and Extra Rinse lights will show in the
bottom left portion of the display.
• If you select the Sanitary feature, the Sanitary light
will blink until the water is heated to the sanitary
temperature level*. Once the sanitary temperature
level is reached, the light will stay on to indicate
that the sanitary temperature has been reached.
*NOTE: This high-temperature rinse sanitizes
dishware and glassware in accordance with
NSF/ANSI Standard 184 for residential
dishwashers. Certified dishwashers are not
intended for licensed food establishments.
• When you select Extra Rinse, an additional
rinse cycle is added.
• Rinse Only is a wash cycle described on
this page.
3
MEDIUM
STRONG SOFT