LG DR7621W User manual

DVD RECORDER
OWNER’S MANUAL
MODEL : DR7621W
Before connecting, operating or adjusting this product,
please read this instruction booklet carefully and completely.
DR7621NW1C_HAASLL_ENG

This lightning flash with arrowhead symbol within an
equilateral triangle is intended to alert the user to
the presence of uninsulated dangerous voltage with-
in the product’s enclosure that may be of sufficient
magnitude to constitute a risk of electric shock to
persons.
The exclamation point within an equilateral triangle
is intended to alert the user to the presence of
important operating and maintenance (servicing)
instructions in the literature accompanying the
product.
WARNING: Do not install this equipment in a confined space
such as a bookcase or similar unit.
CAUTION:
This product employs a Laser System.
To ensure proper use of this product, please read this owner’s
manual carefully and retain it for future reference. Should the
unit require maintenance, contact an authorized service center.
Performing controls, adjustments, or carrying out procedures
other than those specified herein may result in hazardous radi-
ation exposure.
To prevent direct exposure to laser beam, do not try to open
the enclosure. Visible laser radiation when open. DO NOT
STARE INTO BEAM.
CAUTION:
CLASS 2M VISIBLE AND INVISIBLE LASER RADIATION
WHEN OPEN AND INTERLOCKS DEFEATED DO NOT
STARE INTO THE BEAM OR VIEW DIRECTLY WITH OPTI-
CAL INSTRUMENTS.
CAUTION: The apparatus should not be exposed to water
(dripping or splashing) and no objects filled with liquids, such
as vases, should be placed on the apparatus.
CAUTION concerning the Power Cord
Most appliances recommend they be placed upon a dedi-
cated circuit;
That is, a single outlet circuit which powers only that appliance
and has no additional outlets or branch circuits. Check the
specification page of this owner's manual to be certain.
Do not overload wall outlets. Overloaded wall outlets, loose or
damaged wall outlets, extension cords, frayed power cords, or
damaged or cracked wire insulation are dangerous. Any of
these conditions could result in electric shock or fire.
Periodically examine the cord of your appliance, and if its
appearance indicates damage or deterioration, unplug it, dis-
continue use of the appliance, and have the cord replaced with
an exact replacement part by an authorized servicer.
Protect the power cord from physical or mechanical abuse,
such as being twisted, kinked, pinched, closed in a door, or
walked upon. Pay particular attention to plugs, wall outlets, and
the point where the cord exits the appliance.
SERIAL NUMBER:
You can find the serial number on the back of the unit. This
number is unique to this unit and not available to others. You
should record requested information here and retain this guide
as a permanent record of your purchase.
Model No. ______________________________
Serial No. ______________________________
CAUTION: TO REDUCE THE RISK
OF ELECTRIC SHOCK
DO NOT REMOVE COVER (OR BACK)
NO USER-SERVICEABLE PARTS INSIDE
REFER SERVICING TO QUALIFIED SERVICE
PERSONNEL.
WARNING: TO PREVENT FIRE OR ELECTRIC SHOCK
HAZARD, DO NOT EXPOSE THIS PRODUCT TO RAIN
OR MOISTURE.
CAUTION
RISK OF ELECTRIC SHOCK
DO NOT OPEN
2
Safety Precautions
The appliance is not intended for use by young
children or infirm persons without supervision.
Young Children should be supervised to ensure
that they do not play with appliance.
If the appliance is supplied from a cord extension
set or an electrical portable outlet device, the cord
extension set on electrical portable outlet device
must be positioned so that it is not subject to
splashing or ingress of moisture.

INTRODUCTION
3
Table of Contents
INTRODUCTION
Safety Precautions. . . . . . . . . . . . . . . . . . . . . . . 2
Table of Contents. . . . . . . . . . . . . . . . . . . . . . . . 3
DVD Recorder Overview . . . . . . . . . . . . . . . . 4-10
Recordable and Playable Discs . . . . . . . . . . . . 4
Playable Discs . . . . . . . . . . . . . . . . . . . . . . . . . 5
Disc-related terms . . . . . . . . . . . . . . . . . . . . . . 6
About Symbols . . . . . . . . . . . . . . . . . . . . . . . . . 6
About recordable discs . . . . . . . . . . . . . . . . . . . 7
About DVD recording. . . . . . . . . . . . . . . . . . . 8-9
Precautions . . . . . . . . . . . . . . . . . . . . . . . . . . 10
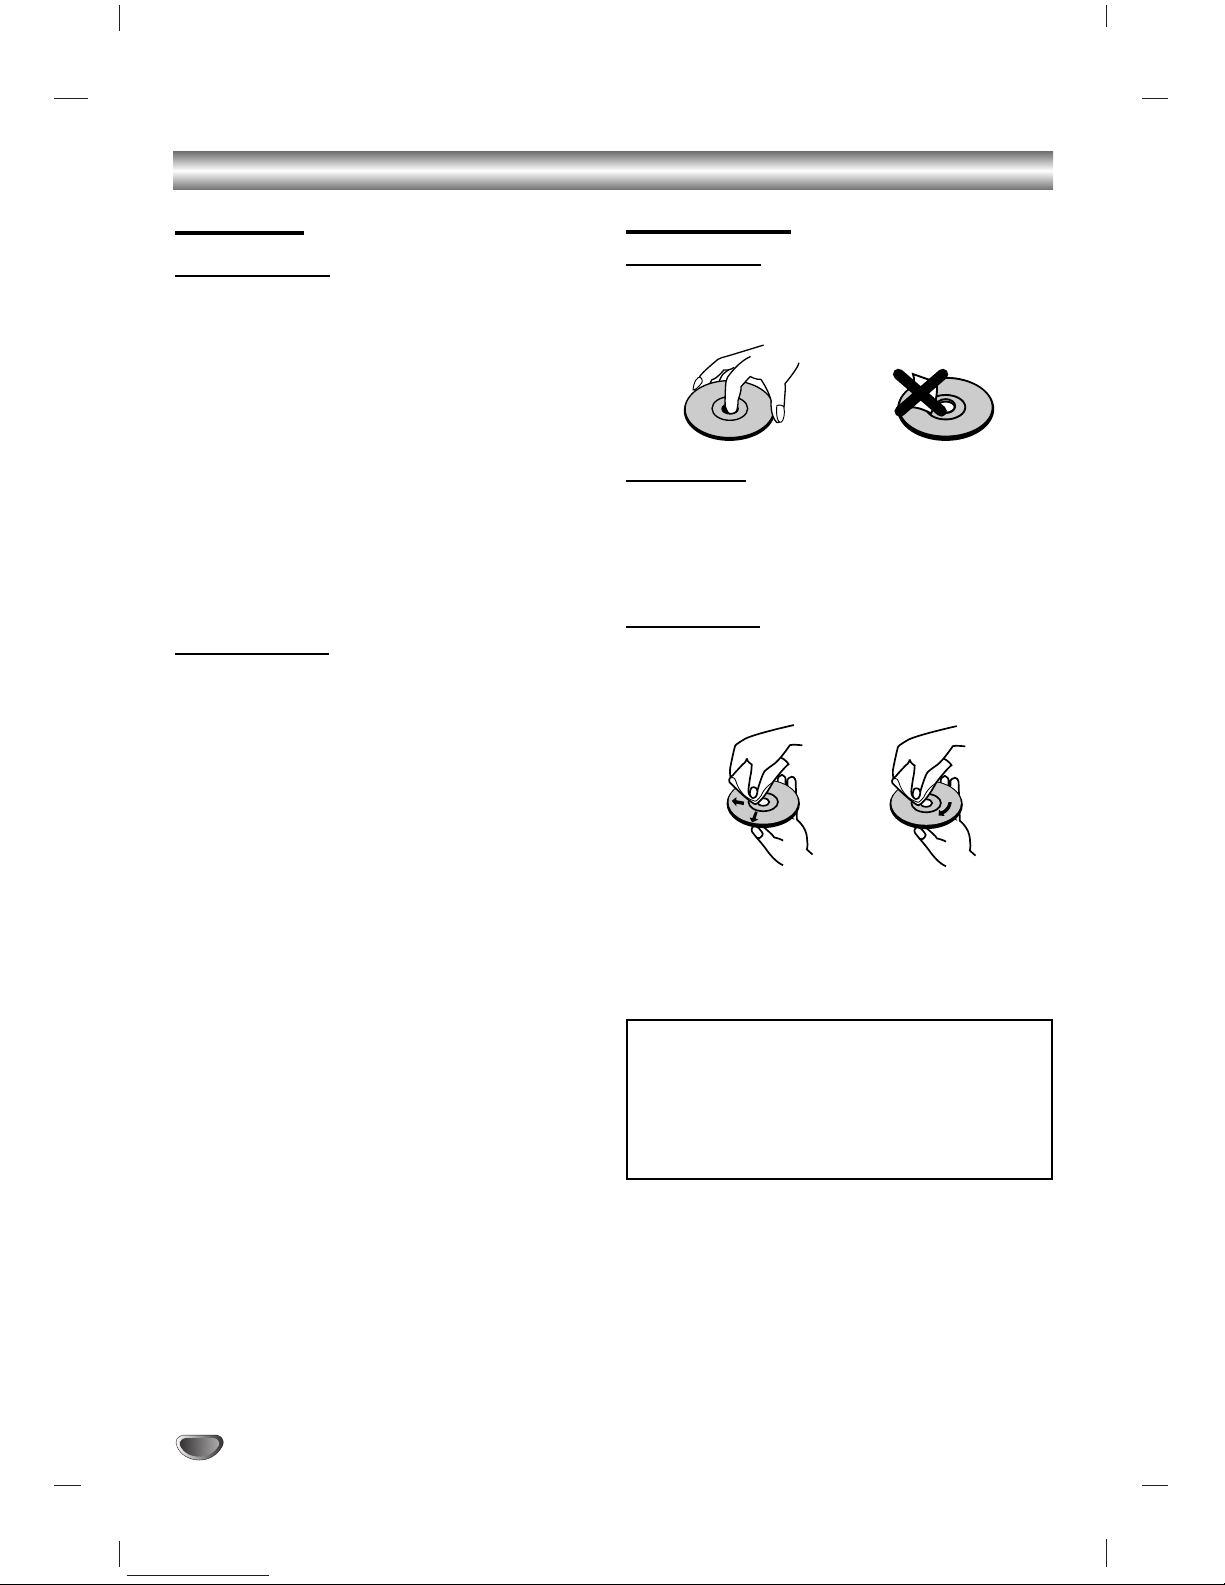
Notes on Discs . . . . . . . . . . . . . . . . . . . . . . . . 10
Front Panel . . . . . . . . . . . . . . . . . . . . . . . . . . . . 11
Remote Control Overview . . . . . . . . . . . . . . . . 12
DVR HOOKUP
Connections . . . . . . . . . . . . . . . . . . . . . . . . 13-16
Rear Panel Connections . . . . . . . . . . . . . . . . . 13
Connecting to the Aerial . . . . . . . . . . . . . . . . . 13
Connections to Your TV . . . . . . . . . . . . . . . . . 14
Connecting to an Amplifier . . . . . . . . . . . . . . . 15
Accessory Audio/Video (A/V) Connections . . . 16
DVR SETUP
Pre-operation Setup . . . . . . . . . . . . . . . . . . 17-28
Initial Settings . . . . . . . . . . . . . . . . . . . . . . . . . 17
General . . . . . . . . . . . . . . . . . . . . . . . . . . . 17-21
•Auto Programming. . . . . . . . . . . . . . . . . . . . 17
•Program Edit . . . . . . . . . . . . . . . . . . . . . 18-19
•Clock Set . . . . . . . . . . . . . . . . . . . . . . . . . . 20
•TV Aspect Ratio . . . . . . . . . . . . . . . . . . . . . 20
•Display Mode . . . . . . . . . . . . . . . . . . . . . . . 20
•Progressive Scan . . . . . . . . . . . . . . . . . . . . 20
•PBC . . . . . . . . . . . . . . . . . . . . . . . . . . . . . . 21
•Factory Set . . . . . . . . . . . . . . . . . . . . . . . . . 21
Language . . . . . . . . . . . . . . . . . . . . . . . . . . . . 21
•Display Language . . . . . . . . . . . . . . . . . . . . 21
•Disc Language . . . . . . . . . . . . . . . . . . . . . . 21
Audio . . . . . . . . . . . . . . . . . . . . . . . . . . . . . . . 22
•Dolby Digital / DTS / MPEG. . . . . . . . . . . . . 22
•Sampling Frequency . . . . . . . . . . . . . . . . . . 22
•DRC (Dynamic Range Control) . . . . . . . . . . 22
•Vocal. . . . . . . . . . . . . . . . . . . . . . . . . . . . . . 22
Lock (Parental Control) . . . . . . . . . . . . . . . 23-24
•Set Password . . . . . . . . . . . . . . . . . . . . . . . 23
•Rating . . . . . . . . . . . . . . . . . . . . . . . . . . . . . 23
•Area Code. . . . . . . . . . . . . . . . . . . . . . . . . . 24
Recording. . . . . . . . . . . . . . . . . . . . . . . . . . . . 25
•Record Mode Set . . . . . . . . . . . . . . . . . . . . 25
•Record Aspect Ratio . . . . . . . . . . . . . . . . . . 25
•DV Record Audio. . . . . . . . . . . . . . . . . . . . . 25
•Auto Chapter . . . . . . . . . . . . . . . . . . . . . . . . 25
Disc. . . . . . . . . . . . . . . . . . . . . . . . . . . . . . 26-27
•Initialize. . . . . . . . . . . . . . . . . . . . . . . . . . . . 26
•Disc Protect. . . . . . . . . . . . . . . . . . . . . . . . . 26
•Finalize . . . . . . . . . . . . . . . . . . . . . . . . . . . . 27
•Disc Label . . . . . . . . . . . . . . . . . . . . . . . . . . 27
Overview for the On-Screen Display . . . . . . . . 28
PLAYBACK
DVD or Video CD Playback. . . . . . . . . . . . . 29-32
Audio CD and MP3/WMA Operation . . . . . . 33-35
Playing an Audio CD or MP3/WMA file . . . . 33-34
Programmed Playback . . . . . . . . . . . . . . . . . . 35
JPEG File Operation . . . . . . . . . . . . . . . . . . 36-37
RECORDING
Basic Recording. . . . . . . . . . . . . . . . . . . . . . . . 38
Basic Recording from TV channels . . . . . . . . . 38
Instant Timer Recording . . . . . . . . . . . . . . . . . 38
Timer Recording . . . . . . . . . . . . . . . . . . . . . 39-40
Recording from an External Input Source . 41-42
Recording from External Components. . . . . . . 41
Recording from a Digital Camcorder . . . . . . . . 41
What is DV? . . . . . . . . . . . . . . . . . . . . . . . . . . 42
EDITING
Title List and Chapter List Menu Overview . . . 43
Title and Chapter Editing . . . . . . . . . . . . . . 44-49
Titles, Chapters, and Parts . . . . . . . . . . . . . . . 44
Adding Chapter Markers . . . . . . . . . . . . . . . . . 44
Changing Title Thumbnails . . . . . . . . . . . . . . . 44
Making a New Playlist. . . . . . . . . . . . . . . . . . . 45
Adding Additional Title/Chapters to the Playlist 45
Deleting a Title/Chapter . . . . . . . . . . . . . . . . . 46
Deleting a Part . . . . . . . . . . . . . . . . . . . . . . . . 46
Naming a Title . . . . . . . . . . . . . . . . . . . . . . . . 47
Combining Two Chapters Into One . . . . . . . . . 47
Moving a Playlist Chapter . . . . . . . . . . . . . . . . 48
Protect a Title . . . . . . . . . . . . . . . . . . . . . . . . . 48
Hide a Chapter . . . . . . . . . . . . . . . . . . . . . . . . 49
Dividing One Title Into Two . . . . . . . . . . . . . . . 49
REFERENCE
Additional Information . . . . . . . . . . . . . . . . . . . 50
Overwriting Recording . . . . . . . . . . . . . . . . . . 50
Viewing Title List menu displayed on
other DVD Recorders or Players . . . . . . . . . . . 50
Playing Your Recordings on Other
DVD Players (Finalizing a Disc) . . . . . . . . . . . 50
Language Code and Area Code List . . . . . . . . 51
Controlling Your TV with the Supplied Remote. . . .
52
Troubleshooting . . . . . . . . . . . . . . . . . . . . . 53-54
Specifications . . . . . . . . . . . . . . . . . . . . . . . . . 55

DVD Recorder Overview
4
Recordable and Playable Discs
DVD-RW (Digital Video Disc - ReWritable):
DVD-RW discs can be formatted for VR mode recording or Video mode recording.
These Discs can be recorded on repeatedly. Recordings can be erased, then you can record again on
the same Disc.
[VR mode]
Recordings can be extensively edited
Playable only on VR mode compatible players (after finalization)
[Video mode]
Playable on regular DVD players (after finalization)
Limited editing features
DVD-R (Digital Video Disc - Recordable)
These Discs can be recorded only once. After you finalize a DVD-R, you cannot record on it or edit it.
DVD-R discs can be only formatted to Video mode.
Playable on regular DVD players (after finalization)
Limited editing features
DVD+RW (Digital Video Disc + ReWritable)
These Discs can be recorded on repeatedly. Recordings can be erased, then you can record again on
the same Disc.
Playable on DVD+RW compatible players (automatically finalization)
The edited contents are playable on DVD+RW compatible players only after finalization
Recordings can be edited the title/chapter
DVD+R (Digital Video Disc + Recordable)
These Discs can be recorded only once. After you finalize a DVD+R, you cannot record on it or edit it
any more.
Playable on DVD+R compatible players (after finalization)
Any edited contents are not be compatible on DVD+R compatible players. (Hide, chapter combine,
added chapter mark, etc.)
Limited title/chapter editing features.
DVD+R DL (Digital Video Disc + Recordable; Double Layer)
These Discs can be recorded only once. After you finalize a DVD+R DL, you cannot record on it or edit
it any more.
Storage space is nearly doubled with double layer DVD+R media, allowing consumers to record up to
8.5GB of video on a single DVD+R disc.
Playable on DVD+R DL compatible players (after finalization)
Any edited contents are not be compatible on DVD+R DL compatible players. (Hide, chapter combine,
added chapter mark, etc.)
Limited title/chapter editing features.
The recommendable recordable DVD discs
DVD-R DVD+R DVD-RW DVD+RW DVD+R(DL)
SONY (8x, 16x) SONY (2.4x, 4x, 8x, 16x) Victor (1x, 4x) SONY (2.4x) Mitsubishi (2.4x)
TDK (4x, 8x) TDK (4x) Maxell (1x, 2x, 4x) TDK (2.4x) Maxell (2.4x)
Verbatim (4x, 8x) Mitsubishi (4x, 8x) TDK (2x) Philips (4x) -
Panasonic (2x, 4x) Ricoh (2x, 4x, 8x) Mitsubishi (2x) Ricoh (2.4x) -
---HP(2.4x, 4x) -
Note:
If a DVD-RW/DVD+RW discs is recorded using a personal computer or other DVD recorder, you cannot format the disc using
this recorder. So if you want to use the disc on this recorder, you must format the disc using the original recorder.

INTRODUCTION
5
DVD Recorder Overview
Playable Discs
DVD (8 cm / 12 cm disc)
Discs such as movies that can be purchased or rented
Video CD (VCD) (8 cm / 12 cm disc)
VIDEO CDs or CD-Rs/CD-RWs in VIDEO CD/Super VIDEO CD format
Audio CD (8 cm / 12 cm disc)
Music CDs or CD-Rs/CD-RWs in music CD format that can be purchased
CD-R/CD-RW (8 cm / 12 cm disc)
CD-R/CD-RW discs that contain audio titles, MP3, WMA, or JPEG files.
Notes:
–Depending on the conditions of the recording equipment or the CD-R/RW (or DVD±R/RW) disc itself, some CD-
R/RW (or DVD±R/RW) discs cannot be played on the unit.
–Do not attach any seal or label to either side (the labeled side or the recorded side) of a disc.
–Do not use irregularly shaped CDs (e.g., heart-shaped or octagonal). Doing so may result in malfunctions.
–Depending on the recording software & the finalization, some recorded discs (CD-R/RW or DVD±R/RW) may not
be playable.
–DVD-R/RW, DVD+R/RW and CD-R/RW discs recorded using a personal computer or a DVD or CD Recorder may
not play if the disc is damaged or dirty, or if there is dirt or condensation on the Recorder’s lens.
–If you record a disc using a personal computer, even if it is recorded in a compatible format, there are cases in
which it may not play because of the settings of the application software used to create the disc. (Check with the
software publisher for more detailed information.)
Regional code of the recorder and DVDs
This recorder is designed and manufactured for playback of Region 2 encoded DVD software. The region
code on the labels of some DVD discs indicates which type of the recorder can play those discs. This unit
can play only DVD discs labeled 2 or ALL. If you try to play any other discs, the message “Incorrect region
code. Can’t play back” will appear on the TV screen. Some DVD discs may not have a region code label even
though their playback is prohibited by area limits.
Notes on DVDs and Video CDs
Some playback operations of DVDs and Video CDs may be intentionally fixed by software manufacturers. As this
unit plays DVDs and Video CDs according to disc content designed by the software manufacturer, some playback
features of the unit may not be available or other functions may be added.
Refer also to the instructions supplied with the DVDs and Video CDs. Some DVDs made for business purposes
may not be played on the unit.
Remote Control Operation
Point the Remote Control at the remote sensor and press the buttons.
Remote Control Battery Installation
Remove the battery cover on the rear of the Remote Control, and insert two R03 (size AAA)
batteries with and matched correctly.
Caution
Do not mix old and new batteries. Never mix different types of batteries (standard, alkaline, etc.).
2

6
DVD Recorder Overview (Continued)
Disc-related terms
DVD +R (Double Layer)
Double layer recording technology offers two recordable
layers on a single DVD disc, providing nearly double the
capacity of 4.7GB single layer DVDs. The greatest,
most valuable benefit of double layer recording technol-
ogy is increased capacity. Storage space is nearly dou-
bled with double layer DVD+R media, allowing con-
sumers to burn up to 8.5GB of video on a single
DVD+R disc.
DVD ±R / DVD ±RW
DVD -R and DVD +R are two different standards for
recordable DVD drives and discs. This format allows
information to be recorded onto the DVD disc only
once. DVD +RW and DVD -RW are two standards for
re-writable media, meaning the DVD content can be
erased and re-recorded. Single-sided discs can hold
4.38 Gigabytes and double-sided discs hold twice as
much.
Title (DVD only)
The main film content, accompanying feature content,
or music album.
Each title is assigned a title reference number enabling
you to locate it easily.
Chapter (DVD only)
Sections of a picture or a musical piece that are smaller
than titles. A title is composed of one or several chap-
ters. Each chapter is assigned a chapter number to
enable you to locate the chapter you want. Depending
on the disc, chapters may not be labeled.
Track (Video CD and Audio CD only)
Sections of a picture or a musical piece on a Video CD
or an Audio CD. Each track is assigned a track number,
enabling you to locate the track you want.
Scene
On a Video CD with PBC (Playback control) functions,
moving pictures and still pictures are divided into sec-
tions called “Scenes”. Each scene available is displayed
on the Scene menu and assigned a scene number,
enabling you to locate the scene you want.
Ascene may be composed of one or several tracks.
Types of Video CDs
There are two types of Video CDs:
Video CDs equipped with PBC (Version 2.0)
PBC (Playback control) functions allow you to interact
with the system via menus, search functions, or other
typical computer-like operations. Moreover, high resolu-
tion still pictures can be played if they are included on
the disc.
Video CDs not equipped with PBC (Version 1.1)
Operated in the same way as audio CDs, these discs
allow playback of video pictures as well as sound, but
they are not equipped with PBC.
About Symbols
About the symbol display
“ “ may appear on the TV screen during operation.
This icon means the function explained in this owner’s
manual is not available on that specific disc, or at that
time.
About the disc symbols for instructions
Asection whose title has one of the following symbols
are applicable only to those discs represented by the
symbol.
Many functions provided on this Recorder are depen-
dent on the recording mode. One or more of the sym-
bols ( , , , ) appear by
each function (explained in this manual) so that you can
see at a glance whether it’s applicable to the disc
loaded.
DVD-R/RW with Video recording mode
DVD-RW with VR recording mode
DVD+R (DL) disc
DVD+RW disc
DVD-Video disc
Video CDs
Audio CDs
MP3 files
WMA files
JPEG files
The finalized DVD disc is a DVD-Video disc.
JPEG
WMA
MP3
CD
VCD
DVD
+RW
+R
VR
Video
DVD+RW
DVD+R
Video
VR

INTRODUCTION
7
DVD Recorder Overview (Continued)
About recordable discs
How are recordable discs different?
The essential difference among DVD-R, DVD-RW,
DVD+R and DVD+RW is that DVD-R and DVD+R are
record-once medium, while DVD-RW and DVD+RW are
re-recordable/erasable medium. You can re-record/
erase a DVD-RW and DVD+RW disc approximately
1,000 times.
Can I play my recordable discs in a regular DVD
player?
Generally, DVD-R, DVD+R and DVD-RW discs record-
ed in Video mode are playable in a regular DVD player,
but they must be ‘finalized’ first. This process fixes the
contents of the disc to make them readable to other
DVD players as DVD-Video discs.
DVD-RW discs recorded in VR (Video Recording) mode
are playable in some players.
Unfinalized DVD+RW discs are playable in a regular
DVD player.
This indicates a product feature that is
capable of playing DVD-RW discs recorded
with Video Recording format.
What are ‘recording modes’?
There are various recording modes available using this
Recorder. When recording to a DVD-R, DVD+R or
DVD+RW disc, recordings are always in Video mode.
DVD-RW discs can be formatted for VR mode recording
or Video mode recording.
VR mode recording
•4different picture quality/recording time settings avail-
able (HQ, SQ, LQ, EQ)
•Not playable on regular DVD players
•Recordings can be extensively edited
Video mode recording
•4different picture quality/recording time settings avail-
able (HQ, SQ, LQ, EQ)
•Playable on regular DVD players (after finalization)
•Limited editing features
DVD+RW mode recording
•4different picture quality/recording time settings avail-
able (HQ, SQ, LQ, EQ)
•Playable on regular DVD players
•The edited contents is playable on regular DVD play-
ers only after finalizing
•Recordings can be edited the title/chapter
DVD+R mode recording
•4different picture quality/recording time settings avail-
able (HQ, SQ, LQ, EQ)
•Playable on regular DVD players (after finalization)
•Any edited contents are not be compatible on regular
DVD players. (Hide, chapter combine, added chapter
mark, etc.)
•Limited title/chapter editing features.
Note :
DVD-Video Format (Video mode) is a new format for
recording on DVD-R/RW and DVD+R/RW discs that
was approved by the DVD Forum in 2000. You may
therefore experience problems playing recordable DVD
discs in some players. Symptoms include video arti-
facts, audio and/or video dropouts and playback sud-
denly stopping.
Our company cannot take responsibility for problems
playing discs recorded on this Recorder in other play-
ers.
Is editing a DVD like editing a video tape?
No. When you edit a video tape you need one video
deck to play the original tape and another to record the
edits. With DVD, you edit by making a ‘Playlist’ of what
to play and when to play it. On playback, the Recorder
plays the disc according to the Playlist.
About word ‘Original’ and ‘Playlist’
Throughout this manual, you will often see the words
Original and Playlist to refer to the actual content and
the edited version.
•Original: content refers to what’s actually recorded
on the disc.
•Playlist: content refers to the edited version of the
disc — how the Original content is to be played.
+R
+RW
Video
VR
Disc type Disc format Recording mode Functions
DVD-Video Video format n/a Playback only
DVD-RW Video Recording VR mode Playback, Recording, Original/Playlist Editing
format (default)
Video format Video mode Playback, limited Recording, limited Editing
DVD-R Video format Video mode Playback, limited Recording, limited Editing
DVD+RW +RW Video format DVD+RW Playback, limited Recording, Title/Chapter Editing
DVD+R (DL) +R Video format DVD+R
Playback, limited Recording, limited Title/Chapter Editing

8
DVD Recorder Overview (Continued)
About DVD recording
Notes :
•This recorder cannot make recordings on CD-R or
CD-RW discs.
•Our company takes no responsibility for recording fail-
ure due to power outages, defective discs, or damage
to the Recorder.
•Fingerprints and small scratches on a disc can affect
playback and/or recording performance. Please take
proper care of your discs.
Disc types and recording formats, modes,
and settings
This recorder can play five different kinds of DVD discs:
pre-recorded DVD-Video discs, DVD-RW, DVD-R,
DVD+RW and DVD+R discs. The disc format for DVD-R
discs is always “Video format”—the same as pre-record-
ed DVD-Video discs. This means that once finalized,
you can play a DVD-R in a regular DVD player.
By default, the DVD-RW disc format is Video Recording
(VR) format, though you can change this to Video for-
mat, if required. (Reinitializing the disc will erase the
contents of the disc.)
The recording mode is closely related to the disc for-
mat. If the disc format is Video Recording format, then
the recording mode is VR mode; if the disc format is
Video mode, then the recording mode is Video mode
(except for DVD-Video, which is not recordable, and so
does not have a recording mode).
Within the recording modes (which are fixed for them
whole disc) are the record settings. These can be
changed as required for each recording and determine
the picture quality and how much space the recording
will take up on the disc.
Recording TV audio channels
This recorder can record either NICAM or regular audio.
If the NICAM setting (page 18) is set to Auto, then if the
broadcast is NICAM, you can record the NICAM audio.
If the broadcast is non-NICAM, the regular audio is
always recorded.
Notes for recording
•The recording times shown are not exact because the
recorder uses variable bit-rate video compression.
This means that the exact recording time will depend
on the material being recorded.
•When recording a TV broadcast, if the reception is
poor or the picture contains interference, the record-
ing times may be shorter.
•If you record still pictures or audio only, the recording
time may be longer.
•The displayed times for recording and time remaining
may not always add up to exactly the length of the
disc.
•The recording time available may decrease if you
heavily edit a disc.
•If using a DVD-RW disc, make sure you change the
recording format (Video mode or VR mode) before
you record anything on the disc. See page 26
(Initialize) for how to do this.
•When using a DVD-R disc, you can keep recording
until the disc is full, or until you finalize the disc.
Before you start a recording session, check the
amount of recording time left on the disc.
•When using a DVD-RW disc in Video mode, recording
time available will only increase if you erase the last
title recorded on the disc.
•The Erase Title option in the Title List-Original menu
only hides the title, it does not actually erase the title
from the disc and increase the recording time avail-
able (except for the last recorded title on a DVD-RW
disc in Video mode).
•Overwrite recording is available using DVD+RW
discs.

INTRODUCTION
9
DVD Recorder Overview (Continued)
Restrictions on video recording
•You cannot record copy-protected video using this
recorder. Copy-protected video includes DVD-Video
discs and some satellite broadcasts. If copy-protected
material is encountered during a recording, recording
will pause or stop automatically and an error message
will be displayed on-screen.
•Video that is ‘copy-once only’ can only be recorded
using a DVD-RW disc in VR mode with CPRM (see
below).
•NTSC format signals from the analog or the DV
inputs is not recorded correctly with this recorder.
•Video signals in SECAM format (from the built-in TV
tuner or from the analog inputs) are recorded in PAL
format.
What is ‘CPRM’?
CPRM is a copy protection system (with scramble sys-
tem) only allowing the recording of ‘copy once’ broad-
cast programs. CPRM stands for Content Protection for
Recordable Media.
This Recorder is CPRM compatible, which means that
you can record copy-once broadcast programs, but you
cannot then make a copy of those recordings. CPRM
recordings can only be made on DVD-RW discs format-
ted in VR mode, and CPRM recordings can only be
played on players that are specifically compatible with
CPRM.
Copyright
•Recording equipment should be used only for lawful
copying and you are advised to check carefully what
is lawful copying in the area in which you are making
a copy. Copying of copyright material such as films or
music is unlawful unless permitted by a legal excep-
tion or consented to by the rights owner.
•This product incorporates copyright protection tech-
nology that is protected by method claims of certain
U.S. patents and other intellectual property rights
owned by Macrovision Corporation and other rights
owners. Use of this copyright protection technology
must be authorized by Macrovision Corporation, and
is intended for home and other limited viewing uses
only, unless otherwise authorized by Macrovision cor-
poration. Reverse engineering or disassembly is pro-
hibited.
•CONSUMERS SHOULD NOTE THAT NOT ALL HIGH
DEFINITION TELEVISION SETS ARE FULLY COM-
PATIBLE WITH THIS PRODUCT AND MAY CAUSE
ARTIFACTS TO BE DISPLAYED IN THE PICTURE.
IN CASE OF 625 PROGRESSIVE SCAN PICTURE
PROBLEMS, IT IS RECOMMENDED THAT THE
USER SWITCH THE CONNECTION TO THE ‘STAN-
DARD DEFINITION’ OUTPUT. IF THERE ARE
QUESTIONS REGARDING OUR TV SET COMPATI-
BILITY WITH THIS MODEL 625p DVD RECORDER,
PLEASE CONTACT OUR CUSTOMER SERVICE
CENTER.

10
DVD Recorder Overview (Continued)
Precautions
Handling the unit
When shipping the unit
The original shipping carton and packing materials
come in handy. For maximum protection, re-pack the
unit as it was originally packaged at the factory.
When setting up the unit
The picture and sound of a nearby TV, VCR, or radio
may be distorted during playback. In this case, position
the unit away from the TV, VCR, or radio, or turn off the
unit after removing the disc.
To keep the surface clean
Do not use volatile liquids, such as insecticide spray,
near the unit. Do not leave rubber or plastic products in
contact with the unit for a long period of time. They will
leave marks on the surface.
Cleaning the unit
To clean the cabinet
Use a soft, dry cloth. If the surfaces are extremely dirty,
use a soft cloth lightly moistened with a mild detergent
solution. Do not use strong solvents such as alcohol,
benzine, or thinner, as these might damage the surface
of the unit.
To obtain a clear picture
The DVD Recorder is a high-tech, precision device. If
the optical pick-up lens and disc drive parts are dirty or
worn, the picture quality will be poor.
Regular inspection and maintenance are recommended
after every 1,000 hours of use. (This depends on the
operating environment.)
For details, please contact your nearest dealer.
Notes on Discs
Handling discs
Do not touch the playback side of the disc. Hold the
disc by the edges so that fingerprints will not get on the
surface. Do not stick paper or tape on the disc.
Storing discs
After playing, store the disc in its case.
Do not expose the disc to direct sunlight or sources of
heat, or leave it in a parked car exposed to direct sun-
light, as there may be a considerable temperature
increase inside the car.
Cleaning discs
Fingerprints and dust on the disc can cause poor pic-
ture quality and sound distortion. Before playing, clean
the disc with a clean cloth. Wipe the disc from the cen-
ter outward.
Do not use strong solvents such as alcohol, benzine,
thinner, commercially available cleaners, or anti-static
spray intended for older vinyl records.
NoYes
Moisture Condensation
Never operate this product immediately after moving
it from a cold location to a warm location. Leave it for
two or three hours without operating it. If you use this
product in such a situation, it may damage
discs/tapes and internal parts.

INTRODUCTION
11
Front Panel
aPOWER
Switches the recorder ON or OFF.
bN(PLAY)
Starts playback.
cx(STOP)
Stops playback or recording.
dz(REC)
Starts recording. Press repeatedly to set the record-
ing time.
ePROG. (V/v)
Scans up or down through memorized channels.
fDisc Tray
Insert a disc here.
gOPEN/CLOSE (Z)
Opens or closes the disc tray.
hDisplay window
Shows the current status of the recorder.
REC: The recorder is recording.
:Indicates when the recorder is in timer recording
or a timer recording is programmed.
: Indicates clock, total playing
time, elapsed time, title number, chapter/track num-
ber, channel, etc.
iRemote Sensor
Point the recorder remote control here.
jINPUT2 (VIDEO IN/AUDIO IN (Left/Right))
Connect the audio/video output of an external
source (Audio system, TV/ Monitor, VCR,
Camcorder, etc.).
kINPUT 2 (S-VIDEO IN)
Connect the S-Video output of an external source
(TV/ Monitor, VCR, Camcorder, etc.).
lDV IN
Connect the DV output of a digital camcorder.
REC
abcde f g h i
jkl

Remote Control Overview
12
0-9 numerical buttons: Selects
numbered options in a menu.
b/ B/ v/ V(left/right/up/down):
Selects an option in the menu.
PR (+/-): Scans up or down through
memorized channels.
A-B: Repeat sequence.
AUDIO: Selects an audio language
(DVD) or an audio channel (CD).
AV: Changes the input to use for
recording (Tuner, AV1-2, or DV IN).
CHP.ADD: Inserts a chapter marker
when playing/recording.
CLEAR: Removes a track number
on the Program List or a mark on
the Marker Search menu.
DISPLAY: Accesses On-Screen
Display.
ENTER
-Acknowledges menu selection.
-Displays information while viewing
a TV program.
INSTANT SKIP: Skips 15 seconds
forward on the disc (about the
length of a typical TV: commercial).
MARKER: Marks any point during
playback.
MENU/LIST: Accesses menu on a
DVD disc. Switches between Title
List-Original and Title List-Playlist
menu.
OPEN/CLOSE (Z): Opens and
closes the disc tray.
PAUSE/STEP (X) : Pause playback
or recording temporarily, press
again to exit pause mode.
PIP: Selects PIP function on or off.
PLAY (N): Starts playback.
POWER: Switches the recorder ON
or OFF.
REC (z): Starts recording. Press
repeatedly to set the recording time.
REC MODE: Selects the recording
mode (HQ, SQ, LQ or EQ).
REPEAT: Repeat chapter, track,
title, all.
RETURN (O)
-Removes the menu.
-Displays the menu of a video CD
with PBC.
SCAN (m/ M): Search back-
ward or forward.
SEARCH: Displays Marker Search
menu.
SETUP: Accesses or removes the
Setup menu.
SKIP (./ >): Go to next
chapter or track. Returns to begin-
ning of current chapter or track or
go to previous chapter or track.
STOP (x): Stops playback or
recording.
SUBTITLE: Selects a subtitle lan-
guage.
THUMBNAIL: Selects a thumbnail
picture for the current title and
chapter for use in the Original and
Playlist menu.
TIMER REC: Displays Timer
Record menu.
TITLE: Displays the disc’s Title
menu, if available.
TV Control Buttons
-POWER: Turns the TV on or off.
-AV: Selects the TV’s source.
-PR +/–: Selects TV’s channel.
-VOL +/–: Adjusts TV’s volume.
ZOOM: Enlarges DVD video image.

DVR HOOKUP
13
Connections
aAERIAL
Connect the aerial to this terminal.
bS-VIDEO OUT
Connect to a S-Video Input on TV.
cCOMPONENT VIDEO OUT/PROGRESSIVE SCAN
(Y Pb Pr)
Connect to a TV with Y Pb Pr inputs.
dAUDIO OUT (Left/Right)
Connect to a TV with audio inputs.
eVIDEO OUT
Connect to a TV with video inputs.
fCooling fan
gAC Power Cord
Plug into the power source.
hRF. OUT
Passes the signal from the AERIAL to your TV/moni-
tor
iCOAXIAL (Digital audio out jack)
Connect to digital (coaxial) audio equipment.
jAUDIO IN 1 (Left/Right)
Connect the audio output of an external source
(Audio system, TV/Monitor, VCR, Camcorder).
kVIDEO IN 1
Connect the video output of an external source
(Audio system, TV/Monitor, VCR, Camcorder).
lOPTICAL (Digital audio out jack)
Connect to digital (optical) audio equipment.
Connecting to the Aerial
Remove the aerial cable plug from your TV set and
insert it into the aerial socket at the back of the
recorder. Plug one end of the aerial cable into the TV
socket on the recorder and the other end into the aerial
input socket on your TV set.
RF coaxial connection
Connect the RF. OUT jack on the recorder to the aerial
input jack on the TV using the 75-ohm Coaxial Cable
supplied (R). The RF. OUT jack passes the signal
through from the AERIAL jack.
ANTENNA
INPUT
Aerial
Rear of the recorder
Rear of TV
L
R
AUDIO INPUT VIDEO
INPUT
SCART INPUT
R
ab cde fg
hijkl
Rear Panel Connections

14
Tips
Depending on your TV and other equipment you wish
to connect, there are various ways you could connect
the recorder. Use only one of the connections
described below.
Please refer to the manuals of your TV, VCR, Stereo
System or other devices as necessary to make the
best connections.
Caution
–Make sure the DVD Recorder is connected directly to
the TV. Tune the TV to the correct video input chan-
nel.
–Do not connect the DVD Recorder’s AUDIO OUT jack
to the phono in jack (record deck) of your audio sys-
tem.
–Do not connect your DVD Recorder via your VCR.
The DVD image could be distorted by the copy pro-
tection system.
Connections to Your TV
Make one of the following connections, depending on
the capabilities of your existing equipment.
Video connection
Connect the VIDEO OUT jack on the DVD Recorder to
the video in jack on the TV using the video cable (V).
S-Video connection
Connect the S-VIDEO OUT jack on the recorder to the
S-Video in jack on the TV using the S-Video cable (S).
Component Video connection
Connect the COMPONENT VIDEO OUT jacks on the
DVD Recorder to the corresponding input jacks on the
TV using an Y Pb Pr cable (C).
Progressive Scan connection
If your television is a high-definition or “digital ready”
television, you may take advantage of the recorder’s
progressive scan output for the highest video resolution
possible. If your TV does not accept the Progressive
Scan format, the picture will appear scrambled if you try
Progressive Scan on the recorder.
Connect the COMPONENT VIDEO OUT /
PROGRESSIVE SCAN jacks on the recorder to the
corresponding in jacks on the TV using the Y Pb Pr
cable (C).
Notes :
Set the Progressive to “On” on the setup menu for
progressive signal, see page 20.
Set the progressive to “Off” by removing any disc
from the unit and close the disc tray. See that “NO
DISC” is displayed on the display window. Then
press STOP and hold it for five seconds before
releasing it.
Progressive scan does not work with the analog
video connections (yellow VIDEO OUT jack) or
S-VIDEO connection.
Audio (Left/Right) Connection
Connect the left and right AUDIO OUT jacks of the DVD
Recorder to the audio left and right IN jacks on the TV
using the audio cables (A). Do not connect the DVD
Recorder’s AUDIO OUT jack to the phono in jack
(record deck) of your audio system.
Connections (Continued)
L
R
AUDIO INPUT VIDEO
INPUT
Pr
Pb
Y
COMPONENT VIDEO INPUT
S-VIDEO
INPUT
Rear of the recorder
Rear of TV
A VC
S

DVR HOOKUP
15
Connections (Continued)
Connecting to an Amplifier
Connecting to an amplifier equipped with two
channel analog stereo or Dolby Pro Logic ll/
Pro Logic
Connect the Left and Right AUDIO OUT jacks on the
DVD Recorder to the audio left and right in jacks on
your amplifier, receiver, or stereo system, using the
audio cables (A).
Connecting to an amplifier equipped with two
channel digital stereo (PCM) or to an Audio/
Video receiver equipped with a multi-channel
decoder (Dolby Digital™, MPEG 2, or DTS)
11
Connect one of the DVD Recorder’s DIGITAL
AUDIO OUT jacks (OPTICAL Oor COAXIAL X) to
the corresponding in jack on your amplifier. Use an
optional digital (optical Oor coaxial X) audio cable.
22
You will need to activate the recorder’s digital out-
put. (See “Audio” on page 22).
Digital Multi-channel sound
Adigital multi-channel connection provides the best
sound quality. For this you need a multi-channel
Audio/Video receiver that supports one or more of the
audio formats supported by your DVD Recorder
(MPEG 2, Dolby Digital and DTS). Check the receiver
manual and the logos on the front of the receiver.
Caution:
Due to the DTS Licensing agreement, the digital output
will be in DTS digital out when DTS audio stream is
selected.
Notes :
–
If the audio format of the digital output does not match
the capabilities of your receiver, the receiver will
produce a strong, distorted sound or no sound at all.
–Six Channel Digital Surround Sound via digital con-
nection can only be obtained if your receiver is
equipped with a Digital Multi-channel decoder.
–To see the audio format of the current DVD in the on-
screen display, press AUDIO.
–This recorder does not perform internal (2 channel)
decoding of a DTS sound track. To enjoy DTS
multi channel surround, you must connect this
recorder to a DTS compatible receiver via one of this
recorder’s digital audio outputs.
R
L
AUDIO INPUTDIGITAL INPUT
COAXIAL
DIGITAL INPUT
OPTICAL
Amplifier (Receiver)
Rear of the recorder
AX O

16
Connections (Continued)
Connecting to the INPUT 1 or INPUT 2
Jacks
Connect the input jacks (AV1, AV2) on the recorder to
the audio/video out jacks on your accessory compo-
nent, using audio/video cables.
Note:
If you use the S-VIDEO IN jack on the front panel, the
VIDEO IN jack on the front panel is not available.
Connecting a Digital Camcorder
Using the front panel DV IN jack, it is possible to
connect a DV digital camcorder and digitally transfer DV
tapes to DVD.
Use a DV cable (not supplied) to connect the DV in/out
jack of your DV camcorder to the front panel DV IN jack
of this recorder.
Note:
This jack is for connection to DV digital camcorder only.
It is not compatible with digital satellite tuners or D-VHS
video decks.
L
R
VIDEO
OUTPUT
AUDIO
OUTPUT
S-VIDEO
OUTPUT
Jack panel of Accessory Component
(VCR, Camcorder, etc.)
Rear of
the recorder
Front of
the recorder
OR
OR
DV Digital Camcorder
Front of the recorder
DV
IN/OUT

DVR HOOKUP
17
Pre-operation Setup
Initial Settings
In this menu system, there are several ways to cus-
tomize the settings provided. Most menus consist of
three levels to set up the options, but some require
greater depth for the variety of settings. If you press
SETUP, only the first and second level of the menu sys-
tem will appear on the TV screen. The third level can be
displayed by pressing B. For navigating the menu lev-
els, you will see “B” on the right side of the menu label
to help you go to the next level.
To bring up and exit the Menu:
Press SETUP to bring up the menu. A second press of
SETUP will take you back to initial screen.
To go to the next level:
Press Bon the remote control.
To go back to the previous level:
Press bon the remote control.
General Operation
11
Press SETUP.
The Setup menu appears.
22
Use v/ Vto select the desired option.
33
While the desired item is selected, press Bto
move to the second level.
44
Use v/ Vto select the second desired option.
55
Press Bto move to the third level.
66
Use v/ Vto select the desired setting then
press ENTER to confirm your selection.
Some items require additional steps.
77
Press SETUP to exit the Setup menu.
General
Auto Programming
This DVD Recorder is equipped with a frequency
synthesized tuner capable of receiving up to 88 TV
channels.
Preparation:
Connect the DVD Recorder to the desired type of aer-
ial, as shown in Connecting to the Aerial on page 13.
11
Press SETUP.
The Setup menu appears.
22
Use v/ Vto select the General option.
33
While the General option is selected, press Bto
move to the second level.
44
Use v/ Vto select the Auto Programming
option.
55
Press Bto move to the third level.
“Start” icon is highlighted.
66
Press ENTER to begin the channel search.
The tuner will automatically cycle through all
available channels in the area and place them in
the tuner’s memory.
Note :
After you have connected your DVD recorder for the
very first time. If you press SETUP for initial setting, you
can only set the “Auto Programming” option. Then you
can set the other options.

18
Pre-operation Setup (Continued)
Program Edit
You can edit a channel manually (add, delete, name,
move, etc.).
11
Press SETUP.
The Setup menu appears.
22
Use v/ Vto select the General option.
33
While the General option is selected, press Bto
move to the second level.
44
Use v/ Vto select the Program Edit option then
press Bto move to the third level.
“Edit” icon is highlighted.
55
Press ENTER.
Program List menu appears.
66
Use v/ Vto select a PR number then press
ENTER.
Program List options appears on the left side of the
menu display.
77
Use v/ Vto select an option then press ENTER
to confirm.
Program Edit: Edits the selected program.
Station Rename: Edits the station name.
Move: Moves the program’s location on the
program list.
Delete: Deletes the program from program list.
Nicam Auto/Off: Set the NICAM function to for the
program Auto or Off.
88
Press RETURN (O) repeatedly to exit Program
List menu.
Program Edit
You can perform a search to select and store TV chan-
nels manually.
1. Use v/ Vto select a program on the Program List
menu then press ENTER.
Program List options appears on the left side of the
Program List menu.
2. Use v/ Vto select ‘Program Edit’ option from the
options then press ENTER.
Program Edit menu appears.
3. Use b/ Bto select the item and press v/ Vto
change the setting.
[PR] indicates the selected programme position.
[Seek] Searches for a channel automatically.
Searching stops when the recorder tunes in a
channel.
[Ch.] Changes the channel number.
[MFT] Fine tunes the channel to obtain a clearer
picture.
4. Choose OK then press ENTER to confirm the setting
and returns to the Program List menu.

DVR SETUP
19
Pre-operation Setup (Continued)
Program Edit (Continued)
Station Rename
You can name stations independently. Names can be
up to 5 characters long.
1. Use v/ Vto select a program on the Program List
menu then press ENTER.
Program List options appears on the left side of the
Program List menu.
2. Use v/ Vto select ‘Station Rename’ option from
Program List options then press ENTER.
Keyboard menu appears.
3. Enter a name for the station. Use vVbBto select
a character then press ENTER to confirm your selec-
tion.
•Alphabet Capital: Switches the keyboard upper
case characters.
•Alphabet Small: Switches the keyboard to lower
case characters.
•Symbol: Switches the keyboard to symbol char-
acters.
•OK: Select to finish.
•Cancel: Select to exit the menu.
•Space: Inserts a space at the cursor position.
•Delete: Deletes the previous character at the
cursor position.
•b / B:Moves cursor to left or right.
Tip
Remote control buttons for entering a name
Numbers (0~9): Enters the character of correspond-
ing location on the selected column.
4. Choose ‘OK’ icon then press ENTER to fix the name
and returns to the Program List menu.
Sorting TV channels manually
You can sort the program’s position on the Program List
menu.
1. Use v/ Vto select a program on the Program List
menu then press ENTER.
Program List options appears on the left side of the
Program List menu.
2. Use v/ Vto select ‘Move’ option from Program List
options then press ENTER.
3. Use v/ Vto select a desired position then press
ENTER to store.
Deleting a program
You can delete a program on the Program List menu.
1. Use v/ Vto select a program on the Program List
menu then press ENTER.
Program List options appears on the left side of the
Program List menu.
2. Use v/ Vto select ‘Delete’ option from Program List
options then press ENTER. The Program is deleted.
Setting the NICAM Auto/Off
This DVD recorder can receive Hi-Fi sound transmis-
sions in NICAM Stereo. However, if sound distortion
occurs, due to poor reception, you can switch Off
1. Use v/ Vto select a program on the Program List
menu then press ENTER.
Program List options appears on the left side of the
Program List menu.
2. Use v/ Vto select ‘Nicam Auto/Off’ option from
Program List options then press ENTER. If you
select Auto, ‘NICAM’ appears on the menu screen.

20
Pre-operation Setup (Continued)
Clock Set
11
Press SETUP.
The Setup menu appears.
22
Use v/ Vto select the General menu.
33
While the General option is selected, press Bto
move to the second level.
44
Use v/ Vto select the Clock Set option.
55
Press Bto move to the third level.
66
Enter the necessary information for date and
time.
b/ B(left/right): Moves the cursor to the previous
or next column.
v/ V(up/down): Changes the setting at the current
cursor position.
77
Press ENTER to confirm your setting, then
press SETUP to exit the Setup menu.
TV Aspect Ratio
You can choose:
- 4:3: Select when a standard 4:3 TV is connected.
- 16:9: Select when a 16:9 wide TV is connected.
Display Mode
Display Mode setting works only when the TV Aspect
Ratio is set to “4:3”.
You can choose:
-
Letter Box: Displays a wide picture with bands on the
upper and lower portions of the screen.
-
Pan Scan: Automatically displays the wide picture on
the entire screen and cuts off the portions
that do not fit.
Progressive Scan
Progressive Scan Video provides the highest quality
pictures with less flickering.
If you are using the COMPONENT VIDEO OUT/
PROGRESSIVE SCAN jacks, but are connecting the
recorder to a standard (analog) television, set
Progressive Scan to [OFF].
If you are using the COMPONENT VIDEO OUT/
PROGRESSIVE SCAN jacks for connection to a TV or
monitor that is compatible with a progressive scan
signal, set Progressive Scan to [ON].
Caution
Once the setting for Progressive Scan output is entered,
an image will only be visible on a Progressive Scan
compatible TV or monitor. If you set Progressive Scan
to [ON] in error, you must reset the recorder. First,
remove the disc in the recorder. Next, press STOP (x)
and hold it for five seconds before releasing it. The
video output will be restored to the standard setting,
and a picture will once again be visible on a convention-
al analog TV or monitor.
Table of contents
Other LG DVD Recorder manuals