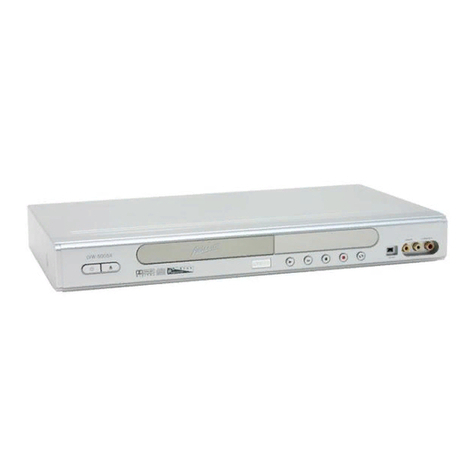
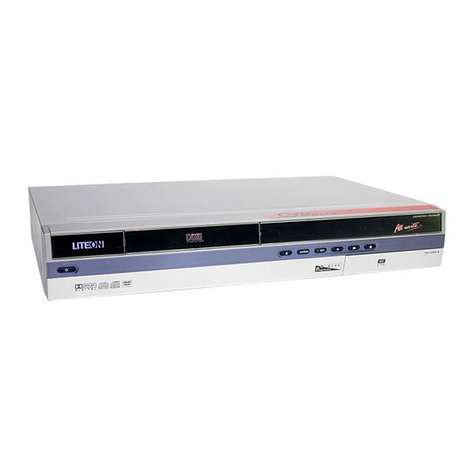
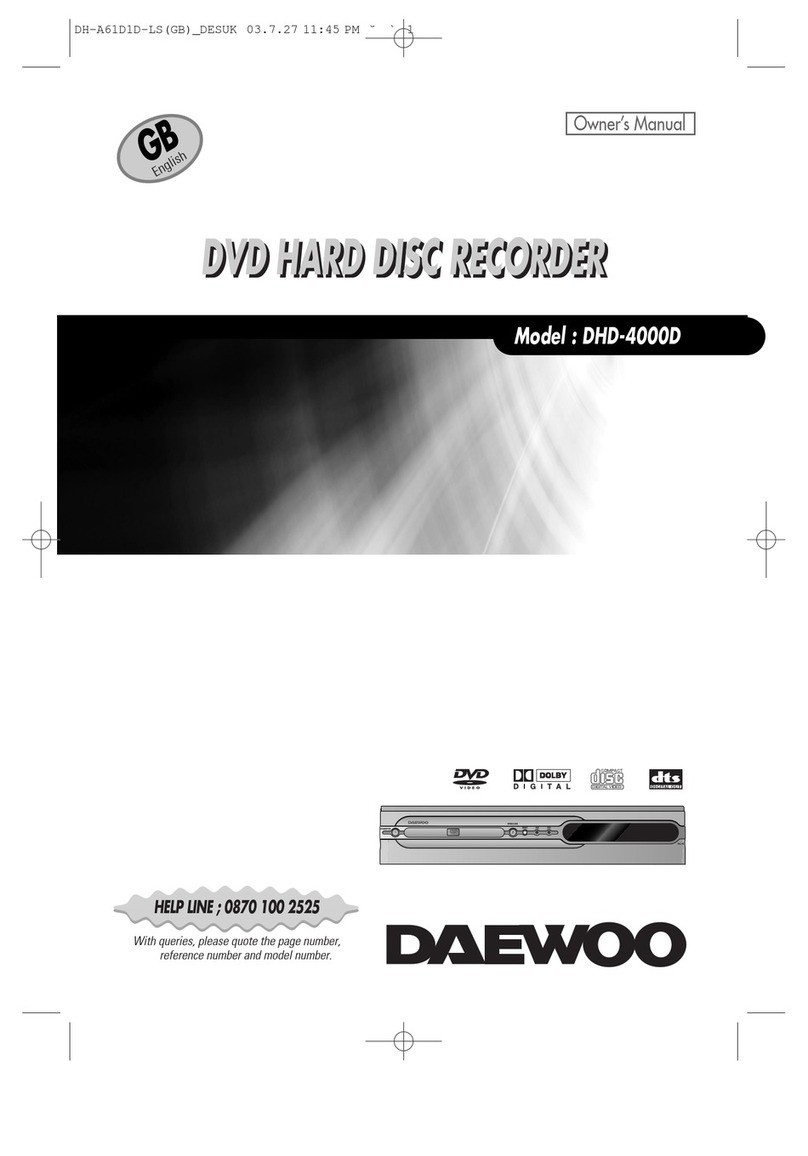
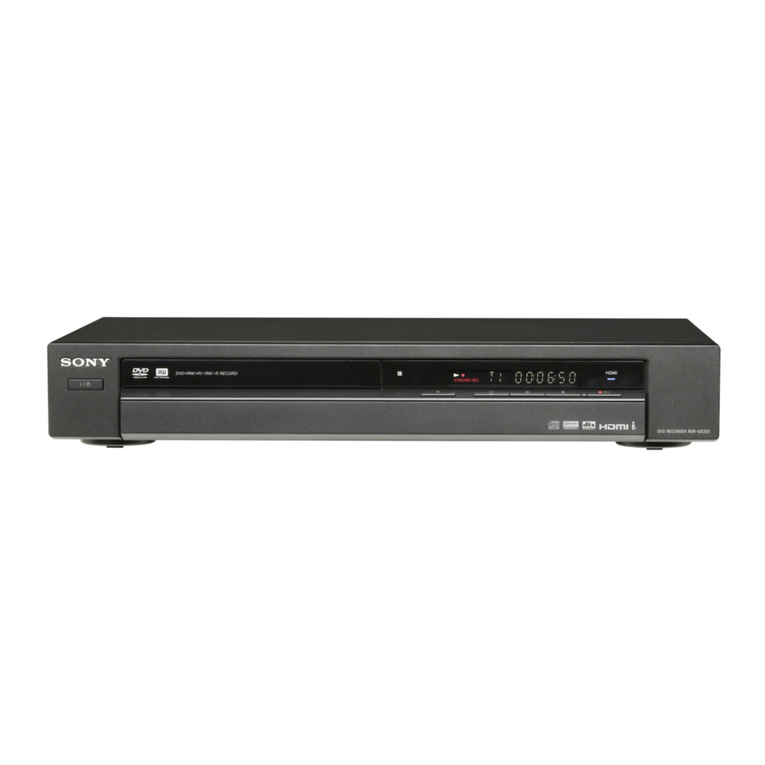
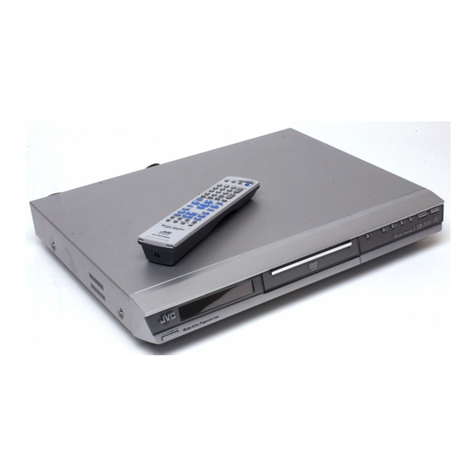
LiteOn HD-A940G User manual

HD-A940/960/970 Series*
User’s Manual
HDD/DVD Recorder
* : HD-A940G, HD-A940GX, HD-A960G, HD-A960GX, HD-A970GX
*Please refer to Model Comparison Chart on the back cover for the features supported by each model.
*The HDMI connection of this DVD recorder features HDCP technology for the purpose of content protection. Connecting the recorder to
a TV via an HDMI-to-DVI cable may lead to loss of signal if the TV is not DVI/HDCP-compliant.
DVD
+R/+RW/-R/-RW

Important Safety Instructions
1. READ INSTRUCTIONS - Read the safety and operation instructions carefully before using this product.
2. RETAIN INSTRUCTIONS - Retain the safety and operation instructions for future reference.
3. HEED WARNINGS - Observe warnings listed in the manual.
4. FOLLOW INSTRUCTIONS - Follow the safety and operation instructions when using this product.
5. CLEAN - Use a dry cloth for cleaning.
6. VENTILATION - Do not block any ventilation openings of this product.
7. MOISTURE - Do not use this product near water, and be sure to prevent this product from being exposed to any
dripping or splashing.
8. HEAT - Do not install this product near any heat sources, such as radiators, heat registers, stoves or other
devices (including amplifier) which produce heat.
9. POLARIZATION - Do not defeat the safety purpose of the polarized or grounding-type plug. A polarized plug
has two blades with one wider than the other. A grounding type plug has two blades and a third grounding prong.
The wide blade or the prong are provided for your safety. If the provided plug does not fit into your outlet, consult
an electrician for replacement of the obsolete outlet.
10. POWER CORD - Protect the power cord from being walked on or pinched, particularly at plugs, convenience
receptacles and the point where they exit from the product.
11. ACCESSORIES/ATTACHMENTS - Use only accessories/attachments specified by the manufacturer.
12. USAGE - Unplug this product during lightning storms or when it is not used for long periods of time.
13. CART - Use only cart, stand, tripod bracket or table specified by the manufacturer or sold with the product.
When a cart is used, operate carefully to prevent the objects from tip-over.
14. SERVICING - Contact qualified personnel when servicing is needed. Servicing is required when this product has
been damaged in any way, for example, when the power cord or plug is damaged; liquid has been spilled on
the product; objects have fallen into the product; the product has been exposed to rain or moisture; the product
does not work normally; or the product has been dropped.
15. BATTERY - To prevent battery leakage which may result in bodily injury, property damage or damage to the unit,
please follow the instructions listed below when using the product’s remote control.
• Install all batteries correctly, with + and - signs matching the marks indicated.
• Do not mix batteries (old and new or carbon and alkaline, etc.)
• Remove batteries when the remote is not used for a long time.
16. WASTE - End-of-life units should be discarded in accordance with your local environmental regulations. For
disposal or recycling information, please contact your local authorities or the Electronic Industries
Alliances: www.eias.org

The lighting flash with arrowhead
symbol, within an equilateral triangle, is
intended to alert the user to the presence of
uninsulated ‘dangerous voltage’ within the
product enclosure that may be of sufficient
magnitude constitute a risk of electric shock
to humans.
The exclamation point within an equilateral
triangle is intended to alert the user to
the presence of important operating and
maintenance (servicing) instructions in the
literature accompanying the
appliance.
CAUTION!
TO REDUCE THE RISK OF ELECTRIC SHOCK, DO NOT
REMOVE THE COVER OF THIS UNIT. THERE ARE NO
USER SERVICEABLE PARTS INSIDE. REFER SERVIC-
ING TO QUALIFIED SERVICE PERSONNEL.
IMPORTANT FOR LASER PRODUCTS
1. CLASS 1 LASER PRODUCT
2. DANGER: Visible and invisible laser radiation when
open and interlock failed or defeated. Avoid direct
exposure to beam.
3. CAUTION: Do not open the top cover. There are no
user serviceable parts inside the unit; leave all servicing
to qualified service personnel.
CAUTION!
THIS PRODUCT UTILIZES A LASER.USE OF
CONTROLS OR ADJUSTMENTS OR PERFORMANCE
OF PROCEDURES OTHER THAN THOSE SPECIFIED
HEREIN MAY RESULT IN HAZARDOUS RADIATION
EXPOSURE. DO NOT OPEN THE COVER AND DO NOT
REPAIR YOURSELF. REFER SERVICING TO
QUALIFIED SERVICE PERSONNEL.
WARNING
TO REDUCE THE RISK OF FIRE, ELECTRIC SHOCK
OR PRODUCT DAMAGE, DO NOT EXPOSE THIS
APPARATUS TO MOISTURE AND ENSURE THAT
OBJECTS FILLED WITH LIQUIDS, SUCH AS VASES,
SHALL BE PLACED AWAY FROM THE UNIT.
CAUTION!
• CD-R/RW discs recorded using a personal computer or
a CD Recorder may not play if the disc is damaged or
dirty, or if there is dirt or condensation on the player lens.
• Unfinalized CD-R/RW discs can be played, but not all
time information (playing time, etc.) will be displayed.
• Check the copyright laws in your country before record-
ing from DVD VIDEO, SVCD, Video CD, Audio CD, MP3
and JPEG discs. Recording of copyrighted material may
infringe copyright laws.
CAUTION! – POWER BUTTON
Disconnect the main plug to shut the power off completely.
The POWER button in any position does not disconnect
the main line. Power can be controlled from the remote.
PRODUCTS WITH 525P/625P PROGRESSIVE SCAN
OUTPUTS NOTICE REQUIREMENTS
“CONSUMERS SHOULD NOTE THAT NOT ALL
HIGH DEFINITION TELEVISION SETS ARE FULLY
COMPATIBLE WITH THIS PRODUCT AND MAY CAUSE
ARTIFACTS TO BE DISPLAYED IN THE PICTURE. IN
CASE OF 525 OR 625 PROGRESSIVE SCAN PICTURE
PROBLEMS, IT IS RECOMMENDED THAT THE USER
SWITCH THE CONNECTION TO THE ‘STANDARD
DEFINITION’ OUTPUT. IF THERE ARE QUESTIONS
REGARDING THE TV SET COMPATIBILITY, PLEASE
CONTACT OUR CUSTOMER SERVICE CENTER.”
LEGAL NOTICES REGARDING MACROVISION
PROPERTY RIGHTS
“U.S. Patent Nos. 4,631,603; 4,577,216; 4,819,098;
4,907,093; and 6,516,132.”
“This product incorporates copyright protection technology
that is protected by U.S. patents and other intellectual
property rights. Use of this copyright protection technology
must be authorized by Macrovision, and is intended for
home and other limited viewing uses only unless otherwise
authorized by Macrovision. Reverse engineering or
disassembly is prohibited.”
This symbol indicates that used electri-
cal and electronic equipment requires
special handling when the unit is to be
discarded. Please send the unwanted
unit to a waste collection/recycling
center near you to help protect our
environment.
SHOWVIEW is a registered trademark of Gemstar Development
Corporation. The SHOWVIEW system is manufactured under
licence from Gemstar Development Corporation.
▀ Manufactured under license from Dolby Laboratories. ‘Dolby’
and the double-D symbol are trademarks of Dolby Laboratories.
▀ DivX, DivX Certified, and associated logos are trademarks
of DivX, Inc. and are used under license.
▀ HDMI, the HDMI logo and High-Definition Multimedia
Interface are trademarks or registered trademarks of HDMI
Licensing LLC.
Warning, Caution and Others
Table of Contents
Important Safety Instructions .........................2
Warning, Caution and Others .........................3
Table of Contents .............................................4
DISC INFORMATION
Recordable Discs ............................................................. 6
Recording Time ................................................................ 6
Playable Discs .................................................................. 7
Unplayable Discs .............................................................. 7
Region Code .................................................................... 7
Disc Preparation (Formatting) .......................................... 8
Disc Finalization ............................................................... 8
Title & Chapter ................................................................. 8
CONNECTIONS
DVD Recorder Overview ..................................9
Front View ........................................................................ 9
Display Window .............................................................. 10
Rear View ....................................................................... 10
Remote Control ..............................................11
Preparing Remote Control .............................................. 12
Remote Control Signal ................................................... 12
Connecting the DVD Recorder ......................13
Step 1: Connecting Antenna/Satellite Cables ................. 14
Step 2: Connecting the Video Cable .............................. 14
Step 3: Connecting the Audio Cable .............................. 17
Step 4: Connecting the Decoder (If Required) ............... 20
Step 5: Connecting the Power Cord ............................... 21
SYSTEM SETTINGS
Easy Setup ......................................................22
Set Language ................................................................. 22
Set Clock Format ............................................................ 22
Set System Date ............................................................ 22
Set System Time ............................................................ 22
Set TV Channels ............................................................ 23
Complete Settings .......................................................... 23
Setup Menu .....................................................23
System ........................................................................... 24
Date/Time ....................................................................... 24
Tuner .............................................................................. 24
Video Input/Output ......................................................... 25
Audio Output .................................................................. 26
Recording / Playback ..................................................... 26
DVD Movie ..................................................................... 26
Channel Editor ................................................28
Moving up/down TV Channels ....................................... 29
Inserting TV Channels .................................................... 29
Swapping TV Channels .................................................. 29
Renaming TV Channels ................................................. 30
Enabling/Disabling TV Channels .................................... 30
Setting Decoder .............................................................. 30
Setting Channel Frequency ............................................ 30
ShowView® Programming System ................31
GETTING STARTED
Contents Menu ...............................................32
Screen Overview ........................................................... 32
Previewing Files via Contents Menu ............................. 33
On-Screen Input Keypad ...............................34
Screen Overview ........................................................... 34
Entering New Title/File Name ........................................ 35
Easy Guider ....................................................36
Screen Overview ........................................................... 36
Using Easy Guider: Play ............................................... 37
Using Easy Guider: Record ............................................ 38
Using Easy Guider: Timer Record .................................. 39
Using Easy Guider: Copy ............................................... 41
Using Easy Guider: Disc Tools ....................................... 43
RECORDING
Recording from TV .........................................47
Recording from External Sources ................48
VCR/V8 Camcorder/DVD Player .................................... 48
DV (Digital Camcorder) .................................................. 48
Recording Options .........................................50
One-Touch Recording .................................................... 50
Adding New Sessions .................................................... 50
Playing Last Recorded Title (HDD) ................................ 50
Using Chapter Mark ....................................................... 50
TIMER RECORDING
Timer Record Menu ........................................53
Info Screen 1 .................................................................. 53
Info Screen 2 .................................................................. 53
Setting Timer Program ..................................54
Date/Time Mode ............................................................. 54
ShowView® Mode ........................................................... 55

TIME SHIFT
Pause Live TV .................................................57
Record & Play .................................................57
PLAYBACK
Navigation Menu ............................................58
Screen Overview ............................................................ 58
Playback Options ........................................................... 59
Playback (Disc) ..............................................62
DVD-Video/VCD/SVCD .................................................. 62
Audio CD ........................................................................ 62
Media Files (Video/Music/Picture) .................................. 62
Picture with Music .......................................................... 63
Playback (HDD) ..............................................64
DIGITAL VIDEO SUP
PORT
MPEG-4 Videos ...............................................65
Supported Formats ......................................................... 65
Playing MPEG-4 Files .................................................... 65
DivX® VOD .......................................................66
Navigation Menu ............................................67
EDITING
Edit Menu ........................................................69
Screen Overview ............................................................ 69
Editing Titles ...................................................70
Rename Title .................................................................. 70
Protect Title .................................................................... 70
Overwrite Title ................................................................ 71
Split Title ......................................................................... 71
Merge Titles .................................................................... 72
Erase Title ...................................................................... 72
Set Title Thumbnail ......................................................... 72
Editing Chapters ............................................73
Insert Chapter Mark ........................................................ 73
Remove Chapter Mark ................................................... 73
Hide Chapter .................................................................. 73
Show Chapter ................................................................. 74
COPYING
One-Touch Copying .......................................76
TROUBLESHOOTING
SPECIFICATIONS
GLOSSARY
RECOMMENDED DISC LIST

6
Disc Information
Unlike traditional VCR (video casette recorder), DVD
recorder comes with a wider variety of media to
choose from for either playback or recording. Please
check the following sections before buying discs or
recording.
Recordable Discs
Type Logo Information
DVD-R • DVD+VR mode
• Write-Once
DVD-RW • DVD+VR mode
• Rewritable
DVD+R • DVD+VR mode
• Write-Once
DVD+RW • DVD+VR mode
• Rewritable
DVD+R DL
(Double
Layer)
• DVD+VR mode
• Write-Once
The DVD-R/DVD-RW/DVD+R/DVD+RW/DVD+R DL
(Double Layer) logos belong to the respective entities
holding the trademarks.
For best results, use discs with the above logos.
Recording Time
Type Mode Time
DVD
(4.7GB)
HQ 1 hour
SP 2 hours
LP 3 hours
EP 4 hours
SLP 6 hours
Just Fit Variable
DVD+R DL
(Double
Layer)
(8.5GB)
HQ 114 minutes
SP 224 minutes
LP 332 minutes
EP 443 minutes
SLP 665 minutes
Just Fit Variable
HDD
(160GB)*
HQ 34 hours
SP 68 hours
LP 101 hours
EP 135 hours
SLP 203 hours
Just Fit Variable
HDD
(250GB)*
HQ 55 hours
SP 108 hours
LP 160 hours
EP 214 hours
SLP 321 hours
Just Fit Variable
HDD
(320GB)*
HQ 70 hours
SP 139 hours
LP 206 hours
EP 275 hours
SLP 413 hours
Just Fit Variable
The ‘Just Fit’ mode is available for timer recording only.
The table lists the minimum recording time available on
each medium.
* depending on the model.

7
Disc Information
Playable Discs
Type Logo Information
DVD-Video
• Pre-recorded
DVD-Video discs
(The region code is
printed on the rear
panel of recorder.)
DVD-R
• Recorded in DVD-
Video format and
finalized
• With JPEG/BMP
files
• With MP3/WMA/
WAV files
• With MPEG-1 files
• With MPEG-2 files
(.VOB/.DAT/.MPG)
• With MPEG-4 files
(.AVI/.DIV*/.DIVX*)
DVD-RW
DVD+R
DVD+RW
DVD+R DL
(Double
Layer)
CD-R
• With JPEG/BMP
files
• With MP3/WMA/
WAV files
• With MPEG-1 files
• With MPEG-2 files
(.VOB/.DAT/.MPG)
• With MPEG-4 files
(.AVI/.DIV*/.DIVX*)
CD-RW
Video CD
(VCD)
• CDs for video files
recorded with CD
sound, VHS quality,
MPEG-1 compres-
sion technology
Super Video
CD (SVCD)
• CDs for video
files recorded with
CD sound, SVHS
quality, MPEG-2
compression
technology
Audio CD
• CDs for music files
recorded in digital
signal, featuring
better audio quality,
less distortion and
less deterioration of
audio quality over
time
The DVD-R/DVD-RW/DVD+R/DVD+RW/DVD+R DL
(Double Layer) logos belong to the respective entities
holding the trademarks.
For best results, use discs with the above logos.
Other types of discs may not be played back with the
intended results on this DVD recorder. Do not use
irregular-shaped discs (e.g. heart-shaped), as these
can damage the recorder.
It may not be possible to play CD-R, CD-RW, DVD-R,
DVD-RW, DVD+R, DVD+RW discs in all cases due to
the type of disc or condition of the recording.
* depending on the model.
If an MP3 file name contains two-byte characters (e.g.
Chinese characters), it may not be displayed correctly.
This DVD recorder does not display ID3 (for MP3) and
WMA tags.
This DVD recorder does not support mp3PRO files.
The MP3 file bitrates supported by this DVD recorder
are: 32Kbps - 320Kbps.
This DVD recorder does not support WMA lossless
files and WMA files protected by DRM (digital rights
management) technology.
Unplayable Discs
This DVD recorder does not play back the disc types
listed below. If you try to play back these discs,
excessive noise may cause damage to your ampli-
fiers or speakers. If an unplayable disc is inserted,
an ‘Invalid Disc’ error message will appear on screen
after attempts of trying to play the disc fail.
• Unfinalized discs recorded on other DVD/CD
recorders
• DVD Audio discs
• KODAK PHOTO CDs
• DVD-Video discs with a region code not supported
by the recorder
• DVD-RAMs
• Data discs (e.g. CD-ROMs, DVD-ROMs) which do
not contain any type of files supported by this DVD
recorder
• Standard SACDs (Hybrid type of SACDs can be
played as normal Audio CDs.)
Region Code
This DVD recorder can only play DVD-Video discs
marked with the same region code as printed on its
rear panel or the all-region discs. If you try to play
discs with different region code(s), a message saying
‘Invalid Region Code’ will appear on screen.
Example of region code :
ALL

8
Disc Preparation
(Formatting)
If you use blank DVD-RW discs, you need to format
the discs before recording. After you insert a blank
DVD-RW disc, the disc preparation screen will
appear. Pressto select ‘Quick Preparation’ or ‘Full
Preparation’, then press ENTER.
• Quick Preparation
If you select this option, the recorder will format part
of the disc for your immediate recording. After the
recording is fi nished, you can continue recording or
play back the recorded title. If you wish to watch the
title on another DVD recorder, DVD player or PC,
you need to fi nalize the disc fi rst.
• Full Preparation
If you select this option, the recorder will format
the whole disc. The process will take a longer time
to complete. After formatting, you can repeatedly
use the disc for recording, and there is no need to
fi nalize the disc afterwards.
The preparation screen will also appear after you
erase a DVD-RW disc.
Disc Finalization
After recording or copying, you may need to fi nalize
your disc before it can be played back on another
DVD recorder, DVD player or PC. Please refer to the
following table for further information on discs you
use.
Type Finalization Note
DVD-R
Data
File -
Video
Title -
DVD-RW
Data
File -
Video
Title
When using a disc
formatted with ‘Quick
Preparation’ mode
When using a disc
formatted with ‘Full
Preparation’ mode
DVD+R
Data
File -
Video
Title -
DVD+RW
Data
File -
Video
Title -
DVD+R DL
(Double
Layer)
Data
File -
Video
Title -
: Not required : Required
Please note that you may not be able to play a fi nalized
disc on certain devices (e.g. older model DVD players)
due to technical incompatibility.
Only discs used to record video titles require fi naliza-
tion. Discs used to copy media fi les (such as MP3 or
JPEG fi les) are considered as data: there is no need to
fi nalize these discs.
Title & Chapter
For DVD-Video or other digital videos, disc contents
are usually divided into individual titles, which you
may preview using the disc menu. Some titles may
be further divided into a smaller unit called ‘chapter’.
To view the disc menu, press MENU on the remote
control.
Editing_00_03
Disc or HDD
During or after recording, you can create chapters by
inserting chapter marks in a video title. Depending on
the target medium you use, the number of maximum
chapters and titles you can add may vary. Please see
the table below for details.
Type Maxi. Title Maxi. Chapter
HDD 5994* -
DVD 49** 254
* For each title, you can create up to 999 chapters.
** For each title, you can create up to 99 chapters. But
you can only create a maximum of 254 chapters in one
disc.

9
Connections
The following sections introduce a step-by-step process to set up this DVD recorder. When more than one setup
option are listed at a specifi c stage, please refer to the option most suitable for your setup condition.
DVD Recorder Overview
Front View
13
13
12
4 DISPLAY window
Shows operation information
2 OPEN/CLOSE button
Opens or closes the disc tray
7 8 9 10 11 12
35
6
4
14
3 Disc tray
Holds discs securely during recording or
playback
5 HDD indicator
Lights when HDD (hard disk drive) is selected
as the target device
6 DVD indicator
Lights when DVD drive is selected as the target
device
7 HDD/DVD button
Changes DVD recorder’s current mode from
HDD (hard disk drive) to DVD and vice versa
8 SOURCE button
Selects equipment connected via line inputs
13 DV-LINK (IEEE 1394) jack
Connects digital camcorder
14 LINE IN (S-Video/Composite VIDEO &
AUDIO L/R) jacks
Connects the outputs of external equipment
via S-Video or composite video/audio cables
1 POWER ON/OFF button
Switches on the DVD recorder or switches
the unit to standby mode 9 RECORD button
Starts recording on current device
10 PLAY button
Starts playback on current device
11 STOP button
Stops playback or recording
12 PUASE/STEP button
Pauses playback or recording
*Appearance of the unit may vary slightly depending on the model.
When using the LINE IN jacks
By default, this DVD recorder automatically selects S-Video signal over the composite one when both input jacks are
used to connect to other devices. If you would like your videos to be imported from a specifi c source, you can either
change the default setting through Setup → Video Input/Output → Front AV Input, or use one set of the connec-
tions at a time.
Connections

10
Display Window
1 PLAY indicator
2 DVD indicator
3 SVCD indicator
4 VCD indicator
5 CDDA indicator
6 FILE indicator
12 Multi-information window
9 PAUSE indicator 14 CD-R/DVD-R indicator
13 DVD+RW indicator
11 TIMER RECORD indicator
10 RECORD indicator
8 DVD+R indicator
7 CD indicator
TIMER
DVD SVCD VCD CDDA CD +R
+RW
-R
-RW
FILE
12
21 3 4 5 6 7
8
13
14
15
9
10
11
15 CD-RW/DVD-RW indicator
Rear View
8 DIGITAL AUDIO OUT (COAXIAL) jack
Connects an amplifier or a receiver with a
digital input jack
7 DIGITAL AUDIO OUT (OPTICAL) jack
Connects an amplifier or a receiver with a
digital input jack
3 COMP OUT (COMPONENT) jacks
Connects the inputs of external equipment via
component video cables
6 HDMI DIGITAL OUT jack
Connects a TV or an AV amplifier (receiver)
with HDMI input jack (via HDMI cable)
1 VHF/UHF IN/OUT jacks
Connects antenna cables
2 AV OUTPUT (VIDEO/AUDIO L/R) jacks
Connects the inputs of external equipment
via composite video/audio cables
1
245
78
3
9
4 SCART INPUT jack
Connects the output of external equipment
via SCART cable
5 SCART OUTPUT jack
Connects the input of external equipment
via SCART cable
9 AC IN terminal
Connects the power cord
1
*Appearance of the unit may vary slightly depending on the model.
(*for models designed with a detachable power cord)

11
Connections
Remote Control
1
2
3
4
5
6
7
8
9
10
11
12
13
14
15
16
17
18
19
20
21
22
23
24
25
26
27
28
29
30
31
1 POWER button
Switches on the DVD
recorder or switches the
unit to standby mode
2 DISPLAY button
Displays disc/HDD
information
3 Alphabet & Number
buttons
4 TIMER button
Displays Timer Record
menu
5 CONTENTS button
Displays Contents Menu
6 TOP MENU button
Displays DVD top menu
(if available)
7 Direction ( )
& ENTER buttons
8 SETUP button
Displays Setup menu
9 HDD/DVD button
Switches to DVD or HDD
10 STOP button
Stops current operation
11 PREVIOUS button
Goes to previous item
(file/track/chapter)
13 EDIT button
Displays Edit menu
12 F. R. (Rewind) button
Reverses playback
14 RECORD button
Starts recording
15 AUDIO button
Displays and switches
audio options
16 OPEN/CLOSE button
Opens or closes disc tray
17 SOURCE button
Selects input source
18 TV (MODE) button
Switches to TV view or
SCART source view (decoder)
19 CH + / CH - button
Changes TV channels
20 ShowView button
Displays the ShowView
system menu
21 GUIDER button
Displays Easy Guider menu
22 MENU button
Displays disc menu
23 NAVI. button
Displays Navigation menu
24 TIME SHIFT button
Pauses live TV program
25 PLAY button
Starts playback
26 PAUSE/STEP button
Pauses current operation or
starts playback frame by frame
27 NEXT button
Goes to next item
(file/track/chapter)
28 F. F. (Fast Forward) button
Fast forward playback
29 COPY button
Starts copying
30 SUBTITLE button
Displays and switches
subtitle options
31 ANGLE button
Displays and switches
angle options
Using the Remote Control
Apart from the basic playback and recording buttons, the unit’s remote control is also designed with a set of quick-
access function buttons: SETUP, GUIDER, TIMER, NAVI. and CONTENTS*. Pressing these buttons will lead you
directly to their respective menus. If you would like to exit the screen, simply press the function button again.
(*The ‘CONTENTS’ button is available in HDD models only.)

12
Preparing Remote
Control
Open the battery compartment and insert the bat-
teries. Make sure the polarities (+ and -) match the
markings inside the remote control.
Using rechargeable batteries is not recommended.
Remote Control
Signal
The remote has an operating range of approximately
7.5 M, and works best when pointed directly at the
unit horizontally at angle up to 30° from the sensor
window of the DVD recorder.
30
0
7.5

13
Connections
Connecting the DVD Recorder
Do not plug the AC power cord into the outlet until all other connections are made.
It is recommended that you connect VIDEO OUT jack of the DVD recorder directly to the video input of your TV.
Connecting VIDEO OUT jack of this recorder to a TV via a VCR may cause a viewing problem when playing
a copy-protected disc. The same viewing problem may also occur when connecting the recorder to a TV/VCR
combo system.
Connection Method
Wall → DVD Recorder → TV
Wall → DVD Recorder → VCR → TV
Before you start
► Check whether all the accessories are included in your package box.
Remote Control (1) Batteries (2)
Audio/Video Cable (1) Power Cord (1) (*depending on the model)
HDMI Cable (1) Blank DVD Disc (1) (*depending on the model)
Antenna Cable (1) User’s Manual (1)
Quick Start Guide (1)

14
Step 1: Connecting Antenna/Satellite Cables
Wall Outlet DVD Recorder TV
1 Use an antenna cable to connect the RF IN jack on the DVD recorder to the antenna outlet on the wall.
2 Use an antenna cable to connect the RF OUT jack on the DVD recorder to the RF IN jack on the television.
(Please note that this serves as a pass-through only.)
SCART IN (AUX/DECODER)
TUNER AV OUTPUT
T V
Wall
RF IN
RF OUT
RF IN
TUNER
Step 2: Connecting the Video Cable
The table below lists some of the options for establishing the video and audio connections of this DVD
recorder. For reference, fi rst check the top row to select a type of video cable you wish to use; then look
down the column to see what types of audio connections are applicable. Select only one of the applicable
options to connect your DVD recorder to other devices unless specifi ed otherwise.
Video
Audio HDMI Cable Component
Video Cable SCART Cable Composite Video
Cable
HDMI Cable *
SCART Cable *
Composite Audio
Cable
Digital Audio Cable
(Optical)**
Digital Audio Cable
(Coaxial)**
* The HDMI and SCART cables can transmit video and audio signals at the same time. Normally, if you use these two
cables for video connection, you do not need to establish an additional analog audio connection.
** If you wish to enjoy digital audio sound, you need to establish the digital audio connection (via an optical or a coaxial
cable) whatever video cable you use.

15
Connections
Option 1 Using HDMI Cable
If your TV has an HDMI input, use an HDMI cable to connect the HDMI OUT jack on the DVD recorder
to the HDMI IN jack on the television.
The HDMI cable can transmit both video and audio signals at the same time. If you use an HDMI cable to connect
to your TV, it is recommended that you remove all other audio/video connections (component or composite cables)
between the DVD recorder and your TV to enjoy better audio/video quality.
However, if you wish to play back discs recorded in DTS format, you need to use an extra optical or coaxial cable
to connect the DVD recorder to your TV or to a stereo amplifi er/receiver.
SCART IN (AUX/DECODER)
T V
HDMI IN
HDMI Cable
HDMI Out
TUNER
HDCP (High-bandwidth Digital Content Protection)
The DVD recorder supports the HDCP technology, which is developed to prevent copying of the content transmitted
via the HDMI cable. After all connections are made, the recorder will start checking whether the connecting TV (or
other display device) is HDCP-compliant. If the verifi cation process fails, a pop-up window will appear. Press and
ENTER to try again. Otherwise, disconnect the HDMI cable and use other types of video cable for connection. If you
select ‘EXIT’ without disconnecting the cable, or if you do not select any option in 10 seconds, the pop-up window will
disappear. Next time when you try to watch HDCP-encrypted content, there will be no image shown on screen.
After all connections are made, make sure related system settings are correct on the Setup menu.
• Setup → Video Input/Output → HDMI Resolution: Select a resolution mode supported by your TV.
• Setup → Video Input/Output → HDMI Output: Select what types of signal you wish to be transmitted via HDMI cable.

16
Option 2 Using Component Cable
If your TV has a component video input, use a component video cable (with green, blue and red
ends) to connect the COMPONENT OUT jack on the DVD recorder to the COMPONENT IN jack on the television.
SCART IN (AUX/DECODER)
Component video cable
Y
CB / PB
CR / PR
COMPONENT IN
Y
CB / PB
CR / PR
T V
Green
Blue
Red
Green
Blue
Red
TUNER
If your television supports ‘Progressive Scan’ mode, you may adjust the ‘Component Output’ setting accordingly for
better results. Please go to Setup Video Input/Output Video Output, and select ‘Component-Progressive’. You
can activate the Setup menu directly by pressing SETUP button on your remote control.
Option 3 Using SCART Cable
If your TV has a SCART input, use a SCART cable to connect the SCART OUT jack on the DVD
recorder to the SCART IN jack on the television.
SCART IN (AUX/DECODER)
T V
SCART IN
TUNER
SCART OUT

17
Connections
Option 4 Using Composite Cable
If your TV has a composite video input, use a composite video cable to connect the VIDEO
(COMPOSITE) OUT jack on the DVD recorder to the VIDEO (COMPOSITE) IN jack on the television.
SCART IN (AUX/DECODER)
Video cable
TV
VIDEO
R
L
R
L
VIDEO IN
AUDIO IN
TUNER
Step 3: Connecting the Audio Cable
Option 1 Using HDMI Cable
If your TV has an HDMI input, use an HDMI cable to connect the HDMI OUT jack on the DVD recorder to
the HDMI IN jack on the television.
After all connections are made, make sure related system settings are correct on the Setup menu. If there is still no
sound, go to SetupAudio OutputHDMI Audio and set ‘PCM’ as the audio output mode.
If you select to use the HDMI cable in Step 2, set the HDMI output mode to ‘Video + Audio’ via SetupVideo Input/
OutputHDMI Output.
Option 2 Using SCART Cable
If your TV has a SCART input, use a SCART cable to connect the SCART OUT jack on the DVD
recorder to the SCART IN jack on the television.

18
Option 3 Using Composite Cable
Use a composite audio/video or a composite audio cable (via the red and white ends) to connect the AUDIO OUT
jack on the DVD recorder to the AUDIO IN jack on a stereo amplifi er, a receiver or a TV.
White
SCART IN (AUX/DECODER)
Audio cable
IN
RIGHT
DVD
LEFT
VIDEO
R
L
Stereo audio amplifier
or receiver
Red
T V
Red
Red
White
White
or
R
L
VIDEO IN
AUDIO IN
TUNER

19
Connections
Option 4 Using Digital Audio Cable
1 Using an Optical Cable
Use an optical cable to connect the DIGITAL OUT (OPTICAL) jack on the DVD recorder to the digital optical
input on a stereo amplifi er or a receiver.
SCART IN (AUX/DECODER)
IN
OPTICAL
COAXIAL
Optical digital cable
OPTICAL COAXIAL
Digital Out (Optical)
DIGITAL AUDIO DEVICE
TUNER
2 Using a Coaxial Cable
Use a coaxial cable to connect the DIGITAL OUT (COAXIAL) jack on the DVD recorder to the coaxial digital
input on a stereo amplifi er or a receiver.
SCART IN (AUX/DECODER)
IN
OPTICAL
COAXIAL
OPTICAL COAXIAL
Digital Out (Coaxial)
DIGITAL AUDIO DEVICE
Coaxial digital cable
TUNER

20
Step 4: Connecting the Decoder (If Required)
For PAY-TV/CANAL+ subscribers, you will need to connect an additional decoder to your TV and DVD
recorder.
1 Refer to Step 1 to connect your DVD recorder to the antenna outlet on the wall, and then to the RF IN jack on the
television, if you have not established the connection.
2 Use a SCART cable to connect the SCART IN jack on the DVD recorder to the SCART OUT jack on the CANAL+
decoder.
3 Use a SCART cable to connect the SCART OUT jack on the DVD recorder to the SCART IN jack on the televi-
sion.
SCART IN (AUX/DECODER)
SCART OUT
Wall
RF IN
T V
RF OUT
SCART
OUT
RF IN SCART IN
CANAL+ Decoder
Completed in Step 1
TUNER
SCART
IN
During recording, if you have problem watching programs imported via decoder, you can press TV (MODE) to switch to
the ‘SCART Bypass’ mode. However, you need to fi rst activate the feature through SetupVideo Input/Output TV
MODE.
Setting TV MODE/SCART Bypass (p.25)
Depending on the cable manufacturers, the SCART cable you use may not be able to detect all signals transferred via
this connection. If you have activated the ‘SCART Bypass’ mode through the Setup menu, and still have problem using
the feature, try to use a new SCART cable to connect the decoder to your DVD recorder.
This manual suits for next models
7
Table of contents
Other LiteOn DVD Recorder manuals

LiteOn
LiteOn LVW-5045 User manual

LiteOn
LiteOn LVW-5115GHC+ User manual

LiteOn
LiteOn LVW-5002 User manual

LiteOn
LiteOn LVC-9015G User manual

LiteOn
LiteOn DD-A100X User manual

LiteOn
LiteOn LVW-5006 User manual

LiteOn
LiteOn DD-A300G User manual

LiteOn
LiteOn LVW-5001 User manual

LiteOn
LiteOn LVW-5006 User manual

LiteOn
LiteOn LVW-5005X User manual
Popular DVD Recorder manuals by other brands

Philips
Philips DVDR5350H Specifications

ADS Technologies
ADS Technologies Instant Video PCI user guide

Pioneer
Pioneer DVR-54HX-S Operating instructions and owner's manual

Panasonic
Panasonic Diga DMR-ES15EB operating instructions

Pioneer
Pioneer DVR-520H operating instructions

Sharp
Sharp DV-RW370S Operation manual