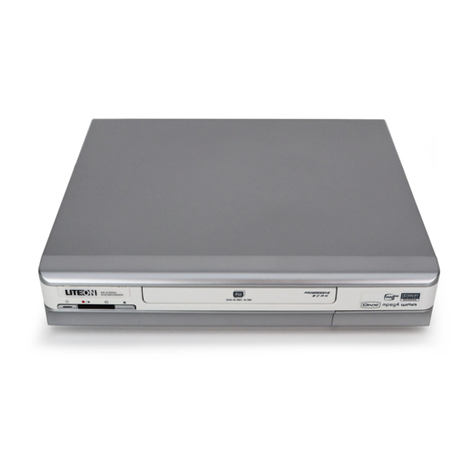
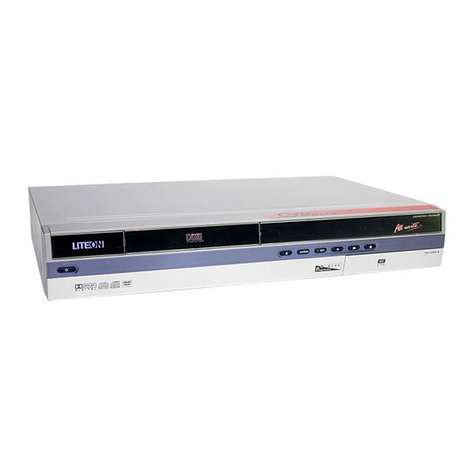
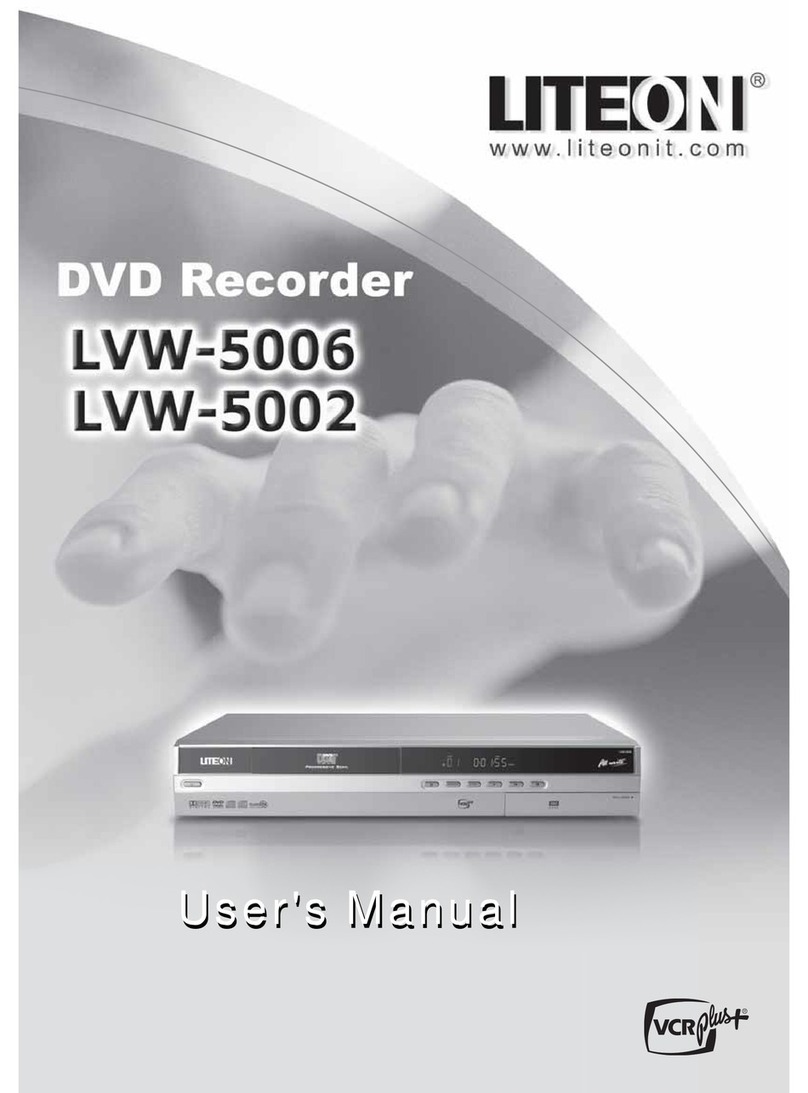
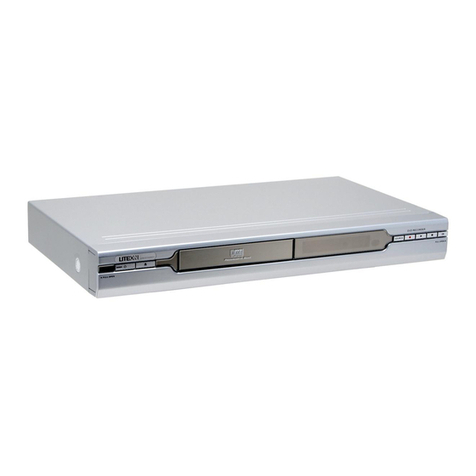
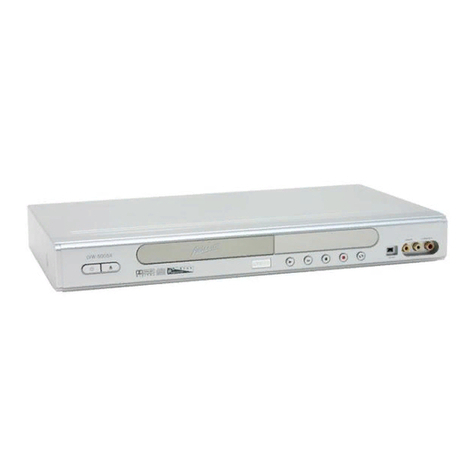
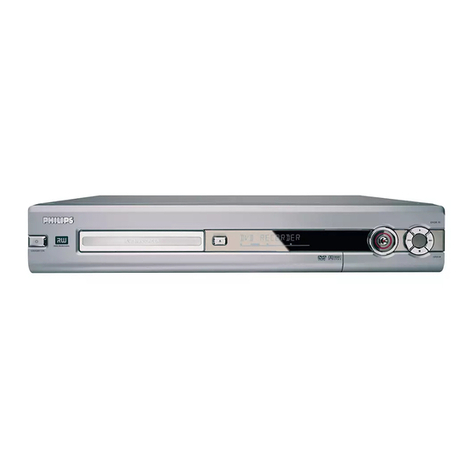
LiteOn LVW-5006 User manual

User's Manual
User's Manual
All manuals and user guides at all-guides.com
all-guides.com

1
Table ofcontents
Getting started
A ccessories ..........................................................................1
Im portantsafety instru c tions ..............
.................................2
Warnings,cautions and others ............................................3
Disk inform ation ..........
........................................................4
Contro ls and displays
Rem ote contro l ....................................................................5
Frontpanelconnections........................
..............................6
Display window ...................................................................6
R earpanelconnections ......................................................7
Connecting up
Connecting the antenna cable and television ....................8
Forbetterpicture .............................................................
....9
C om ponent out.........................................................9
S-Video out..................................
.............................9
Forbettersound ................................................................10
C onnection t
o a stereo audio am plifierorreceiver ......10
C onnection to a digitalaudio device ..........................10
Digitaloutoptical.....................................................10
Digitaloutcoaxial....................................................10
C onnecting a satellite box .......
..........................................11
Quick setup
Initialsetup ........................................................................12
A spectra tio..................
......................................................12
Video outptut...........................................
..........................12
Audio..........................................................................
.....12
TV channelsetup
Autom atic TV channelsearch ...........................................13
Adding ordeleting TV channelm anually.........................13
Fine tuning TV channelm anually....
.................................13
Sw apping TV channelm anually (follow ing TV)...............13
ChannelEditing ..................................
...............................14
Setting up the VCR Plus+ ®system ..................................15
R ecording
Before recording ...............................................................16
R ecording television program s ............................
.............16
Adding new recordings .....................................................17
Changing chapterintervals........................
.......................17
Playback with the DVD m enu ...........................................17
R ecording fro m a VCR orV8 /Hi8 /DV .............
................18
The frontpaneland rearpanelconnection .................18
DV recording ...................................................
..................19
Use“E asy Guider”to record DV signal......................19
“O ne touch record” to record the DV signal.....................20
DV contro l ................
..........................................................20
R ecord on CD-R/CD-RW discs ....................................
........21
Create a correctdisc format.....................................21
VCD/SVCD recording .......................................
........21
Audio CD recording ..................................................21
Timerrecording
Setting the timer................................................................22
R ecording TV program s with VCR Plus+ ®system .............23
Playback
B asic playback ..................................................................24
POW ER,OPEN/CLOSE,P LAY,F.F.,REW ............24
NEXT,PREVIOUS .........
..........................................24
PAUSE/STEP,STOP,DISPLAY ..............................24
TO P MENU,MENU ....................
.............................24
N avigation operation .........................................................25
SLOW ,SEARCH .......
.............................................25
A-B REPEAT,SUBTITLE ..........................................25
AUDIO,ANG LE .......
................................................25
INFORMATION ...................................................
.....25
JPEG/MP3file and A udio CD playback
JPEG file playback ............................................................26
MP3file playback .............................
.................................26
Audio CD playback ............................................................26
Slide show .
.................................................................26
Editing
DVD m enu and Editmenu.................................................27
Nam ing a title.......................................
...........................27
Protecting a title................................................................27
O verw ri
te a title.................................................................27
Erasing a title......................
............................................27
Easy Guider
Playback ............................................................................28
R ecord on DVD ......................
............................................28
R ecord on CD-R/CD-RW ....................................................
.29
VCD/SVCD/Audio CD recording ...............................29
Erase ............................................................
...................30
Finalize ..............................................................................30
GUIoperation
Firm w a re update
Glossary
Specifications
Troubleshooting Guide
A ccessories
Please check and identify the supplied accessories.
1x R em ote contro l 1x AC Pow ercord 2x B atteries
All manuals and user guides at all-guides.com

2
Im portantsafety instructions
1) Read instru c tions.R ead allthe safety and operating
instructions before operating the product.
2) Retainin s tru c tions.K eep the safety and operating
instructions forfuture reference.
3) Heed warnings.A dhere to allwarnings on the productand
in the operating instructions.
4) Follow instru c tions.Follow alloperating and use
instructions.
5) Cleaning -U nplug this productfrom the walloutletbefore
cleaning.Donotuse liquid cleaners oraerosolcleaners. Use
a dam p cloth forcleaning.
6) Attachm ents -Donotuse attachm ents notrecom m ended
by the productm anufactureras they maycause hazards.
7) WaterandMoisture -Donotuse this productnearwater
forexam ple,neara bathtub,w ashbow l,kitchen sink,or
laundry tub,in a wetbasem ent,orneara sw imming pool.
8) Accessories -Donotplace this producton an unstable
cart,stand,tripod,bracket,ortable.The productmayfall,
causing serious injury to a child oradult,and serious dam age
to the product.Use only with a cart,stand,tripod,br
acket,or
table recom m ended by the m anufacturerorsold with the
product.Anym ounting ofthe productshould follow the
m anufacturer’s instructions and should use a m ounting
accessory recom m ended by the m anufacturer.
9) CART-A productand cartcom bination should be moved
with care.Quick stops,excessive force,and uneven surfaces
maycause the productand cartcom bination to overturn.
10) Ventilation -Slots and openings in the cabinetprovide
ventilation,ensure reliable operation ofthe product,and
protectitfrom overheating.Donotblock orcoverthese
openings.The openings should neverbe blocked by placing
the producton a bed,sofa,rug,
orothersimilarsurface.Do
notplace this productin a built-in installation such as a
bookcase orrack unless properventilation is provided orthe
m anufacturer’s instructions have been adhered to.
11) Pow erSources-This productshould be operated only from
the type ofpow ersource indicated on the marking label.Ifyou
are notsure ofthe type ofpow ersupply to yourhom e,consult
yourproductdealerorlocalpow ercom pany.Forproducts
intended to operate f
rom battery pow er,orothersources,refer
to the operating instructions.
12) LO C A TION -The appliance should be installed in a stable
location.
13) N O NUSE PERIODS -The pow ercord ofthe appliance
should be unplugged from the outletw hen leftunused fora
long period oftime.
14) G rounding orPolarization -
•Ifthis productis equipped with a polarized alternating current
line plug (a plug having one blade widerthan the other),it
willfitinto the outletonly one way.This is a safety feature.If
you are unable t
o insertthe plug fully into the outlet,try
reversing the plug.Ifthe plug should stillfailto fit,contact
yourelectrician to replace yourobsolete outlet.Donot
defeatthe safety purpose ofthe
polarized plug.
•Ifthis productis equipped with a three-wire grounding type
plug,itwillonly fitinto a grounding type pow eroutlet.This is
a safety feature.Ifyou are unable to insertthe plug into t
he
outlet,contactyourelectrician to replace yourobsolete
outlet.Donotdefeatthe safety purpose ofthe grounding
type plug.
15) Pow er-C ord Protection -Power-supply cords should be
routed so thatthey are notlikely to be walked on orpinched
by item s placed upon oragainstthem ,paying particular
attention to cords atplugs,convenience receptacles,and the
pointw here they exitfrom the product.
16) OutdoorA ntenna G rounding -Ifan outside antenna or
cable system is connected to the product,be sure the
antenna orcable system is grounded so as to provide som e
protection againstvoltage surges and built-up static charges.
Article 810 ofthe NationalElectricalC ode,ANSI/N FPA 70,
provides information with regard to propergrounding ofthe
mastand supporting structure,grounding ofthe lead-in wire to
an antenna discharge unit,size ofgrounding conductors,
location ofantenna-discharge unit,connection to grounding
elect
rodes,and requirem ents forthe grounding electrode.
17) Lightning -Foradded protection forthis productduring a
lightning storm,orw hen itis leftunattended and unused for
long periods oftime,unplug itfrom the walloutletand
disconnectthe antenna orcable system .This willprevent
dam age
to the productdue to lightning and pow er-line surges.
18) Pow erLines -An outside antenna system should notbe
located in the vicinity ofoverhead pow erlines orotherelectric
lightorpow ercircuits,orw here itcan fallinto such pow er
lines orcircuits.W hen installing an outside antenna system ,
take extrem e care to keep itfrom touching such pow erlines
orcircuits;contactwith them mightbe fatal.
19) Overloading -Donotoverload walloutlets,extension cords,
orintegralconvenience receptacles.This can resultin a risk of
fire orelectric shock.
20) Objects and Liquids -D o notpush objects ofany kind
into thisproductthrough openings;they m ay touch
dangerous voltage points orshortoutparts,resulting ina
fire o r e lectric shock.Liquids ofany kind should notbe
used on oraround thisproduct.
21) Servicing -Donotattem ptto service this productyourself.
O pening orrem oving covers mayexpose you to dangerous
voltage orotherhazards.Referallservicing to qualified service
personnel.
22) D am age R equiring S ervice -U nplug this productfrom the
walloutletand referservicing to qualified service personnel
underthe follow ing conditions:
• W hen the pow ersupply cord orplug is dam aged,
•Ifliquid has spilled orobjects have fallen into the product,
•Ifthe producthas been exposed to rain orwater,
•Ifthe productdoes notfunction properly afterfollow ing the
operating instructions,contactLite-OnCustom erService for
technicalsupport.
•Ifthe producthas been dropped ordam aged in
any way,
•W hen the productexhibits a distinctchange in perform ance.
This indicates a need forservice.
23) Replacem entParts-W hen replacem entparts are
required,be sure the service technician uses replacem ent
parts specified by the m anufacturerorhaving the sam e
characteristics as the originalpart.U nauthorized substitutions
mayresultin fire,electric shock,
orotherhazards.
24) Safety C heck -U pon com pletion ofany service orrepairs to
this product,ask the service technician to perform safety
checks to determine thatthe productis in properoperating
condition.
25) Wallor C eiling M ounting -M ountthe productto a wallor
ceiling only as recom m ended by the m anufacturer.
26) H eat– K eep this productaw ay from heatsources,such as
radiators,heatregisters,stoves,oram plifiers.
27) Battery U sage –Battery leakage mayresultin bodily injury
ordam age to the unit. In orderto avoid battery problem s,
please follow these instructions.
•Installallbatteries correctly,with + and -aligned as marked
on the unit.
•D o notmix batteries (old/new ,carbon/alkaline,etc.).
• Rem ovebatteries w hen the unitis notused fora long time.
All manuals and user guides at all-guides.com

3
Warnings,cautions and others
THE FO LLO W ING APPLIES ONLY FO R U.S.A.
CAUTION!
This equipm enthas been tested and found to com ply with the
limits fora Class B digitaldevice,pursuantto part15 ofthe
FCC Rules.
These limits are designed to provide reasonable protection
againstharmfulinterference in a residenti
alinstallation.
This equipm entgenerates,uses and can radiate radio
frequency energy and,ifnotinstalled and used in accordance
with the instructions,maycause harmfulinterference to radio
com m unications. However,there is no guarantee that
i
nterference willnotoccurin a particularinstallation.Ifthis
equipm entdoes cause harmfulinterference to radio or
television reception,which can be determined by turning the
equipm entoffand on,the useris encouraged to
try to correct
the interference by one ormore ofthe follow ing m easures:
• R eorientorrelocate the receiving antenna.
•Increase the separation betw een the equipm entand
receiver.
• C onnectthe equipm entinto an outleton a circuitdifferent
fr
om thatto which the receiveris connected.
• C onsultthe dealeroran experienced radio/TV technician
forhelp.
IM PORTANT FO R LASER PRODUCTS
1)CLASS 1 LASER PRODUCT
2)DANGER:Visible and invisible laserradiation w hen open
and interlock failed ordefeated.Avoid directexposure to beam .
3)CAUTION:Donotopen the top cover.There are no user
serviceable parts inside the Unit;leave allservicing to qual
ified
service personnel.
CAUTION!
THIS PRODUCTUTILIZES A LASER.
USE OFCONTROLS ORADJUSTM ENTS ORPERFORM ANCEOF
PROCEDURES OTHER THAN THO SE SPECIFIED HEREIN MAY
RESULT IN HAZARDOUS RADIATIONEXPO SURE.
DO NOTO PEN TH E CO VER AND DO NOTREPAIR YO URSELF
REFER SERVICING TO QUALIFIED PERSO NNEL.
W ARNING:
TO REDUCE THE RISK OFFIRE,ELECTRIC SHOCK OR
PRODUCTDAMAGE,DO NOTEXPOSE THIS APPARATUS TO
MOISTURE AND ENSURE TH AT OBJECTSFILLE D WITH LIQUIDS,
SUCH AS VASES,SHALLBE PLACED AW AY FR O M TH E
APPARATUS.
The lighting flash with arrow head sym bol,
within an equilateraltriangle,is intended
to alertthe userto the presence of
uninsulated “dangerous voltage”w ithin the
product’s enclosure thatmaybe of
sufficientm agnitude to constitute a r
isk of
electric shock to hum ans.
The exclam ation pointwithin an equilat-
eraltriangle is intended to alertthe userto
the presence ofim portantoperating and
maintenance (servicing)instructions in the
literature accom panying the appl
iance.
CAUTION!–– P O W E R button
Disconnectthe mains plug to shutthe pow eroffcom pletely.
The POW ER button in any position does notdisconnectthe
main line. Powercan be controlled from the rem ote.
CAUTION!
TO REDUCE THE RISK OFELECTRIC SHO CK,
DO NOTREM OVE TH E CO VER OFTHIS UNIT.
THERE ARE NO USER SERVICEABLE PARTS INSIDE.REFER
SERVICING TO QUALIFIED SERVICE PERSONNEL.
M anufactured underlicense from Dolby Laboratories.
“Dolby”and the double-D sym bolare tradem arks ofDolby
Laboratories.
CAUTION!
• CD-R/RW discs recorded using a personalcom puterora CD
Recordermaynotplay ifthe disc is dam aged ordirty,orif
there is dirtorcondensation on the player’s lens.
•Unfinalized CD-R/RW discs can be played,butnotalltime
infor
mation (playing time,etc.)willbe displayed.
•Checkthe copyrightlaw s in yourcountry before recording
from DVD VIDEO,SVCD,Video CD,A udio CD,MP3and
JPEG discs.Recording ofcopyrighted materialmayinfringe
copyrightlaw s.
LegalNotices Regarding
M acrovision’s Property Rights
“U.S.PatentNos.4,631,603;4,577,216;4,819,098;4,907,093;
and 6,516,132.”
“This productincorporates copyrightprotection technology
thatis protected by U.S.patents and otherintellectual
property rights. Useofthis copyrightprotecti
on technology
mustbe authorized by Macrovision,and is intended for
hom e and otherlimited view ing uses only unless otherwise
authorized by Macrovision. Reverse engineering ordisas-
sem bly is prohibited.”
PRODUCTS WITH 525P PRO G RESSIVE SCAN OUTPUTS
NOTICE REQUIREMENTS
“CONSUMERS SHOULD NOTE TH AT NOT A LL HIGH DEFINITION
TELEVISION SETS ARE FU LLY CO M PATIBLE WITH THIS
PRODUCT AND M AY CAUSE ARTIFAC TS TO BE DISPLAYED IN
THE PICTURE. IN CASE OF 525 PROGRESSIVE SCAN PICTURE
PROBLEM S,IT IS RECOM M ENDED TH AT TH E USER SW ITC H
THE CONNECTION TO THE “STANDARD DEFINITION”OUTPUT.
IF THERE ARE Q UESTIONS REGARDING OUR TV SET COM PAT-
IBILITY W ITH TH IS MODEL525P DVD PLAYER,PLEASE
CONTACT
OUR CUSTOMER SERVICE CENTER.”
All manuals and user guides at all-guides.com

4
PlayableDisc typ es
Disc information
Video System (NTSC & PAL)
This DVD-Recordersupports both NTSC&PALsystem .
A spect Ratio
4:3 (LetterBox)Standard
4:3 Pan&Scan
16:9 (Wide-Screen)
Others
Audio :Appears atthe beginning ofa scene record with
multiple audio languages.
Subtitle : Appears atthe beginning ofa scene recorded
with multiple subtitle languages.
Angle: A ppears atthe beginning ofa scene recorded
from multiple angles.
AllWrite Technology (LVW -5006 m odelonly)
“ALL WRITE”technology m akes italrightto record on almost
allofthe recordable discs.(DVD+RW ,DVD+R,DVD-RW ,
DVD-R,CD-RW orCD-R discs)
Notes:
The DVD-Video/DVD+RW /DVD+R/Logos are tradem arks ofthe
respective com panys.
Forbestresultuse discs with the above logos and thatconform to
specifications.The unitcannotplay otherdiscs correctly.Donot
use irregularshaped discs (e.g.heart-shaped),
as these can
dam age the unit.
Itmaynotbe possible to play CD-R,CD-RW ,DVD-R,DVD-RW ,
DVD+R,DVD+RW in allcases due to the type ofdisc orcondition
ofthe recording.
Unplayabledisc types
The unitdoes notplayback discs listed below .Ifyou try to play
back these discs,excessive noise maycause dam age to
speakers.
1) U nfinalized discs from otherDVD-Recorder.
2) DVD-ROM ,DVD AUDIO,CD-ROM,PHOTO CD,SACD
3) DVD-RAM,DVD-VR format
Region C ode ofDVD-Video
This unitcan playback DVD-VIDEO discs com patible with
the region code is printed on the rearofthe unit.
Exam ples ofplayable DVD-VIDEO discs:
Notes:
AudioSystem
Dolby Digital LinearPCM
DTS (DigitalTheaterS ystem s)
R ecordableDisc typ es
Disc Types Logos C haracteristics
DVD-VIDEO This unit can playback DVD-Video discs and the
re g ion code is printed on the re a r ofthe unit.
DVD¡—
R/RW
DVD¡ˇ
R/RW
DVD¡—
R,DVD¡—
RW and DVD¡ˇ
R,DVD¡ˇ
RW ,discs
written in the DVD-Video form atand finalized.
Video C D (V C D )
SuperVideo CD (S V C D )
Video with CD sound,VHS quality & MPEG-1
com pression technology.
Audio CD (C D -DA) CD is recorded as aDigitalSignalwith better audio
quality, less distortion and less deterioration ofaudio
quality overtime.
CD-R/RW (J P E G / M P 3 ) This unit can play CD-R and CD-RW discs re c o rd e d
withAudio CD orVideo CD form at,orwith
JPEG /M P3 files.Close the sessions orfinalize th e
disc after re c o rd ing.
Disc Types Logos C haracteristics
DVD¡ˇ
R/RW DVD¡ˇ
R disc written in the DVD¡ˇ
VR form at.
DVD¡ˇ
RW disc written in the DVD¡ˇ
VR form at.
DVD¡—
R/RW
(LV W -5006 modelonly)
DVD¡—
R disc written in the DVD¡ˇ
VR form at.
DVD¡—
RW disc written in the DVD¡ˇ
VR form at.
CD¡—
R/RW
(LV W -5006 modelonly)
CD¡—
R/CD¡—
RW disc writte n in th e MPEG1or
MPEG2video form atorwritte n in PC M Audio mode.
“D V D Dual” & “AllWrite”
(LV W -5006 modelonly)
“D V D Dual”--Written on both DVD¡ˇ
R/DVD¡ˇ
RW /
DVD¡—
R/DVD ¡—
RW disc.
“AllWrite” – Written on allre c o rd a b le DVD disc and
CD¡—
R/CD-RW disc.
All manuals and user guides at all-guides.com

5
C ontrols and displays
The Rem oteContro l
1) O pen/Close button ( O PEN/CLOSE)
2) C H button (C hannel)
3) D isplay button (DISPLAY)
4) S etup button (SETUP)
5) Top m enu button
6) E asy Guiderbutton ( Guider)
7) P ause/Step button ( PAUSE/STEP)
8) P lay button ( PLAY)
9) F.F./REW .button( F.F/ REW .)
10) S ource buttons (SOURCE)
11) R ecord button (RECORD)
12) P ow erbutton ( PO W ER)
13) N um bered button (1~9,0)
14) M enu button (MENU)
15) C ursor(STWX),Enterbutton (ENTER)
16) N avigation button (NAVI)
17) N ext/Previous button
( NEXT/ PREVIOUS)
18) S top button ( STO P)
19) E ditbutton (EDIT)
20) Timerbutton (TIMER)
Rem oteContro l
To installb atteries
yO pen the battery com partm entand
insertthe batteries.Makesure the
polarity (+ and -)matches the marks
inside the rem ote control.
yDonotuse rechargeable type batteries.
Rem ote sensor
The rem ote has a range of
approximately 3M and works
bestw hen pointed directly at
the unit.(atangles up to 30°
from the frontofthe unit)
All manuals and user guides at all-guides.com
all-guides.com

6
C ontrols and displays
Frontpanelconnections
Display Panel
Display w indow function
1) P lay indicators
2) D V D indicators
3) S V C D indicators
4) V C D indicators
5) C D indicators
6) M P 3 indic a to rs
7) J P E G indicators
8) R W indicators
DVD+RW indicators (LVW -5002,LVW -
5006 m odel)
DVD-RW indicators (LVW -5006 m odel)
CD-RW indicators (LVW -5006 m odel)
9) R indicators
DVD+R indic a to rs (LVW -5002,LVW -
5006 m odel)
DVD-R indicators (LVW -5006 m odel)
CD-R indicators (LVW -5006 m odel)
10) R ecord indic a to rs
11) P au s e indicators
12) M ulti-inform ation w indow
13) Timerrecording m ode
Nam esofparts and contro ls
1) P O W E R O N / O F F
Turns the recorderon and off.
2) D IS C T R A Y
To accepta disc.
3) D IS P L A Y
O peration indicators are displayed here.
4) O P E N / C L O S E
O pens orcloses the disc tray.
5) SOURCE
Selectequipm entconnected to the line inputs.
6) RECO RD
Starts recording.
7) P L A Y
Plays a disc.
8) P A U S E
Pauses playing orrecording a disc.
9) S T O P
Stops playing orrecording a disc.
1 0 ) D V -L IN K (IE E E -1 3 9 4 ) J a c k
C onnects digitalvideo cam corderwith this DV jack.
11) L INE IN(VIDEO/AUDIO L/R ) Jacks
C onnects the inputofexternalequipm ent.
All manuals and user guides at all-guides.com

7
C ontrols and Displays
Rearpanelconnections
N am es ofparts
1) V H F/UHFIN/OUTJacks
Antenna cables inputand output.
Note:
Playback signals don’tgo through here.Make
properconnections before using this DVD Recorder.
2) LINE IN (S-VIDEO)Jack
S-Video signalinput.
3) LINE IN (VIDEO/AUDIO L/R)Jacks
C om posite signalinput.
4) C O M PO N E N T VIDEO OUTPUT(Y/Pb/
Pr)Jacks
C om ponentsignaloutput.
5) LINE OUT(VIDEO/AUDIO L/R)Jacks
C om posite signaloutput.
6) LINE OUT(S-VIDEO)Jack
S-Video signaloutput.
7) D IGITAL AUDIO OUT(COAXIAL)Jack
C onnects an am plifierorreceiverhaving a digitalinputjack.
8) D IGITAL AUDIO OUT(OPTICAL)Jack
C onnect
s an am plifierorreceiverhaving a digitalinputjack.
9) A C INTerminal
All manuals and user guides at all-guides.com

8
C onnecting up
Before m aking connections
1) D o notconnectthe AC pow ercord untilallotherconnections are m ade.
2) C onnectVIDEO OUTofthe unitdirectly to the video inputofyourTV.C onnecting VIDEO OUTofthe unitto a TV via a VCR maycause
aview ing problem w hen playing back a copy-protected di
sc.Y ou mayalso have a view ing problem w hen connecting the unitto an
integrated TV/Video system .
Notes:
1.D o notplace thisuniton top ofotherequipm entthatm ay generate heat. E xcessive heatm ay cause thisunittomalfunction.
2.ForD igitalC ableandSatelliteTVusersplease connectyourdecoder’soutputtothis unit’sinput.
Connecting to the antenna outletand the television
Before using the unit,follow the steps below to connectthe unitto the antenna cable and TV.
Connecting to a TV with COM POSITE jacks
Usea RF cable (supplied)to connectthe RF IN on the unitto the antenna outlet.
Usea RF cable (sam e as supplied)
to connectthe RF OUTon the unitto the RF inputon the television.
Use AUDIO/VIDEO cables (supplied)to connectthe AUDIO/VIDEO outputon the unitto the audio/video inputon the television.
All manuals and user guides at all-guides.com

9
Forbetterpicture
1.Connecting toaTV viaS-Video out
Connecting to a TV with a S-Video jack
Usea S-Video cable (notsupplied)to connectthe S-Video outputon the unitto the S-Video inputon the television.
Notes:
1.E ntersystem setup to enable S-Video (referto the section titled “Qui
ck Setup”).
2.W hen using S-Video connections,please rem ove allothervideo outputconnections.
3.In this configuration,the R ed and White audio connections are required.
There are twotypes ofconnections (S-Video,and C om ponentvideo)thatprovide higherquality
view ing.
2.Connecting toaTV viaCOM PONENT out
Connecting to a TV with com ponentjacks
UseCOM PONENT cables (notsupplied)to connectthe COM PONENT outputon the unitto the COM PONENT inputon the
television.
Notes:
1.E ntersystem setup to enable COM PONENT (referto the section titled “Quick Setup”).
2.W hen using COM PONENT connections,please rem ove allother
video outputconnections.
3.In this configuration,the R ed and White audio connections are required.
All manuals and user guides at all-guides.com

10
Forbettersound
Connecting to a stereo audio am plifierorre c e iver
Usean audio cord (sam e as supplied)to connectthe AUDIO OUT on
the DVD recorderto the audio inputon a stereo am plifierora
receiver.
There are twotypes ofaudio connections,analog and digital.
Connecting to a digitalaudio device
C onnectan am plifierwith Dolby Digitaland DTS decoders to enjoy
surround sound.
Digitaloutoptical
Usea fiber-optic cable (notsupplied)to connectthe DIGITA L OUT
OPTICAL (digitalopticaloutput)on the DVD recorderto the digital
opticalinputon an stereo am plifierora receiver.
Digitaloutcoaxial
Usea coaxialcable (notsupplied)to connectthe DIGITAL OUT CO-
AXIAL (coaxialdigitaloutput)on the DVD recorderto the coaxialdigital
inputon an stereo am plifierora receiver.
All manuals and user guides at all-guides.com
all-guides.com

11
CONNECTING SATELLITE RECEIVER OR CABLE BOX
Connecting the cable box/satellite box and television
Before using the unit,follow the steps below to connectthe unitto the cable box and TV.
Connecting to a satellite box ora cable box with COM POSITE jacks
UseAUDIO/VIDEO cables to connectthe AUDIO/VIDEO outputofthe unitto the AUDIO/VIDEO input
on the cable box orsatellite
receiver.
All manuals and user guides at all-guides.com

12
Quick setup
M anually setting the date and time
Ifthe date/timeis incorrect,this could be due to a w eak or
disrupted TV signal.
Setthe date m anually
1.Press [Setup]on the rem ote control.The setup m enu will
appear.
2.Select“S ystem ”using [S]or[T]and press [ENTER].
3.Select“Date”using [S]or[T]and press [ENTER].
4.C hange the day/m onth/yearin the highlighted
field using [S]
or[T]orthe num berbuttons 0..9 on yourrem ote control
and confirm with [ENTER]
5.W hen allsettings are correct,press [W]untilreturn to the
main level.
6.To exit
the setup m enu,press [Setup].
Setthe timem anually
1.Press [Setup]on the rem ote control.The setup m enu will
appear.
2.Select“S ystem ”using [S]or[T]and press [ENTER].
3.Select“Time”using [S]or[T]and press [ENTER].
4.C hange the “hour/minute/second”in the highlight
ed field
using [S]or[T]orthe num berbuttons 0..9 on yourrem ote
control.
5.C hange the “AM /PM ”using [S]or[T]and confirm with
[ENTER].
6.W hen allsettings are correct,press [
W]untilreturn to the
main level.
7.To exitthe setup m enu,press [Setup].
Notes:
C heck thatthe clock is correctly setbefore setting the timer
recording.Ifnot,the timerrecording cannotbe m ade.
Audio
DigitalOutput
PCM /BitStream
(E nable digitalaudio outputwith PCM orencoded data)
DTS Out
ON /OFF
Progressive scan m ode
You can change the video outputm ode w hen you press
[SETUP]button and to selectthe “S ystem -->Video
Output-->Progressive”.
(Video willnotbe displayed correctly ifconnected to an
incom patible television.)
Video outputm ode:
480I:Interlace video
480P:Progressive video
Notes:
You mustconnectto the com ponentvideo input
terminalsion a 480P com patible television.
Setting video output
1.P ress the [Setup]button and the setup m enu willbe
displayed.
Aspectratio
Select“4:3”(regular)or“16:9”(widescreen)to suityour
television.Ifyou have a regular4:3 television,you can also
selecthow video on som e discs is presented.
4:3 LetterBox
(selectw hen you connectthe unitto a
normal(4:3)TV.)
W hen playing back a DVD-VIDEO disc
recorded in wide picture format,the
picture is show n with black bars atthe
top and bottom .
4:3 Pan & Scan
(selectw hen you connectthe unitto a
normal(4:3)TV.)
W hen playing back a DVD-VIDEO disc
recorded in wide picture format,the
picture is zoom ed to fillthe screen
vertically,and the leftand rightsides of
the im age are chopped
off.Note,how ever,thatthe picture will
be show n in the 4:3 LB m ode even ifyou selectthe 4:3 PS
m ode depending on the disc.
16:9 Wide Screen
(selectw hen you connectthe unitto a
wide-screen (16:9)TV.)
Notes:
You cannotchange the “A spectRatio”setting during playback.
2.S elect“S ystem ”using [S]or[T]and press [ENTER].
3.S elect“video output”as “SCART S-Video,”“SCART RGB”
“COMPONENT”or“PROGRESSIVE”using [S]or[T]and
press [ENTER].
4.W hen allsettings are correct,press [W]
to return to the
main m enu.
5.To exitthe setup m enu,press the [Setup]button.
Initialsetup
Rem ote contro l & Setup menu
C onfirm the antenna is connected correctly,and follow the steps
below to makethe personaladjustm ents forusing the DVD-
Recorder.
1. P ress [ PO W ER]to turn on the unit.
2. P ress [SETUP]to display the setup m enu.
3. P ress [S][T]to selectthe “S ystem ”,“Language”,
“Playback”,“Record”,“Audio”,“TV Tuner”and press [X]or
press [W]to return to the previous ornextm enu.
4. P ress [S]
[T]to selectthe item thatyou w antto change
and press [X]orpress [Enter].
System ---Video Output
System ---TV Type ---> Date ---> Time
Language ---OSD
Playback --A spectRatio
Audio ---Digit
alOutput (PCM /BitStream )
R ecord ---Q uality (HQ,SP,LP ,EP and SLP )
5. P ress [ENTER]to confirm the setting.
6. P ress [SETUP]to exitthe setup m enu orpress [W]to return
to the previous m enu.
Notes:
To record TV program s using the timerrecord feature,you must
setthe timeaccurately.
All manuals and user guides at all-guides.com

13
TV channelsetup
Autom atic TV channelsearch
W hen the autom atic channelsearch function is activated,the TV
channels are searched and stored in a specific order.Ifthe channel
assignm ents ofyourTV contentproviderchanges orifyou are
reinstalling the DVD-Recorder,you mayneed to startthi
s proce-
dure again.This willreplace the stored TV channelwith the new
ones.
1.Ensure the antennas are securely connected to
the DVD-R ecorder.
2.Sw itch on the TV setand the DVD-R ecorder.
3.P ress [SETUP]to bring up the “SETUP” m enu,
press [S][T]to select the “TV TUNER”and
press [X].
4.P ress [S][T]to select“U tilities” and press
[X].
5.P ress
[S][T]to select“START SCAN”and
press [ENTER]to startauto channelsearch.
6.The auto TV channelsearch starts.The proce-
dure m ay take few minutes.
7.Whenallthe TV channelhave been searched
and stored,press [SETUP]to exit.
Adding ordeleting TV channelm anually
Afteryou have perform ed the autom atic channelsearch,you may
like to add ordelete som e ofthe TV channels.This function allow s
adding ordeleting channelm anually.
1.P ress [SETUP]to display the “SETUP” m enu,
press [S][T]to select “T V TUNER”and press
[X].
2.P ress [S][T]to select“U ilities” and press
[X].
3.P ress [S][T]to select“A dd/Delete” and press
[ENTER]to bring up the add/delete m enu.
4.P ress [W][X][S][T]to selectthe channel(s)
thatyou wantto add ordelete and press
[ENTER]to confirm it.
Movethe cursorto the TV channeland you can press [ENTER]
again to canceldelete operation.
5.P ress [W][X][S][T]to select“EXIT” and
press [ENTER]to save setting and exitthe add/
delete menu.
Fine-tuning TV channelm anually
Afteryou have performedthe autom atic channelsearch you may
like to fine tune the TV channelsignalm anually.Follow the steps
below to com plete fine tune.
1.P ress [SETUP]to bring up the “SETUP” menu,
press [S][T]to select the “TV TUNER”and
press [X].
2.P ress [S][T]to select“FINE”and press [X].
3.P ress [S][T]to fine tune the channelsignal.
Sw apping TV channelm anually(follow ing TV)
This function allow s users to m anually sw ap the TV channelorder
stored in DVD-Recorderto match the TV channelorderstored in
users’TV set.
1.P ress [SETUP]to display the “SETUP” m enu,
press [S][T]to select the “T V TUNER”icon
and press [X].
2.P ress [S][T]to select“S w ap ” and press
[ENTER]to bring up the “S W A P ” m enu.
3.Selectthe TV channel(s)to be sw apped and
press [ENTER]to markit/them .
4.P ress
[S][T][W][X]to selecta new channel
position and press [ENTER]to sw ap.
5.To sw ap moreTV channels,repeatstep “3” to
com plete the settings.
6.Select“EXIT” to save the setting and exitthe
“S W A P ” m enu.
All manuals and user guides at all-guides.com

14
C hannelEditing
Before channelediting
Ensure thatthe antenna cables are securely hooked up to the
unit.
Adding ordeleting TV channelm anually
1.Turn on the TV setand the DVD-R ecorder,
and press [Source]to sw itch the inputsignal
source ofthe unitto “T V .”
2.P ress [EDIT]to bring up the “ChannelEditor”
m enu,press [S][T]to selectone ofthe TV
channels and press [ENTER].
Movethe cursor to the TV channelto makethe selection and
press [ENTER]again to cancelthe delete operation.
Inserting the TV channels
1.P ress [EDIT]to bring up the “ChannelEditor”
m enu,press [S][T]to selectone ofthe TV
channels and press [X].
2.P ress [S][T]to select“Insertto” and press
[E N T E R ].
3.P ress [W][X][S][T]to enter the “Channel
num ber,” and
press [ENTER].The channelwill
be m oved to w here you wantto.
Sw apping TV channels
This function allow s you to m anually sw ap the TV channelorder
stored in the unit to match the TV channelorderstored in yourTV
set.
1.P ress [EDIT]to bring up the “ChannelEditor”
m enu,press [S][T]to selectone ofthe “T V
Channel” and press [X].
2.P ress [S][T]to select“S w ap with” and
press [ENTER].
3.P ress [W][X][S][T]to enter the “Channel
num ber,” and then press [ENTER]
to sw ap.The
orderofthe channels willbe sw apped with the
channelnum berselected.
4.To sw ap otherTV channels,repeatstep 3 to
com plete the settings.
5.P ress [W] [X][S] [T]to select“EXIT,” press
[ENTER]to save the setting and exitthe
“ChannelEdit
or” m enu.
Moving up orm oving dow n the TV channel
1.P ress [EDIT]to appear the “ChannelEditor”
m enu,press [S][T]to selectone ofthe “T V
Channel” and press [X].
2.P ress [S][T]to select the “M ove Up”or
“M ove Down”and press [ENTER].
The TV channelwillchange the address.
Each timeyou press [S]or[T]the item changes as follow s.
Renam ing TV channels
1.P ress [EDIT]to bring up the “ChannelEditor”
m enu,press [S][T]to selectone ofthe TV
channels and press [X].
2.P ress [S][T]to select “R enam e” and press
[ENTER].The display forentering a title nam e appears.
3.Selectthe desire d characters fro m the
keypad.Press [ENTER]after each entry .
4.Whenyou finish
entering the title
nam e,press [W] [X]
[S] [T]to select
“Finish.”
Notes:
You only can enterup to 5
characters fora nam e.
All manuals and user guides at all-guides.com

15
ChannelEditing
Setting up the VC R Plus+®system
Thanks to this programming system ,you no longerneed to
tediously enterthe date,programmenum ber,startand end
times.Allthe information needed by the DVD recorderfor
programming is contained in the VCR Plus+®programming
num ber.ThisP lusC ode num ber
is found in mostTV listings
m agazine.
1.Turn on the TV setand the DVD-R ecorder,
and press [SOURCE]to sw itch yourTV’s input
source to “A V.”
2.P ress [EDIT]to bring up the “ChannelEditor”
m enu,press [S][T]to selectone ofthe “T V
Channel” and press [X].
3.P ress [S] [T]to select“VCR Plus+” icon
and
press [ENTER].
The display forentering a “Guide C hannelN um ber(GCN
num ber)”appears.
4.P ress [W][X][S][T]to enter the “G u ide
ChannelNum ber(GCN num ber)”and press
[E N T E R ].
5.To setthe GCN num berforotherchannels,
repeatfro m step 2 to 4.Or,press [W] [X][S]
[T]to selectthe “EXIT” icon and press
[ENTER]to save the setting and exitt
he “Chan-
nelEditor” m enu.
VCR Plus+ and PlusC ode are tradem arks ofGemstar
Developm entCorporation.The VCR Plus+ system is
m anufactured underlicense from GemstarDevelopm ent
Corporation.
VCR Plus+ system is protected by one ormore issued
United States patents such as Pats.5,307,173;5,335,
079;4,908,713;4,751,578;and 4,706,121
All manuals and user guides at all-guides.com
all-guides.com

16
Recording continues untilyou stop the recording orw hen disc is
full.
To stop recording
W hen you press [ STOP],itmaytake a few moments for
recording to stop and the session to close.
To pause re c o rd ing
Press [ PAUSE]to pause recording,and press [ PAUSE]
to resum e recording.
To change the recording m ode.
Press [SETUP].
Notes:
The new setting can'tchange the currentrecording m ode butwill
be activated during the nextsession.
To check the disc status while recording
Press [DISPLAY],the recording information appears.
Recording
1.P ress [ POW ER]to turn the uniton.
2.P ress [ OPEN/CLO SE]to open the tray and
inserta recordable DVD disc.
Press the button again to close the tray.
W hen you inserta new recordable DVD disc,the DVD-Recorder
willautom atically startthe disc preparation process.
3.P ress [SOURCE]to change the “signal-input
source” and selectthe “T V ” input.
4.P ress [CH ]orpress [S][T]to select
the channelyou wantto record.
Notes:
You can also use the num bered buttons to selecta channel.
5.P ress [RECORD]to startrecording.
Afterpressing [RECORD],itmaytake a few moments to initialize.
Before recording
LVW -5002 DVD Recorderrecords on both DVD+R and DVD+RW
discs.Please use qualified recordable DVD+R/RW discs to ensure
bestrecording quality.C heck ourW eb site forthe qualified discs
list.
LVW -5006 DVD Recorderis a versatile DVD-Recorderthat
em ploys the “A LL WRITE”technol
ogy to makeitalrightto record
on almostallofthe recordable discs.You mayuse DVD+RW ,
DVD+R,DVD-RW ,DVD-R,CD-RW orCD-R discs to record.
Please use qualified recordable DVD+R/RW disc to ensure the
bestrecording quality.C heck ourW eb site
forthe qualified discs
list.
Notes:
1.CD-R,DVD+R & DVD-R are write once DVD discs.
2.CD-RW ,DVD+RW & DVD-RW are re-writable DVD discs.
3.You cannotadd new recording to a DVD-R/DVD-RW /DVD+R
disc afterthe disc is finalized.
4.In som e cases,you maynotbe able to add new recording to
the
recordable DVD discs thatcontain recordings recorded by other
DVD-Recorders.
R ecording televison program s
LVW -5002 m odelonly
LVW -5006 m odelonly
One-touch recording
Useone-touch recording to startrecording im m ediately in 30
minute blocks.Each timeyou press the record button,the
recording timeis extended by another30 minutes.
All manuals and user guides at all-guides.com

17
Recording
Playback with the DVD menu
Selecting a re c o rd e d session on a disc
The “DVD M enu”displays allthe titles (program s)recorded on the
disc and you can selectthe one you w antto play.
1.P ress [ PLAY]or[ GUIDER]
The “DVD M enu”m enu appears w hen you press [ PLAY]or
w hen you press [GUIDER]to select“PLAYBACK”icon,and
display allofthe title (program )on the recordable DVD disc.
2.P ress [W][X]to selecta title (program )you
wantto play and press [ENTER].
To scrollthe “D V D M enu” display by page.
Press [W][X][S][T]to select“ ”or“ ”icon orpress [
NEXT]or[ PREVIOUS],and the entire “DVD M enu”advances
to the next/previous page ofrecorded titles (program s)
.
Notes:
1.Ifa pow erfailure occurs,the program you are recording maybe
lost.
2.Before you start,please check ifthe disc has enough available
space forthe recording.
3.You cannotchange the channelorrecording m ode during
recording.
4.Before playing
a DVD+R disc on anotherplayer,you need to
finalize the disc.
LVW -5006 m odelonly
Before playing a DVD+R/DVD-R/DVD-RW disc on com patible
equipm ent,you willneed to finalize the disc.
Adding new recordings afterotherrecording
sessions.
Press [RECORD]to startrecording,and press
[STO P]atthe pointyou wantto stop.
Note:
Each new recording session is placed afterthe previous session
unless a certain recording title is setto be overwritten.
Changing ChapterInterval
C reating chapters while recording
The DVD-Recordercan autom atically divide a session into
chapters by inserting chaptermarks at5/10/15/20/25/30-minute
intervalduring the recording process.
1.P ress [SETUP]to display the “SETUP” m enu.
2.P ress [S][T]to select the “RECORD”and
press [X].
3.P ress [S][T]to selectthe “CHAPTER MARK”
icon and to setup the time.
4.P ress [SETUP]to exitthe “SETUP”m enu.
Notes:
1.During recording,press [EDIT]to add chaptermark(s)in the
recorded session m anually.
2.You can also start recording using the “E asy Guiderm enu.”
Press [GUIDER],select“R EC O R D ”and then press [ENTER].
Follow the steps to setthe recording m ode.
3.Before you start,please ensure thatthe disc has enough
available space forthe recording.
4.You cannotchange the channelorrecording m ode during
recording.
Adding new recordings
All manuals and user guides at all-guides.com

18
Recording
R ecording fro m a VCR orC am corder/Hi8 /DV
Before starting to record
This DVD-Recordercan acceptstandard CVBS (RCA)analog
audio/video cable orIEEE-1394 cable and record Camcorderonto
DVD in the digitalvideo formatofyourchoice.The unitfunctions
muchlike a digitalVCR.Exam ples ofuse include archiving
videotapes ort
ransferring from a Video C assette RecorderorDV/
V8 Cam corderto a recordable DVD disc.
This DVD-Recorderallow s basic DV controlwith the DVD
Recorder’s rem ote controlw hen connected via the DV Link.
The frontpaneland rearpanelconnection
C onnecta Video C assette RecorderorCamcorderto the unit’s
inputterminals.
To startrecording
1.P ress [SETUP]to select“RECORD”to setthe
recording m ode. (HQ,SP,LP,EP orSLP )
2.Place a recordable DVD disc on the tray with
the disc’s labelfacing up.
3.P ress [SOURCE]to selectthe signal-input
(TV,AV1-Front,AV2-R ear,S-Video,
DV).
Notes:
4.Startto play on the VCR orC am corder.
5.P ress [RECORD]on the DVD-R ecorderto
record yourvideo/audio signalfro m the VCR or
V8 Cam corderonto a recordable DVD disc.
6.P ress [ STO P]to stop recording.
To pause re c o rd ing
Press [ PAUSE]to pause recording,and ifyou w antto restart
recording,press the [ PAUSE]button to resum e recording.
All manuals and user guides at all-guides.com

19
Recording
DV recording
Before you to startto record DV contents
This DVD Recorderallow s basic DV controlfunctions with the
Rem ote C ontrol.The DVD Recorderis equipped with a
cam cordercontrol(Play,Stop,FF orReverse)feature via the DV
Link connection.Simply movethe screen cursorto the desired
functi
on and press [ENTER]atDV inputscreen.
1.Poweron yourTV and this DVD-R ecorder.
2.Place a recordable disc on the tray.M ake sure
the disc’s labelis facing up.
3.C onnectthe DV cable (IEEE-1394 4-pin cable)to
both the DV C am corderand the DVD-R ecorder.
Notes:
1.The DV-Link inputjack on this unitis foruse with DV com patible
cam corderonly.
2.Only DV signals can be inputto the DV-Link jack on this DVD
Recorder.
3.Donotconnecta MICRO MVformatvideo cam corderto this DV-
Link (IEEE-1394) j
ack.
4.You cannotconnectmore than twopieces ofvideo inputsources
ata timeto the frontpanelconnectorofthis DVD-Recorder.
4.Poweron the DV Cam corder.Start“P layback
m ode” on the DV Cam corder.
5.“Pause” the DV C am corderw here you wantto
record.
6.P ress [ GUIDER]on the re m o te contro l.This
actives the E asy Guiderm enu.
7.Press [S][T]and to selectthe “RECORD”
icon,and press [ENTER]to confirm .
8.P ress [S][T]to select“D V ” Input,and press
[ENTER]to confirm .
9.P ress [S][T]to select
a recording quality and
press [ENTER]to confirm .
10.P ress [ENTER]to startrecording.
Notes:
This DVD-Recorderwillstay in “P ause”m ode w hen no DV input
signalis detected.
11.To pause recording.
Press [ PAUSE ]on the rem ote controlto pause recording .
Press [ PAUSE ]again, ifyou w antto resum e recording.
12.To stop recording.
Press [ ]
U se “Easy Guider” to record DV signal
LVW -5002 m odel
Before playing a DVD+R disc on com patible equipm ent,you
willneed to finalize the disc.
LVW -5006 m odel
Before playing a DVD+R/DVD-R/DVD-RW disc on com patible
equipm ent,you willneed to finalize the disc.
All manuals and user guides at all-guides.com
Other manuals for LVW-5006
1
This manual suits for next models
1
Table of contents
Other LiteOn DVD Recorder manuals

LiteOn
LiteOn LVW-5006 User manual

LiteOn
LiteOn DD-A300G User manual

LiteOn
LiteOn LVW-5005X User manual

LiteOn
LiteOn LVW-5045 User manual

LiteOn
LiteOn LVW-5002 User manual

LiteOn
LiteOn LVC-9015G User manual

LiteOn
LiteOn DD-A100X User manual

LiteOn
LiteOn LVW-5115GHC+ User manual

LiteOn
LiteOn LVW-5001 User manual

LiteOn
LiteOn HD-A940G User manual